
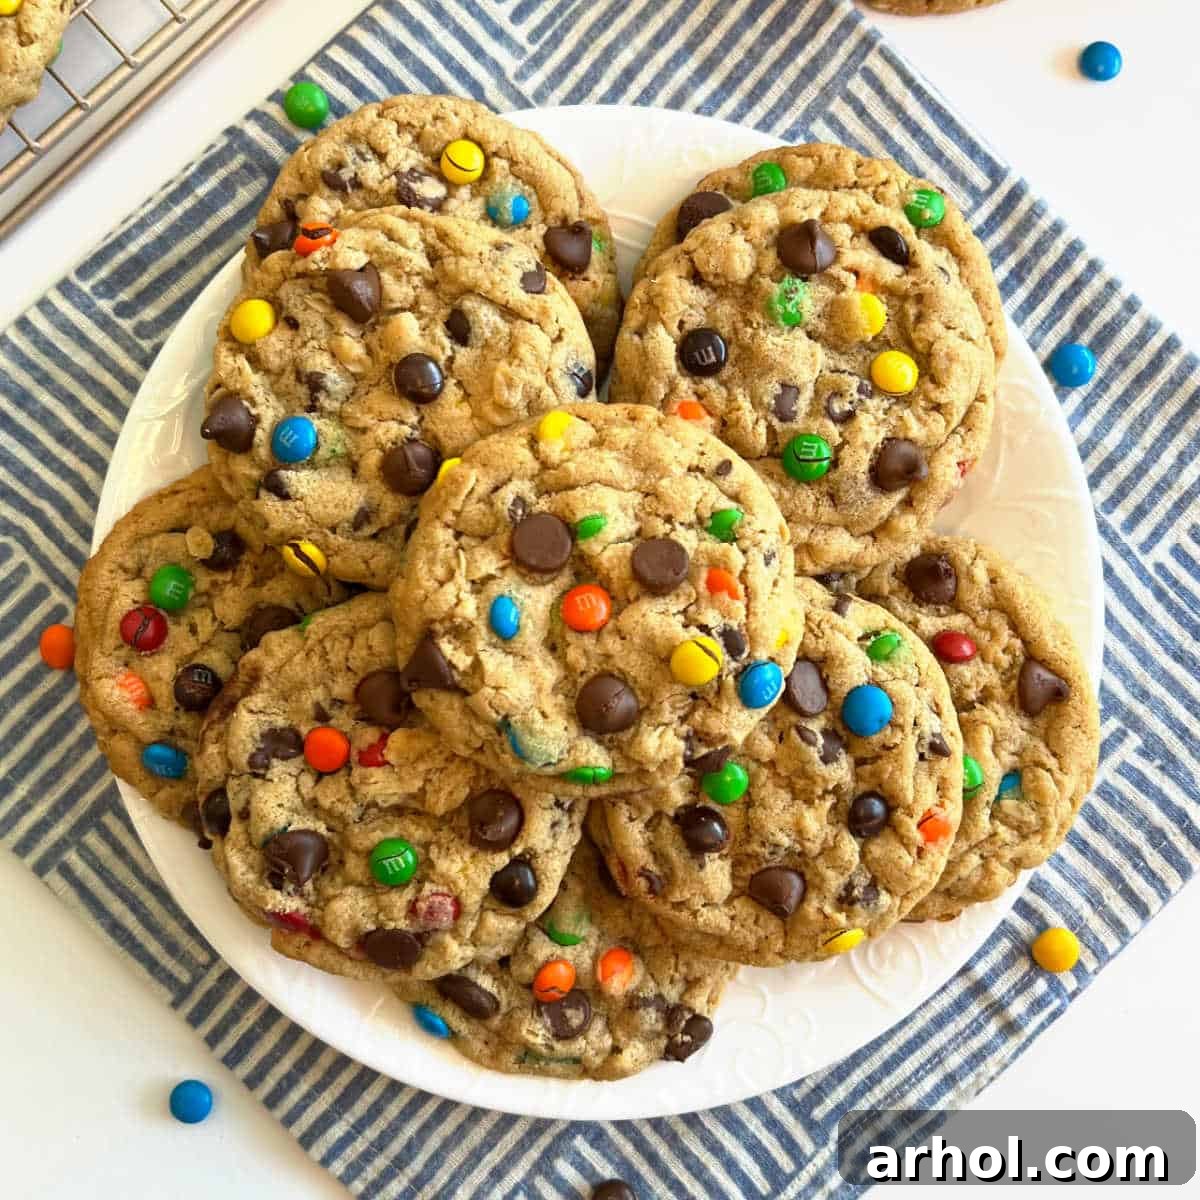
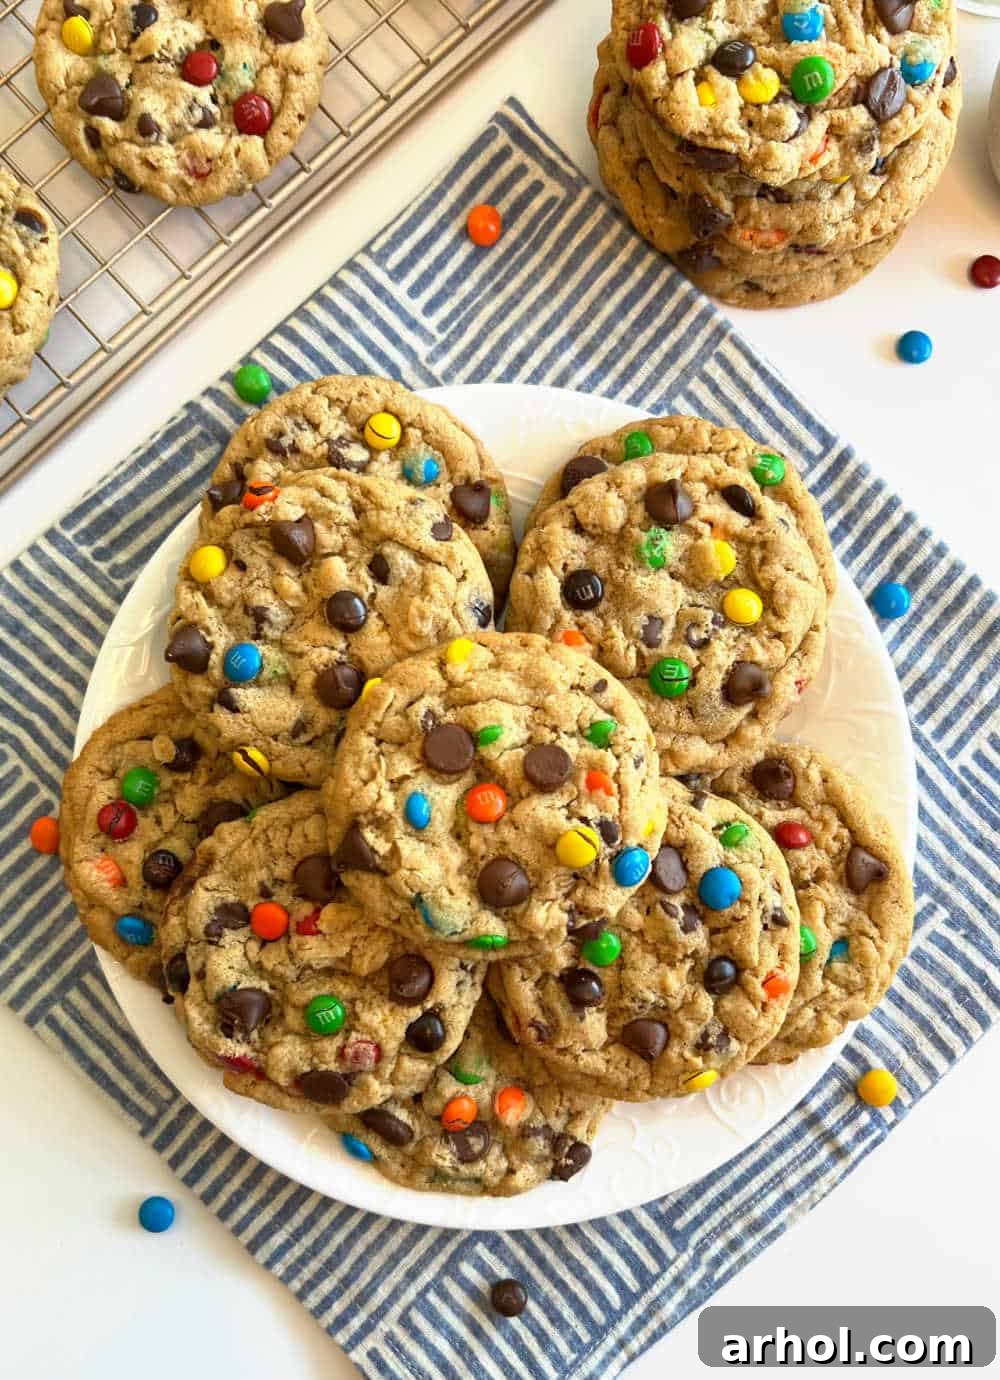
Craving a cookie that’s bursting with flavor and delightful textures? Look no further than these incredible Monster Cookies! This recipe delivers soft, perfectly chewy cookies loaded with a harmonious blend of creamy peanut butter, wholesome oats, rich chocolate chips, and colorful mini candies. They are truly the best, designed to satisfy even the most intense cookie cravings, making them an instant family favorite and a perfect addition to any baking repertoire. Get ready to bake a batch of pure joy that promises to be a hit at any gathering or a delightful treat for yourself!

The Ultimate Easy Monster Cookie Recipe: A Flavor Extravaganza
Monster Cookies earned their whimsical name for a fantastic reason: they’re a joyful “mish-mash” of several beloved cookie ingredients, all rolled into one spectacular, satisfying treat. Imagine the irresistible combination of hearty oats, rich peanut butter, decadent chocolate, and vibrant M&M’s candies – a true symphony of flavors and textures in every single bite. This harmonious blend creates a cookie that’s wonderfully chewy, delightfully sweet, and utterly addictive. Despite their complex profile, these cookies are surprisingly easy to make, proving that extraordinary flavor doesn’t have to mean complicated steps. They’re a testament to the fact that some of the best culinary creations come from mixing a little bit of everything you love!
Our goal with this recipe was to craft the perfect Monster Cookie – one that balances all the classic elements flawlessly. We’ve meticulously refined the ratios to ensure that each ingredient shines, contributing to a cookie that is moist, soft, and never dry or overly crumbly. Whether you’re a seasoned baker or just starting your culinary journey, you’ll find this recipe straightforward and incredibly rewarding. These cookies are not just a dessert; they’re an experience, a delightful journey for your taste buds, and an easy win for any occasion. Prepare to impress your family and friends with a batch of Monster Cookies that are guaranteed to disappear quickly!
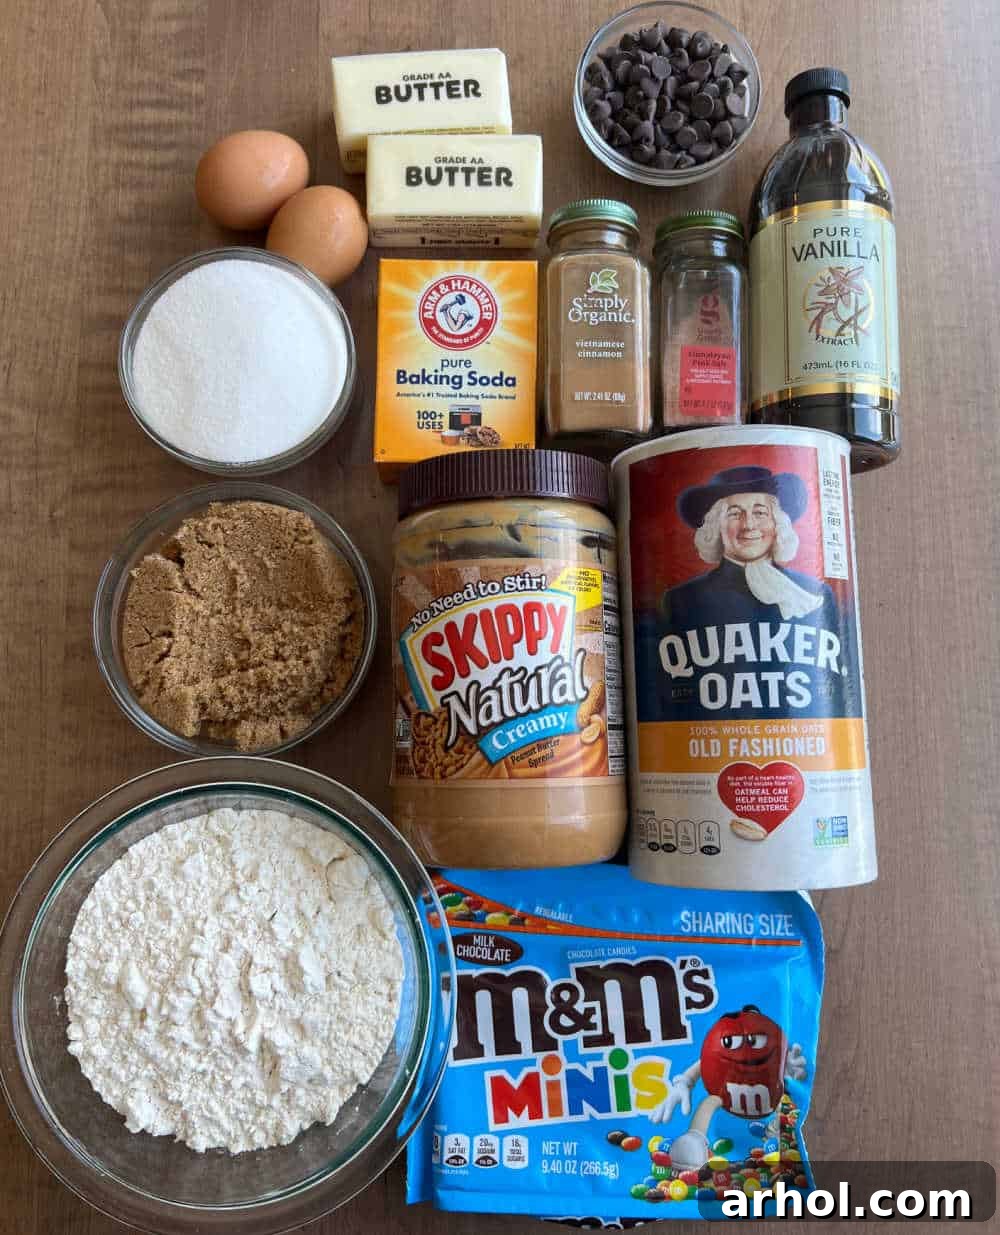
Essential Ingredients for Perfect Monster Cookies
Crafting the perfect Monster Cookie begins with selecting the right ingredients. Here’s a detailed look at what you’ll need to create these irresistible chewy delights, along with some helpful tips for each component to ensure your cookies turn out beautifully every time. Full, precise measurements are available in the comprehensive recipe card below.
- Butter: For the best flavor and texture, we recommend using unsalted butter, as it gives you more control over the overall saltiness of your cookies. If salted butter is all you have, you can slightly reduce the added salt in the recipe. Always ensure your butter is softened to room temperature before you begin; this is crucial for properly creaming it with the sugars, creating an airy base for your dough.
- Peanut Butter: Creamy peanut butter is ideal for achieving that signature soft, smooth texture in Monster Cookies. While crunchy peanut butter can be used, it will result in a slightly different, less uniform texture. Opt for a classic, shelf-stable peanut butter rather than natural peanut butter, as natural varieties tend to separate and can alter the dough’s consistency.
- All-Purpose Flour: The backbone of nearly any cookie, all-purpose flour provides the necessary structure. Make sure to measure your flour correctly by spooning it into a measuring cup and leveling it off, rather than scooping directly from the bag, which can lead to too much flour and dry cookies.
- Oats: Old-fashioned rolled oats are preferred for their hearty texture and chewiness, contributing significantly to the “monster” appeal. Quick oats can be used as a substitute if necessary, but be aware that they will result in a slightly less chewy cookie with a finer texture.
- Eggs: Large eggs act as a binder, adding moisture and helping to create a tender crumb. Ensure they are at room temperature to incorporate more easily into the wet ingredients, preventing curdling and promoting a smoother dough.
- Vanilla Extract: A good quality vanilla extract is essential for enhancing all the other flavors in the cookie, adding a warm, aromatic depth that takes them from good to extraordinary.
- Baking Soda: This leavening agent is key to helping your cookies rise and spread just enough, contributing to their soft, chewy interior. Ensure your baking soda is fresh for optimal results.
- Ground Cinnamon: A touch of cinnamon adds a subtle warmth and complexity that beautifully complements the peanut butter and chocolate. If you’re not a fan, you can certainly omit it, but we highly recommend giving it a try!
- Salt: A pinch of salt is vital for balancing the sweetness and intensifying the flavors of the chocolate and peanut butter. It truly makes all the difference in bringing out the best in these cookies.
- Brown Sugar and Granulated Sugar: The combination of both sugars is what gives these Monster Cookies their perfect balance of crisp edges and chewy centers. Brown sugar adds moisture and a rich, molasses-like flavor, while granulated sugar contributes to spreading and crispness.
- Semi-Sweet Chocolate Chips: These are a classic choice, offering a balanced sweetness that pairs well with the other ingredients. Feel free to use your favorite type of chocolate chips – milk chocolate for a sweeter profile, or dark chocolate for a richer, more intense flavor.
- Mini M&M’s Candies: The vibrant pop of color and delightful crunch of mini M&M’s are what truly define Monster Cookies. While mini M&M’s create a more even distribution throughout the dough, regular-sized M&M’s work just as well if that’s what you have on hand. Don’t hesitate to experiment with different M&M flavors, like peanut butter M&M’s, for an extra layer of deliciousness!
How to Master the Art of Making Monster Cookies
Creating these delightful Monster Cookies is a straightforward process, but following each step carefully will ensure you achieve that perfect balance of chewiness, flavor, and texture. Here’s your detailed guide to baking a batch of these extraordinary treats:
Step-by-Step Baking Instructions:
- Prepare Your Dry Ingredients: Begin by combining your dry ingredients. In a medium-sized mixing bowl, whisk together the all-purpose flour, baking soda, sea salt, and ground cinnamon. Stir thoroughly until all components are evenly distributed. This ensures that the leavening and spices are dispersed throughout the dough for consistent results. Set this bowl aside for now.
- Cream the Wet Ingredients (Part 1): In a separate, large mixing bowl (or the bowl of a stand mixer fitted with the paddle attachment), beat the softened butter on medium speed until it is light, fluffy, and creamy. This aeration is crucial for a tender cookie.
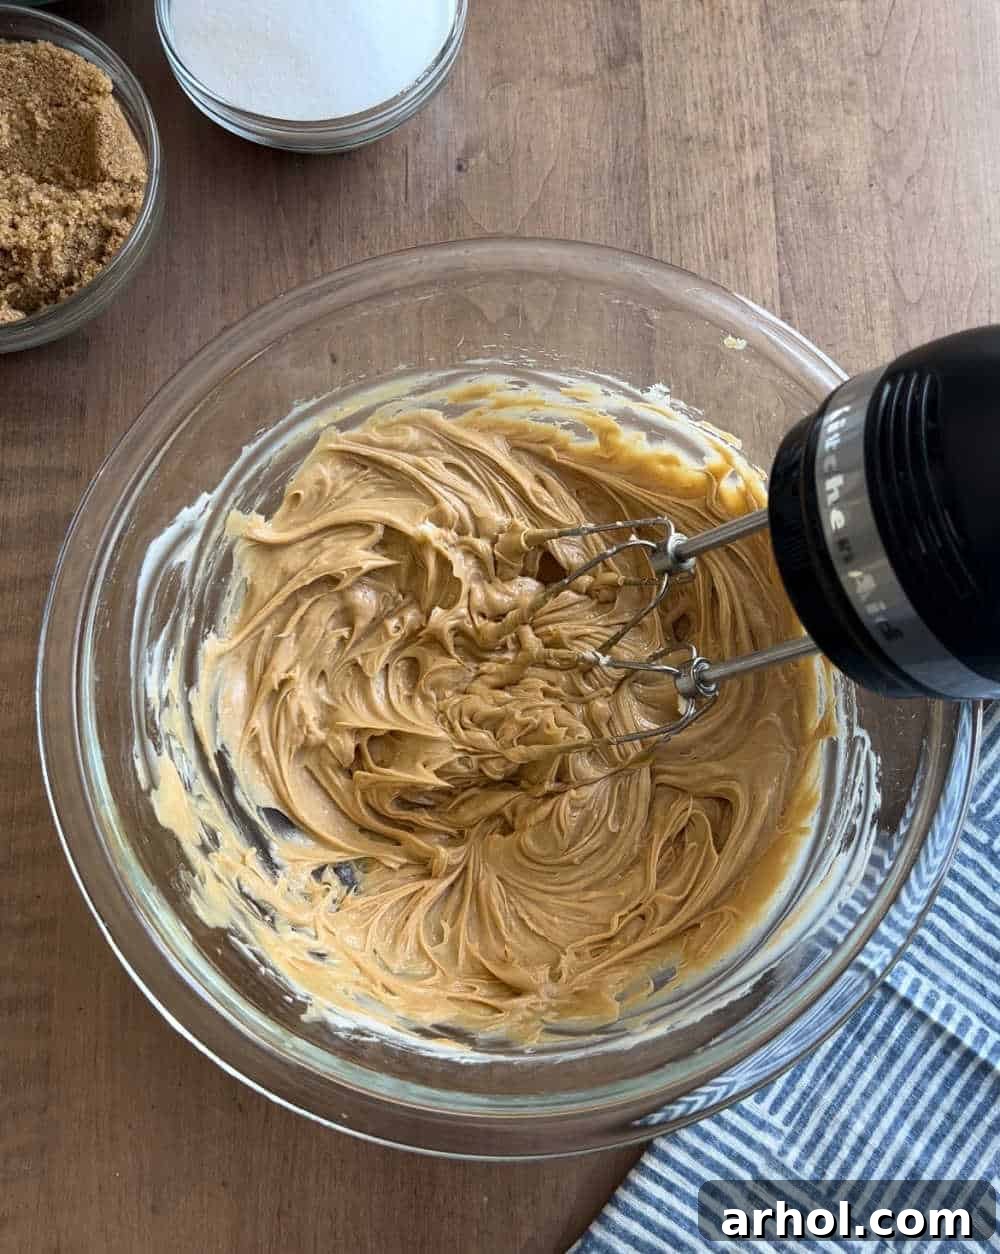
- Incorporate Peanut Butter: Add the creamy peanut butter to the butter in the large bowl. Continue mixing on medium speed until the butter and peanut butter are fully combined, creating a smooth and uniform mixture. Scrape down the sides of the bowl as needed to ensure everything is incorporated.
- Add Sugars and Vanilla: Next, add both the brown sugar and granulated sugar to the peanut butter mixture. Beat on medium speed for 2-3 minutes until the mixture is light, fluffy, and pale in color. This creaming process dissolves the sugars slightly and incorporates air, contributing to the cookies’ texture. Stir in the vanilla extract until just combined.
- Introduce Eggs: Add the eggs one at a time, beating well after each addition. Ensure each egg is fully incorporated before adding the next. This helps to create an emulsified mixture, leading to a smoother dough.
- Gradually Mix in Dry Ingredients: With the mixer on low speed, gradually add the reserved dry ingredient mixture to the wet ingredients. Mix just until the flour streaks disappear and the dough is well blended. Be careful not to overmix, as this can develop the gluten in the flour and lead to tough cookies.
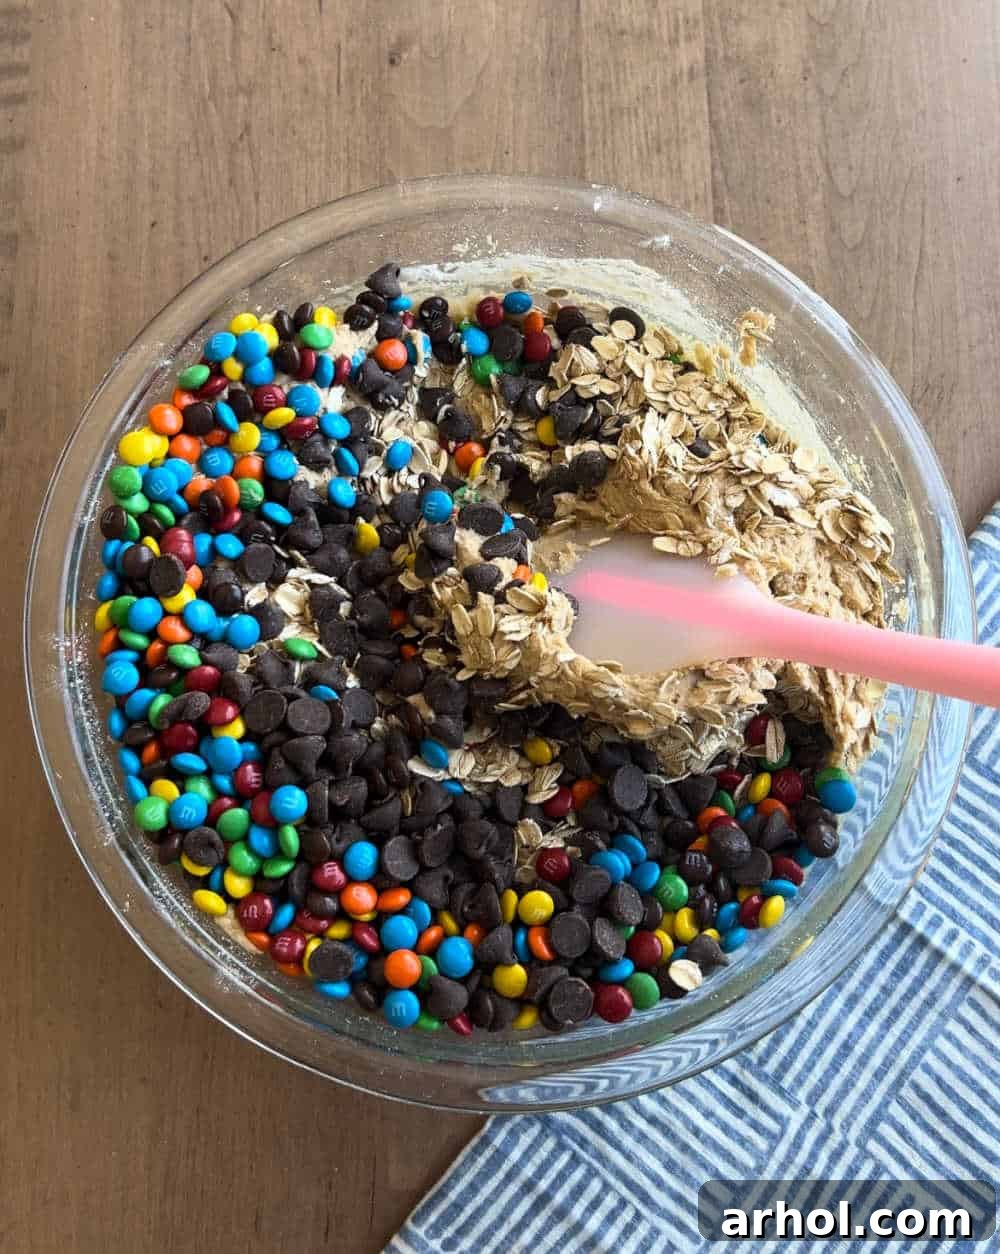
- Fold in the Mix-Ins: This is where the “monster” truly comes to life! Gently stir in the rolled oats, chocolate chips, and mini M&M’s candies using a sturdy spatula or a wooden spoon. Fold until they are evenly distributed throughout the dough. Avoid overmixing to prevent breaking the chocolate and candies.
The dough is now ready for shaping and chilling – a vital step for achieving the perfect Monster Cookie texture. Chilling the dough not only helps prevent excessive spreading during baking but also allows the flavors to meld beautifully, resulting in a more flavorful and satisfying cookie. Do not skip this step!
Shaping and Chilling for Success:
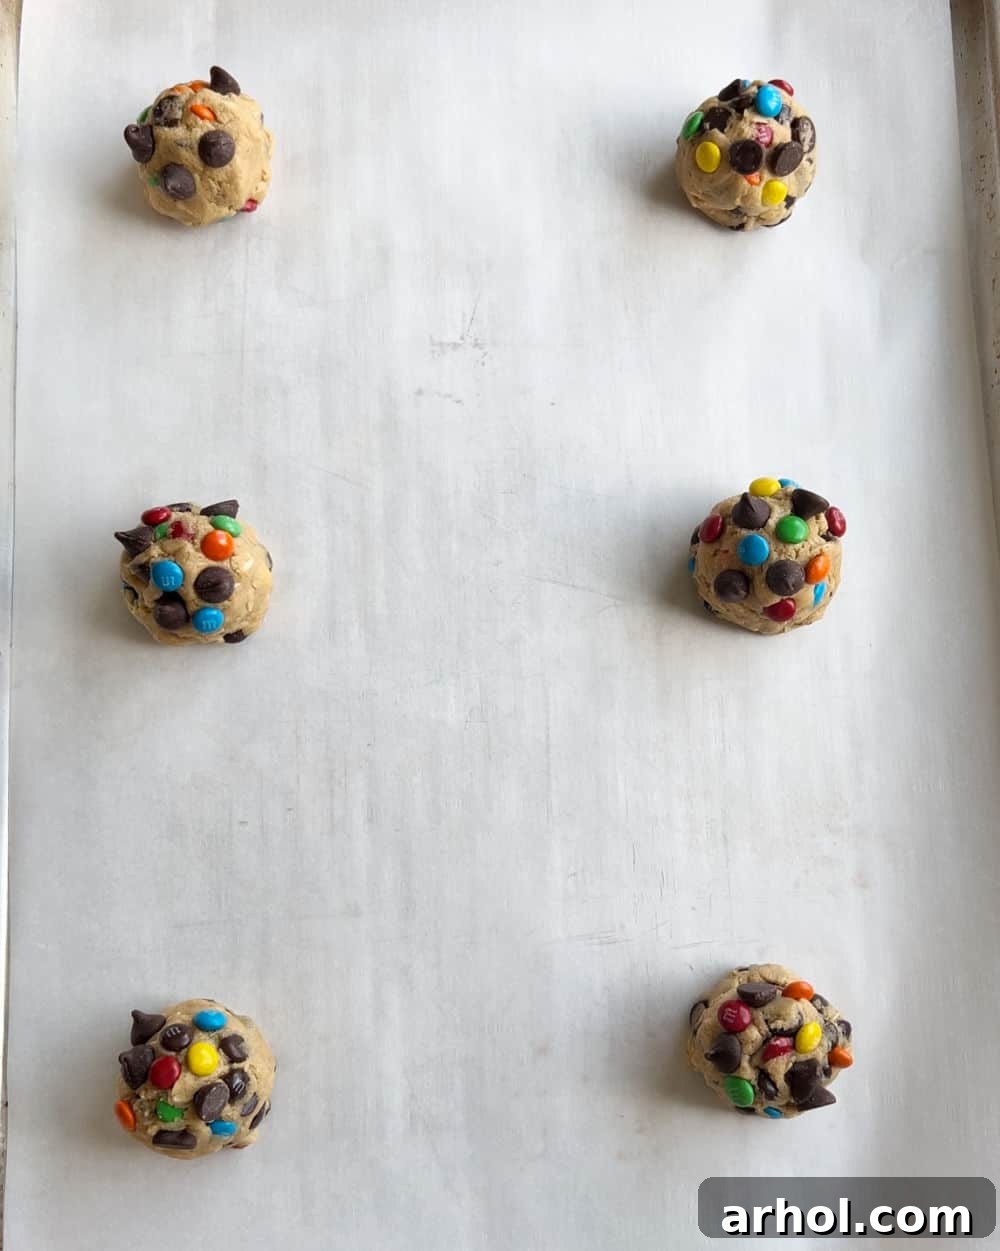
Once your dough is complete, it’s time to prepare it for baking. Using a cookie scoop (approximately 2 tablespoons in size) or a regular tablespoon, portion out uniform balls of cookie dough. Arrange these dough balls onto a baking sheet lined with parchment paper. This parchment paper prevents sticking and ensures even baking. Once your baking sheet is full, refrigerate the cookie dough balls for a minimum of 15 minutes. This chilling period is crucial; it helps the butter solidify, which in turn prevents the cookies from spreading too much during baking, resulting in a thicker, chewier cookie. If you don’t have space for a whole baking sheet in your refrigerator, you can also chill the entire bowl of dough, then scoop the balls just before baking. However, chilling the scooped balls directly on the sheet often yields the best results as they maintain their shape better.
Baking to Golden Perfection:
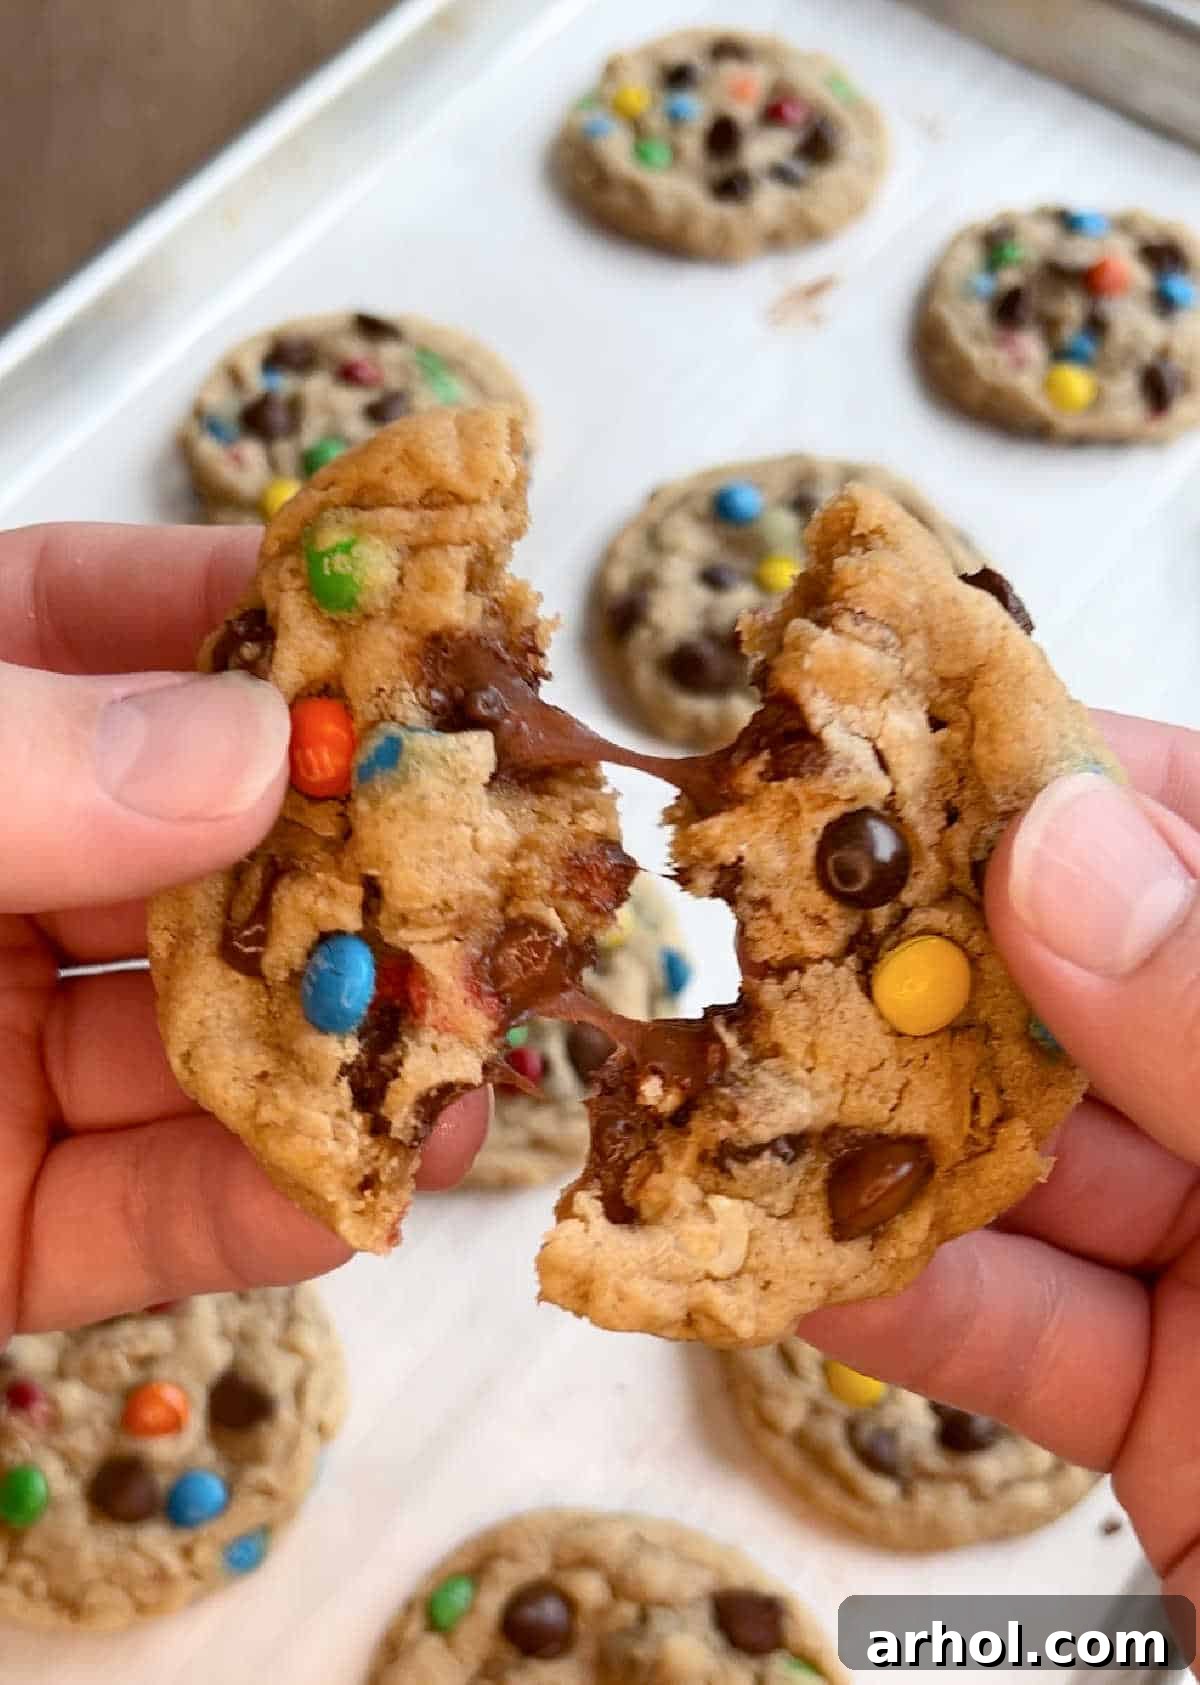
While your cookie dough chills, preheat your oven to 350°F (175°C). Once the oven is ready and the dough has chilled, place the prepared baking sheets into the oven. Bake the Monster Cookies for 12 to 14 minutes. The key is to look for edges that are firm and a light golden brown. The centers of the cookies might still appear slightly soft and underbaked, but this is exactly what you want! Overbaking these cookies will result in a crisp, crumbly texture rather than the desired soft, chewy interior. Remember, cookies continue to set and firm up as they cool. Once baked, remove the cookies from the oven and let them cool on the baking sheet for a few minutes before transferring them to a wire rack to cool completely. This prevents them from breaking and ensures they develop that perfect chewy consistency.
Storing Your Delicious Monster Cookies
Once your Monster Cookies have cooled completely, proper storage is key to maintaining their incredible taste and texture for as long as possible. Here’s how to keep them fresh and delicious:
For Freshly Baked Cookies:
Allow the cookies to cool completely on a wire rack or the baking sheet before storing. Once cooled, transfer them to an airtight container. Store this container at room temperature on your countertop or in your pantry. Your Monster Cookies should remain wonderfully soft and chewy for about 4 to 5 days. For an extra tip to ensure maximum softness, try placing a slice of plain white bread in the container with your cookies. The bread will absorb moisture from the cookies, keeping them incredibly tender – it’s a classic baker’s trick that truly works wonders!
Freezing Baked Cookies:
Monster Cookies freeze beautifully, making them perfect for meal prepping desserts or having a stash of treats ready at a moment’s notice. Place the completely cooled cookies in a single layer on a baking sheet and freeze for about an hour until firm. Then, transfer the frozen cookies to a freezer-safe bag or an airtight freezer container, separating layers with parchment paper to prevent sticking. They can be frozen for up to 3 months. When you’re ready to enjoy them, simply thaw at room temperature or gently warm them in the microwave for a few seconds.
Freezing Cookie Dough Balls:
For ultimate convenience, you can also freeze the unbaked cookie dough. After scooping the dough into balls, arrange them on a baking sheet or plate lined with parchment paper. Freeze them for 1-2 hours until they are solid. Once frozen, transfer the dough balls to a freezer-safe zip-top bag or an airtight container. They will keep well in the freezer for up to 3 months. When you’re ready to bake, you can bake them directly from frozen; just add an extra 2-4 minutes to the baking time. This method is fantastic for having fresh, warm cookies whenever the craving strikes!
Expert Tips for Unforgettable Monster Cookies
Achieving the perfect Monster Cookie is all about a few key techniques and clever tricks. Here are some expert tips to ensure your cookies are consistently delicious and picture-perfect:
- Avoid Overbaking: This is arguably the most crucial tip for chewy cookies! Remove your Monster Cookies from the oven when the edges are set and lightly golden brown, but the centers still look slightly soft and even a little underdone. They will continue to bake and firm up as they cool on the hot baking sheet. Overbaking is the quickest way to turn a chewy cookie into a dry, crispy one.
- Achieve Perfectly Round Cookies: For a bakery-worthy appearance, as soon as you pull the cookies from the oven (while they are still warm and pliable), use a large round cookie cutter or the rim of a drinking glass. Place it around each hot cookie and gently swirl it in a circular motion. This coaxes the warm cookie into a perfectly round shape.
- Keep Them Soft: To prolong the softness and freshness of your Monster Cookies, store them in an airtight container with a slice of plain white bread. The bread will release its moisture, which the cookies will absorb, keeping them wonderfully tender for days.
- Holiday-Themed M&M’s: Elevate your Monster Cookies for any celebration! Swap out the regular M&M’s for holiday-themed colors. Think red and green for Christmas, orange and black for Halloween, or pastels for Easter. This simple change makes your cookies festive and fun for any season.
- Chill Your Dough: While mentioned in the instructions, it bears repeating: chilling your dough for at least 15-30 minutes before baking is paramount. Cold dough spreads less, resulting in thicker, chewier cookies with a better texture.
- Room Temperature Ingredients: Ensure your butter and eggs are at room temperature. This allows them to cream together more effectively, creating a smoother, more emulsified dough that traps air, leading to a lighter, more tender cookie.
- Don’t Overmix: After adding the dry ingredients, mix only until just combined. Overmixing develops gluten, which can lead to tough, dense cookies.
- Quality Ingredients Matter: While simple ingredients are used, their quality makes a difference. Use a good quality vanilla extract and your favorite brand of peanut butter and chocolate chips for the best flavor profile.
- Press Extra Mix-ins on Top: For an aesthetically pleasing cookie with visible M&M’s and chocolate chips, gently press a few extra pieces onto the tops of the scooped cookie dough balls just before baking.

Pin Recipe
Print Recipe
Rated 5 out of 5 stars from 5 votes
Monster Cookies
Dee
This easy Monster Cookies recipe makes soft chewy cookies loaded with peanut butter, oats, chocolate chips and mini candies. Seriously the best, and sure to satisfy any cookie craving!
15 minutes
12 minutes
15 minutes
42 minutes
40
Ingredients
Adjust servings: 1x | 2x | 3x
- 2 cups all purpose flour
- 1 teaspoon baking soda
- 1 teaspoon sea salt
- ½ teaspoon ground cinnamon
- 1 cup butter softened
- ½ cup creamy peanut butter
- 1 cup firmly packed brown sugar
- 1 cup granulated sugar
- 2 eggs
- 1 teaspoon vanilla extract
- 1 ¼ cups rolled oats
- 1 ¼ cups semi sweet chocolate chips (plus extra for the top)
- 1 cup mini m&ms (plus extra for the top)
Instructions
- In a medium mixing bowl, combine the flour, baking soda, sea salt and cinnamon. Mix well and set aside.
- In a large mixing bowl, beat 1 cup butter until creamy.
- Add peanut butter and beat until fully combined.
- Add brown sugar, granulated sugar and vanilla extract, and beat until creamy.
- Add eggs, and beat well. Gradually mix in the flour mixture and mix well.
- Stir in the oats, chocolate chips and mini m&ms, and mix until well combined.
- Using a cookie scoop (about 2 tablespoons full) scoop the cookie dough into balls. Set the dough balls on a prepared baking sheet and chill in the fridge for at least 15 minutes.
- In the meantime, preheat oven to 350 degrees F (175 C).
- Set the chilled cookie dough balls on a prepared baking sheet, making sure they’re at least 2 inches apart from each other.
- Top the cookie dough balls with extra chocolate chips and mini m&ms.
- Bake for 12 to 14 minutes, or until edges are lightly browned and semi firm.
- Remove from oven, allow to cool slightly, then transfer to wire rack or cool surface to cool completely.
Video
A video showcasing the Monster Cookie recipe would be displayed here.
Recipe Notes
Baking Don’ts: Remember not to overbake your cookies. The edges should be firm and golden brown, but the middles can still appear slightly soft. This ensures they will be perfectly chewy once cooled. They firm up considerably as they sit!
Achieving Perfect Rounds: For those picture-perfect round cookies, use a large drinking glass or a round cookie cutter. Immediately after removing the cookies from the oven, place the glass/cutter around the warm cookie and gently swirl it to reshape any irregular edges into a flawless circle.
Softness Secret: To maintain the delightful softness of your Monster Cookies during storage, simply place a slice of regular sandwich bread in their airtight container. The bread will keep them moist and tender for days.
Nutrition Information (per serving)
Calories: 195 kcal, Carbohydrates: 24g, Protein: 3g, Fat: 10g, Saturated Fat: 5g, Polyunsaturated Fat: 1g, Monounsaturated Fat: 3g, Trans Fat: 0.2g, Cholesterol: 22mg, Sodium: 145mg, Potassium: 78mg, Fiber: 1g, Sugar: 16g, Vitamin A: 168 IU, Vitamin C: 0.03mg, Calcium: 21mg, Iron: 1mg
Nutrition information is automatically calculated, so should only be used as an approximation.
Additional Info
Cookies, Dessert
American
Like this recipe? Leave a comment below! We love hearing from you!
Frequently Asked Questions About Monster Cookies
Can I use natural peanut butter for Monster Cookies?
While natural peanut butter can be used, we generally recommend sticking to conventional, shelf-stable creamy peanut butter (like Jif or Skippy) for this recipe. Natural peanut butters tend to be oilier and separate more easily, which can affect the dough’s consistency and lead to a greasier or more crumbly cookie. If you do use natural peanut butter, make sure it’s well stirred and be prepared for potential slight variations in texture.
How can I prevent my Monster Cookies from spreading too much?
The key to preventing excessive spreading is chilling your cookie dough. Ensure the dough is chilled for at least 15-30 minutes before baking. Cold butter in the dough takes longer to melt in the oven, allowing the cookies to set before spreading too much. Additionally, make sure your butter isn’t *too* soft when you start; it should be pliable but still cool to the touch. Baking on parchment paper also helps, and avoid overcrowding your baking sheet.
Can I add different mix-ins to my Monster Cookies?
Absolutely! Monster Cookies are famous for being versatile. Feel free to get creative with your mix-ins. Consider adding chopped nuts (like pecans or walnuts), pretzels for a salty crunch, different types of chocolate (milk, dark, white chocolate chips, or even chopped candy bars), or other colorful candies. Just try to keep the total quantity of mix-ins similar to avoid overwhelming the dough.
What if I don’t have mini M&M’s? Can I use regular ones?
Yes, regular-sized M&M’s work perfectly fine! Mini M&M’s are often preferred for their even distribution and delicate crunch, but regular M&M’s will give your cookies that classic Monster Cookie look and taste. Feel free to use whatever you have on hand.
How do I know when the Monster Cookies are perfectly baked?
Look for cookies with edges that are lightly golden brown and appear set. The centers should still look slightly soft and might even seem a little underbaked. This is crucial for a chewy cookie! They will continue to firm up significantly as they cool on the baking sheet and then on a wire rack. Overbaking will lead to a dry, crunchy cookie, so err on the side of caution.
For even more delicious and easy recipes delivered straight to your inbox, don’t forget to sign up for our weekly newsletter! You can also follow us on social media for daily inspiration and baking tips. Happy baking!