
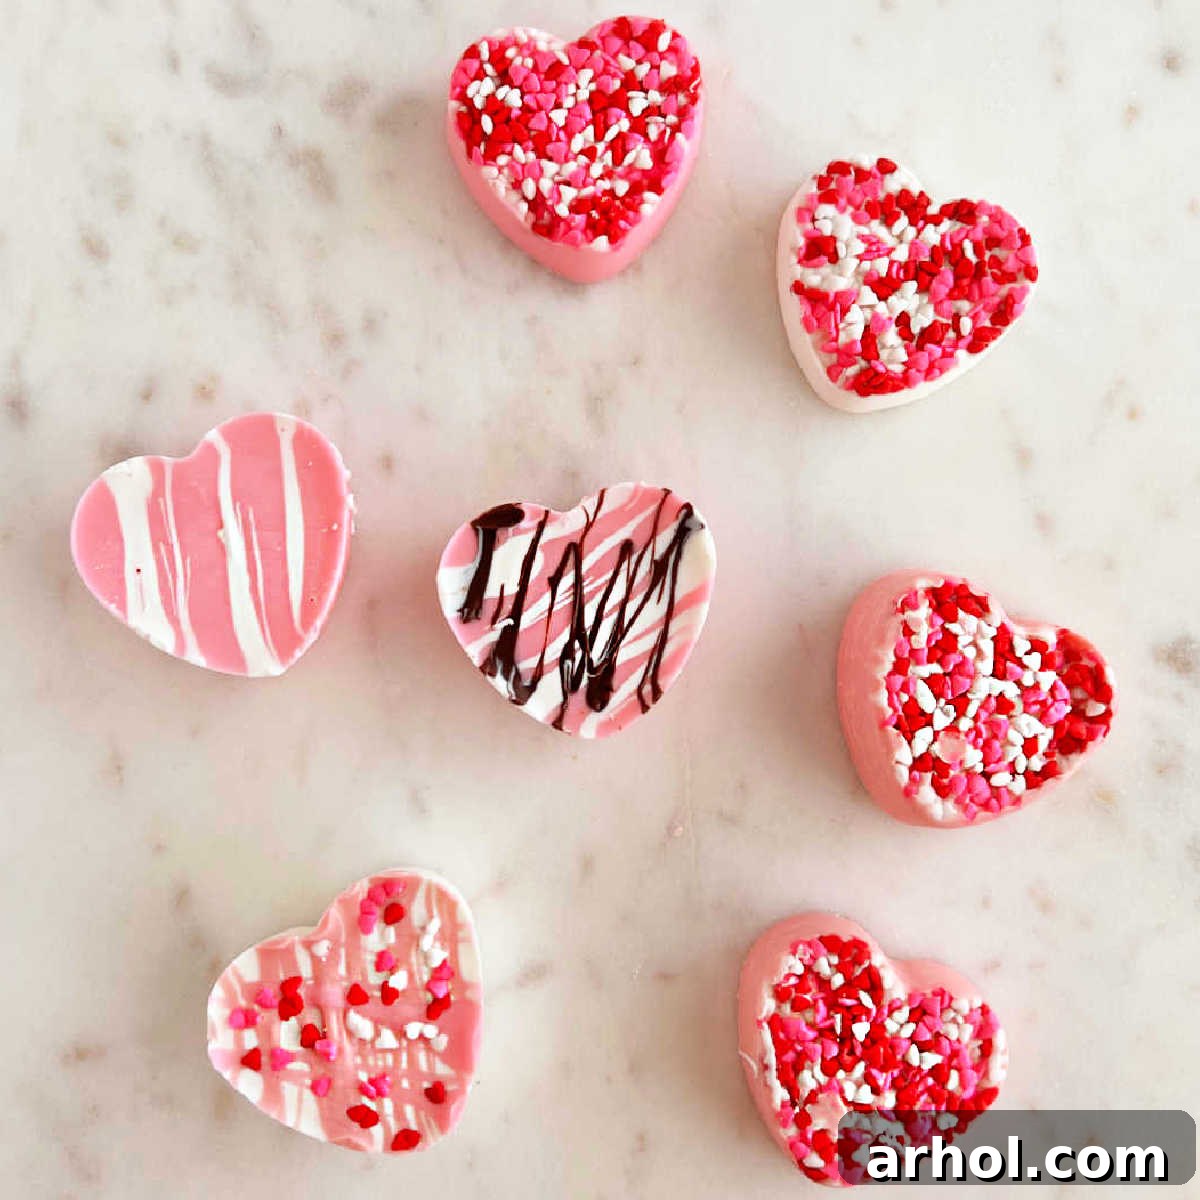
Homemade Chocolate Candy Hearts: The Ultimate Valentine’s Day Treat Guide
There’s a special kind of magic in homemade gifts, and when it comes to expressing affection on Valentine’s Day, nothing quite captures the sentiment like a thoughtful, handcrafted treat. These homemade chocolate candy hearts, crafted with versatile candy melts and rich melted chocolate, are the epitome of edible love. They are incredibly simple to make, yet yield stunning results that are perfect for sharing with your sweetheart, delighting friends, or adding a charming touch to Valentine’s Day treat bags. Imagine the smiles when loved ones receive these personalized, delicious confections – a truly memorable gesture that goes beyond store-bought sweets.
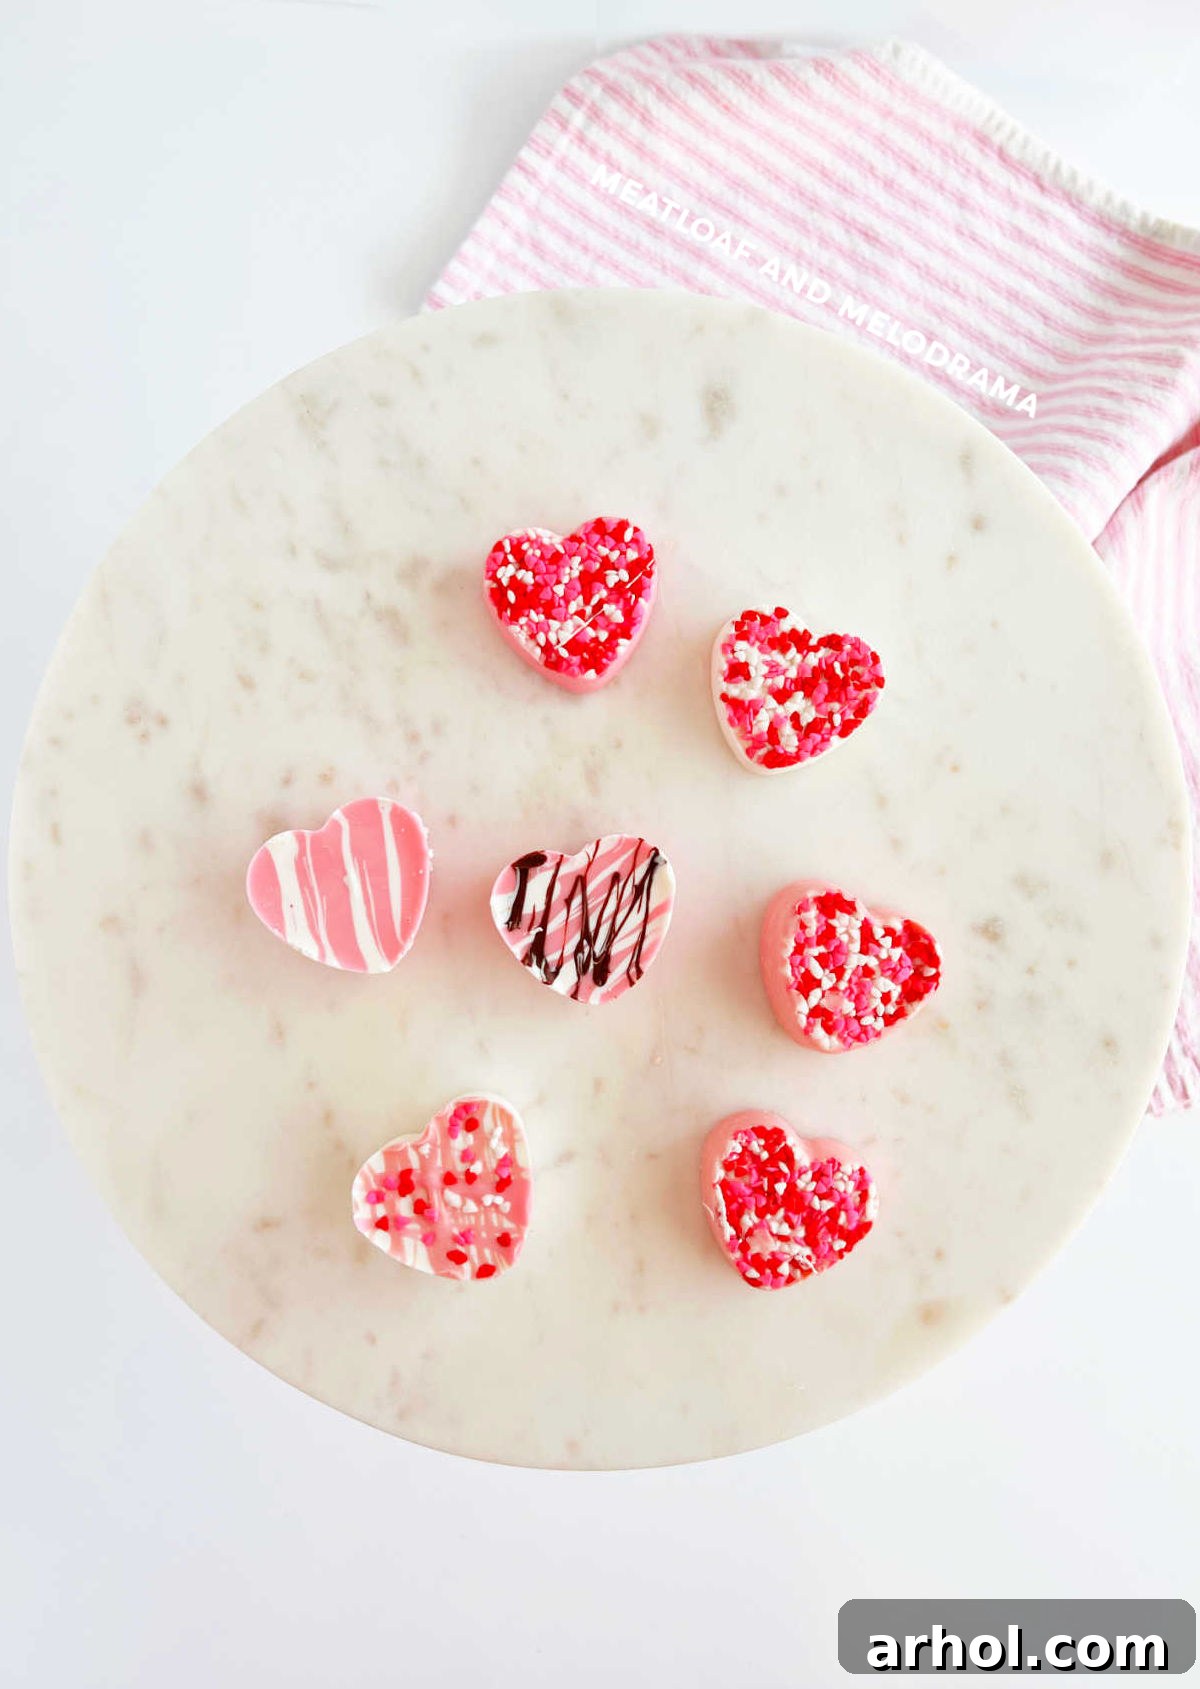
The Universal Language of Chocolate: A Valentine’s Day Tradition
My love affair with chocolate is undeniable; it’s an essential part of life’s celebrations, especially Valentine’s Day. While the beauty of hearts and flowers is certainly cherished, there’s an unparalleled joy in receiving or giving a delicious chocolate treat. It’s a classic symbol of love and indulgence that transcends cultural boundaries. But if you truly want to elevate that message of care and affection, consider presenting someone with homemade chocolate creations. This extra effort transforms a simple treat into a profound statement, conveying a depth of feeling that mass-produced candies simply cannot match.
Over the years, my children and I have enjoyed crafting various homemade chocolate delights, from luxurious chocolate truffles to playful Oreo balls, festive Easter eggs, and decadent fudge. Each project brings us closer and creates lasting memories. This past weekend, we finally embarked on making these delightful chocolate candy hearts, a recipe that proved to be one of the easiest and most rewarding Valentine’s Day projects we’ve ever tackled. If you’re looking for simple yet impactful holiday recipes, our Valentine’s Day snack mix is another fantastic, easy option!
Gather Your Sweet Supplies: Ingredients for Perfect Chocolate Hearts
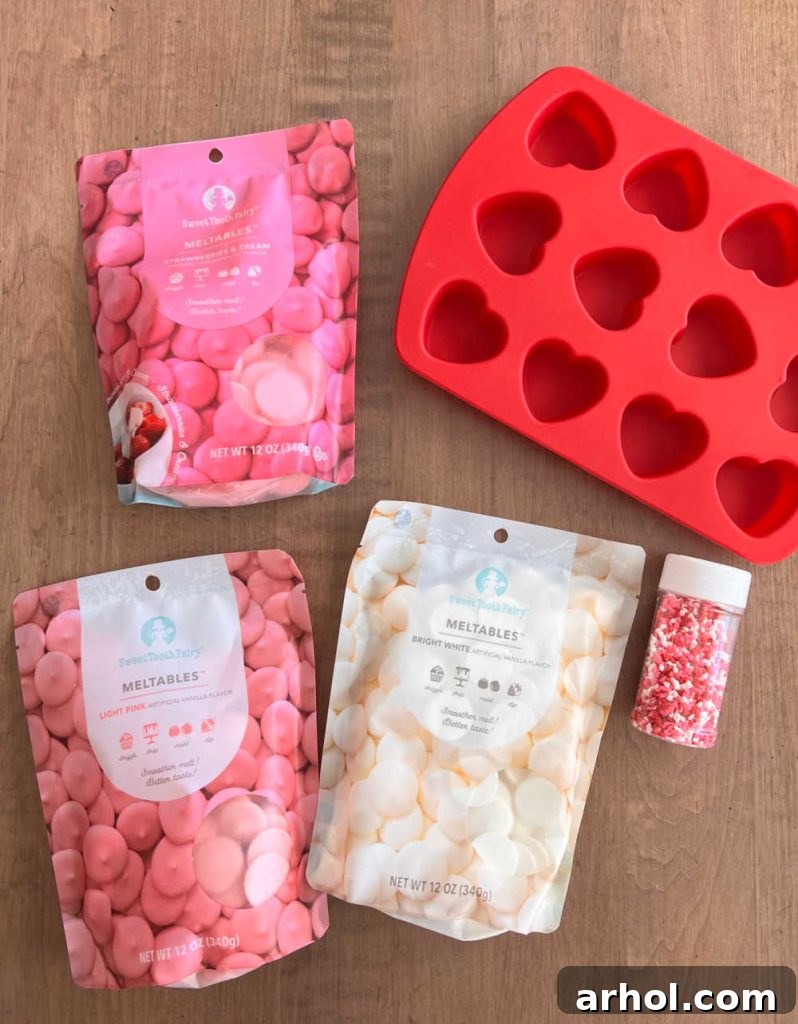
One of the best aspects of this recipe is its simplicity, requiring only a few readily available ingredients. You can easily find these items at most major grocery stores, specialized craft stores with baking sections, or through online retailers. Planning ahead for Valentine’s Day often means finding great deals, as stores tend to put holiday-themed baking supplies on sale well in advance. I managed to snag a wonderful silicone heart mold and an assortment of candy melts and semi-sweet chocolate chips at a fantastic price!
Essential Ingredients:
- Candy Melts: Choose your favorite colors to match your Valentine’s theme. Pink, red, and white are classic choices, but feel free to experiment with any hues that spark joy. These melts are designed to harden smoothly and hold their shape beautifully.
- Chocolate Chips: The type of chocolate is entirely up to your preference. Semi-sweet chocolate chips offer a balanced flavor that pairs wonderfully with candy melts. For a richer taste, dark chocolate chips are an excellent option. If you prefer a milder, sweeter profile, white chocolate chips can also be used, especially when creating pastel-colored hearts.
- Candy Sprinkles: These add a festive touch and a delightful texture. Valentine’s Day themed sprinkles often come in various shapes like tiny hearts or nonpareils in pink, red, and white. Regular rainbow sprinkles are also a fun choice for a more vibrant look.
- Coconut Oil (Optional): A small amount of coconut oil can be added to semi-sweet or dark chocolate chips. It helps achieve a smoother, more fluid consistency when melted, making it easier to pour and drizzle, and ensuring a glossy finish.
Equipment You’ll Need:
- Silicone Heart Molds: These are the key to creating perfectly shaped hearts. Silicone molds are flexible, making it incredibly easy to pop out the finished candies without breakage. They come in various sizes, allowing you to make anything from tiny bite-sized hearts to larger, more substantial ones. Look for molds that are food-grade and heat-resistant.
- Microwave-Safe Bowls: You’ll need separate bowls for each color of candy melt and chocolate you plan to use. Glass or ceramic bowls are ideal for microwave melting.
- Spoons or Small Scoops: For transferring melted chocolate into the molds.
- Piping Bags (Optional, but Recommended for Precision): Disposable piping bags or even a sturdy plastic baggie with a snipped corner can be used for more precise pouring and for creating decorative drizzles.
- Small Rubber Spatula: Useful for stirring melted chocolate and scraping down the sides of the bowls.
- Baking Sheet: To place your silicone molds on, providing a stable surface for moving them into and out of the refrigerator or freezer.
Crafting Your Confections: Step-by-Step Guide to Making Chocolate Hearts
Creating these chocolate candy hearts is an incredibly straightforward process, perfect for bakers of all skill levels. With just a few steps, you’ll have a beautiful batch of homemade treats ready to impress.
Step 1: Melting Your Chocolate & Candy Melts
The first crucial step is to perfectly melt your chosen chocolates and candy melts. Place each color or type of chocolate into separate microwave-safe bowls. Melting them individually prevents colors from mixing prematurely and allows for better control over consistency. Follow the package directions for melting, as specific brands may vary, but typically, this involves microwaving in short 30-second intervals.
After each interval, stir the contents thoroughly. Even if the chocolate doesn’t look fully melted, stirring helps distribute the heat and prevents scorching. Continue this process until the chocolate and candy melts are smooth and creamy, with no lumps remaining. The vibrant colors of the candy melts, especially pink and white alongside semi-sweet chocolate, often remind me of Neapolitan ice cream, adding to the fun!
If you prefer not to use a microwave, a double boiler method works wonderfully on the stovetop. Simply place your heat-safe bowls over a saucepan of simmering water, ensuring the bottom of the bowl does not touch the water. The steam will gently melt the chocolate, allowing for gradual control. Stir continuously until smooth.
Step 2: Filling the Molds & Adding Personal Touches
Once your chocolates are perfectly melted, it’s time to fill your heart-shaped molds and get creative with decorations. We experimented with a couple of different approaches, both yielding adorable results.
Method 1: Pour Chocolate, Then Add Sprinkles
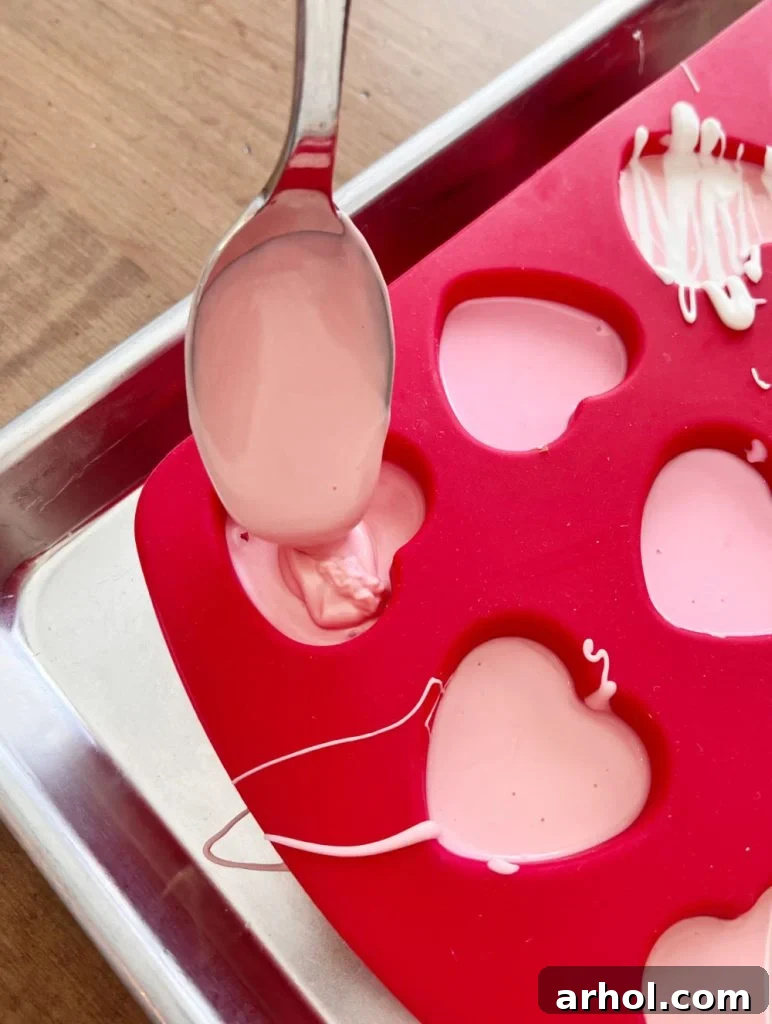
For the first batch, we carefully poured the melted chocolate or candy melts directly into the heart molds. You can use a small spoon or a measuring cup for this. For greater precision, especially if you want crisp edges or to fill smaller details, a piping bag is your best friend. Don’t have one? No problem! A regular plastic baggie with a tiny snip off one of the bottom corners works just as well. This method gives you excellent control over where the chocolate goes.
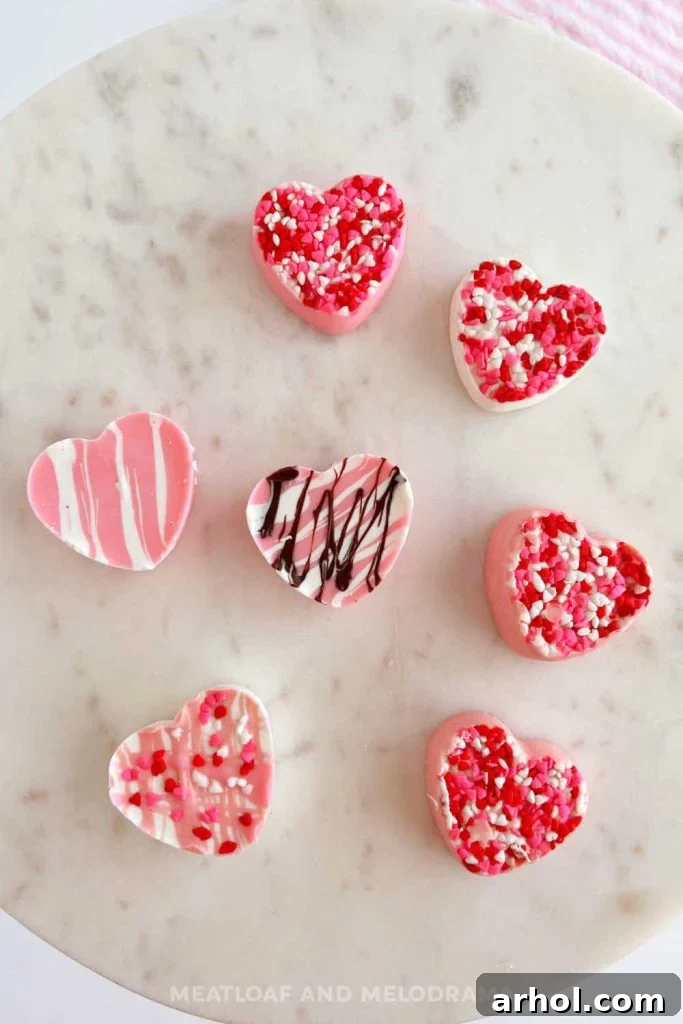
Once the molds were filled with a base layer of chocolate, we immediately sprinkled the candy sprinkles on top. This ensures they adhere nicely as the chocolate begins to cool slightly. We also took the opportunity to drizzle contrasting stripes across some of the hearts, using a different color of melted chocolate in a separate piping bag. My youngest absolutely adored her pink and dark chocolate heart – a true diva choice!
Method 2: Sprinkles First, Then Pour Chocolate
For our next batch, we reversed the order, which is a fantastic technique if you want the sprinkles to be perfectly visible on the top surface of the finished candy (which will be the bottom of the mold). We started by scattering a generous amount of Valentine sprinkles into the bottom of each heart mold, creating a vibrant base layer. Then, we carefully poured the melted chocolate and candy coating over the sprinkles, filling the molds to our desired thickness. This method creates a lovely smooth top with embedded sprinkles once unmolded.
This “sprinkles first” approach can be a little faster if your primary goal is to have a sprinkle-covered surface. However, if you plan to drizzle additional chocolate patterns over the hearts, it’s best to do this after the hearts have been removed from the molds and are fully set. For drizzling, a fork can work for a rustic look, but a piping bag (homemade or store-bought) offers much finer control for intricate designs. Remember, if your melted chocolate for drizzling seems too thick, a tiny bit of coconut oil can be stirred in to achieve a thinner, more free-flowing consistency.
Regardless of the method you choose, the end result is always adorable and delicious! Each heart becomes a unique piece of edible art.
Patience is a Virtue: Setting Your Chocolate Hearts
Once your molds are filled and decorated, the final step before enjoying your creations is allowing them to set properly. This is crucial for achieving firm, easy-to-handle chocolate hearts that pop out of the molds cleanly.
Carefully transfer your silicone molds to the refrigerator. Chilling them for about an hour should be sufficient to allow the chocolate and candy melts to fully harden. If you’re in a hurry or working in a particularly warm environment, you can speed up this process by placing the molds in the freezer for about 15-20 minutes. Just be sure not to leave them in the freezer for too long, as extreme cold can sometimes affect the chocolate’s texture, potentially leading to a dull finish or “bloom.”
As a tip from our own experience, we noticed that in our second batch, we didn’t fill the molds quite as high, resulting in some hearts being thinner than others. This is a great way to control the final size and thickness if you have a preference. Also, don’t let any excess melted chocolate or candy coating go to waste! We often pour any leftovers into smaller heart molds (or even mini ice cube trays) to create tiny, delightful solid chocolates. My personal favorites are the little dark chocolate hearts – they’re intensely flavorful and perfect for a quick bite.
Unleash Your Creativity: Endless Variations for Your Candy Hearts
The beauty of homemade chocolate candy hearts lies in their incredible versatility. There’s no strict design or flavor profile you *must* follow, making them a fantastic canvas for your culinary creativity. Feel free to experiment with any combination of chocolate, sprinkles, and colors that your heart desires!
Chocolate Choices: Beyond the Basics
While I often gravitate towards a mix of white chocolate chips and semi-sweet chocolate chips because their colors beautifully complement pink candy melts, the possibilities are vast. Consider using rich milk chocolate chips for a classic, comforting flavor, or intense dark chocolate chips for a more sophisticated treat. You could even venture into alternative flavors like butterscotch chips for a unique twist. For an added layer of flavor, try incorporating a few drops of food-grade extracts, such as peppermint, almond, or even a hint of raspberry, directly into your melted chocolate before pouring.
Sprinkles & Mix-ins: Adding Texture and Fun
Sprinkles are just the beginning! Valentine’s Day brings a delightful array of cute candies to stores, providing endless opportunities to customize your hearts. Beyond themed pink and white sprinkles, consider adding:
- Mini Marshmallow Bits: For a soft, chewy surprise.
- Valentine’s M&M’s or other small candies: Adds a pop of color and different texture.
- Chopped Nuts: Almonds, pecans, or walnuts for a delightful crunch.
- Dried Fruit Bits: Cranberries or cherries for a touch of tartness and chewiness.
- Crushed Cookies: Like Oreos or graham crackers for added flavor and texture.
For an adventurous palate, I’ve considered adding a pinch of cayenne pepper to a dark chocolate batch next time. The subtle heat would create an intriguing contrast, offering something truly unexpected and memorable!
Shape & Size: Customizing Your Molds
Don’t limit yourself to one size or shape of heart. Different silicone chocolate molds allow you to create a variety of candy hearts, from delicate mini hearts to grander, more substantial ones. You can also play with the thickness of your hearts by adjusting how much melted chocolate you pour into each cavity. For super thick, indulgent candy hearts, fill the mold all the way to the brim. For thinner, more delicate confections, fill the mold only halfway or less. This variation adds visual interest to your treat platter and offers different biting experiences.
Storing Your Sweet Creations: Keeping Hearts Fresh
Once your beautiful homemade chocolate candy hearts are set, proper storage is key to maintaining their freshness, texture, and appearance. Store them in an airtight container in the refrigerator. To prevent them from sticking together or any potential melting mishaps, it’s a good idea to line the container with parchment paper. You can also place small pieces of parchment paper between layers of hearts.
Before serving these delightful treats, allow them to sit out at room temperature for about 10-15 minutes. This takes the chill off, making them softer and easier to bite into, allowing their full flavor and creamy texture to shine. Don’t worry, they won’t melt super quickly at room temperature, so they can be displayed beautifully on a platter for a while without losing their shape. These charming, delectable hearts are truly the perfect gift to tuck into Valentine’s Day treat bags, ready to spread joy!
Recipe originally published in 2016 and updated in 2022.
Homemade Chocolate Candy Hearts Recipe
Recipe Overview
Homemade chocolate candy hearts made with candy melts and melted chocolate are perfect homemade treats for Valentine’s Day. Share these little hearts with your sweetheart or add them to Valentine’s Day treat bags!
- Prep Time: 5 minutes
- Cook Time: 5 minutes
- Setting Time: 1 hour
- Total Time: 1 hour 10 minutes
- Servings: 24 candies
Ingredients:
- 2 cups Pink and white candy melts
- 1 cup Semi-sweet chocolate chips
- Candy sprinkles
- 1 teaspoon coconut oil (optional, for smoother chocolate)
Instructions:
- Melt the chocolate chips and candy melts in separate microwave-safe bowls according to package directions. Stir frequently until smooth.
- There are two main ways to fill your molds:
- Method A (Pour then Sprinkles): Pour melted chocolate or candy melts into the heart molds. Immediately add candy sprinkles on top.
- Method B (Sprinkles then Pour): Add candy sprinkles to the bottom of the empty heart molds first. Then, pour melted chocolate or candy melts over the sprinkles.
- Refrigerate the filled molds for 1 hour, or until the chocolate hearts are completely firm.
- Carefully remove the hardened candies from the molds by gently pressing on the back of the silicone.
Notes:
You can use either a double boiler or a microwave to melt chocolate. For best results, always follow the manufacturer’s directions on the package.
If desired, add 1 teaspoon of coconut oil to the semi-sweet chocolate while melting for a smoother, glossier consistency.
Nutritional values provided are approximate and based on typical ingredients.
Store the chocolate candy hearts in an airtight container in a cool place, preferably the refrigerator.
Nutrition:
- Calories: 85 kcal
- Carbohydrates: 9g
- Protein: 1g
- Fat: 5g
- Saturated Fat: 4g
- Polyunsaturated Fat: 1g
- Monounsaturated Fat: 1g
- Trans Fat: 1g
- Cholesterol: 1mg
- Sodium: 9mg
- Potassium: 43mg
- Fiber: 1g
- Sugar: 8g
- Vitamin A: 4 IU
- Calcium: 5mg
- Iron: 1mg
Nutrition information is automatically calculated and should only be used as an approximation.
Additional Info:
- Course: Dessert
- Cuisine: American
Share the Love: A Perfect Valentine’s Gift
The joy of making these homemade chocolate candy hearts is truly infectious. My children are already enthusiastic about planning their next batch, eager to share these delightful treats with their friends as heartfelt gifts. I have no doubt that their friends will be absolutely thrilled to receive such a thoughtful and delicious present!
These simple yet charming confections are a testament to how easy and rewarding homemade gifts can be. They offer a unique opportunity to infuse love and personal touch into every bite. For more simple recipe ideas, creative homemade candy recipes, and great recipes you can whip together in minimal time, be sure to subscribe to our newsletter. And, don’t forget to follow us on social media for daily inspiration and sweet updates!