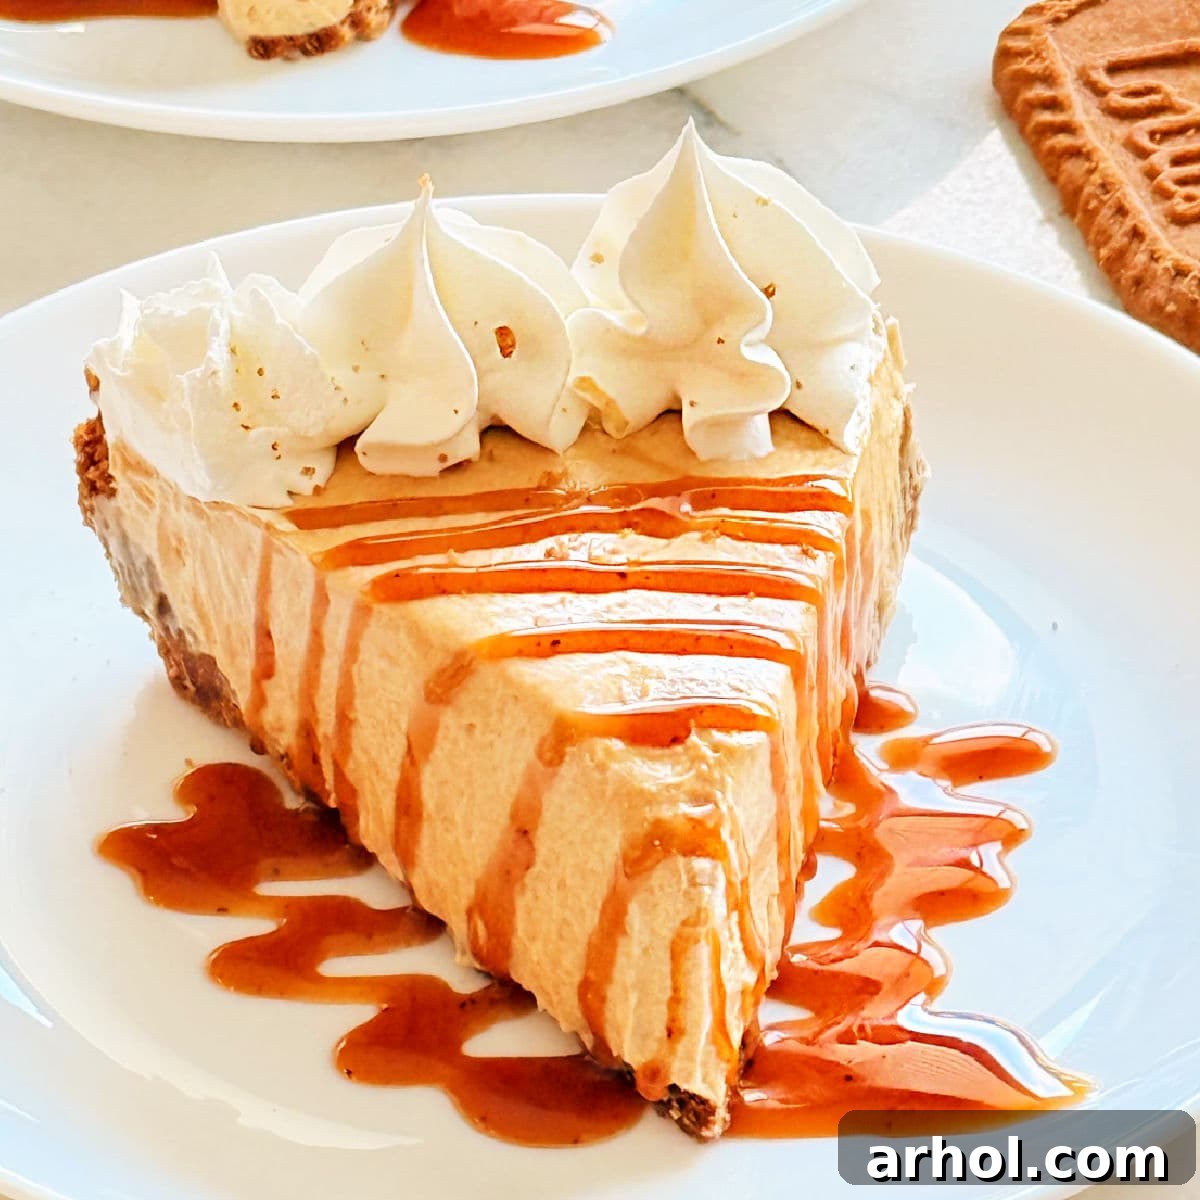
Welcome to the delightful world of no-bake desserts, where indulgence meets incredible ease! This recipe unveils a truly magical creation: the No-Bake Cookie Butter Pie. Imagine a dessert that requires no oven, minimal effort, and yet delivers maximum flavor. This pie features an irresistibly creamy, spiced filling nestled in a perfectly crunchy Biscoff cookie crust, making it the ultimate showstopper for any occasion. Whether you’re hosting a summer barbecue, a festive holiday gathering, or simply craving a sweet treat, this cookie butter pie promises to be a memorable addition to your dessert repertoire.
The beauty of this pie lies in its simplicity and the unique flavor profile of cookie butter. For those unfamiliar, cookie butter is a spread made from crushed Speculoos cookies (often branded as Biscoff in the US), which are famously known for their distinct caramel and spice notes. This delicious spread transforms into a silken, rich filling when combined with cream cheese and whipped topping, creating a dessert that’s both comforting and sophisticated. Get ready to impress everyone with this remarkably easy and utterly delicious no-bake sensation!
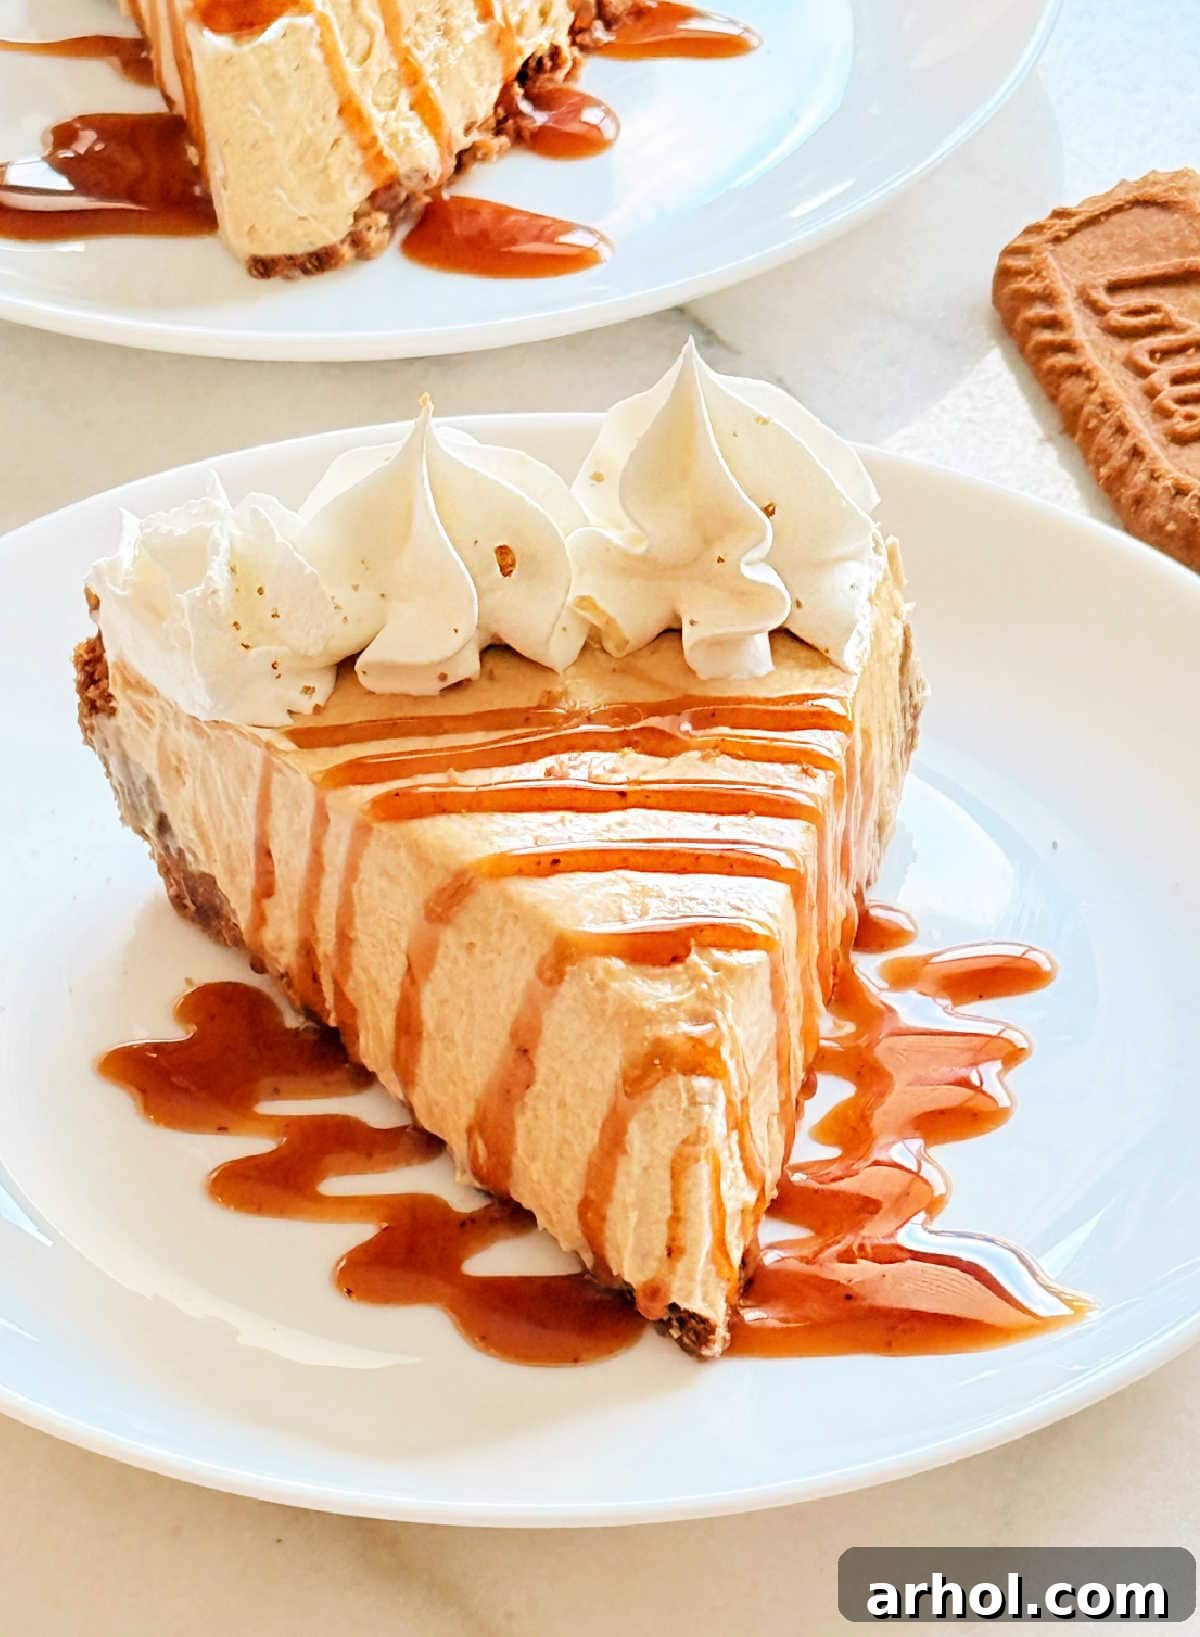
Discover the Allure of Biscoff Pie: A No-Bake Sensation
If you’re in search of a dessert that brings joy without the fuss, this super easy recipe for cookie butter pie is your answer. Perfect for any time of year, especially when you want to avoid turning on the oven, this no-bake wonder comes together effortlessly. You won’t need to bake a single component, not even the crust! While some affectionately call this sweet treat a “Biscoff pie” or “speculoos cookie pie,” our family simply knows it as undeniably delicious. The caramel and cinnamon notes of the Biscoff cookies provide a warm, inviting flavor that pairs perfectly with the light and airy cream cheese filling. It’s a dessert that feels both gourmet and nostalgic, appealing to all ages.
Beyond this incredible pie, the versatile world of cookie butter offers many other delightful possibilities. If you’re looking for an even quicker cookie butter dessert fix, consider a rapid Biscoff dessert dip, perfect for fruit or other cookies, or a refreshing cookie butter ice cream for a chilled treat. But for a truly satisfying and elegant no-bake experience, this pie stands supreme, offering a perfect balance of creamy texture and crunchy crust that’s simply irresistible.
Essential Ingredients for Your Dream Cookie Butter Pie
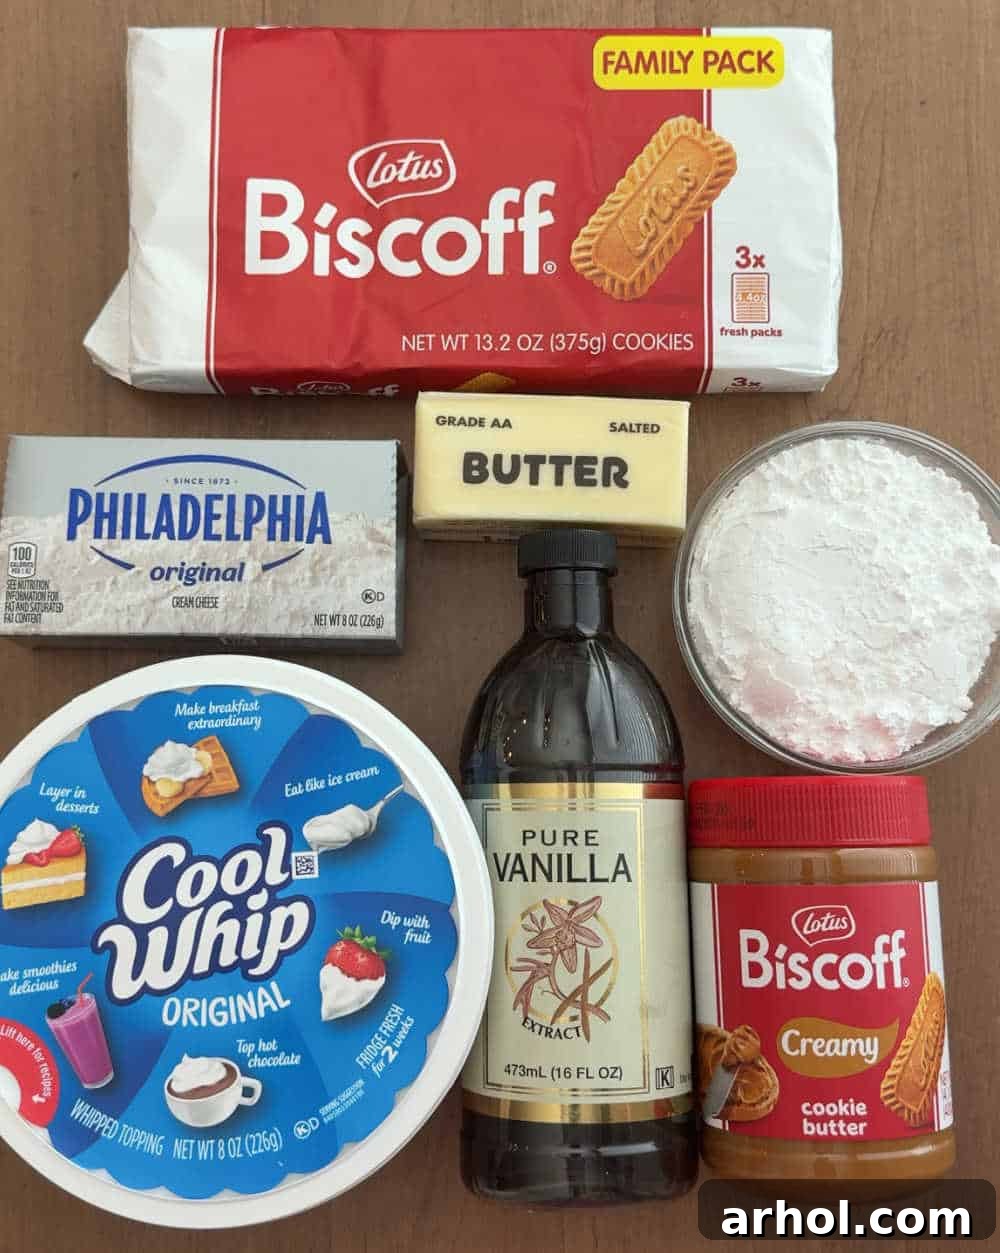
Crafting this easy no-bake cookie butter pie starts with a selection of readily available ingredients that, when combined, create pure magic. Each component plays a vital role in achieving the perfect balance of flavor and texture. Here’s a detailed look at what you’ll need to gather to bring this incredible dessert to life. Full measurements can be found in the printable recipe card below, but these notes will guide you on selection and preparation:
- Biscoff cookies: These iconic spiced, crisp cookies are the star of our crunchy, buttery crust. Their distinctive caramel notes and slight hint of cinnamon are what give this pie its signature flavor. For crushing, you’ll want them to be fine crumbs, which can be achieved easily with a food processor or by hand. If Biscoff cookies aren’t available, you can substitute with graham crackers or gingersnaps for a similar texture, though the flavor profile will differ slightly. Alternatively, a store-bought pre-made pie crust can be used for even quicker preparation.
- Butter: Melted butter is crucial for binding the cookie crumbs together to form a firm, flavorful crust. I typically use salted butter as it enhances the overall taste, but unsalted butter works just as well. If using unsalted, you might consider adding a tiny pinch of salt to the crust mixture for balance. Ensure it’s fully melted and warm, not hot, when mixing with the crumbs.
- Creamy Cookie Butter: This is the heart of our pie’s filling. Made from finely crushed Biscoff or Speculoos cookies, cookie butter offers a smooth, rich, and intensely spiced caramel flavor. You can usually find it in the cookie aisle of your grocery store, near peanut butter, or at specialty stores like Trader Joe’s. While there are creamy and crunchy varieties, the creamy version is highly recommended for this pie as it results in a velvety smooth filling that melts in your mouth.
- Cream cheese: The foundation of our luscious, creamy filling. Full-fat cream cheese is preferred for its rich taste and stability, ensuring the pie holds its shape beautifully. It’s absolutely essential to let the cream cheese soften completely at room temperature before mixing. This step prevents lumps and ensures a smooth, airy filling that combines effortlessly with other ingredients.
- Powdered sugar: Also known as confectioners’ sugar, this ingredient sweetens the pie filling and contributes to its smooth, delicate texture. Unlike granulated sugar, powdered sugar dissolves instantly, preventing any grainy mouthfeel. Adjust the amount to your personal preference, but the specified quantity provides a perfectly balanced sweetness.
- Vanilla extract: A splash of pure vanilla extract elevates the overall flavor of the pie, adding a warm, aromatic depth that complements the cookie butter and cream cheese beautifully. High-quality vanilla makes a noticeable difference in any dessert.
- Whipped topping (Cool Whip): This light and airy ingredient is folded into the filling to give it a wonderfully fluffy, mousse-like consistency. It’s important that your whipped topping is completely thawed before use. While you can substitute with freshly made whipped cream, be aware that the pie’s texture might be slightly less stable and fluffy, and it may not hold its shape as firmly when sliced.
Crafting Your No-Bake Cookie Butter Pie: A Simple Step-by-Step Guide
Creating this irresistible no-bake cookie butter pie is surprisingly simple and requires no advanced baking skills. Just follow these easy steps, and you’ll have a show-stopping dessert ready to chill. The process is divided into two main parts: preparing the perfectly crunchy crust and then whipping up the velvety smooth filling. Let’s get started!
1. The Perfect Biscoff Cookie Crust
The foundation of our pie is a rich and crunchy crust made from Biscoff cookies. This crust not only provides a fantastic texture contrast to the creamy filling but also infuses the pie with those beloved spiced caramel notes.
- Crush the Biscoff cookies: Begin by crushing about 30 Biscoff cookies (approximately 9.5 ounces or 270g) into fine crumbs. The easiest way to do this is in a food processor, pulsing until no large pieces remain. If you don’t have a food processor, place the cookies in a large freezer-safe Ziploc bag, seal it, and use a rolling pin or meat mallet to crush them until they resemble fine sand. Consistency is key here for a uniform crust.
- Combine with melted butter: In a medium-sized mixing bowl, pour the finely crushed Biscoff cookie crumbs. Melt ½ cup (one stick) of butter, then add it to the cookie crumbs. Stir thoroughly with a spoon or spatula until the butter is completely incorporated, and the mixture resembles wet sand. Every crumb should be moistened.
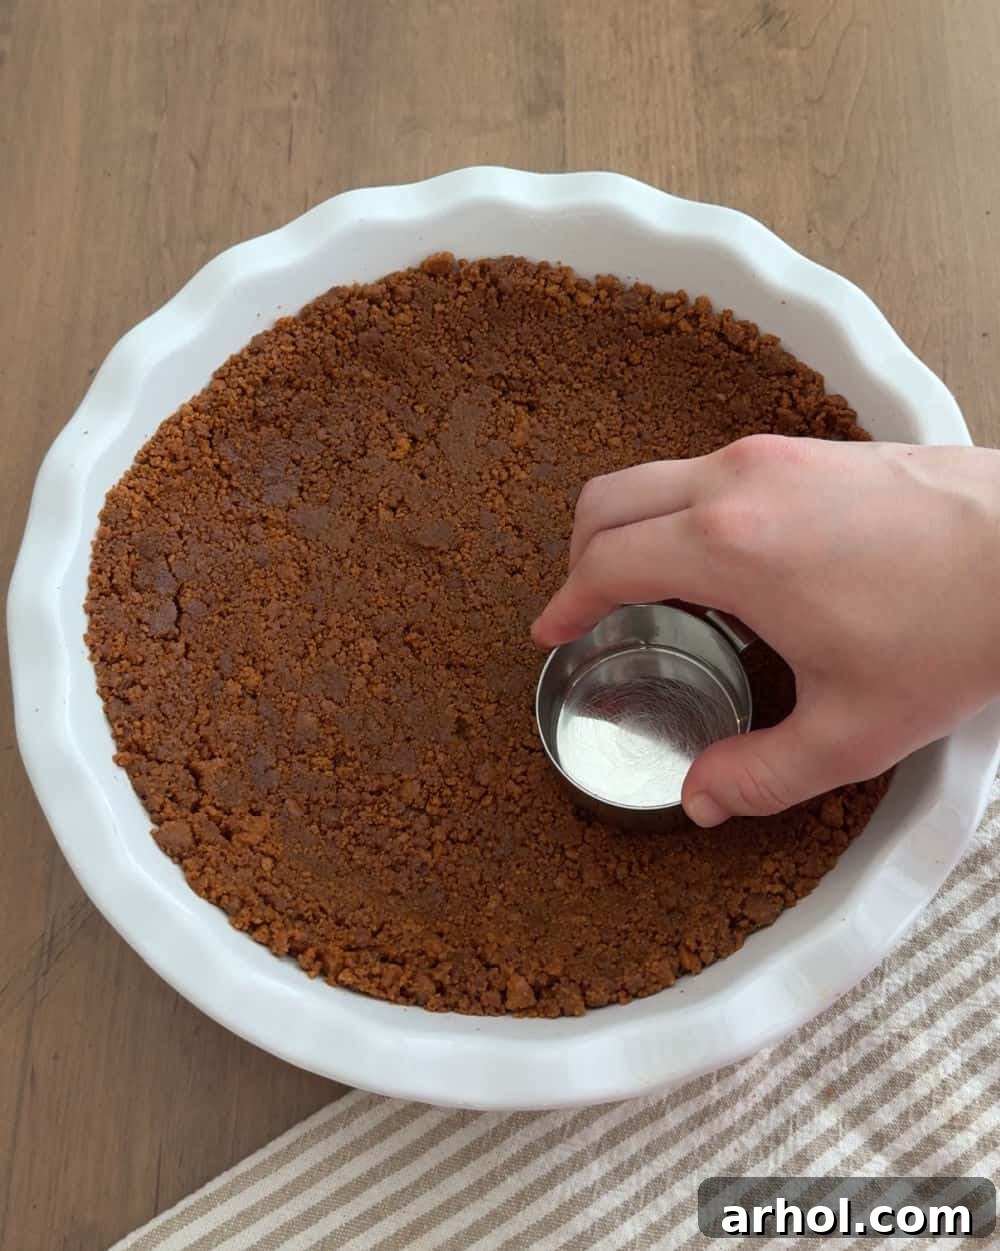
- Press into the pie plate and chill: Lightly spray a 9-inch pie pan with non-stick cooking spray to prevent sticking. Transfer the cookie crumb mixture into the prepared pie pan. Using the back of a spoon or the bottom of a flat measuring cup, firmly press the mixture evenly across the bottom and slightly up the sides of the pie plate. Ensure it’s compact and even. Place the crust in the freezer to set while you prepare the pie filling. This step helps the crust firm up and prevents it from becoming crumbly when you add the filling.
2. The Velvety Creamy Filling
This is where the magic happens! A blend of softened cream cheese, rich cookie butter, and fluffy whipped topping creates a filling that is utterly irresistible. Remember to allow your cream cheese to soften properly for the smoothest results.
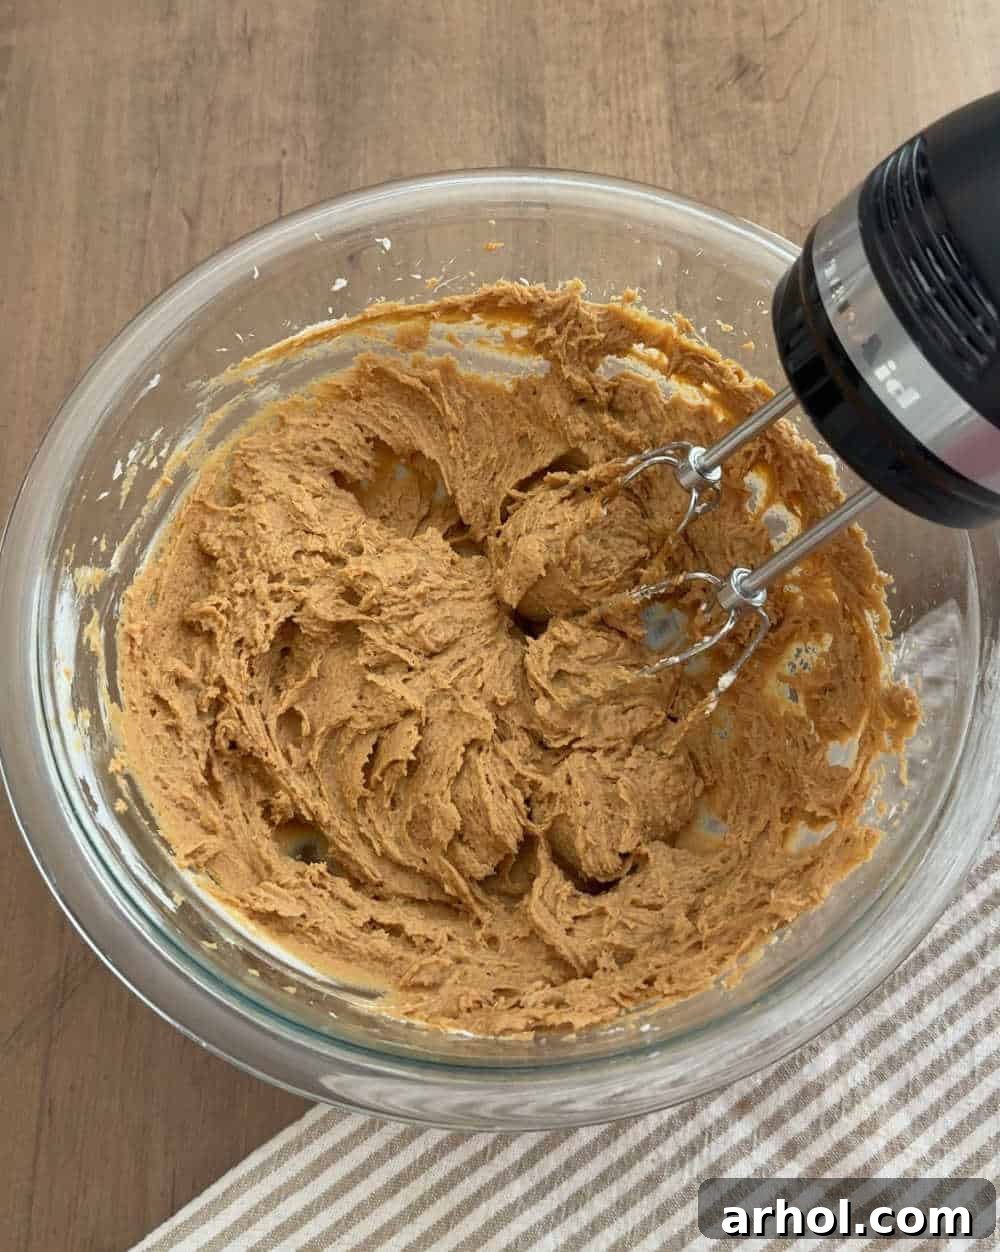
- Whip the cream cheese: In a large mixing bowl, use an electric mixer (handheld or stand mixer) to beat the 8 ounces of softened cream cheese. Beat on medium speed for 2-3 minutes until it is perfectly smooth, light, and fluffy, with absolutely no lumps remaining. This step is crucial for a silky filling.
- Incorporate cookie butter and vanilla: Add 1 cup of creamy Biscoff cookie butter and 1 teaspoon of vanilla extract to the whipped cream cheese. Continue beating on medium speed until all the ingredients are well combined and the mixture is uniformly smooth and creamy. Scrape down the sides of the bowl with a spatula to ensure everything is mixed.
- Add powdered sugar: Gradually add ¾ cup of powdered sugar to the bowl. Beat on low speed initially to prevent a cloud of sugar, then increase to medium speed and continue beating until the sugar is fully incorporated and the filling has a light, airy texture.
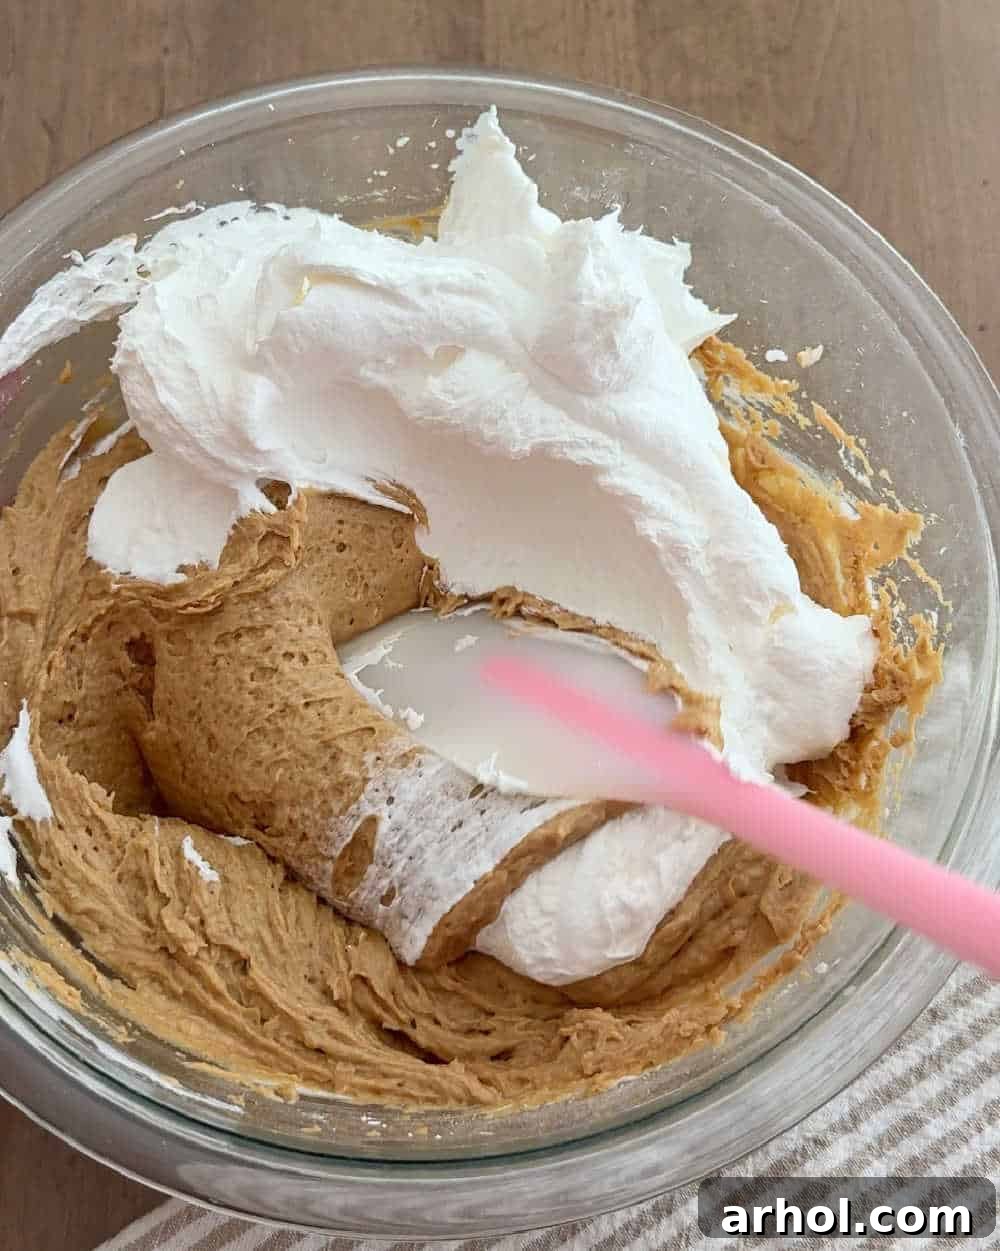
- Gently fold in whipped topping: Carefully and gently fold in the 8 ounces of thawed whipped topping (Cool Whip) using a rubber spatula. Use a light hand, folding just until no streaks of whipped topping remain. Overmixing here can deflate the airiness of the filling, making it less fluffy.
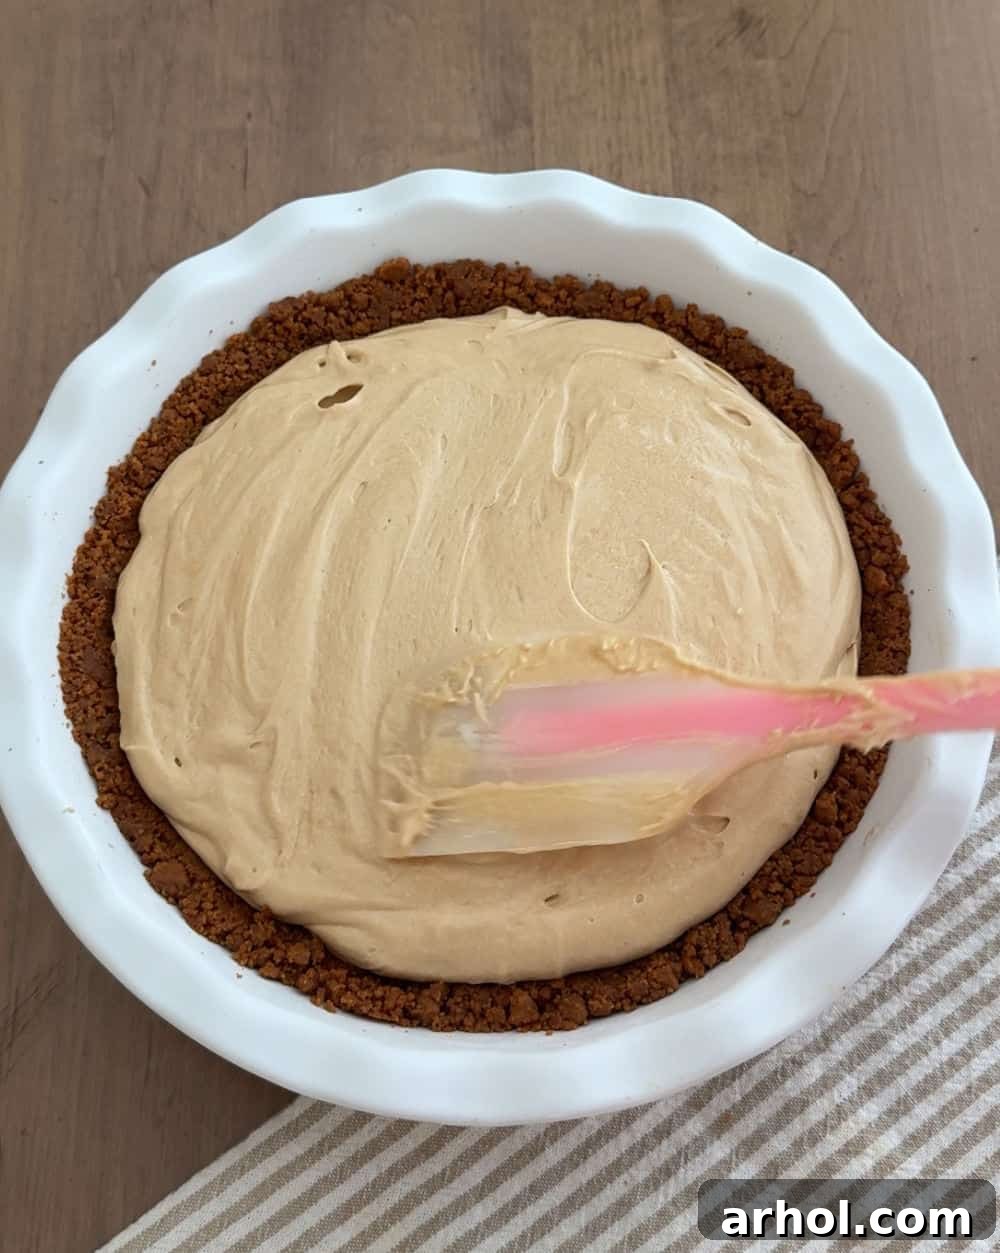
- Assemble and chill: Retrieve your chilled pie crust from the freezer. Evenly spoon the creamy cookie butter filling into the prepared crust. Use your spatula to gently spread and smooth the top of the filling. Once assembled, place the pie in the refrigerator to chill for at least 4 hours. For the absolute best results, allowing the pie to set overnight in the refrigerator is highly recommended, as it will be much firmer and easier to slice cleanly.
Presentation Perfection: Serving Your Cookie Butter Pie
Once your no-bake cookie butter pie has had ample time to chill and set, it’s ready for its grand debut! Presentation can elevate an already delicious dessert to an extraordinary one. While delightful on its own, a few simple garnishes can make each slice truly special and visually appealing.
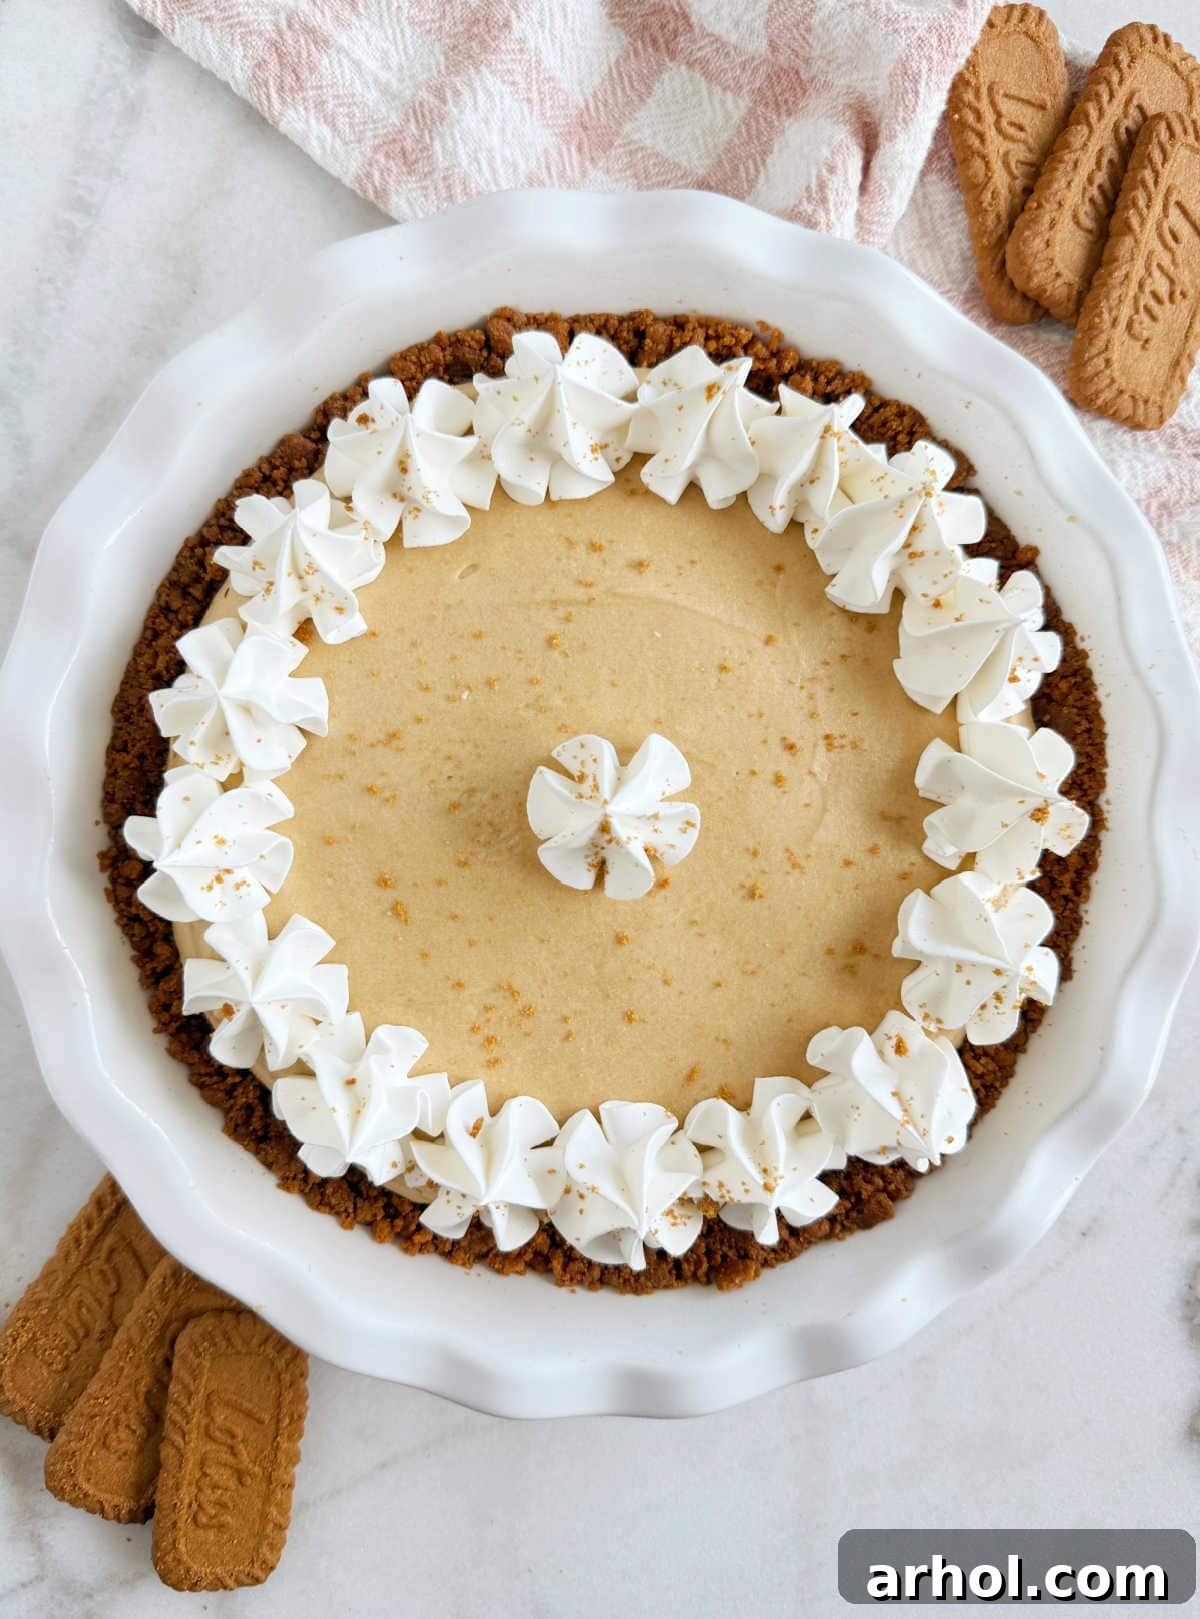
We love to decorate this pie with beautiful swirls of whipped cream (or additional whipped topping) piped into elegant stars or dollops. A sprinkling of extra crushed Biscoff cookie crumbs over the top adds texture and reinforces the pie’s signature flavor. For an extra touch of decadence, consider a drizzle of warm caramel syrup over individual slices just before serving. You can also gently warm a small amount of cookie butter until it’s pourable and use that as a delicious, thematic drizzle. To achieve clean, neat slices, run a sharp knife under hot water and wipe it dry between each cut. This technique helps glide through the creamy filling without dragging, ensuring every portion looks as good as it tastes. Serve this pie alongside a cup of coffee or tea for an ultimate treat, or as a light and refreshing end to any meal.
Storing Your Delicious Cookie Butter Pie
Proper storage is key to keeping your no-bake cookie butter pie fresh and delicious for days. This pie is an excellent make-ahead dessert, allowing you to prepare it well in advance of your event or to simply enjoy leftovers throughout the week.
Refrigeration: Any leftover pie, or the entire pie if made ahead, should be stored in the refrigerator. Cover the pie plate tightly with plastic wrap or transfer individual slices to an airtight container. When stored correctly, the pie will remain fresh and delicious for 4 to 5 days. Keeping it well-sealed prevents it from absorbing odors from other foods in the refrigerator and maintains its creamy texture.
Freezing: For longer storage, this cookie butter pie freezes beautifully. You can freeze the whole pie or individual slices. To freeze the whole pie, place the pie (uncovered) in the freezer until it is firm, about 2-3 hours. Then, wrap it tightly in several layers of plastic wrap, followed by a layer of aluminum foil. For individual slices, wrap each slice securely in plastic wrap and then place them in an airtight freezer-safe container or freezer bag. The pie can be frozen for up to 3 months. To serve after freezing, simply transfer the pie (or slices) to the refrigerator and allow it to thaw for several hours or overnight until soft enough to enjoy. Do not refreeze thawed pie.
Expert Tips for Your Best Cookie Butter Pie
Achieving the perfect no-bake cookie butter pie is easy, especially with these helpful tips to guide you:
- Ensure proper ingredient temperatures: Always make sure your whipped topping is completely thawed and, more importantly, your cream cheese is softened at room temperature before you begin mixing. This is crucial for achieving a smooth, lump-free, and airy filling. Cold cream cheese will result in a clumpy filling.
- Whipped topping vs. real whipped cream: While you can use real homemade whipped cream for the filling, be aware that the pie’s final texture may not be as consistently fluffy and may not set as firmly as it would with a stabilized whipped topping like Cool Whip. If using real whipped cream, ensure it’s whipped to stiff peaks.
- Perfect make-ahead dessert: This cookie butter pie is an ideal dessert for preparing in advance. The pie needs to chill for a minimum of 4 hours to properly set, but for the best texture and easiest, cleanest slices, chilling it overnight is highly recommended. You can make it up to two days ahead of time.
- Avoid overmixing the filling: Once you add the thawed whipped topping, fold it in gently with a spatula until just combined. Overmixing can deflate the air in the whipped topping, resulting in a denser, less airy pie filling.
- Quality ingredients matter: Using good quality Biscoff cookies and creamy cookie butter will significantly impact the flavor of your pie. Opt for full-fat cream cheese for the richest, most stable filling.
- For clean slices: To get beautiful, clean slices of your chilled pie, dip a sharp knife into hot water, wipe it dry, and then make your cut. Repeat this process for each slice. This keeps the knife warm and prevents the creamy filling from sticking.
Frequently Asked Questions (FAQ) About Cookie Butter Pie
- What exactly is cookie butter?
- Cookie butter is a delicious, spreadable confection made from finely crushed Speculoos cookies (often known as Biscoff cookies in North America). These cookies are characterized by their rich caramel flavor and warm spices like cinnamon, nutmeg, and cloves. The crushed cookies are mixed with fats and sugar to create a smooth, creamy butter-like spread, similar in texture to peanut butter, but with a unique sweet and spicy taste.
- Can I make this pie ahead of time?
- Absolutely! This is one of the best make-ahead desserts. You can prepare the entire pie up to two days in advance. Just keep it tightly covered in the refrigerator. We recommend adding any fresh garnishes, like whipped cream or cookie crumbs, right before serving for optimal freshness and appearance.
- Are there any substitutions for Biscoff cookies in the crust?
- Yes, if you can’t find Biscoff cookies or prefer a different flavor, you can certainly substitute them. Graham crackers are a classic choice for a no-bake crust and will work perfectly. Gingersnap cookies also make an excellent substitute, offering a similar spiced flavor profile and crisp texture. You could also use a store-bought graham cracker crust for ultimate convenience.
- How do I ensure my pie sets properly?
- The key to a perfectly set no-bake pie is adequate chilling time. Ensure the pie chills in the refrigerator for at least 4 hours. For the best, firmest results that make for easy slicing, chilling the pie overnight is highly recommended. Also, make sure your cream cheese is full-fat and properly softened before mixing, as this contributes to the filling’s stability.
- Can I freeze slices of cookie butter pie?
- Yes, this pie freezes beautifully! You can freeze the entire pie or individual slices. For slices, wrap each piece tightly in plastic wrap, then place them in an airtight freezer-safe container or bag. The pie can be stored in the freezer for up to 3 months. When you’re ready to enjoy, simply thaw slices in the refrigerator for a few hours before serving.
Full Recipe Card: Creamy No-Bake Cookie Butter Pie

Print Recipe
Creamy No-Bake Cookie Butter Pie
This incredibly easy no-bake cookie butter pie recipe features a luscious, creamy filling nestled within a perfectly crunchy Biscoff cookie crust, making it the ideal dessert for any gathering or a sweet weeknight treat. Prepare to impress with minimal effort!
- By:
- Dee
- Prep Time:
- 20 minutes
- Chilling Time:
- 4 hours
- Total Time:
- 4 hours 20 minutes
- Servings:
- 8
Ingredients
For the Pie Crust
- 30 Biscoff cookies (about 9.5 oz or 270g), finely crushed
- ½ cup (1 stick) unsalted butter, melted
For the Pie Filling
- 8 oz (226g) cream cheese, full-fat, softened at room temperature
- 1 cup (240g) creamy Biscoff cookie butter
- 1 teaspoon pure vanilla extract
- ¾ cup (90g) powdered sugar (confectioners’ sugar)
- 8 oz (226g) frozen whipped topping (like Cool Whip), thawed
Instructions
- **Prepare the Crust:** Place Biscoff cookies in a food processor and pulse until finely crushed into crumbs. Alternatively, place cookies in a large freezer bag and crush with a rolling pin or meat mallet until fine.
- In a medium bowl, combine the crushed Biscoff cookies with the melted butter. Stir thoroughly until the crumbs are evenly moistened and resemble wet sand.
- Firmly press the cookie mixture into the bottom and slightly up the sides of a 9-inch pie plate. You can use the back of a spoon or the bottom of a measuring cup to achieve an even and compact crust. Place the prepared crust in the freezer to set while you prepare the filling, for at least 15-20 minutes.
- **Make the Filling:** In a large mixing bowl, using an electric hand mixer or stand mixer, beat the softened cream cheese on medium speed until completely smooth and fluffy, with no lumps remaining (about 2-3 minutes).
- Add the creamy Biscoff cookie butter and vanilla extract to the cream cheese mixture. Beat again on medium speed until well combined and smooth, scraping down the sides of the bowl as needed.
- Gradually add the powdered sugar to the mixture, beating on low speed until fully incorporated and the filling is light and airy.
- Gently fold in the thawed whipped topping (Cool Whip) using a rubber spatula. Be careful not to overmix, as this can deflate the filling. Fold until just combined and streak-free.
- **Assemble and Chill:** Evenly spoon the creamy pie filling into the chilled cookie crust. Smooth the top with a spatula.
- Refrigerate the pie for at least 4 hours to allow it to set completely. For the best results and easiest slicing, chilling overnight is highly recommended.
- **Serve:** Before serving, decorate with additional whipped cream or whipped topping and a sprinkle of crushed Biscoff cookies, if desired. A drizzle of caramel sauce or melted cookie butter also makes a fantastic garnish.
Notes
- Ensure both the whipped topping is fully thawed and the cream cheese is softened to room temperature for a smooth, lump-free filling.
- For optimal setting and ease of slicing, refrigerate the pie overnight. A minimum of 4 hours is necessary.
- This pie can be prepared up to 2 days ahead of time. Add any fresh garnishes (like whipped cream or cookie crumbs) just before serving.
- For a richer, homemade touch, you can make your own whipped cream by beating heavy cream with a little powdered sugar and vanilla, but keep in mind the texture of the filling might be slightly less airy than with Cool Whip.
Nutrition Information (Approximate Per Serving)
- Calories:
- 659kcal
- Carbohydrates:
- 60g
- Protein:
- 7g
- Fat:
- 44g
- Saturated Fat:
- 20g
- Polyunsaturated Fat:
- 4g
- Monounsaturated Fat:
- 8g
- Trans Fat:
- 0.5g
- Cholesterol:
- 64mg
- Sodium:
- 333mg
- Potassium:
- 105mg
- Fiber:
- 1g
- Sugar:
- 35g
- Vitamin A:
- 817IU
- Calcium:
- 67mg
- Iron:
- 1mg
Nutrition information is automatically calculated and should be used as an approximation. Values may vary based on specific ingredients and brands used.
Additional Info
- Course:
- Dessert
- Cuisine:
- American
We hope you adore this easy no-bake cookie butter pie as much as we do! If you whip up this delightful dessert, please consider leaving a comment and rating below. Your feedback and beautiful creations not only inspire us but also help other dessert lovers discover this truly delicious treat!
More Irresistible No-Bake Desserts to Explore
If you’re now a firm believer in the magic of effortless, delicious treats, be sure to explore more of our reader-favorite no-bake pies. Delight your taste buds with our refreshing Orange Creamsicle Pie, a nostalgic flavor burst perfect for warm days. For chocolate enthusiasts, the rich and decadent No-Bake Chocolate Pudding Pie offers a classic, comforting experience. Or, for a beloved classic combination of sweet and savory, our No-Bake Chocolate Peanut Butter Pie is always a hit. And for a festive seasonal treat, our beloved Eggnog Pie promises to be the star of any holiday gathering! Each of these recipes offers a unique flavor experience with the same wonderful convenience of no oven required, proving that extraordinary desserts don’t always demand extraordinary effort.
For more delightful recipes, expert baking tips, and sweet inspiration delivered straight to your inbox, sign up for our weekly newsletter! You can also connect with us and share your baking adventures on social media – we absolutely love seeing your culinary creations and hearing about your experiences with our recipes!