

Satisfy your sweet tooth and delight your guests with this incredibly easy mini cheesecakes recipe! These charming, bite-sized desserts are the quintessential treat for any gathering, holiday celebration, or simply as a special indulgence for your family. Forget the fuss of a full-sized cheesecake; these individual cheesecakes offer all the rich, creamy flavor you crave in a perfectly portioned package, complete with a delightful graham cracker crust. Whether you’re a seasoned baker or just starting out, this simple recipe guarantees delicious results every time, making you the star of any dessert table.
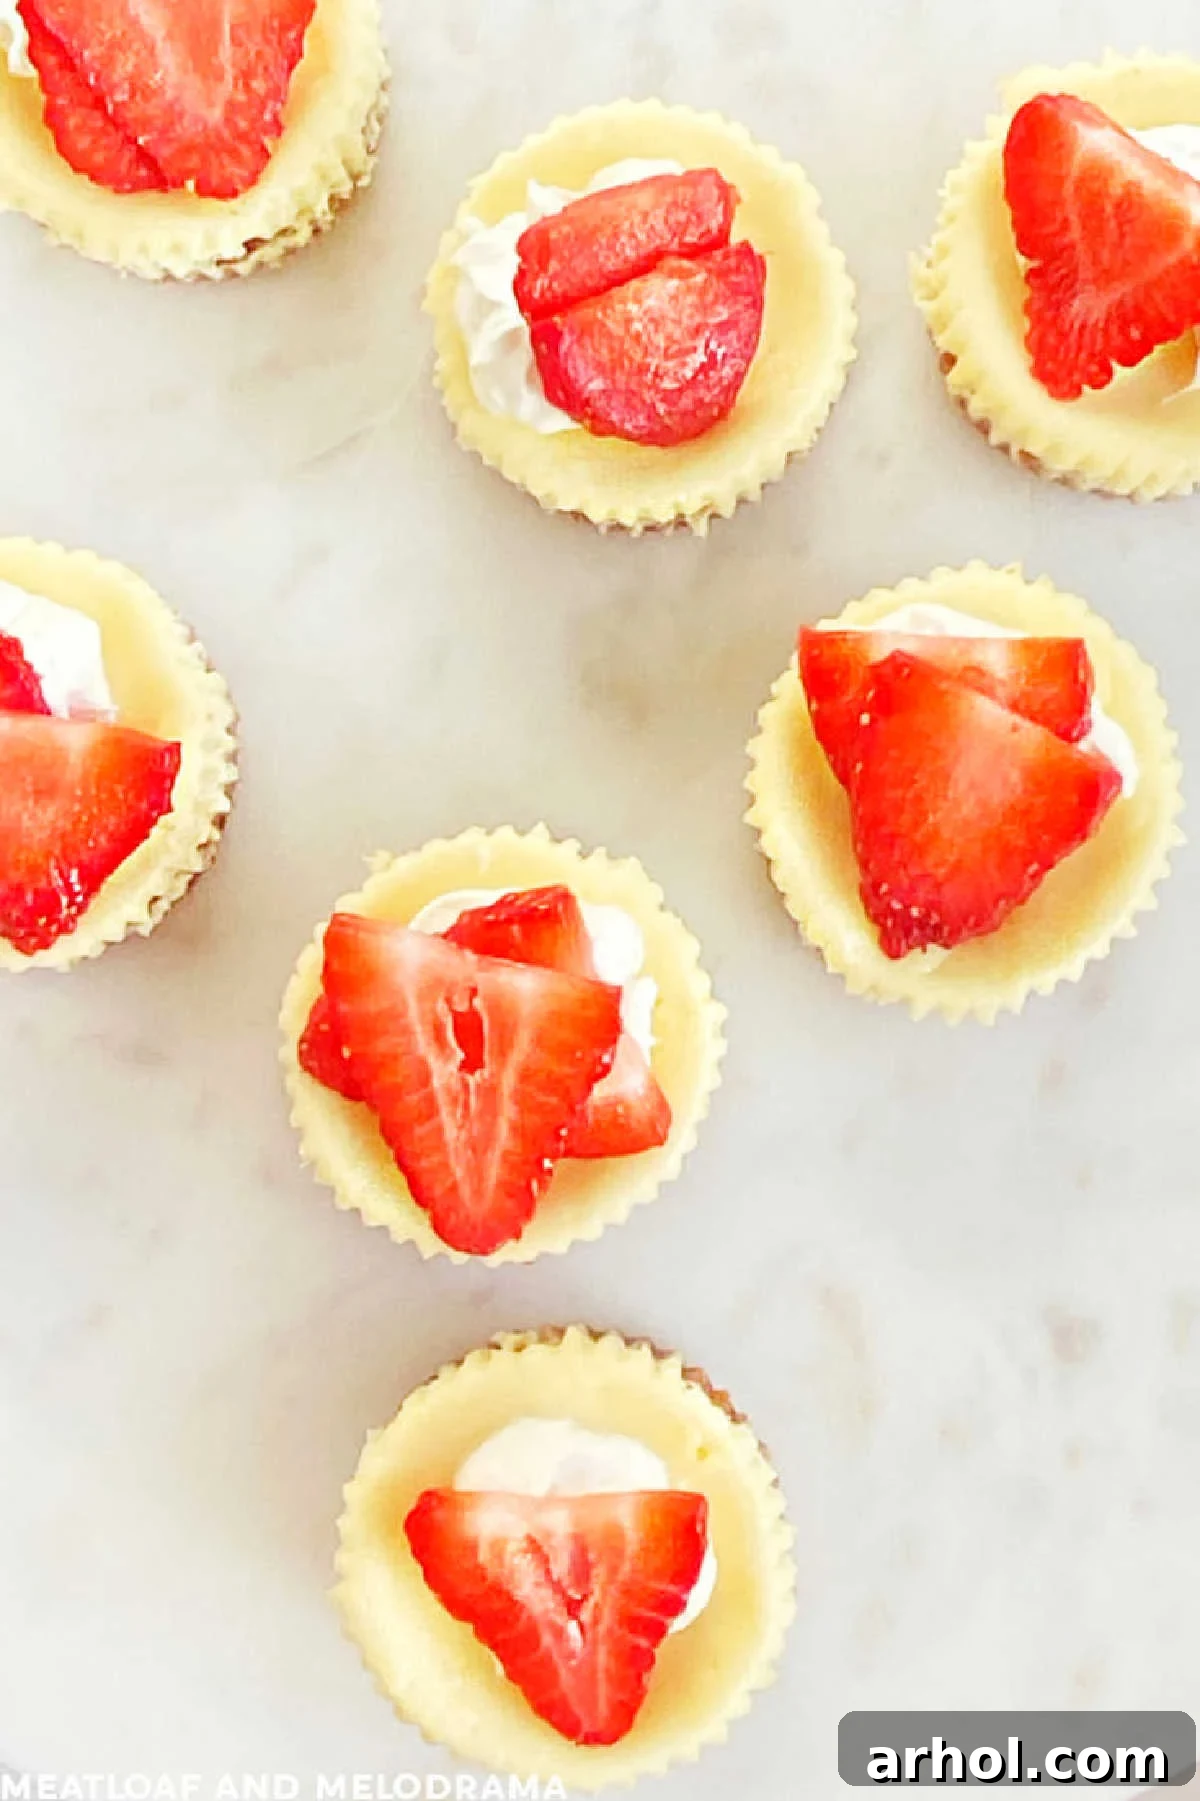
Table of Contents
- Mini Cheesecake Masterpiece with Graham Cracker Crust
- Essential Ingredients for Perfect Mini Cheesecakes
- How to Make Mini Cheesecakes: A Simple Guide
- Baking to Perfection: Ideal Bake Time for Mini Cheesecakes
- Creative Variations and Delicious Substitutions
- How to Store Your Mini Cheesecakes
- Pro Tips for Flawless Mini Cheesecakes
- The Ultimate Mini Cheesecakes Recipe Card
Mini Cheesecake Masterpiece with Graham Cracker Crust
There’s something undeniably captivating about a classic cheesecake. Its velvety texture and rich flavor make it a perennial favorite. But when it comes to serving, a full-sized cake can sometimes feel a bit daunting to cut evenly or transport for gatherings. Enter the individual cheesecake: a brilliant solution that offers all the luxurious taste and texture of its larger counterpart, but in a convenient, charming, and perfectly portioned bite. These baked individual cheesecakes, nestled in a crunchy graham cracker crust, are ideal for everything from elegant holiday gatherings to casual weeknight desserts. The best part? You don’t need any special equipment like a springform pan or a fussy water bath. A standard muffin tin is all it takes to create these delectable mini cheesecakes, making this recipe accessible for even the most novice bakers.
My journey into making these delightful homemade mini cheesecakes began years ago, sparked by my son’s unwavering love for cheesecake. It all started during a casual lunch outing where he convinced me to order a slice for dessert. Its rich, decadent nature meant we could easily share one slice among the four of us, and from that moment, my son was utterly smitten. He frequently requested homemade cheesecake, and I finally relented, though with a twist. Instead of baking a large, traditional cheesecake, we opted for mini cheesecakes made right in our muffin tin. The result was an instant hit! These simple, irresistible bite-sized desserts quickly became a family favorite, and we’ve been making them ever since. This recipe transformed a once-intimidating dessert into a fun, family-friendly baking project. If you love easy dessert recipes that are sure to impress, you might also enjoy exploring my no-bake cheesecake with Cool Whip, a delightful cherry cheesecake dip, or even a cheesecake made in the Instant Pot for an innovative and quick twist!
Essential Ingredients for Perfect Mini Cheesecakes
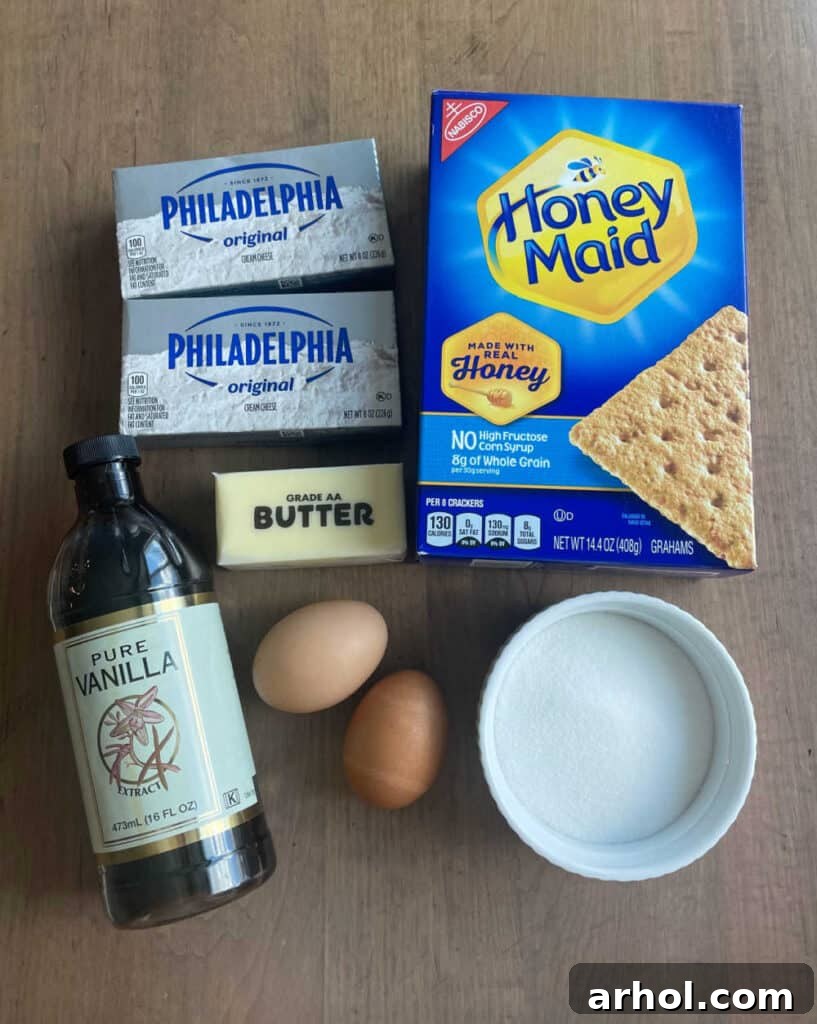
One of the beauties of this easy mini cheesecake recipe is that it relies on a handful of readily available, common pantry staples. With just a quick trip to your local grocery store, you’ll have everything you need to create these delectable treats. Make sure you also have a standard muffin tin and paper or parchment liners on hand. For precise measurements, please refer to the detailed recipe card below.
- Full-Fat Cream Cheese: This is the star of our show! Ensure your cream cheese is at room temperature. This crucial step guarantees a smooth, lump-free batter that whips up beautifully and bakes evenly, yielding that signature creamy, melt-in-your-mouth cheesecake texture. Avoid low-fat or whipped versions, as they can result in a less rich and often watery filling that doesn’t set properly.
- Granulated White Sugar: Provides the perfect level of sweetness, expertly balancing the slight tang of the cream cheese while enhancing its natural richness.
- Pure Vanilla Extract: A splash of good quality pure vanilla extract is indispensable. It enhances the overall flavor profile, adding warmth, depth, and a classic aromatic sweetness to the creamy filling. Don’t skimp on this!
- Pinch of Salt: Just a tiny touch of salt might seem insignificant, but it’s a secret weapon in many dessert recipes. It brightens and brings out the sweetness and richness of the other ingredients, preventing the cheesecake from tasting flat.
- Large Eggs: It’s important for the eggs to be at room temperature as well. They act as a vital binder, giving the cheesecake its structure and helping achieve that delicate, custardy texture. Adding them one at a time and mixing gently prevents overmixing, which can incorporate too much air and potentially lead to cracks in your finished mini cheesecakes.
- Graham Crackers: The foundation of our irresistible, crumbly crust! Finely crushed graham crackers provide a perfectly sweet and slightly spiced base that complements the creamy filling beautifully.
- Melted Butter: I personally prefer salted butter for the crust, as it adds a subtle layer of flavor that complements the crackers and the overall cheesecake profile. However, unsalted butter works just as well; simply add a tiny pinch of salt to the crust mixture if you opt for unsalted. The melted butter binds the graham cracker crumbs together, creating a firm yet tender crust that holds its shape.
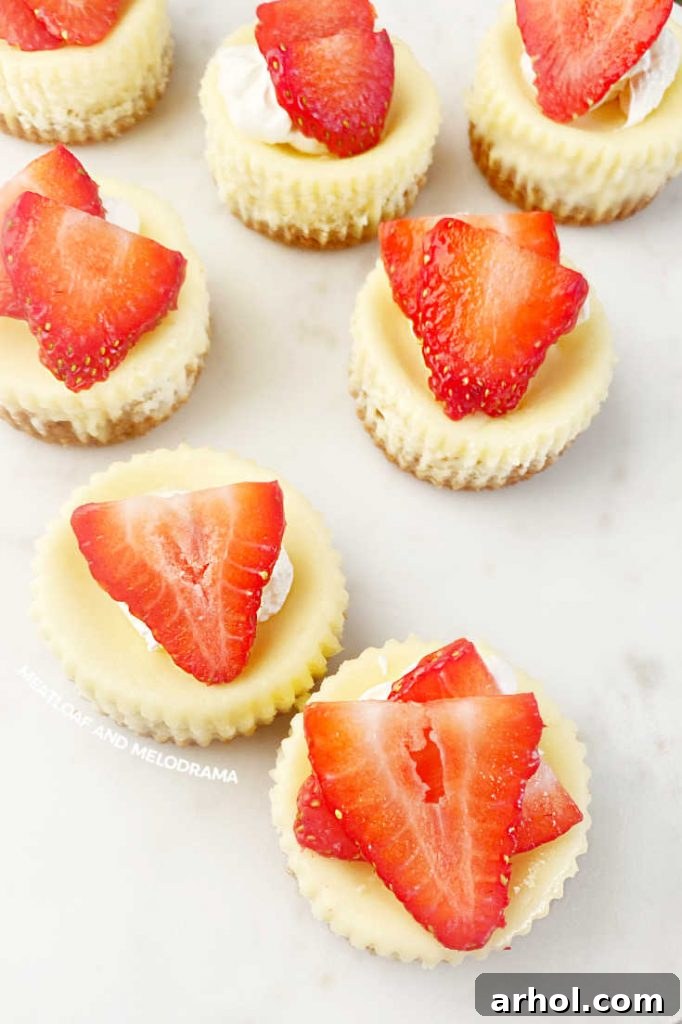
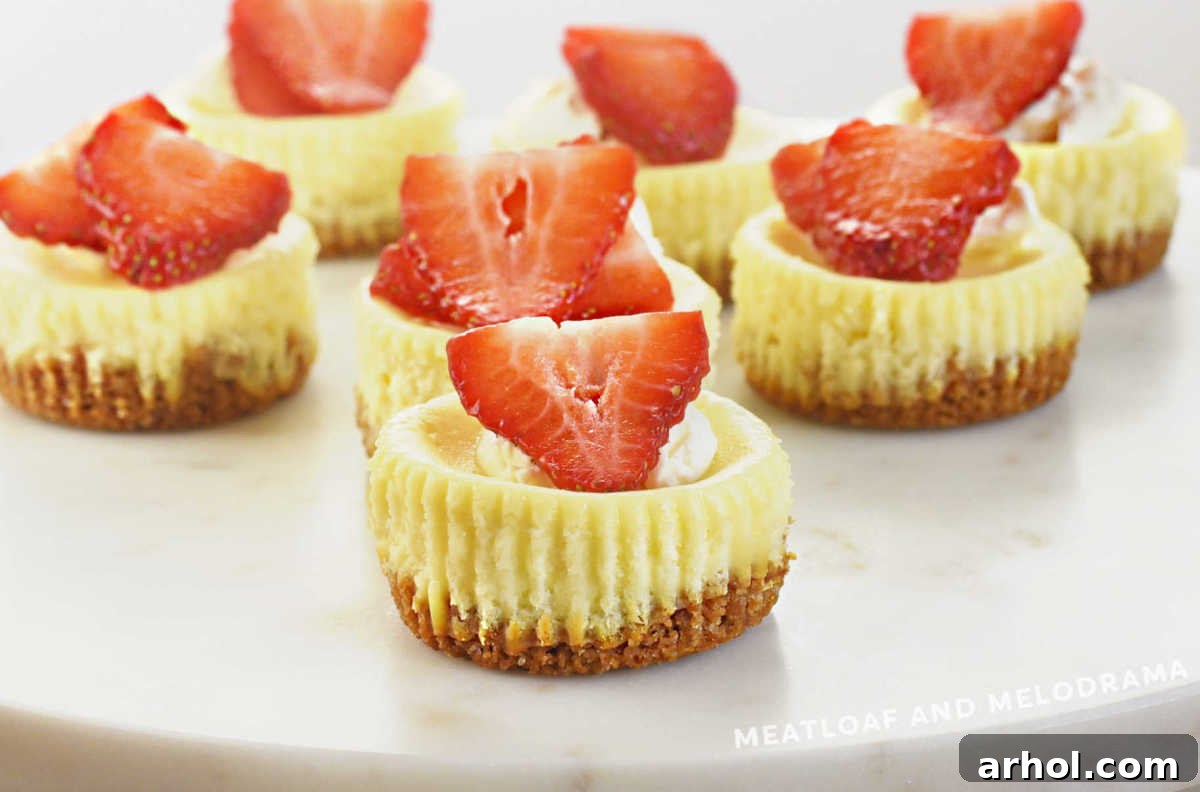
- Optional Toppings: While delicious on their own, mini cheesecakes truly shine with a generous topping! My absolute favorite is fresh sliced strawberries for their vibrant color and tart sweetness, but the possibilities are endless. Consider any fresh fruit like blueberries, raspberries, or kiwi slices, a dollop of fluffy whipped cream, a rich fruit pie filling, or a drizzle of chocolate or caramel for an extra burst of flavor and visual appeal.
Interestingly, unlike some mini cheesecake recipes out there, including certain popular ones from brands like Philadelphia, this recipe does not call for sour cream in the filling. My preference, even for full-sized cheesecakes, is to achieve that perfect creamy texture without it, allowing the pure, unadulterated taste of the cream cheese and vanilla to truly shine through. This approach simplifies the ingredient list without compromising on flavor, lusciousness, or that coveted smooth consistency.
How to Make Mini Cheesecakes: A Simple Guide
Creating these delightful mini cheesecakes is a straightforward process that’s enjoyable for bakers of all skill levels. By following these clear, step-by-step instructions, you’re guaranteed to achieve perfect results every time. Let’s get baking!
1. Prepare the Graham Cracker Crust:
- Crush the Graham Crackers: Begin by finely crushing your graham crackers. For the quickest and most uniform crumbs, a food processor is your best friend. Simply pulse until the crackers are reduced to a fine, sandy texture. If you don’t have a food processor, place the graham crackers in a sturdy freezer bag, seal it, and use a meat tenderizer or rolling pin to smash them into fine crumbs. The finer the crumbs, the more cohesive and delicate your crust will be, ensuring it holds together well.
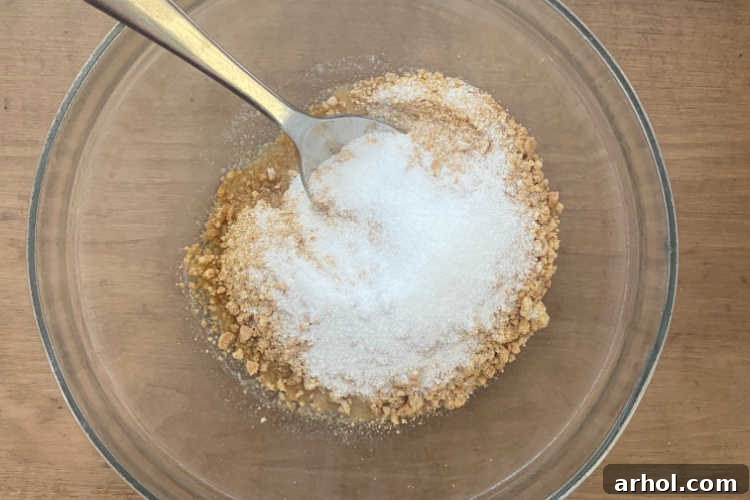
- Combine Ingredients: Transfer the finely crushed graham cracker crumbs to a medium-sized mixing bowl. Add the granulated white sugar and the melted butter. Mix these ingredients thoroughly using a spoon or a rubber spatula until the mixture is uniformly moistened and resembles wet sand. Every crumb should be coated in butter, which is essential for a crust that holds its shape beautifully once baked.
2. Form and Bake the Crusts:
- Prepare Muffin Tin: Preheat your oven to 350°F (175°C). Line a standard 12-cup muffin tin with paper baking cups or cupcake liners. Using liners is crucial as it makes for incredibly easy removal of the baked cheesecakes and simplifies cleanup significantly.
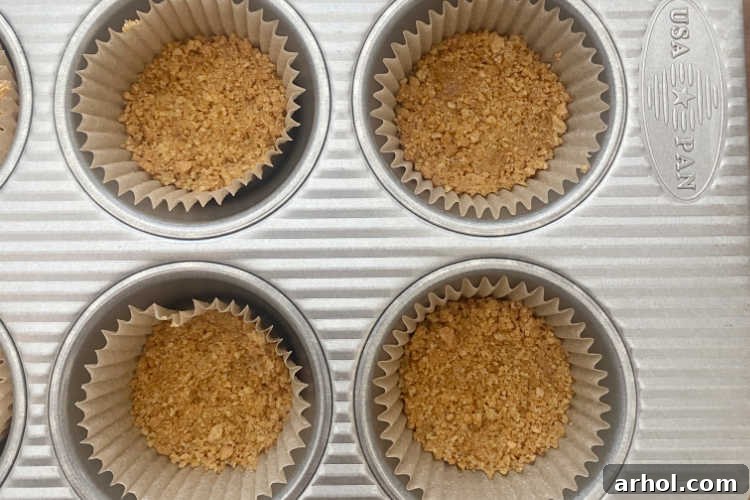
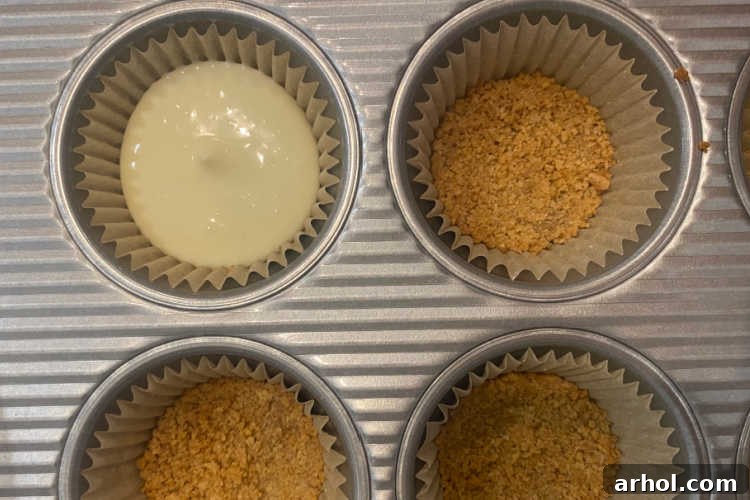
- Press the Crust: Spoon approximately one tablespoon (or a generous spoonful) of the graham cracker mixture into the bottom of each lined muffin cup. Using the back of a spoon, your fingertips, or even a flat-bottomed shot glass, firmly press the mixture down to form an even, compact layer at the bottom of each cup. A well-pressed crust is less likely to crumble when you remove the cheesecakes.
- Pre-bake the Crusts: Place the muffin tin with the pressed crusts into your preheated oven. Bake for about 5 minutes, or until the crusts are lightly golden brown and you can smell their sweet aroma. This quick pre-bake helps to set the crust, preventing it from becoming soggy once the creamy cheesecake filling is added. While the crusts are cooling slightly on a wire rack, you can begin preparing your cheesecake batter.
3. Prepare the Creamy Cheesecake Filling:
- Cream Cheese and Sugar: In a large mixing bowl, using an electric mixer (either a stand mixer with a paddle attachment or a sturdy hand mixer), beat the softened cream cheese and granulated sugar together. Beat on medium speed for 2-3 minutes until the mixture is completely smooth, creamy, and visibly free of any lumps. It’s important to scrape down the sides and bottom of the bowl frequently to ensure everything is well incorporated and no pockets of unmixed ingredients remain. This step is crucial for achieving that signature velvety cheesecake filling.
- Add Vanilla and Eggs: Next, stir in the pure vanilla extract. Then, add the large eggs, one at a time, beating gently on low speed just until each egg is fully incorporated into the batter. It’s vital not to overmix the batter once the eggs are added. Overmixing can incorporate too much air, which can cause the cheesecakes to puff up excessively during baking and then crack or sink dramatically upon cooling. Mix only until no streaks of egg yolk remain. I even let my little boy help crack the eggs sometimes – it often gets a little messy, but it’s all part of the fun and learning process in the kitchen!
4. Fill and Bake the Mini Cheesecakes:
- Fill Muffin Cups: Spoon the prepared cheesecake batter evenly over the pre-baked graham cracker crusts in each muffin cup. An ice cream scoop or a large cookie scoop can make this step incredibly easy and help ensure uniform portions, leading to consistent baking. Fill each muffin cup approximately three-quarters full, leaving a little room for expansion.
- Bake: Carefully place the muffin tin filled with mini cheesecakes into your preheated oven.
Baking to Perfection: Ideal Bake Time for Mini Cheesecakes
One of the fantastic advantages of making individual cheesecakes is their relatively short baking time compared to a full-sized cake, making them a much quicker dessert to prepare. These mini delights typically need to bake for about 18 to 20 minutes in a 350°F (175°C) oven. However, oven temperatures can vary, so it’s always wise to keep a close eye on them during the final minutes to prevent overbaking, which can lead to a dry texture.
You’ll know your mini cheesecakes are perfectly done when the edges appear firm and slightly golden brown, while the centers might still have a very slight, delicate jiggle. It’s important that they are not super jiggly or liquid in the middle, indicating they need a little more time. A slight jiggle is normal and signals that they will continue to set and firm up as they cool. Overbaking can lead to dry cheesecakes and undesirable cracks on the surface, so err on the side of underbaking slightly if you’re unsure.
Once baked, immediately remove the muffin tin from the oven. Allow the mini cheesecakes to cool completely on a wire rack at room temperature. This gradual cooling process is essential for preventing cracks and ensuring they set properly. Rushing the cooling process can shock the cheesecakes, leading to imperfections. Once they are cool enough to handle, transfer the entire muffin tin to the refrigerator. These cheesecakes require a minimum of 2 hours of chilling (or ideally, even longer, such as overnight) to fully firm up and develop their exquisite flavor and texture. Resist the temptation to serve them warm; chilling is key for that signature dense, creamy consistency!
When you’re ready to serve these delightful treats, carefully peel off the paper liners. Don’t worry if the tops aren’t perfectly smooth or if there’s a slight dip in the center – this is completely normal and, in fact, provides the perfect little well for your chosen toppings. With a generous dollop of fluffy whipped cream or a cascade of fresh fruit, any minor imperfections will be deliciously covered, and absolutely no one will mind or even notice! Embrace the homemade charm.
Creative Variations and Delicious Substitutions
The beauty of these mini cheesecakes lies in their incredible versatility. While the classic graham cracker crust and creamy vanilla filling are undeniably delightful, there are countless ways to customize these little guys to suit your taste, the season, or the specific occasion. Let your culinary creativity shine and make these mini cheesecakes truly your own!
Flavor Boosters for the Filling:
- Citrus Zest: For a bright, refreshing flavor profile, add a teaspoon of fresh lemon zest or orange zest to the cheesecake batter along with the vanilla. A tiny splash of fresh lemon juice (about ½ teaspoon) can also enhance the tanginess without significantly altering the texture.
- Chocolate Lover’s Dream: Transform your mini cheesecakes into a rich chocolate indulgence! Fold in miniature chocolate chips, or for a deeper chocolate flavor, whisk in a tablespoon of unsweetened cocoa powder with the sugar. A drizzle of chocolate syrup on top is also a fantastic addition.
- Seasonal Spices: During the autumn and winter months, incorporate a pinch of cinnamon, nutmeg, pumpkin pie spice, or even a touch of ginger into the batter for a festive and warm twist. These spices pair wonderfully with fall fruits like apples or pears.
- Extract Experiments: Beyond classic vanilla, experiment with other extracts. Try almond extract for a subtle nutty note, peppermint extract for a holiday treat, or even a touch of coffee extract to create mocha-flavored mini cheesecakes.
Crust Alternatives:
- Vanilla Wafer Crust: For a slightly sweeter and smoother crust that has a delicate flavor, finely crush vanilla wafers (such as Nilla Wafers) and mix them with melted butter and a touch of sugar.
- Oreo Cookie Crust: For an irresistible chocolatey base that’s a crowd-pleaser, crush entire Oreo cookies (filling and all) and mix with melted butter. This creates a decadent, dark chocolate crust that pairs wonderfully with the creamy cheesecake filling.
- Ginger Snap Crust: For a spiced, more sophisticated, and adult-friendly twist, use finely crushed ginger snap cookies. The warm spices in the cookies add an exciting contrast to the creamy filling.
- Pretzel Crust: For a unique sweet and salty combination that’s surprisingly delicious and addictive, a crushed pretzel crust can be a real game-changer!
Endless Topping Possibilities:
This is where your mini cheesecakes truly come to life, allowing for endless customization and visual appeal. While fresh fruits are always a fantastic and healthy option, don’t limit yourself to just one idea:
- Fresh Fruit Medley: Beyond the ever-popular strawberries, consider fresh blueberries, raspberries, blackberries, sliced kiwi, or even segmented oranges. For an extra juicy topping, macerate strawberries (strawberries tossed with a bit of sugar and left to sit for 30 minutes) to release their juices and create a wonderful natural syrup.
- Fruit Purees & Sauces: Spoon a dollop of tangy lemon curd, a vibrant raspberry sauce, a warm mixed berry compote, or a tropical mango puree on top for an burst of flavor and color.
- Canned Pie Fillings: For ultimate convenience, classic cherry pie filling, blueberry pie filling, or apple pie filling provide instant flavor and a beautiful, glossy presentation.
- Chocolate Indulgence: Drizzle with melted chocolate chips, a rich homemade chocolate ganache, a warm fudge sauce, or even a classic Hershey’s syrup for a chocolatey finish.
- Caramel & Nutty Delights: A decadent swirl of caramel sauce (or salted caramel!), a sprinkle of toasted pecans, walnuts, or almonds adds another layer of texture and irresistible flavor.
- Creamy Toppings: A generous dollop of classic whipped cream is a must for many! You could also try a light cream cheese frosting, a dollop of sweetened sour cream (if you decide to add it as a topping even if not in the batter), or even a delicate meringue topping browned with a kitchen torch.
- Candy & Cookie Crumbles: For a fun, textural element, sprinkle crushed candy bars, chopped nuts, or even more crushed cookies (like Oreos or chocolate chip cookies) on top.
How to Store Your Mini Cheesecakes
Proper storage is key to maintaining the freshness, exquisite flavor, and delightful texture of your homemade mini cheesecakes. These dairy-based treats are perishable and require immediate and consistent refrigeration to stay safe and delicious.
- Refrigeration: Once your mini cheesecakes have cooled completely to room temperature, they must be stored in an airtight container in the refrigerator. When stored correctly, they will remain fresh and delightful for 3 to 4 days. To ensure the best quality and prevent sogginess, I highly recommend storing the plain cheesecakes (without any toppings) and adding your desired embellishments just before serving. This keeps the crust crisp, the filling pristine, and the toppings fresh and vibrant.
- Freezing: Mini cheesecakes freeze exceptionally well, making them a fantastic option for meal prepping desserts, enjoying make-ahead convenience, or saving for a future craving. To freeze, ensure the cheesecakes are completely cooled and unfrosted. Carefully remove them from their paper liners. Place them on a baking sheet lined with parchment paper and freeze until solid (this usually takes about 1-2 hours). Once frozen solid, transfer them to a freezer-safe airtight container, or wrap each cheesecake individually tightly in plastic wrap, then place them together in a large freezer bag. They will keep beautifully in the freezer for up to 3 months without significant loss of quality.
- Thawing: To enjoy your frozen mini cheesecakes, simply transfer them from the freezer to the refrigerator and allow them to defrost slowly overnight, or for several hours (typically 4-6 hours) until fully thawed. Avoid thawing at room temperature for food safety reasons and to maintain texture. Once thawed, you can add your fresh toppings and serve them chilled.
Pro Tips for Flawless Mini Cheesecakes
Achieving bakery-worthy mini cheesecakes is easier than you think with these expert tips and tricks. Follow these guidelines to ensure your cheesecakes are perfectly creamy, beautifully shaped, and utterly delicious every single time:
- Room Temperature Ingredients are Non-Negotiable: This is arguably the most important tip for any cheesecake recipe! Always ensure your full-fat cream cheese and large eggs are at true room temperature. Softened cream cheese blends smoothly and seamlessly with sugar, preventing any lumps and creating a silky-smooth, homogenous batter. Room temperature eggs emulsify better into the batter, leading to a more uniform and stable cheesecake filling, which significantly helps in achieving a perfect texture and preventing dreaded cracks.
- Avoid Overmixing the Batter: Once you add the eggs to the cream cheese mixture, beat only until just combined on low to medium speed. Overmixing is a common culprit for cheesecake issues. It incorporates too much air into the batter, which can cause the cheesecakes to puff up excessively in the oven, leading to an undesirable spongy texture, and then collapse and crack dramatically as they cool. A smooth, dense, and creamy batter is what you’re aiming for, not an airy one.
- Prevent Cracking with Gradual Cooling: Rapid temperature changes are a primary reason for cheesecake cracks. After baking, don’t immediately pull the cheesecakes from the hot oven and onto a cold counter. Instead, turn off the oven, open the door slightly (leaving it ajar by a few inches), and let the mini cheesecakes sit in the cooling oven for about 10-15 minutes. This gradual cooling helps the cheesecakes adjust to the temperature change gently, significantly reducing the likelihood of cracks and preventing the tops from sinking in too much.
- Proper Chilling is Essential: While it’s tempting to dig into these delicious treats right away, chilling the cheesecakes for at least 2 hours (and preferably longer, even overnight) in the refrigerator is absolutely crucial. This extended chilling time allows the filling to fully set, firm up to its ideal consistency, and develop its rich, complex flavor and creamy texture. Patience truly pays off here!
- Don’t Forget Food Safety: Cheesecakes are dairy-based and should not be left at room temperature for longer than 2 hours to ensure food safety and prevent spoilage. Always refrigerate promptly after they have cooled completely.
- Use a Standard Muffin Tin: This recipe is specifically designed for a regular 12-cup muffin tin. If you choose to use mini muffin tins or jumbo muffin tins, you will need to adjust the bake time significantly. Mini cheesecakes will bake faster, while jumbo ones will require more time. Always keep an eye on visual cues for doneness.
5 from 15 votes
Easy Mini Cheesecakes with Graham Cracker Crust
By: Dee
Mini Cheesecakes with a classic graham cracker crust and a rich, creamy filling are baked in a standard muffin pan for a simple yet elegant bite-sized dessert. This cheesecake recipe is incredibly easy to follow and yields utterly delicious results. Customize and top with your favorite fresh fruit, whipped cream, or pie filling for the perfect finish!
Prep Time: 10 minutes
Cook Time: 25 minutes
Total Time: 35 minutes (plus chilling)
Servings: 12 mini cheesecakes
Print Recipe
Ingredients
For the Graham Cracker Crust
- ⅔ cup finely crushed graham crackers
- 1 tablespoon granulated white sugar
- 2 tablespoons melted butter (salted or unsalted)
For the Creamy Cheesecake Filling
- 1 (8-ounce) package plus 3 ounces softened full-fat cream cheese (totaling 11 ounces)
- ¼ cup granulated white sugar
- 1 teaspoon pure vanilla extract
- 2 large eggs, at room temperature
Instructions
- Preheat your oven to 350℉ (175°C).
- Line a standard 12-cup muffin tin with paper baking cups or cupcake liners.
For the Crust
- In a medium bowl, thoroughly mix the melted butter with the crushed graham crackers and 1 tablespoon of sugar until the mixture resembles wet sand.
- Press approximately 1 tablespoon of the graham cracker crust mixture evenly into the bottom of each prepared muffin cup. Bake for 5 minutes, then remove from oven and set aside to cool slightly on a wire rack.
For the Filling
- In a large mixing bowl, using an electric mixer, beat the softened cream cheese and ¼ cup white sugar until completely smooth and creamy, scraping down the sides of the bowl as needed.
- Stir in the vanilla extract until well combined.
- Add the eggs, one at a time, beating gently on low to medium speed just until each egg is fully blended into the mixture. Be careful not to overmix the batter once the eggs are added.
- Pour the prepared cheesecake filling evenly over the pre-baked graham cracker crusts, filling each muffin cup approximately 3/4 full.
- Bake for 18 to 20 minutes, or until the edges are set and lightly golden brown, and the centers have only a very slight jiggle.
- Remove the muffin tin from the oven and allow the cheesecakes to cool completely on a wire rack. For best results and to prevent cracks, turn off the oven, open the door slightly, and let the cheesecakes sit in the cooling oven for 10-15 minutes before fully removing.
- Once completely cool, transfer the muffin tin to the refrigerator and chill the mini cheesecakes for at least 2 hours (preferably longer or overnight) before serving.
- Carefully peel off the paper liners. Top with fresh strawberries, whipped cream, or your favorite toppings just before serving for the ultimate treat!
Watch the Video Tutorial
For a visual, step-by-step guide on making these delicious easy mini cheesecakes, watch our comprehensive video tutorial. It covers all the crucial techniques, from crushing the graham crackers to achieving that perfect creamy filling:
Notes
- Always ensure to use softened, room temperature full-fat cream cheese and eggs. This is paramount for achieving the smoothest batter and best cheesecake texture.
- Do not overmix the cheesecake batter, especially after adding the eggs. Mix only until the ingredients are just well blended; overmixing introduces too much air, which can cause cracking.
- To avoid the cheesecake tops from sinking or cracking, after baking, turn off the oven, open the door slightly, and allow the cheesecakes to sit in the cooling oven for about 10-15 minutes before removing to a wire rack for cooling.
- This recipe yields 12 mini cheesecakes and requires approximately 25 total minutes for baking (combining crust and filling bake times). Additionally, allow at least 2 hours of chilling time (or preferably overnight) in the refrigerator before serving for optimal texture and flavor.
- This recipe is specifically designed for a standard 12-cup muffin tin. Always keep all finished cheesecakes refrigerated due to their dairy content.
Nutrition Information (per serving)
(Approximate values, calculated automatically based on 12 servings)
- Calories: 64 kcal
- Carbohydrates: 8g
- Protein: 1g
- Fat: 2g
- Saturated Fat: 1g
- Cholesterol: 32mg
- Sodium: 52mg
- Potassium: 16mg
- Sugar: 6g
- Vitamin A: 100 IU
- Calcium: 7mg
- Iron: 0.3mg
Nutrition information is automatically calculated and should only be used as an approximation. Values can vary significantly based on specific brands of ingredients used, exact measurements, and any additional toppings or variations chosen.
Additional Information
Course: Dessert
Cuisine: American
Like this easy mini cheesecake recipe? We’d absolutely love to hear your thoughts and see your creations! Leave a comment below with your experience, your favorite topping ideas, or any creative variations you tried!
For more incredibly easy recipes, delightful dessert ideas, and inspiring culinary tips that will elevate your home cooking, be sure to subscribe to our newsletter and follow us on all your favorite social media platforms!

This comprehensive guide and recipe for Easy Mini Cheesecakes with Graham Cracker Crust was first published in 2016 and meticulously updated in 2024 to provide the most current, comprehensive, and user-friendly instructions for making the best bite-sized cheesecakes.