
Welcome to the ultimate guide for creating the most adorable and delicious Halloween sugar cookies! This comprehensive recipe makes crafting spooky season treats an absolute breeze. Whether you’re a seasoned baker or just starting your culinary journey, our easy-to-follow instructions will help you achieve soft, chewy, and perfectly shaped cut-out cookies that are ideal for any Halloween gathering or simply a fun baking day with the family. Get ready to impress everyone with your festive confections!

Are you ready to create the cutest Halloween cookies you’ve ever seen? We’ve always loved making festive treats for Halloween, but this year, we’re taking things up a notch with these delightful cut-out sugar cookies. This versatile cookie dough recipe is truly the best; it’s the same reliable base we use for our beloved Christmas and Easter cut-outs, and it never fails to deliver. Plus, we’ll guide you through making the easiest royal icing ever, using meringue powder for that perfect bakery-style finish!
Why You’ll Absolutely Love These Halloween Cookies!

Perfectly Shaped Cookies: Our cookie dough is incredibly easy to work with. It’s designed to hold its shape beautifully in the oven, meaning your intricate Halloween cut-outs (think ghosts, pumpkins, bats!) will come out looking exactly as intended, without any frustrating spreading.
Irresistible Flavor & Texture: These cookies are celebrated for their soft, slightly chewy texture and a delightful combination of vanilla and almond flavors. Each bite is a sweet, buttery dream that perfectly complements the festive decorations.
Endless Decorating Possibilities: Whether you prefer a simple, elegant glaze, a fluffy buttercream frosting, or intricate royal icing designs, this recipe is your canvas! We’ll show you how to get as creative as you like, from beginner-friendly sprinkles to advanced piping techniques.
A Holiday Tradition: These homemade Halloween sugar cookies are more than just a treat; they’re an experience. Baking and decorating them can become a cherished annual tradition for you and your loved ones, creating lasting memories for years to come.
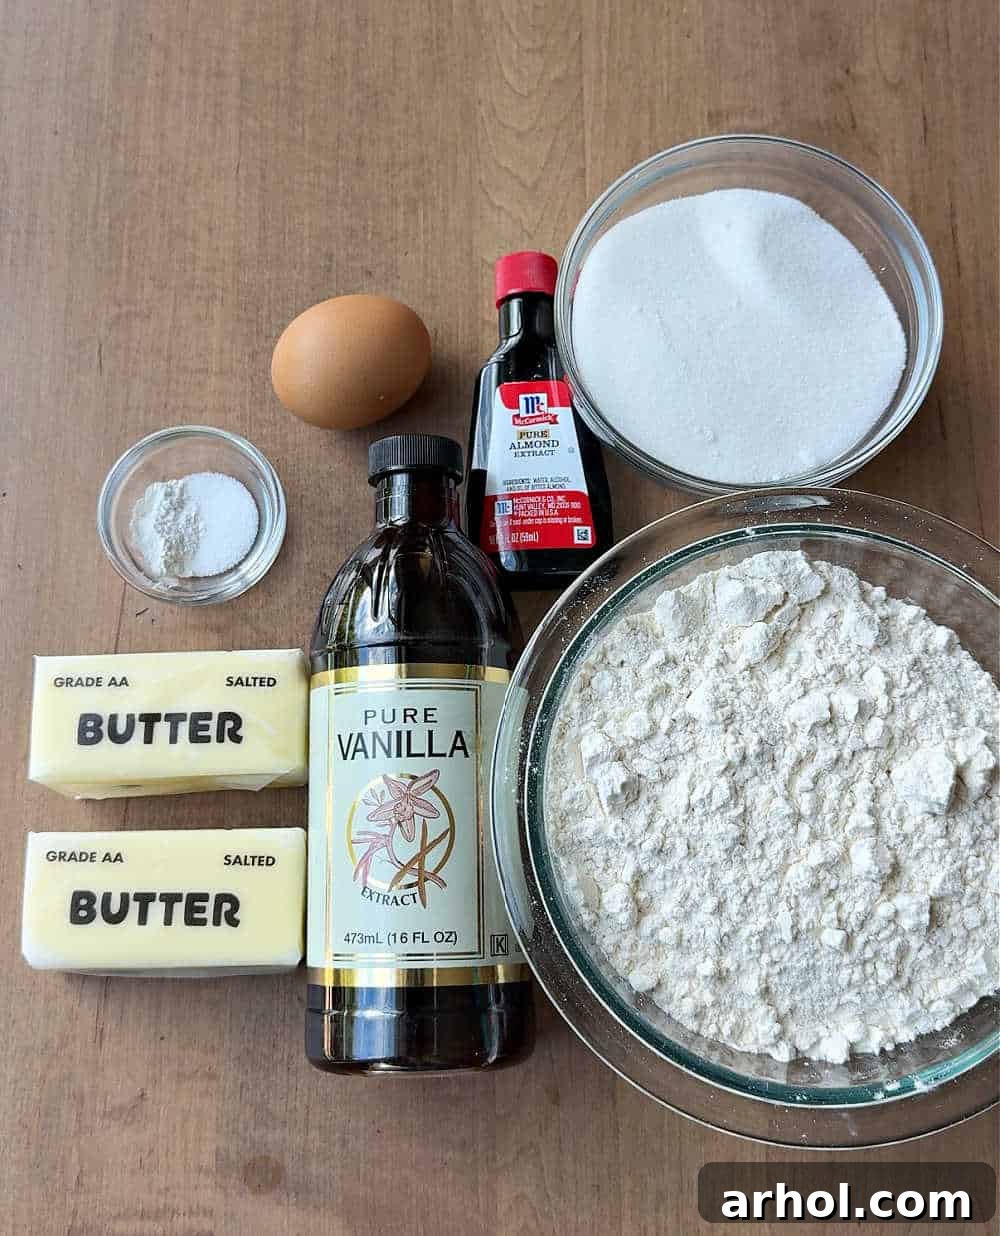
Essential Ingredient Notes for Perfect Cookies
Creating these delightful Halloween sugar cookies starts with the right ingredients. Here’s a detailed look at what you’ll need, with full amounts conveniently listed in the printable recipe card below.
Butter: I consistently use salted butter for its rich flavor and a subtle hint of salt that balances the sweetness. If you only have unsalted butter, that’s perfectly fine! Just add an extra pinch of salt (about ¼ teaspoon) to your dry ingredients to compensate. Ensure your butter is softened to room temperature for smooth creaming, but not melted, as this can affect the dough’s consistency.
Granulated White Sugar: This provides the primary sweetness and contributes to the cookie’s tender texture. Don’t be tempted to reduce the sugar too much, as it’s crucial for both flavor and structure.
Almond and Vanilla Extract: The magical flavor combination! Almond extract adds a unique depth that truly elevates these sugar cookies beyond a basic vanilla flavor. Use high-quality extracts for the best taste. The combination creates a warm, inviting aroma that screams “homemade goodness.”
Egg: A single large egg acts as a binder, bringing all the ingredients together and adding richness. Always use a large egg, not extra-large, to maintain the correct moisture balance in the dough.
All-Purpose Flour: The foundation of our cookies. All-purpose flour provides the necessary structure. Make sure to measure your flour correctly, ideally by weight or by spooning it into the measuring cup and leveling it off, rather than scooping directly from the bag (which can lead to too much flour).
Sea Salt or Kosher Salt: Enhances all the other flavors and prevents the cookies from tasting bland. Either fine sea salt or kosher salt works beautifully.
Baking Powder: A leavening agent that helps the dough rise slightly, contributing to the cookies’ soft and tender crumb without causing excessive spreading.
Step-by-Step Guide: How to Make Halloween Sugar Cookies
Making these spooky season treats is simpler than you might think! Follow these steps for perfect Halloween sugar cookies every time.
1. Creaming the Base: Begin by creaming the softened butter and granulated sugar together in a large mixing bowl. For best results and efficiency, use either a stand mixer fitted with the paddle attachment or a reliable hand mixer. Beat on medium-high speed for at least 3-5 minutes, or until the mixture is light, fluffy, and noticeably pale in color. This crucial step incorporates air, which helps prevent the cookies from spreading too much during baking.
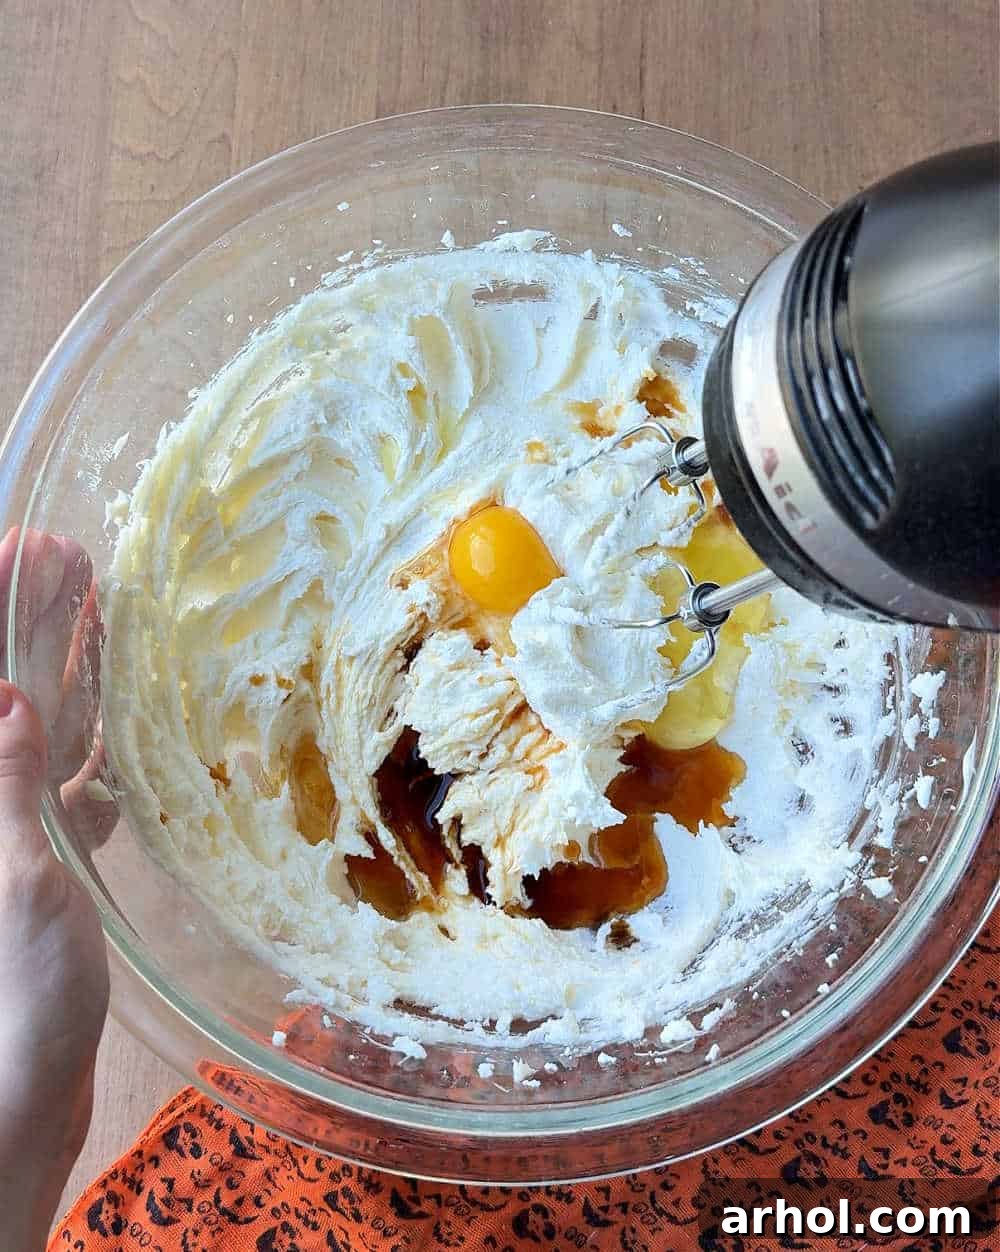
2. Incorporating Wet Ingredients: Next, add the large egg, almond extract, and vanilla extract to the creamed butter and sugar. Mix on low speed until just combined, scraping down the sides of the bowl as needed. Be careful not to overmix at this stage.
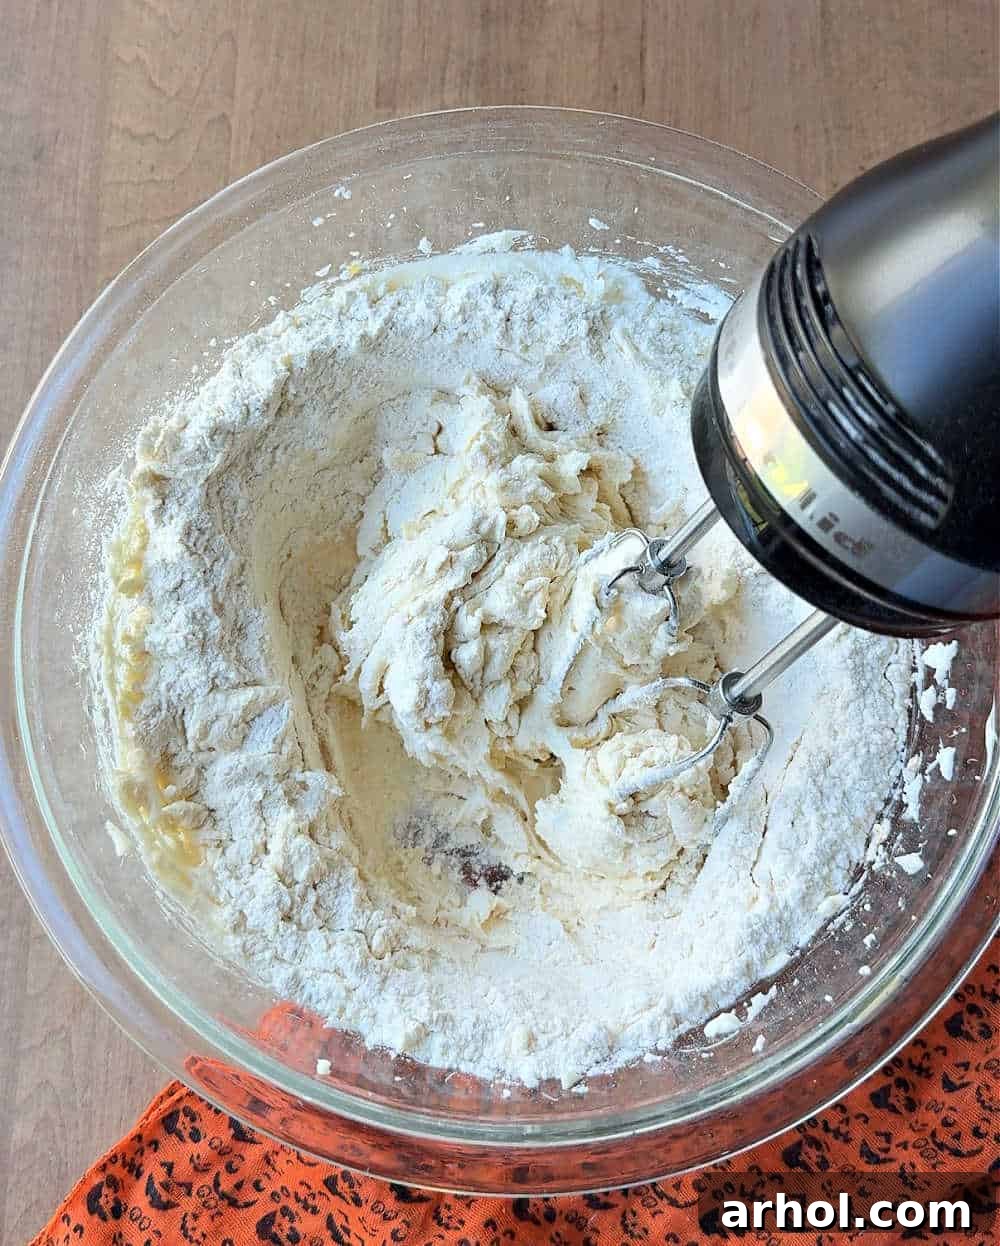
3. Gradually Adding Dry Ingredients: In a separate bowl, whisk together your all-purpose flour, salt, and baking powder. Gradually add the dry ingredients to the wet mixture, starting with about half the flour mixture. Mix on low speed until the flour is mostly incorporated, then add the remaining flour. Continue mixing until a soft, pliable dough forms. To avoid overworking the dough, which can lead to tough cookies, switch to a rubber spatula and finish mixing by hand once most of the flour has disappeared.
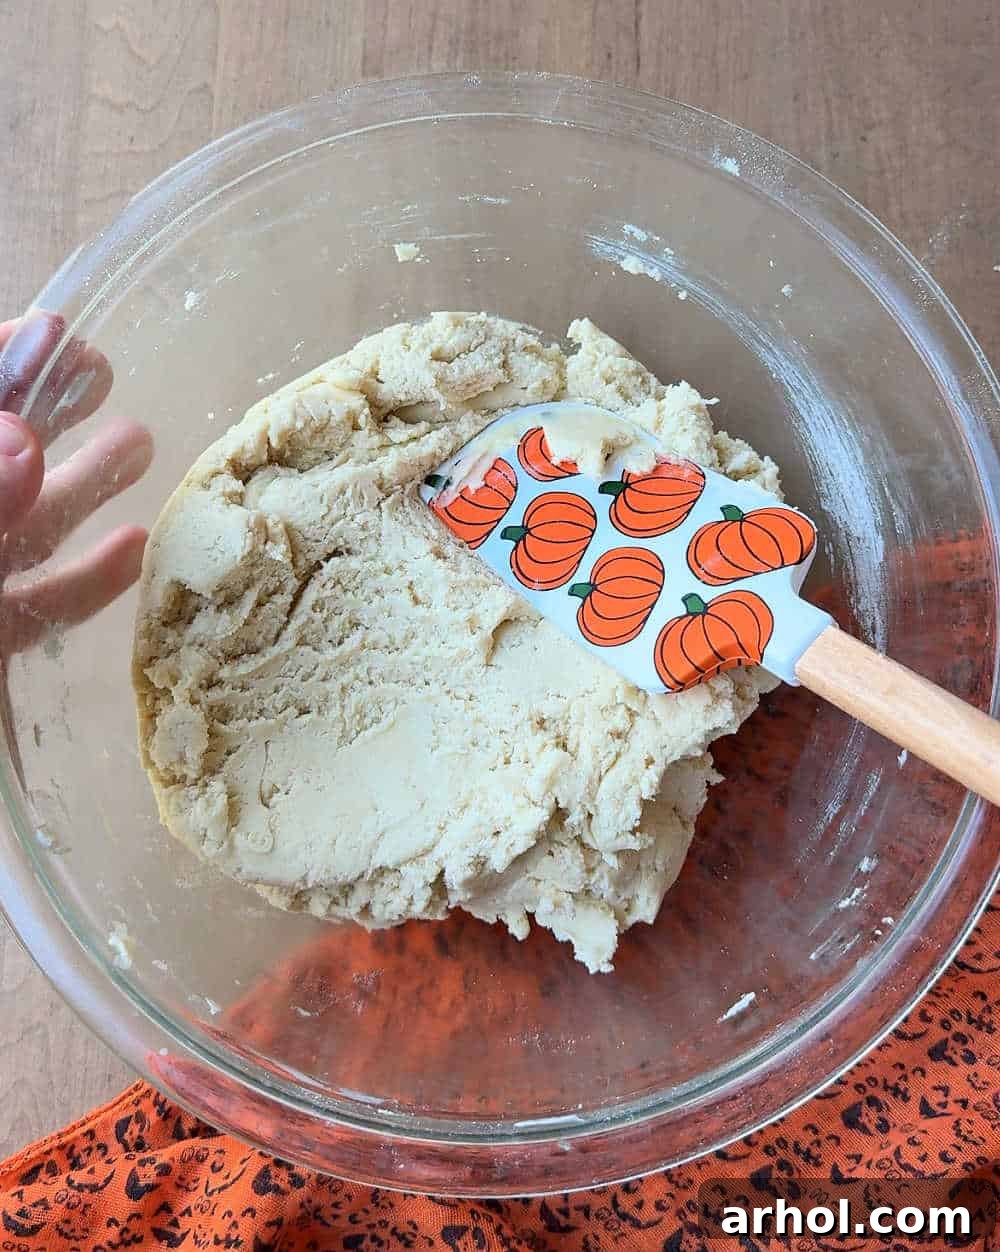
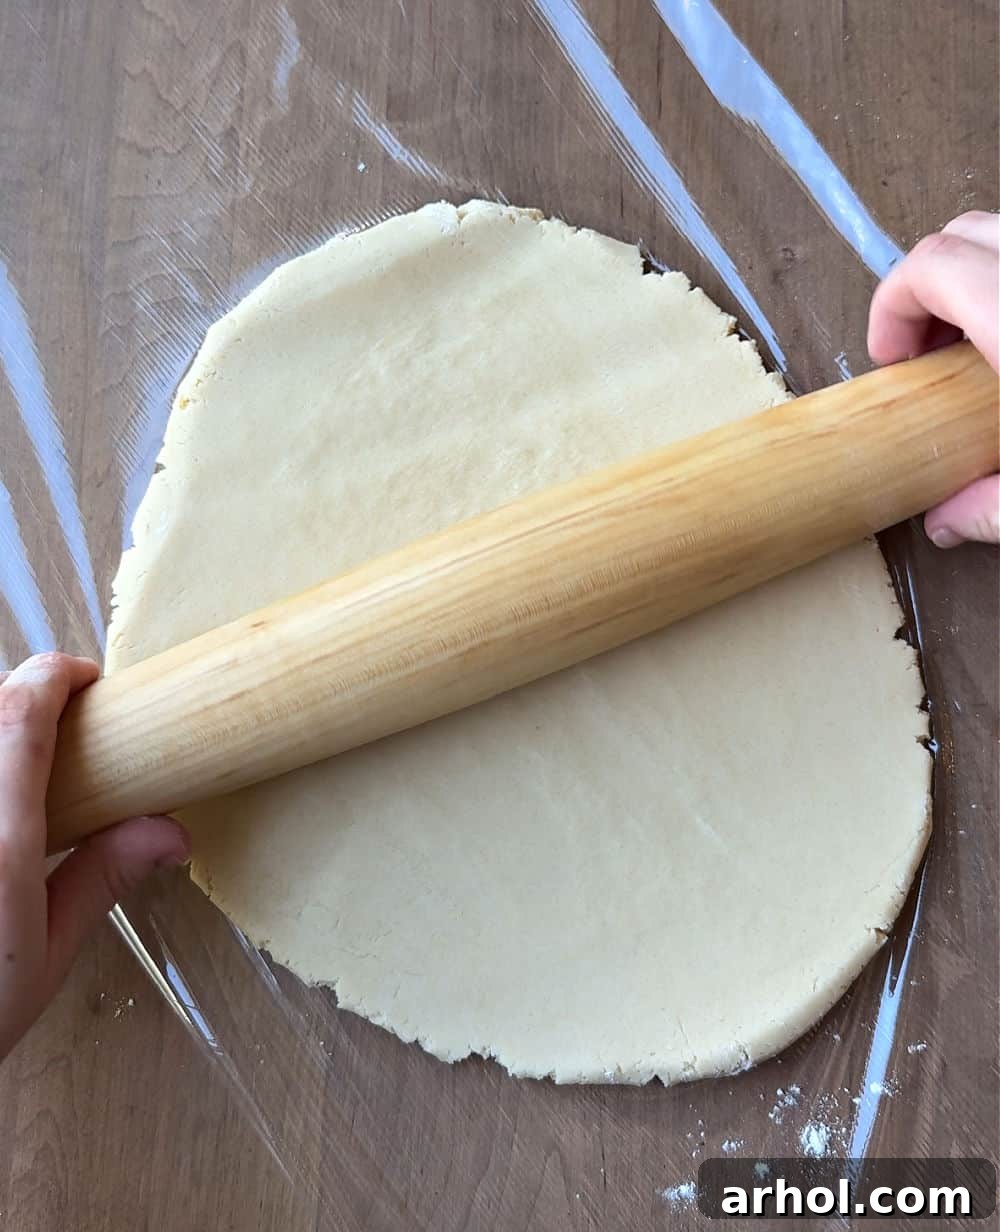
4. Chilling the Dough: Divide the dough into two equal portions. Flatten each portion into a disc and wrap tightly in plastic wrap. For best results and to prevent spreading during baking, chill the dough in the refrigerator for at least 4 hours, or ideally, overnight. This chilling process is essential for easy handling and to ensure your cut-out shapes remain sharp and defined.
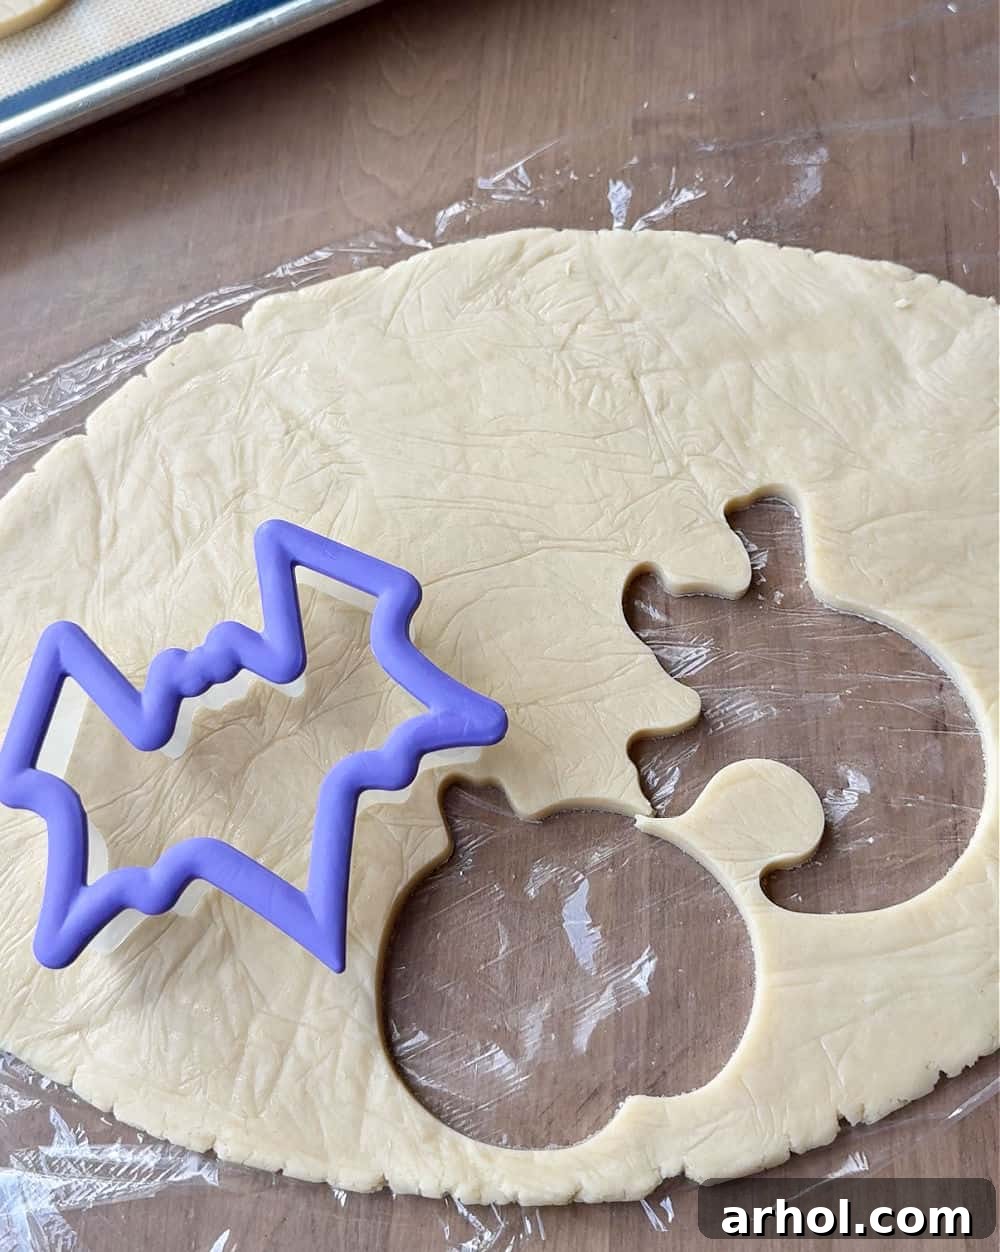
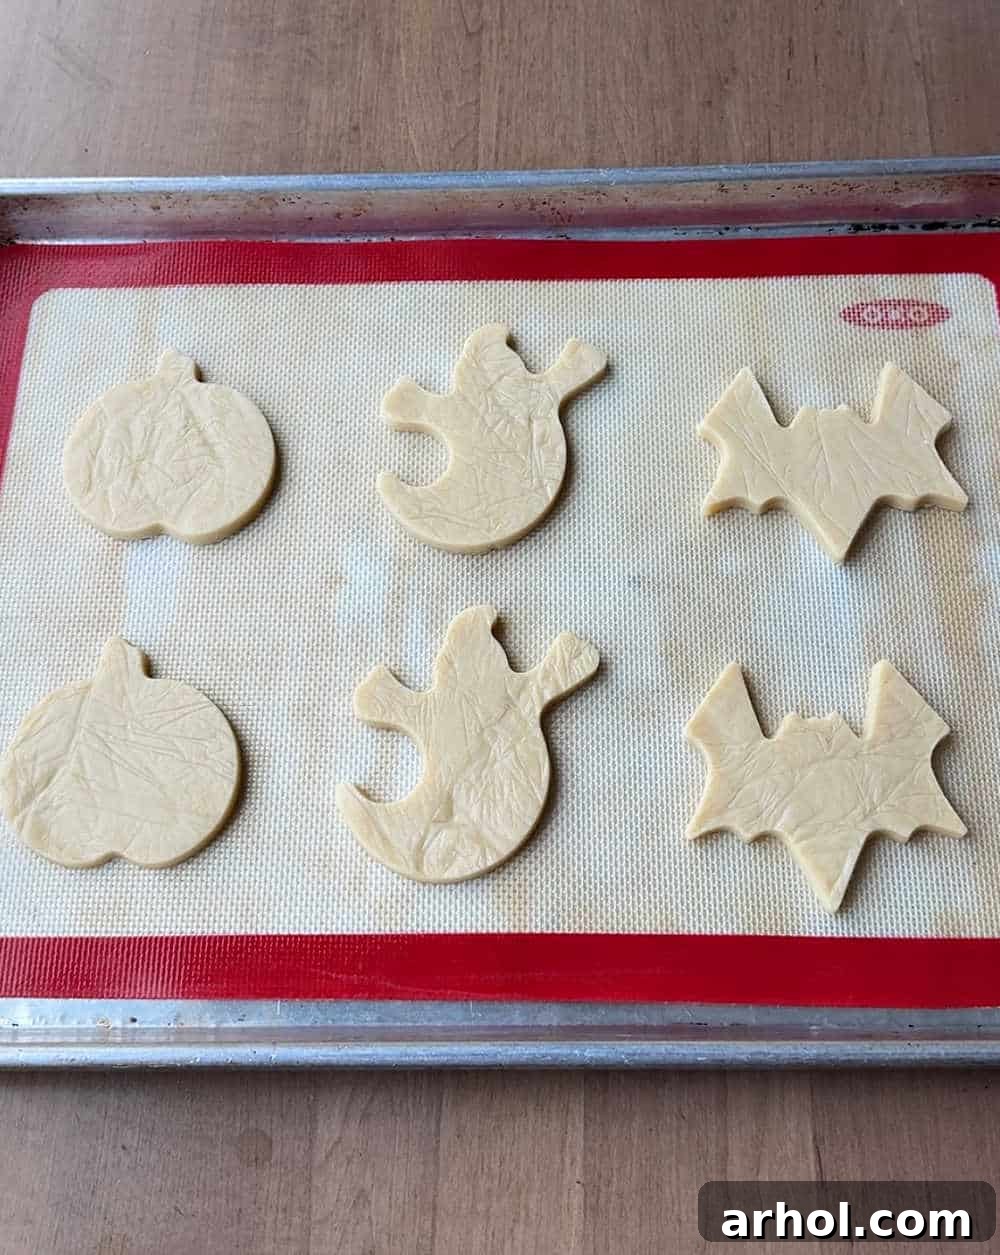
5. Cutting and Baking: Once your dough is thoroughly chilled, preheat your oven to 350°F (175°C). Lightly flour your work surface and rolling pin. Roll out one disc of dough to an approximate thickness of ⅜ inch. Use your favorite Halloween cookie cutters (ghosts, pumpkins, bats, skulls, witches’ hats!) to cut out shapes. Carefully transfer the cut-out cookies to prepared baking sheets lined with parchment paper or silicone baking mats, leaving about 2 inches between each cookie. Re-roll any dough scraps and continue cutting until all dough is used.
6. Baking to Perfection: Bake for 10-14 minutes, or until the edges are lightly golden brown and the centers no longer appear wet. Baking times can vary slightly depending on your oven and cookie thickness, so keep a close eye on them. Avoid overbaking, as this can make your cookies hard and dry. Allow the cookies to cool on the baking sheet for a few minutes before transferring them to a wire rack to cool completely. They must be fully cooled before you begin decorating.

Creative Ways to Decorate Your Halloween Sugar Cookies
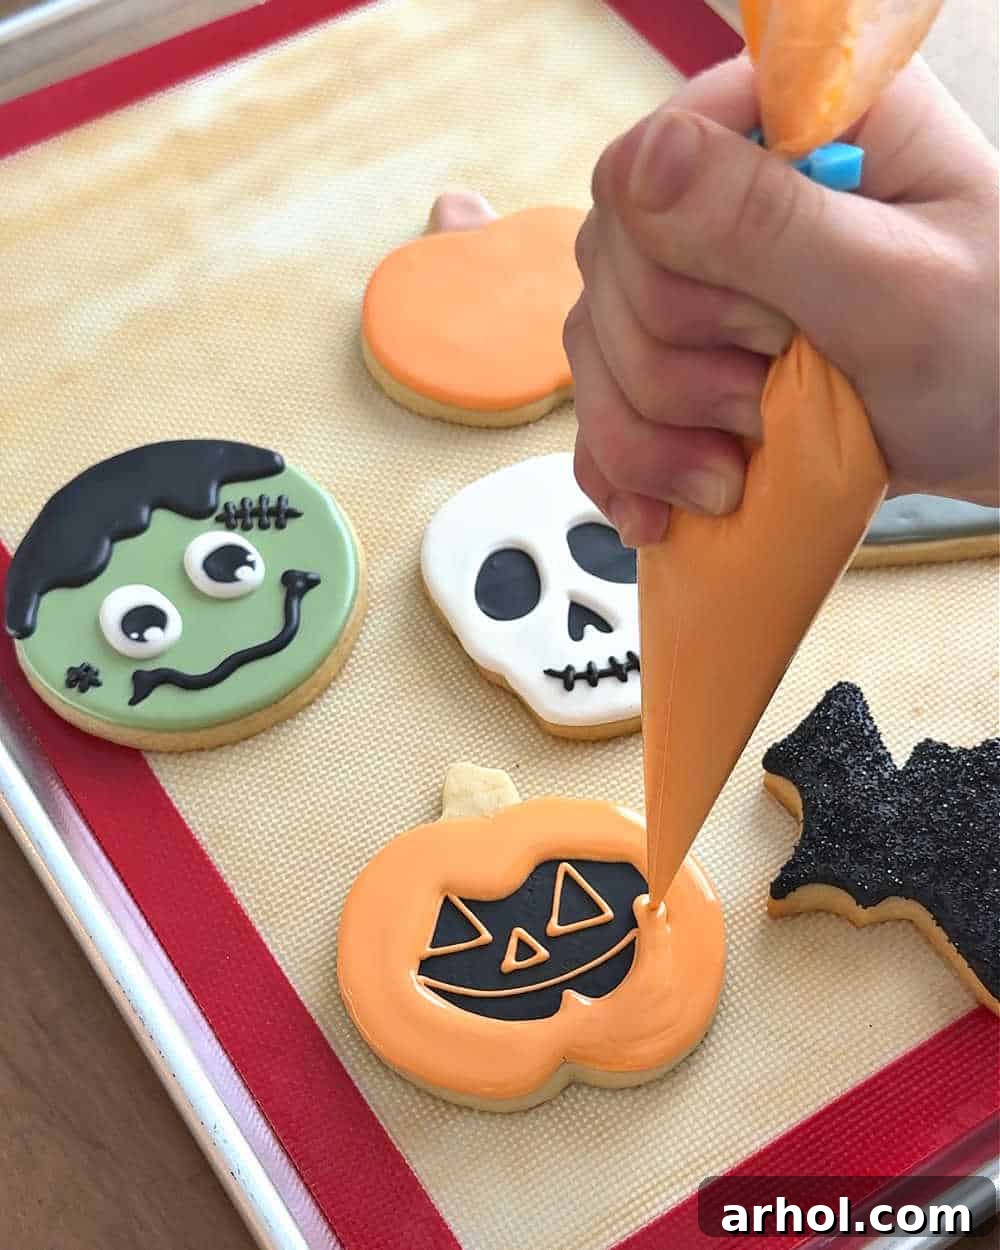
Decorating these soft and chewy sugar cookies is where the real fun begins for spooky season! While royal icing can sometimes seem intimidating, it’s absolutely worth the effort for those stunning, professional-looking results. Here’s how to master it and make your Halloween cookies truly stand out.
Mastering Royal Icing: For the best bakery-style cookies with a beautiful, smooth finish, I highly recommend using meringue powder in your royal icing. It provides stability and a perfect consistency. Follow the directions on your meringue powder package, as ratios can vary by brand. To elevate the flavor and add a gorgeous sheen, incorporate 1 teaspoon each of vanilla and almond extracts, along with 1 tablespoon of corn syrup, into your icing mixture. The corn syrup is key for that lovely shine and a slightly softer bite once dry.
Essential Decorating Tools: For precise designs, tipless piping bags and a cookie scribe (or a simple toothpick) are invaluable. The scribe helps you smooth out icing, pop air bubbles, and guide your designs. If you don’t have specialized tools, don’t worry! Small plastic baggies with a tiny corner snipped off can serve as piping bags, and toothpicks work perfectly as scribes.
Achieving Layered Details: To create depth and intricate details on your skull, pumpkin, or ghost sugar cookies, use a layered approach. First, pipe and flood a thin, even layer of your base color (e.g., black royal icing for a spooky background or white for a ghost). Allow this layer to dry completely – this can take anywhere from 30 minutes to several hours, depending on humidity. Once dry, you can safely pipe your second coat of icing for details like facial features, stitches, or patterns, without fear of colors bleeding.
The Black Icing Secret: A common challenge with black royal icing is achieving a deep, true black without using excessive amounts of food gel, which can tint teeth! My top tip is to mix in a tablespoon of unsweetened cocoa powder into your white royal icing first. The cocoa powder will give it a dark brown base, so you’ll need significantly less black food gel to reach that intense black hue.
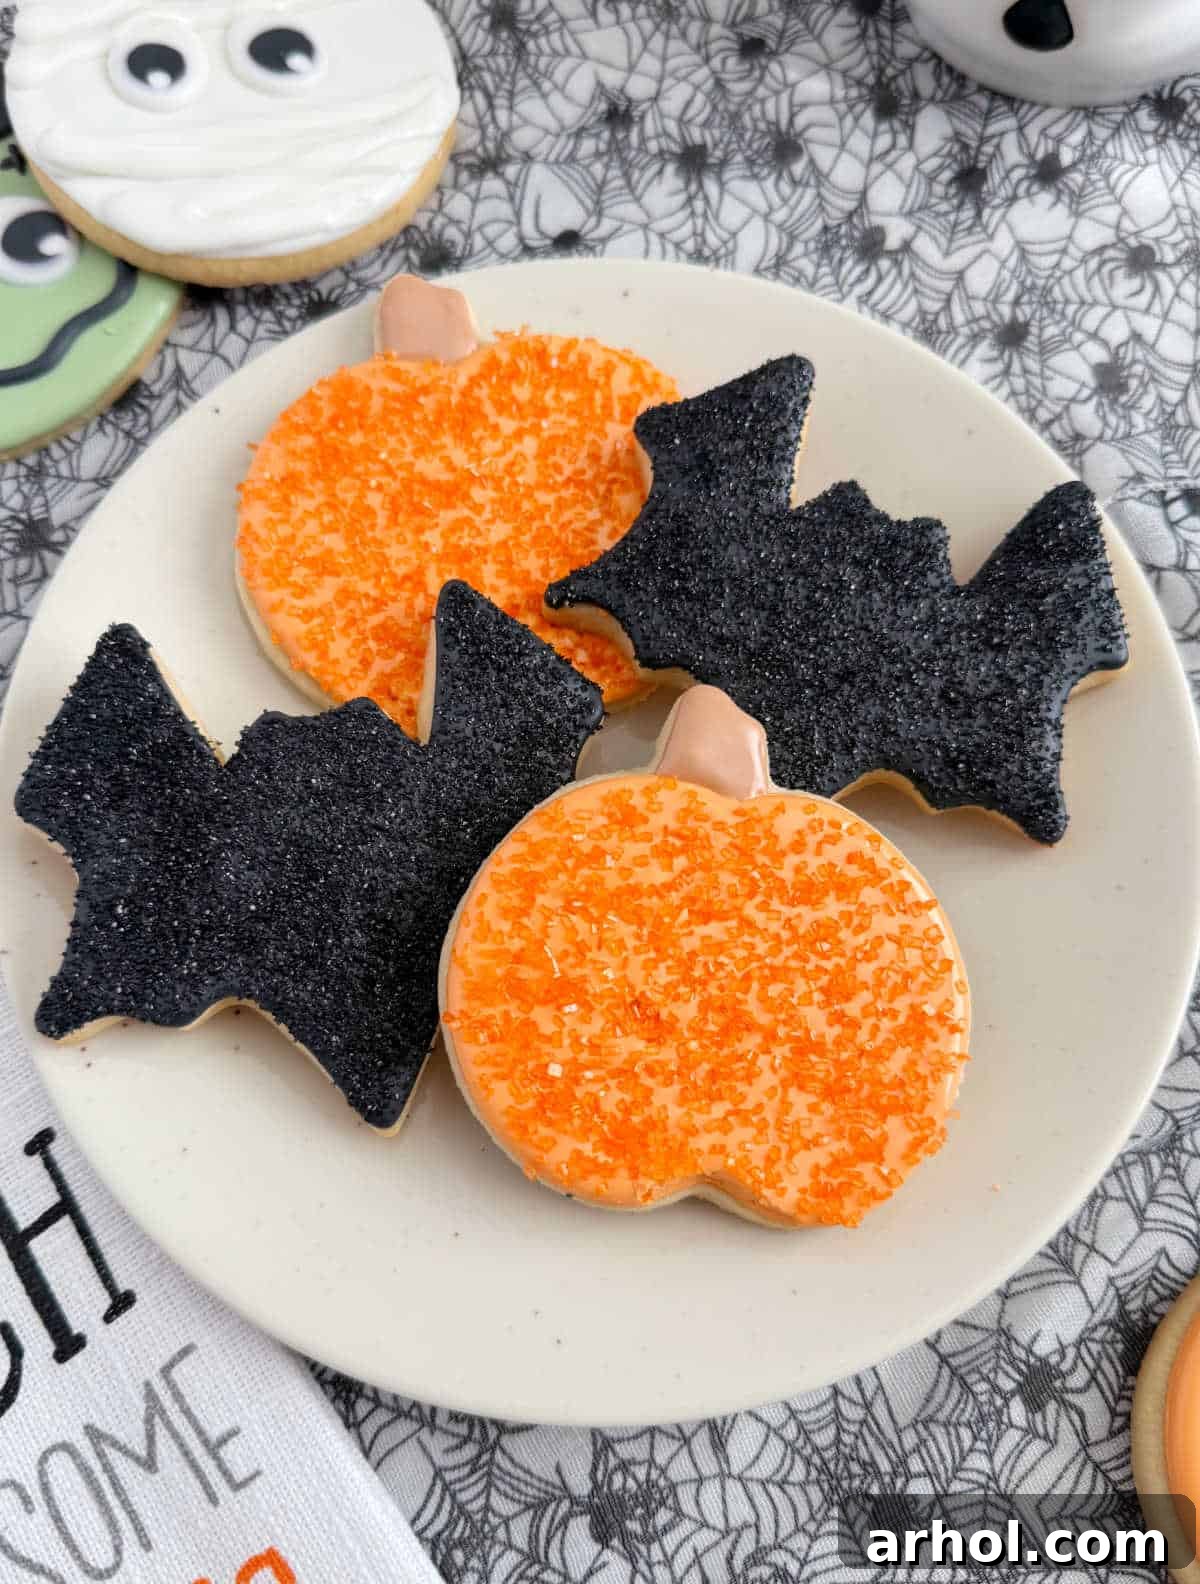
Simple & Sweet Decorations for Beginners: No fancy decorating skills? No problem! You can still create adorable cookies. After applying a base layer of royal icing or even a simple glaze, immediately sprinkle sanding sugar on top. The sparkly texture adds a festive touch and is incredibly easy to do. You can use orange, black, purple, or even glow-in-the-dark sanding sugar for extra Halloween magic!
Top Recipe Tips for Halloween Sugar Cookie Success
- Cream Butter and Sugar Thoroughly: Fully beating the softened butter and sugar together until light and fluffy is paramount. This aeration step prevents your cookies from spreading excessively in the oven, ensuring your cut-out shapes stay crisp and defined.
- Always Chill the Dough: This is a non-negotiable step! Chilling the dough solidifies the butter, making it much easier to roll out and cut intricate shapes. More importantly, it prevents the cookies from losing their shape and spreading while baking. Don’t rush this process; a minimum of 4 hours, or ideally overnight, yields the best results.
- Do Not Overbake: Overbaked cookies will be dry and hard. Bake your cookies just until they no longer look wet in the center and the edges are very lightly golden. They will continue to set as they cool on the baking sheet.
- Achieve Shiny, Soft Icing: For royal icing that has a beautiful sheen and isn’t rock hard, add one tablespoon of corn syrup to the mixture. This simple addition makes a significant difference in both appearance and texture.
- Deep Black Icing, Naturally: When aiming for a rich black icing, mix in a tablespoon of unsweetened cocoa powder first. This darkens the base color, requiring less black food gel and preventing that often-dreaded greyish tint. It also helps avoid staining teeth!
- Use Parchment Paper or Silicone Mats: These liners prevent sticking and help with even baking, making cleanup a breeze.
- Don’t Overwork Re-rolled Dough: If you’re re-rolling dough scraps, handle them gently and chill them briefly if they become too warm before cutting out more shapes.
Storage and Freezing Tips
Once your beautiful Halloween sugar cookies are baked and decorated, proper storage will keep them fresh and delicious for longer.
Store undecorated or decorated cookies in an airtight container at room temperature. They will remain wonderfully soft and fresh for up to a week, or even more. For longer storage, you can freeze undecorated baked cookies for up to 3 months. Simply thaw them at room temperature before decorating. You can also freeze the raw cookie dough, tightly wrapped, for up to 3 months; just thaw it in the refrigerator overnight before rolling and cutting.
More Spooktacular Halloween Treats to Try!
If you adore Halloween recipes as much as we do, expand your spooky repertoire with these other easy and fun treats! After mastering these sugar cookies, why not try our simple and adorable Halloween marshmallow pops or festive cake pops? For a show-stopping dessert, this fun graveyard dirt cake is always a hit. And for quick, no-bake options, these easy Nutter Butter ghosts or playful Oreo pumpkins are perfect. Don’t forget to pair your cookies with some delicious homemade Halloween ice cream for the ultimate festive experience!

Pin
Halloween Sugar Cookies
Ingredients
- 1 cup salted butter softened
- 1 cup granulated sugar
- 1 large egg
- 1 tablespoon almond extract
- 1 tablespoon vanilla extract
- ½ teaspoon salt
- ½ teaspoon baking powder
- 2¾ cups all-purpose flour
Instructions
-
In a large mixing bowl, beat the softened butter with an electric mixer until smooth.
-
Add in the granulated sugar and mix together until fully combined, light and fluffy. This will take at least 5 minutes.
-
Mix in the egg, almond extract and vanilla extract.
-
Add in the salt, baking powder and half of the flour. Mix well.
-
Add in the rest of the flour and mix until fully combined. To avoid overworking the dough, finish mixing with a rubber spatula.
-
Divide the dough into 2 equal parts.
-
Place each portion onto a large sheet of plastic wrap and use a rolling pin to roll out the dough to approximately ⅜ inch thick.
-
Cover rolled out dough with plastic wrap and chill in the refrigerator for at least 4 hours or overnight.
-
After the dough has chilled, preheat oven to 350℉ (175°C).
-
Unwrap the chilled dough and use Halloween cookie cutters to cut out cookie shapes.
-
Place cut out cookies 2 inches apart onto a prepared baking sheet lined with either parchment paper or a silicone baking mat.
-
Bake for 10-14 minutes or until cookies are no longer oily looking and have lightly browned edges.
-
Let cookies cool completely before decorating.
Video
Notes
Fully chill dough so that it’s easy to cut out and doesn’t spread while baking. Patience is key for perfectly shaped cut-out cookies.
Re-roll any remaining dough and cut into shapes until all dough is used, or freeze leftover dough. Handle re-rolled dough gently to avoid overworking it.
Both the unbaked dough and baked, undecorated cookies can be frozen for up to 3 months. Wrap dough tightly in plastic wrap, and store baked cookies in an airtight container.
To make the easy royal icing — follow the directions on the package of meringue powder. These will vary between brands. For enhanced flavor and shine, add 1 teaspoon each of vanilla and almond extracts and 1 tablespoon of corn syrup to your prepared royal icing.
Nutrition
Nutrition information is automatically calculated, so should only be used as an approximation.
Additional Info
For more easy and delightful recipes, be sure to sign up for our free weekly newsletter. Happy baking!