
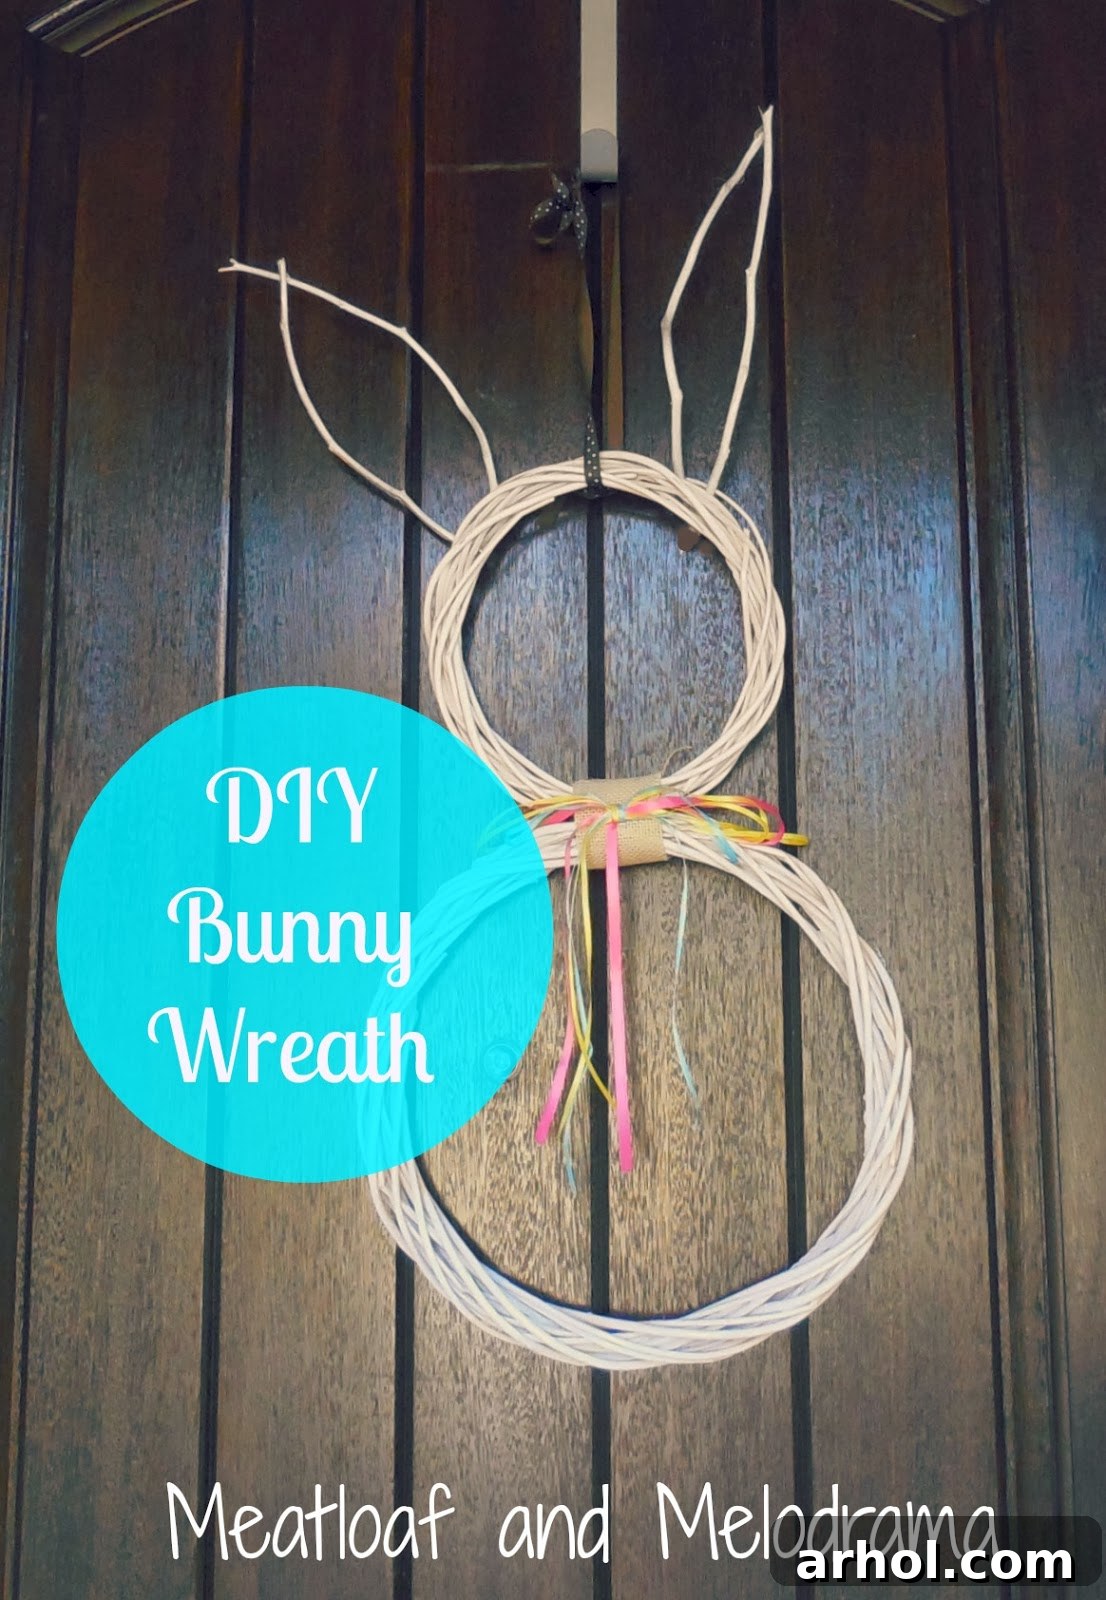
DIY Grapevine Bunny Wreath: Create Your Own Adorable Spring Decor
Hello there, fellow craft enthusiasts! It might still feel a little early for some, but I’ve already dived into my first spring crafting project of the season. Here in sunny Arizona, spring transitions into summer remarkably fast, so I love to embrace and savor every moment of the vibrant spring season while it lasts! Lately, I’ve been utterly charmed by the delightful grapevine bunny wreaths adorning store shelves. However, after a quick glance at their price tags, I decided it was time to unleash my creativity and craft my very own version. This project is not only incredibly satisfying but also a fantastic way to add a personalized touch to your spring home decor without breaking the bank.
Gathering Your Materials: The Foundation of Your Bunny Wreath
The beauty of DIY projects often lies in utilizing what you already have on hand, and this bunny wreath was no exception. For this charming creation, I started with two grapevine wreaths of different sizes. The smaller wreath had previously graced my spring mantel, lending a delicate touch to the display. However, its perfectly circular shape and size made it an ideal candidate for the bunny’s head, leaving me with a blank canvas on my mantel – a welcome excuse for yet another exciting decorating project! These two wreaths would form the distinct body and head of our adorable bunny.
Beyond the wreaths, I rummaged through my craft supplies and found a stash of twigs left over from a previous endeavor. These twigs weren’t just any ordinary sticks; they possessed a slight natural curve, which immediately sparked the idea that they would be absolutely perfect for forming a pair of whimsical bunny ears. Isn’t it wonderful how unexpected items can become the focal point of a new creation? Seeing these disparate elements laid out – two simple wreaths and a handful of curved twigs – it certainly looked like an unconventional assortment, but I knew exactly what magic they would create together.
Essential Supplies for Your Grapevine Bunny Wreath:
- Two grapevine wreaths (one larger for the body, one smaller for the head)
- Several twigs (preferably naturally curved)
- White spray paint (matte or glossy, depending on your preference)
- Hot glue gun and glue sticks
- Thin floral wire or craft wire
- Burlap ribbon (a small piece)
- Assorted colorful ribbons (yellow, pink, blue, or colors of your choice)
- Dark brown ribbon or twine for hanging
- Scissors
- Wire cutters (if using thicker wire)
Step-by-Step Guide: Crafting Your Whimsical Bunny Wreath
Creating your own bunny wreath is a surprisingly simple process, even for beginner crafters. Follow these steps to bring your spring vision to life:
Step 1: Preparing Your Wreaths and Twigs with a Fresh Coat of Paint
One crucial detail I learned from past crafting experiences is the importance of contrast, especially when decorating a dark-colored door. My front door is quite dark, and last year, a rustic, sparsely decorated grapevine wreath I hung virtually disappeared against it – it was nearly invisible from the street! To ensure my adorable rabbit friend would stand out beautifully and be easily seen by all who passed by, I decided to give both grapevine wreaths and the twigs a generous coat of white spray paint. This not only lightens the entire piece but also provides a crisp, clean base that makes subsequent embellishments pop. When spray painting, remember to work in a well-ventilated area, use even strokes, and apply multiple thin coats to avoid drips, allowing adequate drying time between each coat for a smooth, professional finish.
Step 2: Shaping and Attaching the Bunny Ears
Once the white paint was completely dry, it was time to transform those humble twigs into charming bunny ears. I carefully bent and shaped the slightly curved twigs to resemble the iconic long ears of a rabbit. If your twigs aren’t naturally curved, you can gently bend them, or if they are stubborn, consider soaking them in water briefly to make them more pliable, though this adds to drying time. Once satisfied with their shape, I used a hot glue gun to securely attach the base of each twig “ear” to the top of the smaller wreath (which will be the bunny’s head). Hold them firmly in place until the glue sets, ensuring they are symmetrical and stand upright.
Step 3: Assembling the Bunny’s Body and Head
With the ears firmly in place on the smaller wreath, the next step was to connect the head to the body. I positioned the smaller wreath (head) slightly overlapping the top of the larger wreath (body) to create a cohesive bunny shape. To secure them together, I used thin floral wire, wrapping it tightly around the overlapping sections where the two wreaths met. This provides a strong and durable attachment. After securing with wire, I wanted to conceal the wire and add a rustic touch. I took a small piece of natural burlap ribbon, wrapped it strategically over the wire connection point, and then used hot glue to secure the ends of the burlap ribbon together at the back. This not only hides the mechanics but also adds a lovely textural element to the bunny’s “neck.”
Step 4: Adding a Vibrant Pop of Color with a Decorative Bow
Every spring decoration benefits from a burst of cheerful color, and my white bunny wreath was no exception. To infuse some lively spring hues, I selected an assortment of ribbons in bright yellow, soft pink, and serene blue. I carefully crafted a generous, multi-layered bow from these ribbons. The combination of colors immediately brought to mind the playful, colored grass often found in Easter baskets, adding a festive and whimsical touch. Once I was happy with the size and shape of the bow, I used a dab of hot glue to firmly attach it over the burlap ribbon at the bunny’s neck. This central embellishment instantly transforms the wreath, giving it character and a joyful spring spirit.
Step 5: The Finishing Touches and Hanging Your Masterpiece
The final steps involve refining your wreath and preparing it for display. I carefully trimmed the ends of the colorful ribbons on the bow, giving them a neat, angled finish to prevent fraying and enhance their aesthetic appeal. For hanging the wreath, I chose a dark brown ribbon. This decision was deliberate: a dark ribbon tends to blend seamlessly with the dark color of my front door, creating the delightful illusion of a “floating” bunny wreath. This effect is quite charming and eye-catching, making the bunny appear as if it’s magically suspended. While I love the floating look, a fleeting thought crossed my mind about perhaps painting the door hanger a different color to match the wreath – but in the end, I was truly pleased with the outcome. The beauty of DIY is that you can always adapt and refine. How do you think it turned out?
The Benefits of Crafting Your Own Spring Decorations
One of the most satisfying aspects of this project is its incredibly budget-friendly nature. Since I already had all the necessary materials – the wreaths, twigs, paint, and ribbons – this adorable bunny wreath was essentially free! You simply cannot beat the feeling of creating something beautiful and unique without spending a dime. Beyond the cost savings, there’s immense personal satisfaction in making something with your own hands. This was such an easy project, requiring minimal time and effort, yet it yielded a high-impact decorative piece. By choosing to make your own bunny wreath this spring, you stand to save a significant amount of money compared to purchasing a store-bought version, which often comes with a premium price tag for a mass-produced item. Moreover, crafting allows for complete personalization; you can choose colors, textures, and embellishments that perfectly match your home’s aesthetic and your personal style. It’s a wonderful way to inject personality and warmth into your seasonal decor, making your home truly unique.
Tips for Personalizing Your Bunny Wreath
While the white and colorful ribbon design is classic, feel free to let your imagination run wild with variations:
- Color Palette: Instead of white, consider pastel shades like mint green or soft lavender for the wreaths, or even natural brown for a rustic look.
- Ribbon Choices: Experiment with different patterns (gingham, polka dots) or materials (velvet, satin) for your bow.
- Additional Embellishments: Attach small artificial flowers, faux eggs, sprigs of greenery, or even tiny painted wooden beads to add extra charm.
- Bunny Features: You could add small felt eyes and a nose for a more defined bunny face, or a fluffy cotton ball tail on the back of the larger wreath.
- Indoor vs. Outdoor: If hanging outdoors, ensure all materials and glue are weather-resistant or apply a sealant to protect your creation from the elements.
Conclusion: Embrace the Joy of Spring Crafting!
This DIY grapevine bunny wreath project truly embodies the spirit of spring crafting – it’s simple, fun, affordable, and yields a delightful result. It’s a fantastic way to welcome the season and add a handmade touch to your home, inviting smiles and warmth to your entryway or any room. Now that my adorable bunny wreath is complete, I’m already contemplating my next creative endeavor – perhaps tackling that empty space on the mantel! Have you begun working on any spring or Easter crafts yet? I’d love to hear about your projects and creative ideas. There’s nothing quite like the joy of creating something beautiful with your own hands and bringing a touch of seasonal cheer into your living space.
Thank you so much for stopping by and taking the time to read about my latest creation. I hope this tutorial inspires you to embark on your own spring crafting adventure. Have a truly wonderful and creative day!
Warmly,
Dee 🙂