
Easy & Irresistible Valentine’s Day Chocolate Bark Recipe
Delight your sweetheart this Valentine’s Day with a homemade treat that’s as beautiful as it is delicious. This incredibly easy Valentine’s Day bark recipe artfully combines rich chocolate chips, vibrant candy melts, and festive candies to create a colorful, sweet confection that’s perfect for sharing with your special someone, friends, or family. Forget complicated baking; this no-bake wonder is all about melting, pouring, swirling, and pure enjoyment!
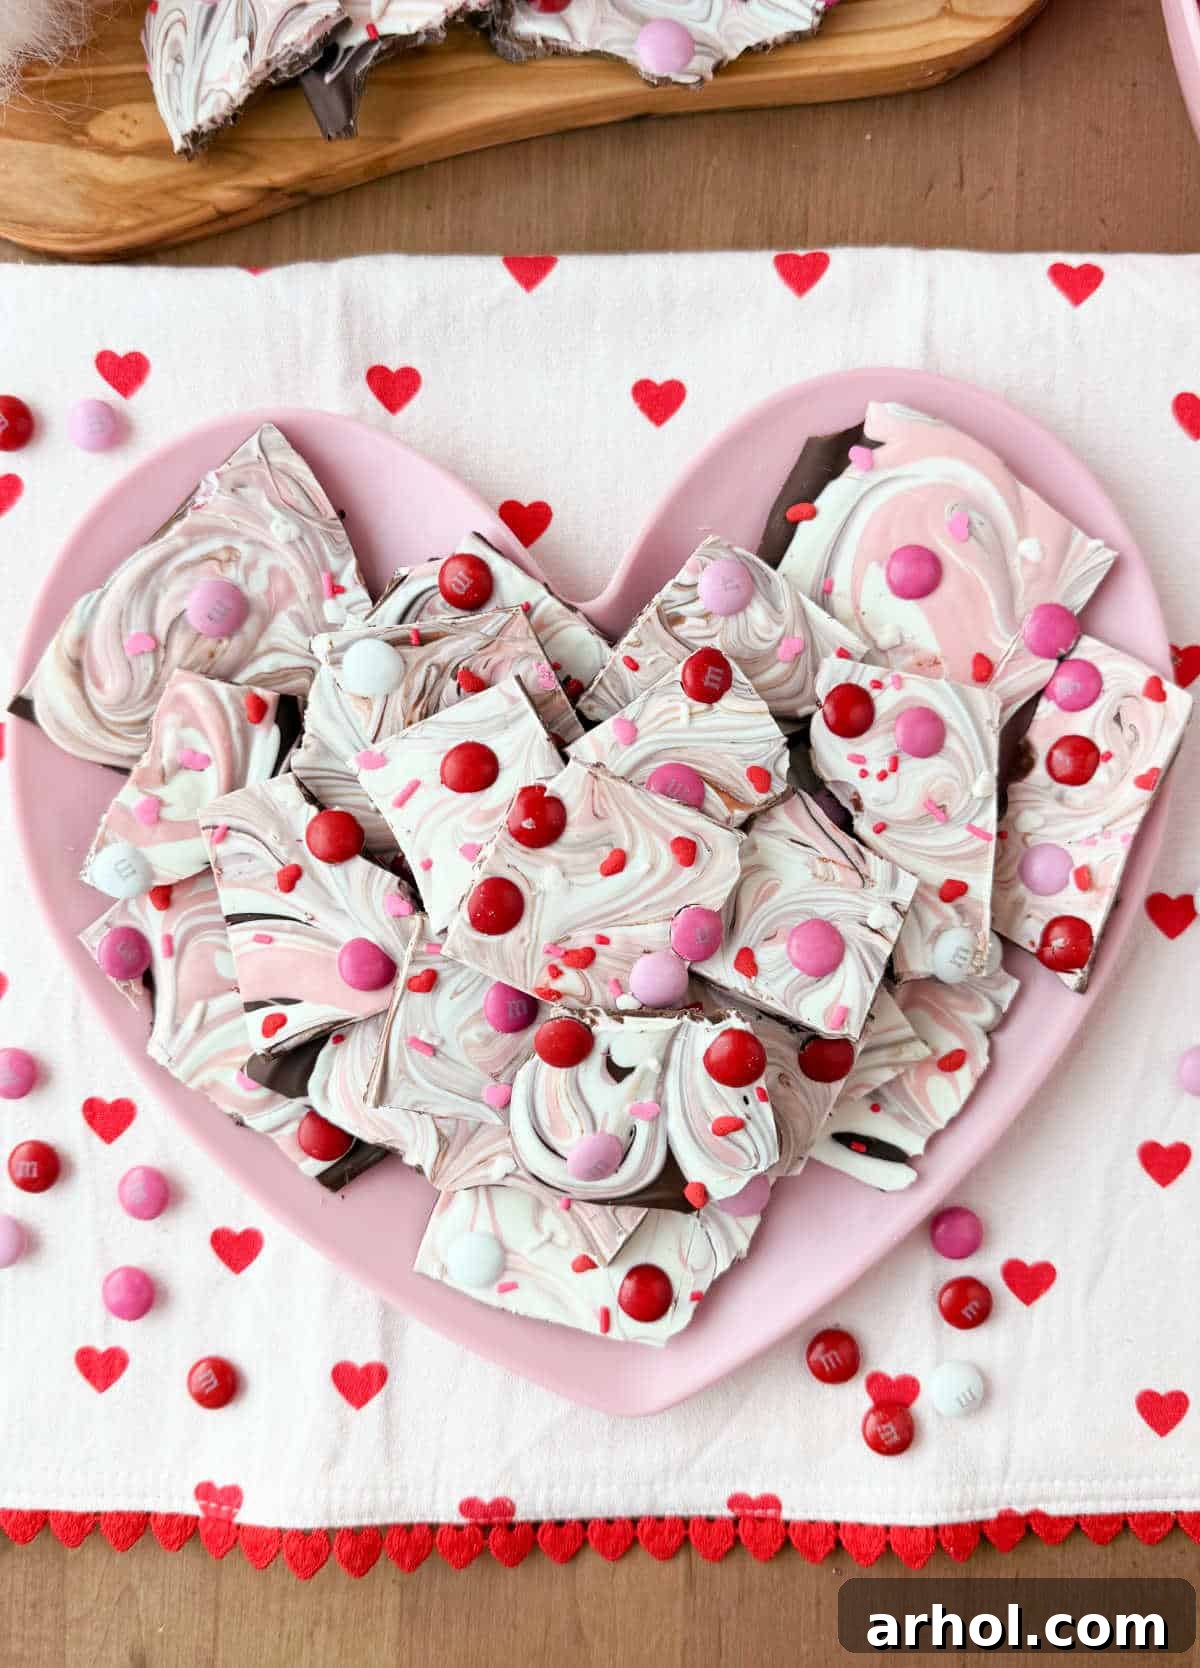
The Sweetest Secret: Why Everyone Loves Easy Valentine Candy Bark
When it comes to celebrating love and friendship, a thoughtful homemade dessert always makes the biggest impact. This easy Valentine bark recipe isn’t just a treat; it’s a delightful experience waiting to happen, perfect for anyone looking for a simple yet impressive Valentine’s Day dessert. Whether you’re a seasoned baker or a complete novice in the kitchen, you’ll find this recipe incredibly approachable. There’s no baking involved, just a few minutes of melting, pouring, and swirling your way to a stunning confection.
We’ve found that chocolate bark is a universal favorite for almost every holiday, and for good reason! It’s adaptable, forgiving, and always a hit. From Christmas peppermint bark and Easter bunny tail bark to spooky Halloween creations and patriotic 4th of July variations, this sweet treat is a versatile staple. Now, we’re thrilled to present a charming Valentine’s Day version that radiates love and festivity. It’s an excellent activity to involve kids in, making cherished memories while crafting edible art. Plus, it makes for a fantastic homemade gift – simply break it into pieces, package them in cute treat bags, and share the love with friends, teachers, or neighbors.
Beyond its simplicity, Valentine’s Day bark offers incredible versatility. You can personalize every batch to suit different tastes and preferences, making each piece a unique expression of affection. The combination of textures and flavors, from the rich chocolate base to the creamy candy melts and crunchy toppings, creates an irresistible symphony for the palate. It’s truly a dessert that brings joy with minimal effort.
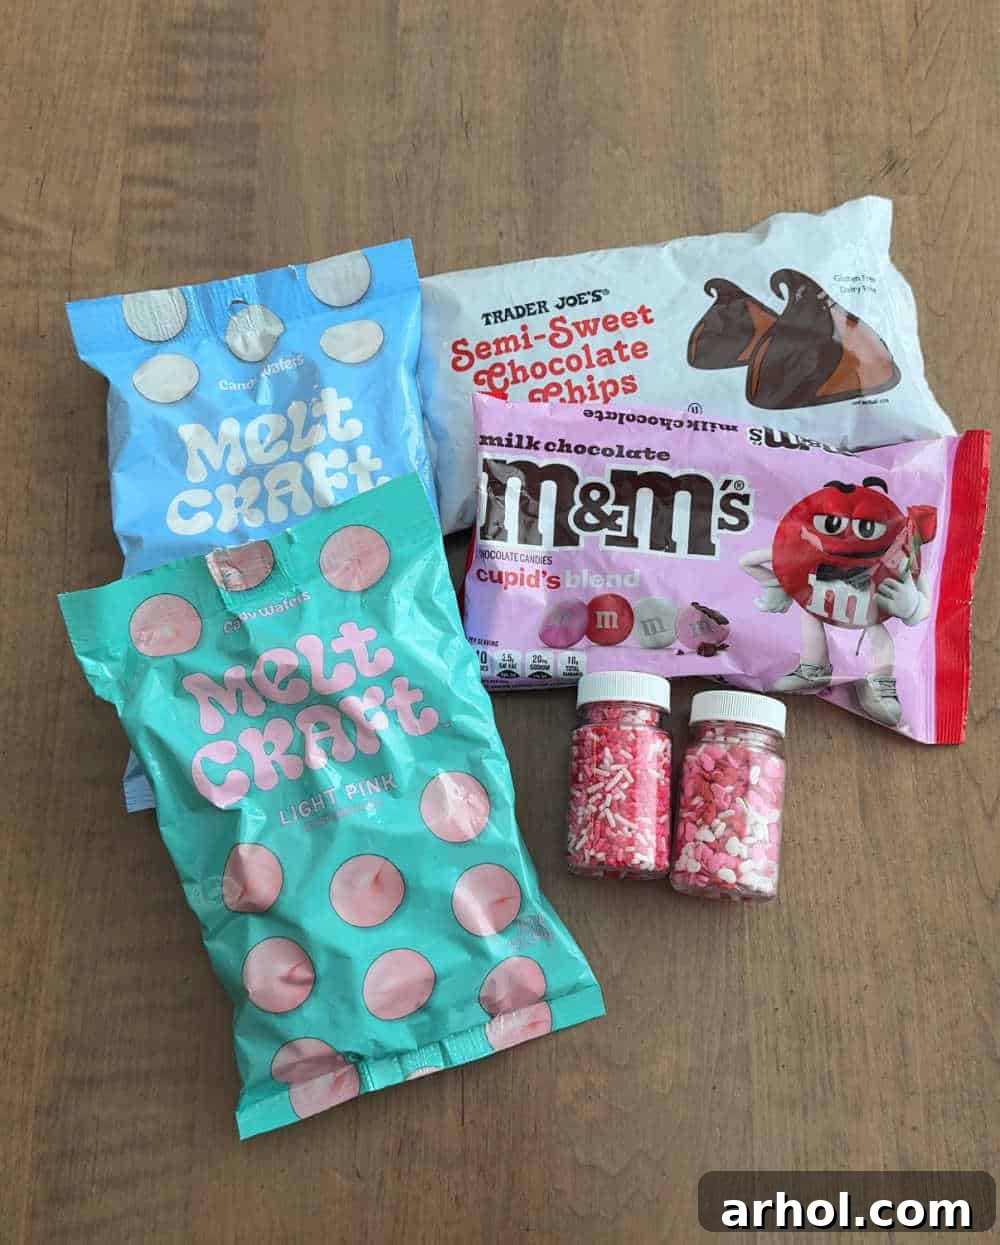
Gather Your Love-Filled Ingredients
Crafting delicious Valentine’s Day bark starts with selecting the right ingredients. Here’s a detailed look at what you’ll need to create this colorful and delightful chocolate treat. Full quantities are provided in the comprehensive recipe card further down this page.
- Semi-Sweet Chocolate Chips: We recommend semi-sweet chocolate chips for the base layer. Their slightly bitter notes provide a wonderful balance to the sweetness of the candy melts and toppings, preventing the bark from being overly sugary. This creates a more sophisticated flavor profile. If you prefer a different chocolate experience, feel free to experiment with dark chocolate for a richer base, or milk chocolate for an even sweeter touch. For those who want to skip the chocolate base entirely or add an extra layer of crunch, consider spreading a layer of crushed pretzels or Oreo cookies instead.
- Candy Coating (Candy Melts): These are key for achieving those vibrant, festive colors that make Valentine’s bark so eye-catching. You can typically find candy melts in a wide array of colors at craft stores, party supply stores, or online retailers. For this recipe, we used beautiful pink and bright white candy melts to evoke a classic Valentine’s aesthetic. An excellent alternative is almond bark, which also melts smoothly and sets well. If you use white almond bark, you can easily customize its color using oil-based food coloring (water-based colors can cause the chocolate to seize). While white chocolate can be used, some people find it more temperamental to melt without seizing or becoming grainy, so candy melts are often a more foolproof option for beginners.
- Valentine Candy: This is where the fun truly begins! We opted for classic Valentine-themed M&M’s for their festive colors and satisfying crunch. However, the possibilities are endless here. Feel free to use your favorite Valentine’s Day candies, such as conversation hearts, small gummy bears, chopped chocolate bars, mini Reese’s Pieces, sprinkles, or even small chocolate kisses. The more variety, the more exciting your bark will be!
- Colorful Sprinkles: While optional, sprinkles are a fantastic way to add an extra touch of cuteness, texture, and visual appeal to your Valentine’s bark. Choose sprinkles in complementary colors like red, pink, and white, or go for special Valentine-shaped sprinkles like hearts. They instantly elevate the festive look of the bark.
Essential Tools for Your Chocolate Bark Adventure
Having the right tools on hand makes the process of creating your Valentine’s Day bark smooth and enjoyable. You likely have most of these items in your kitchen already:
- Large Baking Sheet or Cookie Sheet: Essential for spreading out your melted chocolate layers. A standard half-sheet pan (approximately 18×13 inches) works perfectly.
- Parchment Paper or Wax Paper: Crucial for lining your baking sheet. This prevents the bark from sticking and makes for easy removal and cleanup. Do not skip this step!
- Microwave-Safe Bowls: You’ll need at least three separate bowls for melting the semi-sweet chocolate, pink candy melts, and white candy melts. Glass or ceramic bowls are ideal.
- Rubber Spatulas or Spoons: For stirring the melting chocolate and spreading it evenly on the baking sheet. A sturdy, heat-resistant spatula is best.
- Small Knife or Toothpick: Used for creating those beautiful swirls between the different layers of melted chocolate and candy melts.
- Measuring Cups: To accurately measure your chocolate chips and candy melts.
- Cutting Board and Sharp Knife: For breaking and cutting the set bark into desired pieces.
Crafting Your Valentine’s Day Bark: Step-by-Step Guide
Making this festive Valentine’s Day bark is a wonderfully simple process that yields impressive results. Follow these detailed steps to create your own beautiful sweet treat:
Melting the Chocolate Base
First things first, you need to melt your chocolate chips and candy coating. While a double boiler method on the stovetop works wonderfully, we find the microwave to be the quickest and easiest approach. Always melt chocolate in increments to prevent burning and seizing.
- Prepare Your Workspace: Line a large baking sheet (about 18×13 inches) with parchment paper or wax paper. This ensures your bark won’t stick and makes for effortless cleanup.
- Melt the Semi-Sweet Chocolate: Place your semi-sweet chocolate chips in a microwave-safe bowl. Microwave on 50% power for 30-second intervals, stirring thoroughly after each interval. Continue this process until the chocolate is smooth and fully melted, usually taking 2-3 minutes total. Stirring is vital to distribute heat and prevent hotspots.
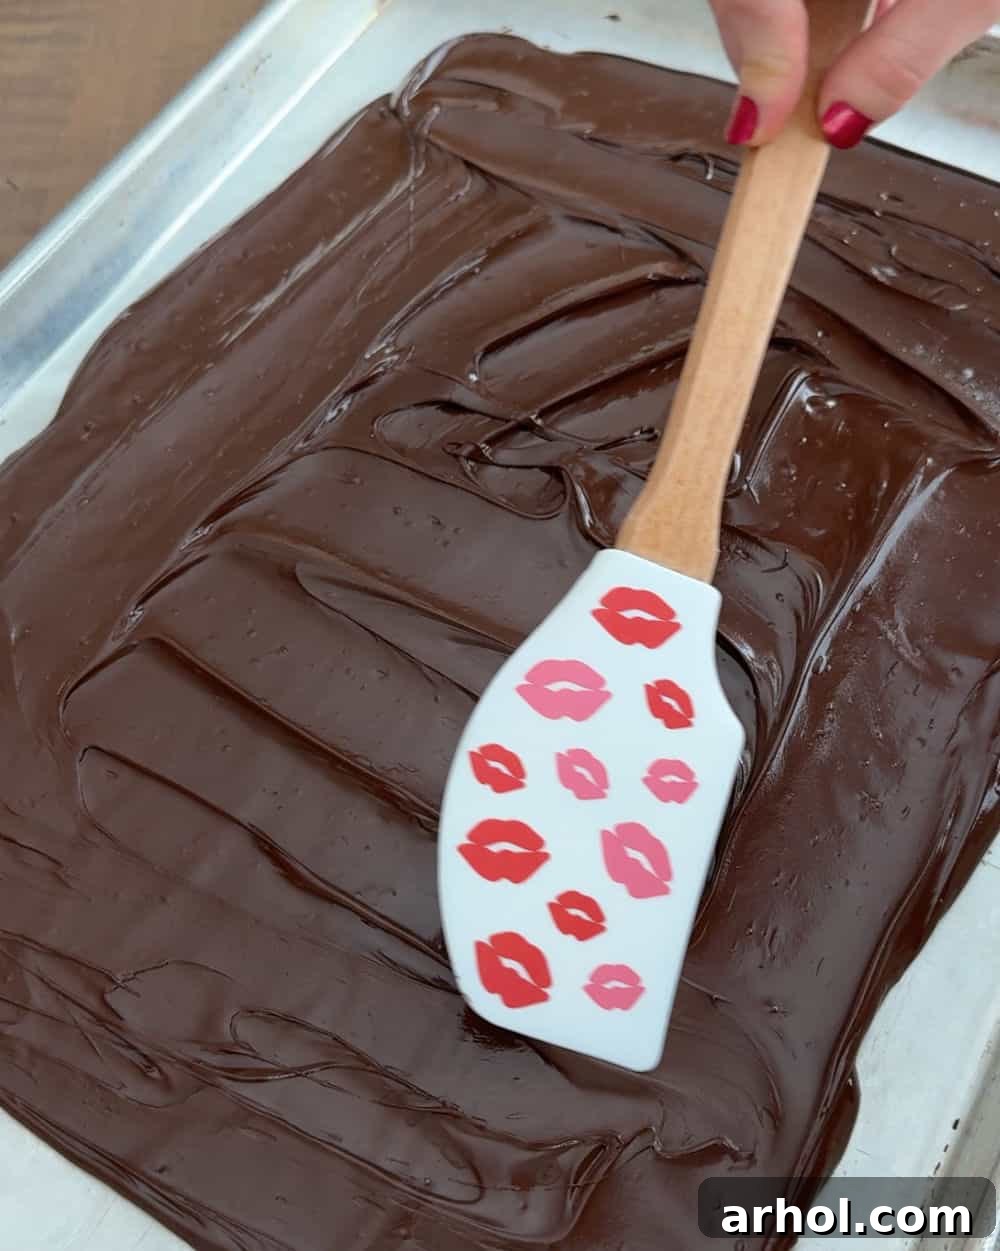
- Spread the Chocolate Base: Pour the melted semi-sweet chocolate onto the prepared baking sheet. Using a rubber spatula or the back of a spoon, carefully spread the chocolate evenly across the parchment paper into a thin, consistent layer. Aim for about ¼ inch thickness.
Adding Vibrant Candy Layers
Once your chocolate base is spread, it’s time to introduce the festive colors of your candy melts.
- Melt the Candy Melts: In separate microwave-safe bowls, melt the pink and bright white candy melts. Follow the same microwave technique as the chocolate chips: 30-second intervals at 50% power, stirring between each, until smooth. This usually takes slightly less time than chocolate.
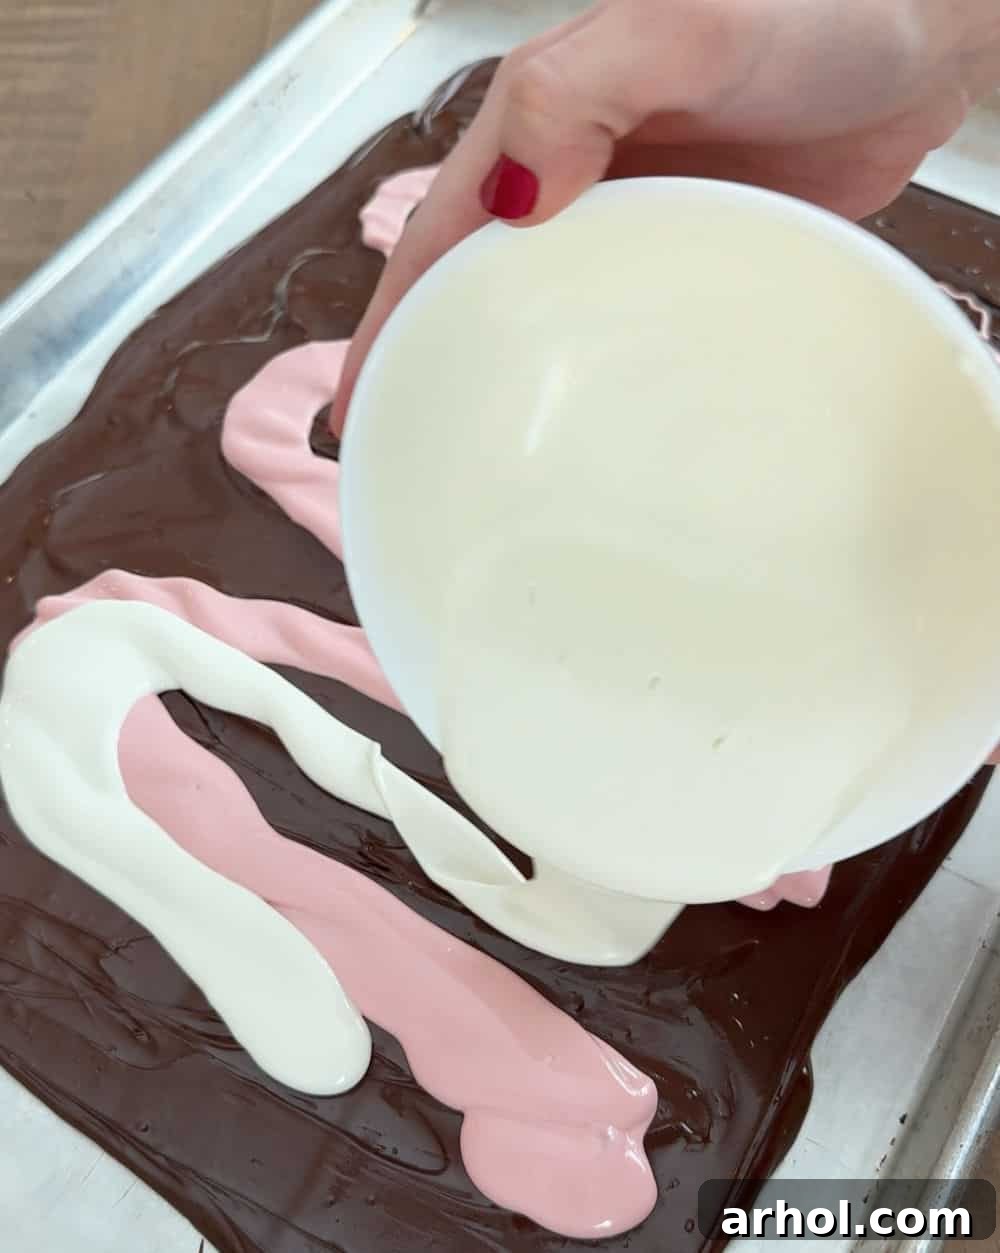
- Pour the Candy Melts: Drizzle spoonfuls of the melted pink and white candy coating over the still-wet semi-sweet chocolate layer. You can create random patterns or strategic lines – there’s no wrong way to do this! The goal is to have distinct pools of color ready for swirling.
Swirling for a Stunning Effect
The swirl is what gives chocolate bark its signature artistic look. It’s simple, but impactful!
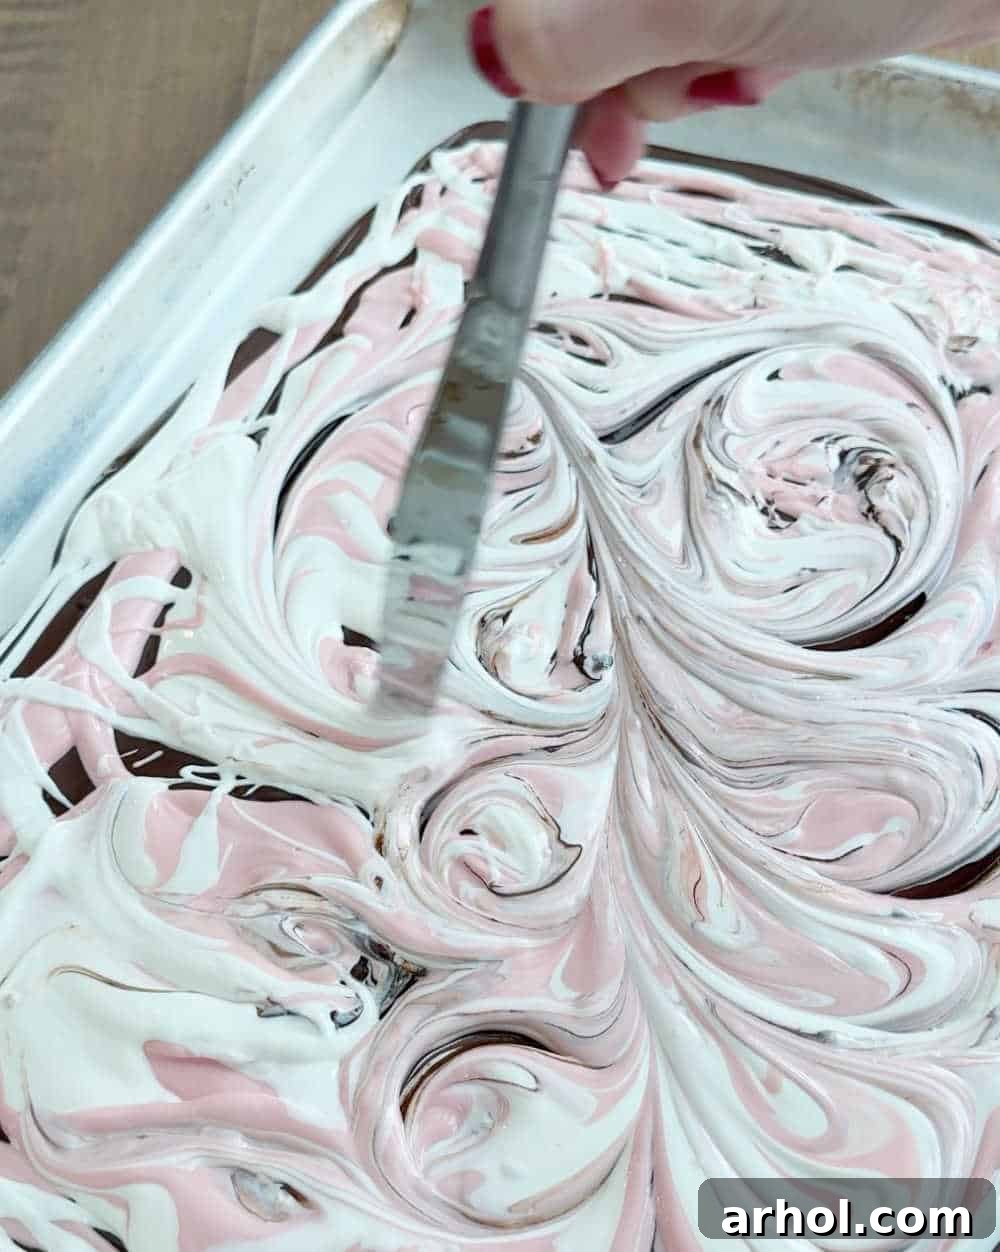
- Create the Swirl: Take a thin knife, a skewer, or even a toothpick, and gently drag it through the different colored melted coatings. Move it in S-shapes, circles, or zig-zags to create beautiful marble-like patterns. Be careful not to over-swirl, as this can cause the colors to muddy. A few elegant passes are all you need to achieve a lovely effect.
The Final Flourish: Toppings
Now for the exciting part – adding your festive toppings!
- Add Candies and Sprinkles: While the chocolate and candy melts are still wet, generously sprinkle your chosen Valentine M&M’s and other candies over the top. Press them down gently to ensure they adhere to the melted layers. Finish with a shower of colorful sprinkles for extra charm and sparkle.
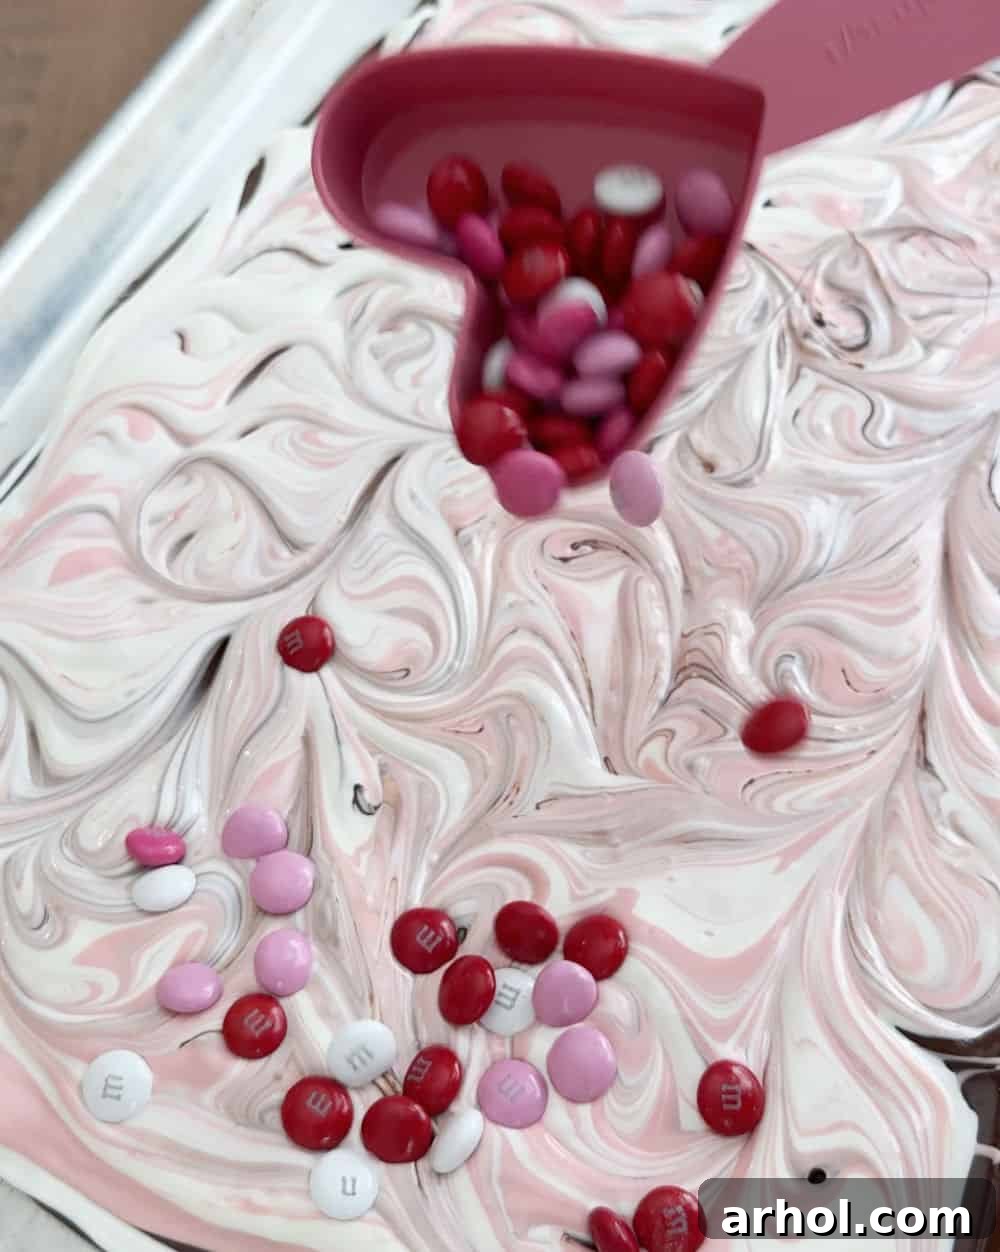
Once all your toppings are in place, the bark needs to set. You can let it firm up on the countertop at room temperature if your kitchen is cool enough, but placing it in the refrigerator will speed up the setting process significantly. This usually takes about 20-30 minutes in the fridge, or 1-2 hours at room temperature. When it’s completely set and firm, you can easily break it into irregular, beautiful pieces to serve.
Creative Customization Ideas for Your Bark
The beauty of chocolate bark lies in its endless customization possibilities. Don’t be afraid to get creative and make this Valentine’s Day bark truly your own! Here are some ideas to inspire you:
- Vary the Chocolate Base: Instead of just semi-sweet, try a layer of rich dark chocolate, sweet milk chocolate, or even a combination. You could also swirl two types of chocolate together for a marbled base before adding candy melts.
- Add Different Mix-Ins: Beyond M&M’s, consider chopped nuts (almonds, pecans), dried cranberries or cherries for a tangy kick, mini marshmallows, crushed Oreos, or pretzel pieces for a salty-sweet contrast.
- Flavor Extracts: A few drops of peppermint, almond, or raspberry extract can be added to the melted chocolate or candy melts for an extra burst of flavor. Just be sure to use oil-based extracts when working with chocolate to avoid seizing.
- Different Colors & Themes: While pink and white are classic Valentine’s, you could use red, purple, or even a mix of all three. For other holidays, simply swap out the colors and candies to match the occasion.
- Embed Larger Candies: For a more dramatic look, you can gently press larger heart-shaped candies, chocolate truffles, or even homemade chocolate-covered strawberries onto the bark while it’s still wet.
Storage, Serving, and Gifting Your Homemade Bark
Optimal Storage
Proper storage is key to keeping your Valentine’s Day bark fresh and delicious for as long as possible. Store the bark in an airtight container to prevent it from absorbing odors or becoming stale. If you live in a warmer climate or your house tends to be warm, keeping it in the refrigerator is recommended to prevent melting and maintain its firm texture. However, if your home is cool (around 68-70°F or 20-21°C), you can comfortably store it on the counter. The bark should last beautifully for 1-2 weeks – if it isn’t devoured sooner! For longer storage, you can also freeze the bark for up to 3 months. Just be sure to place it in a freezer-safe, airtight container. When ready to enjoy, allow it to thaw completely at room temperature before eating to prevent condensation.
Breaking & Serving
Once your chocolate bark is fully set, the most satisfying part is breaking it into pieces. You can either gently snap it by hand into organic, rustic shapes, or for more uniform pieces, score it first with a sharp knife and then break along the lines. The beauty of bark is in its imperfect, varied pieces. Arrange the colorful bark on a festive platter for a party, or stack it in a clear jar for a charming display. It’s perfect as a post-dinner dessert, a midday sweet treat, or an accompaniment to coffee or tea.
Gifting Made Easy
Homemade Valentine’s Day bark makes for an incredibly thoughtful and personal gift. Once broken into pieces, you can easily package it in a variety of ways:
- Treat Bags: Place a few pieces in small cellophane treat bags, tie with a festive ribbon, and add a homemade tag.
- Decorative Tins: Layer pieces of bark in a small, heart-shaped tin or a decorative box for a more elegant presentation.
- Jars: Fill a mason jar or other glass container with bark pieces for a rustic, charming gift.
- Gift Baskets: Include the bark as part of a larger Valentine’s Day gift basket along with other homemade goodies.
This bark is not only a treat for the taste buds but also a feast for the eyes, making it a truly special way to show you care.

Pro Tips for Perfect Valentine’s Bark
- Microwave with Caution: Always melt chocolate and candy coating in short, 30-second increments in a microwave-safe bowl. Stir well after each interval, even if it doesn’t look melted, as residual heat continues the process. This prevents scorching or seizing. Follow the specific directions on the packaging of your chocolate and candy melts for best results.
- Achieving a Clean Break: For neatly sized pieces, allow the bark to set completely. Then, you can either gently snap it by hand for organic, rustic shapes, or, for more uniform pieces, score the bark into large rectangles with a knife, then use a sharp, warm knife (wiped clean after each cut) to cut it into smaller, cleaner portions.
- Preventing Seizing: When melting chocolate, ensure no water gets into it, as even a tiny drop can cause it to seize and become thick and grainy. If using food coloring, always opt for oil-based varieties specifically designed for chocolate.
- Even Spreading: Work quickly when spreading the melted chocolate and candy melts, as they begin to set relatively fast. A thin, even base layer helps ensure all parts of the bark set at the same rate and have a consistent texture.
More Valentine’s Day Sweet Treats to Explore
If you’ve enjoyed making this easy Valentine’s Day bark, you’re in for a treat with more festive recipes! Expand your holiday dessert repertoire with these other delightful homemade goodies. Try our irresistible Rolo pretzel treats for a perfect salty-sweet combination, or whip up a batch of this festive Valentine’s Day snack mix for a crunchy, addictive snack. For another fun, kid-friendly option, check out our Valentine’s Day puppy chow. If you love classic desserts with a holiday twist, these easy Rice Krispie hearts are a must-make. And for a simple yet elegant treat, our easy white chocolate-dipped Oreos are always a crowd-pleaser. Happy baking and celebrating!

Print Recipe
Easy Valentine’s Day Bark
Ingredients
- 2 cups semi-sweet chocolate chips
- 2 cups pink candy melts
- 2 cups bright white candy melts
- Valentine M&M’s and sprinkles (for topping)
Instructions
- Place semi-sweet chocolate chips, white candy melts, and pink candy melts in separate microwave-safe bowls, and melt according to package directions (typically 30-second intervals, stirring between each).
- Pour melted semi-sweet chocolate onto a baking sheet lined with wax paper or parchment paper, and carefully spread with a knife or spatula into an even layer.
- Pour spoonfuls of white and pink melted candy coating on top of the chocolate layer, and swirl together gently with a toothpick or knife to create a marbled effect.
- Top immediately with Valentine M&M’s and sprinkles, pressing down gently to adhere. Allow to set completely in the fridge (about 30 minutes) or on the counter (1-2 hours).
- Once firm, break into pieces, serve, and enjoy!
Video
A video tutorial demonstrating the melting, swirling, and topping process for this Valentine’s Day bark recipe would be placed here. It would visually guide you through each step, making it even easier to create this beautiful treat.
Notes
You can use a double boiler on the stove if you prefer, ensuring no water comes into contact with the chocolate.
Store in an airtight container at room temperature or in the fridge for 1-2 weeks. Bark can be frozen for up to 3 months; thaw completely before eating.
Nutrition
Nutrition information is automatically calculated, so should only be used as an approximation.
Additional Info
Follow me on social media for more easy and inspiring recipes, and don’t forget to sign up for the newsletter to get new recipes directly in your inbox!