
Hello there, fellow DIY enthusiasts and home decor lovers!
I am absolutely delighted to finally unveil this labor of love: a vintage school desk makeover that has truly transformed a forgotten piece of history into a cherished focal point. This desk redo has been a journey, a creative exploration that unfolded over time, and I am so pleased that it’s now complete, ready to inspire and serve its purpose in our home.
Embarking on a furniture makeover project, especially one with such sentimental value, often involves a creative evolution. When I first started working on this vintage school desk, I didn’t have a rigid, pre-determined vision for its final look. Instead, I allowed the process to unfold organically, taking my time between each phase until I was confident in the direction. Rushing a DIY project can often lead to less-than-satisfying results, and patience is truly a virtue when you’re aiming for a perfect finish and a piece that you’ll love for years to come.
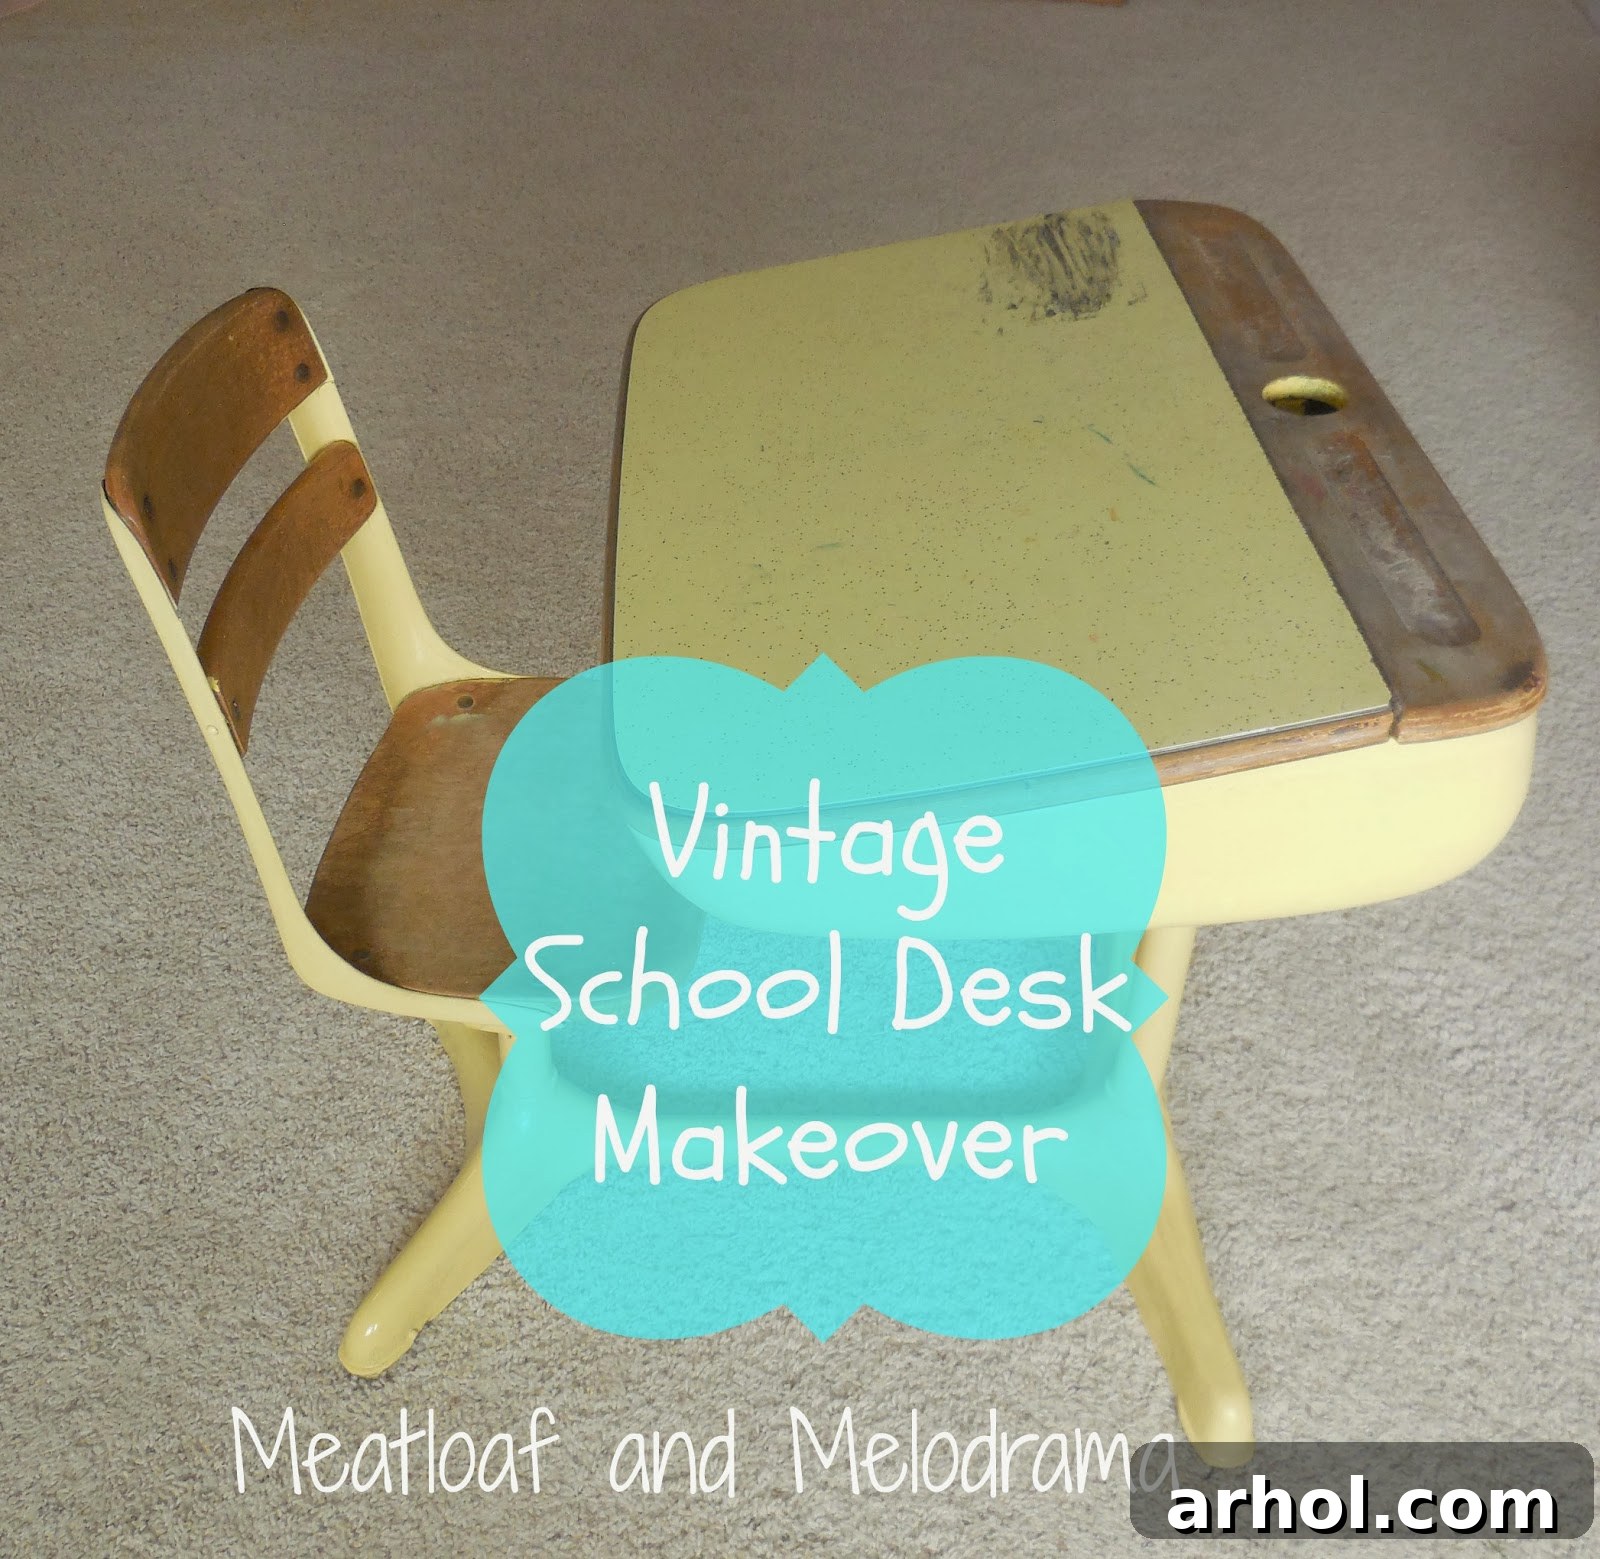
Crucially, this wasn’t just *my* project; it was a collaborative effort with my little “Diva,” who would be the primary user of this charming school desk. Her input was invaluable, and she had some very specific and enthusiastic ideas about how she wanted her personalized study space to look. Involving children in DIY projects not only makes the process more fun but also instills a sense of ownership and pride in the finished product. Now, let me take you back to where it all began – here’s how this vintage desk looked before its incredible transformation:
This desk holds a special place in my heart because it was originally mine when I was a child – a testament to its enduring quality and classic design. And no, that doesn’t make me ancient! I remember it fondly from my school days. The story of how it came into our family is quite charming: my aunt, who worked for one of the local school districts, rescued it from the discard pile when an older school underwent renovations. It’s amazing to think that this piece of history almost ended up in a landfill, but thanks to her foresight, it was given a second chance.
From what I recall, it was initially a rather utilitarian gray, and the desktop was covered with a yellow laminate – a common feature in mid-century school furniture, offering durability but not much aesthetic appeal. Over the years, my dad repainted it a cheerful yellow, and it served as a repository for my ever-growing sticker collection. What is it with kids and stickers, right? They were everywhere! After I eventually outgrew the desk, it found a temporary home in my parents’ old shed, gathering dust until last year when they decided it was time for a major clear-out.
Given its age and worn condition, they were on the verge of finally parting ways with it, but thankfully, they thought to check if I might be interested first. Seriously, of course I was! My daughter was absolutely thrilled at the prospect, as this classic old school desk was just her size, perfectly proportioned for her creative endeavors. This moment marked the true beginning of our vintage school desk makeover journey, transforming a relic into a personalized and functional piece for a new generation.
The first significant step in this desk restoration involved some heavy-duty cleaning and preparation. My amazing husband stepped in to help tackle the initial grime, which included diligently removing all those old stickers that had adhered themselves so stubbornly over the decades. Once the surfaces were clear, we moved on to revitalizing the metal frame. We chose to use spray paint for this section, opting for a fresh, vibrant shade of yellow to complement the desk’s cheerful history. This color choice actually surprised me a bit; I was fully expecting my little Diva to request a “pink and black diva desk,” but she gravitated towards yellow, proving that even little ones can appreciate classic hues.
Spray paint was the ideal choice for the metal components because it allows for a wonderfully smooth, even finish, effectively covering the previous layers of old paint and minor imperfections. Looking at the “before” pictures, you can really see how the desk was covered with layers of faded paint and a myriad of pen marks – true evidence of years of use! The wooden parts were equally worn, showing signs of heavy use and age. And let’s not forget that charming old inkwell – a delightful nod to its original purpose and a feature we absolutely wanted to preserve in this vintage desk makeover.
Next, we focused on the desktop, which presented its own unique challenge. The existing yellow laminate finish, while practical in its day, looked dated and didn’t align with the fresh, vintage aesthetic we envisioned. I had a wonderful idea: why not paint the top with chalkboard paint? This brilliant solution would not only cover the old laminate but also add a fantastic functional element, allowing the kids to doodle, practice their math problems, or write out their to-do lists directly on the desk surface, erasing them with ease. This creative use of chalkboard paint perfectly combines practicality with a playful touch.
To ensure proper adhesion and a smooth foundation for the chalkboard paint, we applied a layer of spray paint as a primer over the entire desktop. Yes, that includes both the old laminate and the exposed wooden sections. Proper priming is a crucial step in any furniture transformation, especially when dealing with different materials or a slick surface like laminate, as it creates a uniform base for subsequent paint layers and ensures longevity of your DIY project.
Once the primer was dry, it was time for the fun part: applying the chalkboard paint. I found a delightful shade of chalkboard paint at Michael’s, a slightly lighter hue than traditional black, which added a softer, more modern vintage feel to the desk. My daughter eagerly lent a hand, painting the layers with enthusiasm. While many projects might only require two layers of chalkboard paint, given this lighter shade, I opted for a total of three layers to ensure complete coverage and a truly durable, functional chalkboard surface. This extra step guarantees that the surface will hold up to frequent use and provide a rich, consistent finish.
A little professional tip for applying chalkboard paint, or indeed many types of paint, is to use foam brushes. Personally, I find that foam brushes consistently deliver a smoother, more even finish compared to traditional bristle brushes. They minimize brush marks and, perhaps most importantly, eliminate the frustrating issue of stray brush hairs getting stuck in your freshly painted surface. This attention to detail in application makes a significant difference in the final look of your DIY furniture makeover.
With the desktop meticulously completed and curing, I shifted my focus to the rest of the desk’s wooden components. This phase introduced a new medium for me: chalk paint. Prior to this project, I had never used chalk paint, but I was eager to experiment with it for this specific desk restoration. My intuition told me that chalk paint would be the perfect choice to achieve the rustic, subtly aged look I envisioned – an aesthetic that I felt would perfectly complement the inherent vintage charm and history of the school desk. Chalk paint is renowned for its matte finish and ease of use, often requiring minimal to no prep work, which is a huge bonus in any furniture flip.
My Diva and I deliberated over the color choice for the wooden seat and the very top edges of the desk. We ultimately settled on a lovely, slightly off-white shade. This color provided a beautiful contrast to the vibrant yellow metal and the dark chalkboard top, while maintaining a soft, classic feel. I applied the chalk paint to all the wooden surfaces, taking care to achieve even coverage. After the paint had dried thoroughly, I performed a very light sanding across the surface. This wasn’t to distress it significantly, but rather just enough to smooth out any minor imperfections and achieve a silky-soft finish. Given that my children would be actively using this desk, I purposefully avoided heavy distressing; after all, I figured they would probably do their own “distressing” naturally through everyday play and use!
Even after painting the wooden sections with the elegant off-white chalk paint, I felt that it needed just a little something extra, a touch to truly elevate its vintage appeal. Inspiration struck, and I decided to use the same chalkboard paint to add a series of simple, clean stripes, creating a subtle yet impactful “grain sack” effect. This design choice instantly added character and depth, tying all the elements together beautifully. It’s funny, isn’t it? This project truly has it all: spray paint for a smooth metal finish, chalk paint for that rustic wood aesthetic, and chalkboard paint for functionality and decorative details. The combination of these techniques made for a truly unique and personalized vintage school desk makeover.
Reflecting on the entire process, I can confidently say that the wait and the thoughtful steps taken were absolutely worth every moment. The chosen colors—the bright yellow metal, the soft off-white chalk-painted wood, and the functional chalkboard top with its subtle stripes—work in perfect harmony, creating a cohesive and inviting piece. This is precisely the look I had envisioned, a blend of vintage charm and modern practicality. What’s even better is that while my little Diva played a key role in its design, the desk isn’t exclusively “girly.” My little guy also enjoys using it occasionally, making it a versatile and cherished spot for both children.
A fascinating detail we uncovered during the restoration process was a very faded stamp inside the desk from the American Seating Company. This discovery allowed me to delve a little deeper into its history. From what I’ve been able to gather through research, this particular model was likely manufactured sometime in the 1940s or possibly the early 1950s. Interestingly, most of the images I found online of similar desks from that era featured wooden tops, leading me to believe that the yellow laminate was added later, perhaps during an earlier renovation or for increased durability in a school setting. I firmly believe that our decision to transform the top with chalkboard paint not only gives it a fantastic modern function but also honors and enhances the true vintage age and style of the desk much better than the old laminate ever did. It feels more authentic to its original character, blending tradition with contemporary utility.
My daughter is absolutely thrilled with her “new” vintage school desk makeover. It’s no longer just an old piece of furniture; it’s a personalized workstation, a creative hub, and a functional space where she can learn, draw, and play. Seeing it get so much daily use is incredibly rewarding, reinforcing my love for “trash to treasure” projects. There’s a unique satisfaction that comes from saving an item from being discarded and giving it a vibrant new life. Now that this project is complete, I’m already eagerly looking for more forgotten furniture pieces to rescue and reimagine!
What are your thoughts on this vintage school desk transformation? I would absolutely love to hear them! Do you have any furniture makeovers of your own that you’re proud to share, or perhaps ideas for my next DIY project? Please leave your comments below; I always enjoy connecting with fellow DIY enthusiasts and learning from your experiences.
Thank you so much for joining me on this journey and following the story of this desk redo from start to finish. If you enjoyed this project and want to see more creative furniture flips, home decor ideas, and DIY adventures, I would be absolutely delighted if you would subscribe by email or follow me on your preferred social media platform. Your support means the world! Have a truly wonderful and inspiring day!
Warmly,
Dee 🙂