
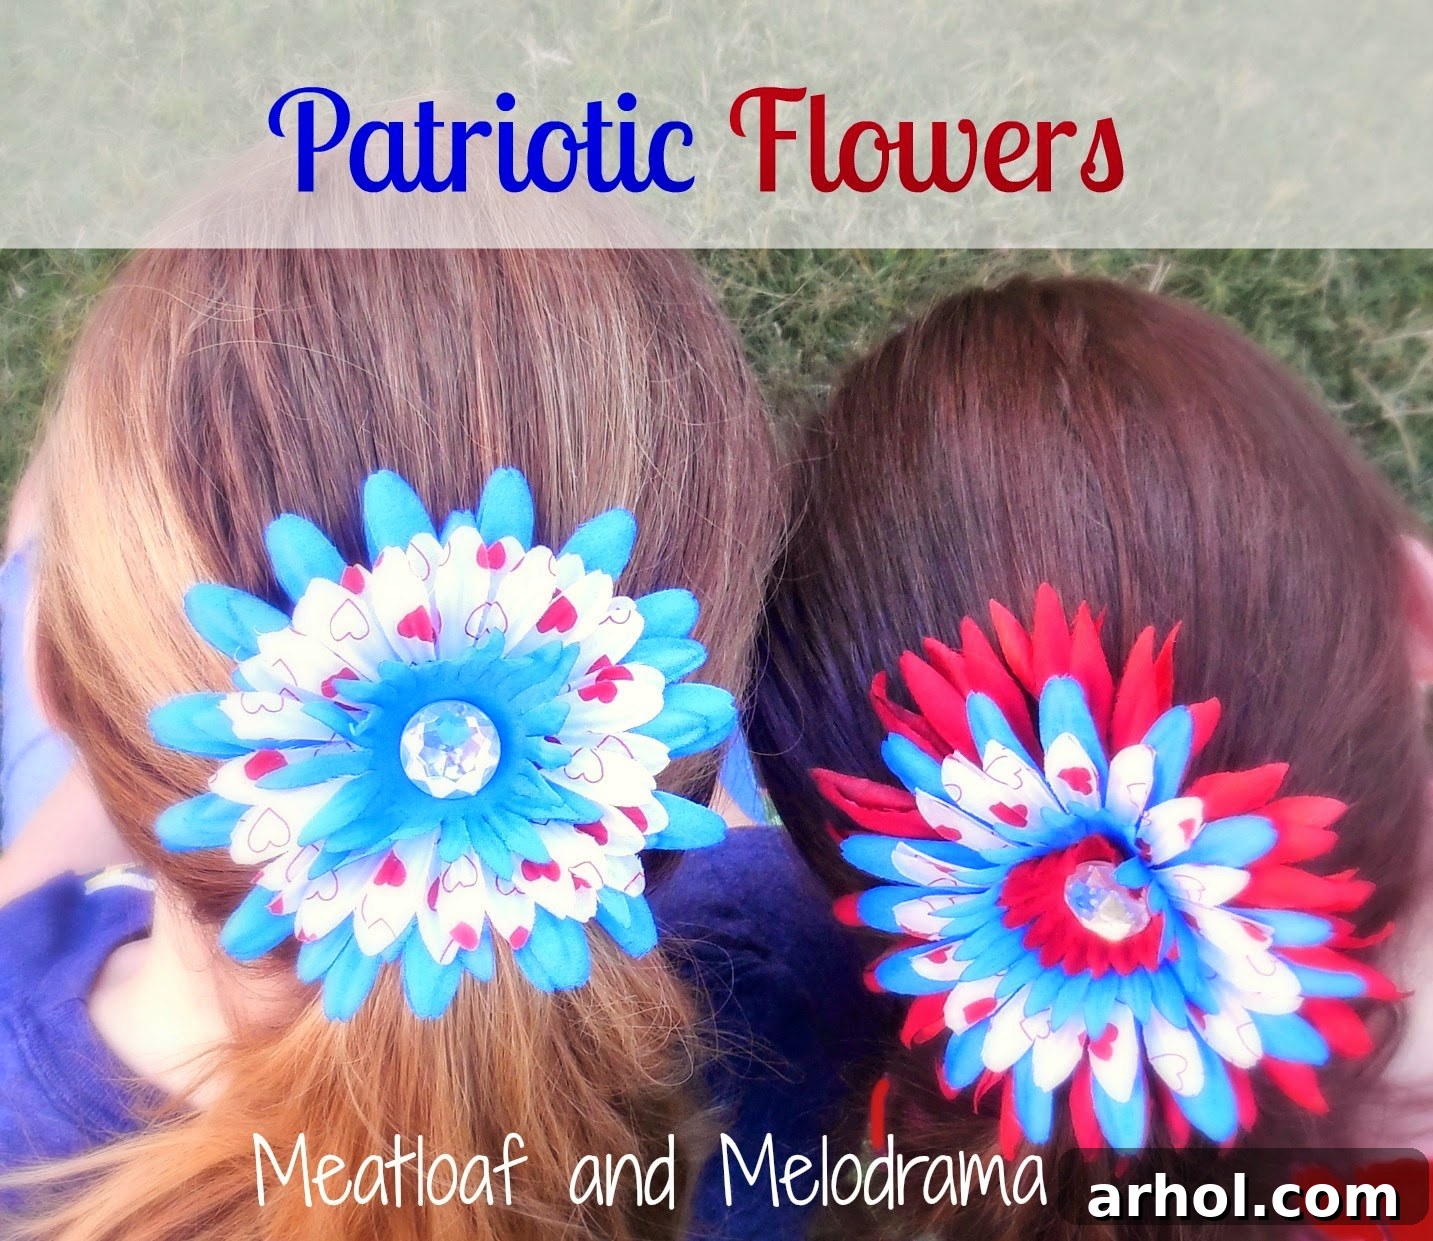
DIY Patriotic Flower Hair Clips: Celebrate Fourth of July in Style!
Hello fellow crafters and parents! As the Fourth of July approaches, bringing with it the vibrant spirit of independence and celebration, our thoughts often turn to festive decorations and, of course, adorable outfits. For many young fashionistas, a special occasion demands a unique touch, and what could be cuter than patriotic hair clips? My daughters absolutely adore wearing flower clips, a passion that, left unchecked, could easily become an expensive endeavor. Being the resourceful and cheap frugal mom that I am, I discovered the joy and savings of crafting our own hair accessories a few years ago. Not only does this allow for endless customization to match every outfit, but I’ve also perfected a clever method to reuse the basic hair clips, attaching new flowers whenever the mood (or the holiday!) strikes. This approach significantly keeps our crafting costs down while maximizing creativity.
While we previously owned some red, white, and blue flowers, time and enthusiastic wear had left them looking a bit worn out. So, with the Fourth of July just around the corner, we embarked on a fun and quick trip to our local craft store. The mission? To gather fresh supplies and create these absolutely charming and festive patriotic flower clips, perfectly designed to add a celebratory sparkle to their Independence Day ensembles.
Why Choose DIY Patriotic Hair Accessories?
Crafting your own accessories offers a multitude of benefits beyond just saving money. It’s a fantastic way to unleash creativity, personalize your style, and even bond with your children. For special holidays like the Fourth of July, handmade items carry an extra layer of sentiment and uniqueness that store-bought options simply can’t match. Imagine the pride your little ones will feel wearing something they helped create themselves! This project is not only incredibly satisfying but also an excellent opportunity to teach children about resourcefulness and the joy of making something from scratch. Plus, you get complete control over the design, ensuring your patriotic accessories perfectly complement your festive celebrations.
Gathering Your Crafting Essentials
The beauty of this project lies in its simplicity and the readily available materials. During our recent craft store excursion, I was thrilled to discover a fantastic sale section. I found these delightful spring heart-patterned flowers – likely remnants from Valentine’s Day, but their vibrant red and white hues, combined with a subtle texture, would create a wonderful contrast against the solid blue flowers we also picked up. Always keep an eye out for clearance bins; they’re treasure troves for frugal crafters!
Materials You’ll Need:
- Assorted Fabric Flowers: Look for red, white, and blue options. These can be silk, felt, or any artificial flower petals. Experiment with different sizes and textures for a layered look.
- Silver Hair Clips: Alligator clips or snap clips work best. If you have old clips lying around, you can easily repurpose them!
- Large Clear Stones or Embellishments: These add a lovely sparkle to the center of your flowers. Alternatives include buttons, rhinestones, or even decorative beads.
- Small Brads: These are key for securely attaching the layers of flowers and then securing them to the clip itself.
- Hot Glue Gun and Glue Sticks: Essential for quick and strong adhesion. *Safety Note: Always supervise children when using a hot glue gun, or have an adult handle this step.*
- Scissors: For trimming any loose threads or adjusting flower layers.
Step-by-Step Guide: Crafting Your Patriotic Clips
Get ready to unleash your inner artisan! This crafting process is straightforward and incredibly rewarding, perfect for an afternoon activity with little helpers. Make sure you have a clean workspace and all your materials within reach before you begin.
Step 1: Deconstruct and Design Your Flower Layers
Begin by carefully pulling apart your selected fabric flowers. Most artificial flowers are constructed in layers, and gently separating them allows you to mix and match petals to create unique combinations. This is where the fun really begins! Experiment with different sizes and colors – perhaps a larger blue flower as the base, topped with white petals, and a smaller red heart-patterned flower for the top layer. Encourage your “assistants” (my girls love this part!) to help arrange the layers, fostering their creativity and design sense.
Once you’ve settled on your desired layers, it’s time to secure the centerpiece. Apply a small dab of hot glue to the back of your large clear stone (or chosen embellishment). Carefully press the flat head of a small brad onto the glue, ensuring it’s centered and firmly attached. This creates a sturdy and decorative central element for your flower.
Step 2: Assemble the Flower Layers with the Brad
Now, gather your chosen flower layers. With the brad firmly attached to the clear stone, you’ll use the pointy ends of the brad to poke through the center of each fabric flower layer. Start with the top layer (usually the smallest or most decorative) and work your way down to the largest base layer. My little helpers are fantastic at this step, using a gentle but firm push to guide the brad through the fabric. Ensure all layers are stacked neatly and centered around the brad.
Step 3: Secure the Flower to the Hair Clip
With your flower layers now neatly held together by the brad, it’s time to attach it to the hair clip. Carefully guide the two prongs of the brad through the small opening on one side of your silver hair clip. Position the flower so that it sits nicely on the top of the clip. Once the brad prongs are through, gently but firmly fold them outwards and flatten them against the inside of the clip. This action secures the flower to the clip, ensuring it stays firmly in place during all the Fourth of July festivities!
Step 4: Add Finishing Touches and Personalize
Now that your basic patriotic flower clip is assembled, take a moment to admire your handiwork! We initially created two distinct combinations, but don’t be afraid to add extra flair. For instance, I ended up incorporating a few extra red petals from another flower to give one of the clips an even richer, bolder splash of color. This is your chance to really make each clip unique. You could add small glitter accents with glue, tiny rhinestones, or even paint the brad heads if you wish. Isn’t this process incredibly easy and fun? Before you know it, you’ll have a collection of custom, festive accessories ready for any Independence Day celebration!
Styling Your Independence Day Look
With your beautiful new patriotic flower clips complete, it’s time to showcase them! These versatile accessories are perfect for pinning back bangs, accentuating a ponytail, or simply adding a festive pop of color to any hairstyle. But don’t stop there! These DIY flowers can also be attached to headbands for a different look, pinned onto a sash, or even used to embellish a plain tote bag for a truly coordinated Independence Day outfit. The possibilities are endless, allowing you to infuse the spirit of the Fourth of July into every aspect of your holiday attire.
Conclusion: Crafting Memories and Celebrating Freedom
Making these cute red, white, and blue flower clips is more than just a craft project; it’s an opportunity to create lasting memories with your loved ones while preparing for a joyous national holiday. It’s a testament to the fact that beautiful, personalized accessories don’t have to break the bank. So, gather your materials, invite your “assistants,” and get ready to craft some Independence Day magic. Whether for your daughters, granddaughters, or even yourself, these handmade patriotic hair flowers are sure to be a delightful addition to any celebration.
Thanks so much for stopping by and crafting with us today! We hope you have an absolutely fantastic and safe Fourth of July, filled with joy, laughter, and plenty of patriotic flair.
Happy Crafting!
Warmly,
Dee 🙂
Sharing At:
Tip me Tuesday