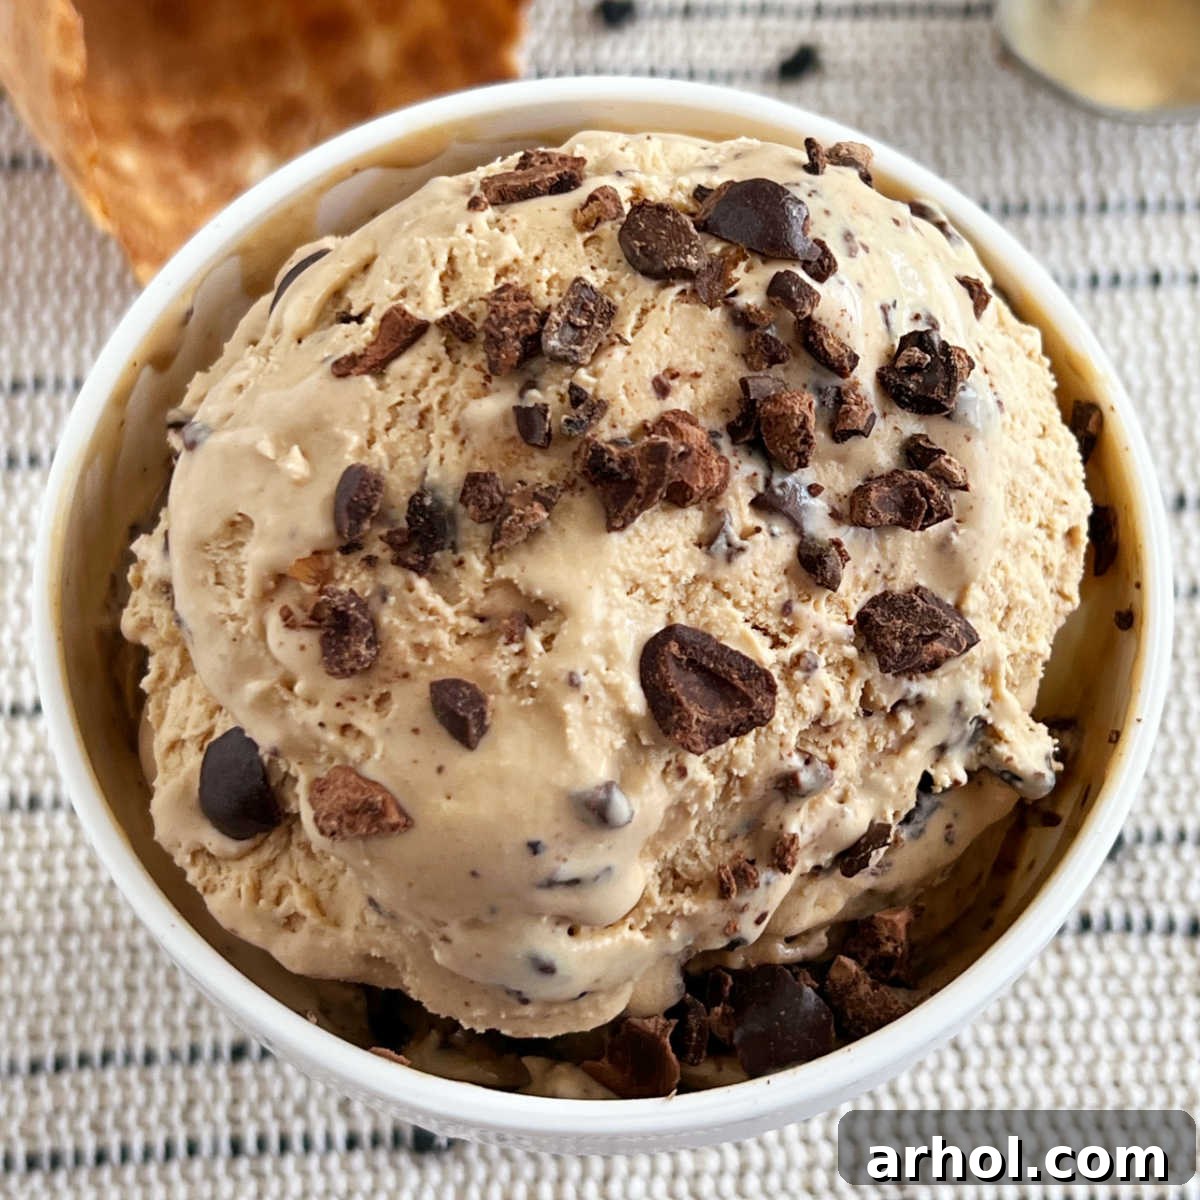
The Ultimate No-Churn Coffee Ice Cream: Effortless, Egg-Free & Unbelievably Creamy
Imagine a scoop of intensely rich, smooth, and creamy coffee ice cream melting delightfully on your tongue. Now, imagine making it from the comfort of your kitchen, without the need for a fancy ice cream machine or a single egg yolk. This isn’t a dream; it’s the reality of our incredible no-churn coffee ice cream recipe!
As devoted coffee enthusiasts, we’ve perfected this simple method to bring you the absolute best homemade coffee ice cream. It’s truly a revelation, especially on a warm day when you crave a refreshing yet indulgent treat. The bold coffee flavor is perfectly balanced, never overpowering, making it a hit even with those in our family who don’t typically reach for a cup of Joe. Prepare to elevate your dessert game with this surprisingly easy and unbelievably delicious creation.
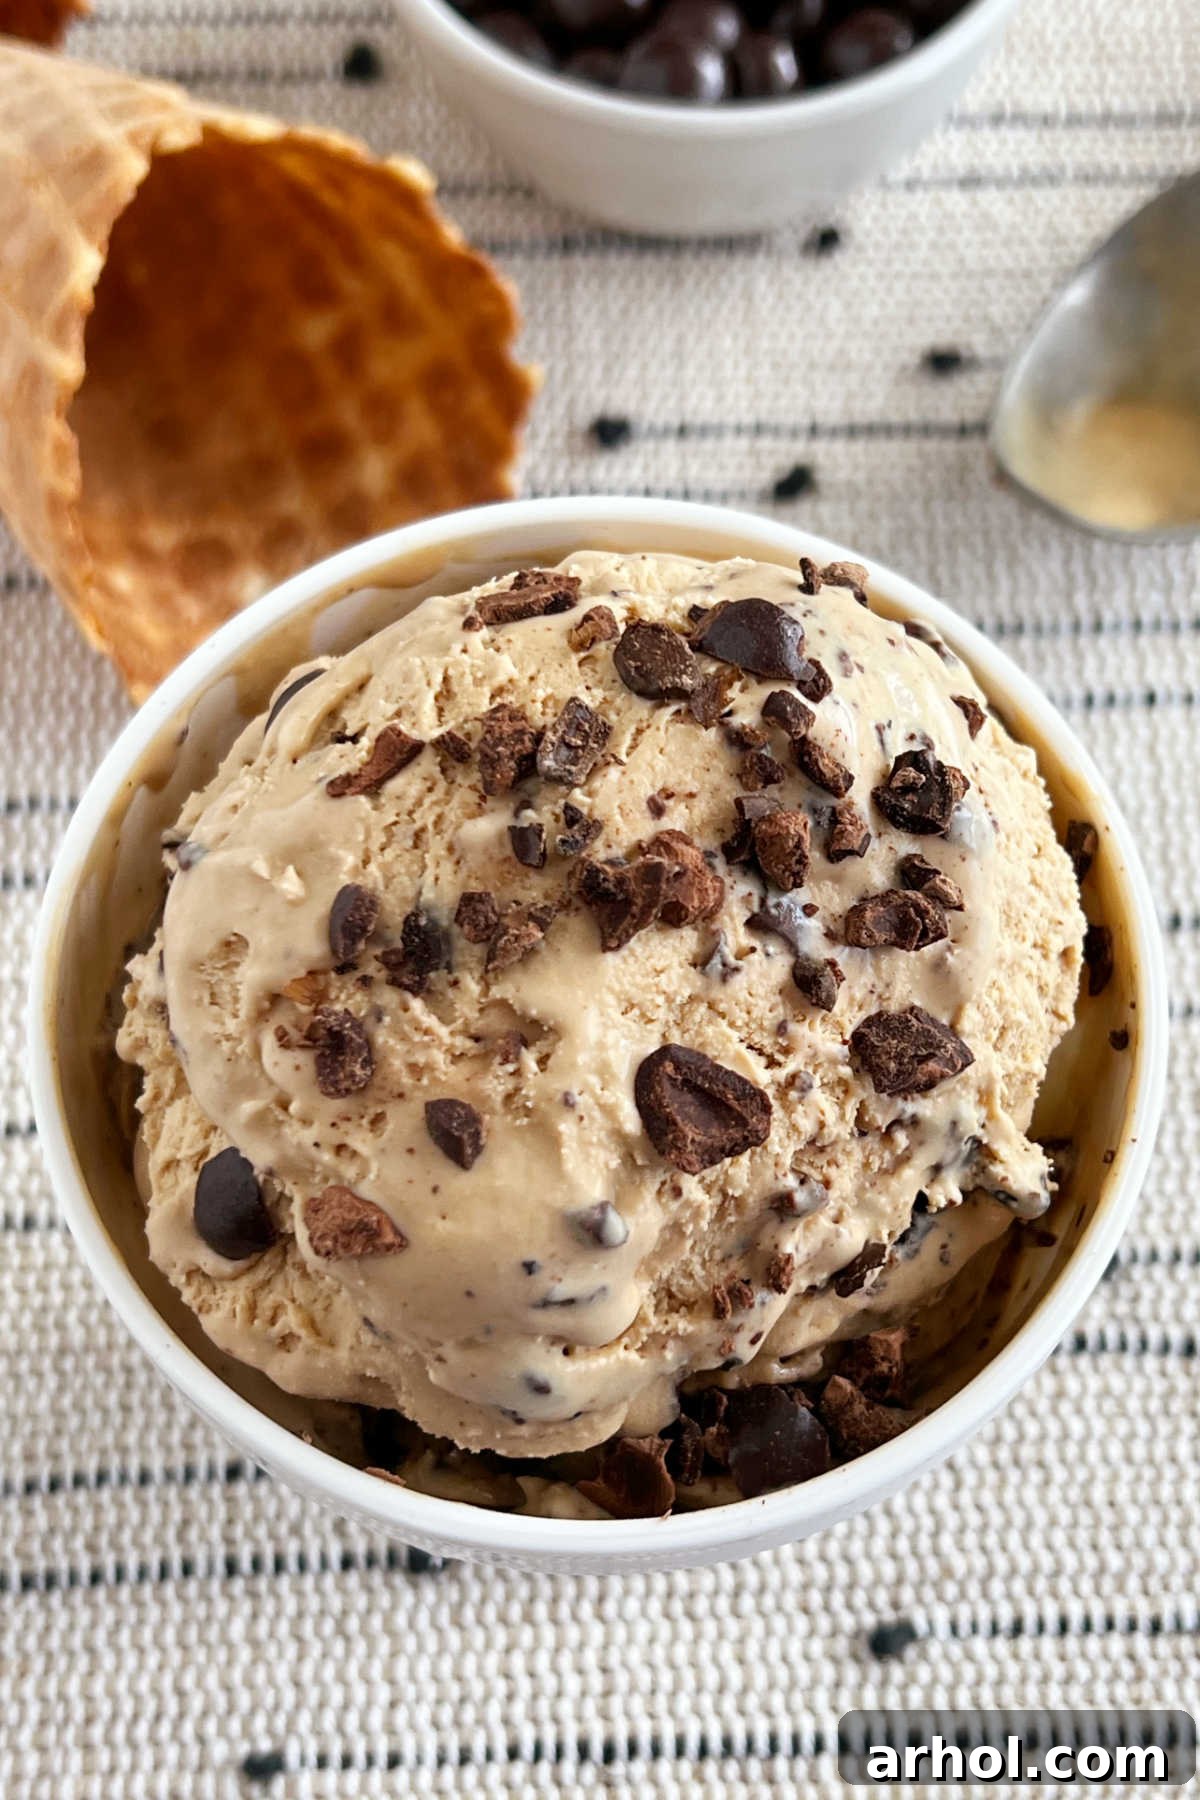
Why Choose No-Churn Ice Cream? The Magic of Simplicity
The concept of “no-churn” ice cream might sound too good to be true, but it’s a culinary marvel that simplifies homemade frozen desserts. The secret lies in a clever combination of just a few key ingredients: heavy whipping cream and sweetened condensed milk. When whipped to perfection, the heavy cream incorporates air, creating a light and fluffy base. Sweetened condensed milk, with its rich sugar content and creamy texture, acts as both the sweetener and the emulsifier, preventing large ice crystals from forming during freezing.
This ingenious method eliminates the need for specialized equipment like traditional ice cream makers, which often require pre-freezing bowls or continuous churning. It also means you don’t have to worry about tempering eggs, a common step in many classic ice cream recipes. For busy home cooks or anyone new to making ice cream, no-churn offers an accessible and foolproof path to creamy, delectable results with minimal fuss.
A Coffee Lover’s Dream Dessert: Perfectly Balanced Flavor
For those who cherish the aroma and taste of freshly brewed coffee, this ice cream is a dream come true. We’ve carefully crafted the recipe to capture the robust, aromatic essence of coffee without overwhelming the palate. The flavor is distinct yet smooth, offering a delightful pick-me-up in a frozen form.
Unlike some coffee-flavored desserts that can taste artificial or overly sweet, this recipe achieves an authentic coffee experience. It’s wonderfully refreshing on a hot day, serving as both a dessert and a cool, invigorating treat. Whether you prefer a subtle hint of coffee or a bolder kick, this recipe is adaptable to your taste, promising a truly satisfying experience for every coffee aficionado.
While this coffee ice cream is perfect on its own, we’ve opted to enhance its luxurious smoothness with a sprinkle of crushed chocolate-covered espresso beans on top. This addition provides a delightful textural contrast and a complementary flavor dimension without altering the creamy consistency of the ice cream itself. It’s a small touch that makes a big difference!
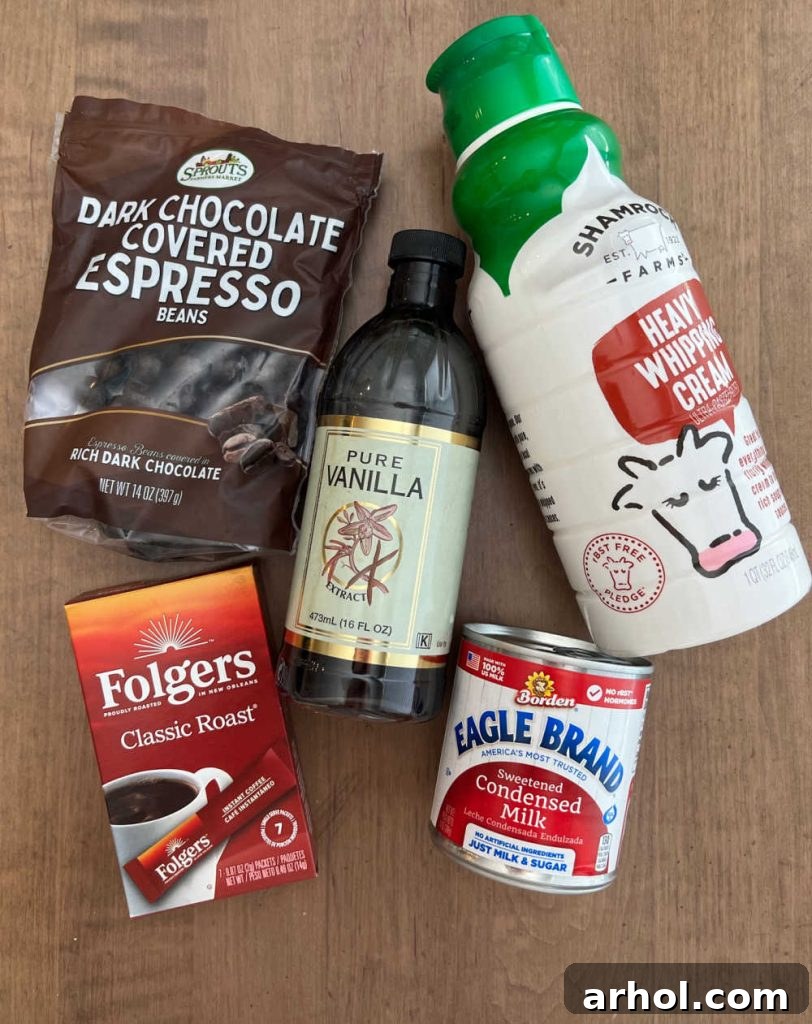
Essential Ingredients for Your No-Churn Coffee Ice Cream
This incredibly simple recipe requires only 5 key ingredients, all easily found at your local grocery store. For precise measurements, please refer to the printable recipe card below.
- Heavy Whipping Cream (Heavy Cream): This is the foundation of your creamy ice cream. It needs to be cold to whip up properly and create the necessary volume and texture. Do not substitute with half-and-half, light cream, or whole milk, as they lack the fat content required for stiff peaks.
- Sweetened Condensed Milk: This ingredient is crucial. It provides sweetness and body, and its unique properties prevent the formation of large ice crystals, ensuring a smooth, scoopable ice cream. Ensure you use *sweetened condensed milk* and not evaporated milk, which is unsweetened and will not yield the same results.
- Instant Coffee Granules (or Espresso Powder): To achieve a rich coffee flavor without watering down your mixture, instant coffee or espresso powder is essential. Brewed coffee contains too much water and will make your ice cream icy. You can use regular or decaffeinated instant coffee, depending on your preference. For an even more intense flavor, high-quality instant espresso powder is an excellent choice.
- Pure Vanilla Extract: A touch of vanilla rounds out the flavors beautifully, adding depth and warmth that complements the coffee. Always opt for pure vanilla extract for the best taste.
- Chocolate-Covered Espresso Beans (Optional Topping): While optional, these provide a fantastic crunch and a lovely bitter-sweet chocolate note that enhances the coffee flavor. Crush them lightly before sprinkling. If you prefer, you can use chocolate chips, a swirl of chocolate sauce, or simply enjoy the ice cream plain for an uninterrupted creamy experience.
Crafting Your Coffee Ice Cream: A Step-by-Step Guide
Making this no-churn coffee ice cream is surprisingly straightforward. Follow these simple steps for perfect results every time:
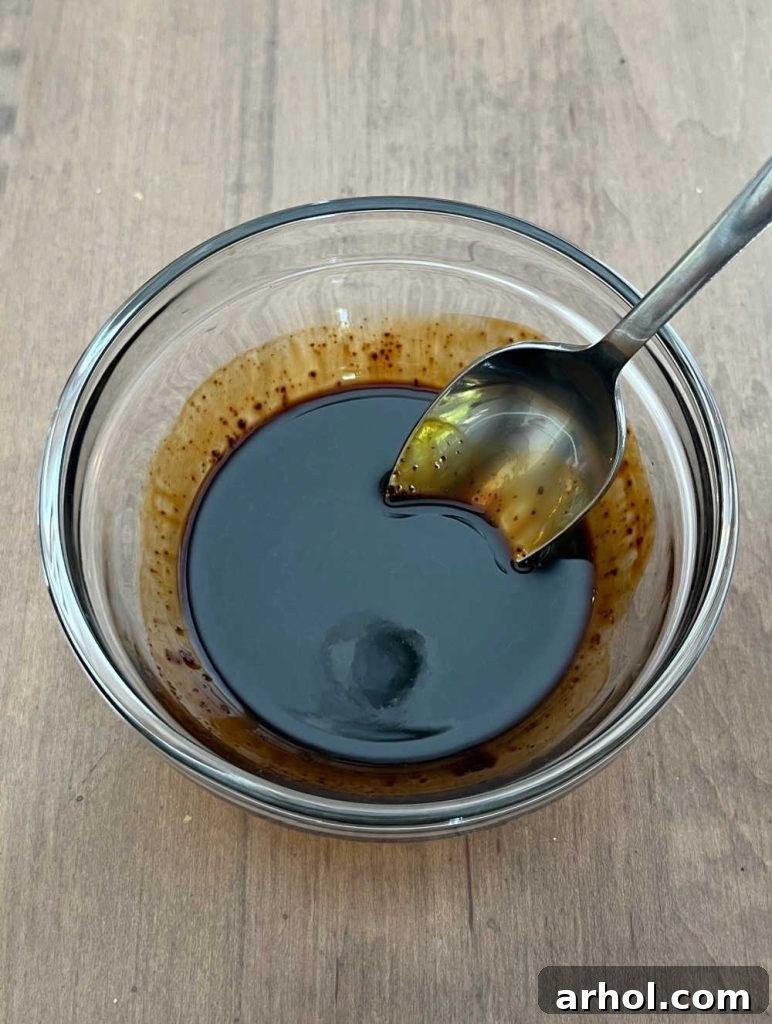
Step 1: Dissolve the Coffee
Begin by adding the instant coffee granules (or espresso powder) to a small bowl. Pour in the vanilla extract. Using a spoon, stir the mixture thoroughly until the coffee crystals are completely dissolved. This step is important to ensure an even distribution of coffee flavor throughout your ice cream and to avoid any grainy texture. The resulting mixture will be quite thick and concentrated.
Step 2: Whip the Cream to Perfection
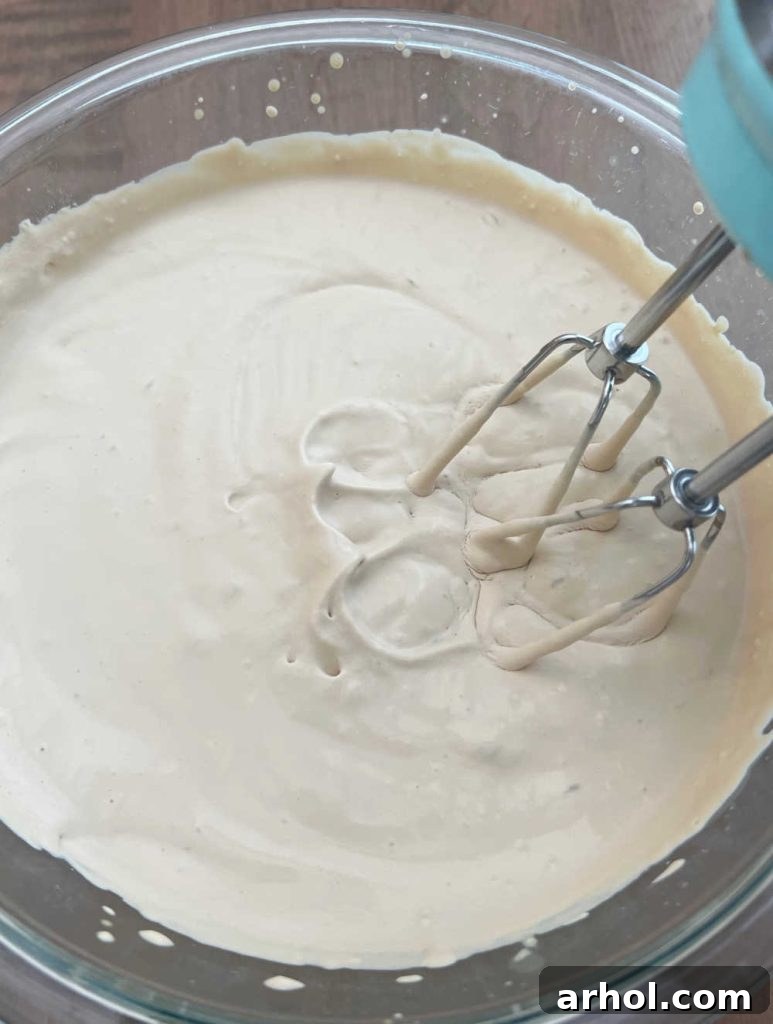
Next, transfer the coffee-vanilla mixture into a large mixing bowl. Add the cold heavy whipping cream to this bowl. Using an electric mixer (either a hand mixer or stand mixer with a whisk attachment), beat the cream on medium-high speed. Continue mixing until stiff peaks begin to form. Stiff peaks mean that when you lift the beaters, the cream stands up firmly without collapsing. Be very careful not to over-mix the cream beyond this point, as it can quickly turn into butter, which will ruin the texture of your ice cream.
Step 3: Gently Fold for Fluffy Texture
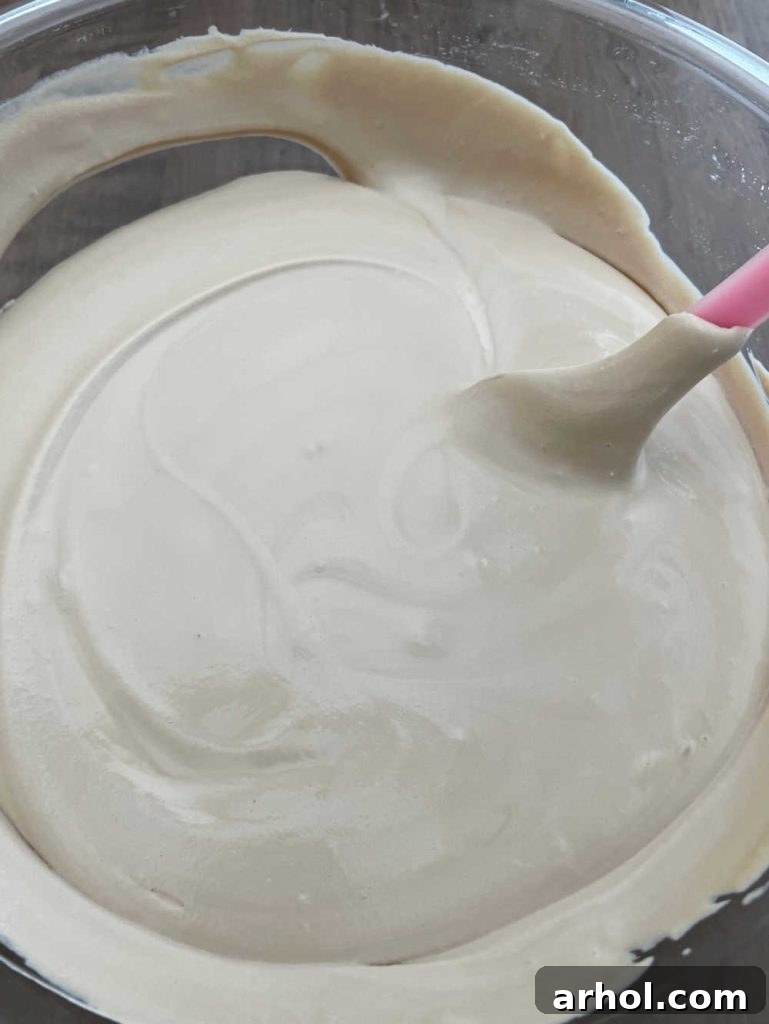
Pour the sweetened condensed milk into a separate large bowl. This is where the magic happens! Carefully, and in several additions, fold the whipped cream mixture into the condensed milk. Use a rubber spatula for this process, employing a gentle ‘cut and fold’ motion. This technique helps to maintain all the air you’ve just incorporated into the heavy cream, which is vital for the light, airy, and creamy texture of your no-churn ice cream. Do not use the electric mixer for this step, as it will deflate the whipped cream and result in a dense, icy texture.
Step 4: Prepare for Freezing
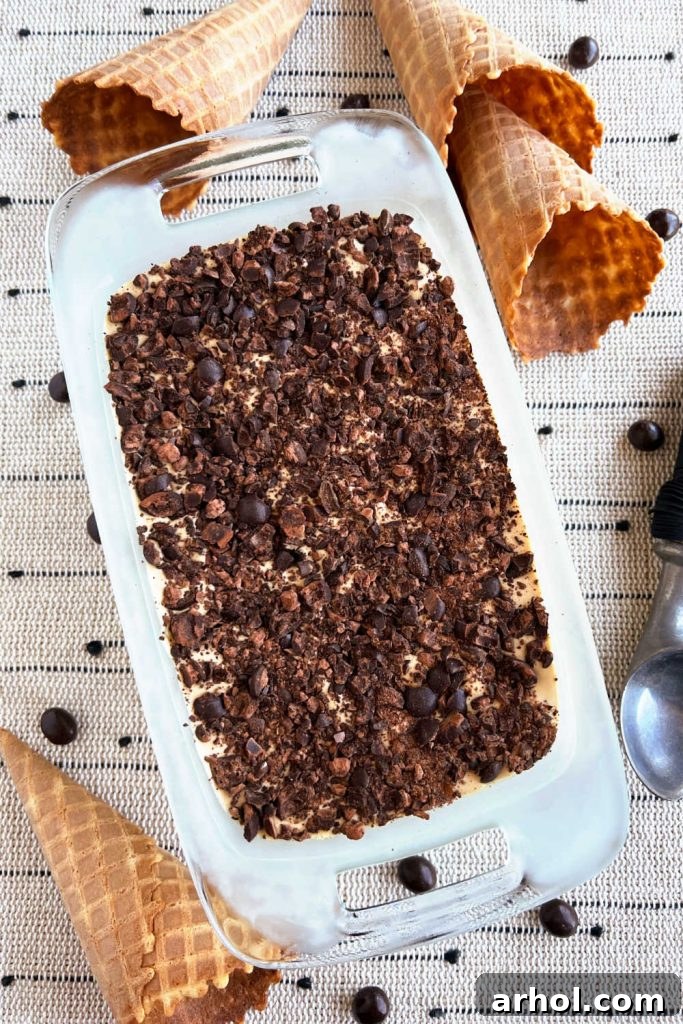
Once the whipped cream and condensed milk are thoroughly combined and no streaks of condensed milk remain, spoon the entire mixture into a loaf pan or any freezer-safe container. Smooth the top evenly with your spatula. If you’re using chocolate-covered espresso beans, sprinkle the crushed pieces generously over the top of the ice cream. This adds a beautiful visual appeal and a delightful crunch. Cover the pan tightly with plastic wrap or an airtight lid before placing it into the freezer.
Freezing for Optimal Creaminess
Patience is key for truly great no-churn ice cream. For the best results, your ice cream mixture needs adequate time to freeze solid and develop its creamy consistency. We recommend freezing the loaf pan for at least 4 hours. However, for an absolutely perfect, scoopable texture and fuller flavor development, freezing overnight (for 8-12 hours) is ideal. Ensure your freezer is set to a cold temperature for efficient freezing.
Storage and Enjoyment
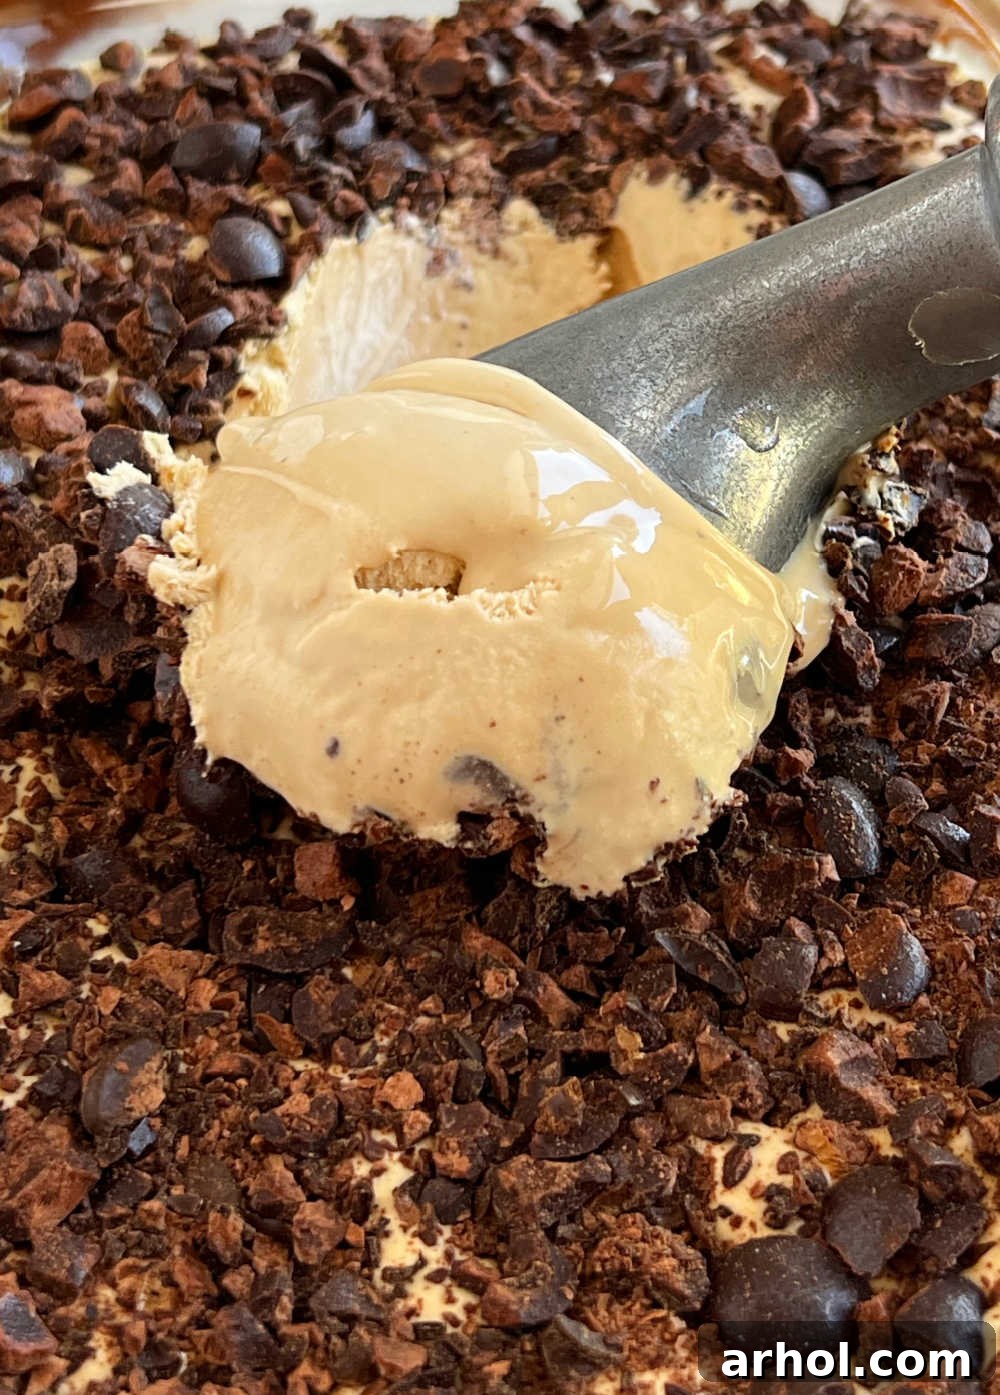
Once your no-churn coffee ice cream is perfectly frozen, keep it stored in the freezer until you’re ready to indulge. For optimal freshness and to prevent freezer burn, transfer any leftover ice cream to an airtight container. If using the loaf pan, ensure it’s tightly covered with plastic wrap, pressing it directly onto the surface of the ice cream to minimize air exposure. Stored properly, your homemade coffee ice cream should retain its delicious flavor and creamy texture for 2-3 months.
Before serving, allow the ice cream to sit at room temperature for 5-10 minutes. This slight softening will make it easier to scoop and enhance its smooth, creamy texture, allowing the flavors to truly shine.
Expert Tips for No-Churn Success
Achieving perfect no-churn ice cream is simple, but a few key tips can ensure the best possible results:
- Plan Ahead: Homemade ice cream requires at least 4 hours to chill and solidify. For truly superior texture, freezing it overnight is even better, so plan your preparation accordingly.
- Use Cold Cream: Always start with very cold heavy whipping cream. Cold cream whips up much faster and achieves stiffer peaks, which are essential for the airy texture of no-churn ice cream.
- The Right Milk Matters: Be absolutely sure to use sweetened condensed milk, not evaporated milk or regular milk. They are not interchangeable for this recipe.
- Heavy vs. Half-and-Half: Look for “heavy whipping cream” or “heavy cream,” which typically has a fat content of 36% or higher. Do not use “half-and-half” or “light cream,” as they lack the necessary fat content to whip properly.
- Fold Gently: When combining the whipped cream with the sweetened condensed milk, gently fold them together using a spatula. Do not use an electric mixer at this stage, as it will deflate the whipped cream and result in an icy, less creamy ice cream.
- Instant is Key: For the richest coffee flavor without watering down your ice cream, use instant coffee granules or instant espresso powder. Brewed coffee adds too much liquid, which can lead to a more icy texture.
- Pre-chill Your Container: For even faster freezing and a slightly smoother texture, you can place your loaf pan or freezer-safe container in the freezer for about 30 minutes before adding the ice cream mixture.
- Cover Tightly: Always cover your ice cream tightly with plastic wrap, pressing it gently onto the surface, or use an airtight lid. This prevents ice crystals from forming on the surface and keeps your ice cream fresh.
Customization Ideas & Flavor Variations
This no-churn coffee ice cream recipe is fantastic on its own, but it also serves as a wonderful base for countless customizations. Get creative and make it your own!
- Chocolate Swirl: Gently swirl in some melted and slightly cooled dark or milk chocolate just before freezing for a beautiful marbled effect and extra chocolatey goodness.
- Mocha Madness: For a mocha twist, whisk 1-2 tablespoons of unsweetened cocoa powder into the instant coffee and vanilla extract mixture.
- Nutty Delight: Fold in chopped walnuts, pecans, or almonds along with the chocolate-covered espresso beans for added texture and flavor.
- Caramel Drizzle: A generous drizzle of salted caramel sauce before serving or swirled into the mixture before freezing can transform this into a caramel-coffee dream.
- Espresso Strength: Adjust the amount of instant coffee or espresso powder to control the intensity of the coffee flavor. Use less for a mild hint, or more for a bold, robust taste.
- Cookie Crumble: Mix in crushed chocolate cookies (like Oreos) or shortbread pieces for another textural dimension.
- Boozy Kick: A splash of coffee liqueur (like Kahlúa) or an Irish cream liqueur can add a sophisticated adult twist. Add it with the condensed milk.
Perfect Serving Suggestions
This versatile coffee ice cream can be enjoyed in so many ways beyond just a scoop in a bowl:
- Classic Scoops: Serve it simply in a bowl or cone, allowing its pure coffee flavor to shine.
- The Ultimate Affogato: Place a scoop (or two!) of coffee ice cream in a small bowl and pour a shot of hot, freshly brewed espresso over it. The contrast of hot and cold, bitter and sweet, is divine.
- Dessert Companion: Pair it with a warm brownie, a slice of apple pie, or a crumbly cookie for an elevated dessert experience.
- Milkshakes: Blend it with milk and a touch more coffee or chocolate syrup for a rich, frosty milkshake.
- Coffee Float: Drop a scoop into a glass of chilled cold brew coffee or even root beer for a surprising twist.
Frequently Asked Questions About No-Churn Coffee Ice Cream
- Can I use decaffeinated instant coffee?
- Absolutely! If you prefer a decaf option, feel free to use decaffeinated instant coffee granules or espresso powder. The flavor will remain just as delicious.
- Why can’t I use brewed coffee?
- Brewed coffee contains a significant amount of water. Adding it directly to the mixture would introduce too much liquid, resulting in an icy, rather than creamy, texture. Instant coffee or espresso powder provides concentrated flavor without the extra water.
- How long does homemade no-churn ice cream last?
- When stored in an airtight container in the freezer, your no-churn coffee ice cream can stay fresh and delicious for up to 2-3 months.
- What kind of pan should I use?
- A standard 9×5 inch (23×13 cm) loaf pan is perfect for this recipe. Any similar freezer-safe container with a capacity of about 8-9 cups will also work well.
- My ice cream isn’t firm enough, what went wrong?
- The most common reasons for soft ice cream are not whipping the heavy cream to stiff peaks, or not freezing for long enough. Ensure your cream is very cold and beaten until firm, and give it at least 4 hours (preferably overnight) in a cold freezer.
More Decadent No-Churn Desserts You’ll Love
If you enjoyed this easy coffee ice cream, you’ll love exploring other simple, homemade ice cream creations:
- Creamy Biscoff Cookie Butter Ice Cream
- Refreshing Strawberry Ice Cream
- Rich Chocolate Peanut Butter Ice Cream
- Classic Oreo Ice Cream
- Fun Halloween Ice Cream
- Indulgent S’mores Ice Cream
- Sweet Cherry Vanilla Ice Cream
- Simple Vanilla Ice Cream
And for more easy dessert inspiration, explore our full collection of easy desserts.
The Best No-Churn Coffee Ice Cream Recipe

This No-Churn Coffee Ice Cream Recipe makes the BEST homemade coffee ice cream without a machine and no eggs. The perfect dessert for coffee lovers!
Rating: 5 out of 5 stars from 9 votes
By: Dee
- Prep Time:
- 15 minutes
- Freeze Time:
- 4 hours
- Total Time:
- 4 hours 15 minutes
- Servings:
- 10 servings
Ingredients
- 1 ½ tablespoons instant coffee granules (or instant espresso powder)
- 1 ½ tablespoons pure vanilla extract
- 2 cups heavy whipping cream (heavy cream), very cold
- 1 14-ounce can sweetened condensed milk
- ½ cup chocolate covered espresso beans, crushed (optional, for topping)
Instructions
- In a small bowl, add the instant coffee granules and vanilla extract. Mix with a spoon until the coffee crystals are completely dissolved, forming a thick paste.
- Pour the cold heavy whipping cream into a large mixing bowl. Add the dissolved coffee mixture. Using an electric mixer, beat on medium-high speed until stiff peaks form. Be careful not to over-mix.
- In a separate large bowl, pour the sweetened condensed milk.
- Gently and carefully fold the whipped cream mixture into the sweetened condensed milk using a rubber spatula until well combined. Avoid using the electric mixer at this stage to maintain the airy texture.
- Pour the milk mixture into a 9×5 inch loaf pan or another freezer-safe container. Spread it evenly.
- If desired, sprinkle the crushed chocolate-covered espresso beans over the top of the ice cream mixture.
- Cover the pan tightly with plastic wrap or a lid and place it in the freezer for at least 4-6 hours, or preferably overnight, until solid.
- Allow to soften at room temperature for 5-10 minutes before scooping and serving.
Notes
- For the creamiest results, allow the ice cream to freeze for at least 4 hours, or ideally overnight.
- Always use sweetened condensed milk, not evaporated milk, for this recipe.
- Ensure you use heavy whipping cream (or heavy cream), not half-and-half, as the fat content is crucial.
- Fold the whipped cream into the condensed milk gently by hand; do not use an electric mixer for this step.
- Feel free to substitute chocolate chips for the espresso beans, or omit toppings entirely for a pure coffee flavor.
- Instant coffee or espresso powder provides a concentrated coffee flavor without adding excess liquid, which can lead to icy ice cream.
Nutrition
Approximate nutritional values per serving (based on 10 servings):
- Calories: 353 kcal
- Carbohydrates: 30g
- Protein: 5g
- Fat: 23g
- Saturated Fat: 15g
- Polyunsaturated Fat: 1g
- Monounsaturated Fat: 5g
- Cholesterol: 69mg
- Sodium: 69mg
- Potassium: 261mg
- Fiber: 1g
- Sugar: 28g
- Vitamin A: 813 IU
- Vitamin C: 1mg
- Calcium: 162mg
- Iron: 0.4mg
Nutrition information is automatically calculated and should only be used as an approximation.
Additional Info
- Course:
- Dessert
- Cuisine:
- American
Enjoyed this recipe? Share your thoughts!
If you try this easy no-churn coffee ice cream, please consider leaving a star rating and a comment below. Your feedback helps us and other readers!
For more simple, delicious homemade ice cream recipes and other culinary delights, sign up for our weekly newsletter and follow us on social media. Happy churning (or rather, no-churning)!