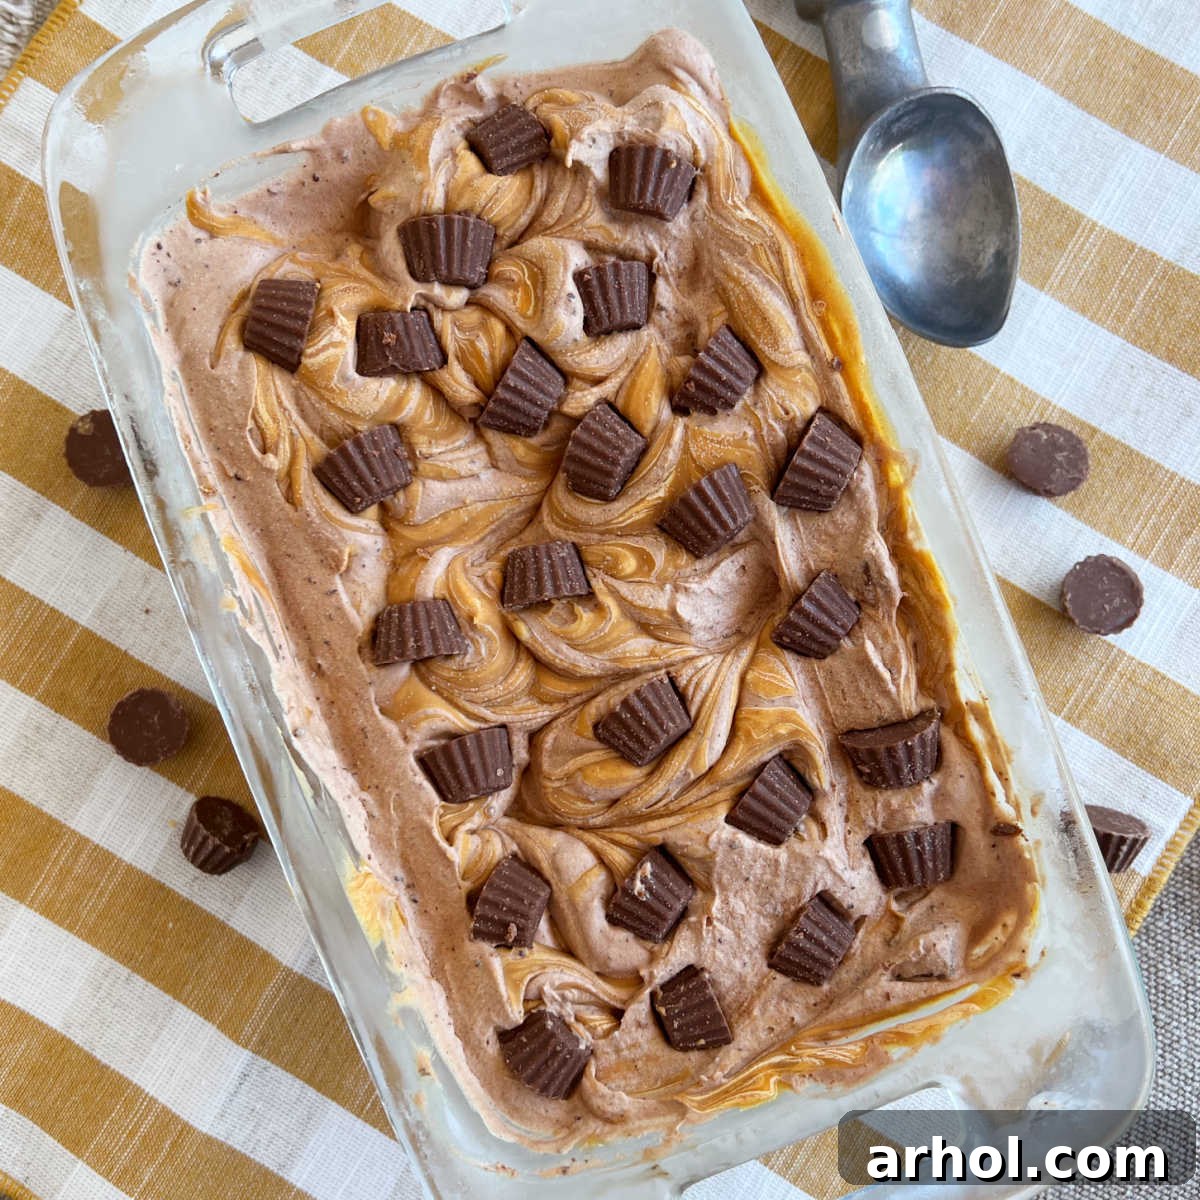
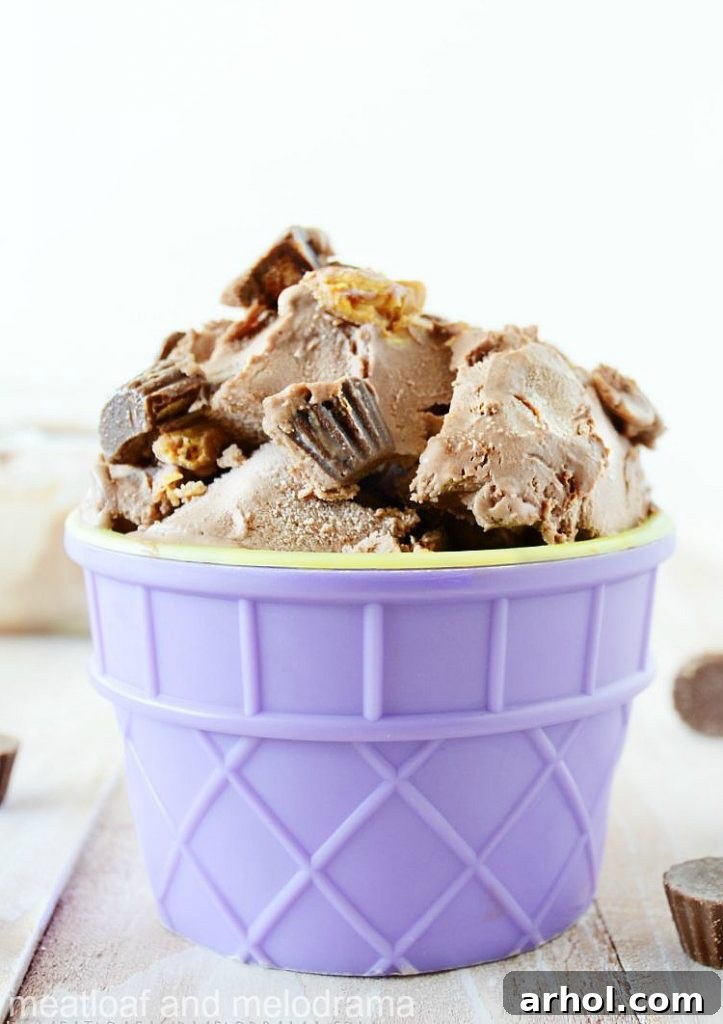
Prepare to delight your taste buds with this sensational no-churn chocolate peanut butter ice cream recipe. It features an incredibly creamy chocolate base, generously swirled with rich peanut butter and dotted with delightful mini peanut butter candies. This homemade ice cream is truly a dream come true for any peanut butter aficionado, offering a luxurious treat without the need for an ice cream machine.
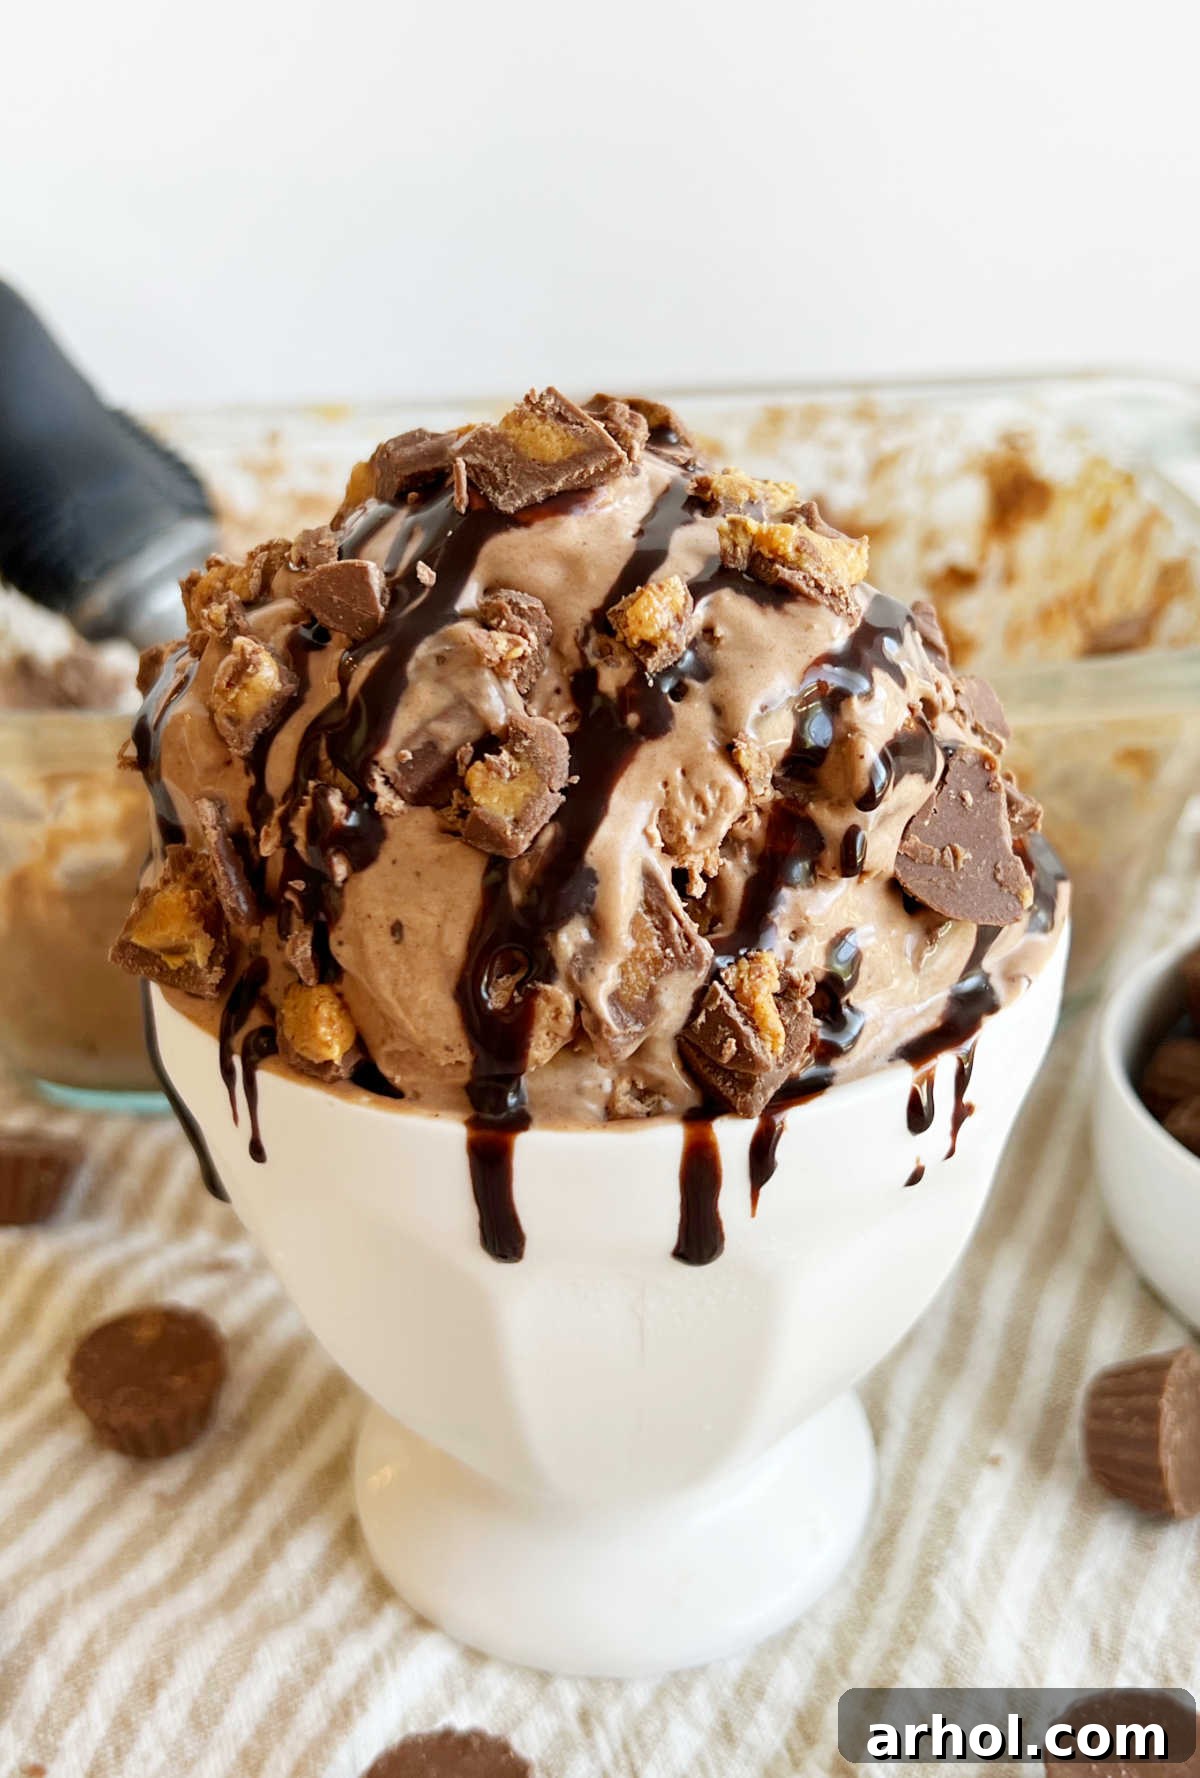
The Ultimate No-Churn Chocolate Peanut Butter Ice Cream
If the classic combination of chocolate and peanut butter sends your senses soaring, then you are about to fall in love with this incredibly easy recipe for no-churn chocolate peanut butter ice cream. Imagine a dessert that delivers rich, creamy flavor without any eggs, cooking, or specialized ice cream machine. Yes, it’s entirely possible, and it’s surprisingly simple to create in your own kitchen!
This effortless ice cream recipe starts with a silky, homemade chocolate ice cream base. Into this luxurious foundation, we artfully weave generous swirls of creamy peanut butter and fold in delightful mini chocolate peanut butter candies. Each spoonful is like biting into a frozen peanut butter cup, making it an absolute favorite, especially among the younger members of the family (and plenty of adults too!). For all the devoted peanut butter lovers out there, this easy dessert is specifically crafted with you in mind.
Should you develop a taste for simple, homemade ice cream creations, be sure to explore some of our other popular no-churn recipes. You might enjoy our refreshing strawberry ice cream, the invigorating coffee ice cream, the beloved homemade Oreo ice cream, or even our festive Halloween version. For classic tastes, our vanilla ice cream is always a hit, and for unique flavors, don’t miss the chocolate s’mores ice cream and the delightful cherry vanilla ice cream. Each offers a unique, satisfying experience, proving that homemade ice cream is always a fantastic idea.
Table of Contents
- The Ultimate No-Churn Chocolate Peanut Butter Ice Cream
- Why Choose No-Churn Ice Cream?
- The Irresistible Allure of Chocolate Peanut Butter
- Essential Ingredients for Your Homemade Treat
- Crafting Your No-Churn Chocolate Peanut Butter Ice Cream: A Simple Guide
- Optimal Storage for Lasting Freshness
- Creative Variations to Customize Your Ice Cream
- Pro Tips for the Perfect Batch Every Time
- Delightful Ways to Serve Your Homemade Ice Cream
- Chocolate Peanut Butter Ice Cream Recipe Card
Why Choose No-Churn Ice Cream?
The beauty of no-churn ice cream lies in its remarkable simplicity and accessibility. You don’t need a bulky, expensive ice cream maker taking up precious cabinet space. This method relies on just a few key ingredients and a stand mixer or hand mixer, making delicious homemade ice cream achievable for anyone, regardless of their kitchen equipment. It’s an ideal solution for those spontaneous dessert cravings or when you want to impress guests with a homemade treat without all the fuss. The resulting texture is surprisingly creamy and rich, rivaling traditional churned varieties, proving that sometimes, less is truly more when it comes to dessert.
The Irresistible Allure of Chocolate Peanut Butter
The marriage of chocolate and peanut butter is a culinary match made in heaven, a duo that consistently ranks as one of the most beloved flavor combinations worldwide. The intense, slightly bitter notes of chocolate perfectly complement the rich, salty, and nutty profile of peanut butter. This contrast creates a harmonious balance of sweet and savory that is utterly addictive. From candy bars to cookies and now to luxurious no-churn ice cream, this iconic pairing satisfies a deep-seated craving for comfort and indulgence. It evokes nostalgia for childhood treats while delivering a sophisticated flavor experience that appeals to all ages.
Essential Ingredients for Your Homemade Treat
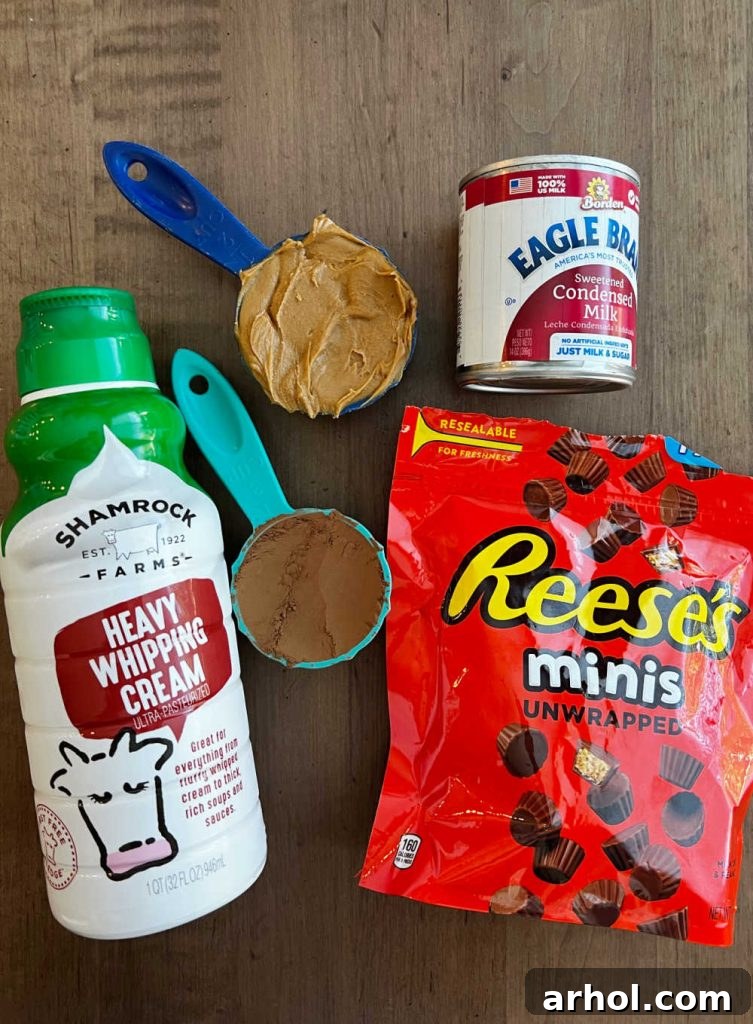
Crafting this delectable ice cream requires a handful of simple, readily available ingredients. Here’s a detailed look at what you’ll need and why each component is crucial for achieving that perfect creamy texture and rich flavor. You’ll find the precise measurements in the printable recipe card further down the page.
- Heavy Whipping Cream: This is the foundation of our no-churn ice cream. When whipped, it incorporates air, creating a light, airy base that becomes incredibly creamy when frozen. Ensure you use heavy whipping cream (often simply labeled as heavy cream) which has a high fat content (typically 36% or more). Avoid using lighter alternatives like half-and-half or whole milk, as they lack the necessary fat to create the desired thick, stable whipped texture for no-churn success.
- Sweetened Condensed Milk: This magical ingredient is key to both the sweetness and the incredibly smooth texture of no-churn ice cream. It’s milk that has been heated to remove most of its water content, then sweetened. It prevents ice crystals from forming, ensuring your ice cream remains wonderfully scoopable. Be very careful not to confuse it with evaporated milk, which is unsweetened and will not yield the same results. Double-check the label!
- Unsweetened Cocoa Powder: To achieve that deep, rich chocolate flavor, unsweetened cocoa powder is essential. You can opt for either regular cocoa powder or Dutch-processed cocoa powder. Dutch-processed cocoa powder is treated with an alkali to reduce its acidity, resulting in a darker color and a smoother, less bitter chocolate flavor. Either will work beautifully, so use whichever you have on hand or prefer.
- Creamy Peanut Butter: The star of the show! We highly recommend using creamy peanut butter for the smoothest swirls and a consistent texture throughout the ice cream. While some prefer natural peanut butter, its oil separation can sometimes affect the final consistency of no-churn ice cream, so a classic processed creamy peanut butter often yields the best results for this particular recipe.
- Reese’s Peanut Butter Cups (Mini): These iconic candies are the perfect mix-in, adding bursts of chocolate and peanut butter flavor and a delightful textural contrast. The mini Reese’s are ideal as they require minimal chopping. However, feel free to get creative! You can use larger Reese’s cups cut into smaller pieces, other chocolate peanut butter candies, plain chocolate chips, or even chopped nuts for a different crunch. If you prefer, you can omit the candy entirely for a simpler, yet still delicious, chocolate peanut butter ice cream.
Crafting Your No-Churn Chocolate Peanut Butter Ice Cream: A Simple Guide
Creating this decadent dessert is surprisingly straightforward. Follow these steps carefully to ensure a perfectly creamy and delicious result every time.
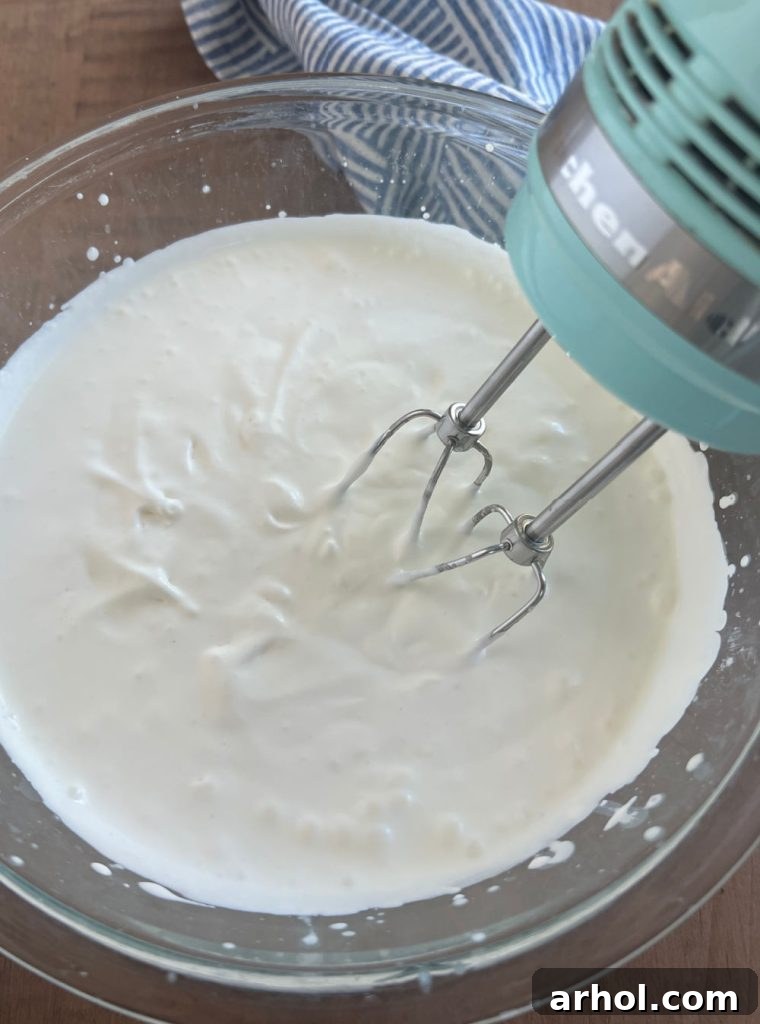
First, begin by preparing your heavy whipping cream. For the best results when whipping cream, place your mixing bowl and whisk attachment (if using a stand mixer) in the refrigerator or freezer for about 10-15 minutes beforehand. This chilling process helps the cream whip up faster and achieve stiffer peaks. Once chilled, pour the heavy cream into the bowl. Using an electric hand mixer or a stand mixer with the whisk attachment, beat the cream on medium-high speed until firm, stiff peaks form. These peaks should hold their shape when the whisk is lifted. Immediately transfer the whipped cream to the refrigerator to keep it cold and stable while you prepare the other components.
In a separate, microwave-safe bowl, measure out your creamy peanut butter. Microwave the peanut butter in short bursts, typically 15-30 seconds, stirring well after each interval, until it becomes a thick, pourable liquid. Be careful not to overheat it, as it can burn easily. Set the melted peanut butter aside at room temperature to cool slightly. In another large mixing bowl, combine the sweetened condensed milk and the unsweetened cocoa powder. Add about half of your cooled, melted peanut butter to this mixture. Whisk these ingredients together thoroughly until they are fully incorporated and the mixture is smooth, even, and free of any cocoa powder lumps.
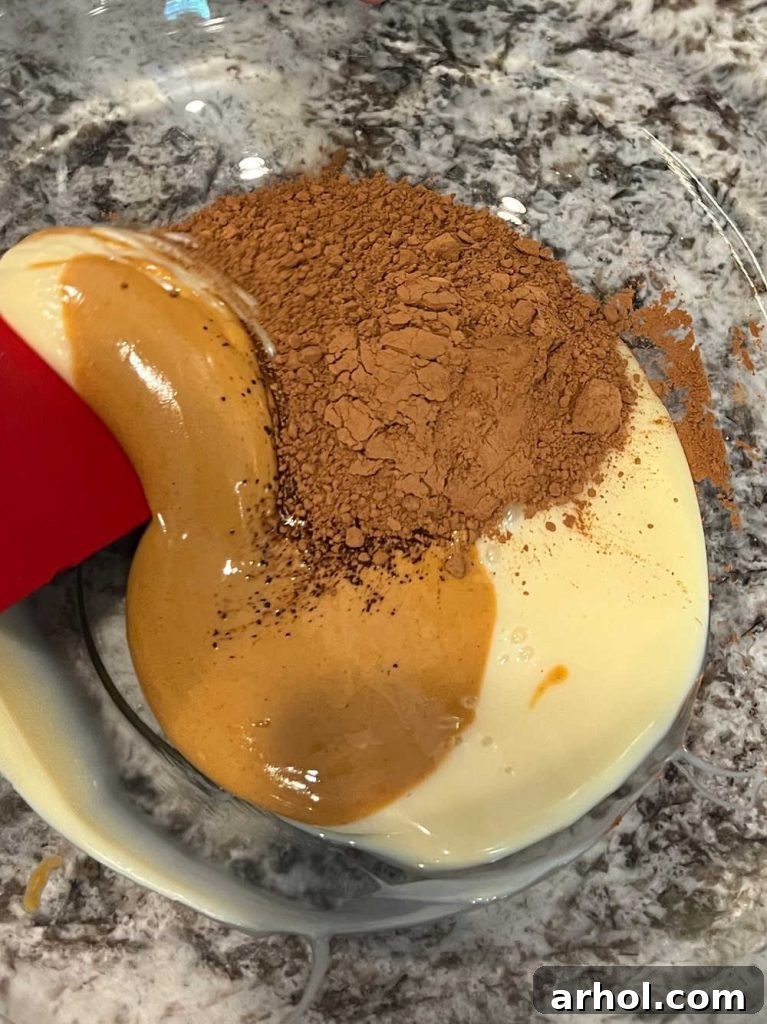
Now comes the delicate folding step. Retrieve your chilled whipped cream from the refrigerator. Gently fold the whipped cream into the peanut butter and milk mixture. This process requires a light touch to maintain the airiness of the whipped cream, which is crucial for the light, creamy texture of your ice cream. Use a spatula and fold carefully from the bottom up, rather than stirring vigorously. It may take a few minutes for the two mixtures to fully combine into a uniform, smooth batter. Resist the urge to use your electric mixer for this step, as it will deflate the whipped cream and result in a less airy ice cream. Once combined, gently fold in most of your chopped mini peanut butter cups, reserving a few for garnish.
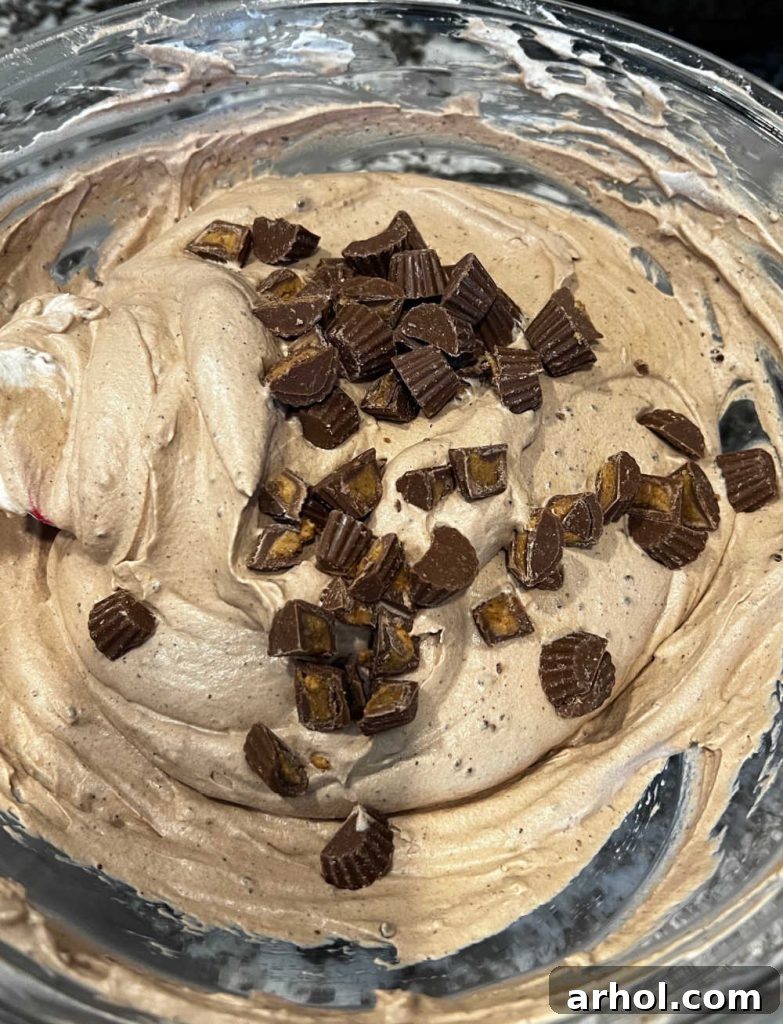
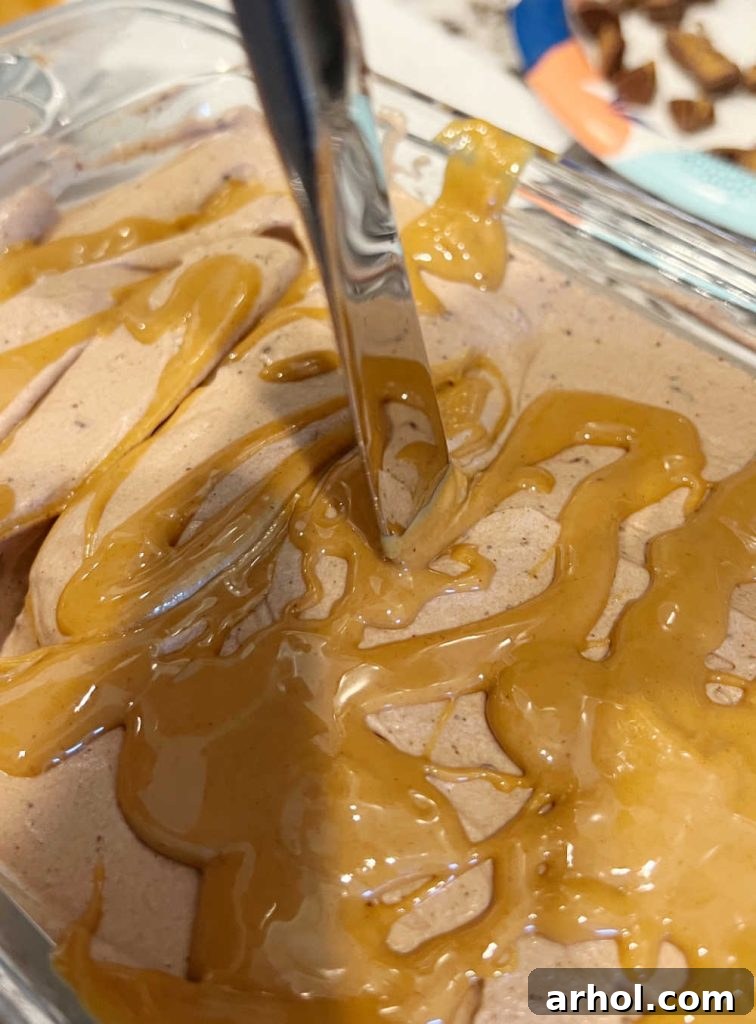
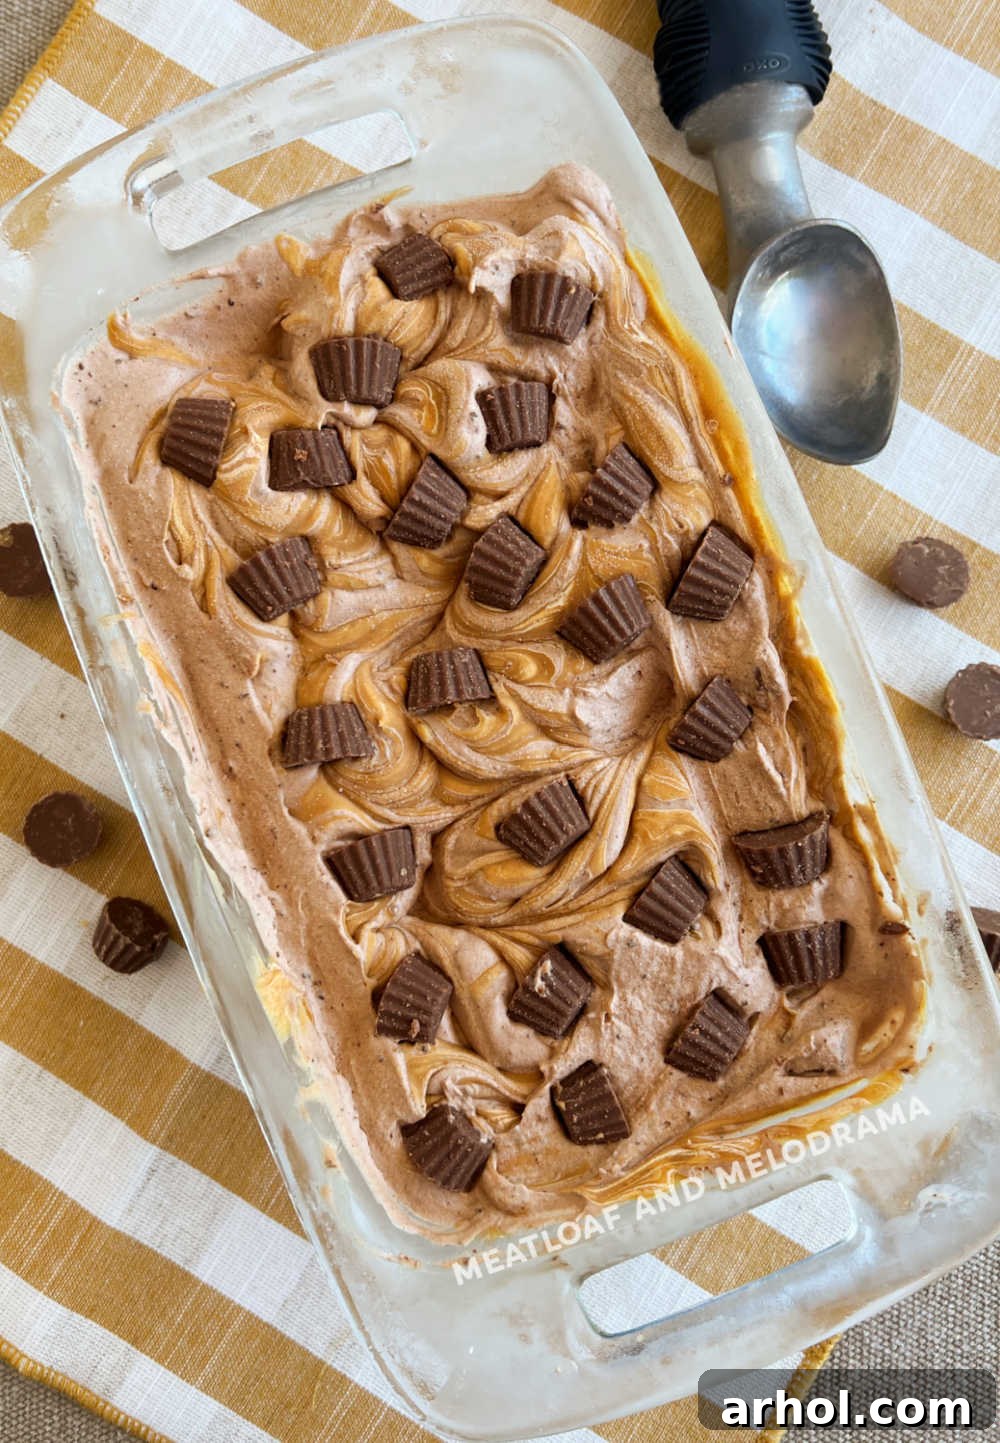
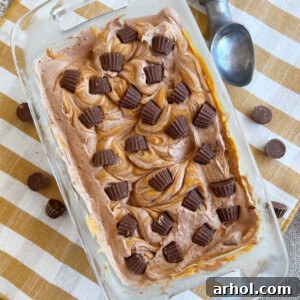
Next, carefully pour the ice cream mixture into a freezer-safe container. A standard loaf pan (approximately 9×5 inches) works perfectly for no-churn ice cream, but a shallow casserole dish or another small, freezer-safe container will also suffice. Spread the mixture evenly across the pan. Now, take the remaining melted peanut butter and drizzle it generously over the top of the ice cream mixture. Using a knife or a skewer, gently swirl the peanut butter into the creamy chocolate base. Create beautiful ribbons and pockets of peanut butter throughout the ice cream, being careful not to overmix. Finally, sprinkle the reserved mini peanut butter candies over the top for a delightful visual appeal and extra crunch. Place the container into the freezer.
Optimal Storage for Lasting Freshness
For your no-churn chocolate peanut butter ice cream to achieve its perfect scoopable consistency and robust flavor, it needs ample time to freeze. A minimum of 4 hours is required, but for the very best results and a truly firm set, allowing it to freeze overnight (for at least 8-12 hours) is highly recommended. Plan your preparation accordingly to ensure sufficient freezing time. Once fully frozen, store the ice cream in an airtight container to prevent freezer burn and maintain its creamy texture. If using a loaf pan, ensure it’s tightly covered with plastic wrap, then foil. Properly stored, this delightful homemade ice cream will keep beautifully in the freezer for 2 to 3 months, ready to be enjoyed whenever a craving strikes.
Creative Variations to Customize Your Ice Cream
This chocolate peanut butter ice cream recipe is fantastic as is, but it also offers plenty of room for creative customization. Feel free to experiment with these variations to tailor it to your preferences or whatever ingredients you have on hand:
- Candy Alternatives: If you can’t find mini Reese’s peanut butter cups, simply purchase the standard-sized cups and chop them into smaller, bite-sized pieces. Alternatively, you can use Reese’s Pieces for a different candy crunch and color, or any generic brand of chocolate peanut butter candy. For a less peanut butter-centric crunch, consider adding chopped chocolate-covered pretzels or mini chocolate chips.
- Peanut Butter Chunks: Instead of swirling the melted peanut butter, create delightful peanut butter chunks! Spoon small dollops of peanut butter onto a parchment-lined baking sheet and freeze them until solid. Once frozen, stir these chunks directly into the ice cream mixture before freezing. This creates surprising pockets of solid peanut butter goodness.
- Texture Play: While creamy peanut butter is recommended for the smoothest swirl, you can absolutely use chunky peanut butter for an added textural dimension. The small pieces of peanuts will provide a satisfying crunch within the creamy ice cream.
- Nutty Additions: Enhance the nutty flavor by folding in a handful of chopped roasted peanuts, cashews, or even candied pecans.
- Extra Chocolate: For true chocoholics, stir in a generous amount of mini chocolate chips, chocolate chunks, or even a swirl of hot fudge sauce along with the peanut butter.
- Flavor Boost: A dash of vanilla extract or a pinch of sea salt in the chocolate base can elevate the flavors even further, balancing the sweetness and intensifying the chocolate notes.
Pro Tips for the Perfect Batch Every Time
Achieving outstanding no-churn ice cream is easy with a few expert tips:
- Mise en Place: Always measure and prepare all your ingredients before you begin mixing. This “mise en place” approach ensures the process flows smoothly and you won’t be scrambling for ingredients mid-recipe.
- Chilled Equipment for Whipped Cream: For the best and quickest results when making whipped cream, use a mixing bowl and whisk attachment that have been chilled in the refrigerator or freezer for at least 15 minutes. Cold equipment helps the cream whip up faster and hold its stiff peaks more effectively.
- Keep Whipped Cream Cold: Once your heavy cream is whipped to stiff peaks, immediately place the bowl back into the refrigerator. This prevents it from deflating while you prepare the peanut butter and condensed milk mixture.
- Gentle Folding is Key: When combining the whipped cream with the peanut butter mixture, use a gentle folding motion with a spatula. Do not use your electric mixer for this step! The mixer will quickly deflate the airy whipped cream, resulting in a dense, icy ice cream rather than a light, creamy one. Fold slowly from the bottom up until just combined.
- Don’t Overmix Peanut Butter Swirl: When swirling the melted peanut butter into the ice cream base, use a light touch. You want distinct ribbons and pockets of peanut butter, not a fully integrated mixture. Over-swirling will cause the peanut butter to disappear into the chocolate.
- Patience is a Virtue: The freezing time is crucial. While 4 hours is a minimum, allowing the ice cream to freeze overnight (8-12 hours) will yield the firmest, most satisfyingly scoopable texture. Resist the urge to check it too early!
- Quality Ingredients Matter: While this recipe is simple, using good quality heavy cream, sweetened condensed milk, and your favorite creamy peanut butter will significantly impact the final flavor and texture.
Delightful Ways to Serve Your Homemade Ice Cream
Once your no-churn chocolate peanut butter ice cream is perfectly frozen, the serving possibilities are endless! Enjoy it simply scooped into a bowl or cone to truly savor its rich flavors and creamy texture. For an extra touch of indulgence, drizzle with warm chocolate fudge, a spoonful of extra melted peanut butter, or a dollop of fresh whipped cream. A sprinkle of chopped roasted peanuts, mini chocolate chips, or even colorful sprinkles can add visual appeal and a delightful crunch. This ice cream also makes a fantastic accompaniment to brownies, blondies, or a warm slice of apple pie, elevating any dessert experience.
Print Recipe
Chocolate Peanut Butter Ice Cream
This no-churn chocolate peanut butter ice cream recipe features a creamy chocolate base with luscious peanut butter swirls and irresistible mini peanut butter candies. It’s the quintessential homemade ice cream for any peanut butter enthusiast!
Ingredients
- 2 cups heavy whipping cream
- 1 14- oz can sweetened condensed milk
- ½ cup creamy peanut butter
- ⅓ cup unsweetened cocoa powder
- 1 cup mini chocolate peanut butter candies, halved and quartered
Instructions
- In a chilled mixing bowl, whisk the heavy cream until stiff peaks form. Place in refrigerator.
- In a separate bowl, heat the peanut butter in the microwave until it turns to a thick liquid, and allow to cool slightly.
- In another bowl, whisk half the peanut butter with the cocoa powder and condensed milk until fully incorporated.
- Gently fold the chilled whipped cream into the peanut butter mixture, then fold in most of the chopped mini peanut butter cups.
- Pour mixture into a loaf pan or freezer-safe container, and spread evenly throughout pan.
- Drizzle remaining peanut butter on top, and swirl into the mixture with a knife.
- Add the remaining peanut butter cups on top. Freeze for at least 4 hours, or preferably overnight, until firm.
Notes
Ice cream needs at least 4 hours to chill. Overnight is even better for optimal texture.
Be sure to use sweetened condensed milk and not evaporated milk – they are not interchangeable.
Look for heavy whipping cream or heavy cream, not half-and-half or light cream.
Gently fold the whipped cream into the milk mixture; avoid using the mixer for this step to maintain airiness.
Nutrition
Calories: 382kcal, Carbohydrates: 29g, Protein: 8g, Fat: 28g, Saturated Fat: 15g, Polyunsaturated Fat: 2g, Monounsaturated Fat: 9g, Cholesterol: 68mg, Sodium: 123mg, Potassium: 319mg, Fiber: 2g, Sugar: 26g, Vitamin A: 813IU, Vitamin C: 1mg, Calcium: 162mg, Iron: 1mg
Nutrition information is automatically calculated and should only be used as an approximation.
Additional Info
For more delightful summer desserts and easy recipes that anyone can master, sign up for our weekly newsletter and follow us on social media. You’ll receive fresh ideas and tips directly to your inbox, ensuring your dessert game is always on point!