
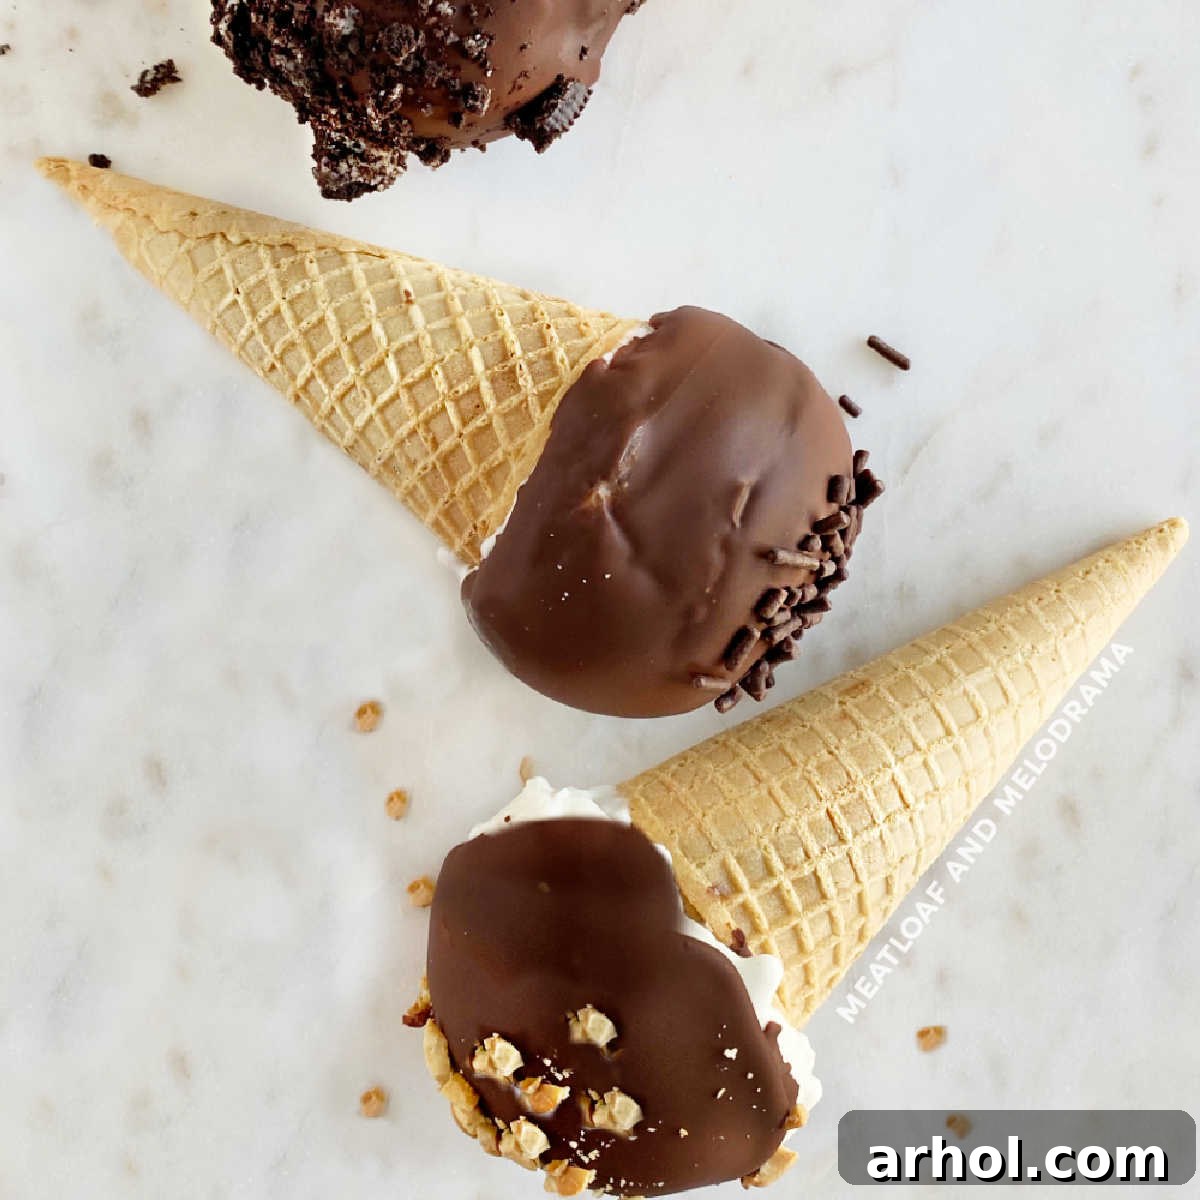
Homemade Drumstick Ice Cream Cones: The Ultimate DIY Summer Treat
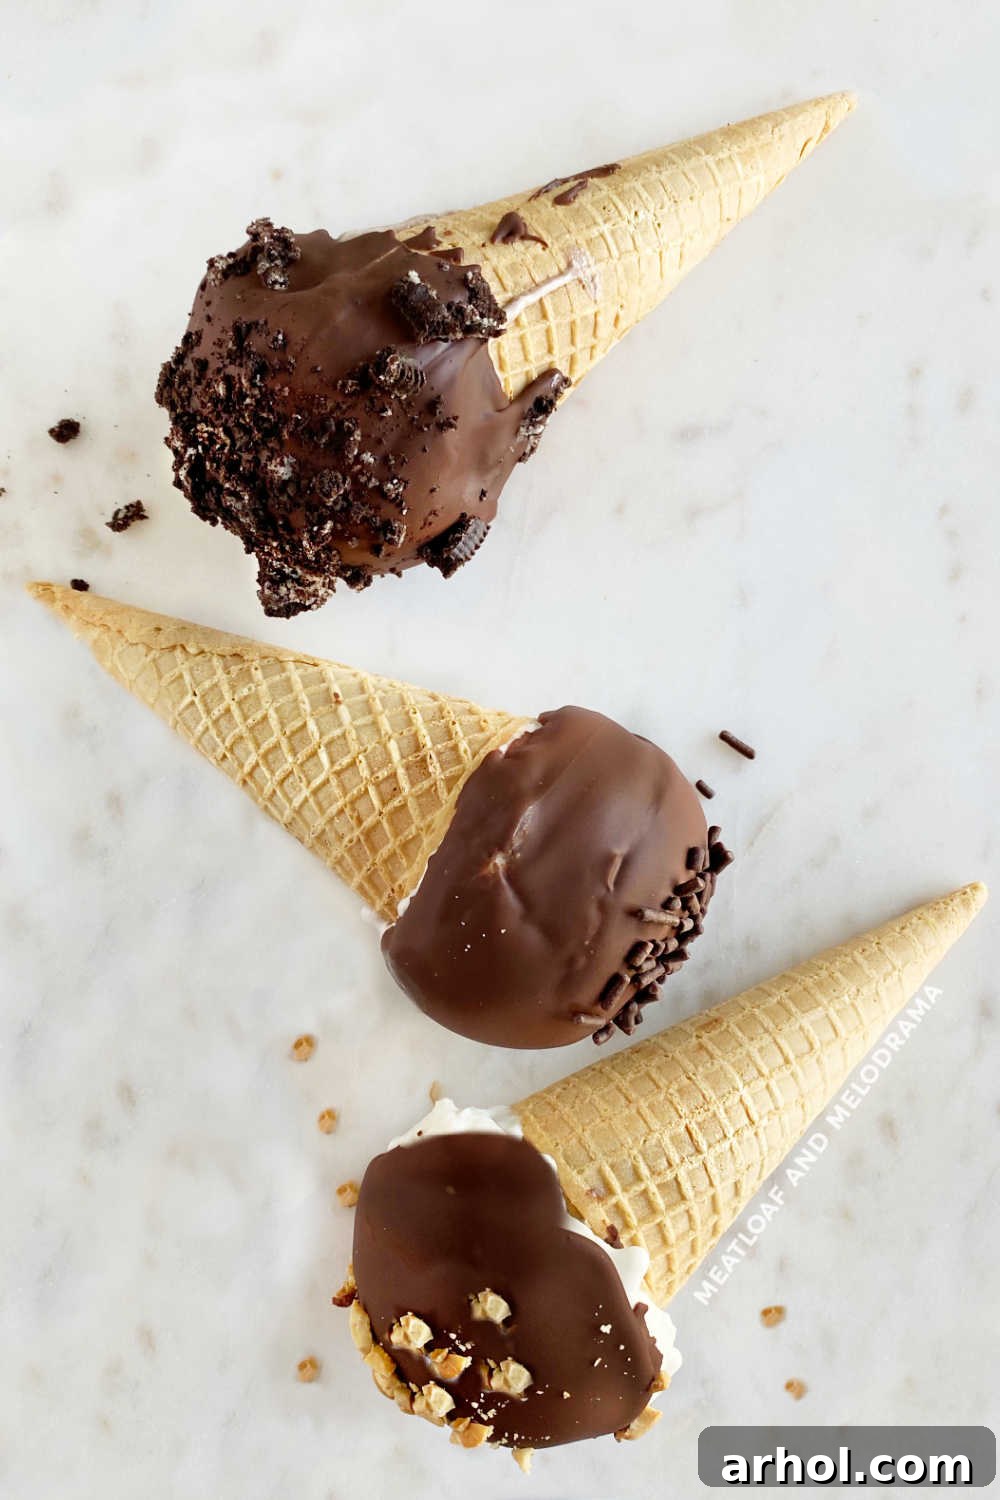
Imagine biting into a perfectly crispy waffle cone, lined with a generous layer of rich chocolate, overflowing with your favorite creamy ice cream, and crowned with a delightful, snappy chocolate shell. Forget those store-bought versions – creating your own homemade Drumstick ice cream cones is not just a delicious endeavor, it’s a fun-filled family activity that results in a superior frozen treat every single time. Perfect for a scorching summer day or a special indulgence any time of the year, these customizable delights are an absolute game-changer for ice cream lovers!
Why Homemade Drumsticks Are a Must-Try
Growing up, few things signaled the arrival of summer quite like the distinct red and yellow box of Drumsticks appearing in our freezer. This classic frozen novelty, with its signature chocolate-lined waffle cone, creamy ice cream filling, and hardened chocolate topping, holds a special place in many hearts. While convenient, store-bought Drumsticks can’t quite compare to the magic of crafting your own. The ability to choose premium ingredients, customize flavors, and share the making process with loved ones elevates this simple treat into an unforgettable experience.
My own children, like I once did, eagerly pick out their preferred frozen desserts during our grocery trips. And consistently, a box of Drumsticks finds its way into the cart. This shared affection for the iconic treat inspired us to take on a delightful kitchen adventure: perfecting the homemade Drumstick. We’ve always enjoyed making easy homemade ice cream, dipped mint chocolate chip ice cream sandwiches, and even ice cream sandwich cakes, so extending our DIY spirit to Drumsticks was a natural progression. Our initial attempts a few years ago were…experimental, to say the least! But through trial and error, we’ve refined our technique, transforming this once “tricky” process into a cherished summer tradition. And let me tell you, the results are absolutely phenomenal – far surpassing anything you can buy in a store.
Beyond the incredible taste, making these chocolate-covered ice cream cones provides a wonderful opportunity for family bonding. Kids love to get involved in every step, from picking out their favorite ice cream flavors and toppings to dipping the cones and watching the chocolate magically harden. It’s a hands-on activity that creates lasting memories, making each bite even sweeter. Plus, controlling the quality of ingredients means you can avoid artificial flavors and preservatives, offering a healthier (and tastier!) alternative to mass-produced treats. It’s a true labor of love that rewards you with the freshest, most personalized frozen dessert imaginable.
Table of Contents
- Ingredient Essentials
- The Indispensable Ice Cream Cone Holder
- Step-by-Step Homemade Drumstick Perfection
- Expert Recipe Tips for Success
- Homemade Drumsticks Recipe Card
Ingredient Essentials for Your DIY Drumsticks
Crafting these delectable frozen treats requires just a handful of simple ingredients. The beauty of making them at home is the freedom to choose your favorites and experiment with endless variations. Here’s a concise list of what you’ll need; detailed quantities are provided in the printable recipe card below:
- Waffle Cones: You’ll need about 8 standard waffle cones. While store-bought ones are perfectly fine and convenient, adventurous bakers might even consider making their own for an extra touch of freshness and flavor. Just ensure they are sturdy enough to hold the generous fillings.
- Your Favorite Ice Cream: This is where the fun truly begins! Select any flavor or combination of flavors your heart desires. Vanilla is classic, chocolate is decadent, strawberry is fruity, mint chip is refreshing, and cookie dough is pure indulgence. Don’t be afraid to mix and match or even use multiple flavors within one cone for a layered experience.
- Semi-Sweet Chocolate Chips: These are crucial for both the protective lining inside the cone and the luscious outer shell. Semi-sweet offers a balanced sweetness, but dark chocolate chips can provide a richer, more intense flavor if preferred.
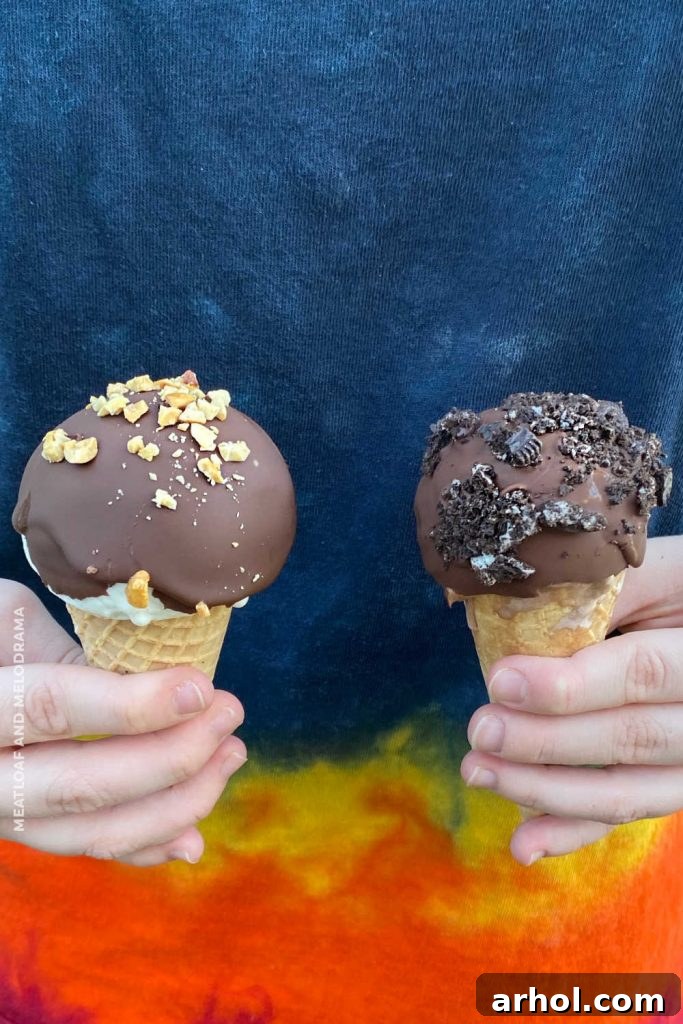
- Toppings Galore: The sky’s the limit here! Chopped peanuts are traditional for that iconic crunch, but crushed Oreo cookies, colorful candy sprinkles (jimmies), mini M&Ms, shredded coconut, or even a drizzle of caramel can transform your Drumstick into a personalized masterpiece.
- Coconut Oil (or Magic Shell): This secret ingredient is essential for creating that signature “magic shell” effect. When melted with chocolate chips, coconut oil allows the chocolate to remain liquid at room temperature but harden instantly upon contact with cold ice cream. If you prefer to skip this step, a bottle of store-bought Magic Shell topping works just as well. Vegetable oil can also be a substitute for coconut oil in a pinch.
Having these ingredients ready is the first step towards a successful and supremely satisfying homemade Drumstick experience. The quality of your chosen ice cream and chocolate will significantly impact the final taste, so opt for brands you genuinely enjoy.
The Indispensable Ice Cream Cone Holder: A Pre-Step for Perfection
Before you even think about melting chocolate, a crucial preliminary step is preparing something to hold your ice cream cones upright and steady. This might seem minor, but it makes the entire assembly process significantly easier and prevents messy disasters. I personally find that a narrow popsicle or ice pop mold works exceptionally well, as its individual slots are perfectly sized to cradle the cones. However, you don’t need specialized equipment.
You can readily improvise with items you likely already have around the house. Tall drinking glasses or mugs are excellent alternatives – just make sure they are narrow enough to support the cone without it tipping over. For a more custom solution, consider creating your own holder: take a clean cardboard box (like a shoe box or a small shipping box) that’s compact enough to fit comfortably in your freezer. Using a utility knife or a sharp object, carefully poke several holes into the top surface, ensuring each hole is just slightly larger than the opening of your waffle cones. This DIY holder will provide a stable, upright position for your cones during freezing and dipping stages, making the entire process smoother and more efficient. Having your cone holder ready before you start ensures a seamless transition between steps, ultimately leading to perfectly formed homemade Drumsticks.
Step-by-Step Homemade Drumstick Perfection
Creating these delightful frozen treats is a multi-step process, but each stage is straightforward and contributes to the irresistible final product. Follow these instructions carefully for the best results:
1. Line the Cones with Chocolate
Begin by melting about half of your semi-sweet chocolate chips. You can do this gently in a microwave (heating in 30-second intervals, stirring in between) or using a double boiler on the stovetop until smooth and liquid. Once melted, carefully pour a small amount of chocolate into the bottom of each waffle cone. The goal is to create that delightful solid chocolate nugget at the very bottom. For easier spreading and to ensure the chocolate reaches the cone’s base, use the back of a small spoon or a butter knife to swirl and coat the interior. Don’t be shy about spreading a thin layer of chocolate around the inside walls of the cone; this adds an extra layer of flavor and helps prevent the cone from getting soggy.
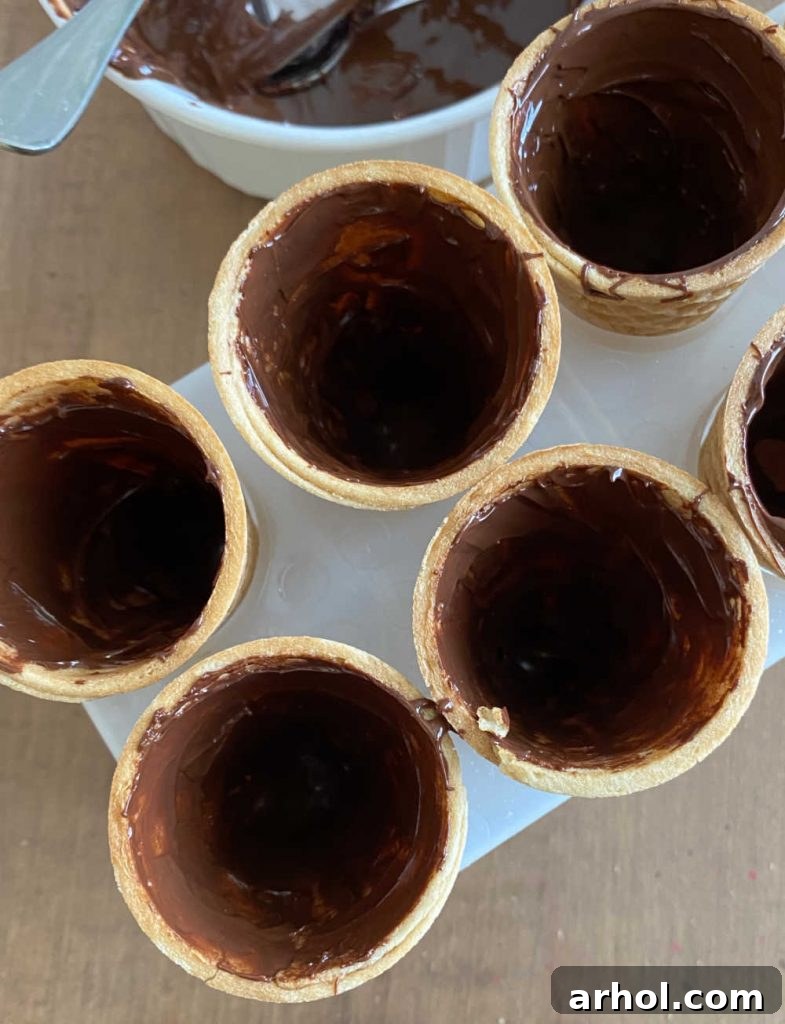
2. Chill the Chocolate Lining
Once your cones are lined, place them into your prepared cone holder. Transfer the holder with the cones into the freezer or refrigerator for a few minutes. This allows the internal chocolate lining to firm up and solidify, preventing it from mixing with the ice cream or melting during the next steps. A firm chocolate base is key to the authentic Drumstick experience.
3. Fill with Ice Cream
Remove the cones from the freezer/refrigerator. Now it’s time for the star of the show – the ice cream! Using an ice cream scoop, carefully pack each cone with your chosen ice cream flavor(s). Gently push the ice cream down to eliminate any air pockets and ensure a dense, satisfying filling that reaches the chocolate base. Top the cones generously, forming a nice dome of ice cream. Once filled, immediately return the cones to the freezer, ensuring the ice cream gets very firm and cold. This step is crucial for achieving that perfect “magic shell” coating later.
4. Prepare the Magic Shell Topping
While the ice cream is firming up, prepare your DIY Magic Shell. In a microwave-safe bowl, combine the remaining half of your semi-sweet chocolate chips with 2 tablespoons of coconut oil. Heat in short bursts (30 seconds at a time) in the microwave, stirring well after each interval, until the mixture is completely smooth and liquid. The coconut oil is vital here; it contains fats that allow the chocolate to harden almost instantly when it hits something cold, mimicking the store-bought Magic Shell. If you’re short on time or ingredients, a store-bought bottle of Magic Shell will work just fine – simply heat it according to its package directions if necessary.
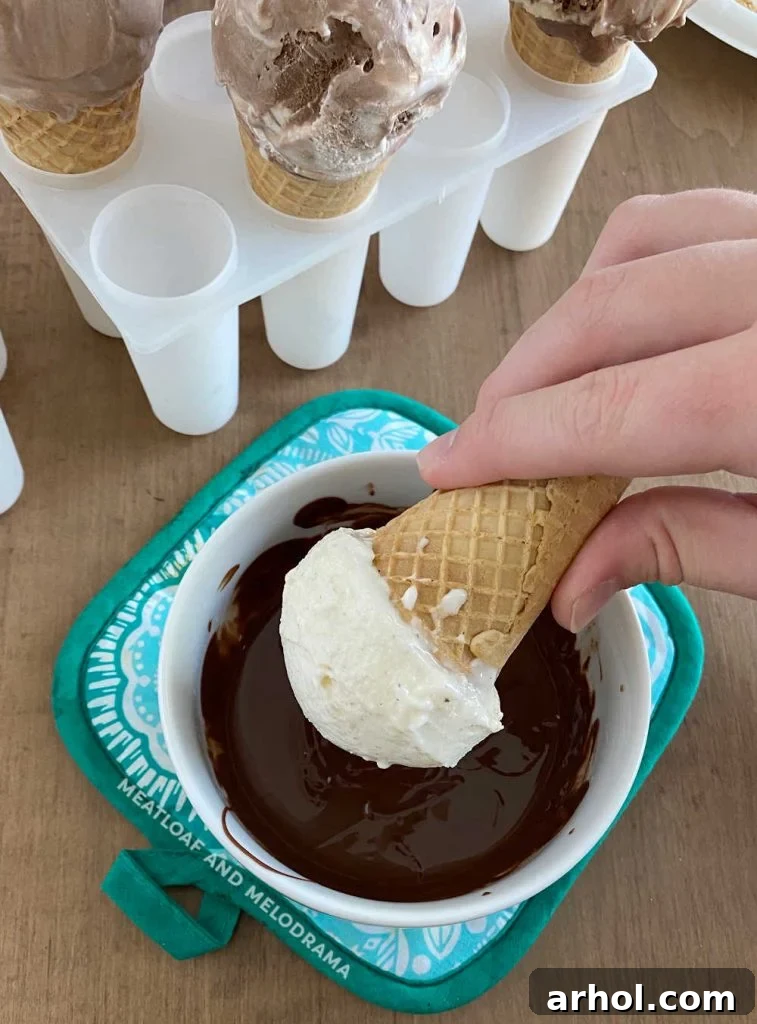
5. Dip and Decorate
Retrieve the now rock-hard ice cream-filled cones from the freezer. Working quickly, invert each cone and dip the ice cream dome into your prepared melted chocolate magic shell. Ensure the entire ice cream surface is covered. The chocolate will harden almost instantly. Immediately after dipping, and while the chocolate is still slightly tacky, dip the coated ice cream into your chosen toppings. We love a variety, such as chopped peanuts for classic crunch, crushed Oreo cookies for a textural contrast, colorful candy sprinkles, or mini M&Ms for a playful touch. Once topped, place the cones back into your cone holder and return them to the freezer for a final chill. This last freeze ensures everything is perfectly firm and ready for enjoyment.
Expert Recipe Tips for Success
Achieving that perfect homemade Drumstick is all about a few key details. Here are some expert tips to ensure your frozen treats turn out flawlessly:
- The Magic Shell is Key: The chocolate coating on top needs to be thin and snappy, not thick and brittle. Plain melted chocolate, even tempered, won’t achieve the desired “magic shell” effect. The addition of coconut oil (or vegetable oil) is crucial. It changes the chocolate’s fat composition, allowing it to harden rapidly and shatter beautifully when cold. This is the secret to replicating the store-bought texture.
- Alternative Chocolate Coatings: If you prefer not to make your own Magic Shell, a bottle of pre-made Magic Shell topping from the grocery store is a convenient substitute. Another option is using melted chocolate candy coating (often found in the baking aisle). While slightly thicker than Magic Shell, it’s thinner and sets better than pure melted chocolate chips, providing a good middle-ground option.
- Work Quickly and Keep Things Cold: Speed is your friend when dipping the ice cream. The colder your ice cream, the faster the chocolate will set, and the less likely your ice cream will melt. Have all your toppings laid out and ready before you start dipping so you can move from dip to decor without delay.
- Storage: Once your homemade Drumsticks are fully set, wrap each one individually in plastic wrap or aluminum foil. Store them in an airtight container in the freezer. This prevents freezer burn and keeps them fresh for up to two weeks, though they rarely last that long!
- Customization is Encouraged: Don’t limit yourself to traditional flavors! Try coffee ice cream with a dark chocolate shell and chocolate-covered espresso beans, or strawberry ice cream with white chocolate and sprinkles. The possibilities are endless, making each batch a unique creation.
The Undeniable Joy of a Homemade Drumstick
So, what makes a Drumstick such an enduringly fun and satisfying treat? It’s a journey of textures and flavors. You start with that initial delightful crack of the chocolate shell, a thin layer that gives way to the smooth, creamy ice cream beneath. Then, as you eat your way down, you encounter the additional chocolate lining the inside of the waffle cone, providing continuous bursts of rich cocoa flavor with every bite. This cleverly designed treat ensures a chocolate presence from start to finish.
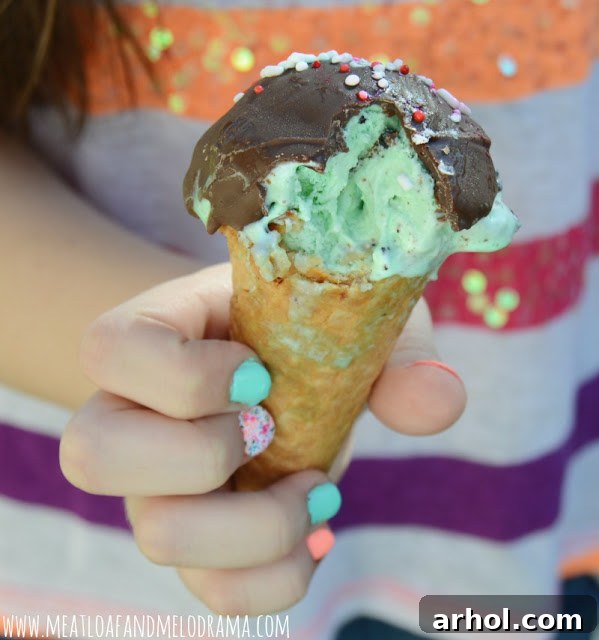
And finally, the grand finale: that amazing, solid nugget of chocolate waiting patiently at the very bottom of the cone. It’s like a delicious treasure, a reward for your efforts, making the entire experience incredibly gratifying. While the process of making your own Drumsticks involves several trips to the freezer and a few careful steps, the collective joy and superior taste make every moment worth it. My kids and I consistently have a blast creating these personalized frozen treats, and without exaggeration, they are significantly better than any store-bought equivalent. The rich flavors, the crisp cone, the customizable toppings – it all adds up to a truly special dessert experience.
Pin Recipe
Print Recipe
Rated 5 out of 5 stars based on 10 votes.
Homemade Drumsticks
Dee
Homemade Drumstick ice cream cones topped with a smooth chocolate shell are a delicious summer dessert or fun treat anytime. Use your favorite ice cream flavor and toppings, and get the kids to help make them! They’re so much better than store-bought!
1 hour
1 minute
1 hour 1 minute
8
Ingredients
- 2 cups semi-sweet chocolate chips, divided
- 8 waffle cones
- 1½ quarts ice cream (your favorite flavor)
- 2 tablespoons coconut oil
- Assorted toppings (e.g., chopped peanuts, crushed cookies, candy sprinkles)
Instructions
- Melt 1 cup of chocolate chips. Pour some of the melted chocolate into the very bottom of each cone, forming a solid chocolate nugget. You can also spread a thin layer around the entire inside of the cone using a knife or spoon for extra chocolate flavor and to prevent sogginess.
- Place the chocolate-lined cones in your cone holder and transfer them to the freezer until the chocolate is completely solid (about 10-15 minutes).
- Fill each cone with ice cream, carefully pushing the ice cream down to the bottom to ensure no air pockets. Top generously with more ice cream, creating a dome. Return the filled cones to the freezer until frozen hard (at least 30-60 minutes).
- In a separate bowl, melt the remaining 1 cup of chocolate chips with 2 tablespoons of coconut oil. Stir until perfectly smooth to create your homemade “magic shell” coating. Alternatively, use store-bought Magic Shell.
- Working quickly, dip each hard-frozen ice cream cone into the chocolate coating, ensuring the ice cream is fully covered. The chocolate will harden almost instantly.
- Immediately after dipping, sprinkle or dip the coated ice cream with your favorite toppings (candy sprinkles, chopped peanuts, crushed cookies, etc.).
- Place the finished Drumsticks back into the freezer until firm, then enjoy your homemade frozen masterpiece!
Notes
Feel free to get creative with your favorite flavors of ice cream and an array of toppings to personalize your Drumsticks.
For convenience, you can substitute store-bought Magic Shell topping for the homemade chocolate-coconut oil mixture.
Nutrition
- Calories: 260 kcal
- Carbohydrates: 21 g
- Protein: 3 g
- Fat: 14 g
- Saturated Fat: 8 g
- Polyunsaturated Fat: 1 g
- Monounsaturated Fat: 4 g
- Trans Fat: 1 g
- Cholesterol: 22 mg
- Sodium: 42 mg
- Potassium: 197 mg
- Fiber: 2 g
- Sugar: 17 g
- Vitamin A: 208 IU
- Vitamin C: 1 mg
- Calcium: 72 mg
- Iron: 1 mg
Nutrition information is automatically calculated and should only be used as an approximation.
Additional Info
Dessert
American
Did you enjoy making these delicious homemade Drumsticks? We’d love to hear from you! Leave a comment below and share your experience, favorite flavors, or unique topping combinations. Your feedback inspires us and helps others create their perfect frozen treats!