
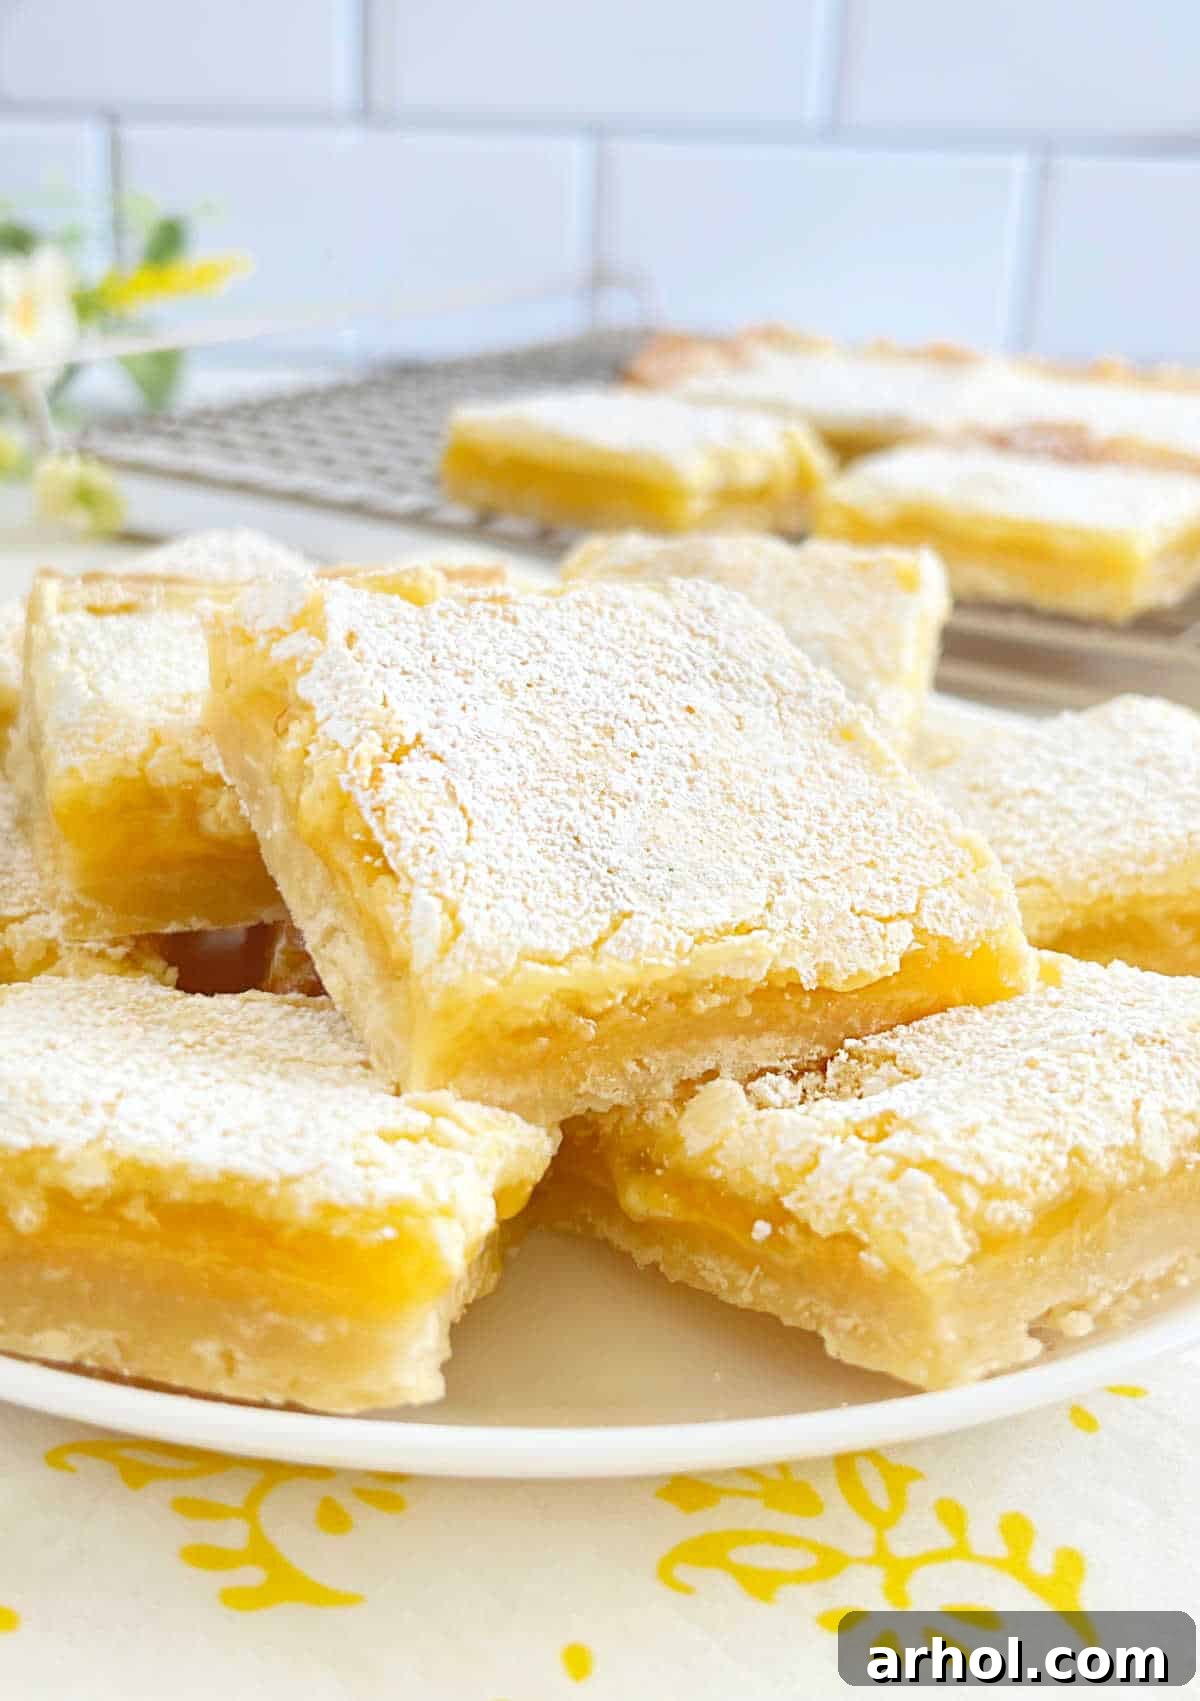
Indulge in the quintessential taste of spring and summer with these delightful Easy Lemon Bars, a recipe cherished through generations. Imagine a perfect balance of sweet and tart, featuring a rich, buttery shortbread crust crowned with a vibrant, tangy lemon curd filling, all dusted with a whisper of powdered sugar. This classic dessert is not only incredibly simple to make but promises to be a showstopper at any gathering, from casual brunches to elegant celebrations, making it the ultimate homemade treat for any lemon enthusiast.
Grandma’s Beloved Easy Lemon Bars Recipe: A Timeless Classic
This isn’t just any lemon bar recipe; it’s *my grandma’s* recipe, a true heirloom that consistently produces what we proudly call the BEST lemon bars ever. There’s an undeniable magic in a recipe passed down through family, and this one embodies comfort, simplicity, and an unmatched burst of fresh lemon flavor. Each bite of these lemon shortbread bars delivers a delightful contrast: the tender, buttery crunch of the shortbread base perfectly complementing the smooth, intensely zesty lemon curd center. Finished with a delicate snowfall of powdered sugar, they are pure sunshine in dessert form. If you’re a connoisseur of lemon desserts, prepare to fall in love with these easy-to-make, utterly irresistible treats.
While my grandma officially dubbed them “lemon squares,” our family always referred to them as “bars.” Given they’re baked in a standard 9×13 inch pan and sliced into rectangular shapes, “bars” certainly feels appropriate! Whatever you call them, their charm and deliciousness remain the same. This recipe stands out for its foolproof method and the consistent quality it delivers, making it a favorite for generations. It’s the kind of dessert that evokes warm memories and creates new ones, perfect for sharing with loved ones.
The Essential Role of Fresh Lemons for Unforgettable Flavor
For these old-fashioned lemon bars to truly shine, fresh lemons are not merely recommended—they are absolutely essential. The difference between bottled lemon juice and fresh-squeezed, along with aromatic lemon zest, is night and day. Fresh lemons inject a vibrant, bright, and authentic “zing” that store-bought alternatives simply cannot replicate. The natural oils in the zest carry a profound lemony essence, elevating the overall flavor profile of the curd to new heights, delivering a depth of flavor that is both refreshing and invigorating.
Pro Tip: To extract the maximum amount of juice from your lemons, gently roll them back and forth on your kitchen counter while applying light pressure before slicing and squeezing. This simple technique helps to break down the internal membranes, allowing for a more generous yield of juice. And always remember to zest the lemon *before* you cut it – it’s much easier to zest a whole lemon! If you find yourself with extra lemons after making these fantastic bars, don’t let them go to waste! Consider whipping up a savory lemon chicken piccata for dinner, or baking a batch of fluffy lemon blueberry muffins for a delightful breakfast or snack. Fresh lemon truly brightens any dish, sweet or savory.
Gathering Your Ingredients for the Perfect Lemon Bars
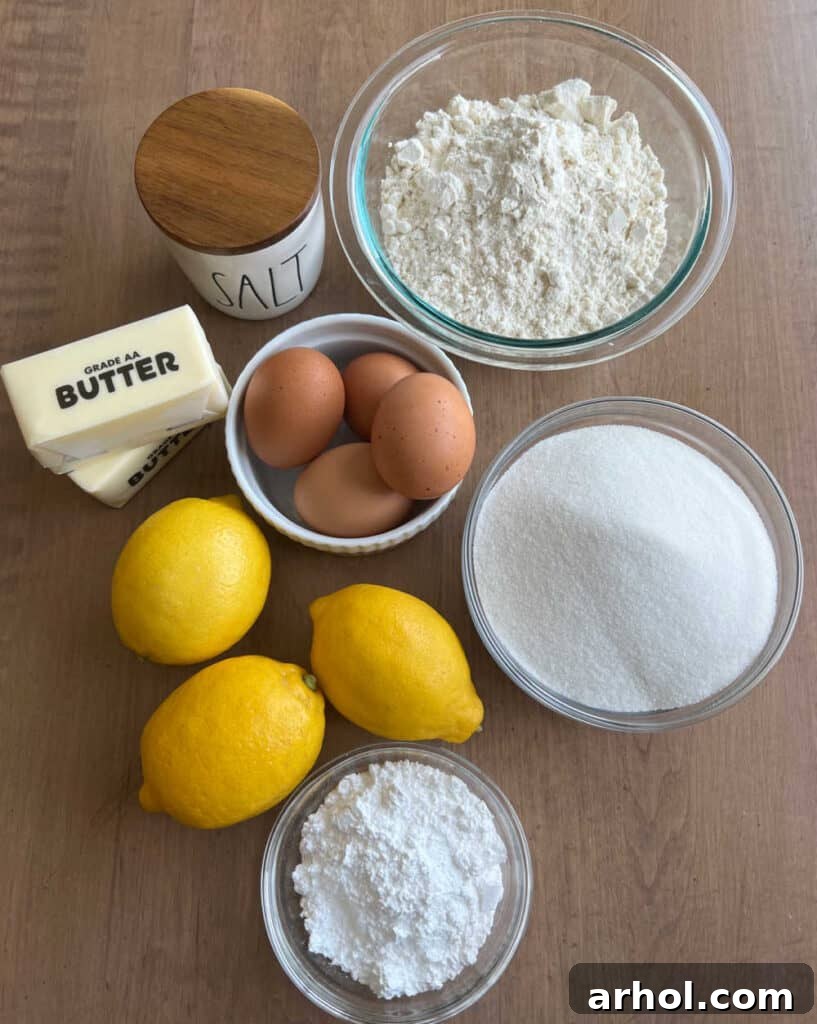
Creating these classic lemon bars requires only a handful of simple, readily available ingredients. The beauty of this recipe lies in its straightforwardness, allowing the natural flavors to truly shine. Each component plays a vital role in achieving that perfect balance of textures and tastes. For precise measurements of each ingredient, be sure to refer to the full, printable recipe card located further down this page.
- All-Purpose Flour: This versatile flour serves a dual purpose in our lemon bars. It forms the tender, yet sturdy, structure for the buttery shortbread crust, and acts as a thickening agent for the luscious lemon curd filling, ensuring it sets beautifully into a sliceable layer.
- Cold Butter: Absolutely crucial for the shortbread crust! Using very cold butter, whether you choose salted or unsalted (adjusting salt content accordingly), is key to achieving that desirable flaky, melt-in-your-mouth texture. The cold butter pieces remain distinct in the dough and create steam pockets as they bake, leading to a perfectly tender base.
- Powdered Sugar: Also known as confectioners’ sugar, this finely milled sugar contributes to the delicate, crumbly tenderness of the shortbread crust. Beyond the crust, it provides that iconic, elegant dusting on top of the finished bars, adding a final touch of sweetness and visual appeal.
- Salt: Just a pinch of salt is needed to enhance all the other flavors. In the crust, it cuts through the richness of the butter, and in the filling, it balances the sweetness of the sugar and the tartness of the lemon, bringing overall harmony to the dessert.
- Granulated Sugar: This is the primary sweetener for our vibrant lemon curd. It meticulously balances the intense tartness of the fresh lemon juice, creating a harmonious and pleasantly sweet-tart flavor profile that is the hallmark of a great lemon bar.
- Large Eggs: These are vital for the lemon curd, acting as the primary emulsifier and thickener. The eggs contribute to the curd’s rich, creamy texture and help it set into a firm, yet silky, layer that holds its shape beautifully when sliced.
- Fresh Lemons: The undeniable star of the show! You’ll need both the intensely flavorful juice and the aromatic zest from approximately 3-4 medium or 2-3 large, bright yellow lemons to infuse these bars with that authentic, zesty, and refreshing lemon flavor. Always opt for fresh for the best, most vibrant results!
Beyond the ingredients, you’ll also want to have a zester, grater, or microplane on hand for effortlessly extracting that flavorful lemon zest. While a food processor or a stand mixer with a paddle attachment can certainly make the crust-making process a breeze, don’t feel limited if you don’t own these gadgets. Grandma certainly didn’t rely on fancy cooking tools, proving that simple forks, a pastry cutter, or even your clean fingertips work just as effectively to achieve a perfect, crumbly crust! The key is the technique, not necessarily the gadget.
Step-by-Step Guide to Making the Best Lemon Bars with Shortbread Crust
Crafting the Perfect Shortbread Crust
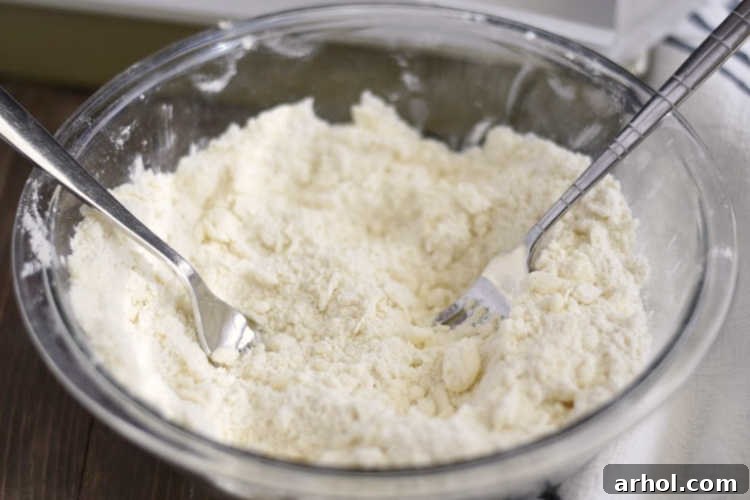
The foundation of exceptional lemon bars lies in a perfectly tender and flaky shortbread crust. This base provides a delightful textural contrast to the smooth lemon curd. To begin, ensure your butter is thoroughly chilled – this is a non-negotiable step for achieving the desired flaky texture. In a large mixing bowl, combine your measured all-purpose flour, powdered sugar, and a pinch of salt. Then, using a pastry cutter, two knives, or even your clean fingertips, carefully cut the cold butter (which you’ve cubed) into the dry ingredients. You’re aiming for a mixture that resembles coarse, lumpy wet sand, with distinct pea-sized pieces of butter still visible throughout. This ensures the butter melts slowly and creates pockets of steam, resulting in a tender, flaky crust. Resist the urge to overmix; overworking the dough can develop too much gluten, leading to a tough, rather than tender, crust.
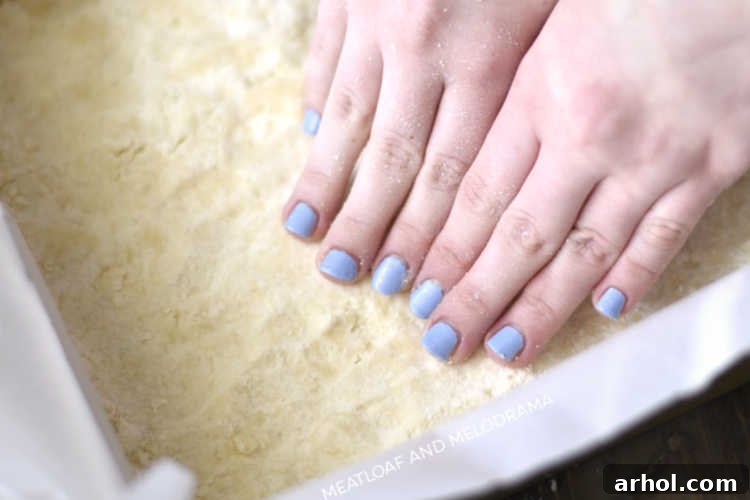
Once your crumbly crust mixture is ready, press it evenly and firmly into your prepared 9×13 inch baking pan. For effortless removal and beautifully intact bars, I highly recommend lining your pan with parchment paper, allowing a generous overhang on the longer sides. This simple trick creates convenient “handles” that make lifting the entire batch of cooled bars from the pan incredibly easy and mess-free. Alternatively, you can grease the pan thoroughly with cooking spray or butter, or even use aluminum foil. Whichever method you choose, it is crucial to ensure the crust is pressed tightly and evenly across the bottom and slightly up the sides of the pan. A well-compacted, slightly raised edge is vital for creating a secure barrier that prevents the liquid lemon curd filling from seeping underneath the crust during baking, guaranteeing a clean, distinct, and beautiful bar layer.
Bake this shortbread crust in a preheated 350°F (175°C) oven for about 20 minutes, or until it turns a light, delicate golden brown around the edges. The center should appear set. While the crust is baking to perfection, you’ll have the ideal window of time to prepare your luscious, tangy lemon curd filling. This efficiency ensures your ingredients are perfectly ready for the next crucial step.
Preparing the Tangy Lemon Curd Filling
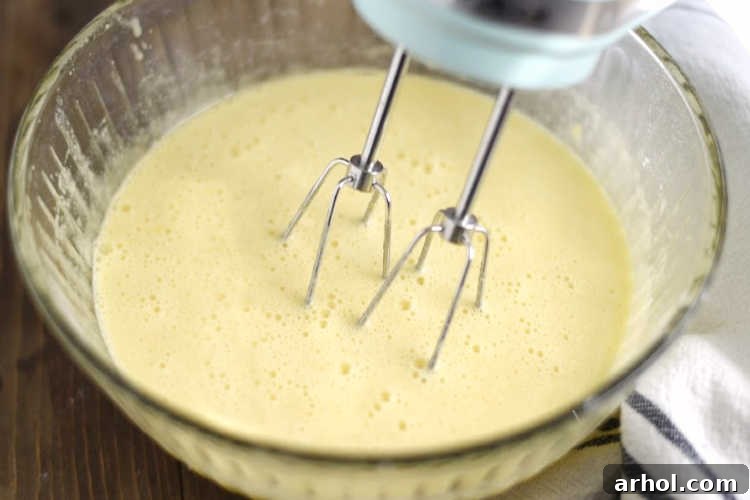
The heart of these lemon bars is undoubtedly the tangy, bright lemon curd, which provides the signature zesty punch. In a separate large mixing bowl, begin by lightly beating the large eggs until they are slightly foamy and pale yellow. Gradually add the granulated sugar, about one cup at a time, mixing thoroughly after each addition until the sugar is well dissolved and the mixture is smooth and slightly thickened. Next, gently fold in the all-purpose flour, ensuring there are no lumps and the mixture achieves a uniform, smooth consistency. Finally, stir in the freshly squeezed lemon juice and, most importantly, the aromatic lemon zest. The zest is where much of the intense lemony flavor and essential oils reside, so don’t skimp on it – it provides a powerful boost of citrus aroma and taste!
Baking and Finishing Your Lemon Bars
As soon as your shortbread crust emerges from the oven, light golden brown and firm to the touch (a few small air bubbles in the crust are perfectly normal and indicate proper baking!), it’s time for the lemon curd. Immediately pour the prepared lemon filling evenly over the warm crust. This timing is absolutely crucial for the success of your lemon bars. As the crust cools, it will naturally shrink slightly. Pouring the filling over a warm crust helps it adhere properly to the base and prevents the edges of the filling from pulling away or spilling over, creating a seamless, beautiful layer. Pouring onto a cool crust can also result in the crust absorbing too much filling, leading to a thinner, less luscious curd layer. The filling will initially be a pale yellow. Return the pan to the oven and bake for an additional 20 to 25 minutes, or until the top of the lemon curd is set and springs back lightly when gently touched in the center. Be careful not to let the top brown too much; a light golden hue is perfect for retaining that vibrant lemon flavor.
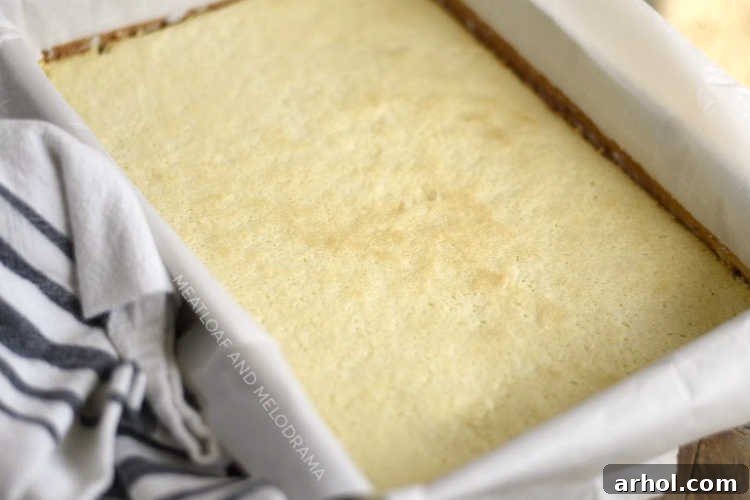
Once out of the oven, run a knife or thin spatula gently around the edges of the crust while it’s still warm to prevent it from sticking to the pan as it cools. If you desire that classic, elegant look, lightly sprinkle some sifted powdered sugar over the warm bars; this allows it to adhere beautifully and creates a lovely finish. Now comes the hardest part: patience! Allow the lemon bars to cool completely at room temperature before transferring them to the refrigerator. For the absolute best results and cleanest, most precise cuts, you must chill them for at least one hour (or ideally, two to three hours) until they are thoroughly firm. Attempting to slice warm lemon bars can be a messy affair, as the curd will still be quite soft. But once thoroughly chilled, they firm up beautifully, allowing for crisp, perfect squares or bars. Serving them cold enhances their refreshing, tangy flavor, making them an even more delightful and palate-cleansing treat, especially on a warm day!

Do Lemon Bars Have to Be Refrigerated?
Yes, absolutely! Due to their luscious, egg-based lemon curd filling, these homemade lemon bars are perishable and require refrigeration. Storing them in an airtight container in the fridge will not only keep them fresh and safe to eat but will also help the curd set perfectly, resulting in that desirable firm, sliceable texture. Many people even find that the flavors meld and deepen further after a good chill, enhancing the overall taste experience.
How Long Do Lemon Bars Last in the Fridge?
For optimal freshness and taste, homemade lemon bars are best enjoyed within 3 to 4 days when stored properly in an airtight container in the refrigerator. Beyond this period, while still safe, their texture and vibrant flavor may begin to diminish. However, don’t be surprised if they disappear much faster than that – these delicious treats have a way of getting devoured quickly! If you wish to extend their shelf life significantly, you can wrap them tightly (individually or in small batches) and freeze them in a freezer bag or a freezer-safe container for up to 3 months. When you’re ready to enjoy them, simply thaw them in the refrigerator overnight before serving for a perfectly delicious, make-ahead dessert solution.
Expert Recipe Tips for Success with Lemon Bars
Achieving bakery-quality lemon bars at home is entirely possible with a few key techniques and insider tips. Pay attention to these details, and your homemade lemon bars will turn out perfectly every single time, delighting everyone who tries them:
- Always Use Cold Butter for the Crust: This tip cannot be stressed enough! Using thoroughly cold butter is paramount for creating a beautifully flaky, tender, and melt-in-your-mouth shortbread crust. The cold butter pieces prevent excessive gluten development and create pockets of steam during baking, leading to that coveted delicate texture.
- Maximize Lemon Juice and Zest Yield: To get the most juice from your lemons, roll them firmly on the counter for a minute or two before cutting and squeezing. This breaks down the internal membranes. Critically, always remember to zest the lemon *before* you slice it open – it’s significantly easier to remove the zest from a firm, whole lemon.
- Pour Filling Over Warm Crust Promptly: This is a crucial timing step! As soon as the shortbread crust comes out of the oven, immediately pour the lemon curd filling over it. A warm crust prevents shrinkage and ensures the filling adheres well, preventing it from seeping underneath the edges or creating unsightly gaps. Pouring onto a cool crust can also result in the crust absorbing too much of the liquid filling, leading to a thinner, less luscious curd layer.
- Utilize Parchment Paper for Easy Removal: Lining your baking pan with parchment paper, especially leaving an overhang on the longer sides, is a game-changer. This creates convenient “handles” that make lifting the entire batch of cooled lemon bars out of the pan an effortless process, allowing for perfectly clean, easy slicing without damaging the delicate crust.
- Chill Thoroughly Before Slicing: While it’s incredibly tempting to cut into them warm, patience is a virtue when it comes to lemon bars. Refrigerating the bars for at least an hour (and ideally 2-3 hours or even overnight) allows the lemon curd to fully set and firm up completely. This crucial chilling step ensures you get beautifully clean, precise cuts and a refreshing texture that truly elevates the experience.
More Irresistible Lemon Dessert Recipes for Lemon Lovers
If you adore the bright, zesty flavor of lemon, then these easy lemon bars are just the beginning of your culinary journey! Our extensive collection of delicious desserts offers even more delightful ways to incorporate this cheerful citrus into your baking repertoire. Beyond lemon, you might also find yourself captivated by the simplicity and charm of our sugar cookie bars.
- Lemon Dump Cake: A delightfully easy, giant lemon bar-like dessert with a soft, sweet cakey topping that’s perfect for feeding a crowd with minimal effort. It’s like a warm, comforting hug in dessert form, bursting with lemony goodness.
- Lemon Crinkle Cookies: Made effortlessly from a cake mix, these soft, chewy cookies burst with bright, tangy lemon flavor and are beautifully coated in a distinctive crinkled, powdered sugar shell, making them as pretty as they are delicious.
- No-Bake Lemonade Pie: A refreshingly cool and creamy pie that requires absolutely no oven time. This simple yet impressive dessert features a surprising secret ingredient that makes it utterly irresistible and perfect for warm weather.
Easy Lemon Bars with Shortbread Crust Recipe Card
Easy Lemon Bars with Shortbread Crust
Dee
15
45
1
2
20
Ingredients
For the Shortbread Crust:
- 1 cup cold butter (2 sticks), cut into small cubes
- 2 cups all-purpose flour
- ½ cup powdered sugar (plus more for dusting)
- ¼ teaspoon salt
For the Lemon Curd Filling:
- 4 large eggs
- 2 cups granulated sugar
- 6 tablespoons all-purpose flour
- 6 tablespoons fresh lemon juice (from about 3-4 medium lemons)
- 1 tablespoon lemon zest (you can use more for extra lemon flavor)
Instructions
For the Shortbread Crust:
- Preheat your oven to 350°F (175°C).
- Prepare a 9×13 inch baking pan by lining it with parchment paper, leaving an overhang on the longer sides for easy removal, or grease it thoroughly with cooking spray or butter.
- In a large mixing bowl, combine the 2 cups of all-purpose flour, ½ cup powdered sugar, and ¼ teaspoon salt. Add the cold butter, cut into small cubes.
- Using a pastry cutter, two forks, or your fingertips, cut the butter into the flour mixture until it resembles coarse crumbs with some pea-sized pieces of butter still visible.
- Press the mixture evenly and firmly into the bottom and slightly up the sides of the prepared baking pan. Ensure the edges are well-compacted to prevent the filling from seeping underneath.
- Bake for 20 minutes, or until the crust is a light golden brown. While the crust is baking, proceed to prepare the lemon filling.
For the Lemon Curd Filling:
- In another large mixing bowl, add the 4 large eggs and beat them lightly with a whisk or hand mixer until slightly foamy.
- Gradually mix in the 2 cups of granulated sugar, one cup at a time, until well incorporated. Then, add the 6 tablespoons of all-purpose flour and mix until smooth.
- Stir in the 6 tablespoons of fresh lemon juice and 1 tablespoon of fresh lemon zest until thoroughly combined.
- Carefully remove the baked crust from the oven. Immediately pour the lemon filling evenly over the warm crust.
- Return the pan to the oven and bake for an additional 20 to 25 minutes, or until the top of the lemon curd is set and springs back lightly when gently touched. Avoid over-browning.
- Remove from oven. While still warm, run a knife or thin spatula around the edges of the crust to prevent sticking. If desired, lightly sprinkle sifted powdered sugar over the warm bars. Allow them to cool completely at room temperature.
- For the best results and clean cuts, refrigerate the lemon bars for at least 1 hour (preferably 2-3 hours) before slicing into individual bars. Keep refrigerated until ready to serve. You can add an extra dusting of powdered sugar just before serving for a beautiful presentation.
Notes
Ensure the crust is pressed tightly against all edges of the baking pan; this acts as a barrier to prevent the lemon filling from running underneath.
Do not allow the crust to cool before adding the filling. Pour the lemon curd over the crust immediately after it comes out of the oven to ensure proper adhesion and a thick, luscious filling.
Nutrition Information
Calories:
225
kcal
,
Carbohydrates:
34
g
,
Protein:
1
g
,
Fat:
9
g
,
Saturated Fat:
5
g
,
Cholesterol:
24
mg
,
Sodium:
110
mg
,
Potassium:
23
mg
,
Sugar:
23
g
,
Vitamin A:
285
IU
,
Vitamin C:
2.1
mg
,
Calcium:
5
mg
,
Iron:
0.7
mg
Nutrition information is automatically calculated and should be used as an approximation only.
Additional Information
Dessert
American
Don’t miss out on more delicious, easy-to-follow recipes! Sign up for our weekly newsletter to have culinary inspiration delivered straight to your inbox and discover new family favorites.