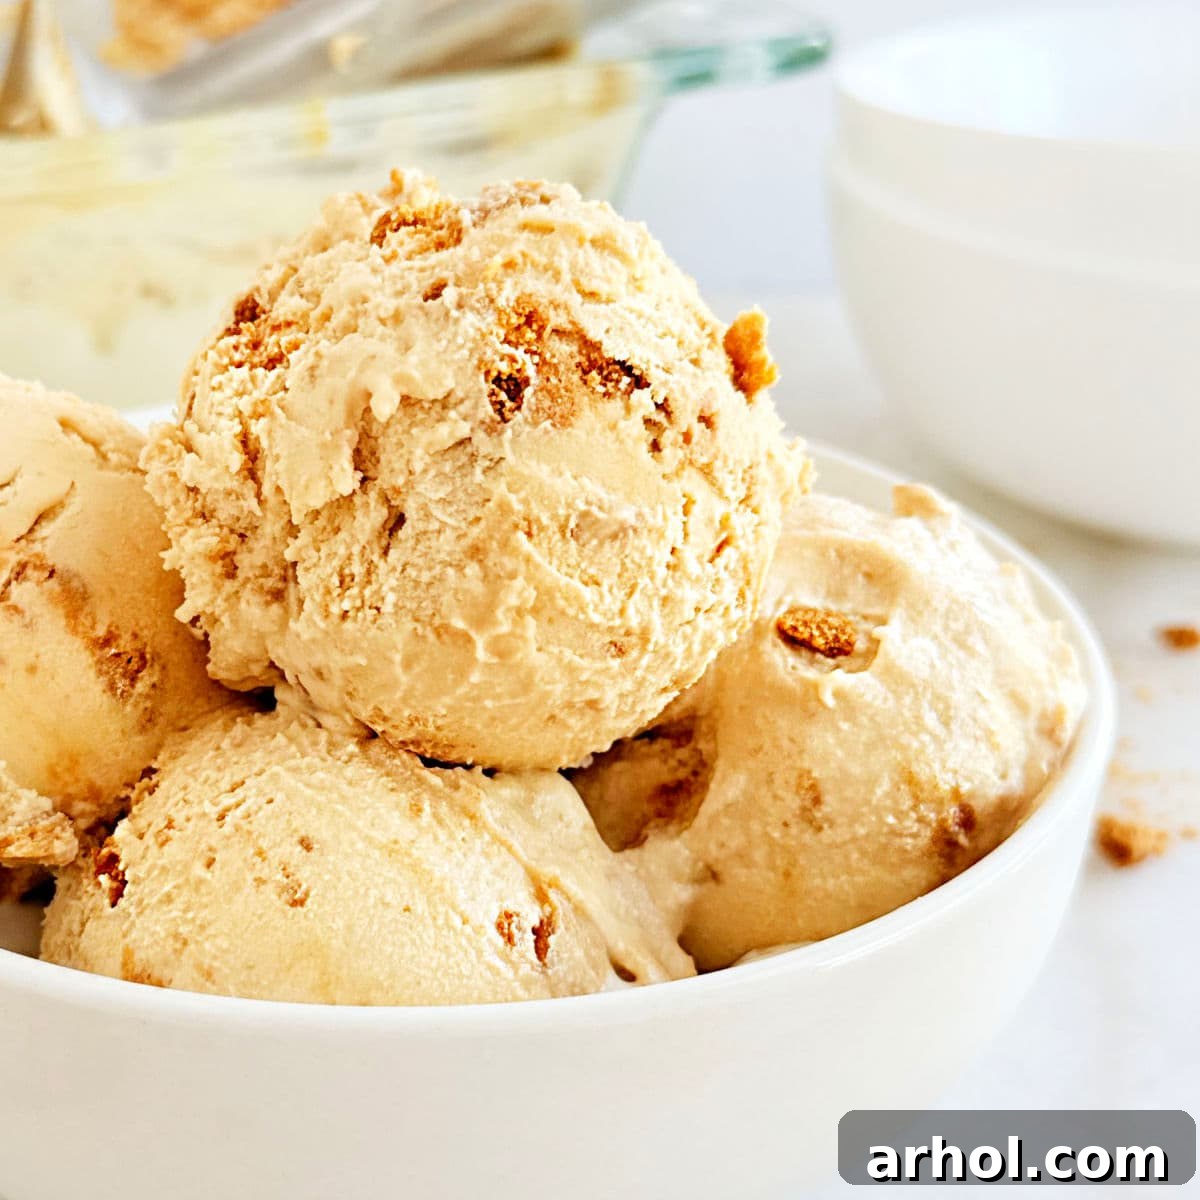
Indulge in the ultimate homemade treat with this incredibly easy no-churn cookie butter ice cream recipe. Crafted using beloved Biscoff cookies and just a handful of simple ingredients, this dessert promises a luxuriously creamy and utterly delicious experience that will delight your taste buds. Forget about expensive ice cream makers or complex techniques – achieving artisan-quality ice cream has never been simpler, making it the perfect project for any home chef looking to create something truly special.
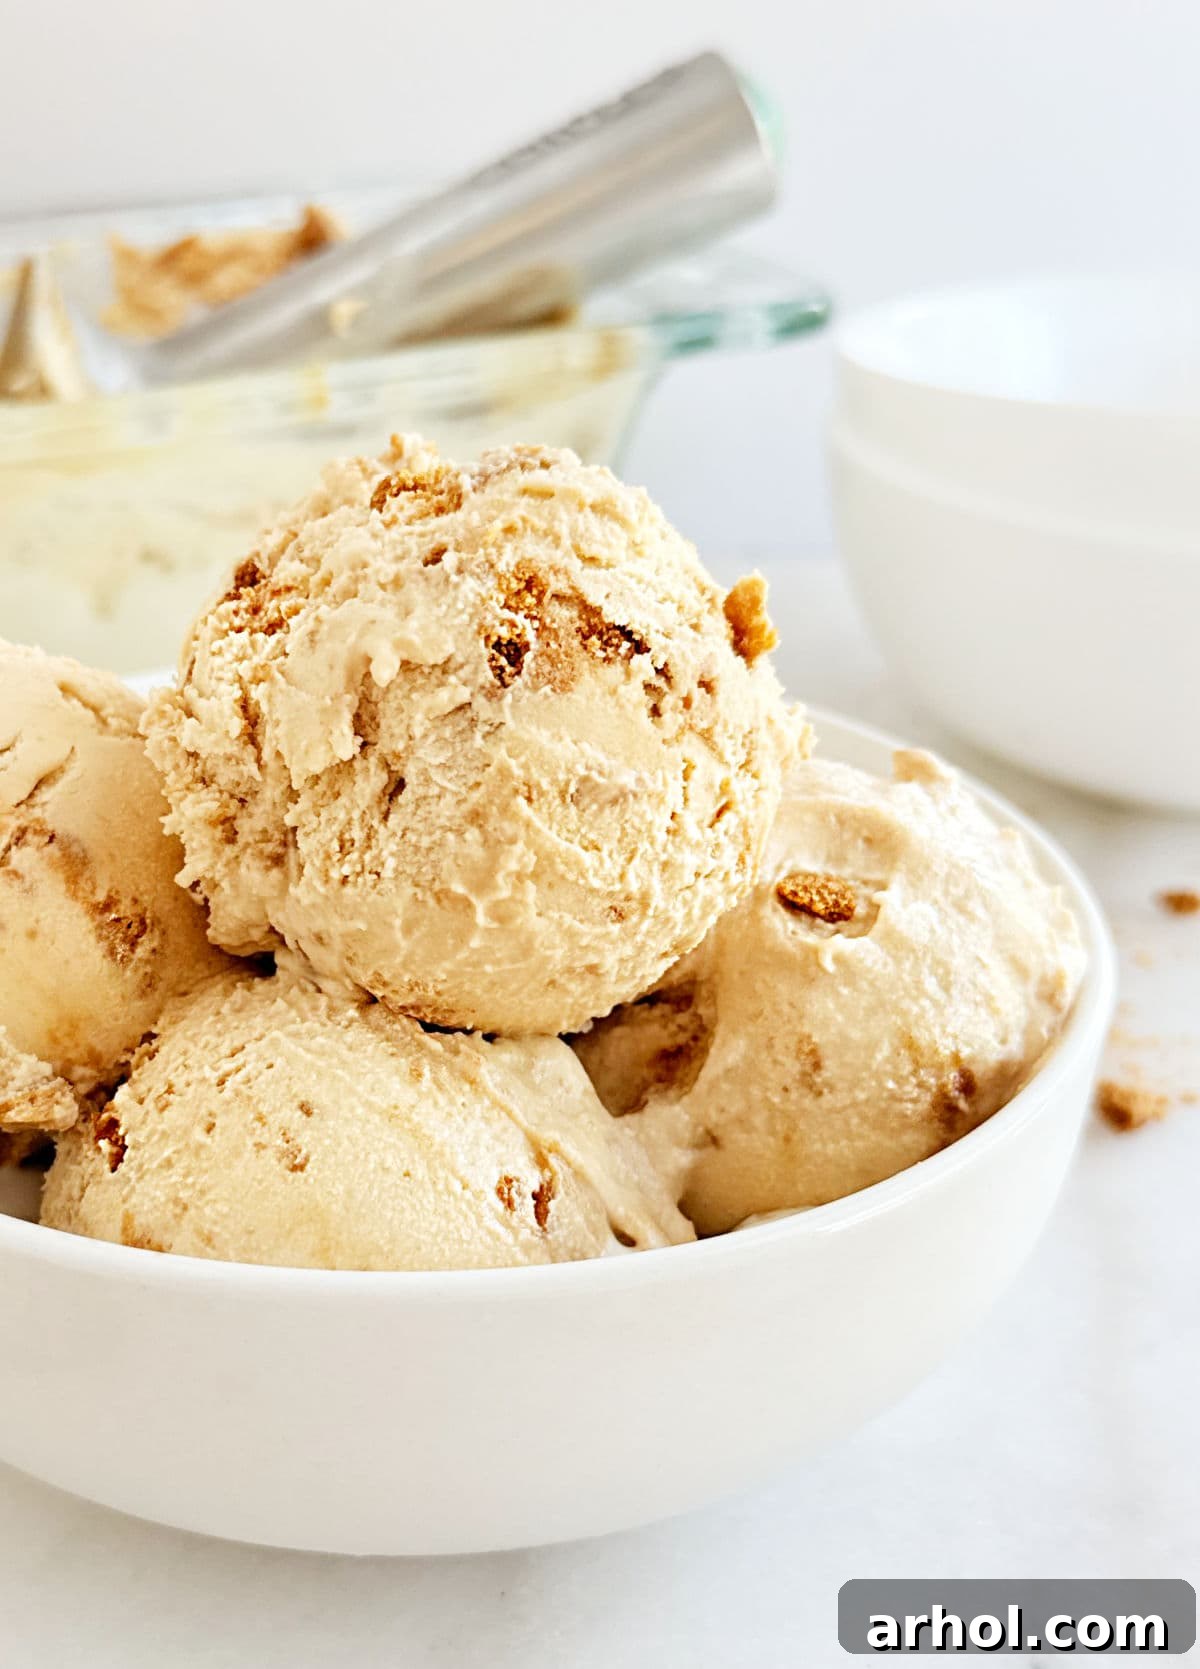
The Irresistible Allure of Homemade Biscoff Cookie Butter Ice Cream
Few flavors capture hearts quite like Speculoos cookies and their spreadable counterpart, cookie butter. Their distinct caramelized notes, a hint of cinnamon, and warm spices create a comforting and uniquely addictive taste profile. As a dedicated fan, I can attest that there’s something truly magical about this European biscuit flavor. My family and I often find ourselves simply dipping the crunchy cookies into the creamy spread for a quick, satisfying snack – a delightful simple pleasure! However, elevating this love for cookie butter into a homemade ice cream is where the real magic happens. This no-churn cookie butter ice cream, generously studded with Speculoos cookie crumbs and adorned with elegant swirls of melted cookie butter, transforms a beloved snack into an extraordinary dessert. It’s undoubtedly one of the best frozen treats you’ll ever make, bringing joy with every spoonful.
What makes this recipe even more appealing is its incredible simplicity. Unlike traditional ice cream recipes that demand an expensive and often bulky ice cream maker, this is a “no-churn” delight. This means all you need is a reliable electric mixer and a freezer, making homemade ice cream accessible to everyone, regardless of their kitchen gadget collection. The process involves minimal effort: whip up a few ingredients, combine them, and let your freezer do the rest. This method not only saves money and counter space but also consistently delivers an amazingly creamy texture without the hassle of churning. If you share our passion for cookie butter, you absolutely must explore other delightful recipes. Consider trying this effortlessly easy cookie butter dip for your next gathering, or perhaps indulge in this delectable no-bake cookie butter pie, both offering different yet equally satisfying ways to enjoy this incredible flavor.
Ingredient Spotlight: Crafting Your No-Churn Masterpiece
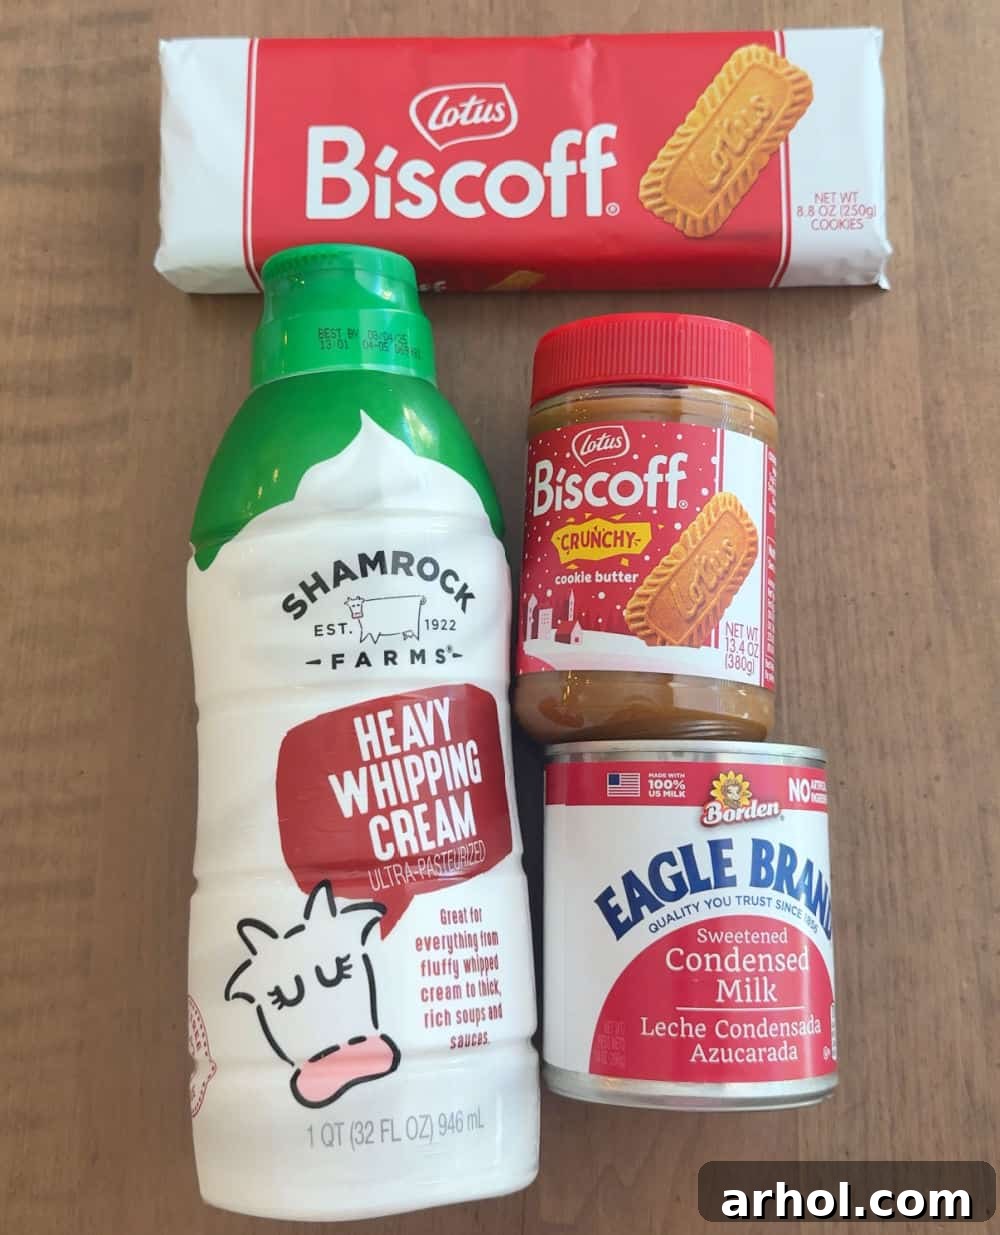
Creating a rich and creamy no-churn ice cream requires a precise combination of high-quality ingredients. Each component plays a vital role in achieving that perfect texture and flavor. Here’s a closer look at what you’ll need to transform simple pantry staples into a gourmet frozen dessert. For the exact quantities, please refer to the detailed recipe card found further down the page.
- Cookie Butter: This is the undeniable star of our recipe, delivering that signature caramelized biscuit flavor that is both unique and incredibly comforting. Originating from Speculoos cookies, cookie butter has soared in popularity and is now widely available in most major supermarkets, often found near peanut butter and other spreads. You’ll typically find it under the popular Lotus Biscoff brand, or various excellent store brands like Trader Joe’s. Both creamy and crunchy versions work beautifully, so feel free to choose according to your preference for added texture. If you opt for crunchy, you’ll naturally incorporate even more delightful cookie bits throughout your ice cream, enhancing the overall experience.
- Heavy Whipping Cream: This ingredient is absolutely crucial for achieving the light, airy, and rich base that defines a great no-churn ice cream. It is imperative to use heavy cream, often labeled as “heavy whipping cream,” which contains a high fat content (typically 36% butterfat or more). This high-fat content is what allows it to whip into stable, voluminous stiff peaks, which are essential for creating the voluminous and velvety texture of the ice cream. Do not substitute with half-and-half, light cream, or milk, as these alternatives lack the necessary fat content and will not whip correctly, resulting in a thin, icy, and disappointing texture rather than creamy goodness. For the best and quickest results, ensure your heavy cream is very cold before you begin whipping.
- Sweetened Condensed Milk: This magical ingredient serves multiple purposes in any no-churn ice cream recipe. It provides all the necessary sweetness, eliminating the need for granulated sugar, and its thick, syrupy consistency is key to preventing the formation of large, unappealing ice crystals. This ensures the final product is wonderfully smooth and creamy. Furthermore, it acts as a crucial binder, contributing to the overall stability and body of the mixture. Be very careful not to confuse sweetened condensed milk with evaporated milk – they are distinctly different products. Sweetened condensed milk is thick, sweet, and typically used in desserts, while evaporated milk is unsweetened, much thinner, and often used in savory dishes or coffee. Using evaporated milk will unfortunately lead to a failed ice cream texture.
- Speculoos Cookies: Also famously known as Biscoff cookies, these delightful, crispy biscuits are central to our ice cream’s authentic flavor profile. While Biscoff is perhaps the most famous and readily available brand, any Speculoos-style cookie will work perfectly. These cookies are not just for dipping or pairing with coffee; when coarsely crushed and folded into the ice cream mixture, they add a wonderful textural contrast – a satisfying crunch amidst the creaminess – and intensify the authentic, spicy cookie butter taste. You can chop them into small bits or crush them more finely, depending on how prominent you want the cookie pieces to be in each bite.
Step-by-Step Guide: Crafting Your Delicious Cookie Butter Ice Cream
Making this no-churn cookie butter ice cream is surprisingly simple and requires no specialized equipment beyond an electric mixer. Follow these steps carefully to achieve a wonderfully creamy and flavorful frozen dessert that will impress everyone with its homemade charm.
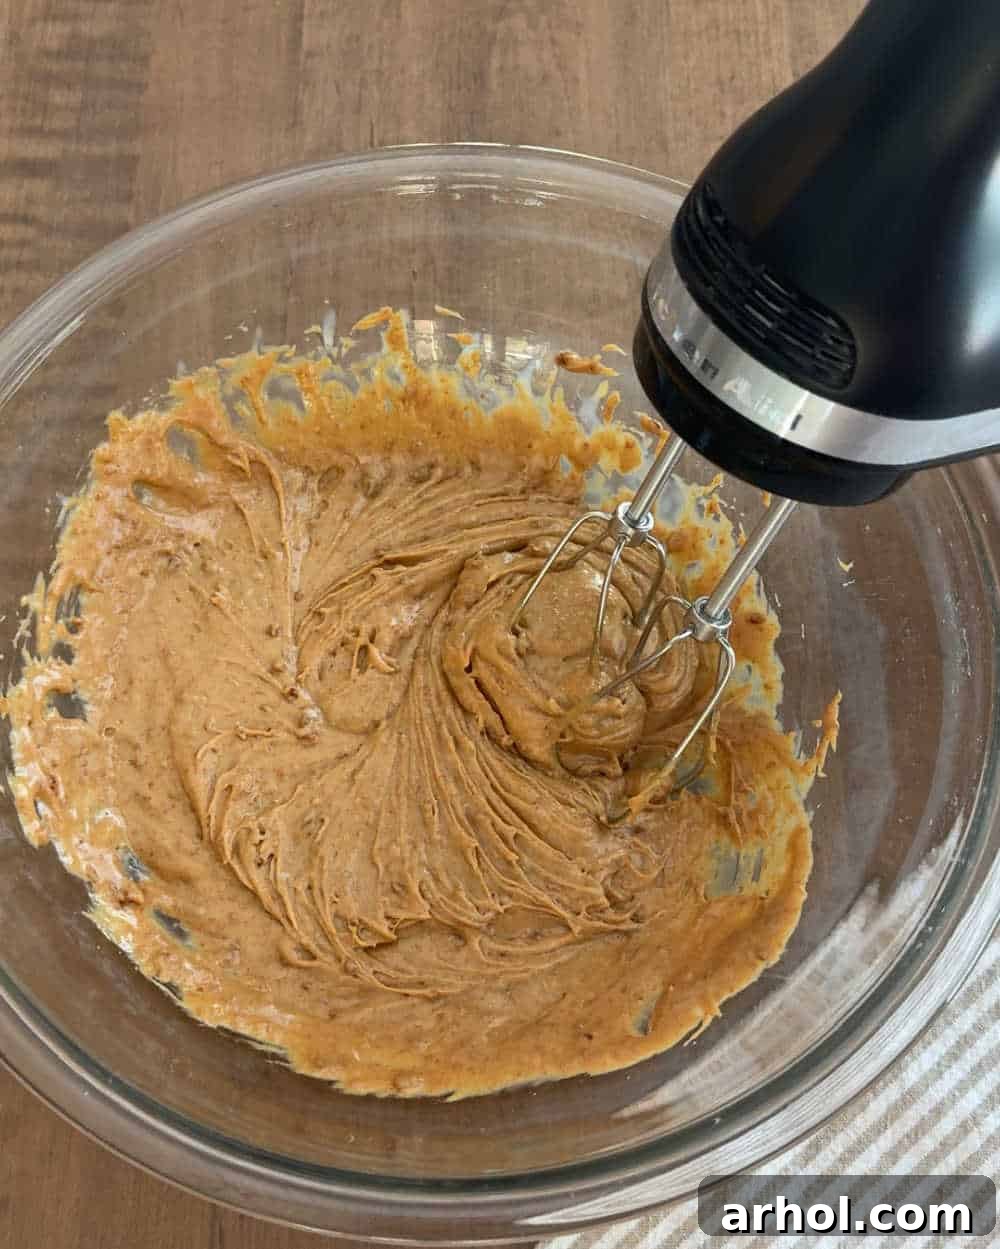
- Prepare the Cookie Butter Base: In a large mixing bowl, combine the room-temperature cookie butter with the sweetened condensed milk. Using an electric mixer on medium speed, beat these two ingredients together until they are thoroughly combined and completely smooth. This process creates a rich, sweet, and velvety base for your ice cream, ensuring all flavors are well integrated from the start. Set this mixture aside. Ensuring the cookie butter is at room temperature is absolutely key here, as it will blend much more easily and smoothly with the condensed milk, preventing any lumps or uneven textures.
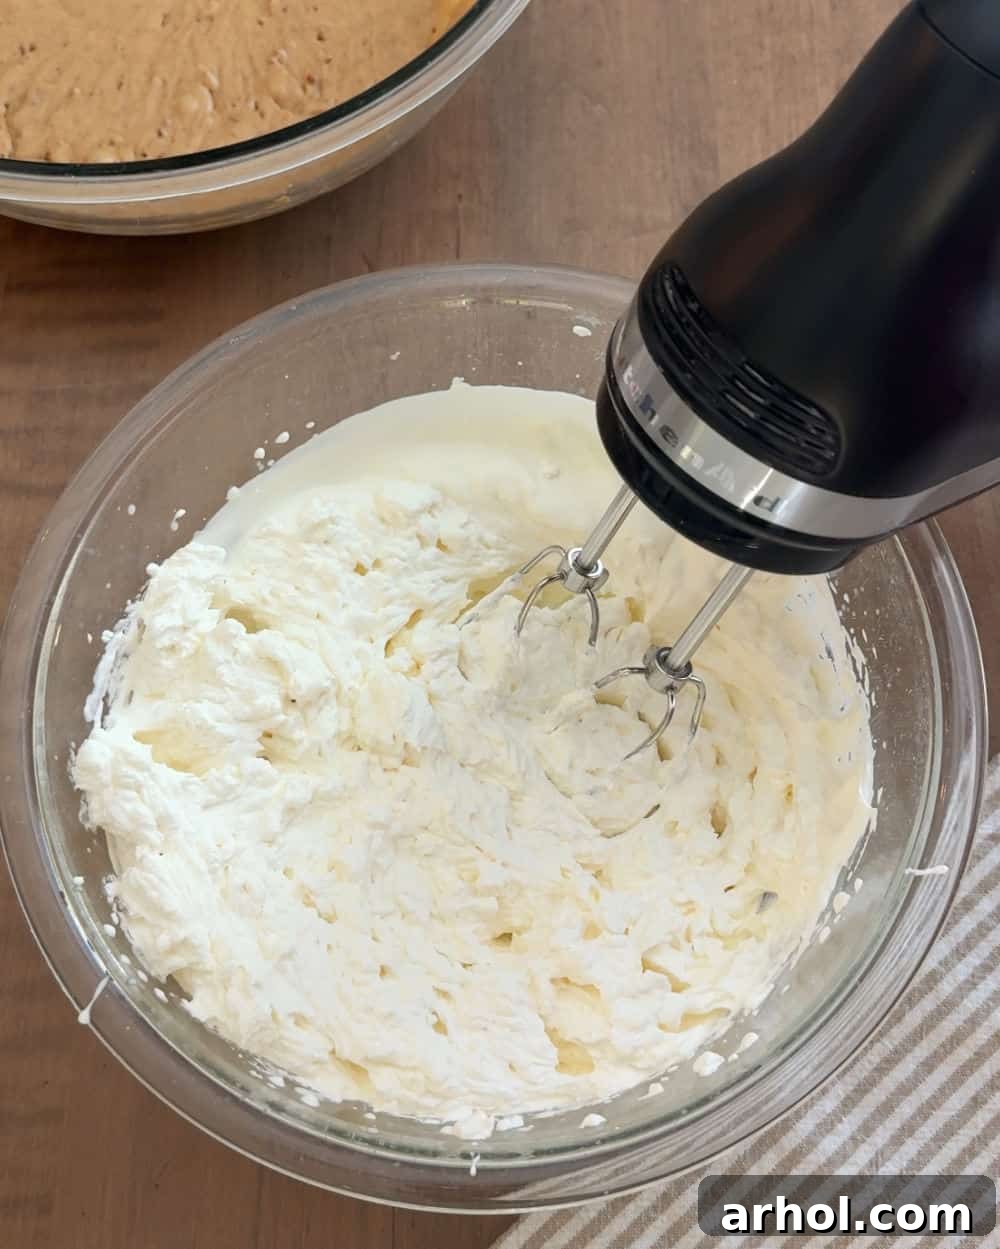
- Whip the Heavy Cream: In a separate, preferably chilled large mixing bowl (using a cold bowl and cold whisk attachments helps the cream whip faster and more effectively, yielding a more stable result), pour in the very cold heavy whipping cream. Using a clean electric mixer with whisk attachments, beat the cream on high speed. Continue beating until stiff peaks form. This means when you lift the beaters from the cream, the peaks stand upright without collapsing. It’s crucial to watch closely and stop immediately once stiff peaks are achieved. Be careful not to over-beat, as this can cause the cream to become grainy, curdle, or even turn into butter, which will negatively impact the final texture of your ice cream.
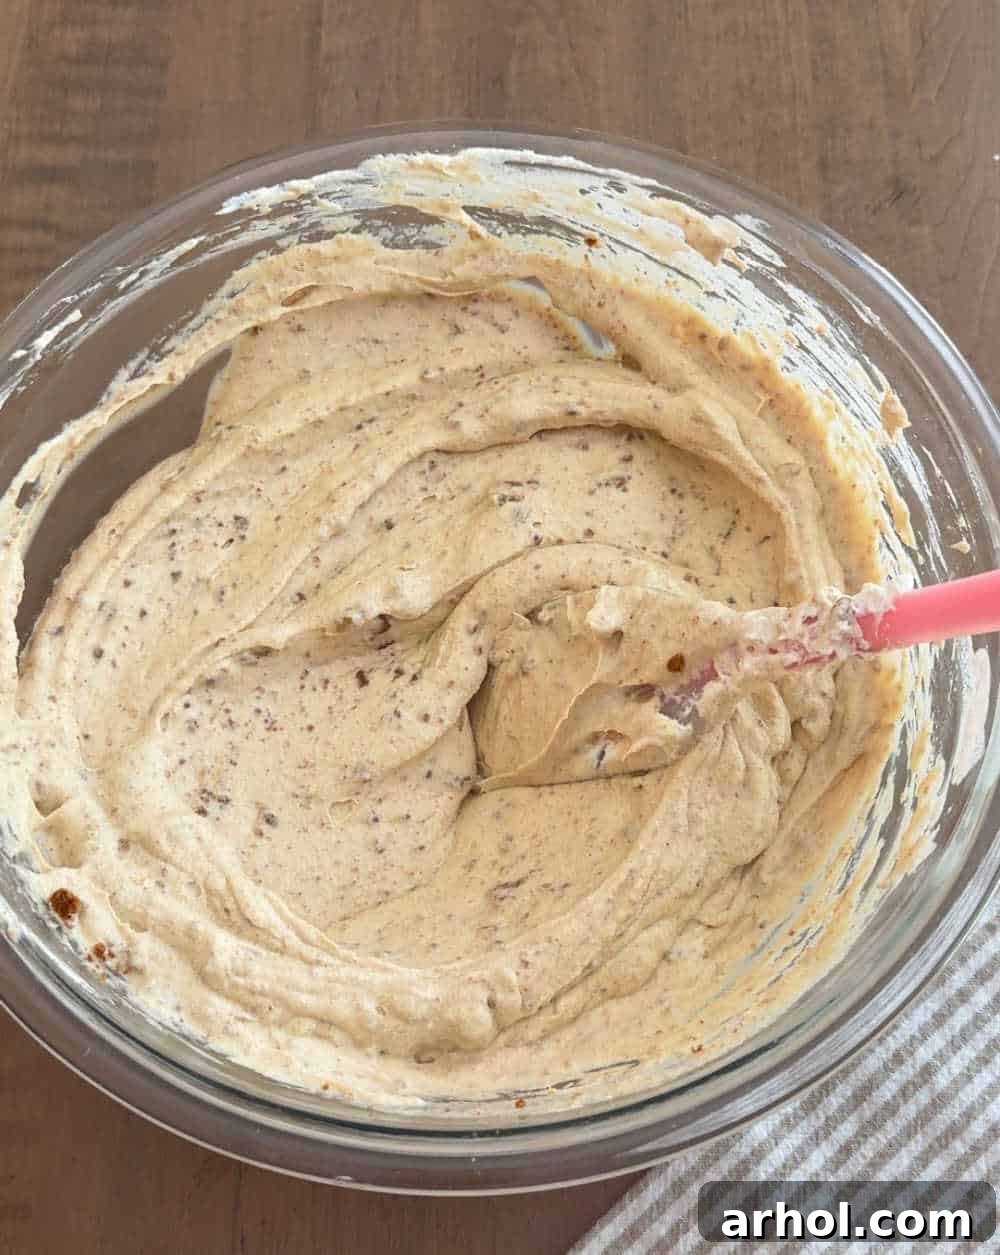
- Gently Fold the Mixtures: This step is paramount for maintaining the light and airy texture of your whipped cream, which translates directly to the creamy mouthfeel of your finished ice cream. Using a wide rubber spatula, carefully and gently fold the sweetened condensed milk and cookie butter mixture into the whipped cream. Employ an upward scooping motion from the bottom of the bowl, then fold the lighter whipped cream over the heavier base. Continue this gentle folding technique until the two mixtures are just combined and no streaks of white cream remain. Overmixing here will deflate the whipped cream, resulting in a denser, less airy, and potentially icier ice cream.
- Incorporate Crushed Cookies: Once the base mixture is uniformly combined, gently fold in the coarsely chopped Biscoff cookie pieces. These will add a delightful crunch and intensify the authentic cookie butter flavor throughout every bite of the ice cream. Distribute them evenly throughout the mixture with your spatula.
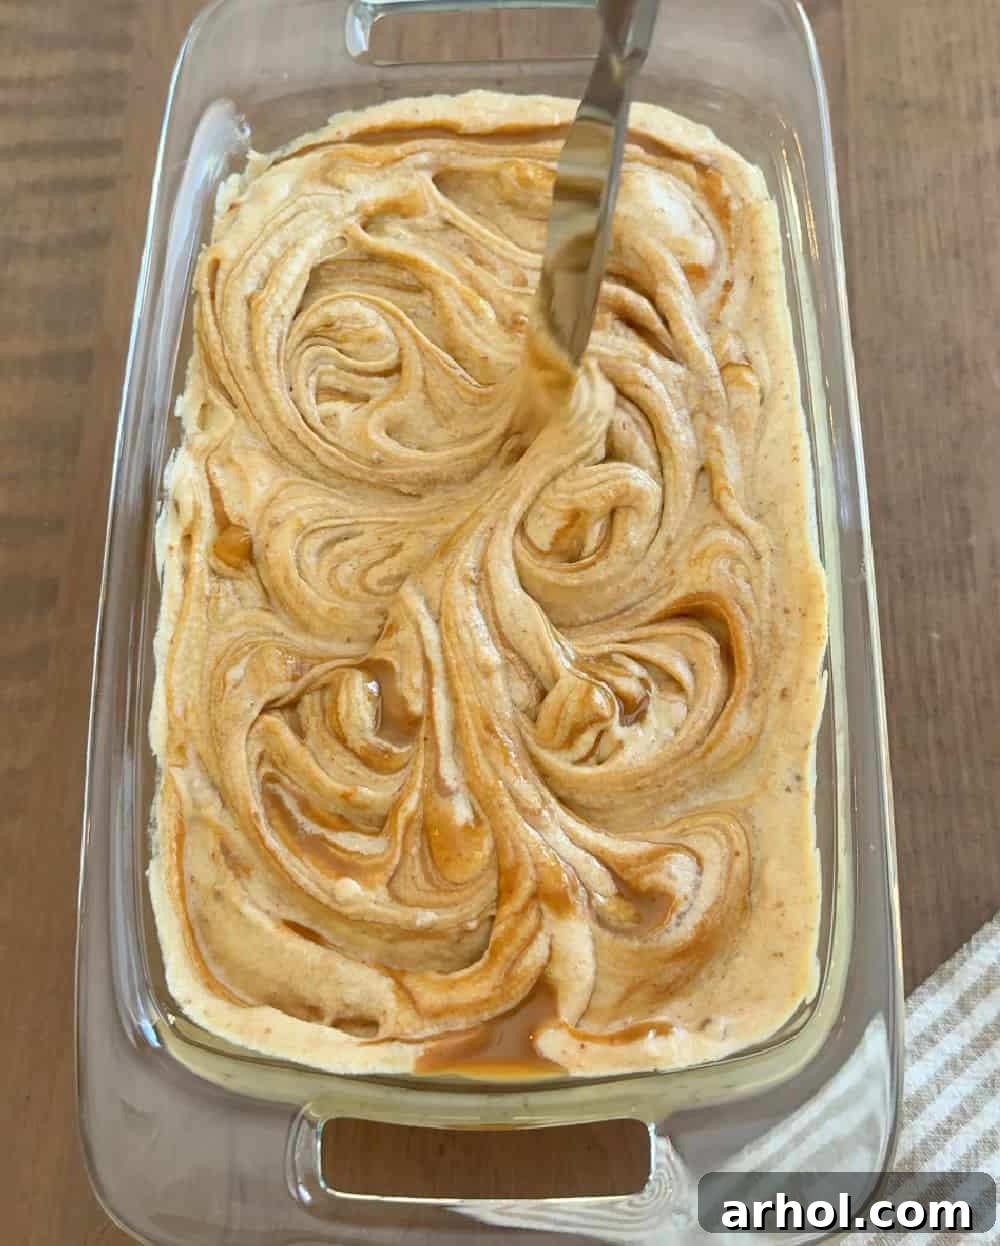
- Transfer and Swirl: Carefully spoon the entire ice cream mixture into a standard 9×5 inch loaf pan or any other suitable freezer-safe container. To create beautiful, enticing cookie butter swirls, gently warm a couple of tablespoons of extra cookie butter until it’s easily pourable (a few seconds in the microwave, stirred until smooth, usually does the trick). Drizzle this melted cookie butter artistically over the top of the ice cream mixture in the pan. Then, take a thin knife or a skewer and gently swirl it through the drizzled cookie butter, creating elegant ribbons and visually appealing pockets of intense flavor. This not only looks professional but adds bursts of concentrated cookie butter goodness.
- Add Extra Topping (Optional): For an added touch of indulgence, a contrasting texture, and a beautiful visual presentation, sprinkle a few more crushed Biscoff cookie bits on top of the swirled ice cream before placing it in the freezer.
- Freeze for Perfection: Cover the loaf pan or container tightly with plastic wrap directly touching the surface of the ice cream to prevent ice crystals from forming, then follow with a layer of aluminum foil to seal it completely. Place it in the coldest part of your freezer for at least 4-6 hours, or preferably overnight, until the ice cream is completely firm and set. This crucial freezing time allows the flavors to meld beautifully and the ice cream to reach its optimal creamy, scoopable consistency.
Expert Tips for No-Churn Ice Cream Success
Achieving perfectly creamy, scoopable, and delicious no-churn ice cream is easy when you follow a few simple guidelines. These tips will help you avoid common pitfalls and ensure your cookie butter ice cream turns out fantastic every time:
- Room Temperature Cookie Butter is Key: Before you start mixing, make sure your cookie butter is at room temperature. If it’s cold or firm, it will be much harder to combine smoothly with the sweetened condensed milk, potentially leading to lumps and an uneven base. A quick zap in the microwave (10-15 seconds) can help if you’re short on time, but ensure it’s merely softened and spreadable, not hot.
- Don’t Over-beat the Whipped Cream: When whipping heavy cream, stop as soon as stiff peaks form. Stiff peaks mean that when you lift the beaters, the peaks hold their shape and don’t flop over. Over-beating will cause the cream to become grainy, crumbly, or even curdle into butter, which will negatively impact the final texture of your ice cream, making it less smooth and luscious.
- Gentle Folding is Essential: Once your heavy cream is whipped, resist the urge to use the electric mixer for combining it with the cookie butter mixture. Instead, use a wide rubber spatula and gently fold the two together. This technique is crucial as it preserves the precious air that you’ve whipped into the cream, which is vital for the light, airy, and creamy texture characteristic of good no-churn ice cream. Fold just until no visible streaks of white cream remain, ensuring uniform incorporation without sacrificing volume.
- Chill Your Mixing Bowl and Whisk: For even faster and more successful whipping of heavy cream, place your mixing bowl (especially if it’s metal) and whisk attachments in the freezer for 10-15 minutes before you start. Cold equipment helps the cream whip more efficiently and achieve stiffer peaks that hold their shape better.
- Quality Ingredients Matter: While this recipe is incredibly simple, the quality of your ingredients makes a significant difference in the final taste and texture. Use good quality heavy cream and your favorite brand of cookie butter for the best flavor outcome. Fresh, cold cream whips best.
- Proper Freezing Time: Patience is a virtue, especially with no-churn ice cream. Don’t rush the freezing process. For optimal texture and firmness, the ice cream needs at least 4-6 hours, but freezing it overnight is always best. This allows it to firm up completely, prevents iciness, and allows all the delicious flavors to fully meld and deepen.
Serving Suggestions for Your Cookie Butter Ice Cream
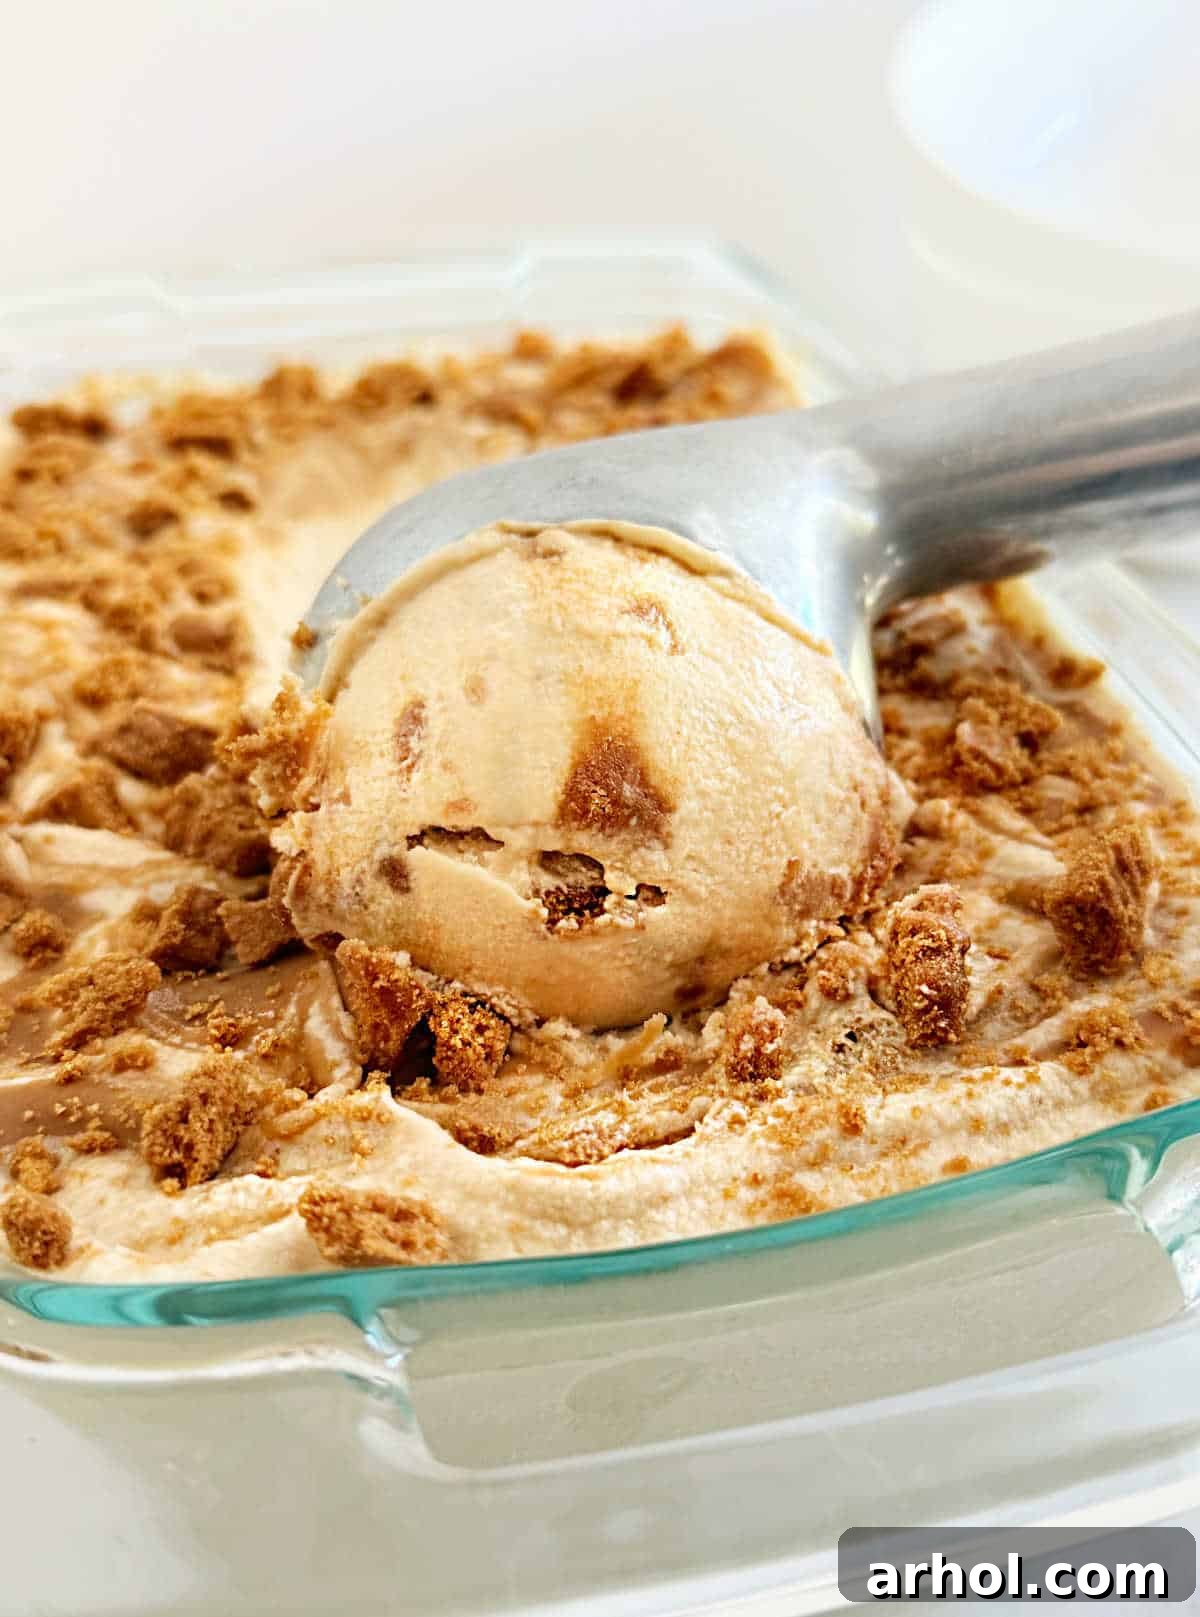
Once your homemade Biscoff cookie butter ice cream is perfectly frozen and ready, the fun doesn’t stop there! While this decadent frozen treat is absolutely fantastic on its own, its rich, spiced flavor also makes it an excellent base for various toppings, pairings, and creative serving ideas. For an extra touch of elegance and to prevent premature melting, consider serving it in chilled bowls.
- Extra Cookie Crunch: Sprinkle more coarsely crushed Biscoff cookies on top just before serving for an enhanced textural experience and a beautiful garnish.
- Warm Drizzle Indulgence: A warm drizzle of extra melted cookie butter can add another layer of intense flavor. Alternatively, a classic caramel sauce or a rich chocolate fudge sauce creates a delightful contrast.
- Chocolate Lover’s Dream: Pair the cookie butter with chocolate by drizzling with chocolate syrup, sprinkling mini chocolate chips, or adding chocolate shavings. The combination of caramelized cookie and rich chocolate is simply divine.
- Fresh Fruit Contrast: A dollop of fresh whipped cream and a side of sliced bananas or fresh berries (like strawberries or raspberries) can provide a lovely, light freshness that beautifully cuts through the richness of the ice cream.
- Coffee Pairing Perfection: Serve a scoop alongside a hot cup of freshly brewed coffee or a rich espresso; the warm and cold elements, along with complementary flavors, create a sophisticated dessert experience.
- Milkshake Magic: For an ultimate treat, blend a few scoops of your cookie butter ice cream with a splash of milk and a touch more cookie butter for an incredible, thick, and flavorful cookie butter milkshake.
- Dessert Upgrade: Use a scoop or two as a luxurious topping for other desserts like warm brownies, apple pie, a simple pound cake, or even waffles and pancakes, transforming them into an elevated dessert experience.
Storage Solutions for Your Homemade Ice Cream
One of the many joys of making your own ice cream is having a delicious stash ready whenever a craving strikes! Proper storage is crucial to maintain the creamy texture and prevent freezer burn, ensuring your homemade cookie butter ice cream stays fresh, delicious, and free of ice crystals for as long as possible.
After the initial freezing period, any remaining ice cream should be transferred into an airtight, freezer-safe container. If you used a loaf pan, make sure to cover it securely. The best method is to first place a layer of plastic wrap directly onto the surface of the ice cream, pressing out any air bubbles, and then covering the entire pan tightly with at least two additional layers of plastic wrap, followed by a final layer of aluminum foil. This double-layer protection is vital for keeping out air, which is the main culprit behind ice crystal formation and dreaded freezer burn. Freezer burn manifests as hard, icy spots and can severely degrade the ice cream’s smooth texture and vibrant flavor. Stored correctly in this manner, your homemade cookie butter ice cream will maintain its optimal quality in the freezer for up to 3 months. When you’re ready to serve, if the ice cream is exceptionally hard straight from the freezer, simply let it sit on the counter for 5-10 minutes to soften slightly. This will make scooping much easier and ensure you get that perfect creamy spoonful every time.
Frequently Asked Questions (FAQ) About No-Churn Cookie Butter Ice Cream
- Can I use crunchy cookie butter instead of creamy?
- Absolutely! Using crunchy cookie butter will introduce an extra layer of delightful texture with more distinct cookie bits distributed throughout your ice cream. It’s a fantastic choice if you love a bit more crunch and an intensified cookie experience in your frozen treats. Feel free to use whichever variety you prefer!
- Do I need an electric mixer?
- While an electric mixer (either a handheld mixer or a stand mixer with a whisk attachment) is highly recommended for efficiently whipping the heavy cream to stiff peaks, it’s not strictly mandatory. You can technically whip the cream by hand with a sturdy whisk and a lot of elbow grease. However, be prepared for a significant arm workout, as it will take much longer and require considerable effort to achieve the desired voluminous and stable consistency. An electric mixer makes this step much quicker and more reliable.
- Why is my ice cream not freezing properly or becoming icy?
- Several factors could contribute to an icy or improperly frozen no-churn ice cream. First, ensure you are using the correct ingredients: heavy whipping cream (not half-and-half, light cream, or milk) and sweetened condensed milk (not evaporated milk). Second, the heavy cream must be whipped to firm, stiff peaks to incorporate enough air, which prevents a dense, icy texture. Third, the mixture should be folded gently to maintain its airiness. Finally, make sure to freeze it for the recommended amount of time, ideally overnight, in an airtight container to prevent environmental moisture from causing ice crystal formation.
- Can I make this recipe dairy-free or vegan?
- Yes, with some careful substitutions, you can adapt this recipe to be dairy-free or vegan! You would typically need to use a full-fat canned coconut cream (which should be chilled overnight, then only the thick cream scooped out) in place of heavy whipping cream. Additionally, opt for a high-quality dairy-free sweetened condensed milk alternative. Always ensure your chosen cookie butter brand is also vegan-friendly (most Biscoff products are, but it’s always best to double-check the labels for hidden dairy). The texture might vary slightly from the traditional version but can still be wonderfully delicious.
- How long does it take for the ice cream to freeze completely?
- For the ice cream to set properly and achieve its ideal firm, scoopable consistency, it typically needs at least 4-6 hours in the freezer. However, for the very best texture, depth of flavor, and stability, it’s highly recommended to freeze it overnight (8-12 hours). This allows all the components to fully set, the flavors to meld, and ensures minimal iciness.
- What if my cookie butter is too hard to mix?
- This is a common issue and usually means your cookie butter is too cold. Before you begin mixing, allow your cookie butter to sit at room temperature for at least an hour or two to soften naturally. If you’re short on time and need it softened quickly, you can gently microwave it for 10-15 seconds, stirring well until it’s smooth and easily pourable, but not hot. Overheating can change its texture.
Explore More Homemade No-Churn Ice Cream Delights
If you’ve enjoyed the simplicity and deliciousness of this cookie butter ice cream, you’re in for an even greater treat! The world of no-churn ice cream is vast and full of exciting flavors waiting to be discovered, proving that gourmet frozen desserts are easily achievable at home without specialized equipment. Whether you love crunchy cookies swirled into your frozen dessert, prefer classic fruit notes, or crave invigorating coffee flavors, there’s a no-churn recipe for everyone. Expand your homemade ice cream repertoire and delight your family and friends with these fantastic, easy-to-make recipes:
- For a timeless cookie classic that never fails to please, try this easy Oreo ice cream, generously packed with crushed chocolate sandwich cookies for a delightful crunch in every bite.
- Embrace festive fun and vibrant colors with this homemade Halloween ice cream, perfect for seasonal celebrations and themed parties with its spooky yet delicious charm.
- Awaken your senses and treat yourself to a sophisticated dessert with a rich and invigorating coffee ice cream, offering a perfect balance of creamy sweetness and bold coffee flavor.
- Indulge in a nutty, sweet, and utterly irresistible combination with chocolate peanut butter ice cream, a true match made in dessert heaven for fans of this classic duo.
- Keep it beautifully classic and wonderfully versatile with an easy homemade vanilla ice cream, which serves as a perfect foundation on its own or with any imaginable topping.
- Dive into deep, rich flavor and nostalgic campfire vibes with this no-churn chocolate s’mores ice cream, bringing all the joy of a campfire favorite into a convenient frozen form.
- Enjoy the sweet and tart notes of this vibrant no-churn cherry vanilla ice cream, bursting with fruity goodness and a delightful creamy base.
- Savor the refreshing taste of summer any time of year with a delightful homemade strawberry ice cream, made with real fruit for an authentic and juicy flavor.

Print Recipe
Cookie Butter Ice Cream
Indulge in creamy, dreamy homemade cookie butter ice cream with this incredibly simple no-churn recipe. Made with just four main ingredients and your favorite Biscoff cookies, it’s an effortless way to create a sensational frozen dessert without an ice cream maker! Get ready for a rich, spiced, and utterly satisfying treat.
Ingredients
For the Ice Cream
- ¾ cup cookie butter (at room temperature)
- 1 (14 oz) can sweetened condensed milk
- 2 cups heavy whipping cream (very cold)
- 8 Biscoff cookies, coarsely chopped into small bits
For the Topping
- 2 tablespoons cookie butter, melted (for swirling)
- 2 Biscoff cookies, chopped into small bits (optional, for garnish)
Instructions
- In a large bowl, mix together the room-temperature cookie butter and sweetened condensed milk until completely smooth and well combined. Set this mixture aside.
- In a separate, large mixing bowl, add the very cold heavy whipping cream. Beat with a handheld electric mixer on high speed until stiff peaks form.
- Using a rubber spatula, gently fold the cookie butter and sweetened condensed milk mixture into the whipped cream until just combined, being careful not to deflate the whipped cream.
- Gently fold in the 8 chopped Biscoff cookie bits, distributing them evenly throughout the ice cream base.
- Evenly pour the mixture into a 9×5 inch loaf pan or any freezer-safe container.
- Drizzle the melted cookie butter over the top of the ice cream mixture. Using a knife or a skewer, gently swirl the melted cookie butter into the ice cream to create beautiful ribbons.
- Optionally, top with the extra 2 chopped Biscoff cookie bits for garnish.
- Cover the pan tightly with plastic wrap directly touching the surface, then with aluminum foil to prevent freezer burn. Freeze for at least 4 hours, or preferably overnight, until the ice cream is solid and firm.
Video
A video tutorial for this recipe will be available soon to guide you through each step!
Notes
- You can use either creamy or crunchy cookie butter for this recipe. If you prefer more distinct cookie pieces throughout your ice cream, opt for the crunchy variety for an added textural dimension.
- Always ensure the cookie butter is at room temperature for easy and smooth mixing with the condensed milk. If it’s too cold or stiff, let it sit out on the counter until it softens naturally.
- For the most efficient and smooth base, use an electric mixer to combine the cookie butter and sweetened condensed milk together.
- When whipping the heavy cream, precision is key: stop immediately once stiff peaks form. Over-beating will lead to a grainy or even curdled texture, affecting the creaminess of your ice cream.
- Remember to gently fold the whipped cream into the milk mixture using a rubber spatula, rather than a mixer. This delicate technique preserves the air incorporated into the cream, which is crucial for achieving a light and airy no-churn ice cream.
Nutrition Information
Carbohydrates: 16g
Protein: 3g
Fat: 23g
Saturated Fat: 12g
Polyunsaturated Fat: 1g
Monounsaturated Fat: 4g
Cholesterol: 45mg
Sodium: 40mg
Potassium: 45mg
Fiber: 0.1g
Sugar: 9g
Vitamin A: 590IU
Vitamin C: 0.2mg
Calcium: 28mg
Iron: 0.3mg
Nutrition information is automatically calculated and provided for approximation purposes only. Individual results may vary.
Additional Recipe Details
Loved this recipe? Your feedback means a lot to us! Feel free to leave a comment below and share your experience.
Don’t miss out on more delightful and easy recipes delivered straight to your inbox! Sign up for our free newsletter today and join our growing community of home cooks who love to create delicious meals and desserts with ease.