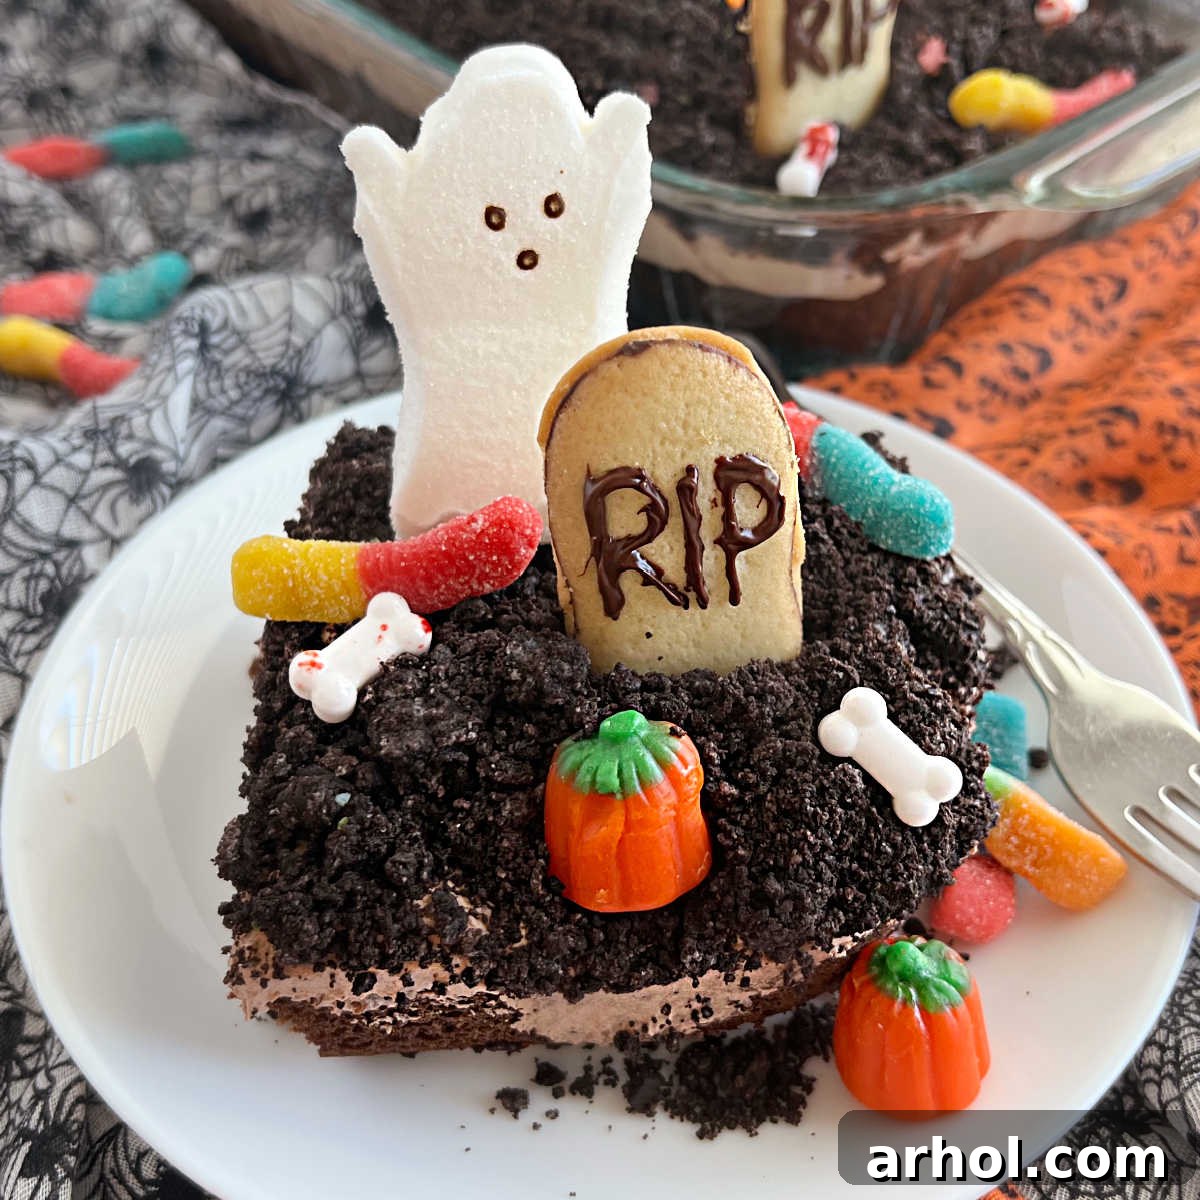
Delight in the spooky season with our incredible Halloween Dirt Cake, also affectionately known as Graveyard Cake! This enchanting dessert is a true centerpiece for any Halloween celebration, blending rich chocolate flavors with a playful, ghoulish presentation. Imagine layers of moist chocolate cake, creamy chocolate pudding, and crushed Oreo cookies that mimic dark, crumbly earth, all brought to life with an array of edible decorations like gummy worms, candy pumpkins, and ghostly marshmallows. It’s not just a treat; it’s an edible work of art that promises endless fun for both adults and children, making it the perfect addition to your holiday festivities. Whether you’re hosting a grand Halloween bash or simply looking for a delightful family activity, this easy-to-make dessert is sure to conjure smiles and create lasting memories. It’s designed for simplicity and maximum impact, ensuring you spend less time baking and more time enjoying the magic of Halloween. Dive into this recipe and discover why our Halloween Dirt Cake is poised to become your new favorite spooky season tradition.
Easy Halloween Cake: Your Ultimate Graveyard Cake Recipe Guide
If you’re searching for a captivating yet effortless dessert to elevate your Halloween festivities, look no further than this incredibly charming Halloween Dirt Cake. It stands out as a beloved classic, consistently ranking among my family’s most cherished Halloween treats year after year. This delightful creation goes by many names – some call it “Ghosts in the Graveyard,” others “Graveyard Cake,” or simply “Halloween Graveyard Dirt Cake.” Regardless of the moniker, its purpose is singular: to enchant and amuse with its artful representation of a spooky cemetery, all in the cutest possible way!
What sets our graveyard cake recipe apart is its unique base: a rich, tender chocolate cake, providing a sturdy and satisfying foundation. This is then lavishly topped with a velvety, homemade chocolate pudding frosting – a delectable concoction that’s smooth, creamy, and utterly irresistible. To complete the “dirt” effect, a generous layer of finely crushed Oreo cookie crumbs is sprinkled over the frosting, perfectly mimicking freshly turned earth. Crucially, this recipe achieves its incredible richness and texture without the addition of cream cheese, making it a distinct and widely appreciated version of the classic dirt cake.
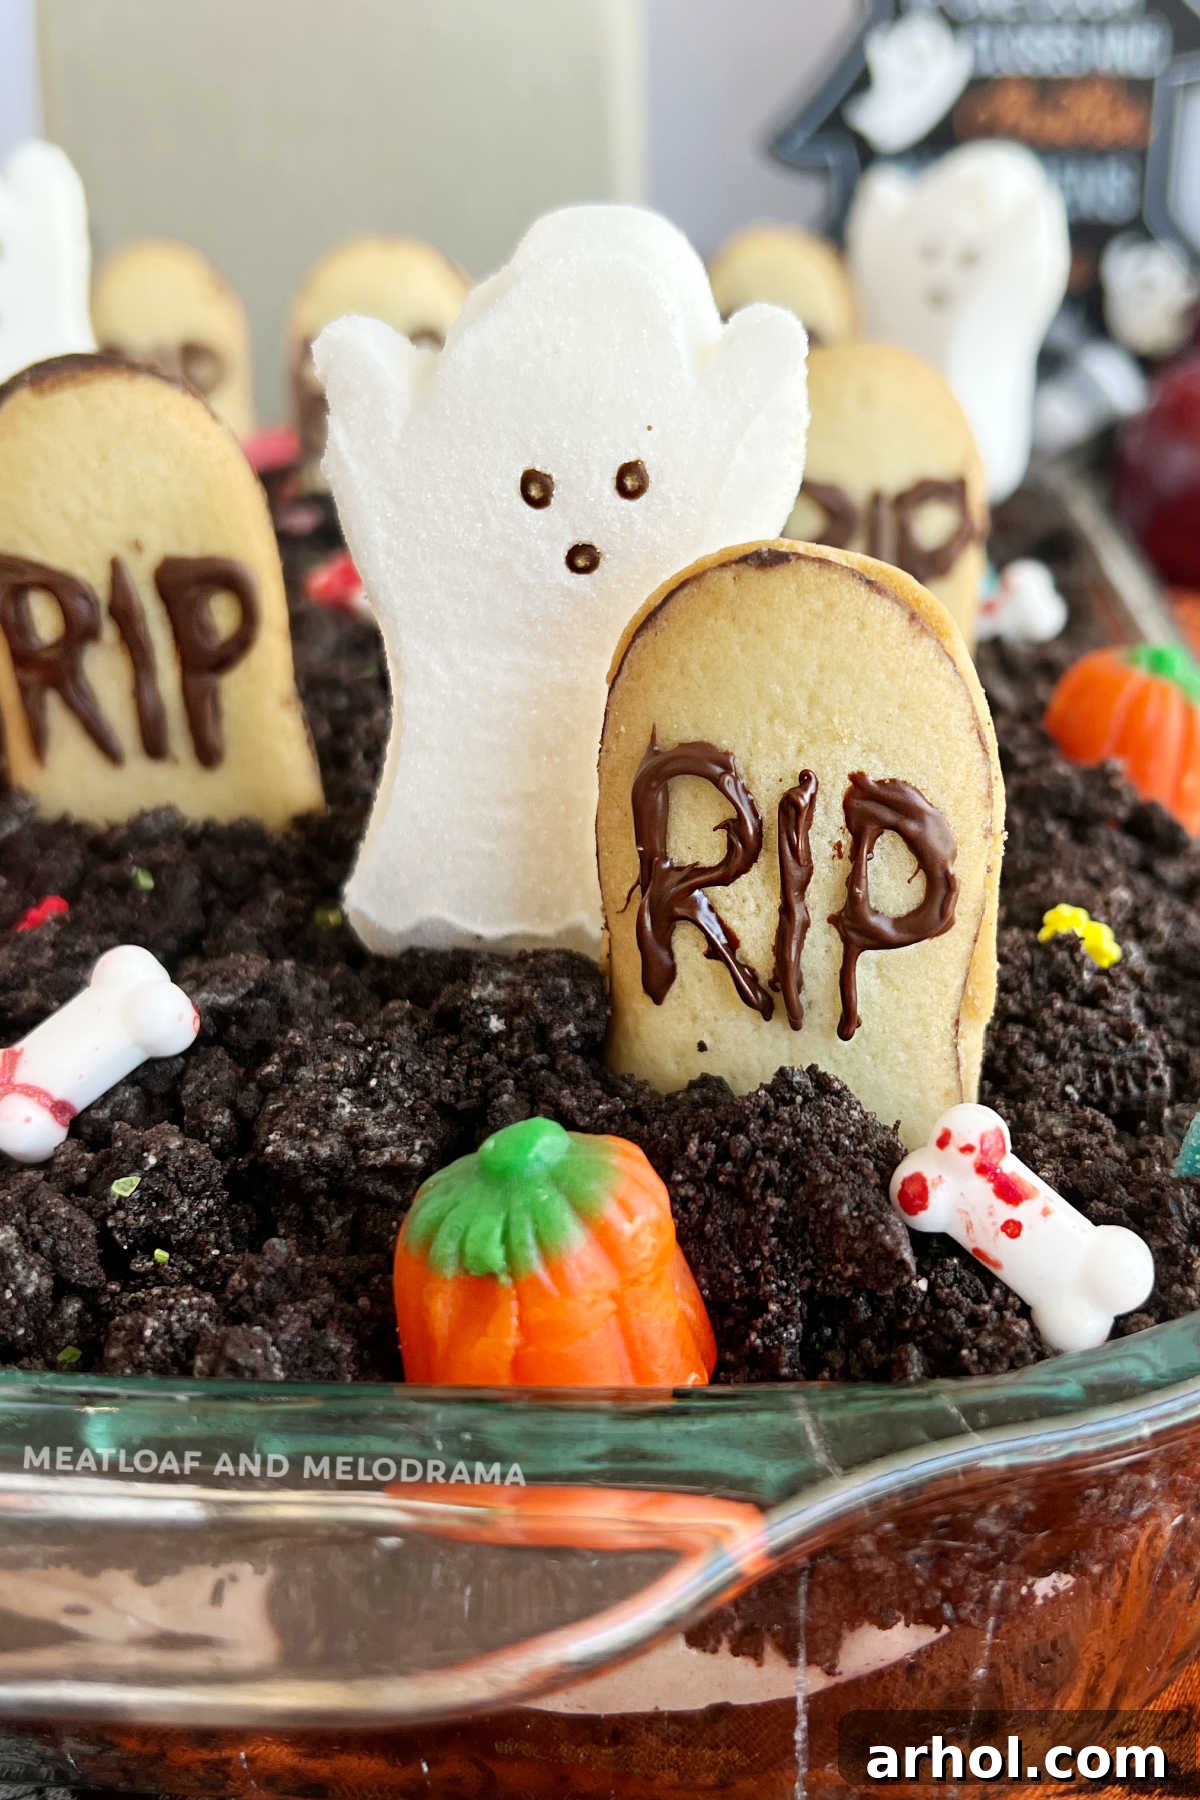
The true magic of this dessert unfolds during the decoration phase. Here’s where creativity takes center stage! Imagine nestling vibrant gummy worms, scattering cheerful candy pumpkins, strategically placing adorable marshmallow ghosts (like Peeps ghosts), and inserting elegant cookie tombstones to transform your cake into a whimsical, edible graveyard scene. This interactive part is always a massive hit, especially with children, who revel in bringing their spooky landscape to life. The possibilities for customization are boundless, allowing each cake to become a unique masterpiece. Prepare for gasps of delight and excited chatter as your guests discover this fantastically fun and flavorful Halloween dessert!
Table of Contents
- Easy Halloween Cake: Your Ultimate Graveyard Cake Recipe Guide
- Essential Ingredients for Halloween Dirt Cake
- Step-by-Step Guide: How to Make Halloween Dirt Cake
- Creative Decoration Ideas for Your Halloween Graveyard Cake
- Storage Tips for Your Spooky Dessert
- Delicious Variations to Your Halloween Dirt Cake
- Expert Recipe Tips for a Perfect Halloween Dirt Cake
- More Hauntingly Good Halloween Desserts
- Halloween Dirt Cake Recipe
Essential Ingredients for Halloween Dirt Cake
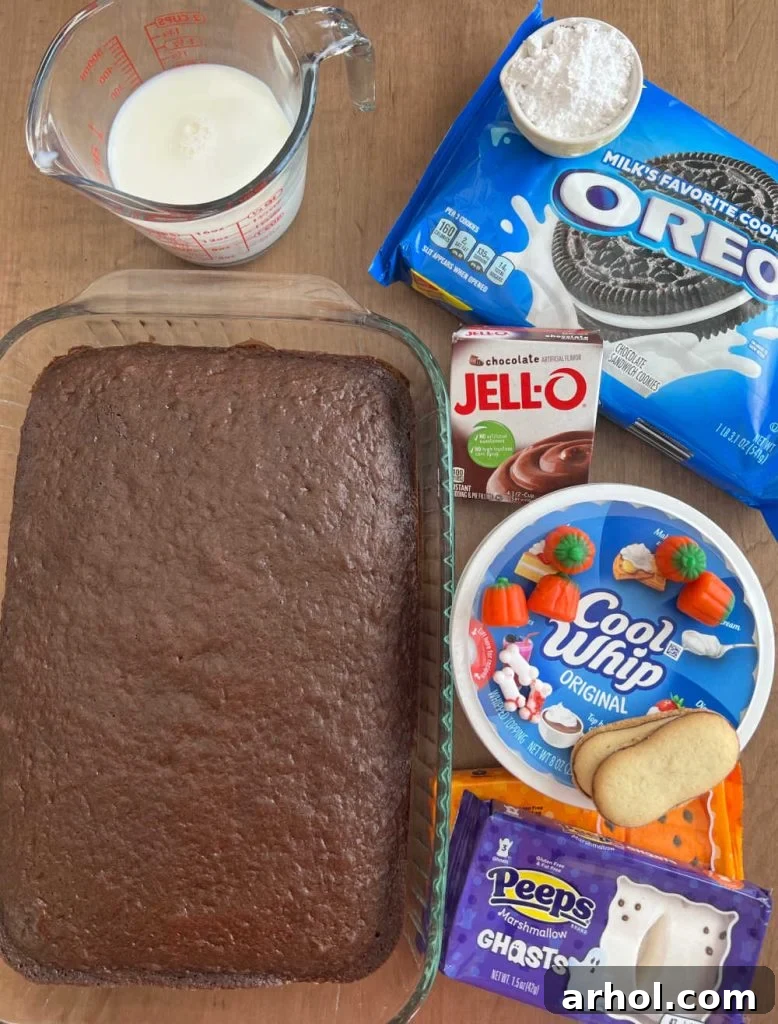
Crafting this spooky delicious Halloween Dirt Cake requires just a handful of readily available ingredients, making it a stress-free baking adventure. You can easily find these items at your local grocery store or order them online for convenience. The precise measurements for each component are thoughtfully detailed in the comprehensive recipe card provided below.
- Chocolate Cake Mix: This serves as the foundational layer of our graveyard. Be sure to also gather the supplementary ingredients (such as eggs, oil, and water) as specified on the cake mix package to prepare a moist and flavorful chocolate cake base.
- Instant Chocolate Pudding Mix: A crucial component for our rich and creamy frosting. It is essential to choose an *instant* pudding mix, not the “cook and serve” variety, as they behave very differently in this recipe.
- Milk: Opt for 2 percent or whole milk to achieve the perfect consistency and richness for your pudding mixture. The fat content contributes significantly to the creamy texture.
- Cool Whip (or Whipped Topping): This ingredient adds an airy, light, and fluffy texture to our chocolate pudding frosting. Remember to thaw it completely in the refrigerator before incorporating it into the mixture to ensure a smooth, lump-free frosting.
- Powdered Sugar: A touch of powdered sugar helps to sweeten and stabilize our homemade pudding frosting, giving it a wonderfully smooth finish and balanced sweetness.
- Oreo Cookies (Crushed): These iconic chocolate sandwich cookies are absolutely indispensable for creating the “dirt” layer. Crush them into fine crumbs to perfectly mimic the appearance and texture of rich, dark earth over your graveyard scene. Any chocolate sandwich cookie will work as a substitute if Oreos are unavailable.
- Milano Cookies (or Nutter Butter Cookies): These elegant, oblong cookies are ideal for crafting sturdy and realistic-looking gravestones. Their flat surface provides an excellent canvas for decorating.
- Assorted Halloween Candy: This is where the fun truly begins! For decorating your graveyard scene, we highly recommend using a vibrant selection of treats such as classic candy corn, delightfully squiggly sour worms (or gummy worms), festive Halloween sprinkles, spooky candy bones, and charming marshmallow pumpkins (or other seasonal marshmallow treats like ghost Peeps).
Additionally, you’ll need a few supplies for decorating your tombstone cookies. Melted chocolate (chocolate chips work perfectly) and a simple toothpick, or alternatively, gel food coloring or edible markers, will allow you to inscribe messages or designs onto your Milano or Nutter Butter gravestones, adding that extra touch of eerie charm to your Halloween Dirt Cake.
Step-by-Step Guide: How to Make Halloween Dirt Cake
Creating this eye-catching Halloween Dirt Cake is a straightforward and enjoyable process, perfect for bakers of all skill levels. Follow these simple steps to assemble your spooky masterpiece:
1. Prepare the Chocolate Cake Base: Begin by preparing your chocolate cake. Follow the instructions provided on your chocolate cake mix package precisely. Pour the batter into a 9×13 inch baking dish (a Pyrex dish works wonderfully for this, allowing you to see the layers). Once baked, it is crucial to allow the cake to cool down completely to room temperature before proceeding. Attempting to frost a warm cake will result in a melty, messy disaster.
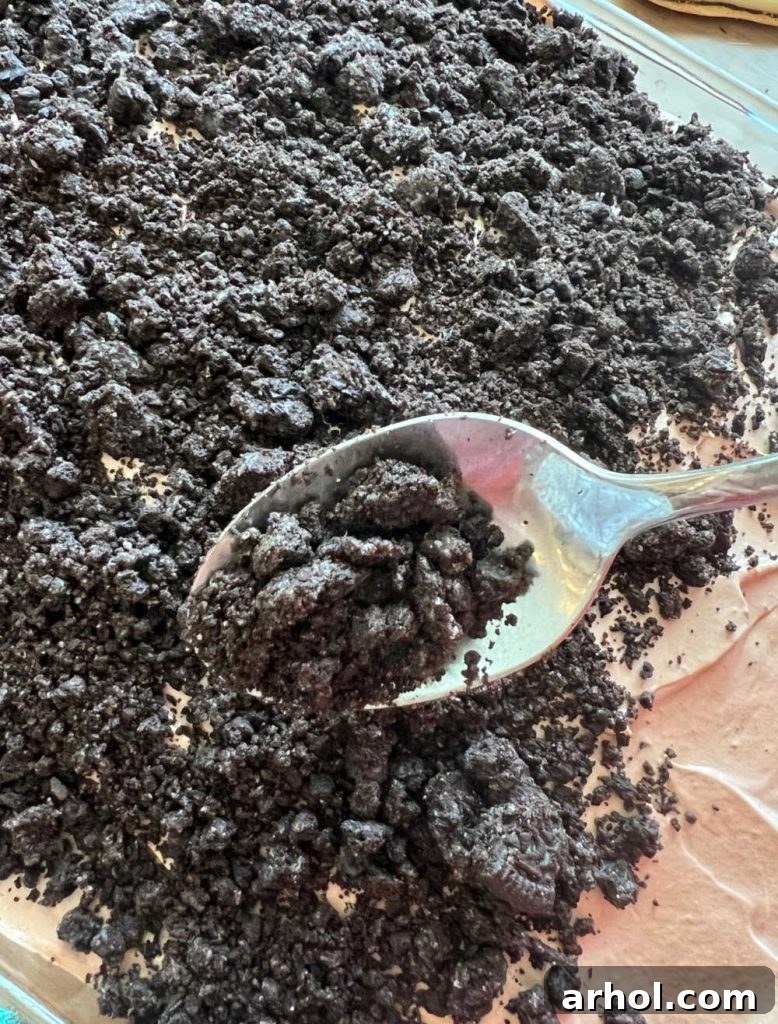
2. Crush the Oreo Cookies: While your cake cools, prepare your “dirt.” Place the Oreo cookies into a large, sturdy plastic zip-top bag. Using a rolling pin or the flat side of a meat mallet, firmly crush the cookies until they form fine, uniform crumbs. For a quicker and more consistent result, you can also process them in a food processor or blender until finely ground. The finer the crumbs, the more realistic your “dirt” will appear.
3. Whisk Up the Creamy Pudding Frosting: In a spacious mixing bowl, combine the instant chocolate pudding mix, milk (2 percent or whole milk for optimal creaminess), and powdered sugar. Using an electric mixer on medium speed, beat these ingredients together until they are thoroughly combined, smooth, and begin to thicken. This usually takes about 2-3 minutes. Next, gently fold in the thawed Cool Whip (or your preferred whipped topping) until the mixture is light, airy, and fluffy. Be careful not to overmix, as this can deflate the whipped topping.
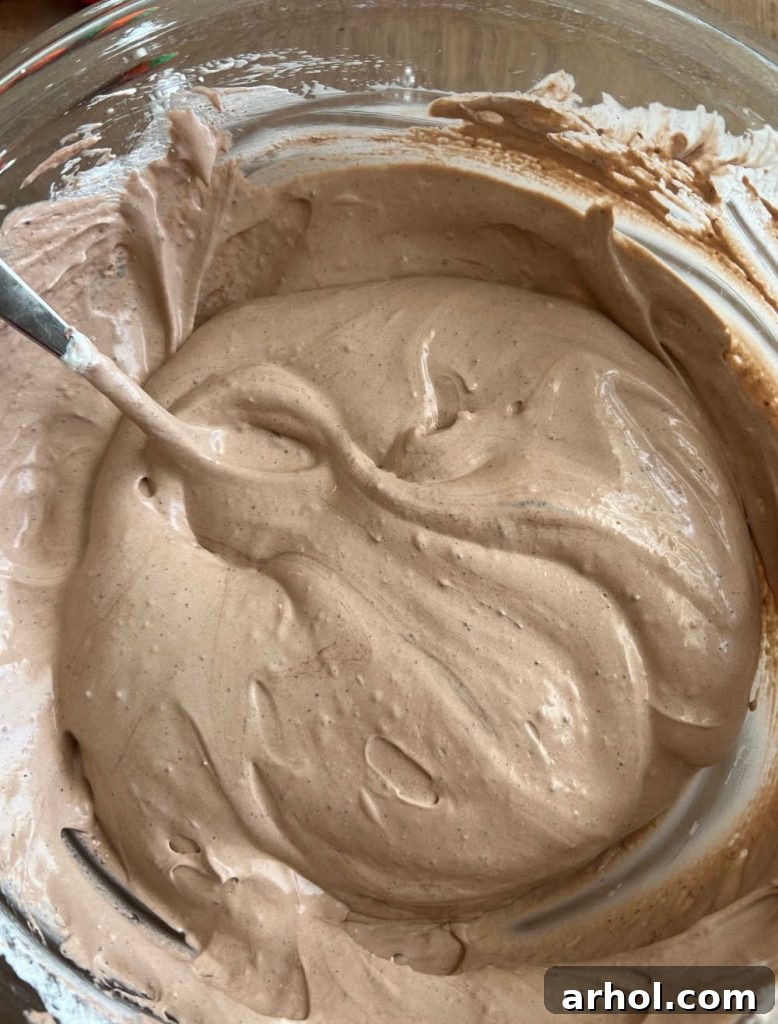
This unique combination of instant chocolate pudding, milk, powdered sugar, and Cool Whip creates an exceptionally delicious and remarkably light frosting that perfectly complements the rich chocolate cake. Its airy texture makes it a joy to eat.
4. Frost the Cake: Once your chocolate cake is completely cool, evenly spread the prepared pudding mixture over the entire top surface of the cake. An offset spatula is an invaluable tool for this step, allowing you to achieve a smooth, professional-looking finish with ease. Don’t be concerned if the frosting seems a little soft or runny immediately after spreading; it will thicken and firm up beautifully as it chills in the refrigerator.
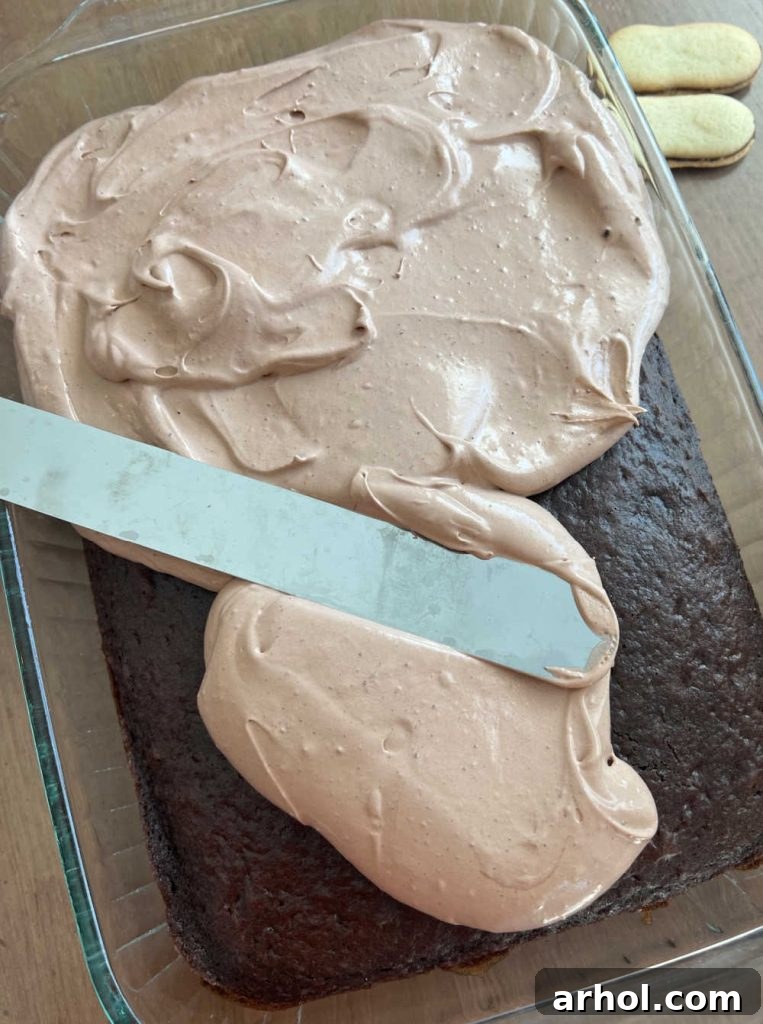
5. Add the “Dirt” Layer: After spreading the pudding frosting, generously spoon the finely crushed Oreo cookies over the entire surface. Ensure that the creamy pudding layer is completely covered with the cookie crumbs, creating the iconic “dirt” effect that is central to this Halloween dessert’s charm. This crumbly layer not only adds visual appeal but also a delightful textural contrast.
6. Chill Before Decorating: With the cake frosted and “dirtied,” it’s time for a brief chill. Place the entire baking dish into the refrigerator. Allow it to set for at least 30 minutes to an hour. This chilling period is essential; it allows the pudding frosting to firm up properly, providing a stable base for your graveyard decorations and making the cake easier to cut and serve later. While the cake chills, you can prepare your tombstone cookies and gather all your fun Halloween candies for the final decoration stage!
Creative Decoration Ideas for Your Halloween Graveyard Cake
Now for the most exciting part: transforming your chocolate and Oreo cake into a whimsical, edible graveyard scene! This is where your creativity truly shines, making each Halloween Dirt Cake unique.
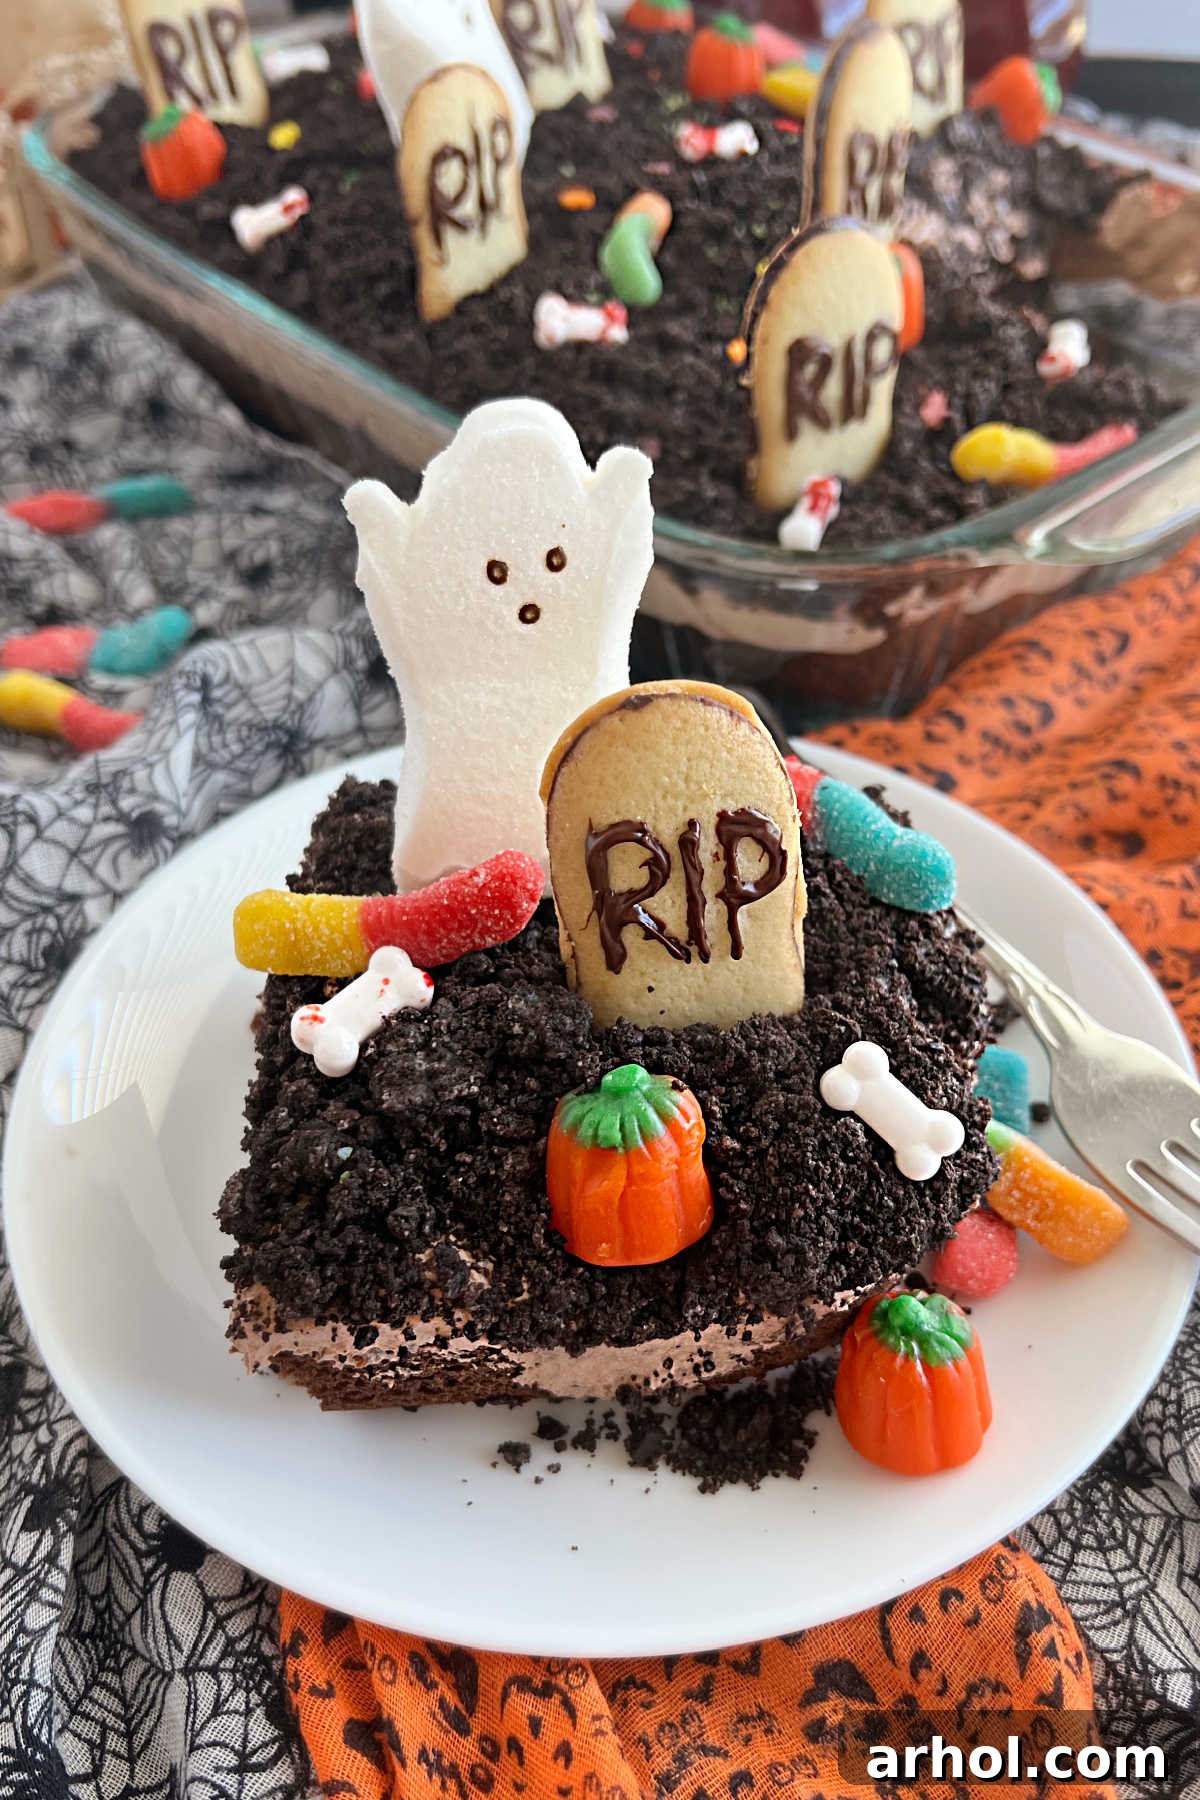
1. Place the Tombstone Cookies: Carefully press your decorated Milano (or Nutter Butter) cookies into the top of the cake, arranging them to look like gravestones. Position them upright, gently pushing them into the firm pudding and Oreo layers. Handle them with care to avoid smearing any intricate writing or designs you’ve applied to the “tombstones.”
Pro Tip for Upright Decorations: If you’re using marshmallow ghosts (like Peeps) or small marshmallow pumpkins, they sometimes struggle to stand tall in the soft cake. To ensure they remain upright and proudly spooky, insert a small wooden toothpick into the bottom of each candy, leaving a portion of the toothpick exposed. Then, gently press the exposed end of the toothpick into the cake. This trick provides stability, keeping your ghosts and pumpkins from toppling over. Just remember to inform your guests and remove all toothpicks before serving and eating!
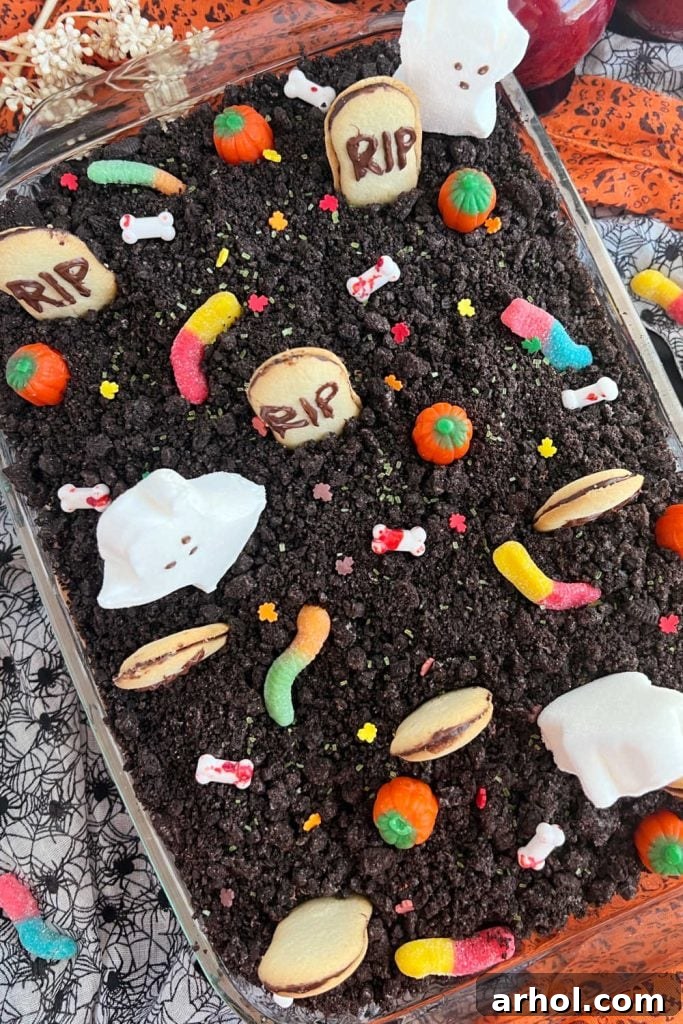
2. Populate Your Graveyard: This is where the graveyard truly comes alive! Scatter a generous amount of gummy worms across the “dirt” surface, making them peek out as if crawling from the ground. Add cheerful marshmallow pumpkins and spooky candy bones to complete the eerie landscape. To enhance the festive feel and add a touch of sparkle, consider sprinkling on Halloween-themed edible glitter, or small sprinkles shaped like fall leaves, bats, or spiders.
Endless Possibilities: The beauty of this Halloween graveyard dessert lies in its versatility. You can personalize it with any of your favorite Halloween candies and edible decorations! Think chocolate-covered pretzel sticks as tree branches, mini chocolate chips as pebbles, candy eyeballs peering from the “dirt,” or even small plastic spiders for an extra creepy touch (just be sure to remove any non-edible decorations before serving). The goal is to have fun and create a spooky scene that reflects your unique Halloween spirit. Let your imagination run wild – the possibilities for fun and frightening toppings are truly endless!
Storage Tips for Your Spooky Dessert
To ensure your Halloween Dirt Cake remains fresh, delicious, and visually appealing, proper storage is key. This graveyard Oreo dessert should be kept chilled in the refrigerator until you are ready to serve it. The cold temperature helps the pudding frosting maintain its firm texture and prevents the decorations from softening prematurely.
While you can certainly prepare the chocolate cake base and even the pudding frosting a day ahead of time, for the very best presentation and texture, it’s highly recommended to decorate the cake on the same day you plan to serve it. This keeps the cookie tombstones crisp and prevents marshmallow decorations from absorbing too much moisture.
For any leftover cake, carefully cover the baking dish with plastic wrap, ensuring it’s sealed tightly to prevent air exposure. Alternatively, transfer individual slices into an airtight container. Store the covered cake in the refrigerator for up to 3 days. It’s important to note that the longer the cake sits, the softer the Oreo cookie crumbs and the Milano cookie tombstones will become as they absorb moisture from the pudding layer. While still perfectly delicious, they might lose some of their initial crunch. Enjoy your spooky treat!
Delicious Variations to Your Halloween Dirt Cake
The beauty of the Halloween Dirt Cake lies in its adaptability! While our recipe provides a fantastic foundation, there are several ways to customize it to suit your preferences or specific occasions:
Traditional Dirt Cake / Halloween Dirt Pudding (No Cake Layer): For those who prefer a more classic “dirt cake” experience or a lighter dessert, you can completely omit the chocolate cake layer. This transforms it into a rich and creamy Halloween dirt pudding. Simply layer the chocolate pudding frosting and crushed Oreo crumbs directly into a serving dish. While delicious, keep in mind that the cake layer often provides a firmer base, making it easier to serve and to securely anchor your fun graveyard decorations. It also adds substantiality, making it a more filling dessert.
No-Bake Individual Halloween Dirt Cups: Looking to feed a crowd or offer perfectly portioned treats? Transform this recipe into adorable Halloween dirt pudding cups! Layer the pudding frosting and Oreo crumbs in clear plastic cups. These individual servings are not only practical for parties but also provide a charming way to showcase the “dirt” effect. You can even let guests decorate their own cups, making it an interactive party activity. This no-bake version is quick, easy, and always a hit!
Year-Round Dirt Pie: The “dirt cake” concept isn’t just for Halloween! Adapt this recipe into a delightful Dirt Pie recipe for any occasion. By changing the decorations, it can perfectly suit other holidays, like Easter (think candy eggs and bunnies), birthdays, or summer gatherings (with flower decorations). The core combination of chocolate and Oreos is universally loved.
Homemade Chocolate Cake: While a boxed cake mix offers incredible convenience and consistent results, if you’re a baking enthusiast and have a favorite homemade chocolate cake recipe, feel free to use it as the base for this Halloween Dirt Cake. A scratch-made cake will add an extra layer of depth and personal touch to your dessert, making it even more special. Just ensure it’s cooled completely before frosting.
Expert Recipe Tips for a Perfect Halloween Dirt Cake
Achieving a show-stopping and delicious Halloween Dirt Cake is simple with these expert tips:
- Plan Ahead for Best Results: For optimal freshness and presentation, you can bake the chocolate cake a day in advance. However, wait to assemble and decorate the cake on the day you plan to serve it. This prevents the cookies from becoming soggy and ensures your decorations look their best.
- Choose the Correct Pudding: Always purchase *instant* chocolate pudding mix, not “cook and serve” pudding. These are two distinct products with different setting properties, and using the wrong one will significantly alter the frosting’s consistency.
- Stabilize Your Peeps: When placing Peeps ghosts, marshmallow pumpkins, or other taller candy decorations, insert a wooden toothpick into the bottom of each piece. This provides stability, helping them stand upright in the cake. Remember to alert guests and remove all toothpicks before serving.
- Effortless Transport for Parties: If you’re bringing your spooky dessert to a Halloween party away from home, bake the cake directly in a disposable foil cake pan. These often come with convenient plastic covers, making transport incredibly easy and mess-free.
- Perfect Oreo Crumbs: For the most realistic “dirt” effect, ensure your Oreo cookies are crushed into very fine crumbs. A food processor or blender yields the best results, but a sturdy plastic bag and a rolling pin work well too.
- Chill Time is Crucial: Don’t skip the chilling step after frosting and adding the Oreo layer. This allows the pudding frosting to firm up, making it easier to decorate and ensuring cleaner slices.
More Hauntingly Good Halloween Desserts
Looking for more enchanting and easy Halloween recipes to round out your party spread or simply enjoy with your family? We have a cauldron full of delightful ideas that are sure to bewitch your taste buds! Extend your spooky dessert menu with some of our other crowd-pleasing creations. Each recipe is designed for ease and maximum Halloween fun, ensuring your celebration is both delicious and memorable.
- Halloween Cake Pops: These adorable bite-sized treats are perfect for parties! Moist cake crumbs are mixed with frosting, rolled into balls, and dipped in colorful candy melts, then decorated with spooky sprinkles or candy eyes. They are as fun to make as they are to eat, offering a delightful pop of flavor in every bite.
- Easy Halloween Oreo Pumpkins: Transform simple Oreo cookies into charming little pumpkins with just a few ingredients. Dipped in orange candy melts and adorned with green frosting stems, these no-bake treats are incredibly quick to assemble and a huge hit with kids.
- No-Bake Nutter Butter Ghost Cookies: Create ghostly delights with minimal effort! Nutter Butter cookies are coated in white chocolate and given edible candy eyes, making them look like cute, spooky spirits. They are ridiculously easy, requiring no baking, and perfect for last-minute party preparations.
- Halloween Popcorn Snack Mix (Monster Munch): A savory and sweet snack mix that’s ideal for munching during a scary movie night or a Halloween party. This mix combines popcorn, pretzels, candies, and often a drizzle of chocolate, creating an addictive blend of textures and flavors.
- Don’t forget to explore our entire collection of easy Halloween Recipes for even more inspiration, from main dishes to appetizers and drinks!

Halloween Dirt Cake Recipe
Dee
30
30
1
2
12
Ingredients
-
15.25
oz
chocolate cake mix
Plus ingredients to make cake (eggs, oil, water as per package) -
3.9
oz
instant chocolate pudding mix -
1
cup
milk
2 percent or whole milk for creaminess -
2
tbsp
powdered sugar -
8
oz
Cool Whip
thawed completely -
25
Oreo cookies
finely crushed (or other chocolate sandwich cookies) -
Milano cookies
or Nutter Butter cookies for tombstones -
Halloween candy
e.g., gummy worms, candy corn, marshmallow ghosts, candy bones, sprinkles
Instructions
- Prepare the chocolate cake according to the package directions in a 9×13 inch baking dish. Allow the cake to cool completely to room temperature before proceeding.
- In a large mixing bowl, combine the instant pudding mix, milk, and powdered sugar. Beat with an electric hand mixer until well combined and the mixture begins to thicken, about 2-3 minutes.
- Gently fold in the thawed Cool Whip until the mixture is light, fluffy, and smooth. Be careful not to overmix.
- Evenly spread the prepared pudding mixture over the top of the cooled chocolate cake, ensuring a smooth layer.
- Generously spoon the finely crushed Oreo cookies over the pudding layer, making sure the entire surface is covered to create the “dirt” effect.
- Chill the cake in the refrigerator for at least 30 minutes to an hour to allow the pudding layer to firm up.
- Decorate the chilled cake by gently pressing Milano cookie tombstones into the “dirt.” Arrange gummy worms, candy corn pumpkins, marshmallow ghosts, and any other Halloween candy of your choice to create a festive graveyard scene.
- Store the completed Halloween Dirt Cake in the refrigerator until you are ready to serve.
Notes
For crushing cookies, a food processor provides the finest crumbs. If you don’t have one, place cookies in a sturdy plastic bag and crush with a rolling pin or meat mallet.
It is vital to follow *this recipe’s* directions for making the pudding frosting, not the instructions on the pudding mix box, as our recipe incorporates additional ingredients for the perfect consistency.
Nutrition
Calories: 348 kcal, Carbohydrates: 59g, Protein: 5g, Fat: 12g, Saturated Fat: 3g, Polyunsaturated Fat: 3g, Monounsaturated Fat: 5g, Trans Fat: 0.03g, Cholesterol: 5mg, Sodium: 549mg, Potassium: 247mg, Fiber: 2g, Sugar: 36g, Vitamin A: 55IU, Vitamin C: 0.04mg, Calcium: 104mg, Iron: 5mg
Nutrition information is automatically calculated, so should only be used as an approximation.
Additional Info
Dessert
American
Like this? Leave a comment below!
For more easy Halloween dessert recipes and delightful culinary inspiration throughout the year, be sure to subscribe to our weekly newsletter! You’ll receive fresh ideas directly in your inbox. Also, don’t forget to follow us on social media for daily dose of deliciousness and behind-the-scenes fun!