
DIY Rainbow Loom Bows: Personalize Your Flip-Flops for Summer Fun!
Hello crafty friends! With the sunshine beaming and school doors closed for the season, summer is officially here, bringing with it a wonderful opportunity for creativity to blossom. For many families, this means more time for imaginative projects and hands-on fun. My little one, in particular, has been eagerly diving into her craft supplies, and her trusty Rainbow Loom is always at the heart of her imaginative endeavors. In fact, if you’re a parent of a loom enthusiast, you know the excitement that new loom products bring – I’m sure the Monster Tail Loom is on many wish lists this year!
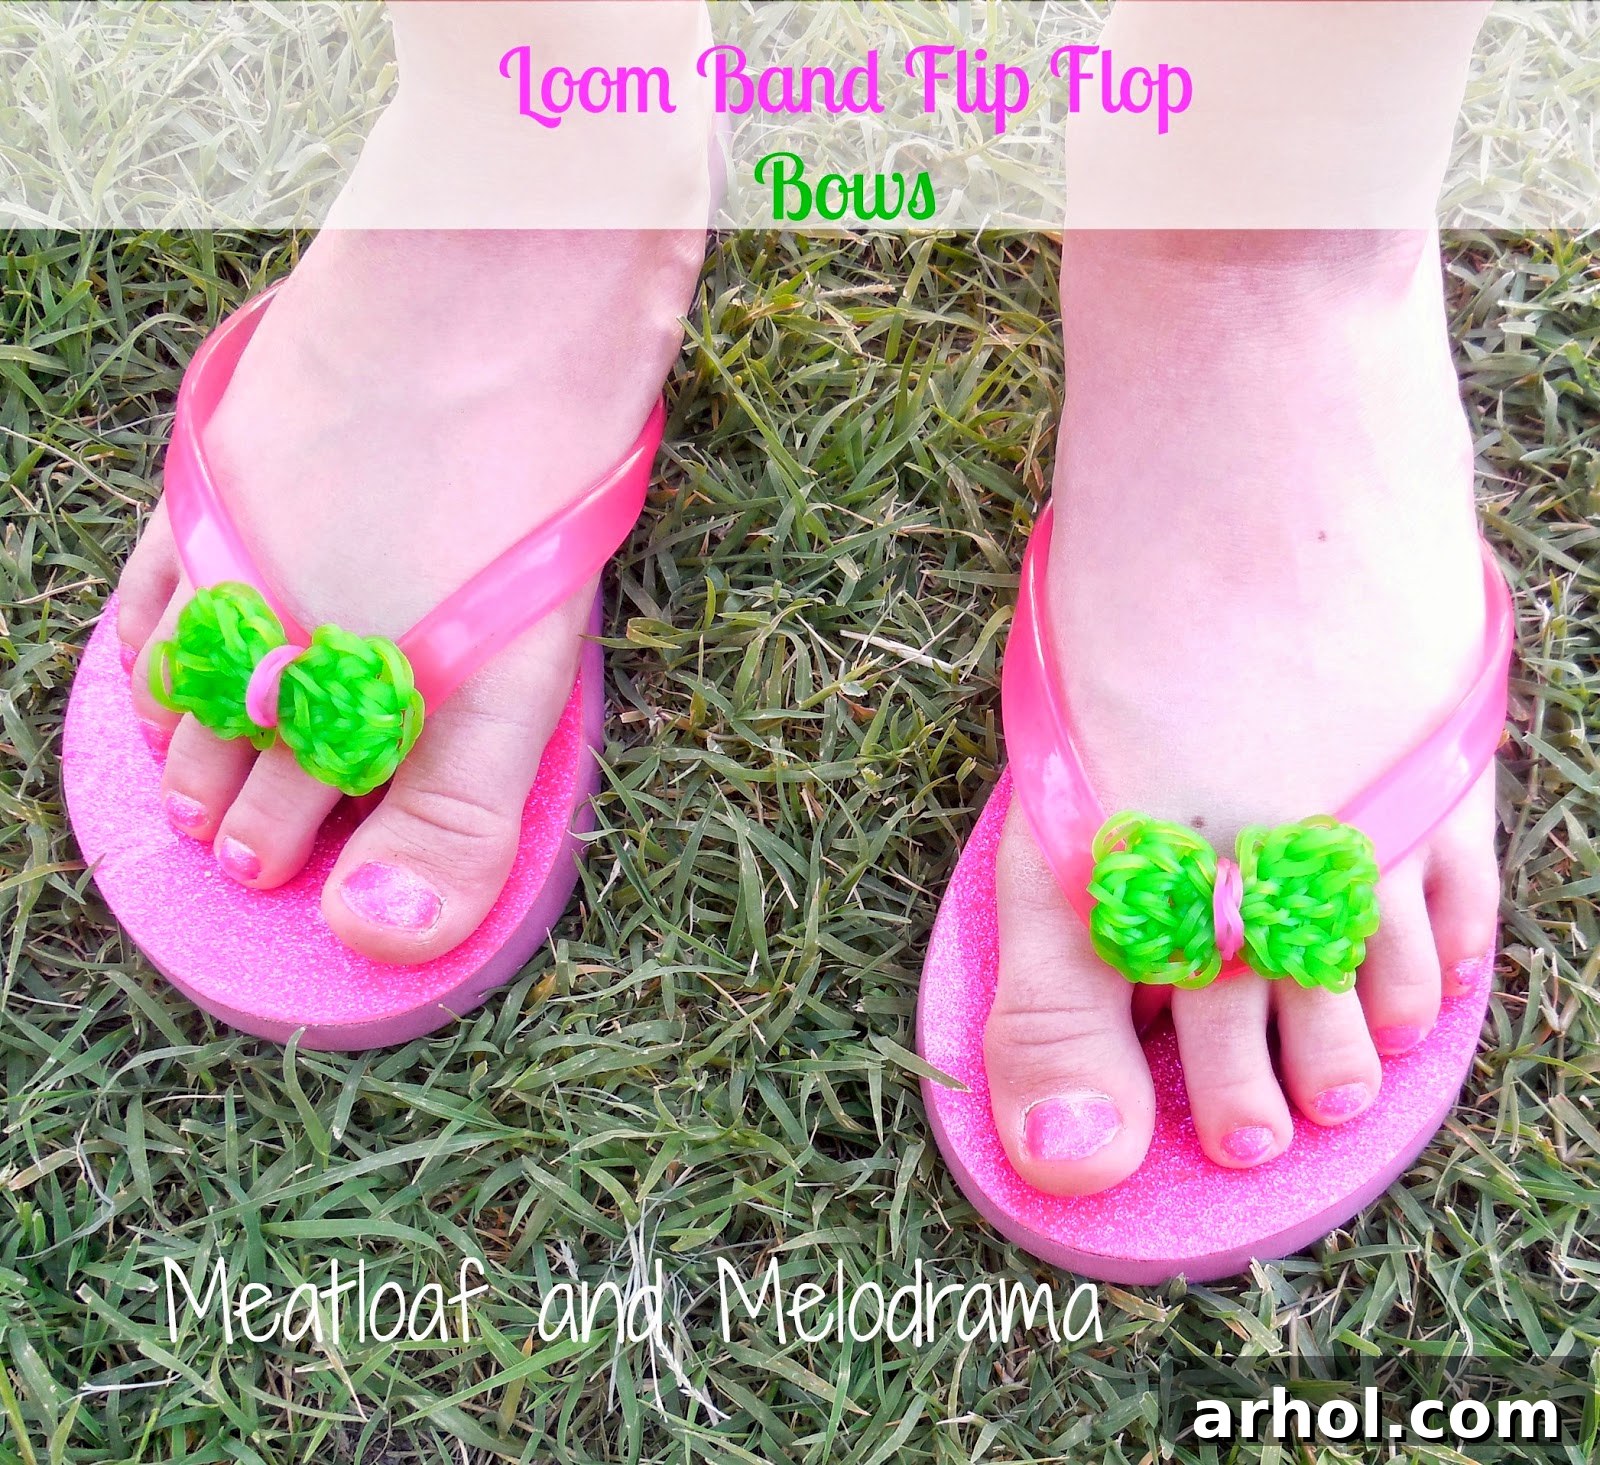
While the focus is often on bracelets and charms, we recently discovered an adorable way to bring that vibrant loom band creativity to everyday summer essentials: flip-flops! My daughter has a favorite pair of bright pink flip-flops. They’re incredibly comfortable and perfect for lounging by the pool, but they lacked a certain flair. That’s when inspiration struck! We decided to whip up some super cute Rainbow Loom bows to give these plain shoes a much-needed splash of personalized style and charm.
This project is wonderfully simple, making it ideal for crafters of all ages, especially those who already enjoy making loom band creations. If your children are adept at using their Rainbow Loom, crafting these bows will be a breeze. The result is a unique and stylish pair of flip-flops that truly stands out. Let’s gather our materials and get started on transforming those plain summer shoes into something spectacular!
What You’ll Need for Your DIY Flip-Flop Bows:
Before diving into the creative process, ensure you have all the necessary items at hand. The beauty of this craft lies in its simplicity and the readily available materials.
- Rainbow Loom or Similar Loom Brand: Any standard loom will work perfectly for creating these charming bows. If you’re new to looming, don’t worry, there are countless tutorials online for basic bow shapes.
- Loom Bands in Your Choice of Colors: This is where the fun begins! Select colors that complement your flip-flops or reflect your personal style. We opted for vibrant neon green and pink bands, which we thought would pop beautifully against the bright pink flip-flops. Consider glitter bands, glow-in-the-dark bands, or even multi-colored bands for extra flair.
- Plain Flip-Flops: The perfect canvas for your loom band artistry! Choose a comfortable pair with simple straps that will easily accommodate the bows.
- Loom Clips (S-clips or C-clips): These are essential for securing your loom band creations and will also play a role in attaching the bows to the flip-flop straps.
- Waterproof Glue: This is a crucial component for ensuring your bows stay firmly attached, especially if your flip-flops will be around water. More on this below!
Choosing the right color combination is half the fun! We loved how the neon green provided a lively contrast to the pink bands, making the bows truly eye-catching. Feel free to experiment with different shades and patterns to match your personality or your favorite swimsuit!
Step-by-Step Guide to Crafting and Attaching Your Loom Bows:
Creating the bows themselves is a rewarding process, and once you have a few under your belt, you’ll be able to whip them up in no time. While specific loom bow instructions can vary, here’s a general approach to crafting and attaching your bows, ensuring they are both secure and stylish.
1. Crafting Your Rainbow Loom Bows:
There are many tutorials available online for making various styles of loom bows, from simple single-band designs to more intricate multi-loop creations. For a basic bow, you would typically:
- Set up your loom: Ensure the open side of the pegs faces away from you.
- Place the bands: Create loops by placing bands in a specific pattern across the pegs to form the bow shape. This often involves forming figure-eights or stretching bands across multiple pegs to create the “loops” of the bow.
- Create the center knot: A crucial step is to gather the central part of the loops together with another band or hook to form the cinched “knot” of the bow, giving it its classic shape. This is usually done by looping a band around the center and then pulling other bands through it to secure.
- Finish and secure: Once the bow shape is formed, carefully remove it from the loom. Use a loom clip (S-clip or C-clip) to secure the final loops, ensuring the bow holds its shape. Make sure the bow is symmetrical and tight for the best look.
Practice makes perfect, so don’t be afraid to try a few bows to get the hang of it. You can experiment with different sizes and band arrangements to create unique looks for each flip-flop!
2. Attaching the Bows to Your Flip-Flops:
Once your beautiful bows are ready, it’s time to integrate them seamlessly onto your flip-flops. This step requires a bit of precision to ensure they look great and stay put.
- Positioning: Decide on the ideal placement for your bows on the flip-flop straps. Most people prefer them centrally located, either at the front where the straps meet or slightly to one side for a charming asymmetrical look.
- Initial Securement: To start, we threaded an extra loom band (in this case, a pink one) through the center of each finished bow. This band acted as a temporary anchor. We then carefully wound this band around the center of the flip-flop’s strap. This gives the bow an initial hold and helps you position it accurately before permanent gluing. After wrapping, attach the ends of this securing band to a clear loom clip, which subtly hides behind the bow. This method allows for minor adjustments before the final step.
3. Anchoring with Waterproof Glue:
While the loom clip provides a good initial hold, for true durability, especially with shoes that will encounter water, a strong, waterproof adhesive is essential. We found that the bows were a little wobbly with just the clip, so we decided to reinforce them.
- Applying the Glue: We used E6000 adhesive, a fantastic multi-purpose glue known for its industrial strength and flexibility. It’s often used for embellishing dance costumes and other heavy-duty crafts because it truly works! Carefully apply a small amount of E6000 (or a similar waterproof craft glue like Gorilla Glue Clear Grip or a strong silicone adhesive) to the back of the bow where it meets the flip-flop strap. Press firmly and hold for a few moments to ensure good contact.
- Safety Note: E6000 can be quite strong-smelling, so always use it in a well-ventilated area. Allow ample time for the glue to cure completely, typically 24-72 hours, before wearing the flip-flops, especially if they will be exposed to water. This ensures maximum adhesion and longevity for your beautiful new embellishments.
And voila! With these steps, you’ve transformed a simple pair of flip-flops into a personalized fashion statement, ready for all your summer adventures!
The Practical Perks of Personalized Loom Band Flip-Flops:
Beyond their undeniable cuteness, these decorated flip-flops offer several practical advantages that make them a summer favorite:
- Waterproof Wonders: Thanks to the nature of loom bands and the waterproof glue, these bows are incredibly durable and resistant to water. You can confidently wear your customized flip-flops around the pool, to the beach, or through a summer rain shower without worrying about damaging your beautiful decorations. This makes them perfect for all sorts of aquatic fun!
- Easy Identification: If you have kids, you know the struggle of finding their shoes amidst a pile of similar-looking footwear at summer camp, a friend’s house, or a public pool. Adding unique, vibrant loom band bows makes identifying your child’s flip-flops incredibly easy. No more mix-ups or lost shoes – their distinctive style will stand out in any crowd! This is a genuine lifesaver for busy parents.
- Personal Expression: This craft offers a fantastic outlet for self-expression. Kids can choose colors, patterns, and bow styles that truly reflect their personality, making their footwear as unique as they are. It’s a wonderful way to foster creativity and individuality.
- Budget-Friendly Style: Instead of buying expensive designer flip-flops, you can elevate a basic, affordable pair with just a few dollars worth of loom bands and glue. It’s a smart and economical way to stay stylish.
- Fun Family Project: Crafting these bows together can be a wonderful bonding experience for parents and children. It’s a chance to spend quality time, teach new skills, and create lasting memories alongside adorable footwear.
Unleash Your Creativity: Beyond the Basic Bow
While the simple bow is charming, don’t stop there! The world of Rainbow Loom offers endless possibilities:
- Vary Your Bow Styles: Experiment with different loom band techniques to create various bow shapes. Try a “fish tail” or “triple single” weave for a more textured bow, or even stack smaller bows on top of larger ones for a layered effect.
- Mix and Match Colors: Instead of just two colors, try three or four! Create rainbow bows, ombre effects, or bows that incorporate glitter bands for extra sparkle.
- Add More Embellishments: Once your loom bows are securely glued, you could consider adding other small, waterproof embellishments like tiny plastic charms, beads, or even painting subtle designs on the straps with fabric paint (ensure it’s waterproof!).
- Decorate Other Items: The same principle of making loom band bows and attaching them can be applied to other items. Think headbands, hair clips, backpacks, or even dog collars for a fun, personalized touch!
I must admit, after seeing how adorable my daughter’s customized flip-flops turned out, I’m now inspired to have her create some unique loom band bows for my own pair! It’s such a simple yet effective way to add a touch of summer fun and personality to everyday items.
Thanks so much for stopping by to explore our latest creative endeavor. We hope this DIY project inspires you to add a handmade touch to your summer wardrobe. Happy looming, and have a wonderfully creative day!
Warmly,
Dee 🙂