
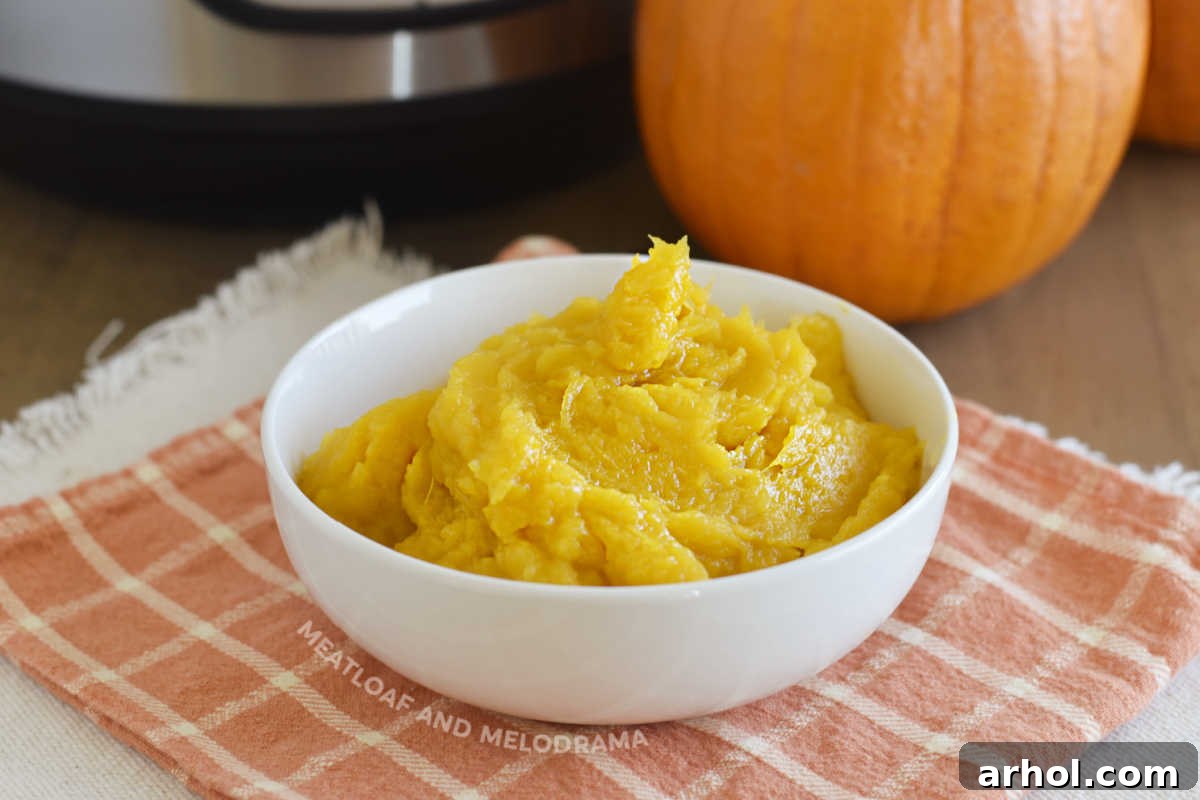
Unlock the secret to vibrant, flavorful fall cooking with homemadeInstant Pot Pumpkin Puree. Forget the struggle of finding canned pumpkin or the hassle of traditional roasting methods. This easy pressure cooker recipe transforms a humble sugar pumpkin into silky-smooth puree in under an hour, making it perfect for your favorite pies, breads, cookies, soups, or any recipe calling for this versatile ingredient. Embrace the rich taste and superior quality that only fresh, homemade pumpkin can provide, all thanks to the convenience of your Instant Pot.
Why Choose Homemade Instant Pot Pumpkin Puree?
There’s a distinct satisfaction that comes with creating your own ingredients from scratch, and pumpkin puree is no exception. While canned pumpkin is a convenient pantry staple, homemade puree offers a freshness and depth of flavor that simply can’t be matched. When autumn arrives, and grocery store shelves mysteriously empty of canned pumpkin, knowing how to make your own becomes an invaluable skill. Moreover, preparing it in the Instant Pot is a game-changer. It eliminates the need for messy pre-peeling and chopping, drastically cutting down on prep time and making the entire process incredibly straightforward.
This method isn’t just about convenience; it’s about quality. You control the ingredients, ensuring your puree is free from any additives or preservatives. The resulting pumpkin is naturally sweet, with a beautiful golden hue and a smooth texture that’s ideal for a wide array of culinary creations. From the rich aroma that fills your kitchen to the superior taste in every dish, homemade Instant Pot pumpkin puree elevates your cooking to a new level. It’s definitely one of the most rewarding Instant Pot recipes to master for the fall season and beyond!
Selecting the Perfect Pumpkin for Puree
When it comes to making pumpkin puree, not all pumpkins are created equal. While those large, hollow jack-o’-lantern pumpkins are fun for carving, they’re typically too watery and stringy for culinary purposes. The key to delicious puree lies in selecting the right variety: sugar pumpkins, also known as pie pumpkins. These smaller, denser pumpkins are specifically bred for their sweet, rich flesh and smooth texture, making them ideal for cooking and baking.
Look for sugar pumpkins that are firm, heavy for their size, and free from any soft spots or blemishes. Their skin should be a vibrant orange. Typically, pumpkins in the 2 to 3-pound range are perfect for this recipe. A pumpkin of this size will yield approximately 1 ½ to 2 cups of puree, which is often comparable to a standard 15-ounce can of pumpkin. Choosing the right pumpkin sets the stage for a truly exceptional homemade puree.
Step-by-Step Guide to Making Instant Pot Pumpkin Puree
Making homemade pumpkin puree in your Instant Pot is surprisingly simple, especially since you don’t need to peel it before cooking! Follow these easy steps for perfect results every time.
1. Prepare Your Pumpkin
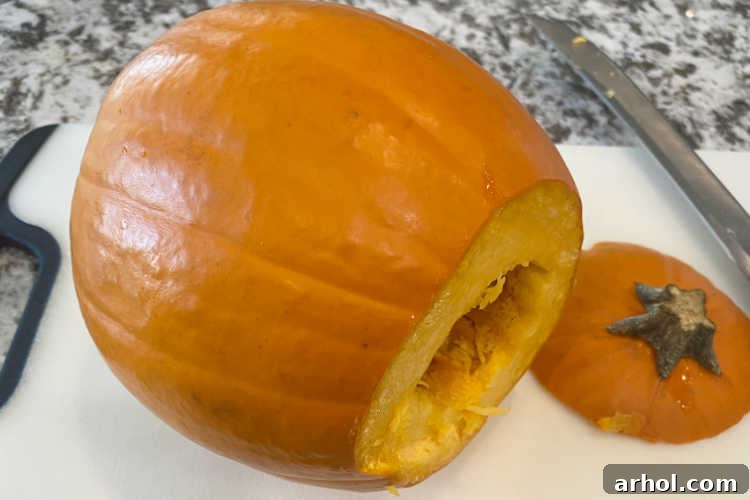
Begin by thoroughly rinsing your sugar pumpkin under cold water to remove any dirt or debris. Pat it dry with a clean cloth. The next crucial step is to carefully cut off the stem and a small section around the top of the pumpkin. You can either slice straight across, creating a flat top, or cut it similarly to how you would for a jack-o’-lantern, making a slightly wider opening. This opening allows steam to escape during cooking, ensuring even results.
2. Set Up Your Instant Pot
Contrary to popular belief, there’s no need to scoop out the seeds and stringy pulp before cooking! This is one of the biggest time-savers of the Instant Pot method. The high-pressure cooking process softens everything, making seed removal incredibly easy afterward. Pour the recommended amount of water into the inner pot of your Instant Pot (refer to the recipe card for specific quantities based on your Instant Pot size). Then, place the trivet (or steamer rack) inside the pot. This keeps the pumpkin elevated out of the water, allowing it to steam perfectly.
3. Pressure Cook the Pumpkin
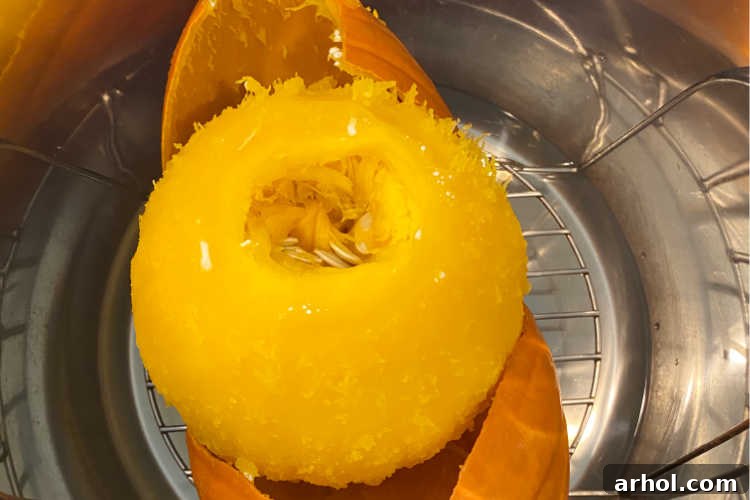
Carefully place the prepared pumpkin, cut side up, onto the trivet in the Instant Pot. Secure the lid, making sure the sealing ring is properly in place, and set the steam release valve to the “Sealing” position. Select the “Pressure Cook” (or “Manual”) setting and set the timer for 15 minutes. Once the cooking cycle is complete and the Instant Pot beeps, perform a quick release of the pressure. This means carefully turning the steam release valve to the “Venting” position to release the steam quickly. Always use an oven mitt or towel to protect your hand from the hot steam.
Once the float valve drops, indicating all pressure has been released, carefully remove the lid. You’ll be amazed at how easily the pumpkin skin may have separated or become loose. Don’t be surprised by any white spots on the cooked pumpkin; these are simply sugars that have caramelized during the cooking process. While not all pumpkins will fully peel themselves in the pot, the skin will be incredibly soft and easy to remove by hand or with a spoon.
4. Prepare for Pureeing
Allow the cooked pumpkin to cool down a bit so it’s easier to handle. Once cool enough, transfer it to a large bowl. Cut the pumpkin open (if it hasn’t split already), and now it’s time to easily remove the seeds and any remaining tough, stringy pulp. The cooking process will have softened these considerably, making them simple to scoop out. And a pro tip: don’t discard those seeds! They can be rinsed, seasoned, and roasted for a delicious, crunchy snack. They make fantastic roasted pumpkin seeds!
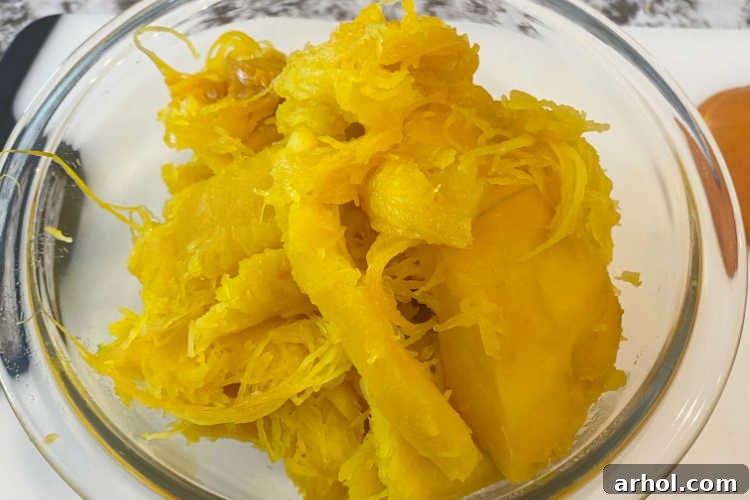
5. Puree to Perfection
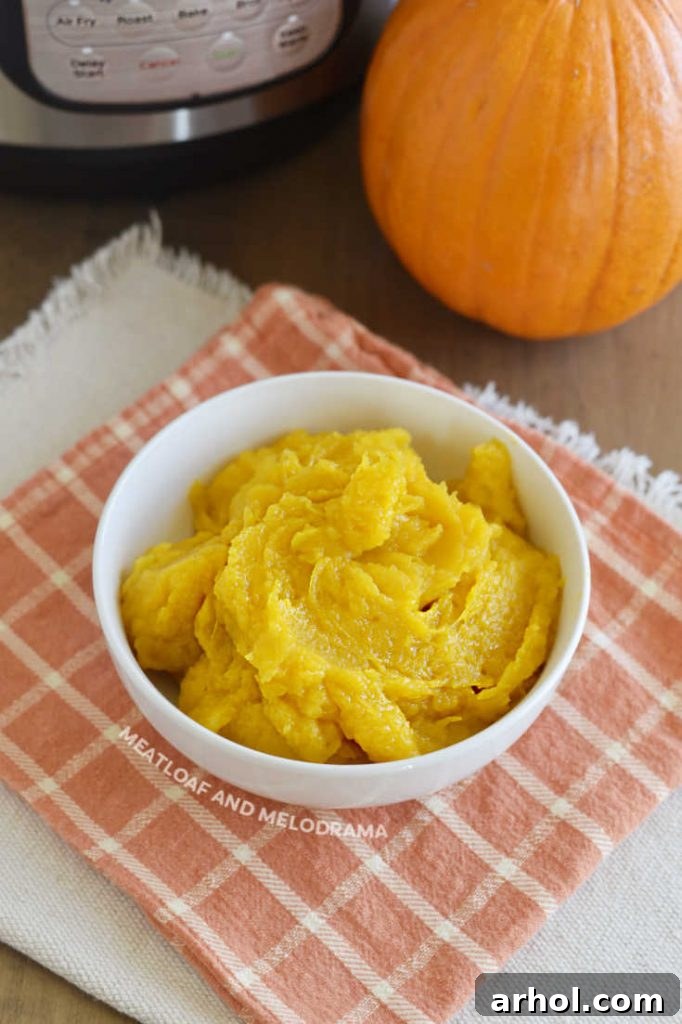
Now for the fun part: pureeing! You have several options for achieving that smooth, velvety texture. An immersion blender is incredibly convenient, allowing you to puree directly in the bowl. Alternatively, a regular blender or a food processor will work just as well. When pureeing, it’s often easier to blend if you leave some of the residual liquid from the pumpkin in the bowl. This helps create a smoother consistency. However, if your pumpkin appears excessively watery (some varieties hold more moisture than others), you might want to strain it first. You can do this by placing the cooked pumpkin in a fine-mesh strainer, lining it with cheesecloth, or simply squeezing out excess liquid with your hands. The goal is a thick, consistent puree, not a watery soup.
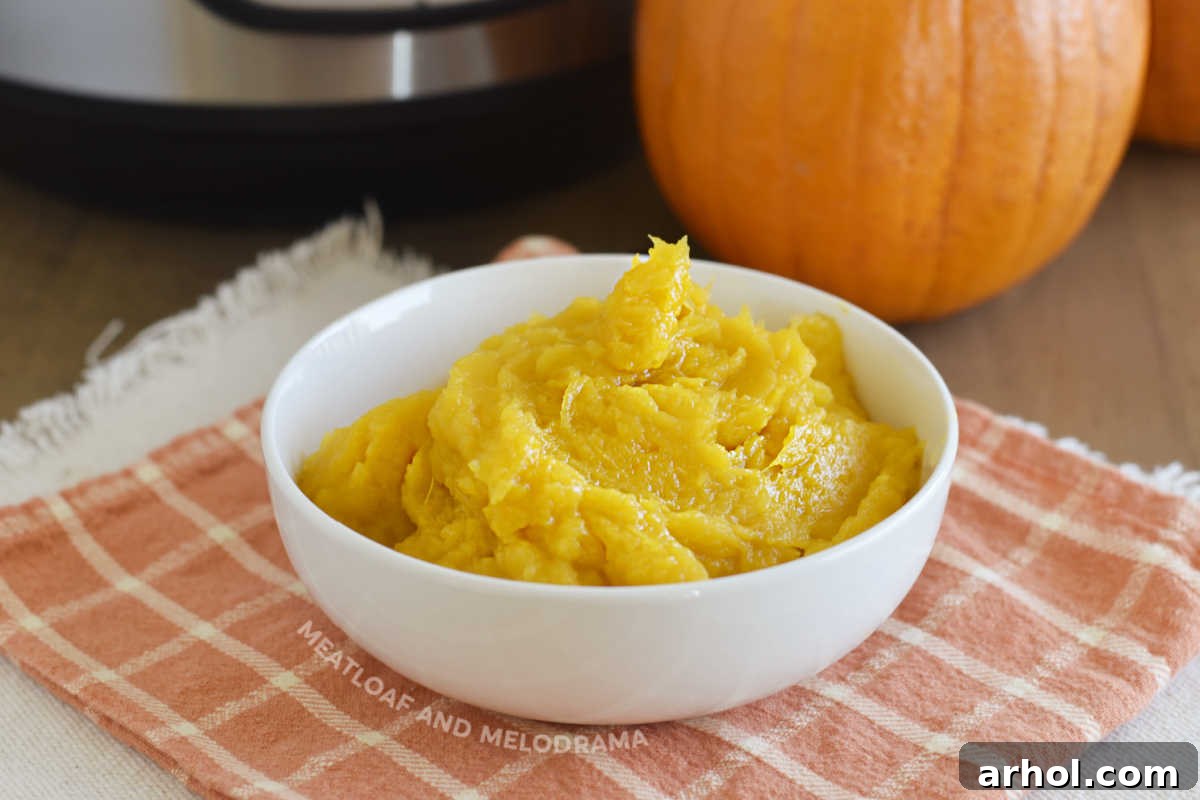
And there you have it! Your beautiful, smooth, golden, and shining homemade pumpkin puree, ready to be incorporated into your favorite recipes. The difference in flavor and texture compared to store-bought will be immediately noticeable.
Storing Your Homemade Pumpkin Puree
Proper storage is essential to enjoy your homemade pumpkin puree long after you’ve made it. A small sugar pumpkin typically yields about 1 ½ to 2 cups of puree, sometimes a little more, which is often the perfect amount for a single recipe.
- Refrigeration: If you plan to use your puree within a few days, store it in an airtight container in the refrigerator. It will stay fresh for up to 3-4 days.
- Freezing for Longer Storage: For extended use, freezing is your best option. Portion the puree into 1-cup measurements (or whatever size works best for your typical recipes). Place each portion into freezer-safe bags, press out any excess air, and flatten the puree to create thin, stackable blocks. This also helps it thaw more quickly. Alternatively, you can freeze smaller portions in ice cube trays or silicone baking cups. Once frozen solid, pop them out and transfer the cubes to a larger freezer bag for easy access. Frozen pumpkin puree can last for 6-8 months, or even longer if properly stored, making it a fantastic way to enjoy pumpkin year-round.
Creative Ways to Use Your Homemade Pumpkin Puree
The beauty of homemade pumpkin puree lies in its incredible versatility. Beyond the classic pumpkin pie, there’s a world of culinary delights awaiting your fresh puree. Here are just a few ideas to inspire your fall cooking:
- Baking:
- Pies and Tarts: The quintessential use! A homemade puree makes for a richer, more flavorful pumpkin pie.
- Muffins and Breads: Add moisture and flavor to pumpkin muffins, quick breads, or even yeast breads.
- Cookies and Bars: Introduce a seasonal twist to oatmeal cookies, blondies, or cheesecake bars.
- Cheesecakes: Elevate your cheesecake with a creamy, pumpkin layer.
- Pancakes & Waffles: Mix into your breakfast batter for a festive morning meal.
- Savory Dishes:
- Soups and Stews: Create creamy, comforting pumpkin soups, like a hearty Savory Pumpkin Soup, or add richness to chili and stews.
- Pasta Sauces: Stir into a creamy pasta sauce for a unique autumnal twist.
- Risotto: Add to risotto for a luxurious, seasonal dish.
- Curries: Pumpkin pairs wonderfully with the warm spices of a curry.
- Drinks & Smoothies:
- Lattes: Make your own homemade pumpkin spice latte base.
- Smoothies: Boost your morning smoothie with a dose of nutritious pumpkin.
- Other Uses:
- Baby Food: A healthy and natural first food for infants.
- Yogurt or Oatmeal Topping: Mix into yogurt or oatmeal for added flavor and nutrients.
- Dog Treats: Many homemade dog treat recipes include pumpkin puree.
Instant Pot Pumpkin Puree Recipe
This recipe ensures you have fresh, delicious pumpkin puree ready for all your culinary adventures. It’s incredibly easy, efficient, and yields a superior product to anything you’ll find in a can.
Instant Pot Pumpkin Puree
By: Dee
Make homemade Instant Pot Pumpkin Puree from a sugar pumpkin in less than an hour with this easy pressure cooker recipe. Perfect for pies, bread, cookies, soup or in any recipe that calls for cooked pumpkin.
5 minutes
15 minutes
20 minutes
1 cup
Equipment
- Instant Pot Pressure Cooker
Ingredients
- 1 ½ cups water (or 1 cup for a 6-quart Instant Pot)
- 1 small sugar pumpkin or pie pumpkin (approximately 2-3 pounds)
Instructions
- Rinse and dry the pumpkin, then carefully cut off the stem and a small area around the top.
- Pour water into the Instant Pot, place the trivet in the pot, and position the pumpkin cut side up on the trivet.
- Place the lid on the pot, ensure the vent is set to the sealing position, and press PRESSURE COOK (or Manual) for 15 minutes. When the pot beeps, perform a quick release of pressure, and when the pin drops, carefully remove the lid.
- The pumpkin should be fork-tender. If it’s not, pressure cook for an additional 5 minutes until tender. Use kitchen tongs to carefully remove the pumpkin from the pot.
- Allow the pumpkin to cool slightly. Once cool enough to handle, remove the skin, scoop out the seeds, and discard any extra tough pulp. Place the cooked pumpkin into a large bowl.
- If the pumpkin has released a lot of liquid, strain it using cheesecloth or a fine-mesh strainer to achieve a thicker consistency. Then, puree the pumpkin using an immersion blender, a regular blender, or a food processor until smooth.
- Use your fresh pumpkin puree immediately in your favorite recipe, or refrigerate it until ready to use. For longer storage, freeze the puree as directed in the “Storing Your Homemade Pumpkin Puree” section.
Notes
- Use 1.5 cups of water for an 8-quart Instant Pot and 1 cup for a 6-quart Instant Pot.
- If the pumpkin is not fork tender after the initial cooking, cook for an additional 5 minutes until it reaches the desired tenderness.
Nutrition
Serving: 1 cup, Calories: 49kcal, Carbohydrates: 12g, Protein: 1g, Fat: 1g, Saturated Fat: 1g
Nutrition information is automatically calculated, so should only be used as an approximation.
Additional Info
Tips for the Best Instant Pot Pumpkin Puree
- Pumpkin Size Matters: For optimal results, aim for a sugar or pie pumpkin weighing between 2 to 3 pounds. This size cooks evenly and yields a good amount of puree.
- Don’t Rush Tenderness: If your pumpkin isn’t easily pierced with a fork after the initial 15 minutes of pressure cooking, simply return it to the Instant Pot and cook for an additional 5 minutes. Different pumpkin densities can affect cooking time, so always check for fork-tenderness.
- Save Those Seeds: Don’t toss out the pumpkin seeds! They can be easily cleaned, roasted with your favorite seasonings, and enjoyed as a delicious and healthy snack. It’s a great way to minimize food waste and get a bonus treat.
- Adjusting Consistency: If your puree seems too thin, you can gently heat it on the stovetop over low heat, stirring frequently, to evaporate some of the excess moisture. If it’s too thick, a tablespoon of water or broth can help achieve your desired consistency.
- Cool Before Pureeing: While the pumpkin needs to cool slightly for easier handling, ensure it’s not piping hot when you put it into a blender or food processor, as hot liquids can create pressure and cause the lid to burst off.
Frequently Asked Questions About Instant Pot Pumpkin Puree
Q: Can I use any type of pumpkin for puree?
A: It’s highly recommended to use sugar pumpkins or pie pumpkins. These varieties have a sweeter, denser flesh and less water content, resulting in a richer, smoother puree perfect for cooking and baking. Larger carving pumpkins tend to be watery, stringy, and lack flavor.
Q: Do I have to remove the seeds before pressure cooking?
A: No, and this is one of the best parts of using the Instant Pot! The high-pressure cooking softens the pumpkin flesh, making it incredibly easy to scoop out the seeds and stringy bits after cooking. This saves you significant prep time and effort.
Q: How much puree does one small pumpkin yield?
A: A typical 2-3 pound sugar pumpkin will usually yield about 1 ½ to 2 cups of finished pumpkin puree. This is roughly equivalent to a 15-ounce can of pumpkin puree.
Q: My pumpkin puree is too watery. What can I do?
A: If your puree is thinner than desired, you can easily remedy it. Transfer the puree to a saucepan and cook it over low heat, stirring occasionally, until some of the excess moisture evaporates and it reaches your preferred thickness. You can also strain it through a fine-mesh sieve lined with cheesecloth.
Q: How long can homemade pumpkin puree be stored?
A: Freshly made pumpkin puree can be stored in an airtight container in the refrigerator for 3-4 days. For longer storage, it can be frozen for up to 6-8 months. Freeze in convenient portions using freezer bags, ice cube trays, or silicone molds.
Q: Can I add spices to the pumpkin before cooking?
A: While you can, it’s generally recommended to keep the puree plain. This allows for maximum versatility, as you can then season it differently for sweet or savory applications later. Adding spices before cooking can limit its uses.
Making homemade Instant Pot Pumpkin Puree is a rewarding experience that offers superior flavor and freshness for all your seasonal recipes. With minimal effort and maximum convenience, you’ll wonder why you ever bought it from a can. Enjoy the rich, authentic taste of fall in every dish!