
Easy 3-Ingredient No-Churn Oreo Ice Cream: Your Guide to Homemade Bliss
Unleash the joy of homemade ice cream with this incredibly simple 3-ingredient Oreo Ice Cream recipe. Say goodbye to complicated gadgets and hello to a luscious, creamy dessert that’s guaranteed to be a hit with everyone. This no-churn cookies and cream ice cream is not just easy; it’s a delightful experience that brings smiles and satisfaction, proving that the best treats don’t always require an ice cream machine, eggs, or extensive effort.
Why No-Churn Oreo Ice Cream is a Game-Changer
If the thought of making homemade ice cream has always seemed daunting, prepare to have your mind changed! Our no-churn Oreo ice cream recipe eliminates the need for any specialized equipment like an ice cream machine. It’s also completely egg-free, making it accessible to more dietary preferences and incredibly straightforward. The result is a wonderfully cool, smooth, and lusciously creamy texture that rivals any store-bought variety, brimming with the irresistible crunch of Oreo cookies.
For years, my family has indulged in this simple pleasure, especially when store shelves run low on our favorite flavors. This recipe consistently delivers perfect results, transforming ordinary ingredients into an extraordinary frozen dessert. The joy of creating a customized treat, precisely to your family’s liking, is unparalleled. This method has also opened doors to exploring other delightful no-churn creations, such as S’mores Ice Cream, Cherry Vanilla Ice Cream, Chocolate Peanut Butter Ice Cream, and even seasonal favorites like Pumpkin Ice Cream. The versatility of the no-churn base is truly remarkable!
The classic cookies and cream flavor, often made with Oreo cookies, remains a top choice in our household. My oldest daughter particularly enjoys crafting creative variations, like her popular Halloween cookies and scream ice cream. This recipe is more than just a dessert; it’s an opportunity for fun, family bonding, and satisfying those sudden ice cream cravings with minimal fuss.
The Magic Behind 3 Simple Ingredients
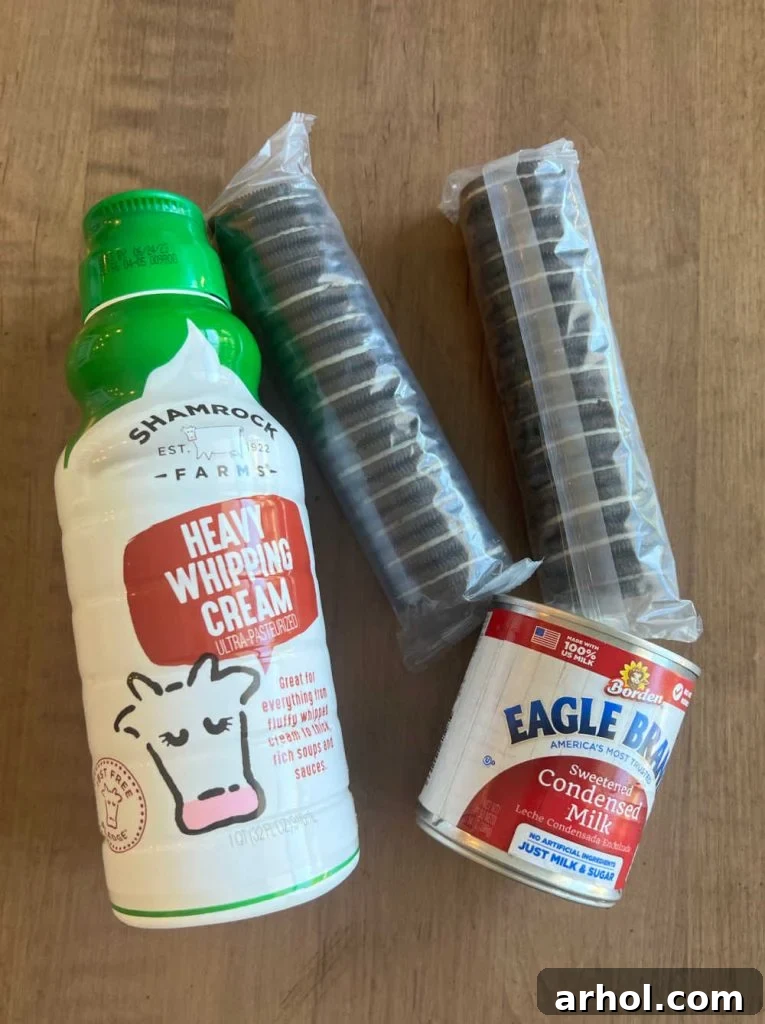
The beauty of this easy Oreo ice cream recipe lies in its minimal ingredient list. You likely have these staples in your pantry already, or they are readily available at any grocery store. Let’s break down the role of each component:
- Heavy Whipping Cream: This is the foundation of our creamy texture. When whipped, heavy cream incorporates air, creating a light, airy base that mimics traditional churned ice cream. It’s crucial to use heavy whipping cream (also known simply as heavy cream) and not substitutes like half-and-half or milk, as they lack the necessary fat content to achieve the desired consistency and aeration. Ensure it’s very cold for optimal whipping.
- Sweetened Condensed Milk: This ingredient is the secret weapon for sweetness and preventing ice crystal formation, which is a common challenge with no-churn recipes. Its high sugar content and thick consistency contribute to the smooth, rich mouthfeel of the ice cream. Absolutely avoid using evaporated milk, as it’s unsweetened and has a different texture, which will not yield the same results.
- Oreo Cookies: The star of the show! These iconic chocolate sandwich cookies provide the classic “cookies and cream” flavor and delightful textural contrast. Feel free to experiment with different Oreo varieties (Double Stuf, mint, golden, etc.) or even other brands of sandwich cookies if you prefer. The amount can also be adjusted based on how “cookie-loaded” you like your ice cream.
With these three simple items, you’re just a few steps away from a sensational homemade frozen dessert. The full, detailed recipe can be found in the dedicated recipe card below, but let’s first walk through the process and crucial tips for success.
Essential Equipment for Homemade Ice Cream
While an ice cream maker isn’t required, a few basic kitchen tools will make the process smooth and enjoyable:
- Electric Mixer: A hand-held electric mixer or a stand mixer with a whisk attachment is essential for whipping the heavy cream to stiff peaks quickly and efficiently.
- Large Mixing Bowls: You’ll need at least two large bowls – one for whipping the cream and another for combining the ingredients.
- Spatula: A sturdy rubber or silicone spatula is vital for gently folding the whipped cream into the condensed milk, preserving its airy texture.
- Freezer-Safe Pan or Container: A loaf pan (9×5 inches) is ideal for freezing as it provides a good surface area for even freezing. A shallow baking dish or an airtight freezer-safe container also works well.
- Rolling Pin or Food Processor: For crushing the Oreo cookies to your desired consistency.
Step-by-Step: How to Make 3-Ingredient Oreo Ice Cream without an Ice Cream Maker
Making this delightful dessert is straightforward. Follow these steps for perfect results every time:
Prepare Your Oreo Cookies
The first step is to prepare your Oreo cookies. For a classic cookies and cream texture, you’ll want a mix of finely crushed crumbs and larger, chunkier pieces. This ensures a delightful surprise in every bite!
- Crushing Method 1 (Manual): Place your Oreo cookies in a large freezer bag. Seal it tightly, removing as much air as possible. Use a rolling pin or the flat side of a meat mallet to gently crush the cookies. Aim for a mix of textures – some finely ground, some larger chunks. This method offers great control over the cookie consistency.
- Crushing Method 2 (Blender/Food Processor): For a quicker approach, you can pulse the cookies in a blender or food processor. Be cautious not to over-process them into a fine powder; a few quick pulses should suffice to create a varied texture.
Some prefer to scrape a portion of the white cream filling from the cookies and blend it into the ice cream base for an extra layer of sweetness and Oreo flavor. While optional, it’s a fun variation to try!
Whip the Heavy Cream
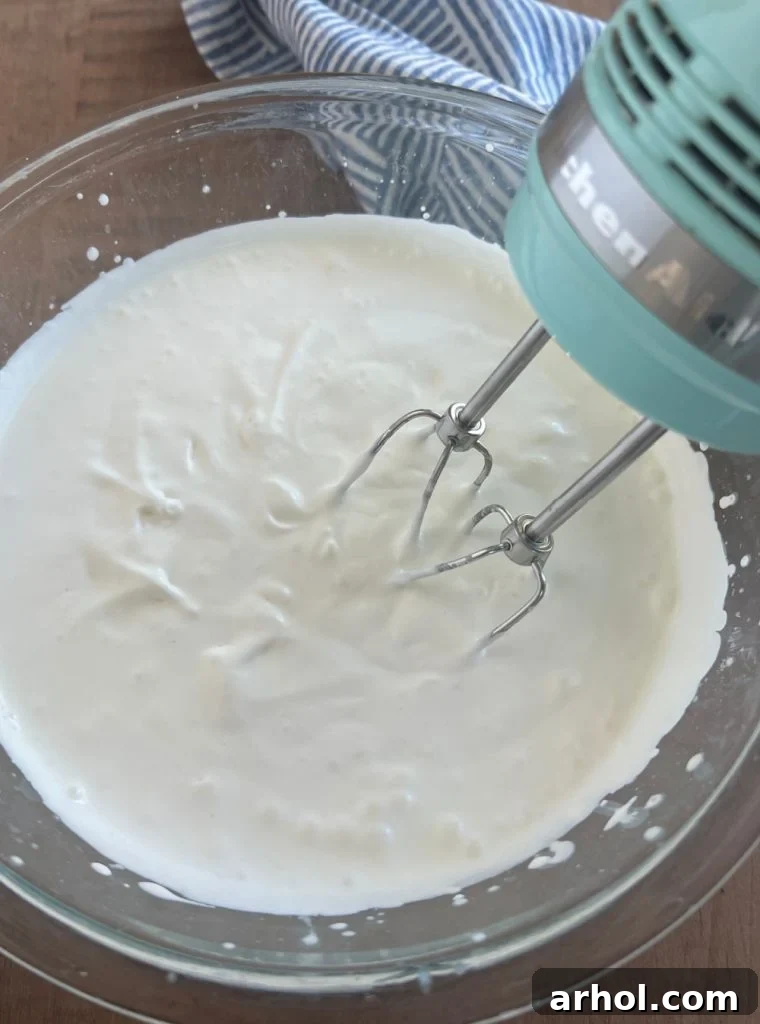
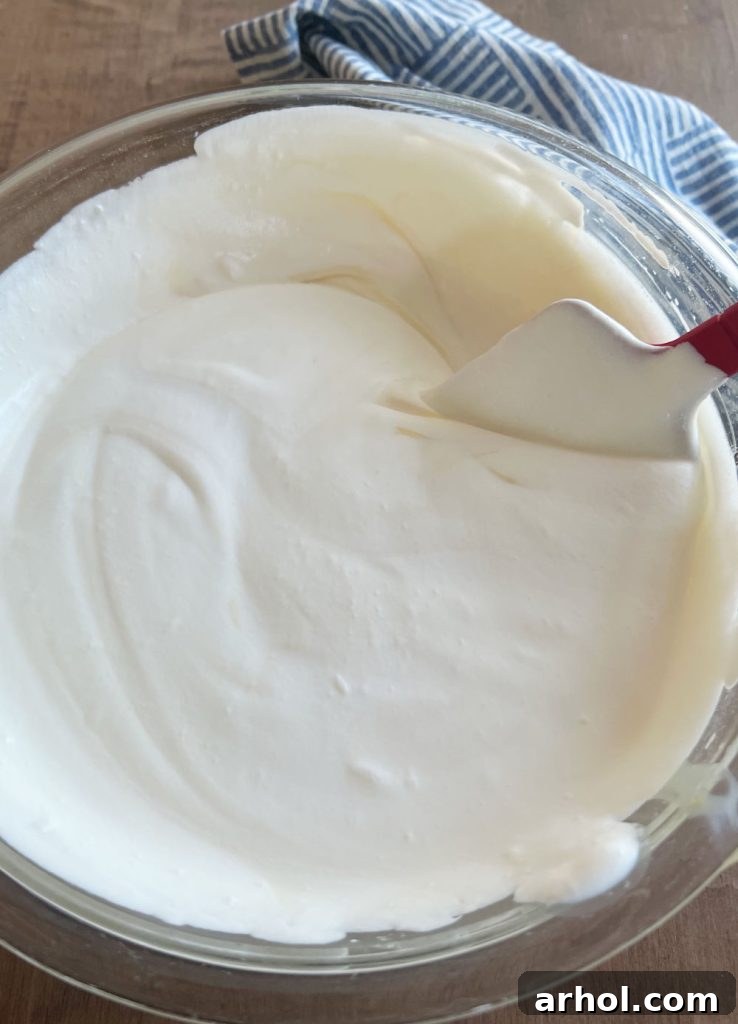
Next, it’s time to create the airy base for your ice cream. Pour the very cold heavy whipping cream into a large, clean mixing bowl. Using an electric mixer (either hand-held or stand mixer) on high or medium-high speed, beat the cream until stiff peaks form. Stiff peaks mean that when you lift the beaters, the cream holds its shape firmly. Be careful not to overmix, as this can turn the cream grainy. Keep a kitchen towel handy – little drops of cream can be enthusiastic!
Combine the Ingredients
In a separate large bowl, pour the sweetened condensed milk. This will be the base for our mixture. Now, with a spatula, gently fold the whipped cream into the sweetened condensed milk. The key here is “gently.” You want to incorporate the two mixtures without deflating the air you’ve just whipped into the cream. This gentle folding technique is crucial for maintaining the light, airy texture of your no-churn ice cream.
Add the Oreo Crumbs
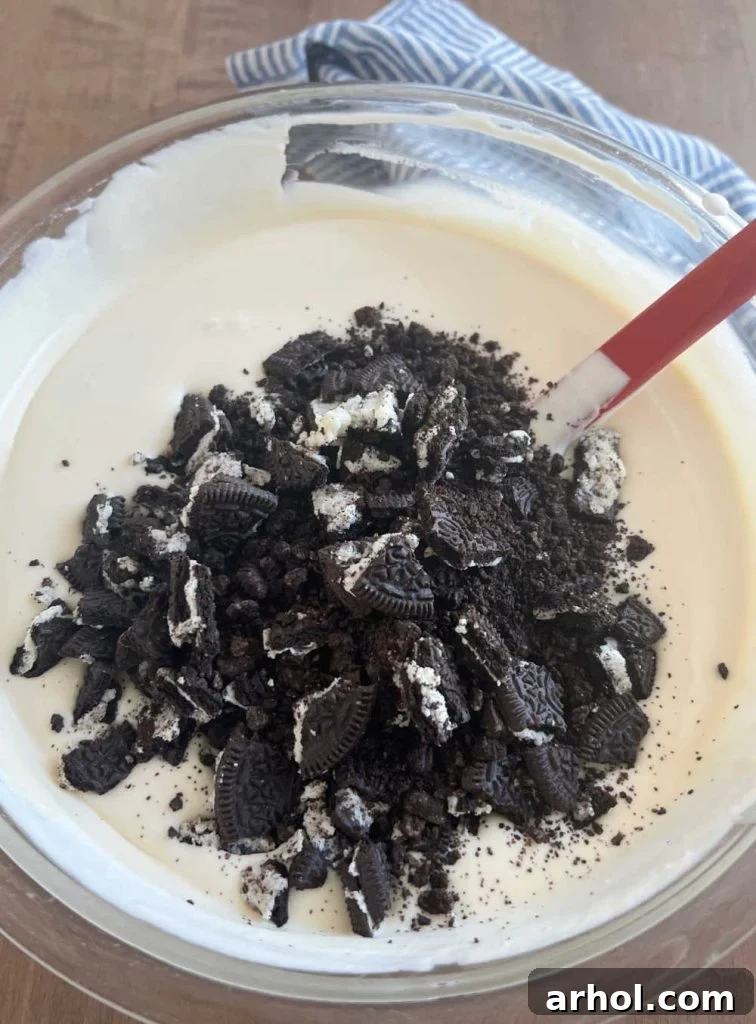
Once the whipped cream and condensed milk are well blended and smooth, it’s time for the stars of the show! Add your crushed Oreo cookies and cookie crumbs to the mixture. Again, gently fold them in with your spatula until they are evenly distributed throughout the creamy base. Avoid vigorous stirring, which can compromise the texture.
Freeze for Perfection
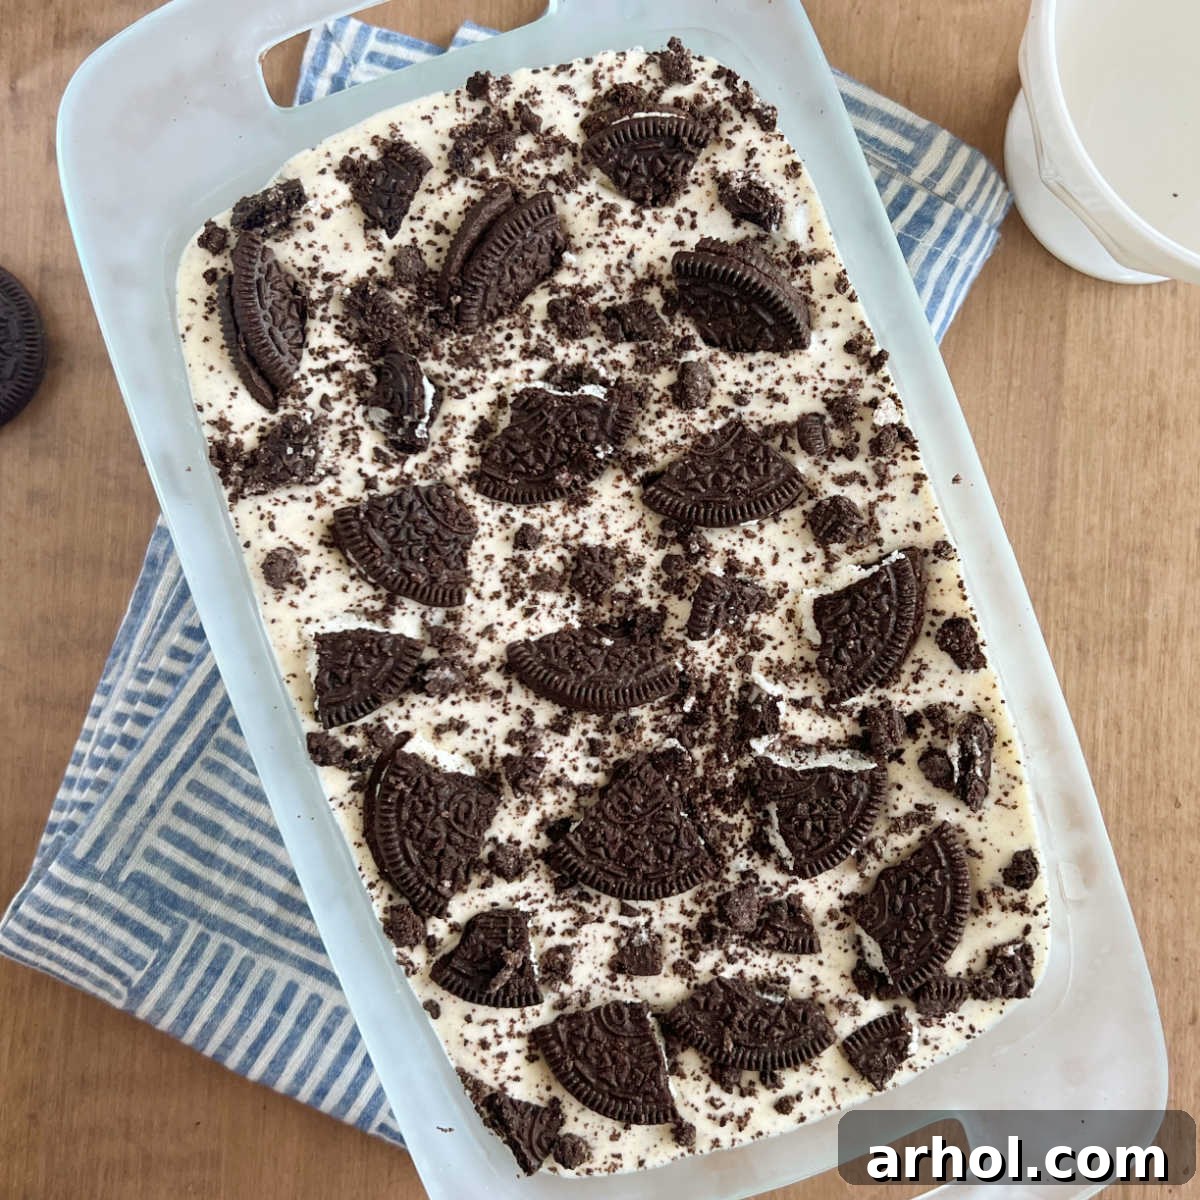
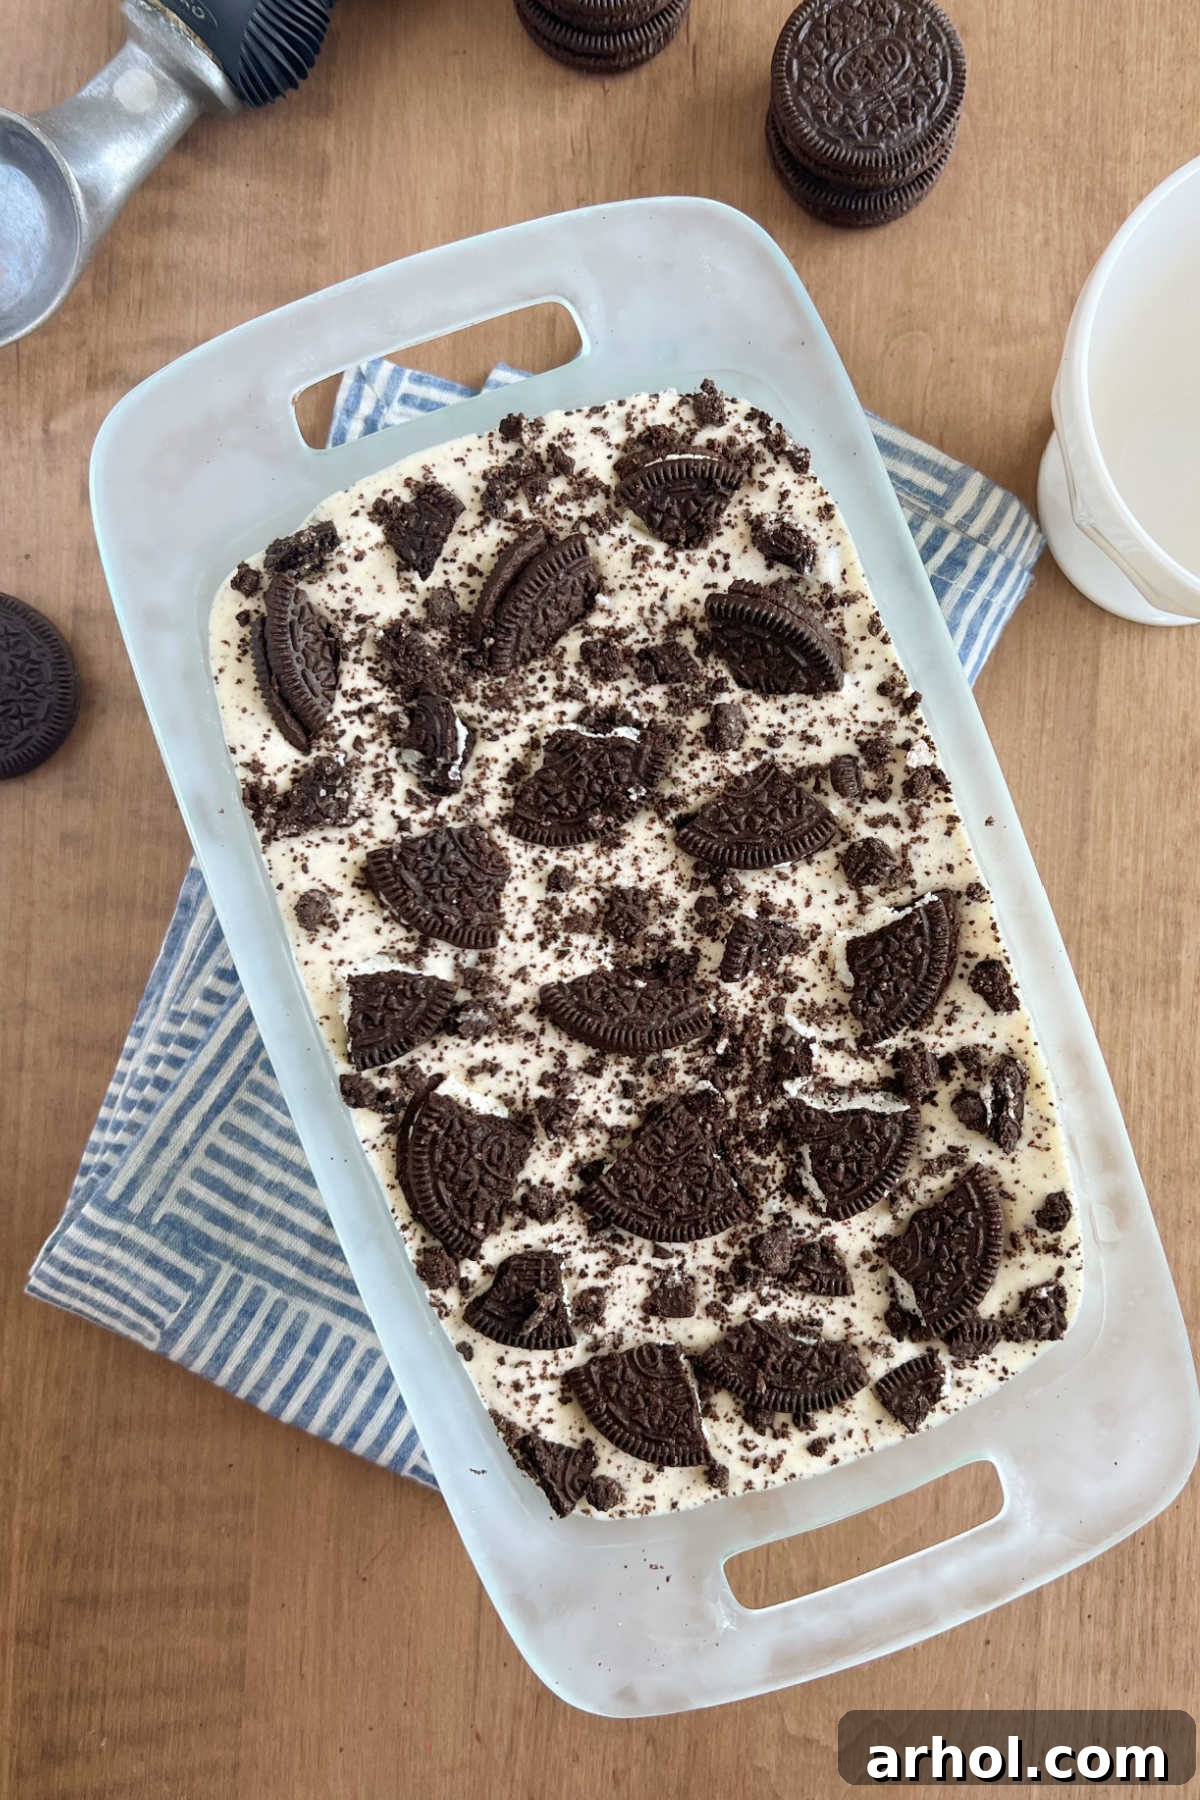
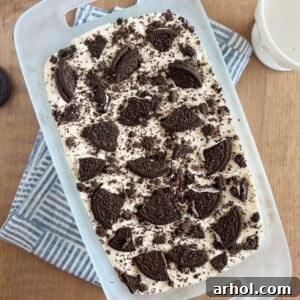
Pour the ice cream mixture into your chosen freezer-safe container, such as a loaf pan or shallow dish. For an extra special touch, arrange additional larger pieces of Oreo cookies on top of the mixture. This not only makes for a beautiful presentation but also adds more delightful cookie crunch for true cookies and cream enthusiasts! Cover the pan tightly with plastic wrap or aluminum foil to prevent ice crystals from forming on the surface. Place it in the freezer for at least 6 hours, but ideally overnight, to ensure it becomes perfectly firm and scoopable.
Serving, Customizing, and Storing Your Homemade Cookies and Cream Ice Cream
Serving Suggestions
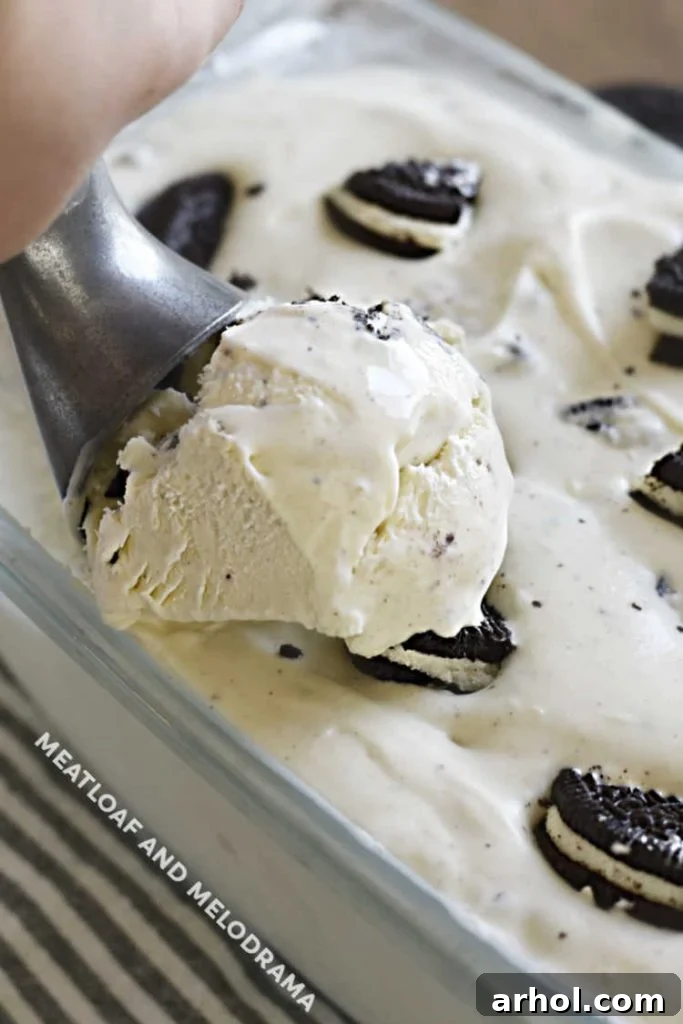
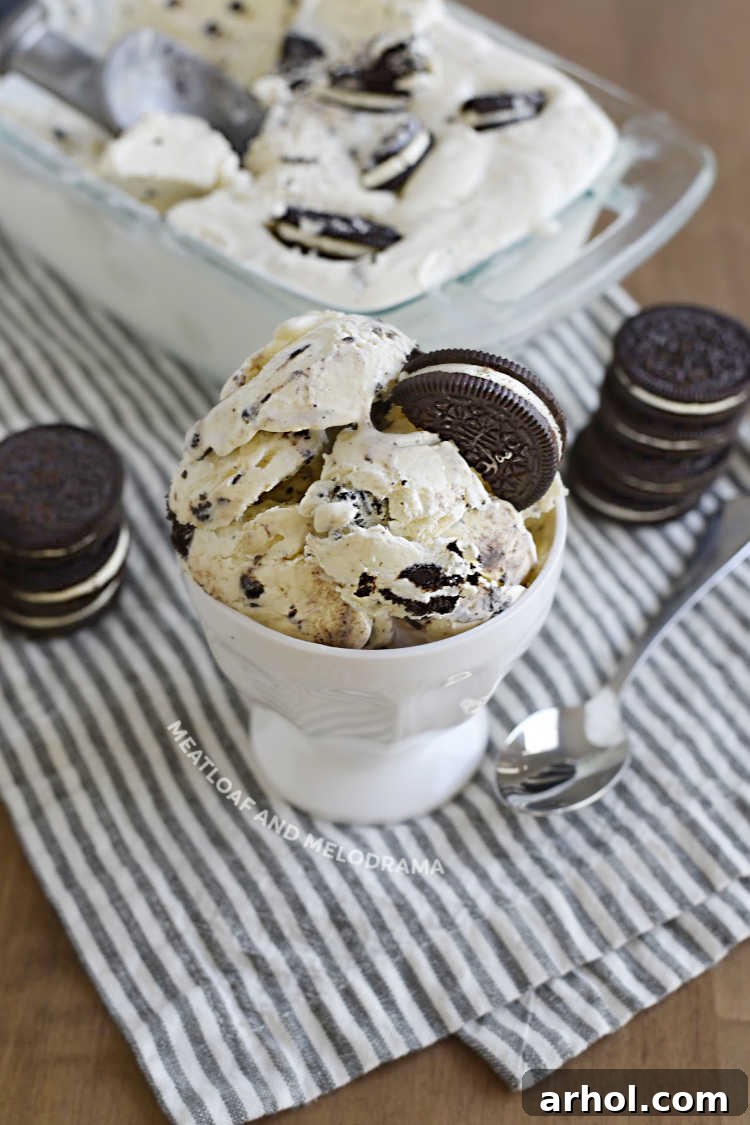
After your homemade cookies and cream ice cream has achieved its ideal firmness, remove it from the freezer and let it sit at room temperature for about 5-10 minutes. This brief resting period will allow it to soften slightly, making it easier to scoop and enjoy. The exact time will depend on the ambient temperature of your home.
Once softened, the serving possibilities are endless:
- Classic Cones or Bowls: The simplest and often most satisfying way to enjoy it.
- Decadent Sundaes: Drizzle with chocolate syrup, caramel, whipped cream, and a cherry on top for an indulgent treat.
- Homemade Oreo Ice Cream Sandwiches: Use extra Oreo cookies (or large chocolate wafers) to sandwich a scoop of your creamy creation.
- Milkshakes: Blend a few scoops with milk and extra Oreos for a thick, frosty shake.
- Dessert Topping: A scoop of this ice cream elevates brownies, pies, or fruit crumbles.
There are no rules here – eat it plain, load it with toppings, or get creative!
Customization & Variations
The beauty of homemade ice cream is the ability to customize! Don’t limit yourself to just Oreos:
- Different Cookie Flavors: Try mint Oreos, golden Oreos, Nilla Wafers, graham crackers, or even chocolate chip cookies.
- Add-ins: Fold in chocolate chips, chopped nuts, mini marshmallows, or a swirl of peanut butter or caramel sauce before freezing.
- Extracts: A teaspoon of vanilla extract (in addition to the heavy cream) or mint extract can enhance the flavor profile.
- Fruit: For a refreshing twist, consider folding in pureed berries (like strawberries or raspberries) or finely chopped fruit (like bananas) into a plain no-churn base before adding cookies.
Storing Leftover Ice Cream
To keep your homemade ice cream fresh and free from ice crystals, store any leftovers in the freezer. For best taste and texture, transfer it to an airtight container. If keeping it in the loaf pan, press a layer of plastic wrap directly onto the surface of the ice cream before covering the pan with foil or a lid. Properly stored, your homemade Oreo ice cream will maintain its quality for up to 3 months.
Expert Tips for the Perfect No-Churn Ice Cream
Achieving perfectly creamy, delicious no-churn ice cream is simple with a few insider tricks:
- Patience is Key for Freezing: While the ice cream is quick to prepare, it requires adequate time in the freezer to set properly. A minimum of 6 hours is essential, but leaving it overnight (10-12 hours) will guarantee a perfectly firm, scoopable texture. If your ice cream seems too soft, it simply needs more time to chill.
- Don’t Overmix the Whipping Cream: When beating the heavy cream, stop as soon as stiff peaks form. Overmixing can cause the cream to separate and become grainy, which will affect the smooth texture of your ice cream. Stiff peaks mean the cream holds its shape when the beaters are lifted, but it’s still smooth and creamy, not crumbly.
- Gentle Folding Preserves Air: The airy texture of your whipped cream is what makes no-churn ice cream so light and delightful. When incorporating the whipped cream into the condensed milk and then adding the cookies, use a gentle folding motion with a spatula. This technique retains as much air as possible, preventing a dense or icy final product.
- Choose the Right Container: A standard 9×5-inch loaf pan is excellent because its shape allows the ice cream to freeze relatively evenly and makes scooping easy. A shallow, freezer-safe dish also works well, provided you have enough space in your freezer for it to lie flat and undisturbed.
- No Need to Chill Your Bowl: Unlike some traditional whipped cream recipes, there’s no strict need to pre-freeze your mixing bowl for this recipe. While chilling the bowl can sometimes help cream whip faster, the ice cream will harden sufficiently in the freezer regardless, so it’s an optional step.
- Always Use Cold Heavy Cream: Ensure your heavy whipping cream is well-chilled before you start beating it. Cold cream whips up faster and achieves stiffer peaks than room-temperature cream.
More Irresistible Oreo Desserts to Try
If you’re as devoted to these classic chocolate sandwich cookies as we are, you’ll love exploring other creative ways to incorporate them into your desserts. Expand your Oreo repertoire with these fantastic recipes:
- Easy Oreo Dip: A creamy, sweet dip loaded with Oreo crumbles, perfect for parties or a quick snack. Serve with fruit, pretzels, or more cookies!
- Air Fryer Oreos: Recreate the carnival classic at home with minimal oil. These warm, crispy, cake-like Oreos are an absolute delight.
- Explore More: For even more simple and delicious dessert ideas, including plenty of no-bake options and other sweet treats, be sure to visit our comprehensive desserts recipe page.
Easy Oreo Ice Cream (3 Ingredients)
Dee
15
minutes
0
minutes
6
hours
6
hours
15
minutes
10
Ingredients
-
1
14 oz Can
Sweetened Condensed Milk -
2
Cups
Heavy Whipping Cream
(or Heavy Cream) -
20
Oreo Cookies, broken into pieces
(a mixture of halved, quartered, and crushed pieces for texture, adjust to your liking)
Instructions
-
Partially crush the Oreo cookies. Aim for a mix of fine crumbs and larger chunks. Set aside some larger pieces for garnish, if desired.
-
In a large bowl, add the sweetened condensed milk and set it aside.
-
In another large, clean bowl, add the cold heavy whipping cream. If desired, you can scrape some of the cream filling from the Oreos into this bowl.
-
Using an electric mixer or a whisk, beat the heavy whipping cream on high speed until stiff peaks barely form. It’s important not to overmix the cream.
-
Carefully spoon the whipped cream into the bowl containing the sweetened condensed milk.
-
Gently fold the whipped cream into the sweetened condensed milk until they are fully combined and the mixture is smooth. Then, gently fold in the crushed Oreo cookies and crumbs until they are evenly distributed.
-
Pour the mixture into a loaf pan or other freezer-safe container. Top with additional Oreo pieces for garnish, if desired.
-
Cover the pan tightly with plastic wrap or aluminum foil and place the ice cream in the freezer for at least 6 hours (preferably overnight) before serving.
Notes
Always use heavy cream or heavy whipping cream; whole milk or half-and-half will not yield the correct texture.
Ensure you use sweetened condensed milk, as evaporated milk is unsweetened and will not provide the same results.
Nutrition
Calories:
165
kcal
,
Carbohydrates:
1
g
,
Protein:
1
g
,
Fat:
18
g
,
Saturated Fat:
11
g
,
Cholesterol:
65
mg
,
Sodium:
18
mg
,
Potassium:
36
mg
,
Sugar:
1
g
,
Vitamin A:
700
IU
,
Vitamin C:
1
mg
,
Calcium:
31
mg
Nutrition information is automatically calculated, so should only be used as an approximation.
Additional Info
Dessert
American