

Unleash your inner child and satisfy your sweet tooth with these heavenly No-Bake Chocolate Chip Cookie Dough Balls! This incredibly easy recipe allows you to create delicious, edible cookie dough without any raw eggs or raw flour, ensuring a safe and utterly delightful treat that will quickly become a household favorite. Perfect for curbing those intense cookie dough cravings, these bites are simple to make and impossible to resist.

Table of Contents
- Why Edible Cookie Dough?
- Essential Ingredients for Cookie Dough Balls
- The Crucial Step: Heat-Treating Flour
- Step-by-Step Guide: How to Make Chocolate Chip Cookie Balls
- Pro Tips for Perfect Edible Cookie Dough
- Delicious Variations for Your Cookie Dough
- Storage Tips for Longevity
- No Bake Chocolate Chip Cookie Dough Balls Recipe
For many dessert enthusiasts, the allure of a classic chocolate chip cookie is undeniable. The aroma of freshly baked cookies filling the kitchen is pure bliss. However, if we’re being honest, there’s often one irresistible temptation even before those cookies hit the oven: the raw cookie dough itself! That rich, sweet, buttery mixture, studded with chocolate chips, often calls to us more strongly than the baked product. It’s a nostalgic treat that brings back childhood memories of sneaking spoonfuls from the mixing bowl.
Why Edible Cookie Dough? The Safe Way to Indulge
While the taste of traditional raw cookie dough is heavenly, we now know that consuming it comes with potential risks. Traditional cookie dough typically contains raw eggs, which can carry salmonella, and raw flour, which can harbor harmful bacteria like E. coli. These health concerns have long deterred many from indulging in this delightful guilty pleasure.
But what if you could enjoy all the flavor and texture of raw chocolate chip cookie dough without any of the worries? That’s precisely what this no-bake, edible cookie dough recipe offers! We’ve meticulously crafted a recipe that eliminates both raw eggs and raw flour through a simple heat-treating process, making it perfectly safe to eat straight from the bowl. This eggless dough has been a favorite for years, consistently delivering that authentic cookie dough experience without compromising on safety or taste.
Unlike some edible cookie dough recipes that use cream cheese or other additions, our method focuses on recreating the closest possible texture and flavor to classic cookie dough. It’s incredibly easy to prepare, so much so that even children can help make it. The biggest challenge you’ll face is stopping yourself and your family from devouring the entire batch!
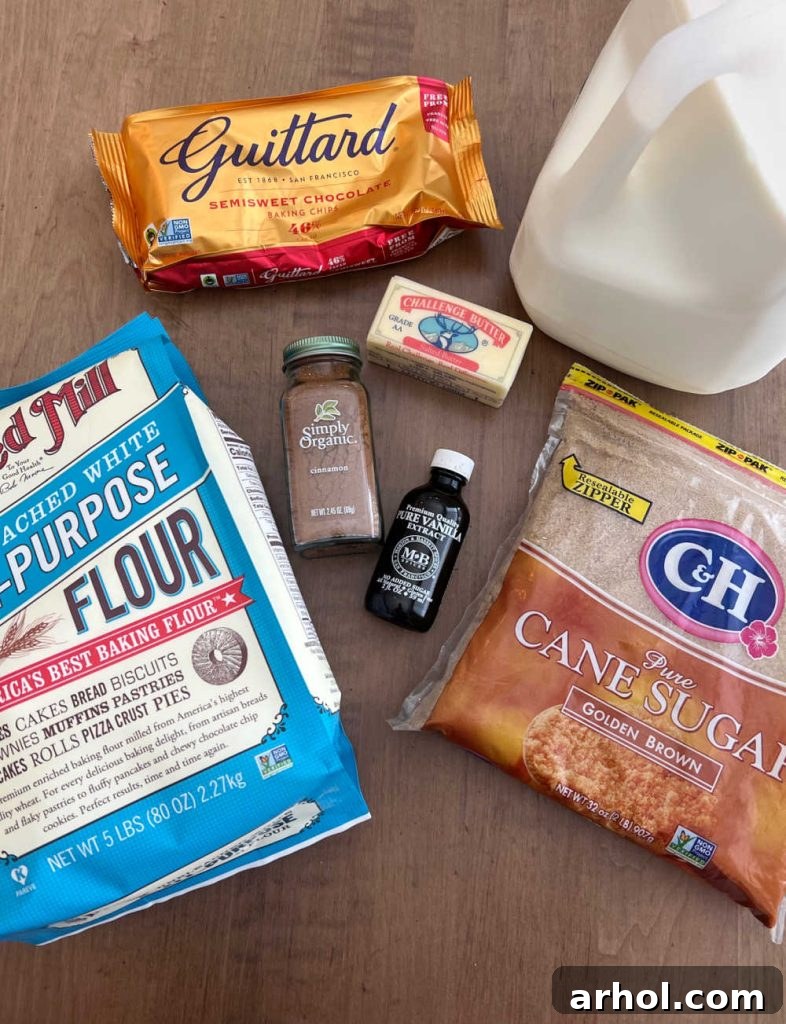
Essential Ingredients for Your No-Bake Cookie Dough Balls
Creating these delightful chocolate chip cookie dough bites requires just a few basic pantry staples. These are ingredients you likely already have on hand, or can easily find at any local grocery store. The beauty of this recipe lies in its simplicity and the readily available nature of its components. Let’s break down what you’ll need:
- Brown Sugar: This provides the classic chewy texture and deep, caramel-like sweetness essential for chocolate chip cookie dough. Both light and dark brown sugar work, with dark brown sugar offering a more robust flavor.
- Softened Butter: Room temperature butter is key for achieving a smooth, creamy base when mixed with sugar. It helps create that melt-in-your-mouth richness.
- All-Purpose Flour: The primary dry ingredient, which will be heat-treated for safety. Ensure it’s plain all-purpose flour, not self-rising.
- Milk: A small amount of milk helps to bind the dough and achieve the perfect, pliable cookie dough consistency. You can use any type of milk – dairy or non-dairy – to suit your preferences.
- Vanilla Extract: A crucial flavor enhancer that elevates the overall taste profile, adding warmth and depth to the sweet dough. Pure vanilla extract is always recommended for the best flavor.
- Ground Cinnamon (Optional): While not traditionally found in all cookie doughs, a touch of ground cinnamon adds a wonderful layer of subtle spice and warmth that complements the chocolate beautifully. Feel free to include it or omit it based on your taste.
- Semi-Sweet Chocolate Chips: The star of the show! We typically use semi-sweet, but feel free to experiment with milk chocolate, dark chocolate, or even a mix. These are mixed into the dough and can also be used for coating if you choose to make truffles.
Having these ingredients ready will ensure a smooth and enjoyable cookie dough making experience!
The Crucial Step: Heat-Treating Flour for Safety
Before you even think about mixing your cookie dough, there’s one incredibly important step: heat-treating your all-purpose flour. This process eliminates any potential harmful bacteria that might be present in raw flour, making your edible cookie dough perfectly safe to consume. Don’t skip this! There are two primary methods you can use:
- Oven Method:
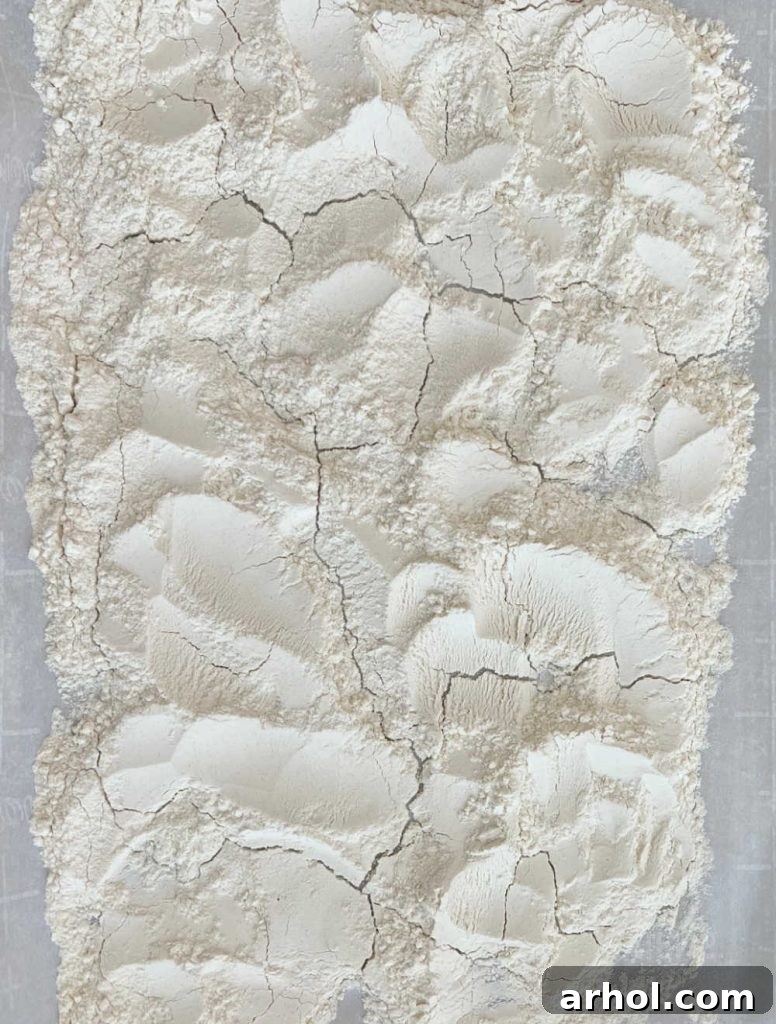
Spread the desired amount of all-purpose flour evenly across a rimmed baking sheet lined with parchment paper. This ensures the flour heats thoroughly and uniformly. Bake the flour in a preheated oven at 350°F (175°C) for approximately 5 minutes. The goal isn’t to brown the flour, but to bring it to a safe temperature. Once baked, let the flour cool completely before adding it to your other ingredients. This usually takes about 10-15 minutes, or you can speed it up by spreading it out on a cool surface.
- Microwave Method:
Alternatively, place the flour in a microwave-safe bowl. Heat it in the microwave on high power for 30-60 second intervals, stirring well between each interval. Continue heating and stirring until the flour reaches an internal temperature of 165°F (74°C) as measured with a food thermometer. This method is often quicker for smaller batches. Just like with the oven method, ensure the flour cools down completely before proceeding with the recipe.
We often prefer the oven method as it’s a bit more hands-off, allowing us to prepare other ingredients while the flour bakes. Whichever method you choose, the key is to ensure the flour is fully heat-treated and then thoroughly cooled.
Step-by-Step Guide: How to Make Chocolate Chip Cookie Balls
Once your heat-treated flour has cooled, you’re ready to embark on the delicious journey of making your no-bake chocolate chip cookie dough! This process is straightforward and enjoyable, even for novice bakers. Follow these steps for perfect results:
1. Cream Butter and Sugar:
In a large mixing bowl, combine the softened butter and brown sugar. Using an electric mixer (handheld or stand mixer) on medium speed, beat these two ingredients together until the mixture is light, fluffy, and smooth. This creaming process incorporates air, which contributes to the delightful texture of the cookie dough.
2. Incorporate Vanilla and Cinnamon:
Stir in the vanilla extract and, if using, the ground cinnamon. Mix until these aromatic ingredients are well combined with the butter and sugar mixture. The vanilla will deepen the flavor, while cinnamon adds a subtle warmth that enhances the chocolate.
3. Gradually Add Heat-Treated Flour:
Now, it’s time to add your cooled, heat-treated all-purpose flour. To prevent lumps and ensure a smooth dough, it’s a good idea to gradually add the flour to the butter mixture. You can either sift the flour directly into the bowl or break up any large clumps with a fork before adding it. Mix on low speed until the flour is just incorporated and the mixture starts to come together into a firm, crumbly dough. Overmixing at this stage can make the dough tough, so mix only until combined.
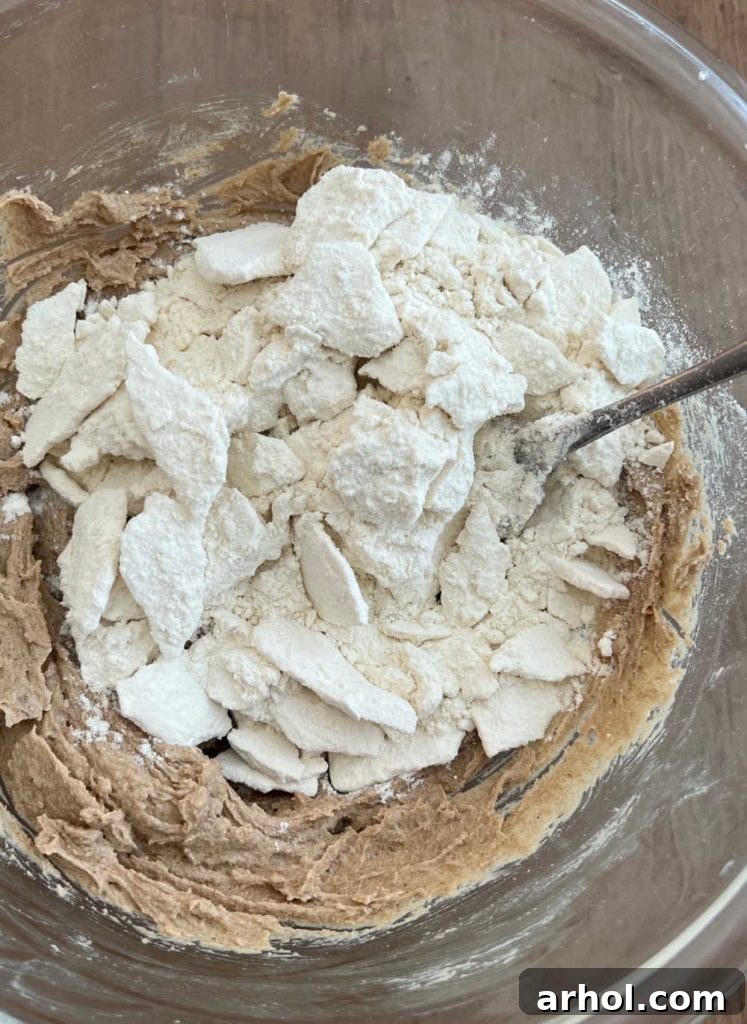
4. Achieve Perfect Dough Consistency with Milk:
After the flour is mixed in, add the milk. This is where the magic happens, transforming the firm mixture into a soft, pliable, and perfectly scoopable cookie dough consistency, just like traditional dough. Add the milk a tablespoon at a time, mixing well after each addition, until you reach your desired texture. You might need slightly more or less depending on the humidity and how much your butter was softened.
5. Fold in Chocolate Chips:
Once your dough has reached the ideal consistency, gently fold in the semi-sweet chocolate chips using a spatula or spoon. We typically use regular-sized chocolate chips, but mini chocolate chips also work wonderfully and distribute more evenly throughout smaller dough balls. Mix until the chocolate chips are evenly dispersed throughout the dough.
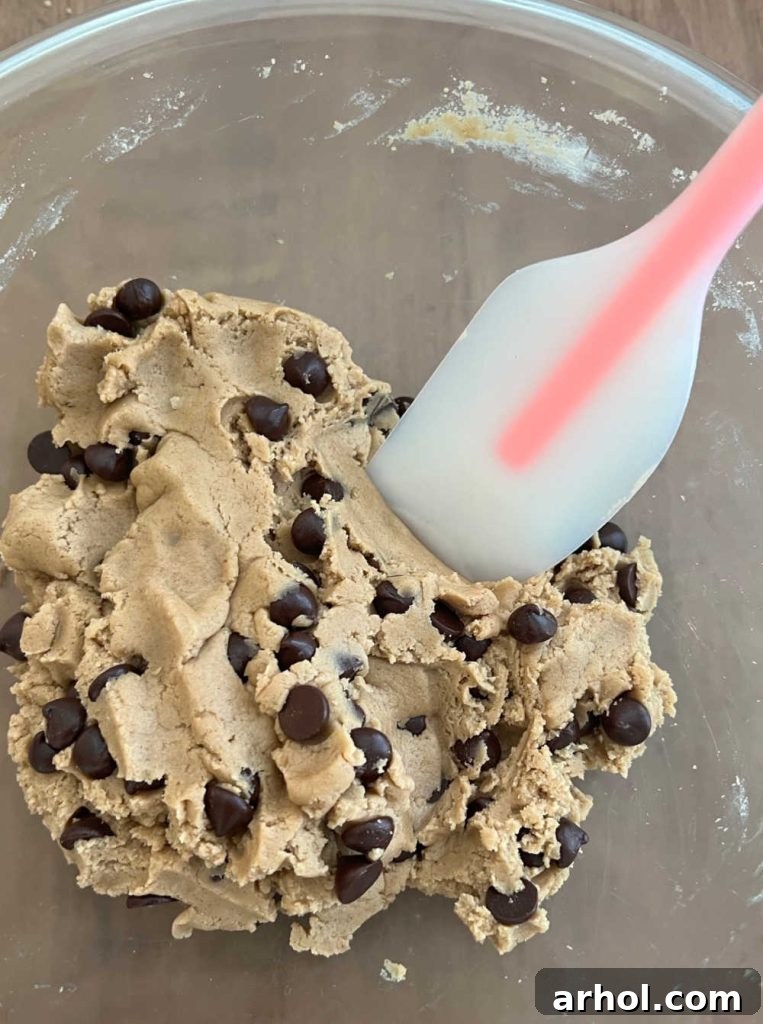
6. Chill the Dough:
Cover the bowl with plastic wrap and refrigerate the cookie dough for at least 30 minutes, or until it is firm enough to easily roll into balls. Chilling helps the dough firm up, making it less sticky and easier to handle, and also allows the flavors to meld together beautifully.
7. Form the Cookie Dough Balls:
Once chilled, remove the dough from the refrigerator. Use a small cookie scoop, a mini ice cream scoop, or simply your clean hands to form the dough into bite-sized balls. We find that 1-inch balls are the perfect size for a satisfying treat. Place the formed balls onto a baking sheet lined with wax paper or parchment paper.
8. Final Chill and Enjoy:
If your kitchen is warm, or you prefer a firmer texture, place the formed cookie dough balls in the freezer for about 15-30 minutes, or in the refrigerator for an hour, until they are nice and firm. Once set, they are ready to be devoured!

For an extra special treat, consider transforming these into decadent chocolate chip cookie dough truffles! Simply follow the steps above, but ensure the dough balls are very firm and even slightly frozen before dipping them into melted chocolate or candy coating. Once coated and decorated, refrigerate them again until the chocolate sets, resulting in an impressive and delicious dessert.
Pro Tips for Perfect Edible Cookie Dough
- Butter Temperature: Ensure your butter is truly softened to room temperature, but not melted. This allows it to cream beautifully with the brown sugar, creating a smooth and pliable dough.
- Don’t Overmix Flour: Once you add the heat-treated flour, mix only until it’s just incorporated. Overmixing can develop the gluten in the flour (even though it’s not being baked), potentially leading to a slightly tougher dough.
- Adjust Milk as Needed: The amount of milk required can vary slightly based on the moisture content of your brown sugar and the exact softness of your butter. Add it gradually until the dough reaches a soft, scoopable consistency. It should resemble traditional cookie dough.
- Chill Time is Your Friend: Don’t rush the chilling step. A well-chilled dough is much easier to roll into uniform balls and helps them hold their shape better.
- Uniform Balls: For consistent size and appearance, especially if making truffles, use a small cookie scoop. If using your hands, try to keep them slightly damp to prevent sticking.
Delicious Variations for Your Edible Cookie Dough
While classic chocolate chip cookie dough is a delight on its own, this recipe is incredibly versatile and can be customized in countless ways to suit your taste or occasion. Here are some fun variations to try:
- Cookie Dough Truffles: As mentioned, dipping the chilled dough balls in melted chocolate is a game-changer. For the coating, you can use dark chocolate, milk chocolate, white chocolate, or even a blend of different chocolates. Adding a teaspoon of coconut oil to your melted chocolate helps achieve a smoother, glossier finish and makes dipping easier. Drizzle with contrasting melted chocolate for an elegant touch!
- Alternate Chocolate Chips & Mix-ins: Don’t limit yourself to semi-sweet! Experiment with milk chocolate, dark chocolate, white chocolate, or even butterscotch chips. For extra flavor and texture, consider adding:
- Mini M&Ms for a pop of color and candy crunch.
- Chopped nuts like pecans or walnuts.
- Shredded coconut for a tropical twist.
- Mini marshmallows or crushed pretzels.
- Sprinkles and Sugar Crystals: Before the dough sets, roll the balls in colorful sprinkles, sanding sugar, or even edible glitter for a festive look. This is especially fun for holidays or birthday treats.
- Flavor Extracts: Beyond vanilla, try a hint of almond extract, peppermint extract (especially around the holidays), or even a touch of orange zest for a bright, citrusy note.
- Cookie Dough Crumble: Instead of forming balls, you can crumble the chilled dough over ice cream, yogurt, or milkshakes for an instant topping.
- Cookie Dough Dip: Serve the unrolled, chilled dough in a bowl with graham crackers, pretzels, fruit, or vanilla wafers for a fun, shareable dessert dip.
The possibilities are endless, allowing you to tailor this basic edible cookie dough recipe to any craving or celebration.
Storage Tips for Your Edible Cookie Dough
Proper storage is key to keeping your no-bake cookie dough balls fresh and delicious. While it’s hard to keep your hands off them for long, here’s how to store them effectively:
- Refrigeration: Store edible cookie dough bites in an airtight container in the refrigerator for up to 4 to 5 days. This keeps them firm and ready for snacking whenever a craving strikes.
- Freezing for Longer Storage: For extended enjoyment, you can freeze the cookie dough balls. Place them in a single layer on a parchment-lined baking sheet and freeze until solid (about 1-2 hours). Once frozen, transfer them to a freezer-safe bag or airtight container. They will last for up to 3 months in the freezer.
- Thawing: To enjoy frozen cookie dough balls, simply take them out of the freezer and let them sit at room temperature for about 10-15 minutes, or until they reach your desired softness. They can also be enjoyed straight from the freezer for a firmer, colder treat.

No Bake Chocolate Chip Cookie Dough Balls
Ingredients
- ¾ cup brown sugar
- ½ cup softened butter
- 1 ¼ cup all purpose flour
- 3 tablespoons milk
- 2 teaspoons vanilla extract
- 1 teaspoon ground cinnamon
- 1 cup semi sweet chocolate chips
Instructions
- Spread flour evenly on a rimmed baking sheet and bake at 350 degrees F (175 C) for 5 minutes. Alternatively, heat the flour in a microwave-safe bowl in the microwave until it reaches 165 degrees F (74 C) as measured with a food thermometer (about 1 minute, stirring every 30 seconds). Allow the flour to cool completely before proceeding.
- In a large bowl, cream together the softened butter and brown sugar until light and fluffy.
- Stir in the vanilla extract and ground cinnamon (if using). Gradually add the cooled, heat-treated flour, mixing until the mixture becomes firm and crumbly.
- Add the milk, one tablespoon at a time, mixing until the dough reaches a soft, pliable consistency similar to regular cookie dough. Add more milk if needed to achieve desired texture.
- Fold in the chocolate chips until evenly distributed throughout the dough. Cover the bowl and refrigerate the dough for at least 30 minutes, or until firm.
- Once firm, use a small cookie scoop or your hands to form the mixture into 1-inch balls. Place them on a wax-paper lined cookie sheet. Refrigerate or freeze until firm, if desired, before serving.
For Truffles
- Freeze the formed cookie dough balls for at least 1 hour until very firm. Melt 2 cups of your chosen chocolate chips (with a teaspoon of coconut oil, if desired, for smoother coating). Dip the frozen cookie dough balls into the melted chocolate until fully coated.
- Place the coated truffles back on the cookie sheet and refrigerate until the chocolate coating is completely set.
- Drizzle with melted white chocolate or other toppings for decoration, if desired, before the chocolate sets.
Notes
Store dough balls in an airtight container in the refrigerator for up to 5 days, or freeze for up to 3 months for longer storage.
Nutrition
Carbohydrates: 11g,
Protein: 1g,
Fat: 6g,
Saturated Fat: 3g,
Cholesterol: 5mg,
Sodium: 18mg,
Potassium: 70mg,
Sugar: 7g,
Vitamin A: 60IU,
Calcium: 12mg,
Iron: 0.8mg
Nutrition information is automatically calculated, so should only be used as an approximation.
Additional Info
These no-bake chocolate chip cookie dough bites offer the ultimate indulgence for anyone who loves the taste of raw cookie dough, but seeks a safe and simple way to enjoy it. With just a handful of common ingredients and a quick heat-treating step for the flour, you can whip up this irresistible sweet treat in no time.
If you’re a fan of easy no-bake desserts, be sure to check out some of my other delightful recipes: explore my Oreo Cookie Balls for a festive treat, indulge in the creamy goodness of Chocolate Chip Dip, or savor the sophisticated flavor of Bourbon Balls. You can find even more fantastic ideas on my comprehensive easy dessert recipes page.
For more innovative no-bake recipe ideas, simple recipes to satisfy your sweet tooth, and all the latest new recipes, make sure to subscribe to my newsletter and follow along on social media! Happy snacking!
Recipe originally published in 2016 and meticulously updated in 2022 to provide the best possible experience.