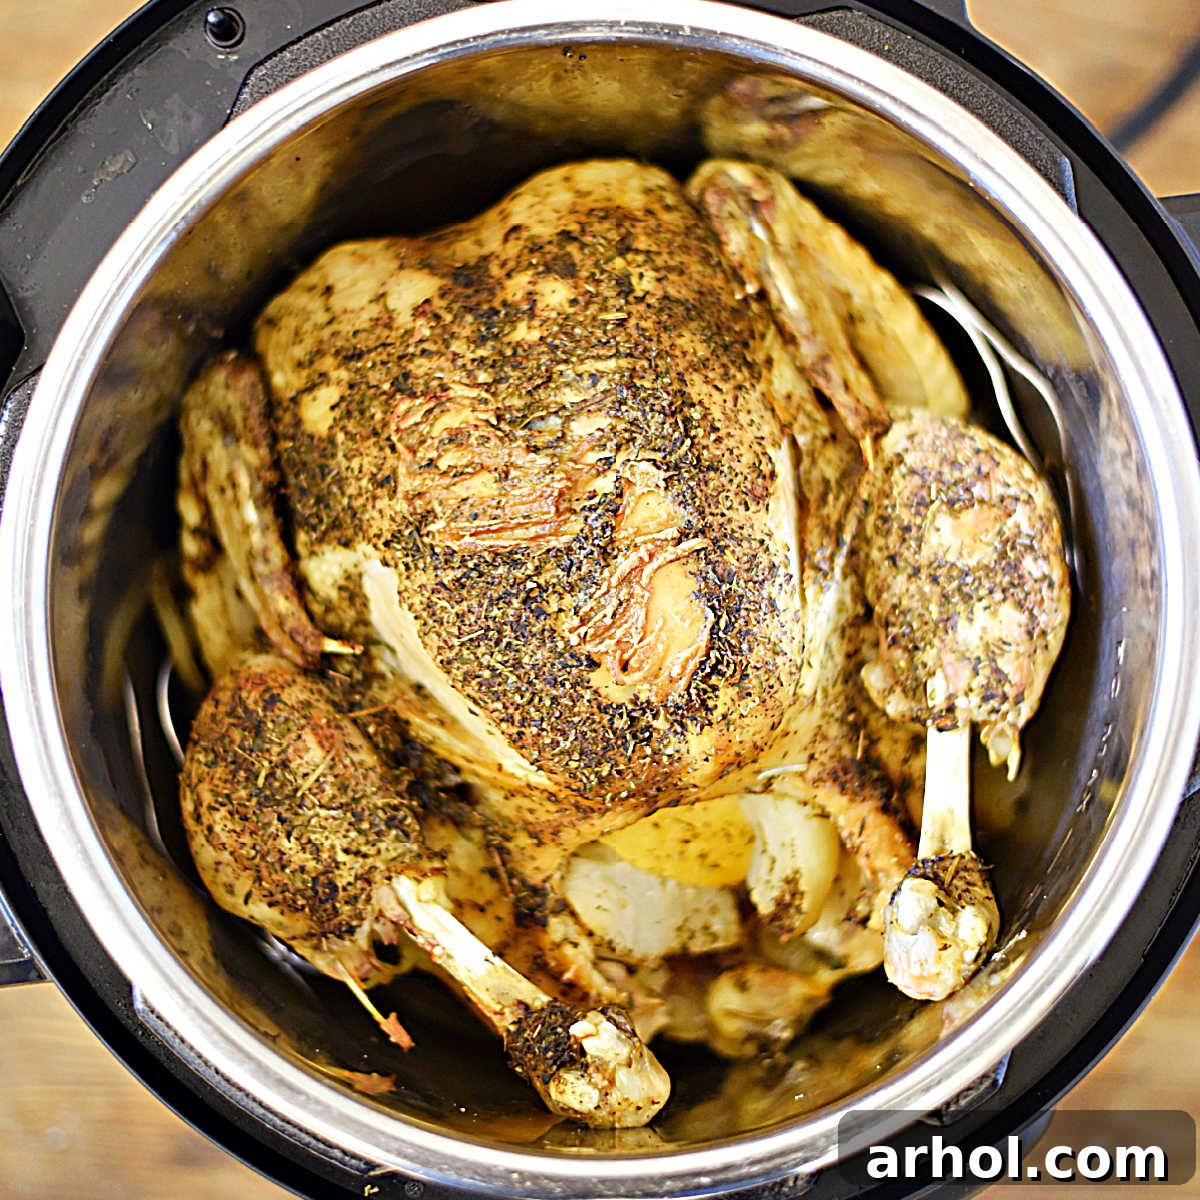
Transform your dinner routine with the ultimate **Instant Pot Whole Roast Chicken** recipe! This comprehensive guide shows you exactly how to cook a succulent, flavorful whole chicken in your pressure cooker in a fraction of the time it takes in a traditional oven. Experience tender, juicy meat every single time, and with simple techniques like using the Duo Crisp lid or a quick broil, you can achieve that irresistible, golden-crispy skin that makes homemade roast chicken truly special. Perfect for busy weeknights or relaxed family meals, this easy-to-follow recipe is designed to become an instant family favorite, proving that convenience doesn’t mean compromising on taste or quality. Say goodbye to mediocre store-bought rotisserie chicken and hello to superior homemade flavor that will impress your entire family!
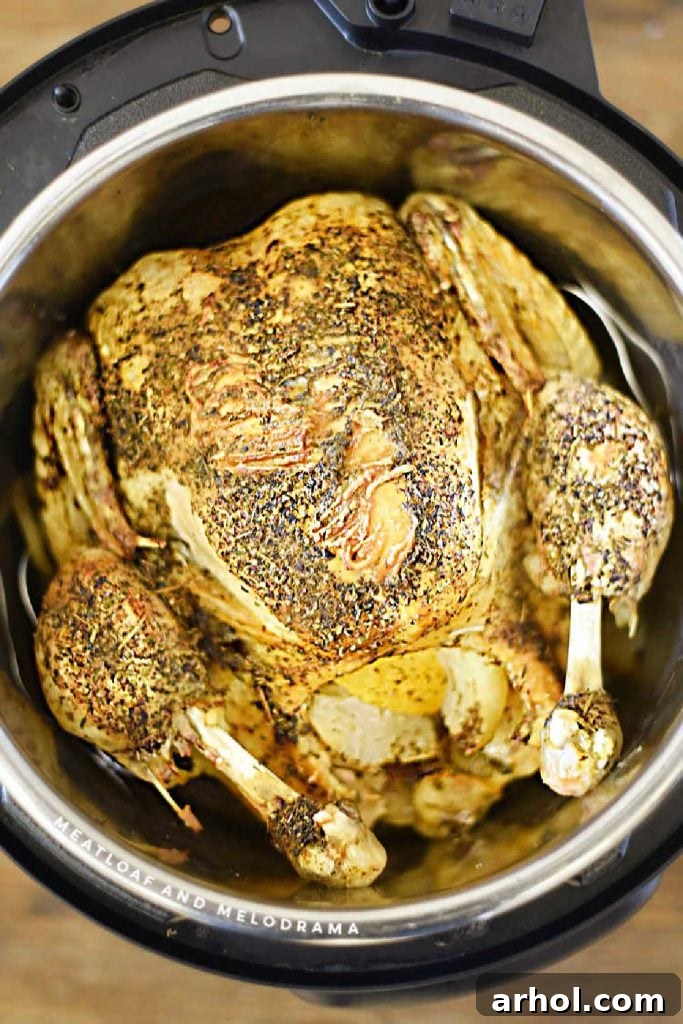
If you’re a devoted fan of the convenience and savory taste of grocery store rotisserie chicken, prepare to elevate your home cooking experience and save a significant amount of money with this incredible **homemade whole roast chicken recipe** crafted right in your Instant Pot. While a classic roast chicken dinner prepared in a Dutch oven undeniably offers its own rustic charm and delicious results, the electric pressure cooker dramatically speeds up the entire process, delivering equally delicious, fall-off-the-bone tender chicken with minimal fuss. Imagine enjoying a perfectly cooked, flavorful whole chicken any night of the week, reducing your oven time to mere minutes for crisping, and transforming your dinner routine.
Beyond the immediate satisfaction of a fantastic meal, this recipe offers unparalleled versatility. Never let those valuable bones go to waste again! They are the perfect foundation for creating the most nourishing and intensely flavorful homemade chicken stock or bone broth you’ll ever taste. This precious liquid gold can be effortlessly frozen for future use, adding incredible depth and richness to countless soups, stews, risottos, and sauces. Alternatively, if you’re craving another comforting meal, you can easily transform your leftover chicken and fresh broth into a hearty bowl of Instant Pot Rotisserie Chicken Soup almost immediately after your main dinner.
This chicken dinner truly stands out as one of our absolute favorite Instant Pot recipes for several compelling reasons. It consistently yields an incredibly moist, deeply flavorful, and supremely juicy chicken every single time, making it a reliable and foolproof choice for any occasion, from a simple weeknight meal to a small gathering. Plus, the invaluable bonus of having abundant delicious leftover chicken opens up an exciting world of culinary possibilities, ready to be effortlessly incorporated into a wide variety of recipes that call for cooked chicken. From quick and healthy chicken salads to hearty casseroles and flavorful tacos, this chicken is truly a versatile gift that keeps on giving!
Table of Contents: Your Comprehensive Guide to a Perfect Instant Pot Whole Chicken
- Why Choose Instant Pot Whole Chicken? Speed, Flavor, and Health Benefits
- Essential Ingredients for Your Instant Pot Roast Chicken Feast
- How to Cook a Whole Chicken in the Instant Pot: A Detailed Guide
- Achieving the Perfect Instant Pot Chicken Cooking Time: Tips for Success
- Secrets to Achieving Irresistibly Crispy Chicken Skin: Broil or Air Fry?
- Delicious Side Dishes to Serve with Your Perfectly Roasted Chicken
- How to Store and Maximize Leftover Instant Pot Chicken
- Instant Pot Whole Roast Chicken: The Complete Recipe Card
Why Choose Instant Pot Whole Chicken? Speed, Flavor, and Health Benefits
The Instant Pot has truly revolutionized home cooking, and preparing a whole chicken is undoubtedly one of its most impressive feats. Unlike the traditional method of oven roasting, which can demand hours of your precious time, your pressure cooker effortlessly delivers a perfectly cooked, fall-off-the-bone tender chicken in under an hour. This incredible speed means you can enjoy a wholesome, homemade meal even on your busiest weeknights, transforming a daunting task into a simple reality. It’s not just about the speed; the enclosed, high-pressure cooking environment plays a crucial role in locking in every drop of moisture and intensifying the flavors, resulting in an exceptionally juicy bird every single time, a quality often hard to achieve with other methods.
Furthermore, opting to make your own rotisserie-style chicken at home provides significant advantages. You gain complete control over the ingredients used, allowing you to avoid any unwanted additives, excess sodium, or artificial flavors often found in many store-bought rotisserie versions. This makes your homemade chicken a healthier, more transparent, and ultimately more satisfying choice for your family. The Instant Pot method is also remarkably economical, costing significantly less than purchasing a pre-cooked chicken. It’s a healthier, more budget-friendly, and incredibly convenient alternative that will quickly become an indispensable staple in your kitchen, simplifying meal prep and ensuring delicious results consistently.
Essential Ingredients for Your Instant Pot Roast Chicken Feast
Crafting this utterly delicious Instant Pot whole roast chicken requires just a handful of simple, fresh, and readily available ingredients. These components come together harmoniously to create a deeply satisfying and aromatic flavor profile that is both comforting and impressive. The inherent beauty of this recipe lies in its elegant simplicity and the wonderful flexibility it offers to customize the seasonings to perfectly match your family’s preferences. Here’s a breakdown of what you’ll need to gather:
- Whole Fresh Chicken: For optimal results, select a whole fresh chicken weighing between 4 to 5 pounds. This size is ideal for fitting comfortably within most standard 6-quart or 8-quart Instant Pot models, ensuring that it cooks evenly and thoroughly. While fresh chicken is always recommended for superior texture and flavor, a properly thawed frozen chicken can also be used successfully.
- Olive Oil: A single tablespoon of high-quality olive oil serves multiple purposes. It acts as an excellent binder, helping your chosen seasonings adhere perfectly to the chicken skin. More importantly, it contributes significantly to achieving that desirable beautiful golden crust if you opt for a quick broil or air fry step after the pressure cooking.
- Aromatics for the Cavity & Pot: Onion, Lemon Quarters, Garlic Cloves: These humble but potent aromatics are absolutely essential for infusing the chicken with incredible, vibrant flavor from the inside out. As the chicken pressure cooks, these ingredients gently release their fragrant essences, permeating the meat with bright, tangy lemon notes and rich, savory garlic and onion flavors. A standard white or yellow onion works perfectly, and a fresh lemon adds an invigorating zest that brightens the entire dish.
- Versatile Seasoning Blend: Sea Salt, Ground Black Pepper, Garlic Powder, and Herbes de Provence (or Italian Seasoning): This classic and well-balanced combination provides an aromatic and deeply savory flavor foundation. Herbes de Provence, with its exquisite blend of thyme, rosemary, oregano, and often a touch of lavender, imparts a sophisticated, Mediterranean-inspired taste. However, if Herbes de Provence isn’t on hand, a good quality Italian seasoning blend is a fantastic and widely available alternative that will also deliver wonderfully delicious results. Feel free to adjust the quantities of these seasonings to perfectly suit your personal taste preferences.
- Cooking Liquid: Chicken Broth or Water: Approximately 1.5 cups of liquid are required to create the necessary steam and pressure within the Instant Pot. Using chicken broth will imbue the resulting cooking liquid with an extra layer of savory flavor, making it an excellent base for a quick homemade gravy or stock. However, it’s important to note that plain water works perfectly fine and has been consistently proven to yield equally delicious and tender chicken, so don’t hesitate to use what you have readily available in your pantry.
How to Cook a Whole Chicken in the Instant Pot: A Detailed Guide for Success
Cooking a whole chicken in the Instant Pot is not only surprisingly straightforward but also consistently yields unbelievably tender and flavorful results. This ingenious method elegantly bypasses the lengthy roasting times typically associated with conventional ovens, thereby making a wholesome, homemade chicken dinner a completely accessible reality any night of the week. Follow these meticulously detailed steps to ensure you achieve a perfectly cooked, juicy bird every single time:
Step 1: Prepare the Chicken with Precision. Begin by thoroughly patting the entire chicken, both inside and out, dry with clean paper towels. This seemingly small but crucial step is vital; it helps your chosen seasonings adhere much more effectively to the skin and significantly contributes to a more appealing, slightly crisper skin texture, especially if you plan to broil or air fry it later. Next, meticulously remove any neck, giblets, or other parts that might be tucked inside the chicken cavity. These can be set aside and saved for making an incredibly rich homemade chicken stock later, adding zero waste to your cooking process.
Step 2: Infuse Flavor into the Cavity. Generously stuff the cleaned chicken cavity with a portion of your quartered onion, half of the fresh lemon, and at least one peeled garlic clove. For an even deeper internal flavor, sprinkle some of your chosen seasoning blend directly inside the cavity as well. These aromatics will gently steam and release their essences, permeating the meat from within during the pressure cooking process.
Step 3: Season the Exterior for Maximum Taste. Drizzle or rub the olive oil evenly and thoroughly over the entire surface of the chicken skin. This not only acts as an excellent binder for your seasonings but also contributes significantly to achieving a beautiful, golden-brown finish later. Following this, liberally sprinkle the remaining seasoning blend (comprising sea salt, ground black pepper, garlic powder, and either Herbes de Provence or Italian seasoning) over the oiled skin, ensuring complete and even coverage for maximum flavor in every bite.
Step 4: Prepare the Instant Pot for Cooking. Carefully place the metal trivet (the steamer rack that typically comes with your Instant Pot) into the bottom of the pressure cooker inner pot. Then, pour 1.5 cups of chicken broth or water into the pot. The trivet serves a crucial purpose by keeping the chicken elevated above the liquid, allowing it to steam evenly and preventing it from sitting directly in the liquid, which could lead to a less desirable texture. With care, place the seasoned chicken, breast-side up, directly onto the trivet.
Step 5: Enhance with Extra Aromatics (Optional but Highly Recommended). While this step is entirely optional, we highly recommend placing any extra whole garlic cloves, or leftover onion or lemon quarters, directly into the liquid at the bottom of the pot. These additional aromatics will further infuse the cooking environment with delightful aromas and flavors, contributing to the overall richness of the chicken. As an added bonus, that beautifully roasted garlic can later be mashed and spread over the cooked chicken for an extra burst of concentrated savory deliciousness!
Step 6: Initiate Pressure Cooking. Securely fasten the Instant Pot lid, ensuring that the sealing ring is properly seated within the lid. Turn the steam release valve to the “Sealing” position, guaranteeing that pressure can build inside the pot. Select the “Pressure Cook” or “Manual” setting on your Instant Pot and set the cooking time based on the chicken’s weight (refer to the detailed cooking time guidelines provided in the next section). The Instant Pot will then take some time to come to pressure before the actual cooking countdown begins.
Step 7: The Crucial Natural Pressure Release. Once the pressure cooking cycle is complete and the Instant Pot beeps, resist the urge to immediately open the lid. Instead, allow for a 10 to 12-minute Natural Pressure Release (NPR). This means you simply do nothing and allow the pressure to dissipate gradually and naturally for this specified period. This crucial resting step is paramount for ensuring the chicken remains incredibly juicy and tender by allowing the internal juices to redistribute throughout the meat. After the natural release period, carefully perform a Quick Release for any remaining pressure by turning the steam release valve to “Venting.” Only when the float valve drops completely is it safe to twist and open the lid.
Important Note on Liquid Choice: While incorporating chicken broth will undoubtedly add an additional layer of rich flavor to the drippings and the resulting potential gravy, many experienced home cooks have found that plain water works just as effectively for cooking the chicken itself, yielding equally delicious and moist results. Therefore, do not hesitate to use whichever liquid you have conveniently on hand; the final outcome will still be wonderfully flavorful!
Achieving the Perfect Instant Pot Chicken Cooking Time: Tips for Success
One of the most frequently asked questions when preparing a whole chicken in an Instant Pot revolves around the ideal cooking duration: “How long exactly should I pressure cook it?” To consistently achieve a perfectly cooked whole chicken that is both thoroughly done and optimally tender in a pressure cooker, the general and reliable rule of thumb is to allocate 6 minutes of high-pressure cooking time per pound of chicken. This precise calculation ensures that your chicken is cooked safely to the recommended internal temperature, reaching peak tenderness without any risk of overcooking or dryness.
Here’s a quick guide based on common chicken sizes:
- For a 5-pound chicken: Set the Instant Pot to cook for 30 minutes on high pressure.
- For a 4-pound chicken: Set the Instant Pot to cook for 25 minutes on high pressure.
- For a 3-pound chicken: Set the Instant Pot to cook for approximately 18-20 minutes on high pressure.
It’s important to remember that these figures represent the active cooking time under pressure. You must also factor in the time it takes for your Instant Pot to come to pressure (which can typically range from 10 to 15 minutes, depending on the chicken’s size, the initial temperature of the liquid, and the model of your Instant Pot) and the mandatory 10-12 minute natural pressure release period after the active cooking is complete. These additional stages are integral to the entire process, contributing significantly to the desired tender texture and exceptional juiciness of your final roast chicken.
Always Verify Doneness with a Thermometer: After the pressure has been fully released and the lid safely opened, it is absolutely paramount to confirm that your chicken has reached a safe internal temperature. Utilize an instant-read meat thermometer, carefully inserting it into the thickest part of the thigh (ensuring not to touch the bone, as bone conducts heat and can give a false reading) and also into the thickest part of the breast. Both the dark meat and the white meat should consistently register at least 165 degrees Fahrenheit (74 degrees Celsius). If, upon checking, the temperature is found to be lower than the safe minimum, you can simply return the chicken to the Instant Pot and cook for an additional 2-5 minutes on high pressure, followed by a quick release, until the correct temperature is achieved. This ensures both safety and optimal eating quality.
Secrets to Achieving Irresistibly Crispy Chicken Skin: Broil or Air Fry?
While the Instant Pot is undeniably a master at producing incredibly moist, tender, and flavorful chicken, there’s one common challenge that pressure cooking inherently presents: the absence of crispy skin. The high-moisture, steaming environment inside the pot tends to soften the chicken skin rather than browning and crisping it. However, the good news is that achieving that highly coveted, golden-brown, and audibly crispy skin is entirely possible with just a few simple, extra steps. You have two excellent and effective methods to choose from, depending on your available kitchen equipment:
Method 1: Broiling in a Conventional Oven for Classic Crispiness
This is a classic, widely used, and highly effective way to transform the soft skin of your pressure-cooked chicken into a delightfully crispy exterior. Once your chicken is fully cooked in the Instant Pot and the pressure has been completely released, proceed as follows:
- Prepare for Broiling: With utmost care, gently remove the whole chicken from the Instant Pot. At this point, you can also remove any lemon or onion pieces from its cavity. Transfer the chicken onto an oven-safe casserole dish or a sturdy baking sheet, ideally lined with aluminum foil or parchment paper for significantly easier cleanup.
- Enhance with Fat for Flavor and Extra Crispness: For an additional layer of rich flavor and to actively assist the skin in crisping beautifully, dot a couple of tablespoons of unsalted butter over the chicken skin. Alternatively, you can brush it lightly with a little more olive oil. This fat helps conduct heat and creates that desirable crunchy texture.
- Broil to Golden Perfection: Place the prepared chicken under a preheated broiler in your oven. Set your broiler to a medium-high heat setting. It is crucial to keep a very close eye on the chicken during this stage, as broilers work extremely quickly and can burn food in a matter of seconds! Broil for approximately 5-8 minutes, or until the chicken skin develops a rich golden-brown hue and achieves your desired level of crispiness. Rotate the baking pan as needed to ensure even browning across the entire surface.
- Rest Before Carving and Serving: Once the skin is perfectly crispy, promptly remove the chicken from the oven and allow it to rest undisturbed for at least 5 minutes before you begin carving. This essential resting period allows the internal juices to redistribute evenly throughout the meat, ensuring every single bite is succulent and bursting with flavor.
Method 2: Utilizing an Air Fryer Lid (Instant Pot Duo Crisp, Mealthy, Ninja Foodi)
If you are fortunate enough to own an Instant Pot model equipped with an integrated air fryer lid (such as the Instant Pot Duo Crisp) or a separate crisping lid accessory that fits your pressure cooker, this method provides an incredibly convenient and mess-free way to achieve perfectly crispy skin without the need to transfer the chicken to a completely different appliance.
- After Pressure Cooking: Once the pressure cooking cycle is fully complete and the pressure has been safely and entirely released, carefully remove the standard pressure cooker lid from your Instant Pot.
- Attach the Air Fryer Lid: With precision, place your air fryer/crisping lid directly onto the Instant Pot base. Ensure that it is securely seated and locked into position according to your specific appliance’s instructions for safe operation.
- Air Fry or Broil for Crispiness: First, press the “CANCEL” button on your Instant Pot’s main display to deactivate the “KEEP WARM” cycle. Then, select the “Broil” or “Air Fry” function on your crisping lid. If your lid allows for temperature adjustments, typically set it to a high heat. Cook the chicken for an initial period of 6 to 8 minutes.
- Monitor and Adjust for Desired Crispiness: Throughout this crisping phase, it is vital to keep a close watch on the chicken. You can easily lift the air fryer lid to check its progress and even flip the chicken if necessary for more even browning. If you prefer a darker, extra-crispy skin, you can add more time in short 1-2 minute increments until your desired level of crispiness is achieved. Please note that specific directions, temperature settings, and cooking times may vary slightly depending on your individual air fryer lid model and brand, so always consult your appliance’s user manual for precise guidance.
- Rest and Serve: Just as with the oven broiling method, it is crucial to allow the chicken to rest for about 5 minutes after it has finished crisping. This brief resting period is essential for allowing the internal juices to redistribute evenly throughout the meat, guaranteeing maximum juiciness and flavor when you finally carve and serve your magnificent Instant Pot whole roast chicken.
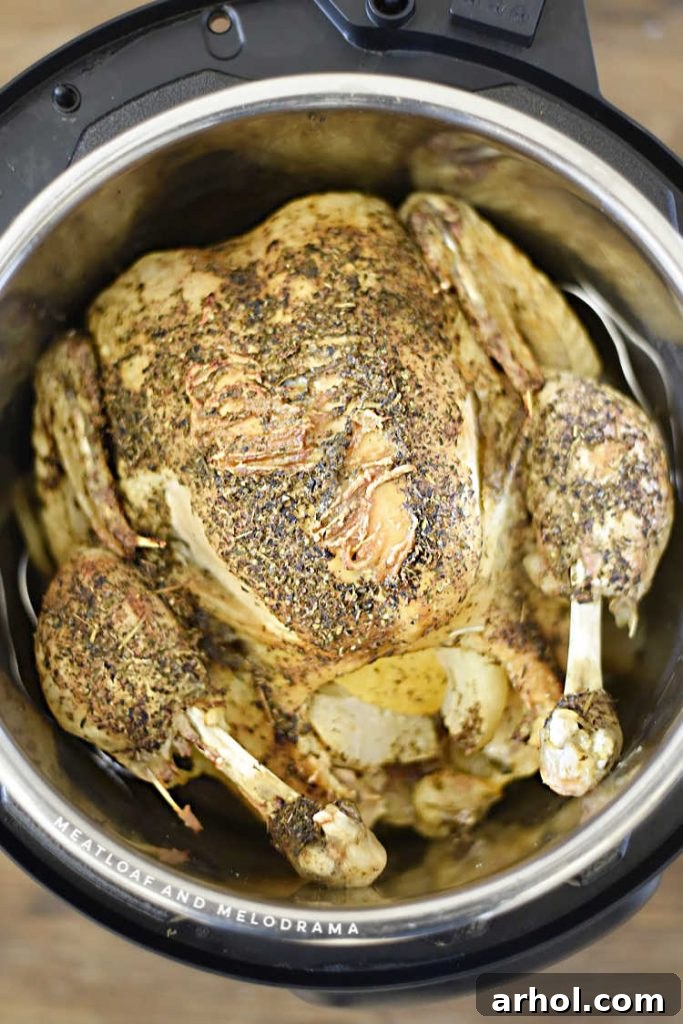
The flavorful cooking liquid that remains in the Instant Pot after you’ve removed the chicken is an absolute culinary treasure! It’s deeply infused with all the rich, savory flavors from the chicken, its drippings, and the aromatic ingredients you added. This makes it the perfect, robust base for crafting a quick and incredibly easy homemade chicken gravy. Simply strain the liquid to remove any solids, skim off any excess fat from the surface, and then thicken it to your desired consistency with a simple cornstarch slurry or a flour roux for a truly delightful and essential accompaniment to your perfectly roasted chicken.
What to Serve with Your Perfectly Roasted Instant Pot Chicken
A perfectly cooked and flavorful Instant Pot whole roast chicken deserves an equally delicious and complementary array of side dishes to transform it into a complete and unforgettable meal. The inherent versatility of this chicken means it pairs beautifully with a wide spectrum of flavors and textures, allowing for endless culinary creativity. Here are some of our absolute favorite recommendations to help you create a truly satisfying and well-rounded family dinner:
- Comforting Potatoes: Classic choices that always hit the spot include wonderfully creamy Instant Pot mashed potatoes, or tender and flavorful Instant Pot Baby Potatoes. For a different textural experience, consider crispy roasted potato wedges seasoned with herbs, or a refreshing and tangy homemade potato salad.
- Wholesome Grains: A bed of fluffy Jasmine rice or hearty brown rice can serve as a wonderful, absorbent base to soak up any delicious chicken juices or savory gravy. For lighter and healthier alternatives, nutrient-rich quinoa or delicate couscous also make excellent choices.
- Vibrant Roasted Vegetables: Roasting vegetables, either alongside your chicken (if you’re utilizing the oven broil method) or separately in the oven, truly enhances their natural sweetness and deepens their flavors. Try vibrant roasted carrots, tender broccoli florets, crisp asparagus spears, or caramelized Brussels sprouts for a delightful contrast.
- Fresh Steamed or Sautéed Greens: Quick, healthy, and easy-to-prepare options like perfectly steamed green beans or lightly sautéed spinach provide a fresh, verdant contrast to the richness of the chicken. Sweet and tender glazed carrots are another consistently family-friendly choice that adds a touch of sweetness.
- Crisp Salads: A refreshing and crisp green salad, tossed with a light vinaigrette dressing, can add a welcome element of freshness and a perfect balance to the savory richness of the roasted chicken, cutting through the richness beautifully.
How to Store and Maximize Leftover Instant Pot Chicken for Future Meals
One of the most rewarding and practical benefits of cooking an entire whole chicken, especially in your Instant Pot, is the generous abundance of delicious leftovers! Proper storage techniques are key to ensuring your cooked chicken remains fresh, safe, and readily available for numerous future meals, thereby extending its culinary usefulness. After allowing the chicken to cool completely to room temperature (this is crucial to prevent bacterial growth and steaming inside the container), carefully carve the meat from the bones. Store the carved chicken meat in an airtight container in the refrigerator for up to 3-4 days for optimal freshness. For longer-term preservation, the cooked chicken can be efficiently shredded or diced and then frozen in freezer-safe bags or containers for an impressive duration of up to 3 months, making future meal prep incredibly easy.
Leftover Instant Pot whole chicken is remarkably versatile, transforming mundane meal prep into an exciting culinary adventure. Here are some incredibly creative and practical ways to savor and utilize your leftover chicken:
- Effortless Quick Lunches: Shredded or diced chicken is perfect for assembling speedy sandwiches, filling wraps, or adding a substantial protein boost to your favorite salads, making lunch prep a breeze.
- Flavorful Global Inspired Dishes: Easily incorporate your cooked chicken into delicious chicken tacos, cheesy quesadillas, hearty burritos, or savory enchiladas, bringing international flavors to your table.
- Comforting Casseroles & Pasta Dishes: Integrate the shredded chicken into your family’s favorite comforting chicken casseroles, toss it into a variety of pasta dishes for added protein, or use it as a topping for homemade pizzas.
- Classic Chicken Salad: A timeless and perpetually popular choice! Simply mix your shredded chicken with creamy mayonnaise, finely diced celery, fresh herbs (like dill or parsley), and your preferred seasonings for a refreshing and satisfying chicken salad.
And remember, don’t let that valuable chicken carcass and any leftover bones go to waste! They are ideal for making a rich, deeply flavored homemade chicken stock. This liquid gold can be frozen into convenient portions and used as a foundational base for countless future recipes, truly maximizing your whole chicken purchase and cooking efforts.
Pin
Instant Pot Whole Roast Chicken Recipe
Dee
10 minutes
25 minutes
15 minutes
50 minutes
8
Equipment Needed for This Recipe
-
Instant Pot Pressure Cooker (6-quart or 8-quart)
-
Instant-Read Meat Thermometer (essential for food safety)
-
Optional: Oven-safe casserole dish or baking sheet (for broiling) OR Instant Pot Duo Crisp / Air Fryer Lid
Ingredients
-
1
4 to 5-pound
whole fresh chicken (giblets removed) -
1
tablespoon
olive oil -
1
tablespoon
herbes de Provence seasoning (or Italian seasoning)
-
1 ½
teaspoons
sea salt -
1
teaspoon
garlic powder -
½
teaspoon
ground black pepper -
1
white or yellow onion
peeled and quartered -
1
lemon
quartered -
2
cloves
garlic
peeled (1 for cavity, 1 for pot) -
1 ½
cups
chicken broth or water
Step-by-Step Instructions
-
Pat the whole chicken thoroughly dry with paper towels to remove excess moisture, then rub its entire surface evenly with olive oil.
-
Sprinkle the herbes de Provence (or Italian seasoning), sea salt, pepper, and garlic powder generously over the chicken’s exterior and inside its cavity. Then, stuff the cavity with one peeled garlic clove, some of the quartered onion, and half of the lemon pieces. If all aromatics don’t fit inside, place any extra lemon or onion pieces into the bottom of the Instant Pot alongside the liquid.
-
Place the trivet into the Instant Pot liner, pour 1.5 cups of chicken broth or water into the pot, and carefully position the seasoned chicken, breast-side up, on the trivet. Add the second peeled garlic clove to the liquid in the pot, if desired.
-
Secure the Instant Pot lid, turn the steam release knob to the “Sealing” position, and select “PRESSURE COOK” (or “Manual” on older models) on HIGH pressure for 30 minutes for a 5-pound chicken. Adjust cooking time based on chicken weight: use 6 minutes per pound.
-
Once pressure cooking is complete, allow a 10 to 12-minute Natural Pressure Release (NPR). After this, hit “CANCEL” to turn off the warming function, then carefully perform a Quick Release for any remaining pressure. Open the pot only when the float valve drops completely. Use an instant-read meat thermometer to ensure the internal temperature of both dark and white meat is at least 165°F (74°C).
-
To crisp skin in the oven: If desired, for crispy skin, carefully lift the chicken from the Instant Pot onto a baking pan or casserole dish. Broil in a preheated oven (set to medium-high) for about 5-8 minutes, or until the skin becomes beautifully golden brown and crisp. Watch carefully to prevent burning.
-
To crisp skin with Duo Crisp or crisping lid: Once pressure cooking is done, remove the pressure lid and attach the air fryer/crisp lid to the Instant Pot. Ensure the “KEEP WARM” cycle is canceled, then select “BROIL” or “AIR FRY” for 6 to 8 minutes, or until the chicken skin reaches your desired crispiness. Cooking times and specific functions may vary slightly depending on your appliance model and brand, so always consult your manual.
Helpful Recipe Notes and Tips
For a 6-quart Instant Pot: If you are using a 6-quart Instant Pot, please reduce the liquid amount to 1 cup of chicken broth or water to avoid overfilling.
Seasoning Substitute: If herbes de Provence seasoning is not readily available, a good quality Italian seasoning blend can be used as a perfectly flavorful and aromatic substitute, yielding delicious results.
Resting for Juiciness: For the absolute juiciest chicken, it is crucial to allow it to rest for at least 5 minutes after cooking (and crisping, if applicable) before you begin carving. This essential resting period allows the internal juices to redistribute evenly throughout the meat.
Nutrition Information (Approximate Per Serving)
Calories:
190
kcal
,
Carbohydrates:
1
g
,
Protein:
1
g
,
Fat:
2
g
,
Saturated Fat:
1
g
,
Cholesterol:
1
mg
,
Sodium:
437
mg
,
Potassium:
4
mg
,
Fiber:
1
g
,
Sugar:
1
g
,
Vitamin A:
19
IU
,
Vitamin C:
1
mg
,
Calcium:
9
mg
,
Iron:
1
mg
Nutrition information is automatically calculated and should therefore only be used as an approximation and not as a precise dietary guide.
Additional Recipe Information
Main Course, Dinner
American, Comfort Food
Gluten-Free (check seasonings)
Did you enjoy this recipe? We’d love to hear from you! Leave a comment below!
Important Recipe Update Note: This popular Instant Pot whole chicken recipe, originally published in 2018, underwent a comprehensive update in 2021. The update specifically focused on including detailed and user-friendly instructions for utilizing the innovative Instant Pot Duo Crisp or other compatible air fryer crisp lids. This significant enhancement means you can now effortlessly achieve that highly coveted, beautifully crispy skin directly in your Instant Pot, completely eliminating the need to transfer the cooked chicken to a separate oven for an additional broiling step. We are continuously dedicated to providing the most current, efficient, and user-friendly cooking methods for your ultimate culinary convenience and enjoyment!
For more incredibly easy and delicious Instant Pot chicken recipes, along with a wealth of other delightful culinary inspiration, tips, and tricks delivered straight to your inbox, be sure to sign up for our exclusive weekly newsletter! Join our thriving community of passionate home cooks and ensure you never miss out on a new, mouth-watering recipe or valuable cooking advice.