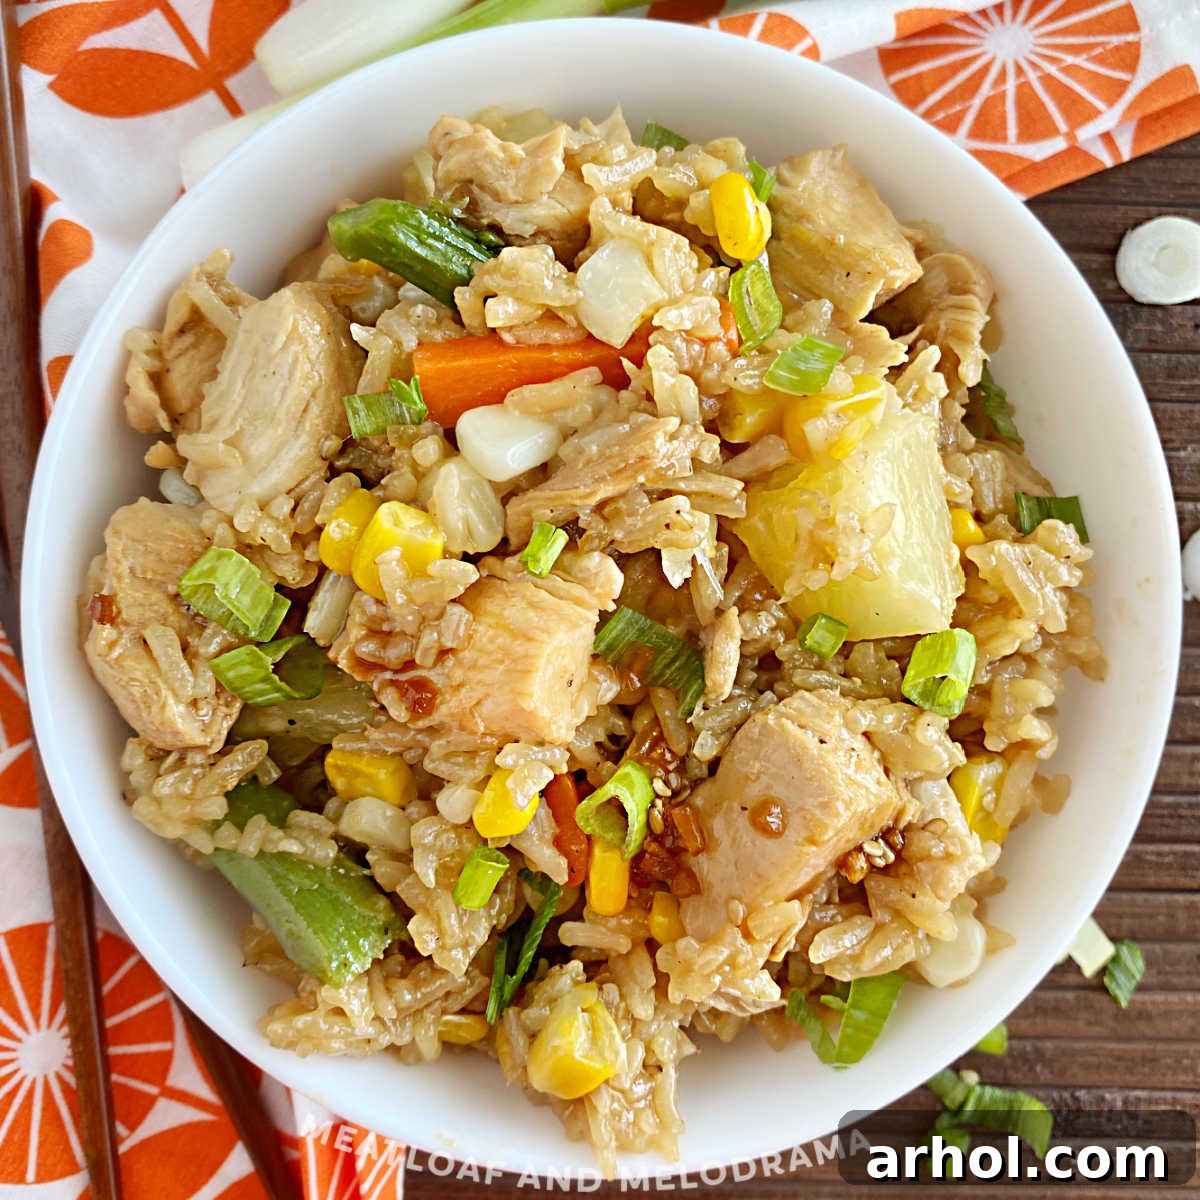
Welcome to your new favorite weeknight dinner! This Instant Pot Teriyaki Chicken and Rice recipe is a game-changer, offering a delicious, flavorful, and incredibly easy one-pot meal that the whole family will adore. Crafted with tender chicken breasts, aromatic jasmine rice, a colorful medley of vegetables, and a rich teriyaki sauce, this dish promises maximum flavor with minimal effort. Perfect for those busy evenings when you need a satisfying meal on the table in a flash, without the fuss of multiple pots and pans.
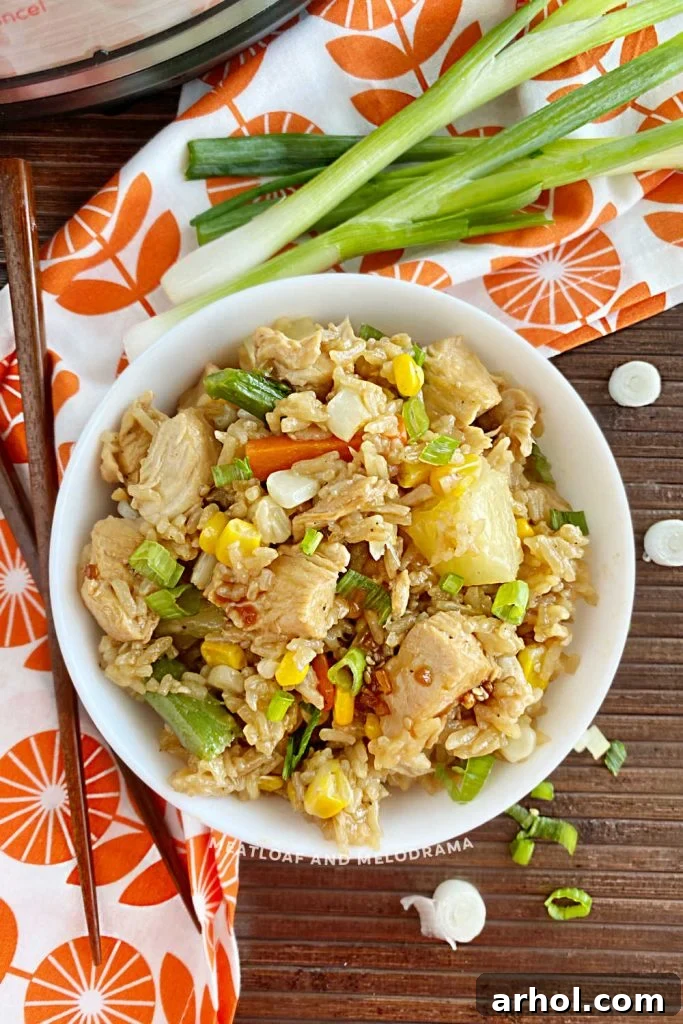
Table of Contents
- Why the Instant Pot is Your Weeknight Hero
- The Heart of the Dish: The Teriyaki Magic
- Simple, Wholesome Ingredients
- Step-by-Step Guide: How to Make Instant Pot Teriyaki Chicken and Rice Bowls
- Mastering the Instant Pot: Cooking Time and Pressure Release
- Effortless Customization: Delicious Variations
- Storage and Meal Prep Tips
- Instant Pot Teriyaki Chicken and Rice Recipe Card
One-pot meals are truly the ultimate solution for quick and easy dinner recipes, especially on the busiest of days. The convenience of preparing an entire meal in a single appliance is unmatched, and this Instant Pot Teriyaki Chicken and Rice recipe is a shining example. I recently whipped up this incredibly simple dish, and it was an instant hit with my entire family! Not only is it one of the easiest Instant Pot chicken recipes you can make, but the clean-up afterward is remarkably fast, leaving you more time to enjoy your evening.
The brilliance of this recipe lies in its efficiency: the chicken and rice cook simultaneously in the Instant Pot, meaning you only have one pressure cooker to wash – a true lifesaver for anyone tired of a sink full of dishes. While I have previously shared a more elaborate Instant Pot teriyaki chicken recipe featuring a homemade teriyaki sauce, for those extra busy nights, I confidently reach for my favorite jar of quality teriyaki sauce. This small swap makes an already easy chicken dinner even more effortless without compromising on flavor.
You’ll undoubtedly want to add this incredibly delicious and satisfying meal to your growing list of easy Instant Pot recipes to try. If your palate leans towards delightful Asian-inspired flavors, you might also enjoy exploring other popular Instant Pot dishes like Instant Pot Honey Garlic Chicken or the savory Instant Pot Korean Beef. Each offers a unique taste experience while upholding the convenience of pressure cooking.
Why the Instant Pot is Your Weeknight Hero
The Instant Pot has revolutionized home cooking, especially for busy individuals and families. Its ability to perform multiple cooking functions in one appliance – from sautéing to pressure cooking – makes it ideal for recipes like this Teriyaki Chicken and Rice.
- **Speed and Efficiency:** Pressure cooking significantly reduces traditional cooking times, meaning dinner is ready much faster.
- **One-Pot Convenience:** Say goodbye to endless stacks of dirty dishes. Everything cooks in a single pot, simplifying both cooking and cleanup.
- **Consistent Results:** The Instant Pot’s precise temperature and pressure control lead to perfectly cooked rice and wonderfully tender chicken every time.
- **Hands-Off Cooking:** Once you set it, you can walk away. No constant stirring or monitoring required, freeing you up for other tasks.
The Heart of the Dish: The Teriyaki Magic
Teriyaki sauce is the star of this recipe, providing that unmistakable sweet, savory, and umami-rich flavor that makes this dish so irresistible. Originating from Japan, “teriyaki” refers to a cooking method where food is broiled or grilled with a glaze of soy sauce, mirin, and sugar. In Western cuisine, it typically refers to the sauce itself.
While a homemade teriyaki sauce offers a fresh, customizable flavor, using a good quality store-bought teriyaki sauce is a fantastic shortcut for this quick Instant Pot meal. Look for brands with lower sodium content or those that use natural ingredients for the best taste. The beauty of store-bought sauce is its consistency and convenience – just pour and cook!
If you’re inspired to make your own teriyaki sauce, you would typically combine soy sauce, rice vinegar, a touch of honey or brown sugar for sweetness, and optionally a splash of sesame oil for an extra layer of nutty aroma. Whisking these ingredients together before adding them to the pot gives you complete control over the flavor profile.
Simple, Wholesome Ingredients
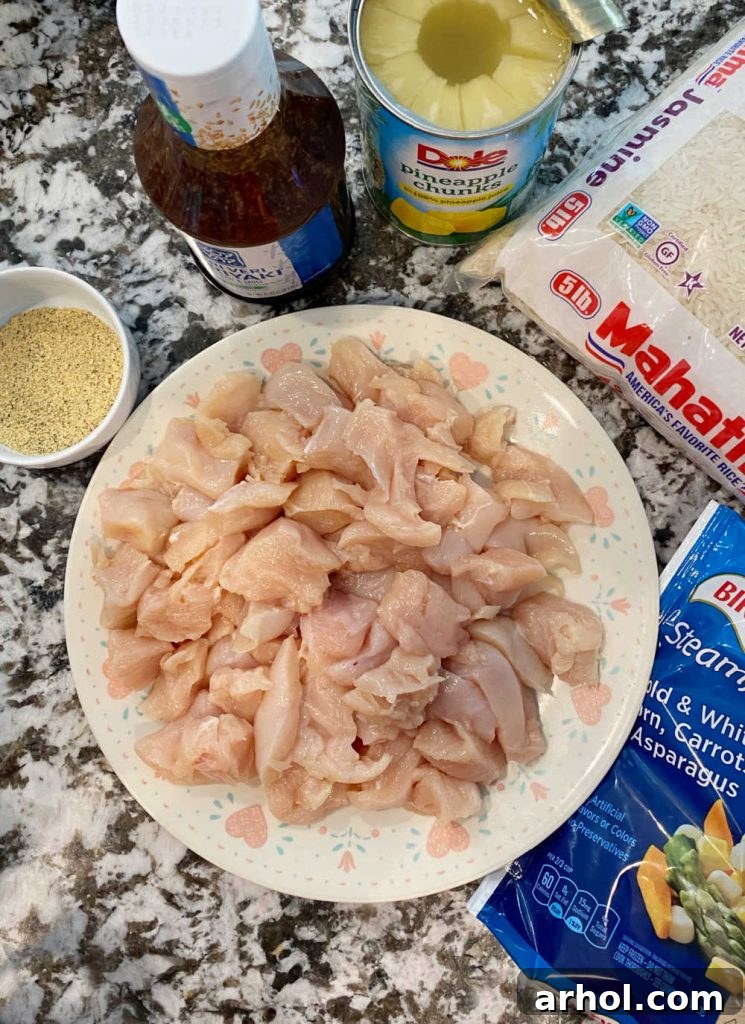
Making incredibly flavorful Instant Pot teriyaki chicken bowls requires only a handful of readily available ingredients. Here’s what you’ll need and some tips for each:
- Boneless Skinless Chicken Breasts: We use chicken breasts for a lean protein option, cut into approximately 1-inch pieces for quick and even cooking. You can also opt for boneless, skinless chicken thighs for a richer, more succulent texture if preferred.
- Vegetable Oil: Essential for sautéing the chicken and building flavor. Olive oil or avocado oil are excellent healthy alternatives that work just as well.
- Seasonings (Salt, Pepper, Garlic Powder, Ground Ginger): These pantry staples add a foundational layer of flavor to the chicken, complementing the teriyaki sauce beautifully. The ginger, in particular, enhances the Asian-inspired profile.
- Chicken Broth: This is crucial for cooking the rice and creating a flavorful base. Low-sodium chicken broth is recommended to control overall saltiness, or you can use water in a pinch, though broth adds more depth.
- Jasmine Rice: Our rice of choice for its fragrant aroma and fluffy texture. It’s vital to rinse the rice thoroughly under cold, running water before adding it to the Instant Pot. This removes excess starch, preventing the rice from becoming gummy and helping to avoid the “Burn” notice. Brown rice can also be used, but it will require adjustments to the liquid amount and cooking time.
- Teriyaki Sauce: For ultimate convenience, a good quality store-bought teriyaki sauce is perfect. I often use Soy Vay low sodium, but feel free to use your favorite brand. If you’re feeling ambitious, you can make your own with soy sauce, rice vinegar, honey or brown sugar, and a dash of sesame oil.
- Frozen Mixed Veggies: A simple way to add color, nutrition, and texture. Make sure they are thawed before adding them at the end to prevent them from overcooking and becoming mushy. Common mixed vegetable blends include carrots, peas, and corn.
- Pineapple Chunks or Tidbits: The sweet and tangy notes of pineapple perfectly balance the savory teriyaki, adding a refreshing burst of flavor. Canned pineapple works wonderfully for convenience.
Step-by-Step Guide: How to Make Instant Pot Teriyaki Chicken and Rice Bowls
Creating this delightful one-pot meal in your Instant Pot is straightforward. Follow these steps for a perfectly cooked dish every time:
- Prepare the Chicken: Begin by cutting your boneless, skinless chicken breasts into roughly 1-inch pieces. This ensures the chicken cooks quickly and evenly alongside the rice.
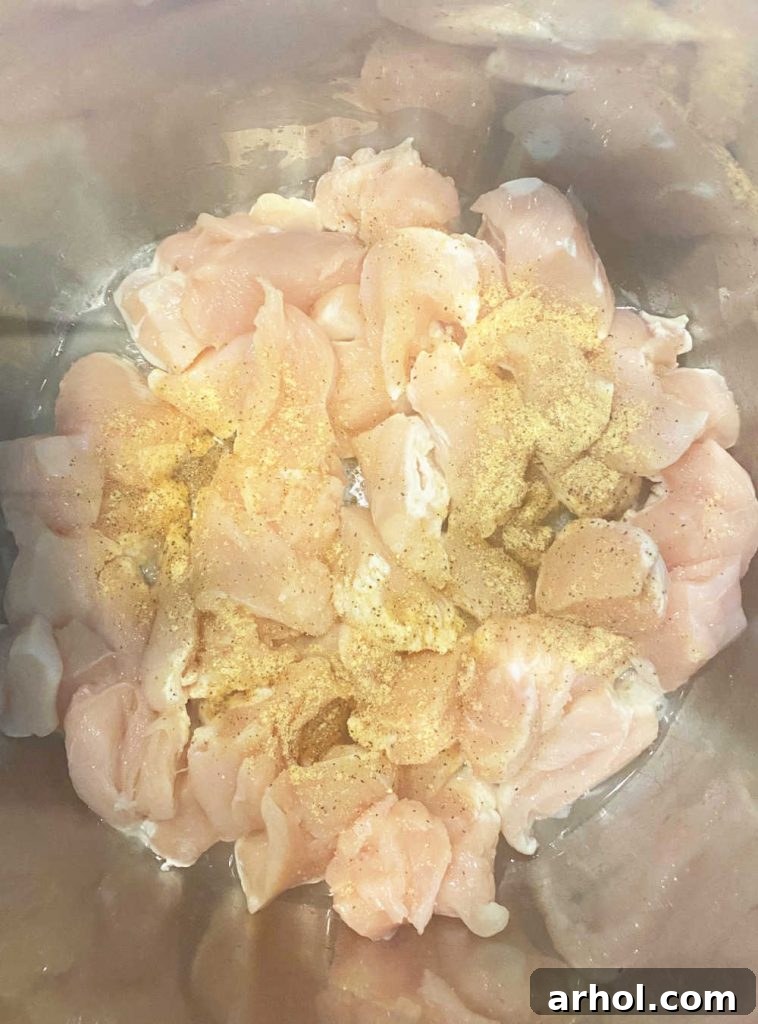
- Sauté the Chicken: Turn your electric pressure cooker to the “Sauté” mode. Once the pot indicates it’s hot (usually a “Hot” display or a audible beep), add the vegetable oil. Add your chicken pieces to the hot oil. As the chicken cooks, season it generously with sea salt, black pepper, ground ginger, and garlic powder. Stir frequently and cook until the chicken is no longer pink on the outside. This browning step is crucial for developing deep, savory flavors.
- Deglaze the Pot: After sautéing, hit the “Cancel” button to turn the pot off. If you notice any browned bits stuck to the bottom of the pot (which can happen during sautéing), it’s important to deglaze. Pour a small amount of chicken broth or cold water into the pot and use a wooden spoon or spatula to scrape up all those flavorful bits. This step is vital for preventing the dreaded “Burn” notice on your Instant Pot.
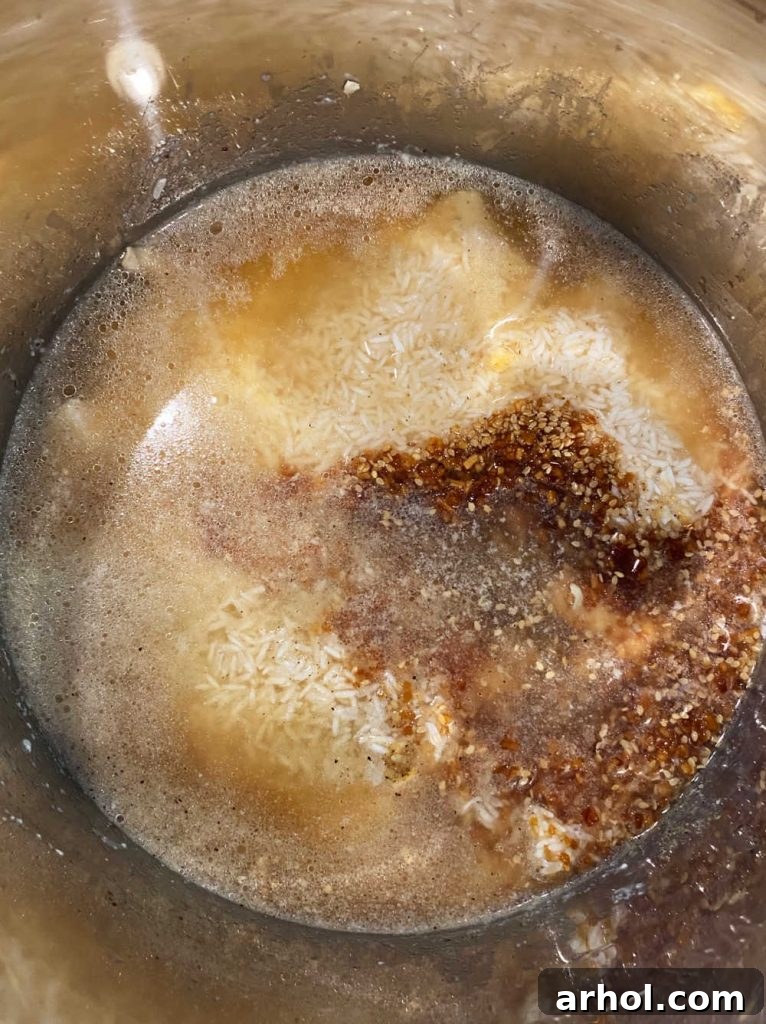
- Add the Rice: Carefully add your uncooked jasmine rice directly over the sautéed chicken. Remember, you should have rinsed the rice thoroughly beforehand to ensure a fluffy texture and prevent sticking.
- Pour in the Broth: Gently pour the chicken broth over the rice. Make sure the rice is fully submerged and covered in the liquid. You can lightly mix the rice and broth at this point, but be careful not to disturb the chicken too much.
- Layer the Teriyaki Sauce: Now, pour the teriyaki sauce directly over the broth and rice. This is an important trick: **do not stir everything together.** Layering the ingredients in this order helps prevent the sauce from sinking to the bottom and burning, which is a common cause of the “Burn” notice with thicker sauces.
- Seal and Pressure Cook: Place the lid on your Instant Pot and ensure the sealing vent is set to the “Sealing” position. Depending on your Instant Pot model, this may happen automatically. Select the “Pressure Cook” (or “Manual”) setting and set the cook time to 4 minutes on high pressure.
Mastering the Instant Pot: Cooking Time and Pressure Release
Understanding the cooking time and pressure release method is key to achieving perfectly cooked teriyaki chicken and rice.
- **Pressure Cooking:** After you set the cook time to 4 minutes on high pressure, the Instant Pot will take some time to come to pressure. This preheating phase can range from 5 to 10 minutes, depending on the volume and temperature of the contents. Once it reaches pressure, the 4-minute cooking countdown will begin. You’ll hear the Instant Pot beep once the 4 minutes are complete.
- **Natural Pressure Release (NPR):** Do not open the lid immediately! You want to allow a 10-minute natural pressure release (NPR). This means you let the Instant Pot sit undisturbed for 10 minutes after the cooking cycle finishes. During this time, the pressure will gradually decrease, and the residual heat will continue to cook the rice, allowing it to absorb moisture and achieve a perfectly fluffy texture without sticking or becoming mushy. This 10-minute NPR method is the same technique used for cooking Instant Pot jasmine rice by itself, ensuring optimal results.
- **Quick Release (QR):** After the 10-minute natural pressure release, carefully hit the pressure release valve to perform a quick release of any remaining pressure. Stand clear of the valve as steam will forcefully escape. Once the float valve (or pin) drops down, indicating all pressure has been released, you can safely remove the lid.
- **Stir in Final Ingredients:** With the lid safely removed, stir in the thawed mixed vegetables and pineapple chunks. The residual heat from the pot will gently warm the vegetables without overcooking them. Give everything a good stir until the mixture is completely blended.
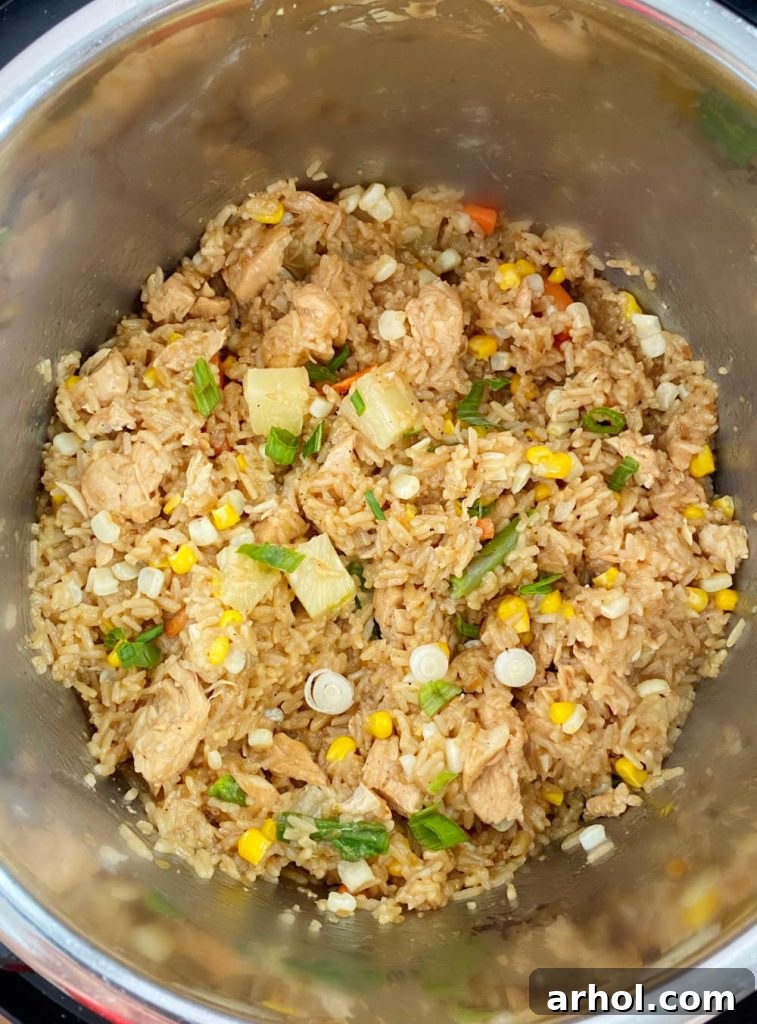
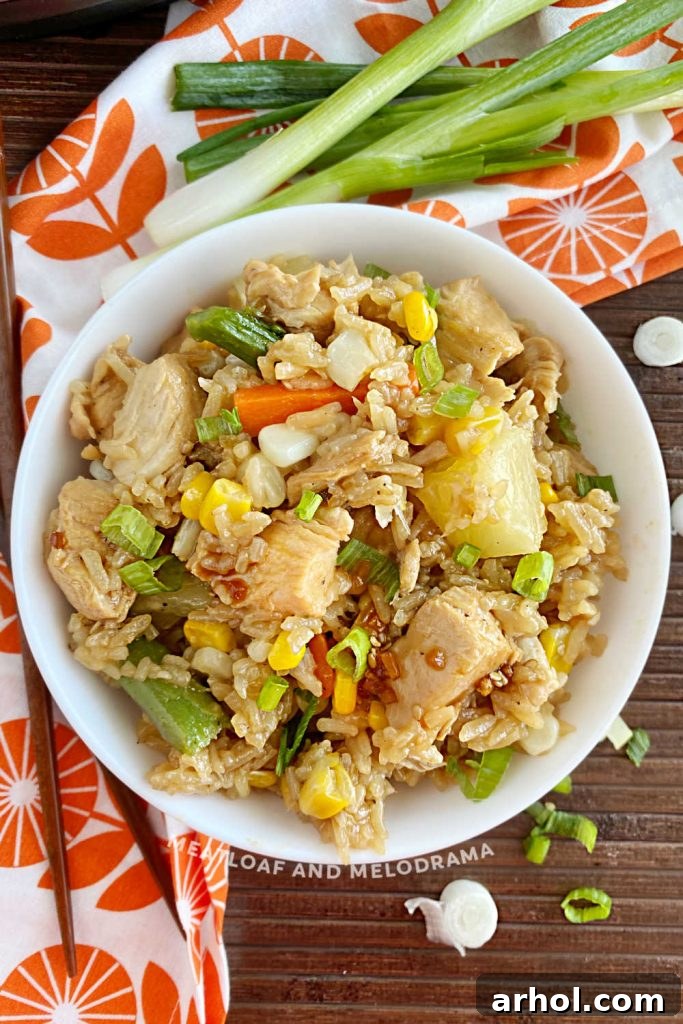
If you desire more sauce, you can certainly add an extra splash of teriyaki sauce now or when you serve the chicken teriyaki rice bowls. For an extra touch of freshness and flavor, consider garnishing your bowls with some chopped green onions or a sprinkle of sesame seeds. This flavorful Instant Pot teriyaki chicken truly doesn’t need anything else – you have the perfect balance of flavors and textures between the tender chicken, perfectly seasoned rice, crisp-tender veggies, and the sweet acidity of pineapple.
Effortless Customization: Delicious Variations
One of the best aspects of this Instant Pot Teriyaki Chicken and Rice recipe is how incredibly versatile it is. It’s easy to adapt this delicious chicken teriyaki to suit your personal needs, tastes, and whatever ingredients you have on hand. Don’t be afraid to get creative!
- **Protein Swaps:** Instead of boneless, skinless chicken breasts, you can use boneless, skinless chicken thighs for an even juicier and richer flavor. Cut them into 1-inch pieces just like the breasts. For other protein options, consider swapping chicken for bite-sized pieces of pork tenderloin, firm tofu (pressed and cubed), or even shrimp (add shrimp during the last minute of pressure cooking, or after releasing pressure, to avoid overcooking).
- **Rice Alternatives:** While jasmine rice offers a wonderful fragrance and texture, you can certainly use brown rice for a whole-grain option. Keep in mind that brown rice typically requires more liquid and a longer cooking time in the Instant Pot (usually around 15-20 minutes with a 10-minute natural release), so adjust accordingly. Always remember to rinse your rice!
- **Vegetable Medley:** The frozen mixed vegetables are a convenient choice, but feel free to customize your veggie blend. Fresh broccoli florets, sugar snap peas, sliced bell peppers, or green beans would all be excellent additions. For fresh vegetables, you can either add them in with the thawed mixed veggies at the end (allowing the residual heat to warm them through) or steam them lightly beforehand if you prefer them softer. Water chestnuts or bamboo shoots can add an interesting crunch.
- **Spice It Up:** If you enjoy a bit of heat, easily spice up this quick meal by adding a dash of sriracha sauce or red pepper flakes along with the teriyaki sauce. You could also drizzle a little chili oil over individual servings.
-
**Extra Flavor Boosts:**
- **Fresh Ginger & Garlic:** For an even more vibrant flavor, sauté minced fresh ginger and garlic along with the chicken.
- **Mushrooms:** Sliced mushrooms can be sautéed with the chicken or added with the other vegetables.
- **Lime Juice:** A squeeze of fresh lime juice at the end can brighten up all the flavors.
-
**Garnishes & Toppings:** Elevate your bowls with various garnishes. Beyond chopped green onions and sesame seeds, consider:
- A drizzle of toasted sesame oil for a nutty finish.
- A sprinkle of chopped fresh cilantro.
- Crushed peanuts or cashews for added crunch.
- A fried egg on top for a heartier meal.
- **Serving Suggestions:** This dish is a complete meal on its own, but it pairs wonderfully with sides like crispy egg rolls, steamed dumplings, or a light cucumber salad.
Storage and Meal Prep Tips
This easy Instant Pot recipe yields a generous amount of chicken and rice, making it ideal not only for family dinners but also for efficient meal prepping throughout the week. You can certainly adjust the recipe to make less if you prefer, but preparing a larger batch saves time and effort later on.
- **Refrigeration:** Store any leftover teriyaki chicken and rice in an airtight container in the refrigerator. It maintains its delicious flavor and quality for 3 to 4 days, making it perfect for grab-and-go lunches or quick dinners.
- **Freezing for Longer Storage:** For longer-term storage, allow the cooked dish to cool completely. Then, portion it into individual servings in freezer-safe containers or gallon freezer bags. Remove as much air as possible before sealing to prevent freezer burn. Frozen teriyaki chicken and rice can be stored for up to 2-3 months.
-
**Reheating:**
- From the Refrigerator: Reheat individual portions in the microwave for 1-2 minutes, stirring halfway through, until thoroughly warmed. You can add a splash of water or broth if it seems a bit dry.
- From the Freezer: For best results, thaw frozen portions in the refrigerator overnight. Then, reheat as described above. If reheating directly from frozen, it will take longer (3-5 minutes or more) and may benefit from a small amount of liquid to restore moisture. You can also reheat on the stovetop over medium-low heat, adding a little water or broth, until warmed through.
Instant Pot Teriyaki Chicken and Rice
Equipment
-
Instant Pot Pressure Cooker (6 or 8 quart)
Ingredients
- 2 pounds boneless skinless chicken breasts cut into 1 inch pieces
- 1 tablespoon vegetable oil or olive oil or avocado oil
- 1 teaspoon garlic powder
- ½ teaspoon sea salt
- ½ teaspoon ground ginger
- ½ teaspoon ground black pepper
- 2 cups uncooked jasmine rice rinsed
- 2 cups chicken broth low sodium
- 1 cup teriyaki sauce low sodium recommended
- 2 cups frozen mixed vegetables thawed
- 1 cup pineapple chunks
Instructions
-
Turn the Instant Pot pressure cooker to Sauté mode. When it heats up, add the vegetable oil and then the chicken.
-
Add the garlic powder, salt, pepper, and ground ginger to the chicken. Cook, stirring frequently, until the chicken is no longer pink on the outside.
-
Hit the “Cancel” button to turn the pot off. If necessary, deglaze the bottom of the pot with a small amount of broth to scrape up any stuck-on bits, preventing the “Burn” notice.
-
Add the rinsed rice evenly over the chicken. Then, carefully pour the chicken broth over the rice, ensuring it’s fully covered. Gently spread the teriyaki sauce over the broth, but **do not stir** the layers together.
-
Place the lid on the pressure cooker, ensuring the vent is set to the sealing position. Select the “Pressure Cook” (or “Manual”) setting and set the cook time to 4 minutes on high pressure.
-
Allow the pot to natural pressure release (NPR) for 10 minutes once the cooking cycle is complete. After 10 minutes, quick release any remaining pressure by carefully turning the pressure valve.
-
Once the float valve drops, remove the lid. Stir in the thawed mixed vegetables and pineapple chunks. Mix well until all ingredients are completely blended and warmed through. Serve immediately.
Notes
For those who enjoy extra sauce, feel free to add more teriyaki sauce before serving or alongside the meal.
Nutrition
Carbohydrates: 43g,
Protein: 25g,
Fat: 4g,
Saturated Fat: 2g,
Polyunsaturated Fat: 1g,
Monounsaturated Fat: 1g,
Trans Fat: 1g,
Cholesterol: 58mg,
Sodium: 1517mg,
Potassium: 593mg,
Fiber: 2g,
Sugar: 7g,
Vitamin A: 1889IU,
Vitamin C: 10mg,
Calcium: 39mg,
Iron: 2mg
Nutrition information is automatically calculated and should be used as an approximation only.
Additional Info
I genuinely hope you enjoy this easy Instant Pot teriyaki chicken and rice as much as my family and I do. It truly simplifies dinner time without sacrificing incredible flavor. For more delicious and convenient recipes delivered straight to your inbox, don’t forget to sign up for my weekly newsletter. Happy cooking!