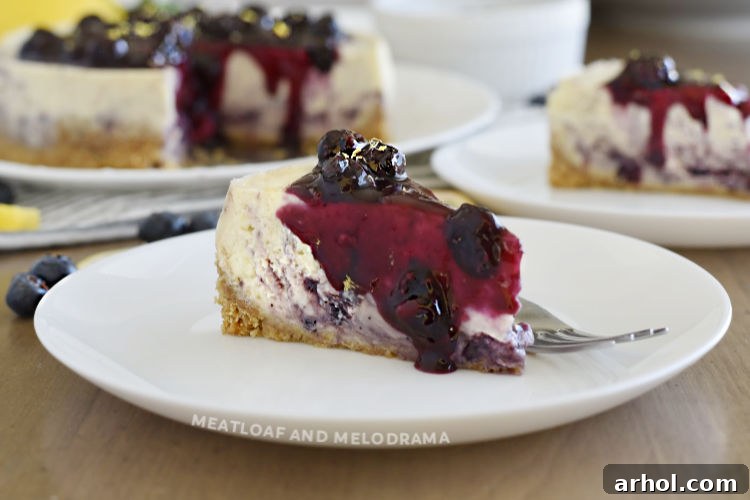
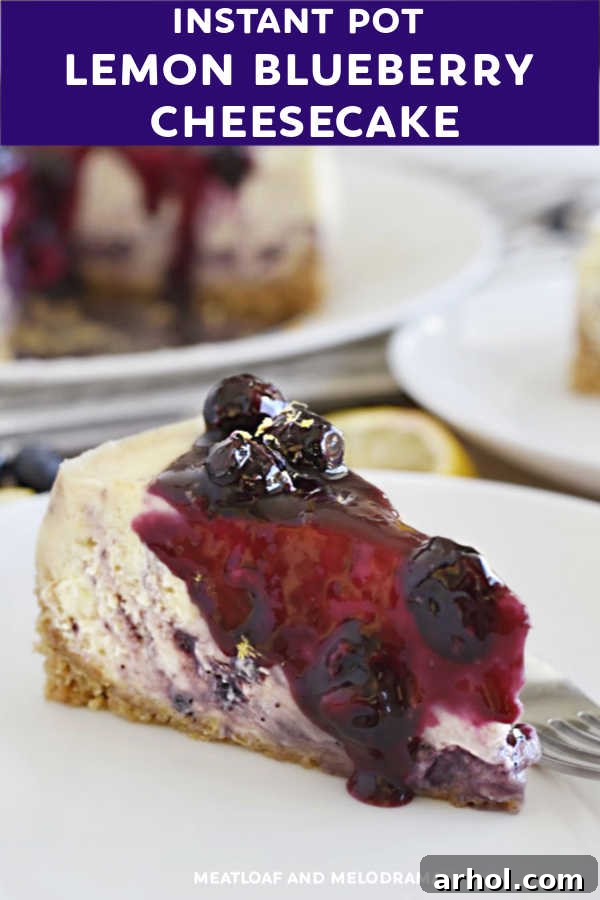
Indulge in the ultimate spring and summer dessert with this incredible Instant Pot Lemon Blueberry Cheesecake! This delightful creation is celebrated for its cool, creamy texture, refreshing lemon zest, and vibrant blueberry swirl, all coming together in a perfectly balanced symphony of flavors. What makes this recipe truly special is the magic of the pressure cooker, transforming a seemingly complex dessert into an effortless culinary triumph right in your own kitchen.
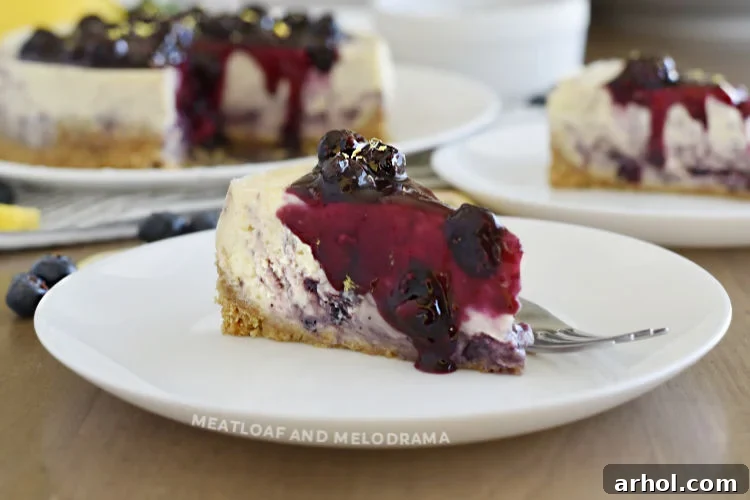
Cheesecakes consistently rank among the most beloved desserts, and crafting them in an Instant Pot takes convenience and consistency to a whole new level. This lemon blueberry rendition is a testament to that, offering a gourmet dessert experience that tastes and looks like it came from a high-end bakery, yet is surprisingly simple to achieve at home. Say goodbye to cracked cheesecakes and uneven baking – the Instant Pot ensures a perfectly smooth, evenly cooked masterpiece every time.
While many of my Instant Pot recipes focus on quick and easy dinners, discovering the joy of pressure-cooked cheesecakes has been a game-changer. Once you experience the unparalleled simplicity and perfect results, you’ll be eager to explore every imaginable flavor. We’ve previously delved into autumnal delights like pumpkin cheesecake, festive treats like eggnog cheesecake and peppermint cheesecake, and even a decadently rich dark chocolate cheesecake. While each holds a special place, this light, airy, and refreshingly tangy lemon blueberry cheesecake currently reigns as a family favorite, perfect for brightening any occasion.
Why Choose the Instant Pot for Cheesecake?
Making cheesecake in your Instant Pot is a revelation for several reasons. Firstly, it eliminates the need for a traditional water bath, which can often be cumbersome and risky. The pressure cooker creates its own moist, steamy environment, preventing cracks and ensuring a luxuriously smooth, custardy texture. Secondly, it keeps your kitchen cool, a huge advantage during warmer months when you crave a delicious homemade dessert without turning on the oven. Finally, the consistent heat and pressure guarantee a perfectly cooked cheesecake every time, making it an ideal method for both novice and experienced bakers.
Essential Tips for Instant Pot Lemon Blueberry Cheesecake Success
To ensure your lemon blueberry cheesecake turns out flawlessly, here are some crucial tips to keep in mind:
- Preparation is Key: Gather all your ingredients and have them measured and ready before you begin mixing. This streamlines the process and prevents last-minute scrambling.
- Room Temperature Matters: For the smoothest, creamiest filling, ensure your cream cheese and eggs are at room temperature. Take them out of the refrigerator at least an hour or two before you start.
- Zest Before Juicing: Always zest your lemon before slicing it in half to extract the juice. It’s much easier to get all that fragrant zest from an un-cut lemon.
- Avoid Overmixing: When combining the cheesecake batter ingredients, mix just until they are blended and smooth. Overmixing introduces too much air, which can lead to cracks in your finished cheesecake.
- Add Eggs Last: Eggs act as a binder and help set the cheesecake. Incorporate them one at a time, mixing on low speed until just combined.
- Gentle Swirling: When adding the blueberry jam, use a knife or a thin spatula to gently swirl it through the batter. The goal is distinct streaks, not a uniform purple mixture.
- Plan for Chilling: Refrigerate the cheesecake for a minimum of 6 hours, or ideally overnight, before serving. This crucial step allows the cheesecake to fully set and develop its rich flavors and firm texture.
Crafting Your Lemon Blueberry Swirl Cheesecake in the Instant Pot
The Perfect Graham Cracker Crust
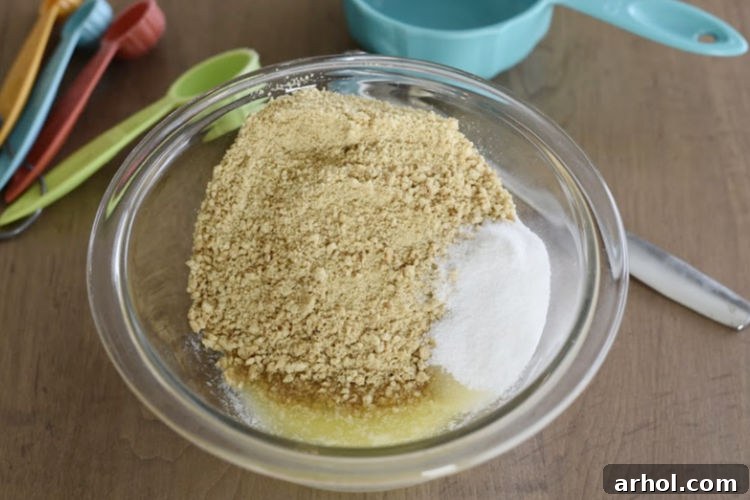
Every great cheesecake begins with a solid foundation, and our graham cracker crust is simple and satisfying. Start by crushing graham crackers into fine crumbs. While a food processor makes quick work of this, a large freezer bag and a rolling pin are equally effective (and a fun task for younger helpers!). Combine the finely crushed crumbs with granulated sugar and melted butter in a mixing bowl. Mix these ingredients thoroughly until the mixture resembles wet sand – cohesive enough to hold its shape when pressed.
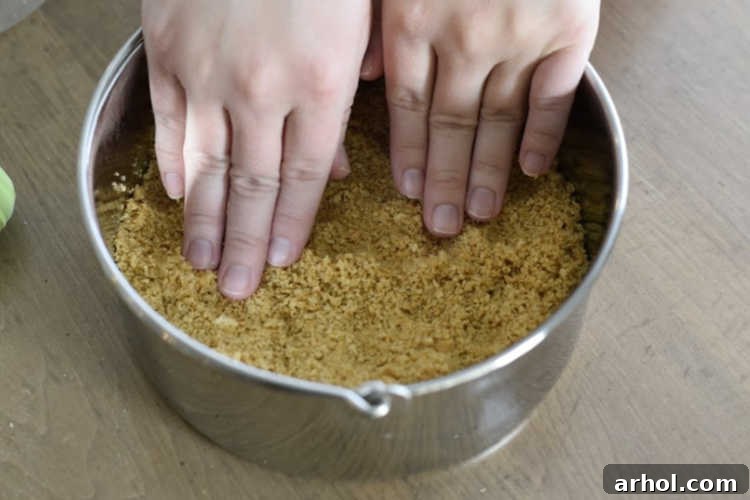
Once mixed, press the crust firmly and evenly into the bottom of a prepared 7-inch springform pan or push pan. A sturdy, flat-bottomed glass or your hands can help achieve an even layer. Place the pan in the freezer to chill while you prepare the cheesecake filling. This step helps the crust set, preventing it from crumbling when sliced. You can even prepare the crust ahead of time and freeze it for at least 30 minutes, or longer, until ready to use.
The Creamy Lemon Blueberry Filling
Now, for the star of the show: the rich and tangy lemon blueberry filling. In a large mixing bowl, gently beat the softened cream cheese with sugar until just creamy and smooth. Remember our tip: avoid overmixing! Gradually add the sour cream, fresh lemon juice, and fragrant lemon zest, mixing until everything is just combined. Finally, incorporate the eggs, one at a time, mixing on low speed until they are barely blended into the batter. This careful approach ensures a silky-smooth, crack-free cheesecake.
With the creamy lemon base ready, it’s time to add the beautiful blueberry swirl. To save time and ensure consistent results, I opt for a high-quality organic blueberry jam, like Bon Maman. Its consistency is perfect for creating those delightful swirls, and it’s already cool enough to incorporate without affecting the batter’s temperature. Simply dollop spoonfuls of jam over the cheesecake batter and then, using a knife or spatula, gently swirl it through. The key is to create distinct ribbons of blueberry, not to fully mix it into the lemon batter. This visual appeal, combined with the bursts of blueberry flavor, makes each slice a treat.
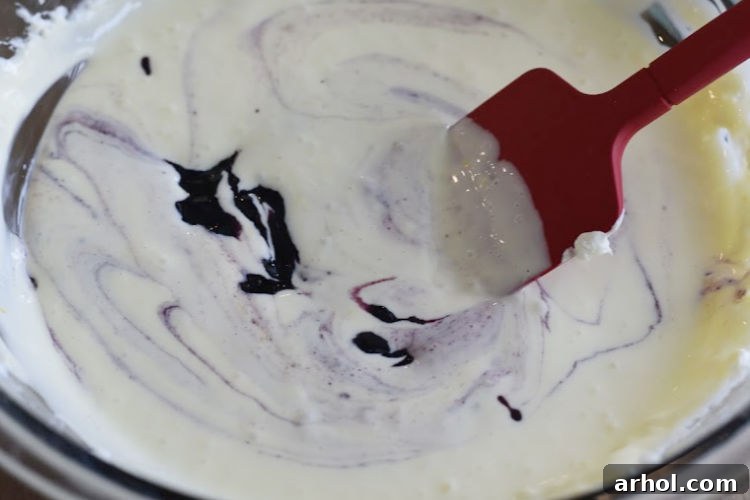
Carefully pour the cheesecake filling over the chilled graham cracker crust in the springform pan, smoothing the top with a spatula if needed. Now, prepare your Instant Pot (a 6-quart model works perfectly). Pour 1 cup of water into the inner pot and place a trivet at the bottom. If your springform pan doesn’t have a handle, fashion a foil sling to easily lower and lift the pan. Place the cheesecake on the trivet, ensuring it’s stable.
Perfectly Pressure Cooking Your Cheesecake
The beauty of Instant Pot cheesecake lies in its precise cooking time. For this particular cheesecake, with its creamy yet not overly thick batter, 35 minutes of pressure cooking is ideal. Once the cooking cycle is complete, resist the urge to immediately release the pressure. Instead, allow for a 15-minute natural release. This gradual release of pressure is vital for preventing the cheesecake from cracking and helps it continue to set gently. After 15 minutes, you can perform a quick release for any remaining pressure.
Knowing When Your Cheesecake is Perfectly Done
Determining the doneness of a cheesecake is straightforward. The cheesecake is ready when the edges are mostly firm, and the internal temperature reaches approximately 150 degrees Fahrenheit. The center might still have a slight “jiggle” – this is perfectly normal and desirable. Don’t worry, this subtle jiggle will firm up beautifully as the cheesecake cools and chills in the refrigerator. If you find the cheesecake is still too jiggly after the natural release, you can cook it for an additional 5 minutes at high pressure, followed by another short natural release.
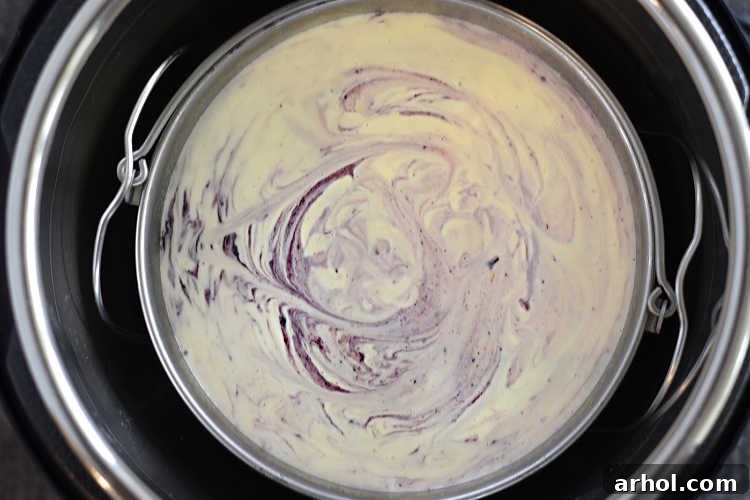
After carefully removing the cheesecake from the Instant Pot (using oven mitts and the foil sling if applicable), you might notice a small amount of condensation on the surface. Gently blot this moisture away with the corner of a paper towel. Allow the cheesecake to cool slightly on a wire rack for about 30 minutes before covering it. Then, transfer it to the refrigerator. This chilling period is crucial; it allows the flavors to meld and the cheesecake to achieve its signature dense, smooth texture. For the best results, chill for at least 6 hours, though overnight is highly recommended.
Optional Fresh Blueberry Topping for Extra Zing
While delicious on its own, a homemade fresh blueberry topping can elevate your cheesecake to new heights. I like to prepare an easy blueberry syrup using fresh blueberries, a touch of sugar, lemon juice, and a cornstarch slurry to thicken it slightly. This bright, fruity topping can be spooned generously over the entire cheesecake before serving or added to individual slices as desired. For a simpler approach, you can skip the cooked topping and garnish with fresh blueberries and a dollop of whipped cream. A sprinkle of fresh lemon zest also adds a lovely aromatic finish.
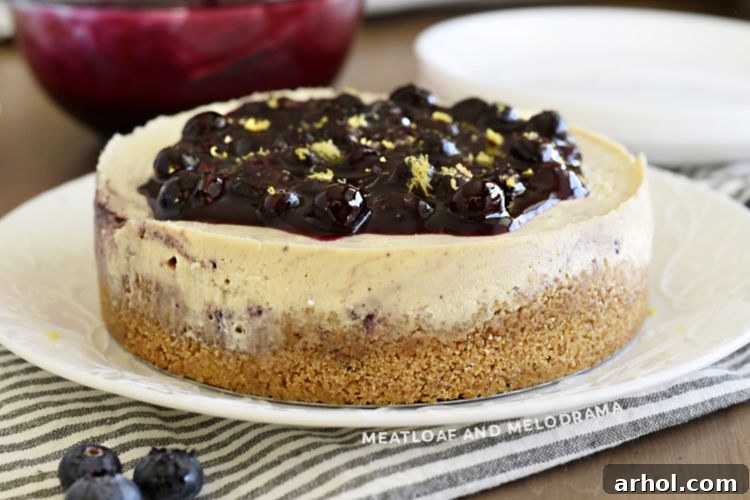
This Instant Pot Lemon Blueberry Cheesecake is consistently a hit with my family, disappearing almost instantly! Its cool, creamy, and light profile makes it the quintessential dessert for spring and summer gatherings. Imagine serving this refreshing treat for Easter brunch, a special Mother’s Day celebration, or any summer holiday barbecue. And with the Instant Pot doing all the work, you can enjoy a fantastic homemade dessert without ever needing to heat up your kitchen!
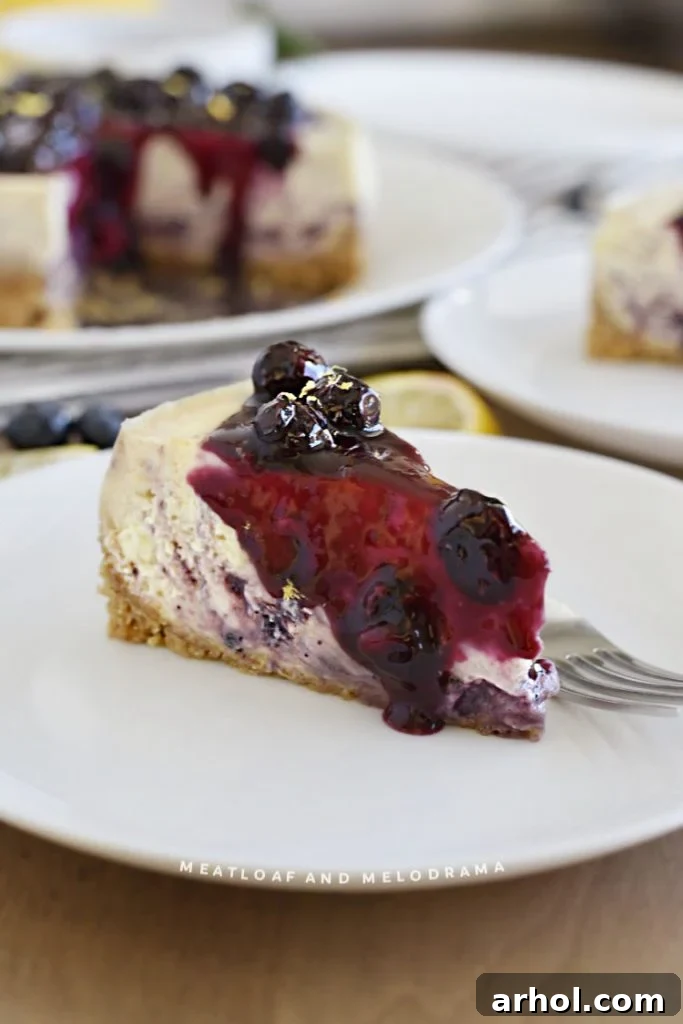
How Long Does Homemade Cheesecake Last?
Homemade cheesecakes, when properly stored in the refrigerator, typically remain delicious for about 5 days. However, in our experience, this Lemon Blueberry Cheesecake is so irresistibly good that it rarely lasts beyond two days! Store any leftovers tightly covered in an airtight container to maintain its freshness and prevent it from absorbing other odors from the fridge.
Instant Pot Lemon Blueberry Cheesecake
By: Dee
Instant Pot Lemon Blueberry Cheesecake is a cool, creamy, and wonderfully lemony dessert, featuring a beautiful blueberry swirl throughout. This easy dessert is perfectly cooked in your pressure cooker, making it a stress-free delight!
Prep Time: 15 minutes
Cook Time: 35 minutes
Refrigeration Time: 6 hours (minimum)
Total Time: 6 hours 50 minutes
Servings: 8
Equipment
- Instant Pot Pressure Cooker (6-quart recommended)
- 7-inch Springform Pan
- Mixing Bowls
- Whisk or Electric Mixer
- Spatula or Knife (for swirling)
- Food Processor or Ziploc Bag & Rolling Pin (for crust)
- Small Saucepan (for optional topping)
Ingredients
For the Crust
- 1 cup crushed graham crackers (about 7 rectangle sheets)
- 1 tablespoon granulated sugar
- 2 tablespoons butter, melted
For the Filling
- 16 ounces cream cheese (two 8-ounce blocks), softened to room temperature
- ½ cup granulated sugar
- ¼ cup sour cream
- 2 tablespoons fresh lemon juice
- 1 tablespoon fresh lemon zest
- 2 large eggs, at room temperature
- ½ cup organic blueberry jam (such as Bon Maman)
For Pressure Cooking
- 1 cup water (for the Instant Pot)
Blueberry Topping (optional)
- 2 cups fresh blueberries
- ¼ cup granulated sugar (adjust to taste)
- 2 teaspoons lemon juice
- ¼ cup water
- 1 tablespoon cornstarch
- 1 ½ tablespoons water (for cornstarch slurry)
Instructions
The Crust:
- Finely crush the graham crackers using a food processor for even crumbs, or place them in a large zip-top bag and crush thoroughly with a rolling pin.
- In a medium bowl, combine the crushed cookies, granulated sugar, and melted butter. Mix well until the mixture resembles wet sand and holds together when pressed.
- Press the crust mixture firmly and evenly into the bottom of a greased 7-inch springform pan. Use the bottom of a glass or your fingers to create a compact base.
- Place the prepared crust in the freezer while you prepare the cheesecake filling. This helps it set and become firm.
The Filling:
- In a large mixing bowl, beat the room temperature cream cheese and ½ cup granulated sugar together until just creamy and smooth. Be careful not to overmix.
- Add the sour cream, 2 tablespoons lemon juice, and 1 tablespoon lemon zest. Mix on low speed until just combined.
- Incorporate the eggs, one at a time, mixing on low speed only until each egg is just blended into the batter. Again, do not overmix.
- Dollop the blueberry jam over the cheesecake filling. Using a spatula or knife, gently swirl the jam into the batter, creating beautiful ribbons. Do not mix it completely in.
- Carefully pour the cheesecake filling over the chilled crust in the springform pan, smoothing the top with a spatula if necessary.
Pressure Cooking the Cheesecake:
- Pour 1 cup of water into the inner pot of your 6-quart Instant Pot. Place a trivet at the bottom of the pot.
- If your pan lacks a handle, create a foil sling by folding a long piece of aluminum foil into a strip. Place the cheesecake pan in the sling, then use the sling to carefully lower the pan onto the trivet in the Instant Pot.
- Close the Instant Pot lid and ensure the sealing valve is in the SEALING position. Select the PRESSURE COOK (or Manual) setting and set the time for 35 minutes on high pressure.
- Once cooking is complete, allow a 15-minute natural pressure release (NPR). After 15 minutes, perform a quick release (QR) to release any remaining pressure.
- When the float valve drops, carefully open the lid. Using oven mitts and the foil sling (or pan handles), carefully remove the cheesecake from the pot.
- The cheesecake is done when the edges are mostly firm and only the very center has a slight jiggle. The internal temperature should be around 150°F. If it’s still too jiggly, cook for another 5 minutes at high pressure with a short natural release.
- Gently blot any condensation from the top of the cheesecake with the corner of a paper towel.
- Allow the cheesecake to cool slightly on a wire rack for about 30 minutes before covering it. Store the covered cheesecake in the refrigerator for at least 6 hours, or ideally overnight, before serving.
Blueberry Topping (optional):
- In a small saucepan, combine the 2 cups fresh blueberries, ¼ cup granulated sugar, 2 teaspoons lemon juice, and ¼ cup water.
- Cook the mixture over medium-high heat, stirring occasionally, until it begins to bubble and the blueberries start to break down.
- In a separate small bowl, whisk together the cornstarch and 1 ½ tablespoons water until a smooth slurry forms.
- Stir the cornstarch slurry into the bubbling blueberry mixture. Reduce the heat to low and continue stirring until the mixture thickens to your desired consistency.
- Remove from heat and allow the blueberry topping to cool completely before spooning it over the chilled cheesecake.
Notes
- This recipe was developed for a 6-quart Instant Pot. If using an 8-quart Instant Pot, increase the water in the inner pot to 2 cups for pressure cooking.
- Always zest the lemon before cutting it for juice.
- The optional blueberry topping is moderately sweet. For a sweeter topping, you can increase the sugar to ½ cup.
- A light drizzle of lemon glaze (powdered sugar mixed with lemon juice) can also be a lovely addition if you prefer a different topping.
- Garnish with fresh lemon zest or a few extra fresh blueberries just before serving for an elegant touch.
Nutrition
Nutrition information is automatically calculated and should only be used as an approximation.
Calories: 336 kcal
Carbohydrates: 25g
Protein: 4g
Fat: 25g
Saturated Fat: 14g
Cholesterol: 74mg
Sodium: 287mg
Potassium: 108mg
Fiber: 1g
Sugar: 19g
Vitamin A: 894 IU
Vitamin C: 2mg
Calcium: 72mg
Iron: 1mg
Additional Info
Course: Dessert
Cuisine: American
Enjoyed this recipe? Share your thoughts and leave a comment below!