

Indulge in the simplest, most delightful treat that instantly brightens any occasion: White Chocolate Dipped Oreos. Coated in a smooth, sweet candy shell and adorned with festive sprinkles, these beloved cookies transform into gourmet delights perfect for Valentine’s Day, Christmas, birthdays, or just an everyday sweet craving. Forget complicated baking; this recipe is all about quick enjoyment and maximum flavor with minimal effort.

When time or energy is scarce, but the craving for a homemade sweet is strong, few desserts deliver as consistently as chocolate-dipped cookies. Whether you favor milk chocolate, rich dark chocolate, or the creamy sweetness of white chocolate, this method is a guaranteed win. These no-bake treats are incredibly versatile and can be customized to suit any holiday or personal preference.
My family and I have a tradition of making these white chocolate-dipped Oreos every Valentine’s Day. They’re not just delicious; they’re a fun, hands-on activity for kids of all ages. But the magic doesn’t stop at Cupid’s holiday! By simply changing the color of your candy coating and the theme of your sprinkles, you can transform these simple cookies into festive treats for any celebration. Imagine spooky Halloween Oreo Pumpkins, charming Oreo Turkey Cookies for Thanksgiving, or delightful Oreo Cake Balls for your Christmas cookie platters. The possibilities are endless!
Why You’ll Love This Easy Recipe
There are countless reasons why white chocolate-dipped Oreos have become a universally loved dessert. Beyond their undeniable deliciousness, their simplicity and versatility make them a go-to treat for home bakers, busy parents, and anyone looking for a quick and impressive dessert.
- Effortless Preparation: This is a true no-bake wonder. No oven required, just a microwave and a few simple steps. You can whip up a batch in under 30 minutes, including chilling time!
- Minimal Ingredients: You only need three core ingredients to create these masterpieces. This makes grocery shopping a breeze and keeps costs down.
- Endlessly Customizable: Whether it’s the candy coating color, the type of sprinkles, or additional toppings, you can personalize these cookies for literally any holiday, theme, or personal preference.
- Kid-Friendly Activity: The dipping and decorating process is incredibly fun for children. It’s a fantastic way to get them involved in the kitchen without the dangers of a hot oven.
- Perfect for Gifting: Homemade white chocolate Oreos make thoughtful and delicious gifts. Package them in small bags or boxes for party favors, teacher gifts, or holiday presents.
- Party Perfect: These elegant yet simple treats are always a hit at gatherings. Arrange them on a platter for a stunning dessert display that will impress your guests.
Essential Ingredients for Perfect Dipped Oreos
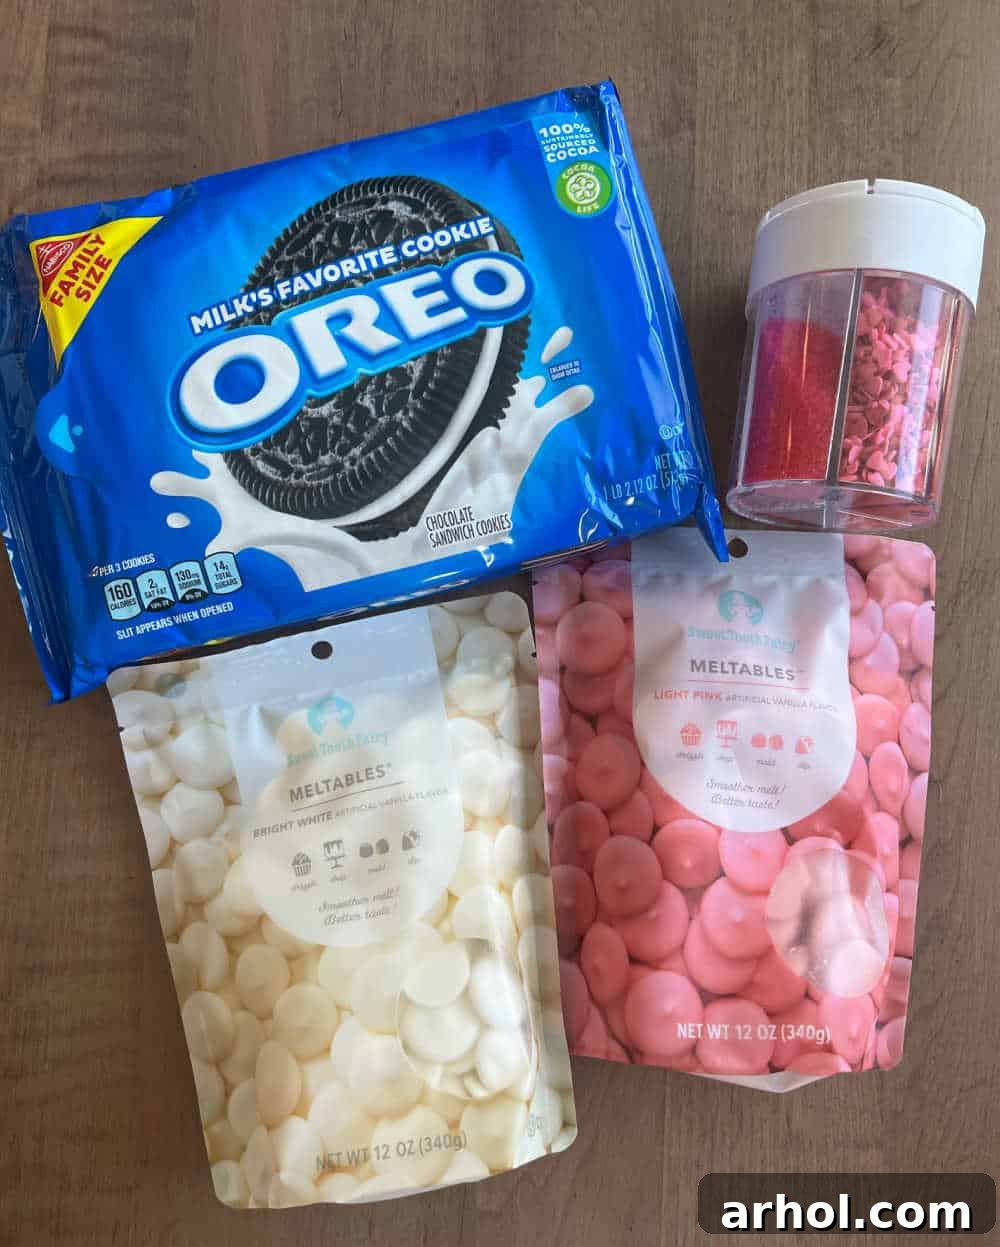
Making these delightful cookies requires just a handful of straightforward ingredients, all readily available at your local grocery store. The full, precise measurements can be found in the printable recipe card further down this page.
- Oreo Cookies: The star of our show! While standard Oreo sandwich cookies are my go-to for their classic chocolate flavor and sturdy structure, feel free to experiment. Double Stuff Oreos provide an extra creamy center, while flavored varieties like Mint Oreos or Golden Oreos offer exciting new taste profiles. Generic chocolate sandwich cookies also work wonderfully as a budget-friendly alternative.
- Melting Wafers (Candy Melts): These are your best friend for a smooth, professional-looking coating. Also known as candy coating, meltables, or candy melts, these wafers are specifically designed to melt easily and set quickly with a beautiful, hard finish. While white chocolate chips or almond bark can be used, melting wafers offer superior consistency and ease of use, making them highly recommended. For a festive touch, I often use both white and pink wafers, especially for Valentine’s Day. You can find these in various colors in the baking aisle of most craft or grocery stores.
- Holiday Sprinkles: The ultimate decorative touch! Sprinkles add color, texture, and a celebratory feel. Choose sprinkles that match your theme – red and pink hearts for Valentine’s, red and green for Christmas, or a rainbow mix for birthdays. Beyond sprinkles, consider edible glitter, mini chocolate chips, or finely crushed nuts for added appeal. You can also drizzle a contrasting color of melted candy coating for an extra layer of visual interest.
In terms of equipment, you’ll need a few basic kitchen tools: a microwave-safe bowl (or multiple bowls if using different colored melts), a fork for dipping, and a baking sheet lined with wax paper or parchment paper to prevent sticking and make cleanup a breeze.
Step-by-Step Guide to Making White Chocolate Covered Oreos
Creating these picture-perfect treats is surprisingly simple. Follow these steps for flawless white chocolate-dipped Oreos every time.
- Prepare Your Workspace: First, line a large baking sheet with wax paper or parchment paper. This non-stick surface is crucial for preventing your dipped cookies from adhering as they set. Have your sprinkles or other decorations ready and open, as you’ll need to apply them quickly.
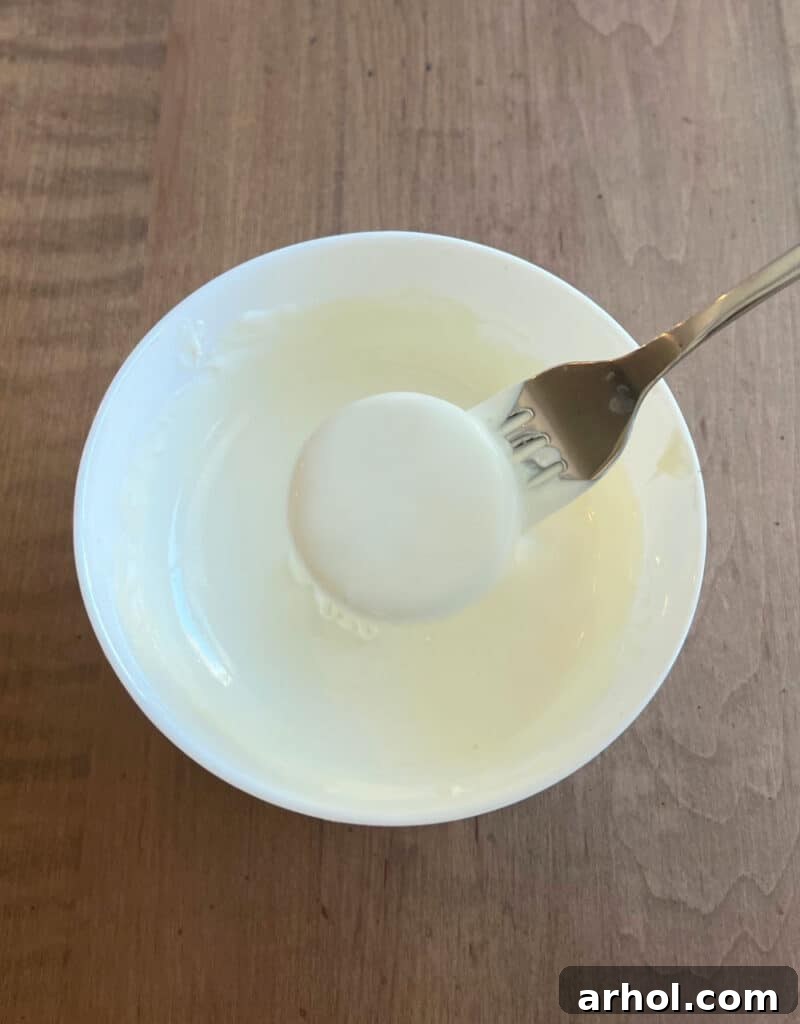
- Melt the Candy Coating: Place your chosen melting wafers (white, pink, or any color) into a microwave-safe bowl. It’s vital to melt the wafers in short intervals to prevent scorching or seizing. Start by microwaving for 30 seconds, then remove and stir thoroughly. Continue microwaving in 15-30 second increments, stirring well after each, until the candy coating is completely melted and perfectly smooth. The consistency should be fluid enough for easy dipping without being watery. If using multiple colors, repeat this process for each color in separate bowls.
- Dip the Oreos: This is where the magic happens! Gently place one Oreo cookie onto a fork. Submerge the cookie completely into the melted chocolate, ensuring it’s fully covered. Lift the cookie out and lightly tap the side of the bowl with the fork. This allows any excess chocolate to drip back into the bowl, ensuring a clean, even coat on your cookie. For an even more uniform appearance, you can use a second fork or a toothpick to help guide the cookie off the dipping fork onto the prepared baking sheet.
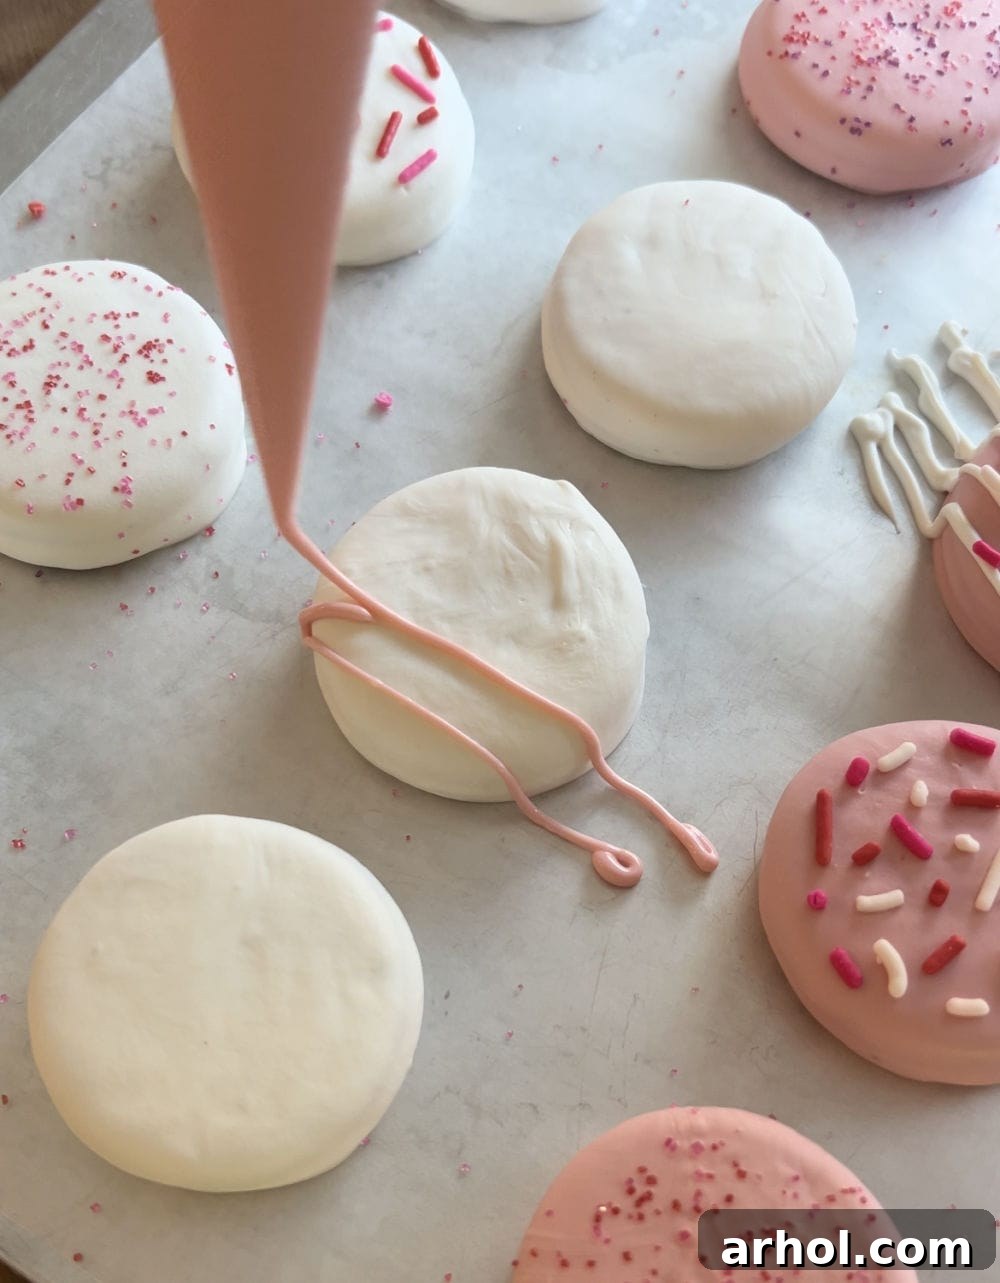
- Decorate Instantly: Immediately after placing each dipped cookie on the wax paper-lined sheet, sprinkle it generously with your desired decorations. The melted candy coating hardens relatively quickly, so timing is key to ensure your sprinkles adhere properly. Repeat the dipping and decorating process until all your cookies are beautifully coated and adorned.
- Add Drizzles (Optional but Recommended): For an extra touch of elegance and flavor, consider drizzling a different color of melted candy coating over your already-dipped cookies. Once your base layer of white chocolate has slightly set (but isn’t fully hard), use a clean fork or a piping bag with a very small tip to artisticially drizzle lines or patterns over the top. This technique adds a professional finish and allows for further color customization.
- Allow to Set: Let the cookies sit at room temperature for about 15-20 minutes, or until the chocolate coating is completely firm. For quicker setting, especially in warm environments, you can place the baking sheet in the refrigerator for about 10-15 minutes.
Storing Your White Chocolate Dipped Cookies
Once your delectable white chocolate-dipped Oreos have fully dried and hardened, proper storage is key to maintaining their freshness and crispness. These cookies are quite resilient and can be stored in a few different ways.
- Room Temperature Storage: Place the completely set cookies in an airtight container. Keep the container in a cool, dry place away from direct sunlight. Stored this way, your dipped Oreos will remain fresh and delicious for up to two weeks. This is usually the preferred method to maintain the cookie’s texture.
- Refrigeration (if needed): If your home is particularly warm, or if you prefer a slightly firmer chocolate coating, you can store the cookies in an airtight container in the refrigerator. Just be aware that condensation might form when you take them out, which can affect the appearance of the chocolate. Let them come to room temperature for a few minutes before serving for the best flavor and texture. They will also last for about two weeks in the fridge.
- Freezing for Longer Shelf Life: For extended storage, white chocolate-dipped Oreos can be frozen. Once fully hardened, place them in a single layer on a baking sheet and freeze for about an hour. Then, transfer the frozen cookies to a freezer-safe airtight container or heavy-duty freezer bag, layering them with parchment paper to prevent sticking. They can be frozen for up to 2-3 months. Thaw them in the refrigerator overnight or at room temperature for an hour before enjoying.
Frankly, these irresistible treats rarely last long enough to require extensive storage, but it’s good to know your options!
Pro Tips and Creative Variations
While this recipe is incredibly simple, a few expert tips can elevate your white chocolate-dipped Oreos from great to absolutely extraordinary. Plus, explore exciting variations to keep things fresh and fun!
Perfect Melting Techniques
- Microwave with Caution: Always melt chocolate or candy wafers in short intervals, stirring thoroughly after each. This gradual approach prevents the chocolate from seizing (becoming thick and unworkable) and ensures a smooth, glossy finish. If your chocolate appears too thick, a tiny amount of vegetable shortening or coconut oil (about ½ teaspoon per cup of melts) can help thin it out, but avoid adding water, which will cause it to seize.
- Double Boiler Method: If you don’t have a microwave, or prefer a more controlled melting process, a double boiler works beautifully. Place your candy melts in a heat-safe bowl set over a pot of simmering water (ensure the bowl doesn’t touch the water). Stir constantly until melted and smooth.
Customizing Your Coating
- Food Coloring for White Chocolate: If you’re using true white chocolate (not candy melts) and want to tint it, be sure to use oil-based food coloring or gel food coloring. Water-based food coloring will cause chocolate to seize. Candy melts, however, are already dyed or designed to be easily colored with gel food coloring.
- Two-Tone Dipping: For a visually striking effect, try dipping half an Oreo in white chocolate and, once set, dipping the other half in dark or milk chocolate. Or, dip the entire cookie in one color, let it set, then dip just one corner in a contrasting color.
Decorating Masterclass
- Timing is Everything for Sprinkles: Always add your sprinkles or other small candies immediately after dipping the cookie, while the candy coating is still wet and tacky. This ensures they adhere firmly. If the coating hardens, they won’t stick.
- Layered Drizzles: For a sophisticated look, allow the initial white chocolate coating to fully set. Then, melt a contrasting color of candy coating (like pink, dark chocolate, or even a vibrant blue). Use a fork, a piping bag with a fine tip, or even a squeeze bottle to drizzle patterns over the hardened white chocolate. You can even add sprinkles onto this drizzled chocolate before it sets for a layered sprinkle effect.
- Beyond Sprinkles: Get creative with toppings! Consider finely crushed nuts (peanuts, almonds), shredded coconut, mini M&M’s, crushed peppermint candies (for Christmas), or even additional Oreo crumbs for a double-Oreo effect. Edible glitter or lust dust can add a touch of sparkle.
Flavor Enhancements
- Extracts: A tiny drop of food-grade extract (like peppermint, almond, or vanilla bean) can be stirred into your melted white chocolate for an extra flavor dimension. Start with a very small amount and taste as you go.
- Citrus Zest: For a bright, fresh flavor, finely grate some lemon or orange zest into your white chocolate. It pairs surprisingly well and adds an aromatic touch.

More Easy Holiday Dessert Ideas
If you’re a fan of easy desserts that impress without stress, you’ll love these other simple, festive recipes. Perfect for holiday parties, sweet cravings, or thoughtful edible gifts, they complement our White Chocolate Dipped Oreos beautifully:
- Valentine’s Day Snack Mix: A delightful blend of sweet and salty, perfect for sharing.
- Chocolate Covered Strawberries: A classic romantic treat, surprisingly easy to make at home.
- Valentine’s Rice Krispies: Fun, chewy, and easily customized with festive colors and shapes.
- Valentine’s Pretzel Hugs: Salty pretzels, melted chocolate hugs, and M&M’s combine for an addictive sweet-and-salty crunch.
Explore these and many more easy dessert recipes to find your next favorite sweet indulgence!

White Chocolate Dipped Oreos
By: Dee
White Chocolate Dipped Oreos, beautifully covered in candy coating, are the ultimate easy treat. They’re perfect for Valentine’s Day, Christmas, or any time you need a quick, impressive, and delicious dessert. Customize them with your favorite colors and sprinkles!
Prep Time: 5 minutes
Cook Time: 5 minutes
Resting Time: 20 minutes
Total Time: 30 minutes
Servings: 20
Ingredients
- 1 package Oreo sandwich cookies (about 40 cookies)
- 1 package white chocolate candy melts
- 1 package pink candy melts (optional, for decoration)
- Holiday sprinkles
Instructions
- Line a baking sheet with wax paper or parchment paper.
- Melt the candy coating according to package directions. For microwave, use 30-second increments, stirring after each until smooth.
- Using a fork, dip each Oreo cookie into the melted coating until fully covered. Tap the fork against the bowl to allow excess chocolate to drip off.
- Place the coated cookie on the prepared baking sheet.
- Immediately decorate with seasonal sprinkles or candies before the coating hardens.
- If desired, once the first layer is slightly set, use a fork or a piping bag to drizzle additional melted chocolate (e.g., pink candy melts) over the top.
- Allow cookies to set completely at room temperature or in the refrigerator for 15-20 minutes until firm.
Notes
- Store dipped Oreos in an airtight container at room temperature for up to 2 weeks.
- Melting wafers (candy melts) are recommended for their smooth consistency and quick setting, but white chocolate chips or white almond bark can be used as alternatives.
Nutrition
Nutrition information is an approximation.
- Calories: 106kcal
- Carbohydrates: 16g
- Protein: 1g
- Fat: 4g
- Saturated Fat: 1g
- Sodium: 104mg
- Potassium: 48mg
- Sugar: 9g
- Calcium: 5mg
- Iron: 2mg
Additional Info
Course: Dessert
Cuisine: American
Enjoyed making these delightful Oreos? We’d love to hear from you! Leave a comment below and share your creations!
For more easy dessert recipes, quick meal ideas, and family-friendly recipes that everyone will adore, be sure to sign up for our weekly newsletter and follow us on social media. Join our community of food lovers and never miss a delicious update!
Recipe first published in 2015 and thoughtfully updated in 2024 to bring you the best tips and a refreshed experience.