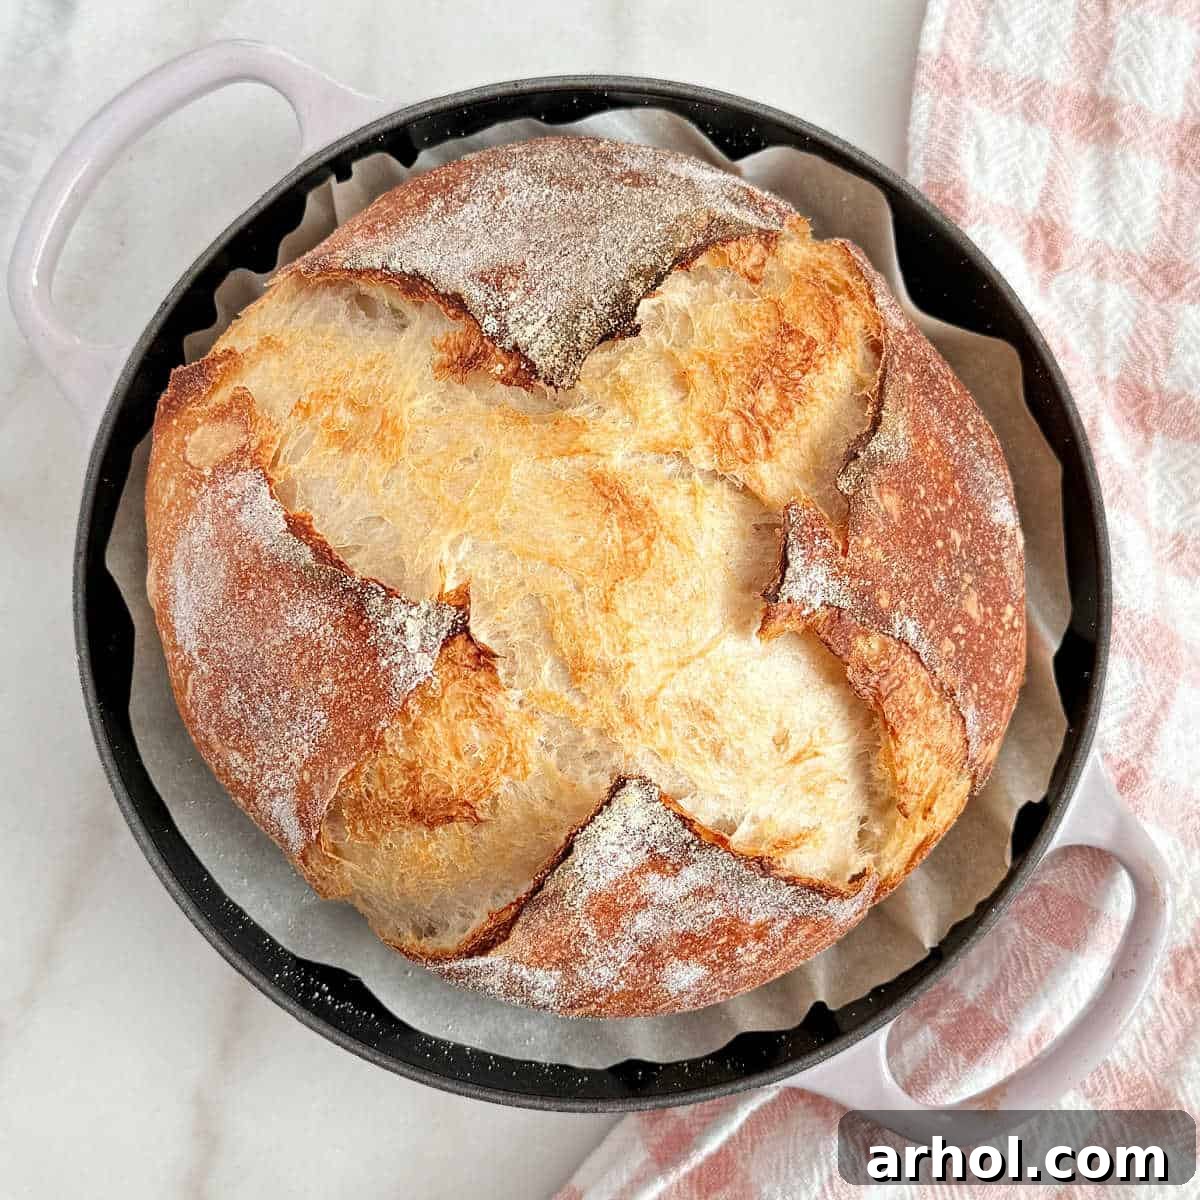
Easy Same-Day Sourdough Bread: Your Ultimate Beginner’s Guide
Embark on your sourdough journey with this incredibly accessible and easy same-day sourdough bread recipe. Designed specifically for aspiring bakers and beginners, this method allows you to enjoy a warm, fragrant loaf of homemade bread in a single day, completely eliminating the typical requirement for lengthy overnight proofing. Our straightforward approach simplifies the process by utilizing standard cup measurements instead of precise grams, making sourdough baking less intimidating and more enjoyable for everyone new to the craft.
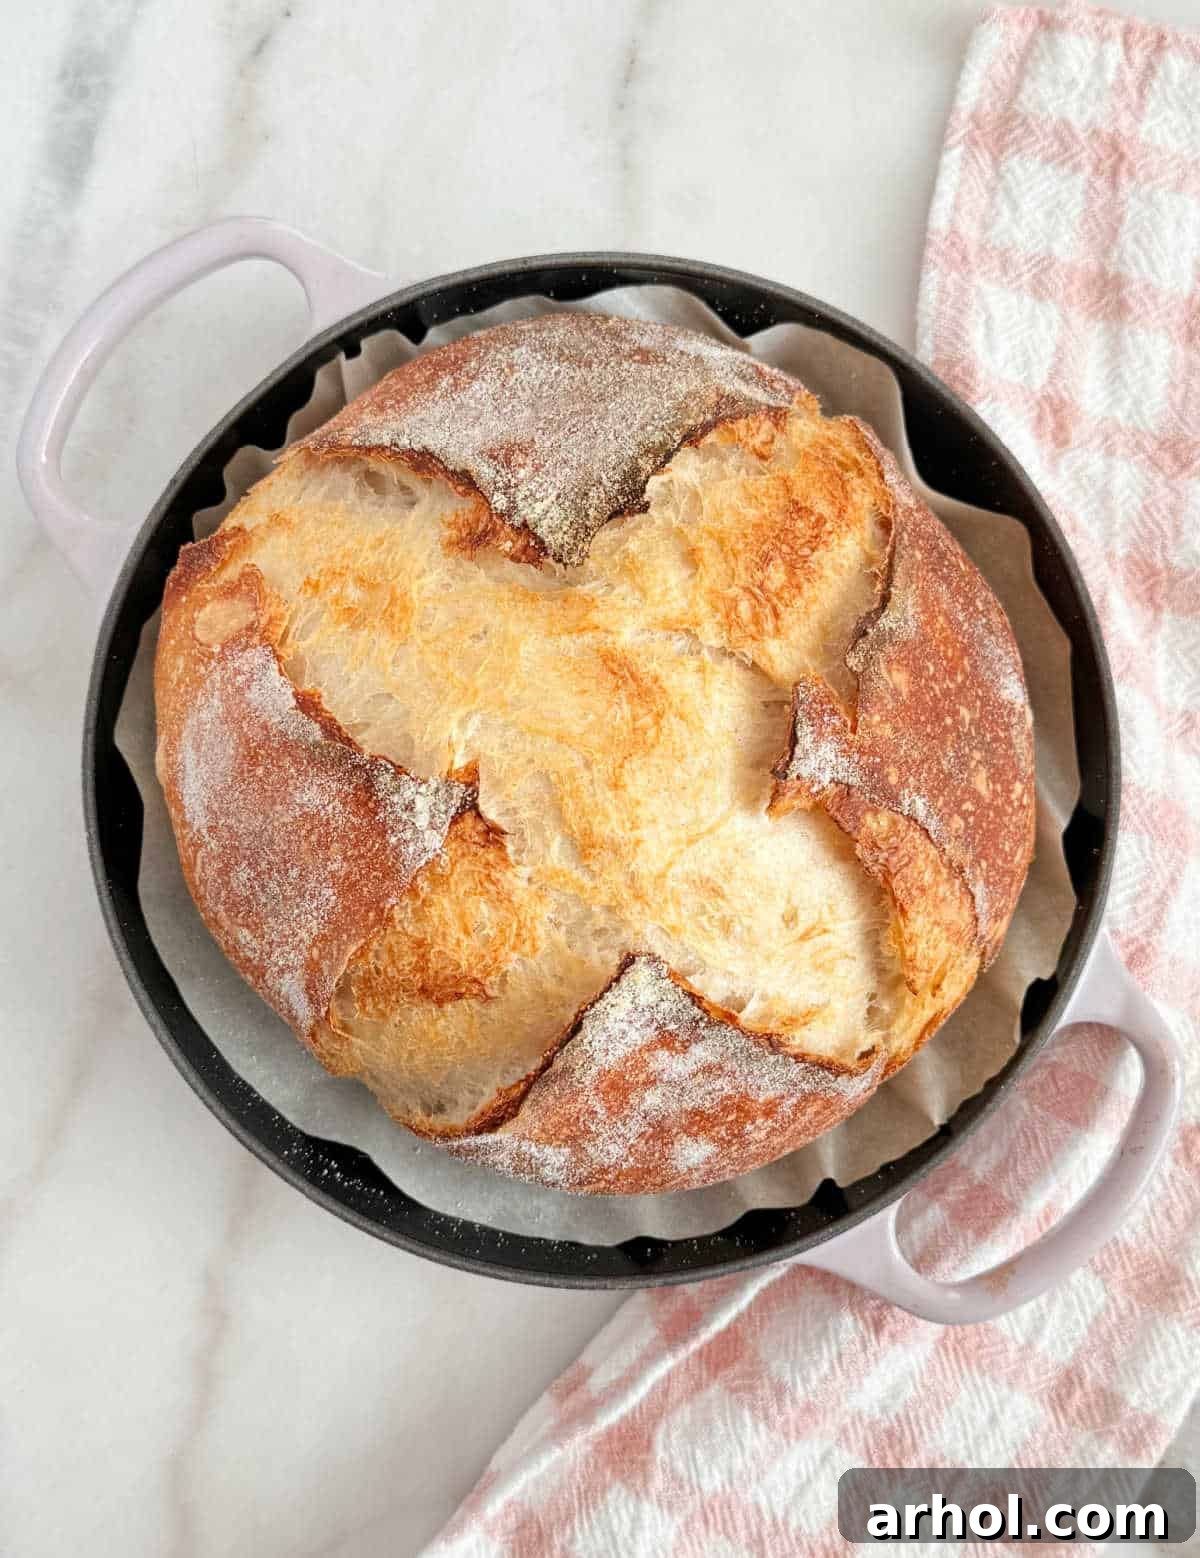
Have you dreamt of baking your own rustic sourdough but felt overwhelmed by complex instructions, advanced techniques, or the extensive time commitment often associated with it? This recipe is your solution! Not only does it streamline the process, but it also allows you to start baking with minimal specialized equipment. This means you can dip your toes into the rewarding world of sourdough without a significant initial investment. Should your passion for bread-making grow, you can always expand your collection of baking supplies later on.
My kitchen has seen countless loaves over the years, from quick and comforting banana bread to traditional yeast-risen delights like Paska and rich nut rolls. My adventure into sourdough began nearly a year ago, and through countless batches, I’ve learned that every loaf, even the imperfect ones, is a step towards mastery. Don’t be disheartened if your first few attempts aren’t bakery-perfect; sourdough baking is a journey of patience and practice. The unparalleled satisfaction of tearing into a warm, chewy slice, especially when adorned with a dollop of creamy homemade butter, truly makes every effort worthwhile. After conquering this simple same-day method, consider trying our adaptable sourdough sandwich bread for another delightful baking experience!
Key Benefits: Why You’ll Love This Same-Day Sourdough Recipe

- **Achieve Fresh Sourdough in Hours, Not Days:** The most compelling advantage of this recipe is its swift turnaround. You can initiate the dough preparation in the morning and have a freshly baked, artisanal loaf ready to complement your dinner. This expedited process is perfect for busy individuals, last-minute cravings, or simply when you want to enjoy homemade bread without the extensive planning usually associated with sourdough.
- **Delicate Flavor & Softer Crust:** Unlike sourdough loaves that undergo prolonged cold fermentation, this same-day method typically produces a bread with a milder tang and a softer, less chewy crust. This characteristic makes it exceptionally appealing to those who prefer a more subdued sourdough flavor, and it’s often a big hit with children who might find traditional sourdough too robust.
- **Ideal for Sourdough Novices:** With clear, cup-based measurements and straightforward steps, this recipe is designed to boost confidence for those new to working with sourdough starter. It demystifies the process, making it approachable and rewarding.
- **Start with Basic Kitchenware:** There’s no need to rush out and buy specialized bread-making tools immediately. Many of the recommended items are likely already in your kitchen, allowing you to begin your baking journey without extra expense.
Essential Ingredients for Your Perfect Sourdough Loaf
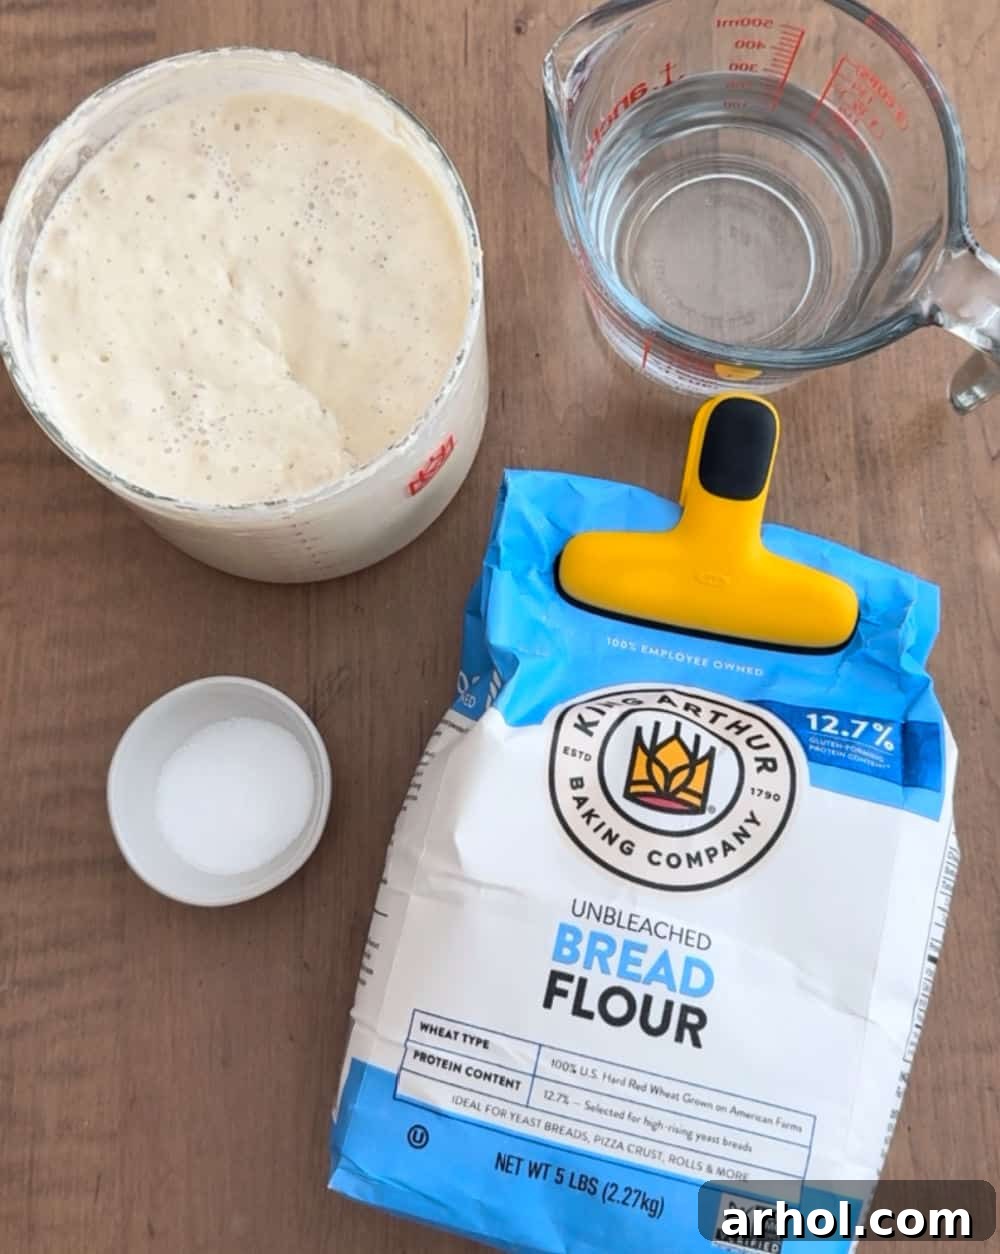
Crafting this delectable sourdough requires only a few fundamental ingredients. The exact quantities are conveniently provided in the comprehensive recipe card located further down this page.
- Active Sourdough Starter: This dynamic culture is the living soul of your sourdough bread, providing both leavening and flavor. For optimal results, your starter should be vibrant, bubbly, and ideally fed approximately 8 hours before you plan to mix your dough. If you’re new to the sourdough world, consider sourcing an established starter from a reputable provider online, or even better, ask a fellow baker friend, relative, or neighbor to share a portion of theirs. A strong, active starter is paramount for achieving a good rise and open crumb.
- Warm Water: The temperature of your water plays a critical role in activating your sourdough starter. I typically use filtered water, as our home is equipped with a filtration system. Some passionate bakers advocate against using tap water, believing that chemicals like chlorine can impede the starter’s activity; however, this often depends on local water quality and individual preference. Heating the water slightly in the microwave for just a few seconds until it’s comfortably warm to the touch (ideally between 90-100°F or 32-38°C) significantly boosts the yeast activity and promotes a more vigorous rise in your dough.
- Bread Flour: While I began my sourdough experiments successfully using all-purpose flour, I’ve found that bread flour consistently yields superior results. Bread flour boasts a higher protein content compared to all-purpose flour, which translates to a stronger gluten network. This robust gluten structure is crucial for trapping the gases produced during fermentation, resulting in sourdough’s characteristic chewy texture and desirable open, airy crumb.
- Sea Salt: Salt is more than just a flavor enhancer in bread; it plays a vital role in regulating the fermentation process and strengthening the dough’s gluten structure. Fine sea salt or kosher salt are excellent choices for sourdough baking. It is generally advisable to steer clear of iodized salt, as the iodine can potentially interfere with the delicate microbial activity of your sourdough starter, slowing down fermentation.
Recommended Tools for Your Sourdough Baking Adventure
You don’t need a professional bakery setup to produce fantastic sourdough at home. Many of these items are likely already in your kitchen or can be easily acquired from most general stores or online retailers.
- **Measuring Cups:** For this beginner-focused recipe, standard dry and liquid measuring cups are perfectly adequate for accurately proportioning your ingredients. However, as your baking skills progress and you explore more advanced recipes, investing in a digital kitchen scale will offer unparalleled precision, which many sourdough enthusiasts come to appreciate.
- **Mixing Bowls:** You will need two primary bowls: one large bowl for the initial mixing of your dough and a smaller, ideally round bowl for the final proofing stage. While specialized proofing baskets, known as bannetons, are popular for giving the dough shape and wicking away moisture, a simple glass bowl generously lined with a clean flour sack towel works just as effectively and is a great starting point.
- **Flour Sack Towels (Tea Towels) or Parchment Paper:** These are indispensable for lining your proofing bowl or banneton. They create a non-stick surface, preventing your delicate dough from adhering during its final rise. If you opt for parchment paper, ensure it’s cut large enough to cradle the dough and facilitate an easy, mess-free transfer into your baking vessel.
- **Dutch Oven, Bread Oven, or Roaster with a Lid:** Baking sourdough in a lidded, heavy-bottomed vessel is a game-changer. The enclosed environment traps steam, which is critical for achieving a beautifully thin, crispy crust and maximizing “oven spring” (the final burst of rise in the oven). I initially used a Dutch oven, but have since transitioned to a dedicated bread oven due to its lighter weight and easier maneuverability. If using a Dutch oven, always confirm that it is rated safe for the high temperatures required for bread baking. A sturdy roasting pan with a tight-fitting lid can also serve as an effective alternative.
- **Bread Lame or Razor Blade:** This specialized tool is used for scoring (making controlled cuts on) the dough’s surface just before baking. Scoring allows the dough to expand predictably and beautifully in the intense heat of the oven, preventing it from bursting haphazardly and creating appealing designs. While a very sharp kitchen knife can work for your initial attempts, a dedicated bread lame (often just a razor blade on a handle) offers superior precision and control.
- **Rice Flour:** This non-gluten flour is highly recommended for dusting your proofing towels or banneton. Its low moisture absorption and lack of gluten create an excellent non-stick barrier, ensuring your dough releases cleanly. While regular all-purpose flour can be used, rice flour performs better in preventing sticking and won’t add extra gluten to your bread, which could alter its texture.
- **Dough Scraper:** A simple plastic or metal dough scraper is an incredibly useful, inexpensive tool. It makes scraping the sticky dough from your mixing bowl much easier and is also handy for dividing, shaping, and manipulating the dough without making a mess of your hands.
- **Parchment Paper:** Beyond its use for lining proofing baskets, a circular piece of parchment paper is invaluable for safely transferring your delicate, shaped dough into a scorching hot Dutch oven or bread oven. It minimizes any risk of sticking to the hot surface and simplifies the entire transfer process. Cut it slightly larger than your shaped dough to create “handles” for easy lifting.
How to Make Easy Same-Day Sourdough Bread: Your Step-by-Step Guide
Follow these straightforward steps to create a beautifully baked, homemade sourdough loaf, ready to enjoy in a single day.
1. The Initial Mix: Bringing Your Ingredients Together
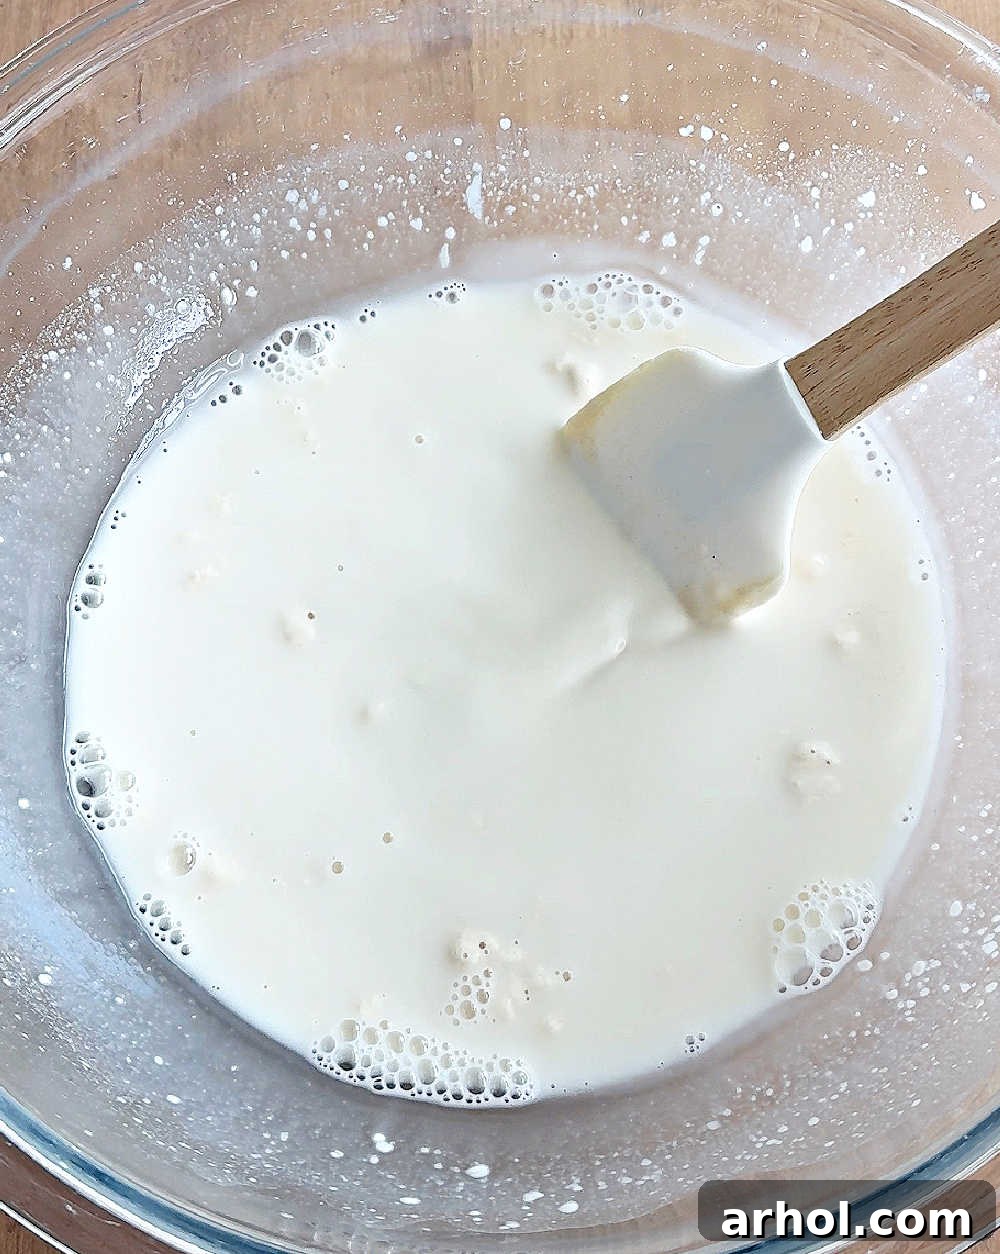
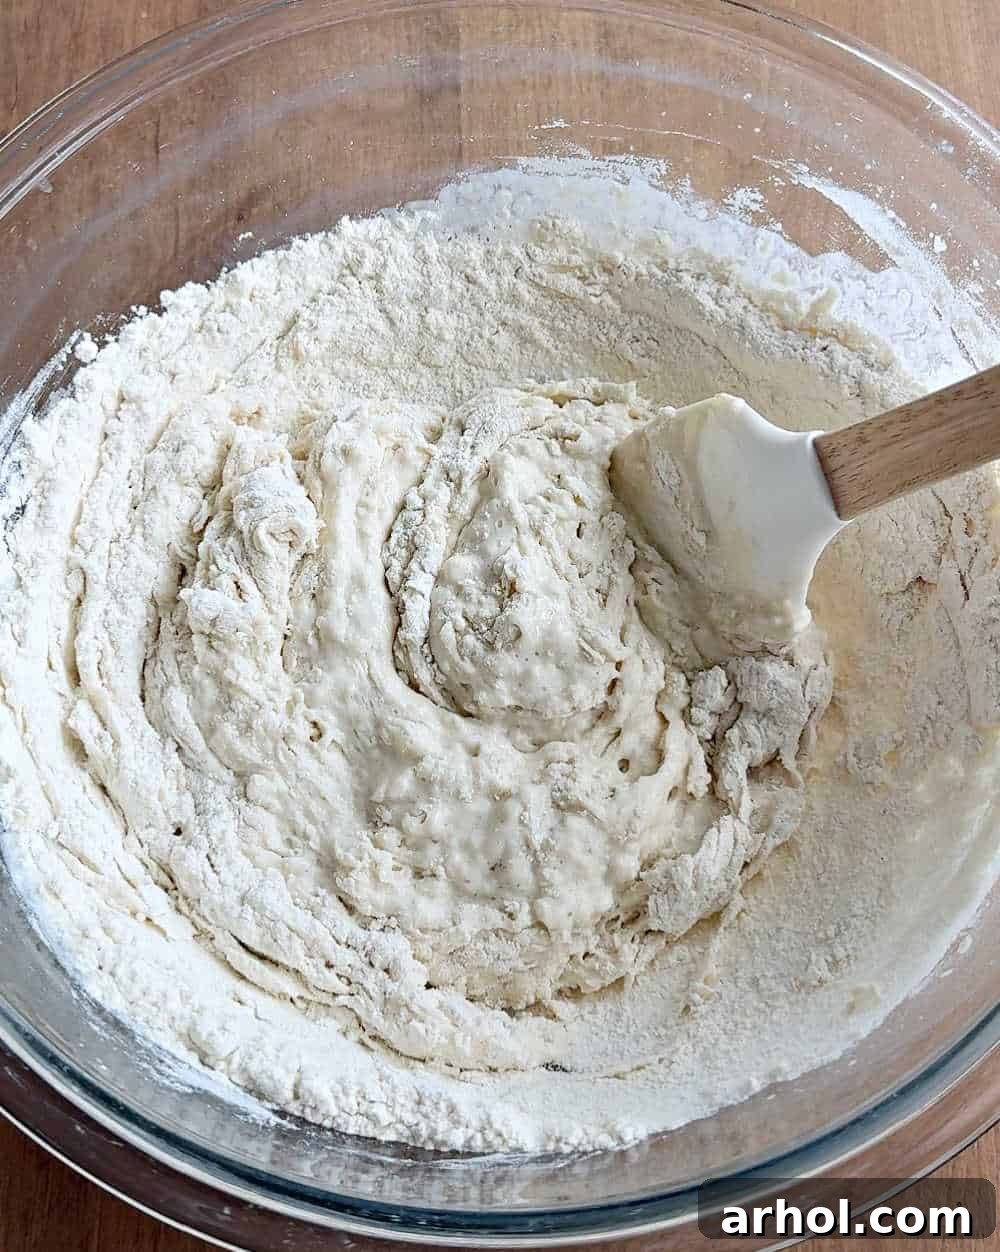
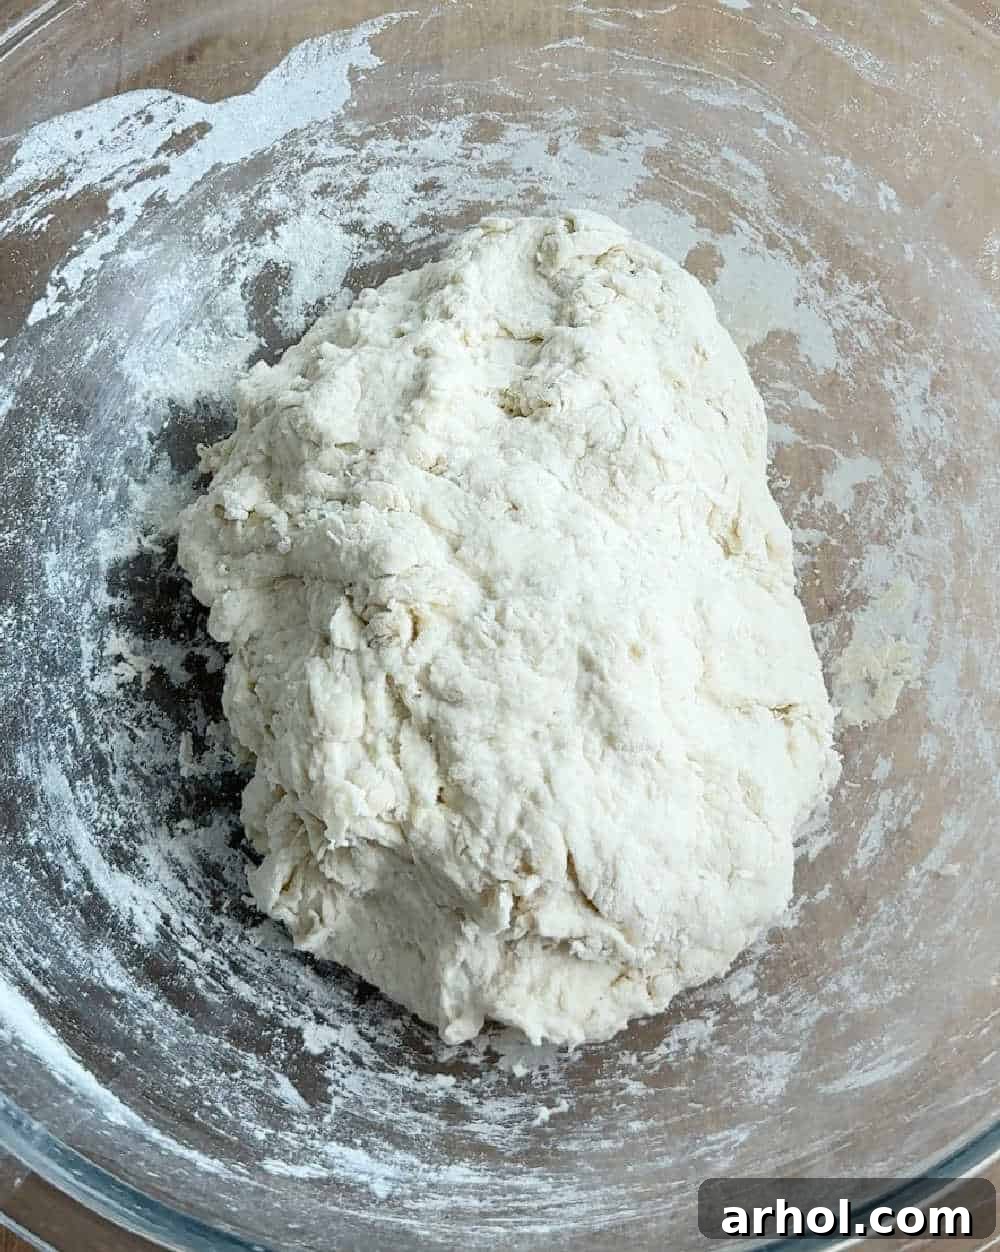
In a large mixing bowl, begin by adding your active, bubbly sourdough starter. Pour in the pre-warmed water and gently stir the mixture until the starter is mostly dissolved and well-integrated into the water. This ensures even distribution throughout the dough. Next, gradually incorporate the bread flour, adding it one cup at a time, followed by the sea salt. Mix everything together thoroughly until you achieve a shaggy, somewhat sticky dough consistency. It’s completely normal for the dough to appear a bit rough and uneven at this stage; this “shaggy mass” is a good indicator of proper hydration. I often like to give it a quick mix with my hands to get a tactile sense of the dough’s texture before covering the bowl.
2. Building Strength: The Rest and Stretch and Fold Method
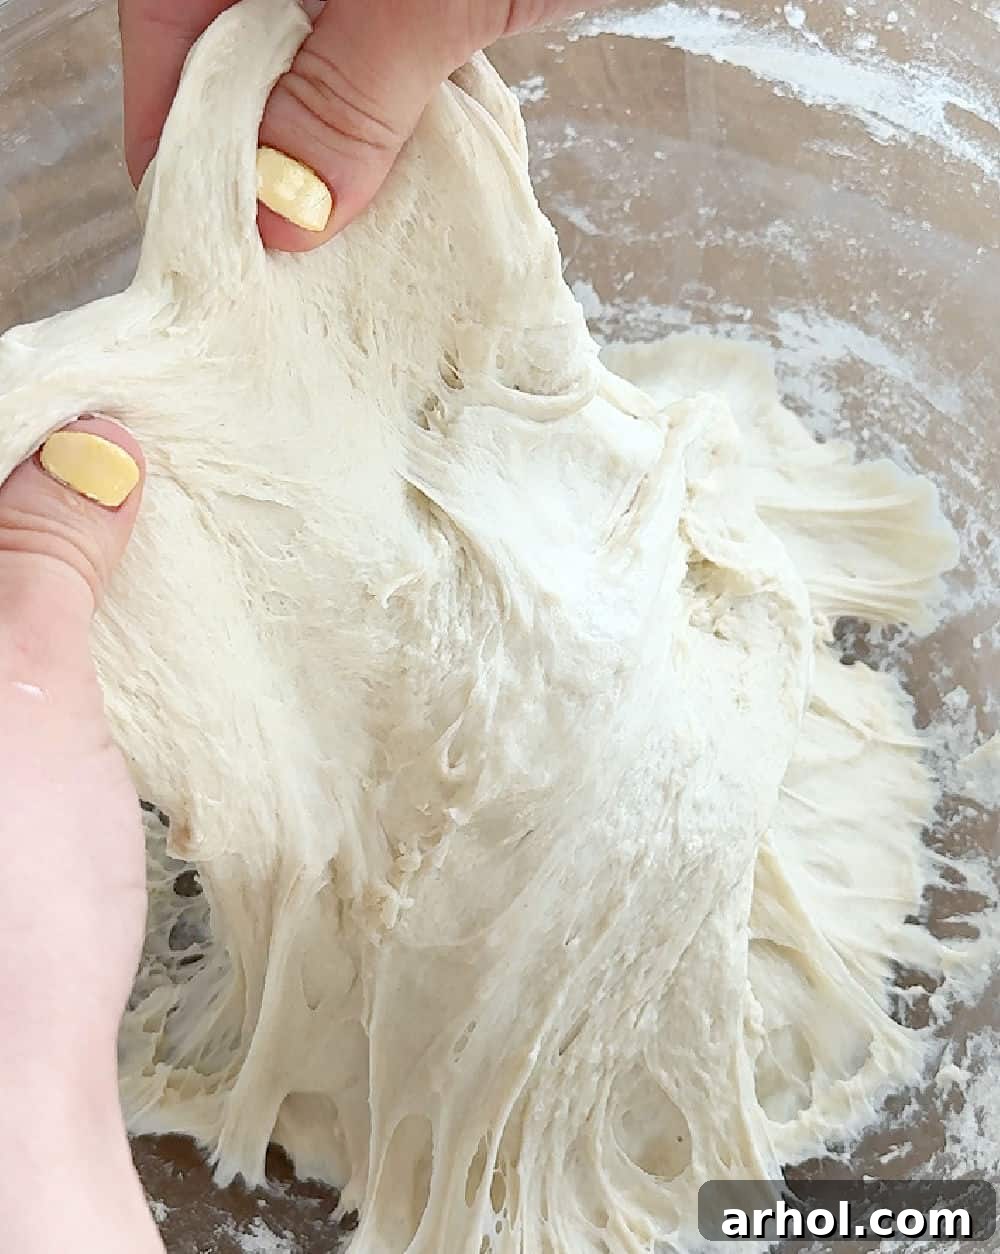
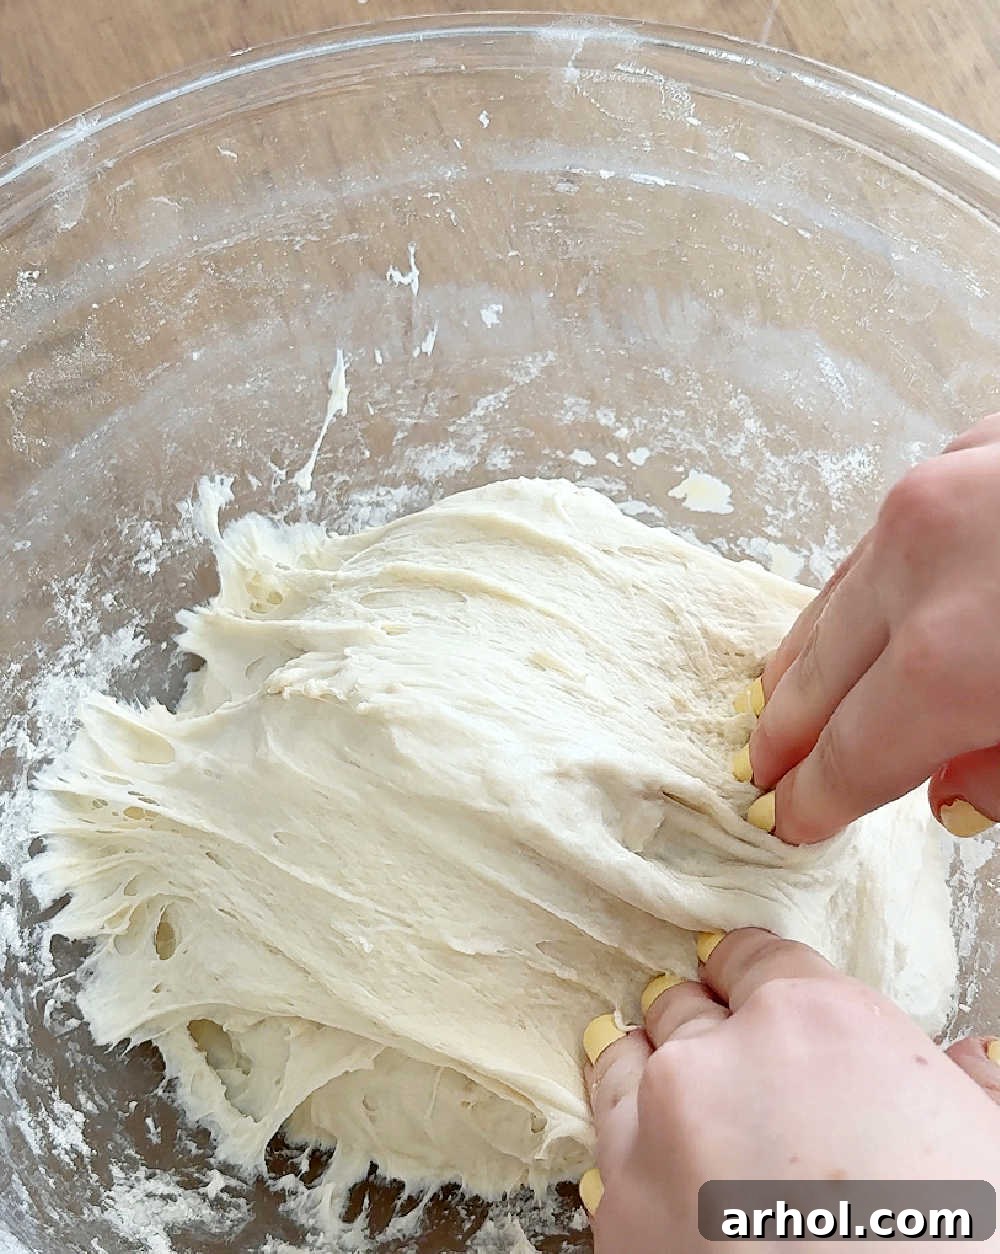
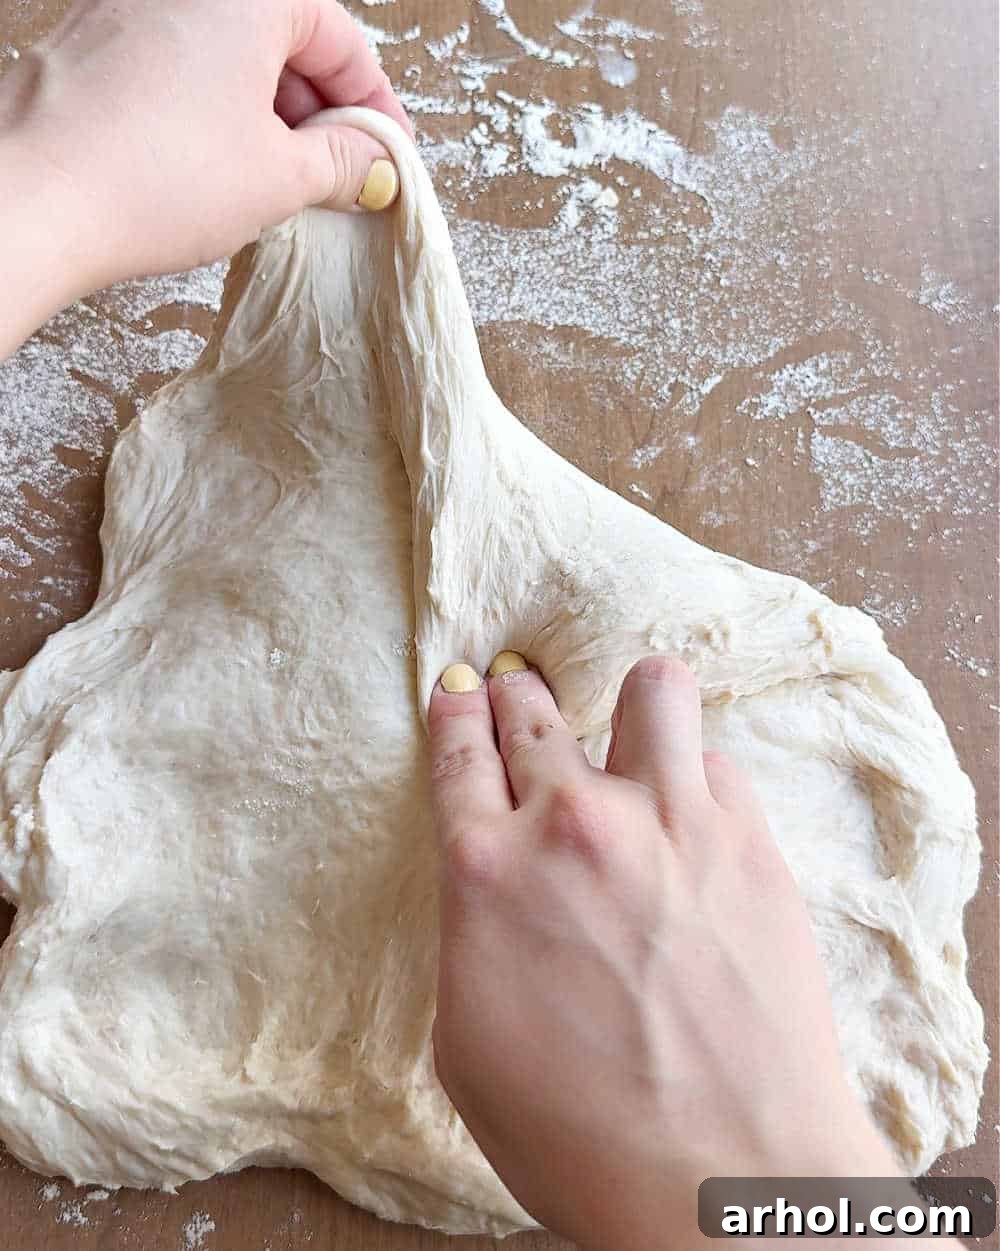
Once your dough is mixed, cover the bowl and let it rest for a full hour in a warm spot. A sunny kitchen counter near a window or a cozy corner near a warm (but not hot) oven provides an ideal environment. This initial resting period allows the flour to fully hydrate and kickstarts the gluten development process. Following this rest, you’ll begin the “stretch and fold” technique – a gentle yet highly effective method for strengthening the dough’s gluten structure without intensive kneading. To perform a stretch and fold, simply dampen your hands slightly to prevent sticking. Grab one side of the dough, gently lift it upwards, and stretch it over the main dough ball towards the opposite side of the bowl. Next, rotate the bowl a quarter turn and repeat the stretch and fold with the next side. Continue this process until all four “sides” of the dough have been stretched and folded over. After completing a set, cover the bowl again and allow the dough to rest for 30 minutes. Repeat this entire cycle (stretch, fold, rest) two to three more times. With each set, you’ll notice the dough progressively becoming smoother, firmer, and more elastic, indicating successful gluten development.
Bulk Fermentation: The Crucial First Rise
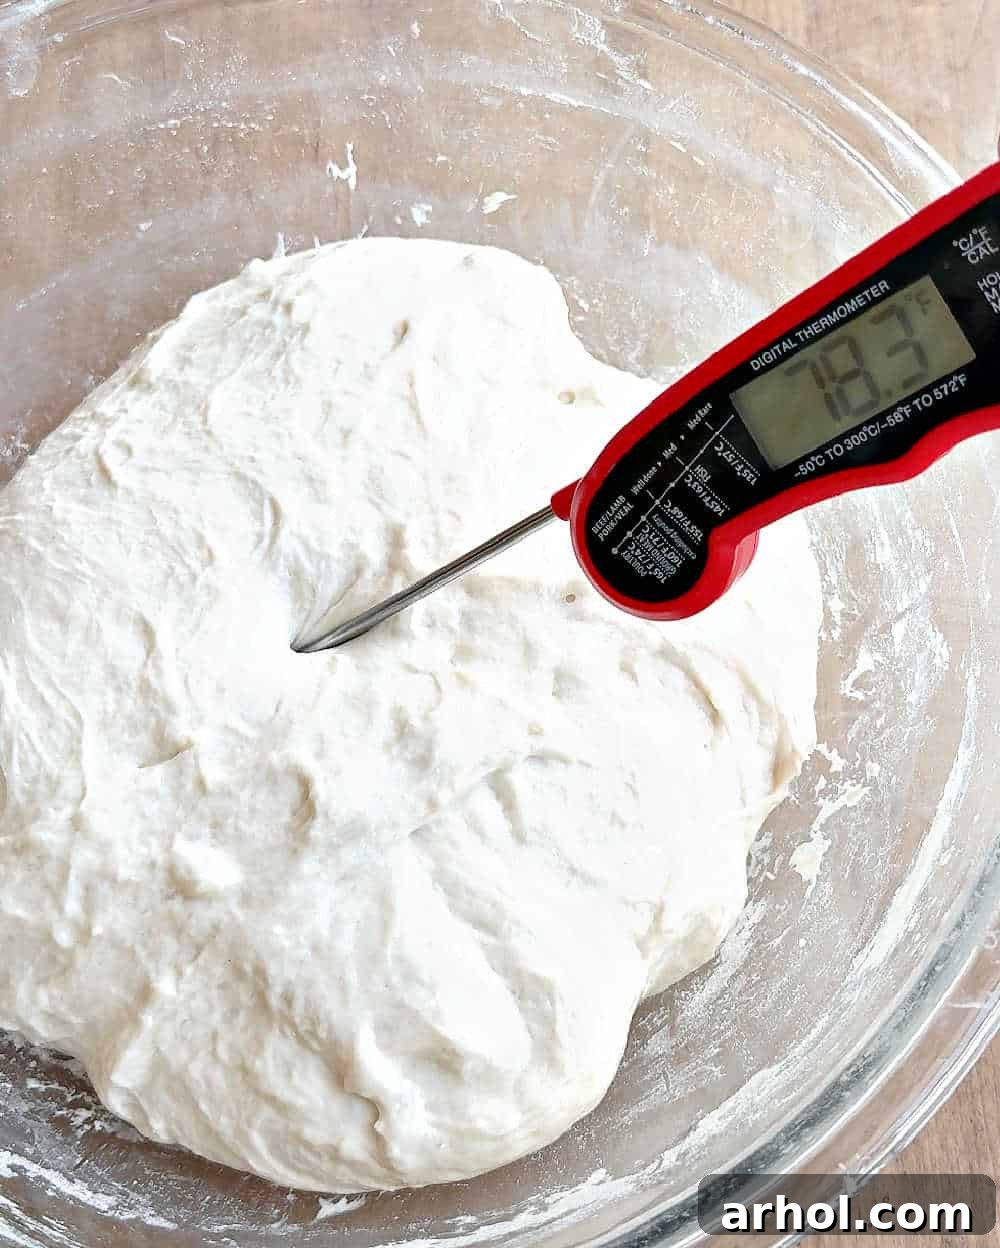
While the actual fermentation technically commences the moment your flour and active starter are combined, the bulk fermentation period refers to the time after your final set of stretch and folds when the dough is left undisturbed. During this critical stage, the yeast and beneficial bacteria within your sourdough starter actively work to consume sugars, produce carbon dioxide gas, and develop the complex flavors characteristic of sourdough. The duration of bulk fermentation is highly variable, influenced by factors such as ambient room temperature and humidity. On a warmer day, this phase might be as short as two hours, whereas in a colder environment, it could extend considerably longer. The most reliable way to determine if your dough has sufficiently fermented is to check its internal temperature; ideally, it should reach approximately 77-78°F (25-26°C). Additionally, visually inspect the dough for signs of activity: it should have noticeably increased in volume (potentially nearly doubling), and you should observe small, active bubbles forming on its surface and along the sides of the bowl (this is particularly easy to spot if you are using a clear glass bowl). These indicators signify a healthy, active fermentation ready for the next step.
Shaping Your Sourdough Loaf for Baking
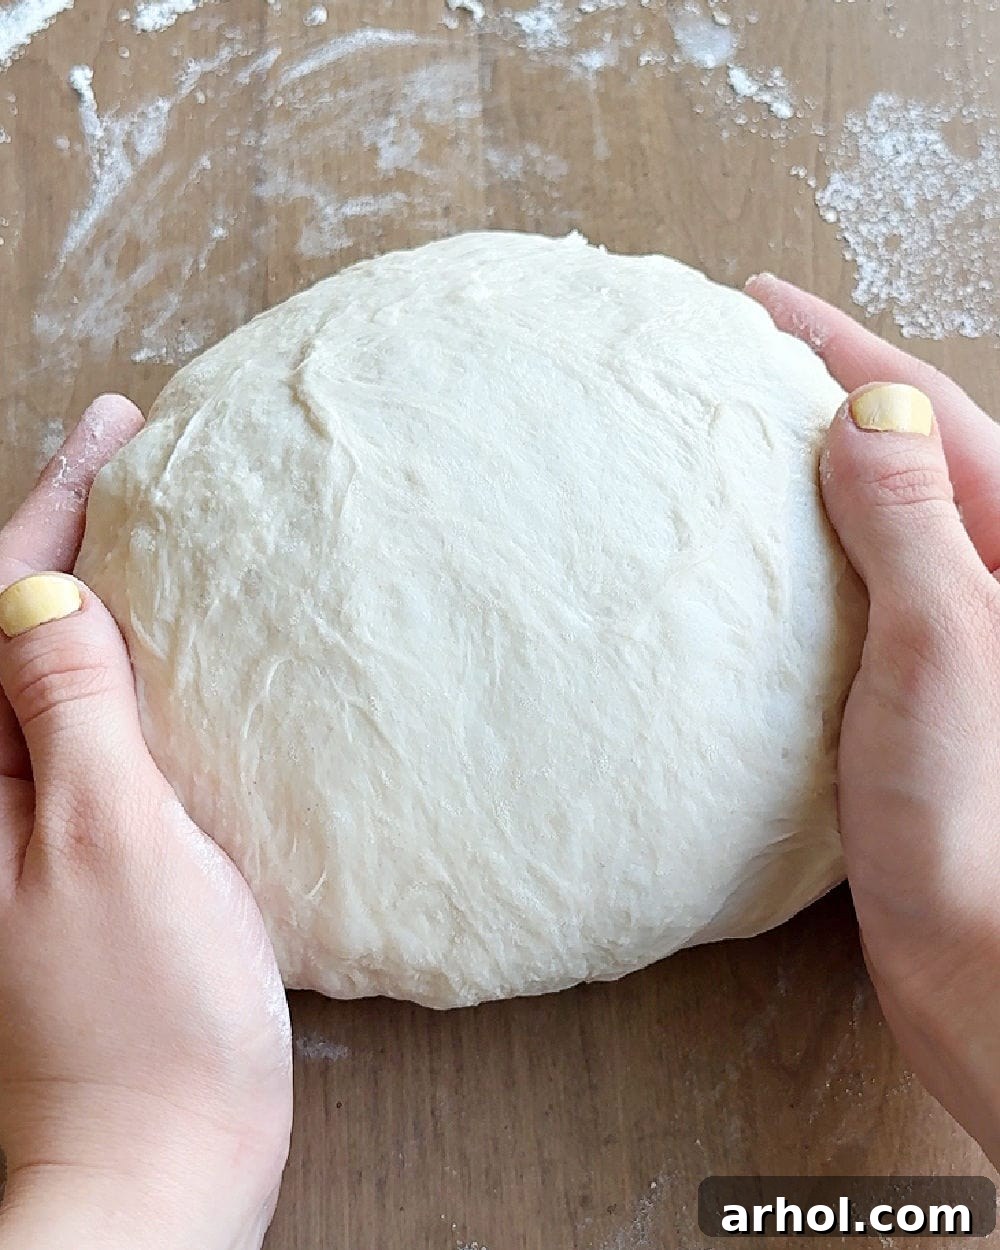
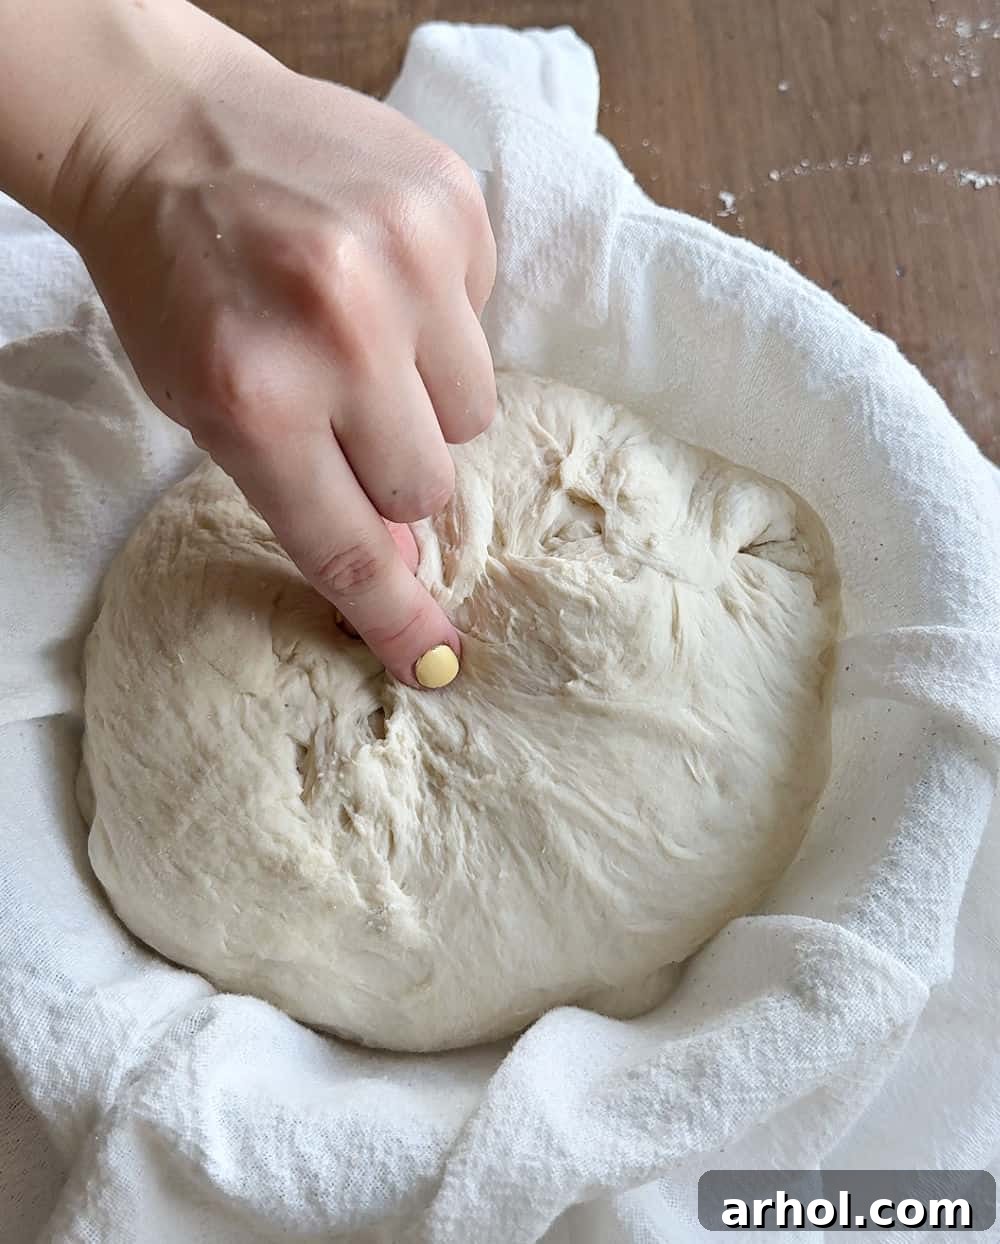
Once your bulk fermentation is complete and your dough has developed beautifully, it’s time to give it its final shape. Lightly dust a clean work surface with flour; rice flour is an excellent choice for this, as it effectively prevents sticking without introducing additional gluten. Gently turn your dough out onto the floured surface. For a classic round loaf, often called a “boule,” the goal is to create surface tension that will support the dough’s structure during baking. Start by gently stretching the dough into a rough square. Then, begin pulling each corner or side of the dough towards the center, overlapping them to create a tight, gathered seam. Once all sides are gathered, carefully flip the dough over so that the newly created seam is now underneath. Using your hands, gently cup the dough and move it in a circular motion on the counter. This action helps to create a taut, smooth surface on the top of the dough ball, which is vital for achieving a good “oven spring.” Finally, carefully lift your beautifully shaped dough and place it, seam-side up (which will be the bottom during baking, but top during proofing), into your prepared small, cloth-lined proofing bowl or banneton basket. Ensure the bottom of the bowl or basket is well-dusted with rice flour to prevent any sticking. Cover it gently and allow it to rest for its second, shorter rise in a warm spot for another one to two hours.
Scoring and Baking Your Sourdough Masterpiece
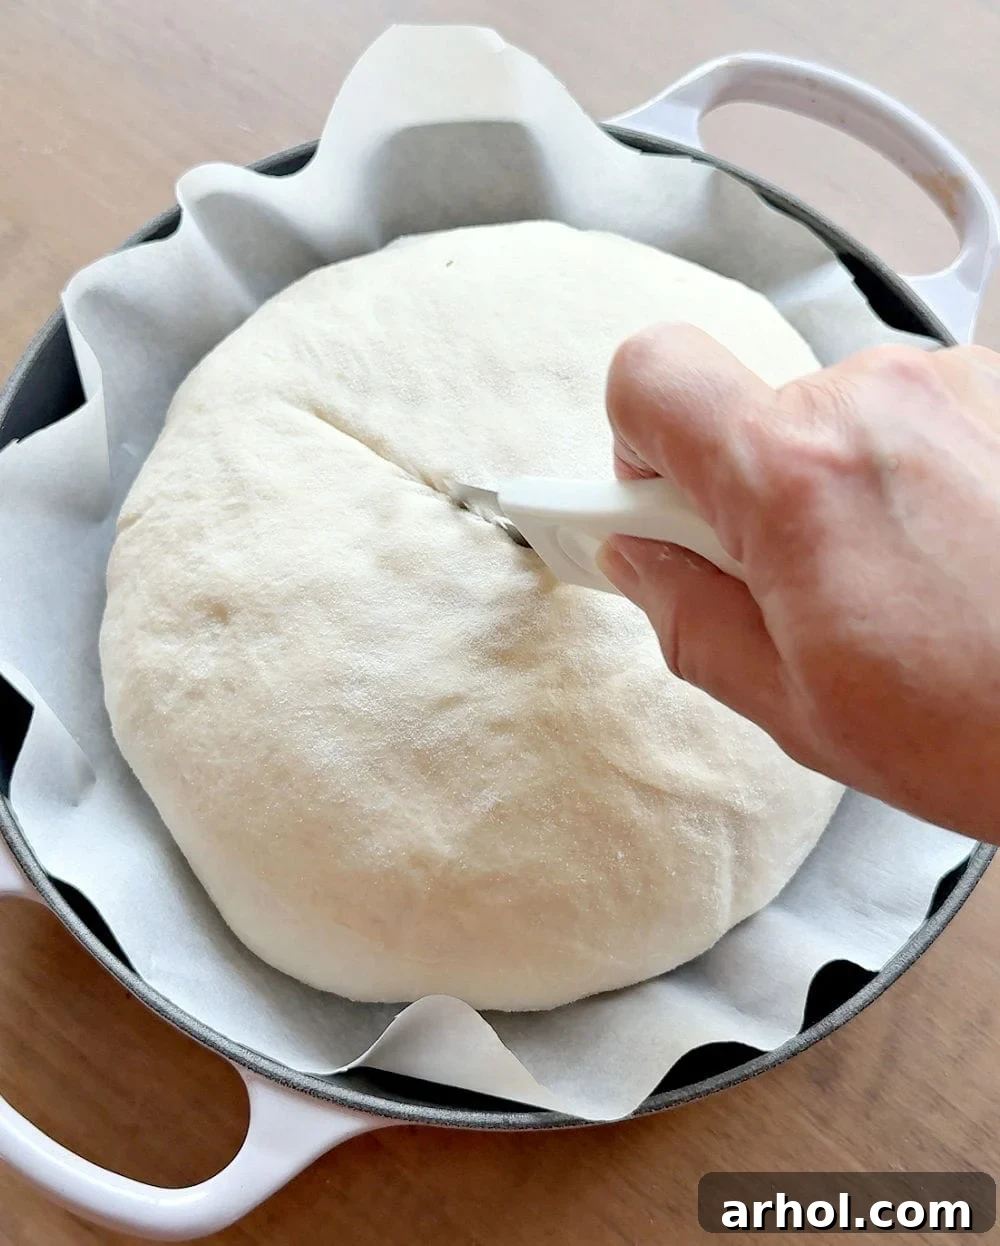
To achieve the signature crust and impressive “oven spring” of sourdough, a very hot baking environment is essential. Begin by placing your Dutch oven or bread oven inside your main oven, then preheat the oven to a robust 450°F (232°C). Allow it to preheat for a minimum of 30-45 minutes to ensure the baking vessel is thoroughly and uniformly hot. Warm, relaxed dough can be challenging to score neatly; to firm it up slightly and make scoring easier, place your shaped dough (still in its proofing basket) into the freezer for approximately 15-20 minutes while your oven preheats. Once your oven and baking vessel are at temperature, carefully remove the scorching hot Dutch oven using sturdy oven mitts. Cut a piece of parchment paper to comfortably fit the bottom of your hot baking vessel. Gently invert your dough directly onto this parchment paper, ensuring the smooth, taut top of the loaf is now facing upwards. Working quickly and confidently, use your bread lame or a very sharp razor blade to score the surface of the bread. A single, deep slash or a more intricate pattern will guide the dough’s expansion in the oven, creating beautiful aesthetics and preventing uncontrolled ruptures. Carefully lift the parchment paper, with the dough nestled upon it, and gently lower it into the preheated Dutch oven. For extra steam and a crisper crust, you can lightly mist the dough with water before covering. Place the lid securely on the Dutch oven and bake for 30 minutes. After 30 minutes, remove the lid to allow the crust to beautifully brown and crisp up, continuing to bake for another 10-15 minutes, or until the top achieves a rich golden-brown hue. To confirm your bread is perfectly baked, use an instant-read thermometer to check its internal temperature; it should register around 207°F (97°C). Additionally, the bottom of the loaf should produce a hollow sound when tapped.
Expert Sourdough Baking Tips for Success
- **Precision in Measuring:** For the most consistent and best results, accurate measurement of ingredients is crucial. When measuring flour with cups, gently scoop it into the dry measuring cup and then level it off with the back of a knife; avoid packing it down. Always use a clear liquid measuring cup for water for precise volume.
- **Optimal Proofing Environment:** Sourdough dough thrives in consistent warmth. Seek out a sunny spot on your counter near a window, or strategically place your covered dough near a slightly warm (but not hot) oven. Many modern ovens also feature a “proof” setting, which creates the perfect warm, humid environment. If not, simply turning on your oven light and placing the covered dough inside can generate enough gentle warmth.
- **Managing Fermentation Speed:** Sourdough fermentation is a living process, highly responsive to ambient temperature and humidity. If you find yourself needing to step away for an extended period during bulk fermentation and worry about the dough over-proofing, you have a convenient solution: simply place the covered dough in the refrigerator. The cold temperature will significantly slow down the fermentation process, offering you greater flexibility in your schedule.
- **Ensuring Proper Doneness:** Oven temperatures can vary significantly. To guarantee your bread is perfectly baked through, always use an instant-read thermometer to check the internal temperature, aiming for approximately 207°F (97°C). Another traditional indicator is the “hollow tap” test: the bottom of a fully baked loaf should sound hollow when gently tapped.
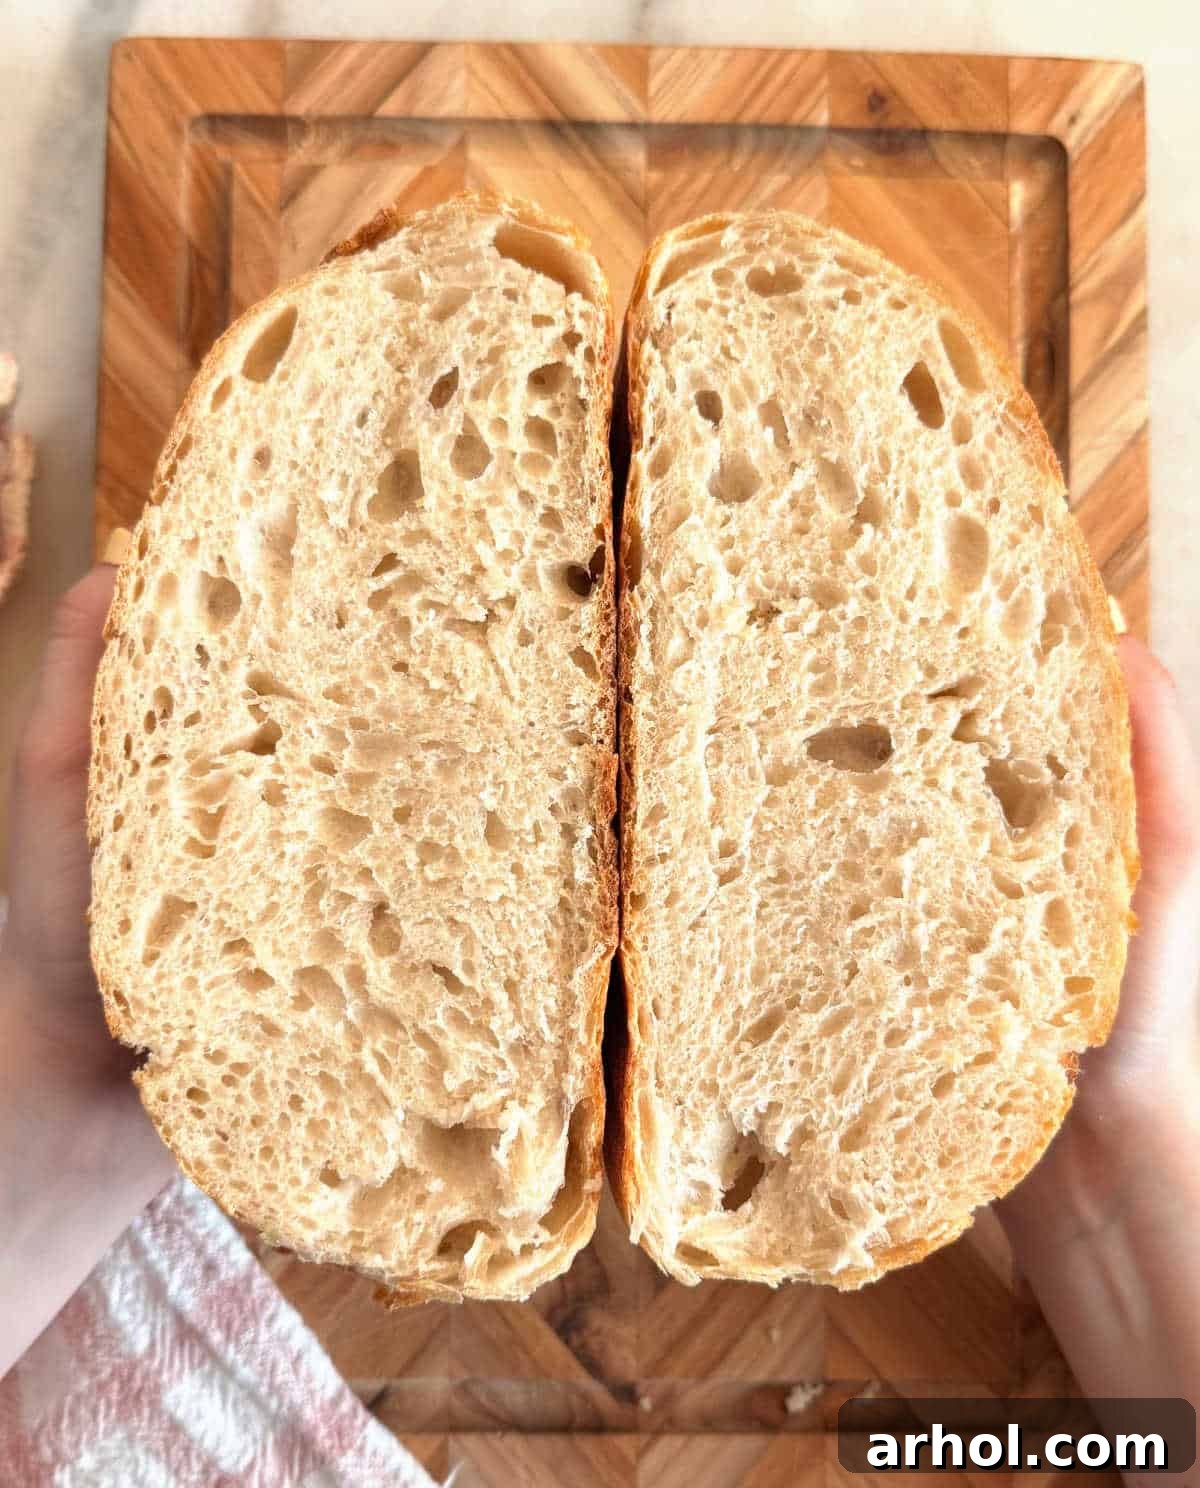
- **The Critical Cooling Period:** It’s tempting to slice into a piping hot loaf, but resist the urge! Allowing your freshly baked sourdough to cool completely for at least one hour on a wire rack is absolutely vital. This resting period allows the internal structure of the bread to fully set and enables excess steam to escape, which prevents the dreaded gummy or doughy texture inside.
- **Handling Sticky Dough with Ease:** Sourdough can be quite sticky, especially during the stretch and fold stages. To manage this effectively and keep your hands clean, lightly wet your fingers with water before handling the dough. This simple trick creates a non-stick barrier, making the stretching and folding process much smoother and more pleasant.
Storing Your Homemade Sourdough for Lasting Freshness
Proper storage is key to extending the life of your delicious homemade sourdough. For immediate enjoyment or consumption within a day or two, store leftover sourdough in an airtight container, a dedicated bread bag, or wrapped in a clean flour sack towel at room temperature. This will help prevent it from drying out too quickly. If you’ve baked multiple loaves or wish to preserve the freshest taste for a longer duration, sourdough freezes exceptionally well. Once completely cooled, wrap the entire loaf or sliced portions tightly in plastic wrap, followed by a layer of aluminum foil, and freeze for up to three months. To enjoy, simply thaw at room temperature and refresh in a warm oven for a renewed crust and tender crumb. And remember, don’t let any stale sourdough go to waste! It’s a fantastic ingredient for creating savory stuffing, hearty breakfast casseroles, or adding texture to homemade meatballs.
Sample Baking Schedule for Your Same-Day Sourdough
This detailed timeline provides a general framework to guide you through the same-day sourdough process. Keep in mind that actual times can vary based on your kitchen’s ambient temperature, humidity levels, and the activity of your specific sourdough starter.
- **10:00 PM (The Night Before):** Feed your sourdough starter. Leave it on your kitchen counter overnight to become fully active and bubbly, ready for baking in the morning.
- **8:00 AM:** In a large bowl, mix together your active starter, warm water, bread flour, and salt. Allow the shaggy dough to rest for its initial 1-hour hydration period.
- **9:00 AM:** Begin the first set of gentle stretch and folds.
- **9:30 AM:** Perform the second set of stretch and folds, allowing 30 minutes of rest in between sets.
- **10:00 AM:** Complete the third set of stretch and folds.
- **10:30 AM (Optional):** If your dough still feels underdeveloped or weak, perform a fourth set of stretch and folds. Otherwise, proceed to bulk fermentation.
- **10:30 AM – 1:30 PM (or longer):** Begin bulk fermentation (the first rise). Monitor your dough’s internal temperature (aim for 77-78°F / 25-26°C) and look for visual cues like significant increase in size (nearly doubled) and bubbles on the surface. This stage can take anywhere from 2 to 4 hours, depending on environmental conditions; it tends to be quicker in warmer weather.
- **1:30 PM:** Gently turn out and shape your dough. Place it into a rice-flour-dusted proofing basket or bowl for its second, shorter rise.
- **3:30 PM:** Preheat your oven to 450°F (232°C) with your Dutch oven or bread oven inside. While the oven preheats, place your shaped dough in the freezer for about 15-20 minutes to firm it up, which aids in scoring.
- **3:45 PM:** Carefully remove the hot baking vessel from the oven. Invert your dough onto a circular piece of parchment paper, ensuring the loaf’s top is now facing upwards. Quickly score the bread’s surface and gently transfer it, still on the parchment paper, into the hot vessel. Mist lightly with water for extra steam.
- **3:45 PM – 4:15 PM:** Bake the sourdough with the lid on for 30 minutes.
- **4:15 PM – 4:25 PM:** Remove the lid and continue baking for another 10-15 minutes, or until the top crust is a rich golden brown.
- **4:25 PM:** Carefully remove your perfectly baked loaf from the oven.
- **5:25 PM:** Allow the bread to cool completely on a wire rack for at least one hour before slicing and savoring its incredible flavor!
Easy Same Day Sourdough Bread
Dee
15 minutes
45 minutes
6 hours
7 hours
12
Equipment
-
1 Dutch oven or bread oven
Ingredients
- 1 cup active sourdough starter
- 1 ¼ cups warm water
- 3 cups bread flour
- 2 teaspoons sea salt
Instructions
-
Add the active sourdough starter to a large mixing bowl.
-
Add the warm water, then mix until the starter is mostly dissolved and well combined.
-
Gradually stir in the bread flour, 1 cup at a time, followed by the sea salt, mixing until you have a shaggy, cohesive dough.
-
Cover the bowl and let the dough rest in a warm place for 1 hour for initial hydration.
-
Begin the first set of stretch and folds: wet your hands slightly, lift one side of the dough, and stretch it over to the opposite side. Rotate the bowl a quarter turn and repeat. Continue until all 4 sides are done.
-
Allow the dough to rest for 30 minutes, then perform another set of stretch and folds. Repeat this process 1-2 more times until the dough feels firmer and holds its shape after folding.
-
Cover the bowl and let the dough rest in a warm place for bulk fermentation until it has nearly doubled in size, the internal temperature is 77-78℉ (25-26°C), and you see bubbles on the surface and bottom.
-
Turn the dough out onto a lightly floured surface (rice flour is recommended). Shape the dough by pulling the sides towards the center to form a rough circle. Flip it over and use circular motions to create a tight, smooth ball (boule).
-
Place the shaped dough ball seam-side up into a proofing bowl or banneton basket that has been lined with a flour-dusted tea towel. Gently pinch the bottom seams of the dough together to seal.
-
Cover the proofing bowl with the ends of the towel or plastic wrap, and let it rise in a warm place for 1-2 hours for the second proof.
-
Place your Dutch oven or bread oven on the middle rack of your oven and preheat to 450℉ (232°C). While the oven preheats, place the proofed dough into the freezer to firm up, and cut a circular piece of parchment paper to fit your baking vessel.
-
Once the oven reaches temperature, remove the chilled dough from the freezer. Gently flip the dough onto the circle of parchment paper so that the smooth, taut top is now facing right side up.
-
Carefully remove the hot Dutch oven from the oven using oven mitts. Lift the parchment paper with the dough and gently lower it into the hot vessel. Quickly score the bread’s surface with a lame or razor blade, and lightly mist with water to aid in steam creation.
-
Bake with the lid on for 30 minutes. Then, remove the lid and continue to bake for another 10-15 minutes, or until the top is deeply golden brown. The bread is done when it sounds hollow when tapped, and its internal temperature reaches around 207℉ (97°C).
Notes
While a Dutch oven or a dedicated bread oven is recommended for best results, a sturdy roasting pan with a tight-fitting lid can also be used effectively.
Always use a liquid measuring cup for water and a dry measuring cup for flour. When measuring flour, scoop it gently into the cup and level with the back of a knife; do not pack it tightly.
If your home is cool, particularly in winter, use your oven’s proof setting or simply turn on the oven light to create a warm environment for your dough to rise.
To prevent the sticky dough from adhering to your hands during stretch and folds, lightly wet your fingers with water.
Nutrition
Carbohydrates: 27g,
Protein: 4g,
Fat: 1g,
Saturated Fat: 0.1g,
Polyunsaturated Fat: 0.2g,
Monounsaturated Fat: 0.04g,
Sodium: 389mg,
Potassium: 31mg,
Fiber: 1g,
Sugar: 0.1g,
Vitamin A: 1IU,
Calcium: 5mg,
Iron: 0.3mg
Nutrition information is automatically calculated and provided for general reference; it should only be used as an approximation.
Additional Info
Bread
American
Enjoyed this recipe? Share your thoughts below!
Don’t miss out on more delightful and easy recipes! Sign up for our weekly newsletter to receive culinary inspiration and tips directly in your inbox.