
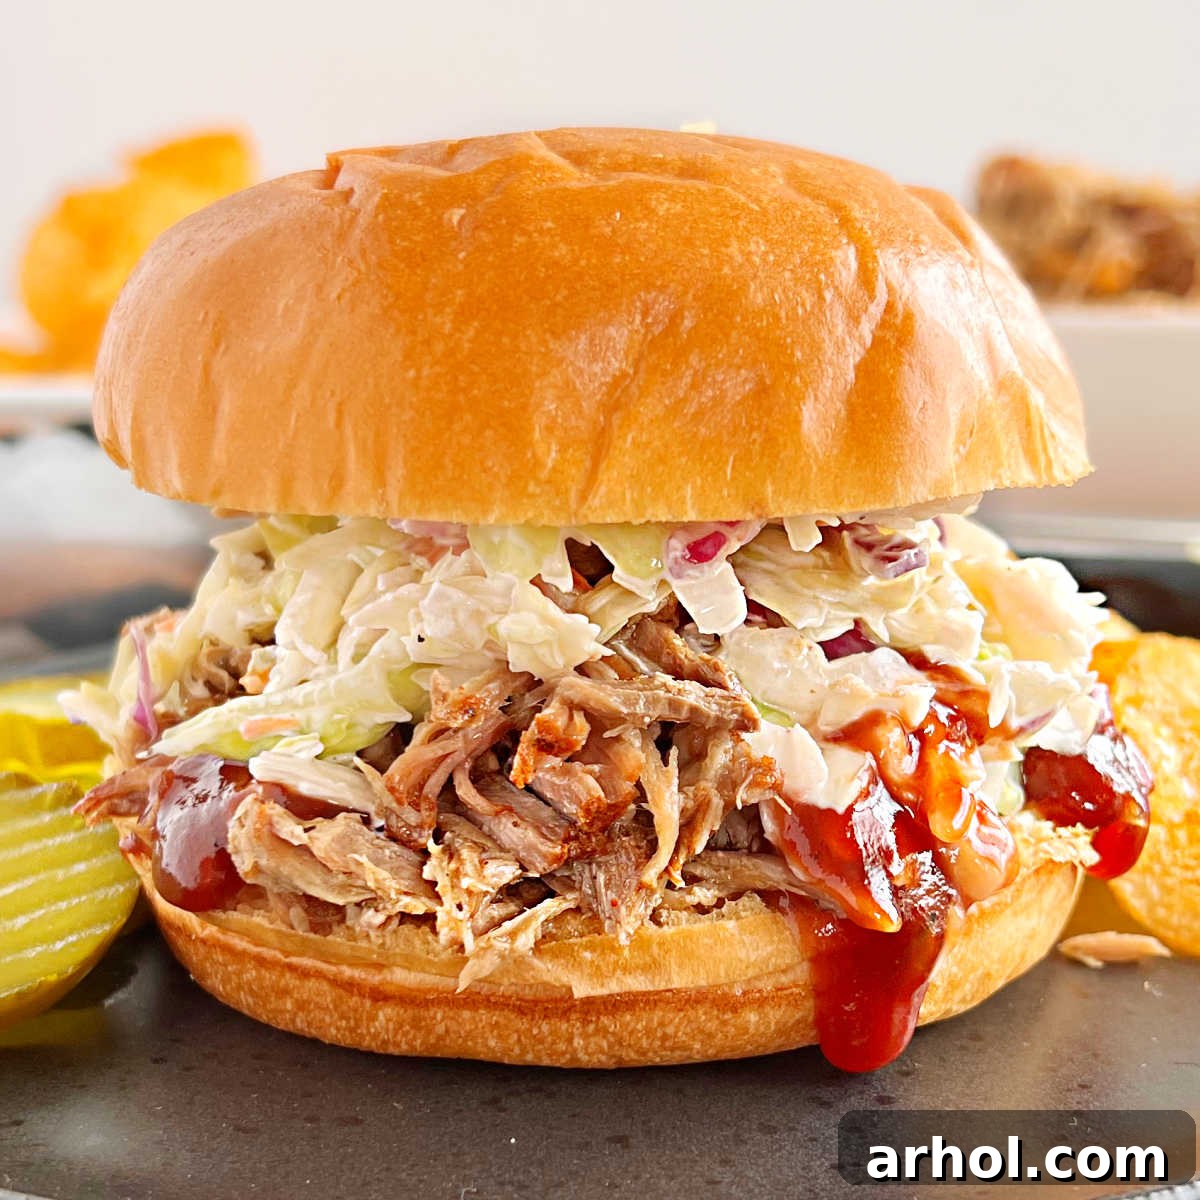
This comprehensive guide reveals the secret to making **exceptionally tender and flavorful Instant Pot Pulled Pork**. Utilizing an electric pressure cooker, you can transform a tough pork butt or pork shoulder roast into succulent, shreddable meat in approximately two hours – a fraction of the time required by traditional methods. This versatile pulled pork is perfect for an array of dishes, from classic pulled pork sandwiches and savory carnitas to loaded nachos and comforting dinners served over creamy mashed potatoes. Prepare for an easy, delicious meal that the entire family will wholeheartedly enjoy!
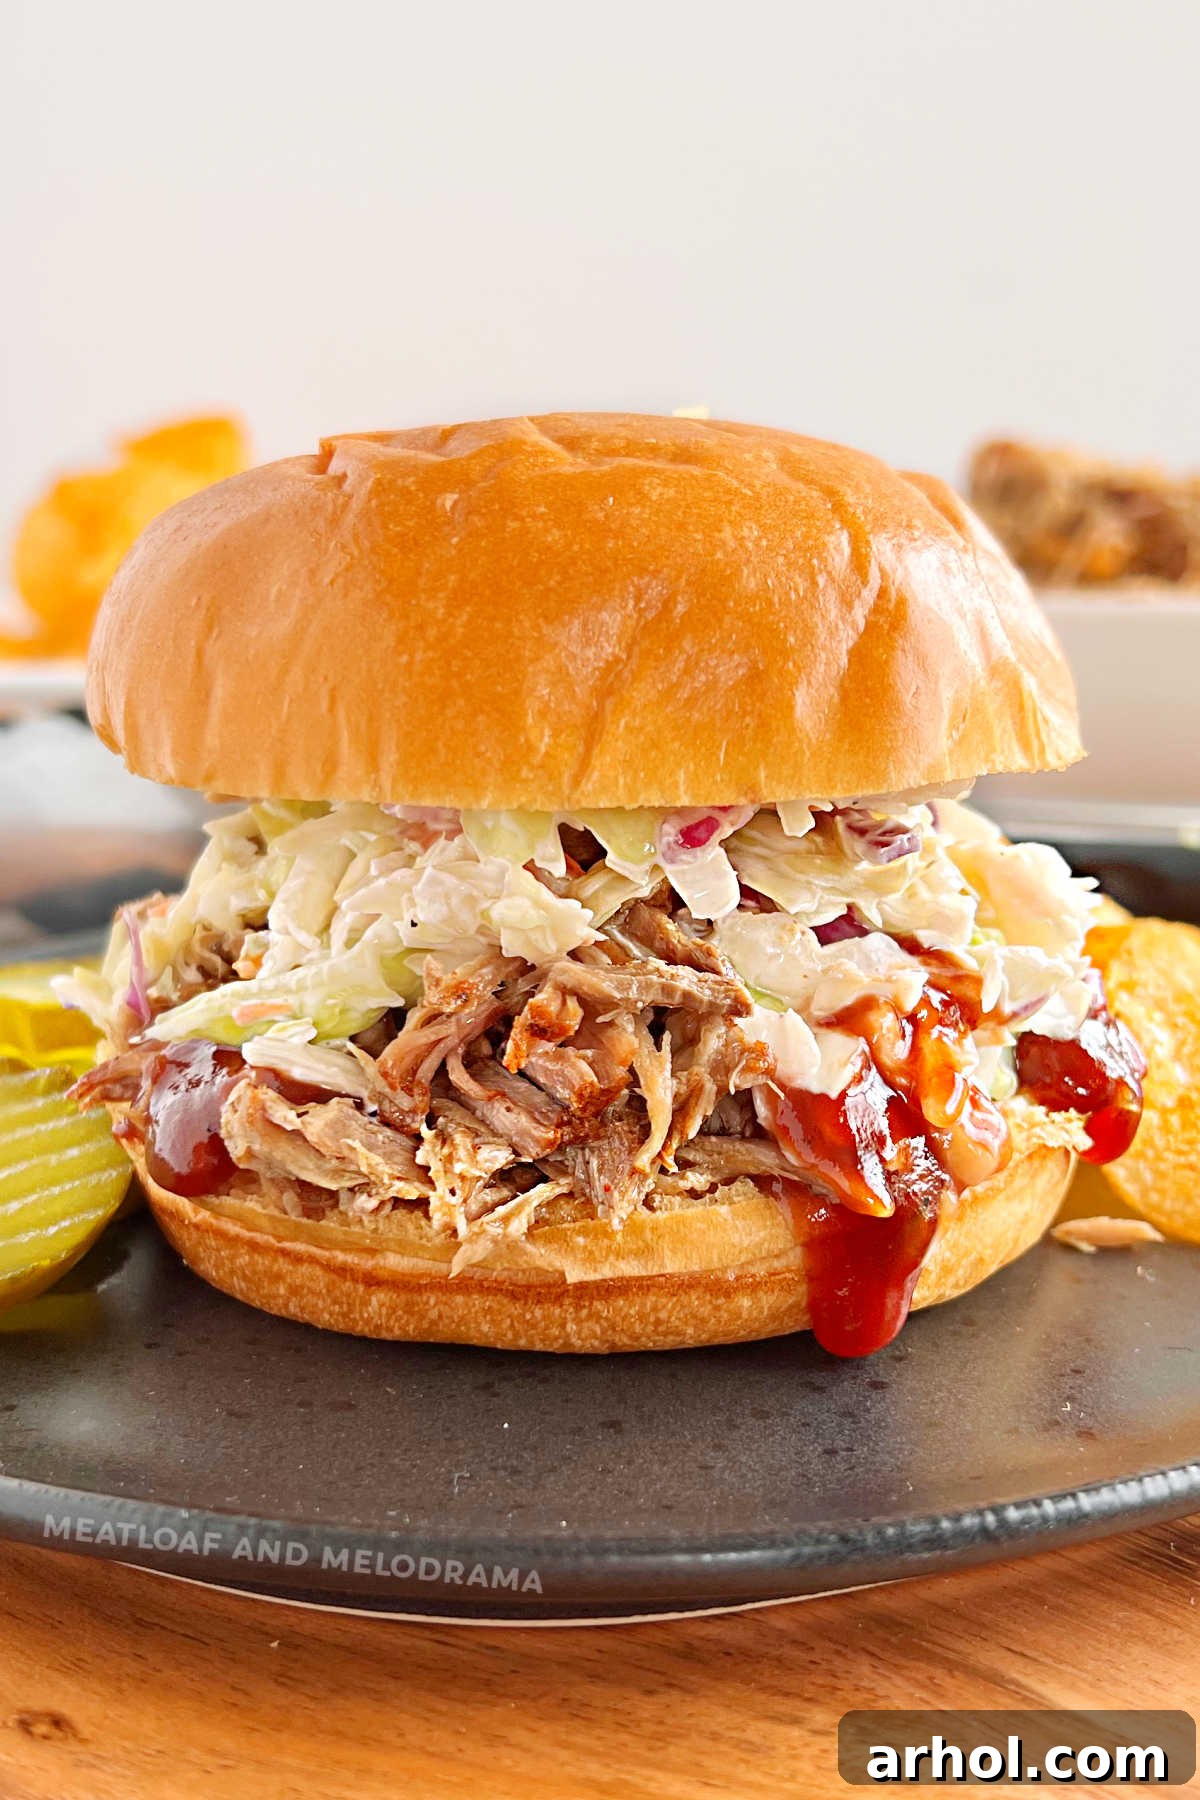
Table of Contents
- Introduction to Instant Pot Pulled Pork
- Key Ingredients for Perfect Pulled Pork
- Choosing the Best Cut of Pork for Pulled Pork
- Crafting the Ideal Dry Rub: How to Season Pork Shoulder
- Step-by-Step Guide: How to Make Pulled Pork in the Instant Pot
- Optimal Cooking Time for Instant Pot Pulled Pork
- Serving Suggestions and Flavor Variations
- Storing and Reheating Leftover Pulled Pork
- Essential Cooking Tips for Instant Pot Pulled Pork Success
- Frequently Asked Questions (FAQ)
- Instant Pot Pulled Pork Recipe Card
Introduction to Instant Pot Pulled Pork
Discovering the magic of making pulled pork in the Instant Pot was a game-changer for my kitchen, and it will be for yours too! The first time I prepared it for a New Year’s Day gathering, the results were nothing short of spectacular. I’m talking about pork so incredibly tender it practically melts in your mouth, achieved in an astonishingly short two hours. This electric pressure cooker method drastically cuts down the cooking time compared to a slow cooker, delivering moist, fall-apart pork with minimal effort.
One of the greatest advantages of this recipe is its simplicity and versatility. By keeping the initial seasoning straightforward, you create a blank canvas for countless culinary creations. While BBQ sauce and homemade coleslaw make for classic pulled pork sandwiches on soft brioche buns, the possibilities extend far beyond. Transform leftovers into zesty carnitas tacos, cheesy pulled pork nachos, or a hearty pork chili verde. This adaptability makes Instant Pot pulled pork not just a meal, but a foundation for diverse and exciting dishes throughout the week.
Key Ingredients for Perfect Pulled Pork
Achieving perfectly tender and delicious pulled pork requires only a handful of readily available ingredients. You’ll likely find most of these staples in your pantry or at any local grocery store:
- Pork Butt (Boston Butt) or Pork Shoulder Roast: This is the star of our dish. We typically use a substantial 6 to 8-pound roast to yield plenty of succulent meat for meals and leftovers. Look for good marbling for the best flavor and tenderness.
- Liquid: Water, Soda (Coke, Dr. Pepper), Broth, or Beer: This essential liquid creates the pressure and helps tenderize the pork. Dark sodas like Coke or Dr. Pepper add a subtle sweetness and remarkable tenderness due to their acidity. Beef or chicken broth enhances savory notes, while beer adds a rich, malty depth.
- Sea Salt: A fundamental seasoning that brings out the natural flavors of the pork. Don’t skimp on quality salt.
- Garlic Powder: Provides a foundational aromatic flavor that complements pork beautifully.
- Smoked Paprika: Adds a delightful smoky depth and a vibrant color to the dry rub, enhancing the overall BBQ profile.
- Ground Black Pepper: Offers a mild heat and pungent aroma, balancing the other spices.
- Yellow or White Onion: Fresh onion slices added to the pot infuse the cooking liquid and pork with sweet, savory notes. If fresh isn’t available, onion powder or dried minced onions can be incorporated into the dry rub.
- Garlic Cloves: Whole peeled garlic cloves add a robust, fresh garlic flavor as they cook down with the pork.
- Barbecue Sauce (Optional, for serving): Your favorite BBQ sauce can be added after pressure cooking for a customizable flavor. This allows everyone to choose their preferred level of sweetness or tang.
Choosing the Best Cut of Pork for Pulled Pork
The success of your pulled pork largely depends on selecting the right cut of meat. The most popular and highly recommended cut is the **pork butt roast**, also known as a Boston butt roast. Despite its name, this cut comes from the upper part of the pig’s front leg, specifically the shoulder area. It’s renowned for its generous marbling – those pockets of fat interspersed throughout the meat – which are crucial for rendering incredible flavor and moisture during the long cooking process.
While often used interchangeably, a “true” pork shoulder (sometimes labeled picnic roast) is a slightly different cut and may include the skin. For pulled pork, the pork butt is generally preferred due to its higher fat content and excellent marbling, which contributes to its signature melt-in-your-mouth tenderness. You can opt for either a bone-in or boneless pork butt roast. From my experience, both yield equally delicious results, so choose whichever is more readily available or fits your budget. The bone may add a touch more flavor, but boneless is often easier to handle and shred.
Crafting the Ideal Dry Rub: How to Season Pork Shoulder
A simple yet potent dry rub is key to infusing your pork butt or pork shoulder with fantastic flavor before it even enters the Instant Pot. This rub creates a savory crust and penetrates the meat as it cooks, resulting in a deeply seasoned pulled pork. To prepare your homemade dry rub, simply combine the following spices in a small bowl:
- Sea Salt
- Ground Black Pepper
- Garlic Powder
- Smoked Paprika
Feel free to adjust the quantities to suit your taste, or consider adding a pinch of brown sugar for a touch of sweetness, a dash of cayenne pepper for a subtle kick, or onion powder if you prefer an even more intense onion flavor without fresh onions. Thoroughly mix the spices, then liberally coat the entire surface of the pork roast. Gently rub the mixture into the meat, ensuring every crevice is covered. This step is vital for building a flavorful foundation and is far more effective than just sprinkling the spices on top.
Step-by-Step Guide: How to Make Pulled Pork in the Instant Pot
Making pulled pork in the Instant Pot is surprisingly straightforward. Follow these steps for tender, shreddable results:
- Prepare the Pork Roast: Begin by cutting your large pork roast into smaller, more manageable pieces. For a 6-8 pound roast, I typically divide it into 3 large chunks. While this step is optional, it significantly helps the meat cook more evenly and ensures it fits comfortably within the Instant Pot’s inner pot.
- Season the Meat: Generously apply the homemade dry rub (sea salt, garlic powder, smoked paprika, ground black pepper) all over the pork pieces. Take your time to rub the spices deeply into the meat. This ensures maximum flavor penetration during pressure cooking.
- Load the Instant Pot: Place the seasoned pork chunks directly into the bottom of the Instant Pot. Distribute the cut yellow or white onion and peeled garlic cloves around and on top of the pork.
- Add the Liquid: Pour your chosen liquid – water, dark soda (like Dr. Pepper or Coke), beef broth, chicken broth, or beer – into the pot. I’ve found that dark sodas work wonders in tenderizing the meat, imparting an insane tenderness and a subtle sweetness that is truly delicious. Ensure the liquid covers the bottom of the pot but doesn’t completely submerge the pork.
- Pressure Cook: Secure the Instant Pot lid and make sure the sealing valve is set to the “Sealing” position. Select the “Pressure Cook” (or “Manual”) setting on high pressure for 90 minutes. The Instant Pot will take some time to build pressure before the cooking countdown begins.
- Natural Release: Once the cooking cycle is complete, allow for a natural pressure release. This means letting the pressure release gradually on its own, which typically takes about 15-20 minutes or even longer for larger roasts. A natural release is crucial for tender cuts of meat as it allows the fibers to relax and reabsorb juices, preventing dry pork. The float valve will drop when it’s safe to open the lid.
- Shred and Serve: Carefully open the lid. The pork should be incredibly fork-tender and easily shreddable. You can either drain the excess cooking liquids (reserving some for moisture if desired) or simply shake off the liquid from the shredded pork before serving. Use two forks to shred the pork directly in the pot, or transfer it to a large bowl for easier shredding.
Optimal Cooking Time for Instant Pot Pulled Pork
The question of “how long to cook pulled pork in the Instant Pot?” is a common one, and you’ll find various answers across different recipes. However, for a truly tender, fall-apart result, especially when dealing with a thick cut like pork shoulder, sufficient cooking time is non-negotiable. This extended cooking duration is essential for breaking down the tough connective tissues and fat within the meat, which is what transforms it into the succulent, shreddable consistency we crave.
While a general rule of thumb for Instant Pot pulled pork is often cited as 15 minutes per pound, I’ve found that for consistently perfect results with larger cuts (6 to 11 pounds), a standard cook time of **90 minutes on high pressure followed by a full natural pressure release** is ideal. This timing works whether you have a 6-pound, 8-pound, or even an 11-pound pork roast, provided you’ve cut it into a few large chunks as recommended. The natural release period, which can add another 15-25 minutes, is vital. It allows the pressure to drop slowly, preventing the meat from seizing up and ensuring maximum juiciness and tenderness. If the pork is tough after cooking, it simply means it hasn’t cooked long enough. Don’t worry! Simply place it back in the Instant Pot and cook for an additional 15-20 minutes at high pressure with another natural release. It’s very difficult to overcook a pork shoulder in the Instant Pot when aiming for pulled pork.
You can even cook Instant Pot pulled pork from a frozen pork roast. Keep in mind that cooking from frozen will significantly increase the time it takes for the Instant Pot to come to pressure, but the actual pressure cooking time generally remains similar once pressure is reached.
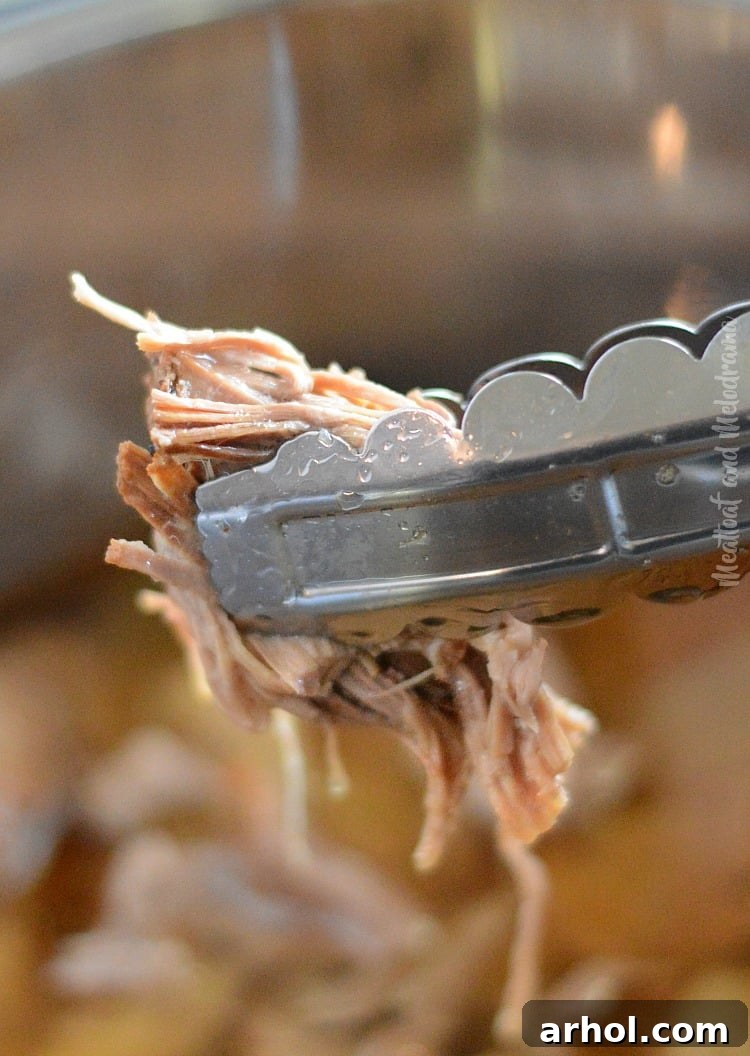
When the cooking is complete and the pressure has fully released, you’ll be greeted with pork that is undeniably fork-tender and perfectly ready for shredding – exactly the desired outcome for exceptional pulled pork. Before serving, you can either drain off most of the cooking liquids for a drier shred or allow a small amount to cling to the meat for added moisture and flavor. Some people even reduce the cooking liquid on the sauté setting to create a rich gravy to serve alongside the pork.
Serving Suggestions and Flavor Variations
The beauty of Instant Pot pulled pork lies in its incredible versatility. While delicious on its own, it truly shines when incorporated into various dishes:
Classic & Comforting Servings:
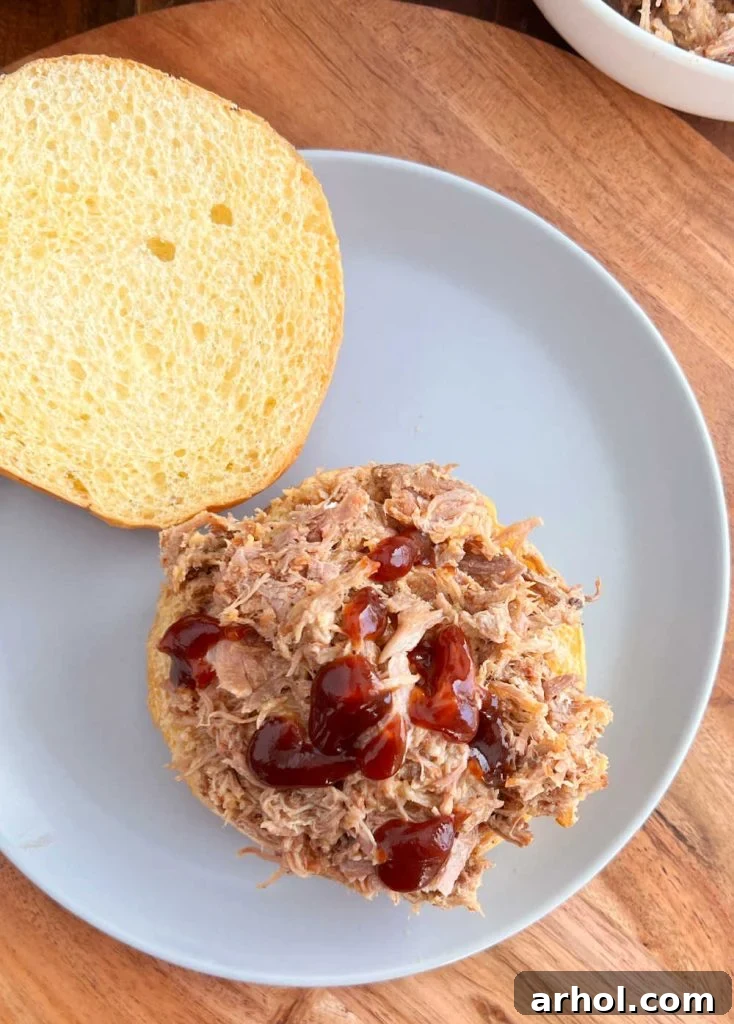
- Pulled Pork Sandwiches: The quintessential way to enjoy pulled pork! Serve it on brioche buns, potato rolls, or slider buns, generously topped with your favorite BBQ sauce and a refreshing scoop of coleslaw.
- Over Mashed Potatoes: A simple yet deeply satisfying meal. Pile the tender pork over creamy mashed potatoes, perhaps with a drizzle of pan juices or gravy.
- Baked Potatoes: Load up baked sweet potatoes or regular potatoes with pulled pork, cheese, sour cream, and chives for a hearty meal.
- Mac and Cheese: Stir pulled pork into a creamy baked mac and cheese for an ultimate comfort food fusion.
Exciting Flavor Variations:
- Instant Pot Carnitas: Transform your pulled pork into crispy, flavorful carnitas! After shredding, toss the pork with a Mexican spice mixture (cumin, oregano, chili powder), a squeeze of fresh lime juice, and a splash of orange juice. For extra crispiness, spread the pork on a sheet pan and broil or pan-fry it until beautifully browned and slightly crispy edges form. Serve in tortillas with your favorite taco toppings.
- Pulled Pork Nachos: For a crowd-pleasing appetizer or a fun dinner, arrange tortilla chips on a baking sheet, top with pulled pork, shredded cheese, and your favorite toppings like jalapeños, black beans, corn, and diced tomatoes. Bake until cheese is melted and bubbly.
- BBQ Sauce Integration: If you desire to cook the pork directly with BBQ sauce, it’s generally recommended to add the sauce *after* the pressure cooking is complete. Stirring BBQ sauce into the pot before cooking can cause the sugars in the sauce to scorch or burn under high pressure. Instead, shred the pork, then stir in your favorite BBQ sauce, or simply serve it on the side. For a richer, sweeter BBQ flavor, you can add a tablespoon or two of brown sugar directly to the cooking liquid before pressure cooking, which is less likely to burn.
- Flavorful Liquids: Elevate the taste and tenderness of your pulled pork by using liquids other than water. Dark sodas like Dr. Pepper, Coke, or root beer are fantastic choices. Their acidity helps break down the meat fibers, resulting in incredibly tender pork, while also adding a unique sweet and savory depth. Beef broth, chicken broth, apple cider vinegar, or apple juice also work exceptionally well, each imparting its own distinct flavor profile.
- Spicy Pulled Pork: Add a pinch of cayenne pepper or a chopped jalapeño to the pot with the onions and garlic for a fiery kick.
Storing and Reheating Leftover Pulled Pork
Having leftover Instant Pot pulled pork is a culinary gift, perfect for quick meals throughout the week. Proper storage ensures its longevity and maintains its delicious flavor and texture.
- Refrigeration: Store any leftover pulled pork in an airtight container in the refrigerator. It will remain fresh and flavorful for approximately 3-4 days. For best results, store it with a little bit of its cooking liquid or BBQ sauce to prevent it from drying out.
- Freezing: Pulled pork freezes remarkably well, making it excellent for meal prepping. Place cooled pulled pork in freezer-safe airtight containers or heavy-duty freezer bags. Remove as much air as possible to prevent freezer burn. It can be stored in the freezer for up to 6 months. Thaw overnight in the refrigerator before reheating.
- Reheating Methods:
- Microwave: The quickest method for small portions. Place pork in a microwave-safe dish, cover, and heat in 30-60 second intervals, stirring in between, until heated through. Add a splash of broth or water if it seems dry.
- Stovetop: For larger quantities or to prevent dryness, reheat pulled pork in a skillet over medium-low heat. Add a bit of broth, water, or BBQ sauce, cover, and stir occasionally until warm.
- Oven: Preheat oven to 300°F (150°C). Place pulled pork in an oven-safe dish with a splash of liquid (broth or water) and cover tightly with foil. Heat for 20-30 minutes, or until thoroughly warmed.
Leftover pulled pork isn’t just for sandwiches; it makes fantastic tacos, quesadillas, breakfast scrambles, and even pizza toppings. Or, simply enjoy the tasty meat on its own!
Essential Cooking Tips for Instant Pot Pulled Pork Success
To ensure you achieve the absolute BEST Instant Pot pulled pork every single time, keep these expert tips in mind:
- Don’t Skip the Dry Rub: Creating a simple yet flavorful dry rub before cooking is crucial. It infuses the pork with deep flavor from the inside out. You can always add BBQ sauce after cooking, but the rub is your foundation.
- Cut the Roast: For larger cuts of pork, dividing them into 2-3 smaller, roughly equal pieces promotes more even cooking and helps the meat fit better in your Instant Pot. This ensures all parts of the roast become uniformly tender.
- Searing is Optional: Contrary to many recipes, searing the pork before pressure cooking is not strictly necessary for tender, flavorful pulled pork. I rarely sear my pork, and it consistently turns out tender and delicious. Skipping this step saves time without compromising the final texture.
- Use Flavorful Liquids: While water works, opting for a more flavorful liquid like beef broth, chicken broth, dark soda (Coke, Dr. Pepper, Root Beer), or even beer will significantly enhance the depth and complexity of your pulled pork. The acidity in some of these liquids also aids in tenderization.
- Always Use Natural Pressure Release (NPR): For pork roasts and any large, tough cuts of meat in the Instant Pot, a natural pressure release (NPR) is highly recommended for at least 15-20 minutes, or even a full NPR. This slow release allows the meat to cool down gradually and reabsorb its juices, resulting in a more tender and moist product. A quick release can shock the meat, potentially making it drier and tougher.
- Don’t Overcrowd the Pot: Ensure your pork pieces don’t exceed the max fill line of your Instant Pot. Overcrowding can prevent proper pressure buildup and even cooking.
- Check the Sealing Ring: Always double-check that the silicone sealing ring is properly seated in the lid before closing and sealing your Instant Pot. A misplaced ring is a common reason for the pot not coming to pressure.
- Taste and Adjust: After shredding the pork, taste it! This is your chance to adjust seasonings, add more salt, pepper, or your favorite BBQ sauce to achieve your perfect flavor profile.
Frequently Asked Questions (FAQ)
Why is my pulled pork tough in the Instant Pot?
If your pork is tough after pressure cooking, it simply means it hasn’t cooked long enough. Toughness indicates that the connective tissues haven’t fully broken down yet. The easiest way to remedy this is to return the pork shoulder to the Instant Pot. Add a little more liquid if needed, secure the lid, and cook for an additional 15-20 minutes on high pressure, followed by another natural release. It’s quite difficult to overcook a pork shoulder to the point of dryness in the Instant Pot, so an extra cooking cycle will almost always result in the desired tenderness.
Can you cook a frozen pork roast in the Instant Pot?
Yes, absolutely! You can cook a frozen pork roast in the Instant Pot. However, be aware that if the roast is very large and you cannot cut it into smaller pieces, it will take considerably longer for the pressure cooker to come to pressure. Once at pressure, the actual cooking time typically remains the same as for a thawed roast (e.g., 90 minutes for a standard pork butt), but the overall process will be extended by the time it takes to pressurize.
Do I need to sear the pork before pressure cooking?
No, searing the pork beforehand is entirely optional for Instant Pot pulled pork. While searing can add a layer of flavor and color through the Maillard reaction, the high-pressure cooking environment is so effective at tenderizing that it’s not a critical step for achieving delicious pulled pork. Skipping the searing step saves time and still yields excellent results.
How much liquid do I need in the Instant Pot for pulled pork?
For most Instant Pot models, you need at least 1 to 1.5 cups of liquid to ensure proper pressure buildup. This recipe calls for 1.5 cups, which is usually sufficient for a 6-8 pound pork roast. You don’t need to submerge the pork entirely; the steam created by the liquid is what cooks the meat under pressure.
Instant Pot Pulled Pork
This Instant Pot Pulled Pork recipe makes tender shredded pork from a pork butt or pork shoulder roast in the electric pressure cooker in about 2 hours! Use the tender meat for pulled pork sandwiches, carnitas, nachos or over mashed potatoes for an easy dinner the whole family will love!

By: Dee
Prep Time: 5 minutes
Cook Time: 1 hour 30 minutes
Total Time: 1 hour 35 minutes
Servings: 15
Equipment
- Instant Pot Pressure Cooker
Ingredients
- 1 (6-pound) pork shoulder roast (pork butt)
- 2 teaspoons sea salt
- 1 teaspoon garlic powder
- 1 teaspoon smoked paprika
- 1 teaspoon ground black pepper
- 1 ½ cups liquid (water, coke, Dr. Pepper, or broth)
- 1 yellow or white onion, cut into large pieces
- 3 cloves garlic, peeled
Instructions
- Cut roast into 3 large pieces, and season generously with sea salt, garlic powder, paprika, and pepper. Ensure the entire surface is coated.
- Place the seasoned pork chunks into the Instant Pot. Add the liquid, then distribute the onion pieces and garlic cloves around the pork.
- Secure the Instant Pot lid and move the valve to the “Sealing” position. Select the “Pressure Cook” (or “Manual”) setting on high pressure and set the cooking time for 90 minutes.
- Once the cooking cycle is complete, allow for a full natural pressure release. When the float valve drops, carefully open the lid.
- Using two forks, shred the tender pork directly in the pot. Serve immediately with your favorite accompaniments.
Notes
- Recipe made with all-natural pork shoulder roast in an 8-quart Instant Pot pressure cooker. Adjust liquid amounts if using a smaller model.
- Natural release typically takes about 20 minutes or more. To save a little time, you can do a quick release after 15 to 20 minutes of natural release.
- Using your favorite dark soda pop (like Dr. Pepper or Coke) for the liquid adds incredible flavor and tenderness!
Nutrition
Nutrition information is automatically calculated, so should only be used as an approximation.
Calories: 150kcal, Carbohydrates: 1g, Protein: 1g, Fat: 1g, Saturated Fat: 1g, Polyunsaturated Fat: 1g, Monounsaturated Fat: 1g, Cholesterol: 1mg, Sodium: 312mg, Potassium: 7mg, Fiber: 1g, Sugar: 1g, Vitamin A: 66IU, Vitamin C: 1mg, Calcium: 2mg, Iron: 1mg
Additional Info
Course: Main Course
Cuisine: American
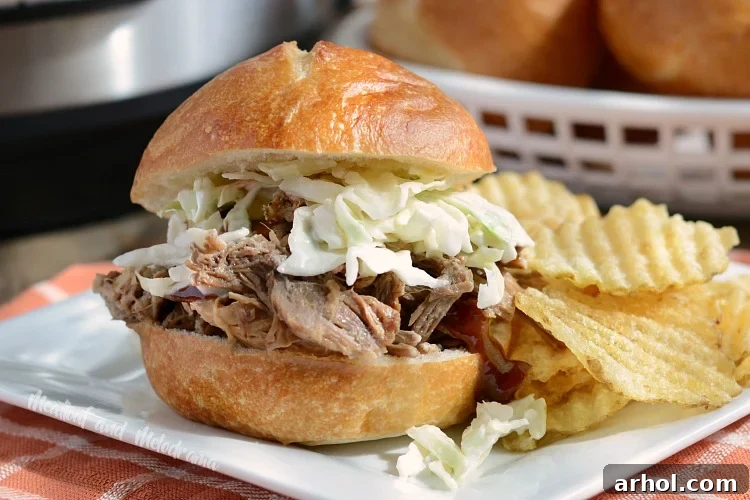
This perfect, easy Instant Pot pulled pork has become a consistent family favorite in our home, and I sincerely hope you find as much joy and deliciousness in this recipe as we do! Whether it’s for game day gatherings, weeknight dinners, or meal prep, these BBQ pulled pork sandwiches and their many variations are sure to be a hit.
For more effortless recipe ideas and quick meal solutions that simplify your cooking routine, be sure to subscribe to our newsletter and follow us on social media! We’re always sharing new ways to make cooking fun and delicious.
Happy Cooking,

Recipe first published in 2018 and comprehensively updated in 2023 for enhanced clarity and detail.