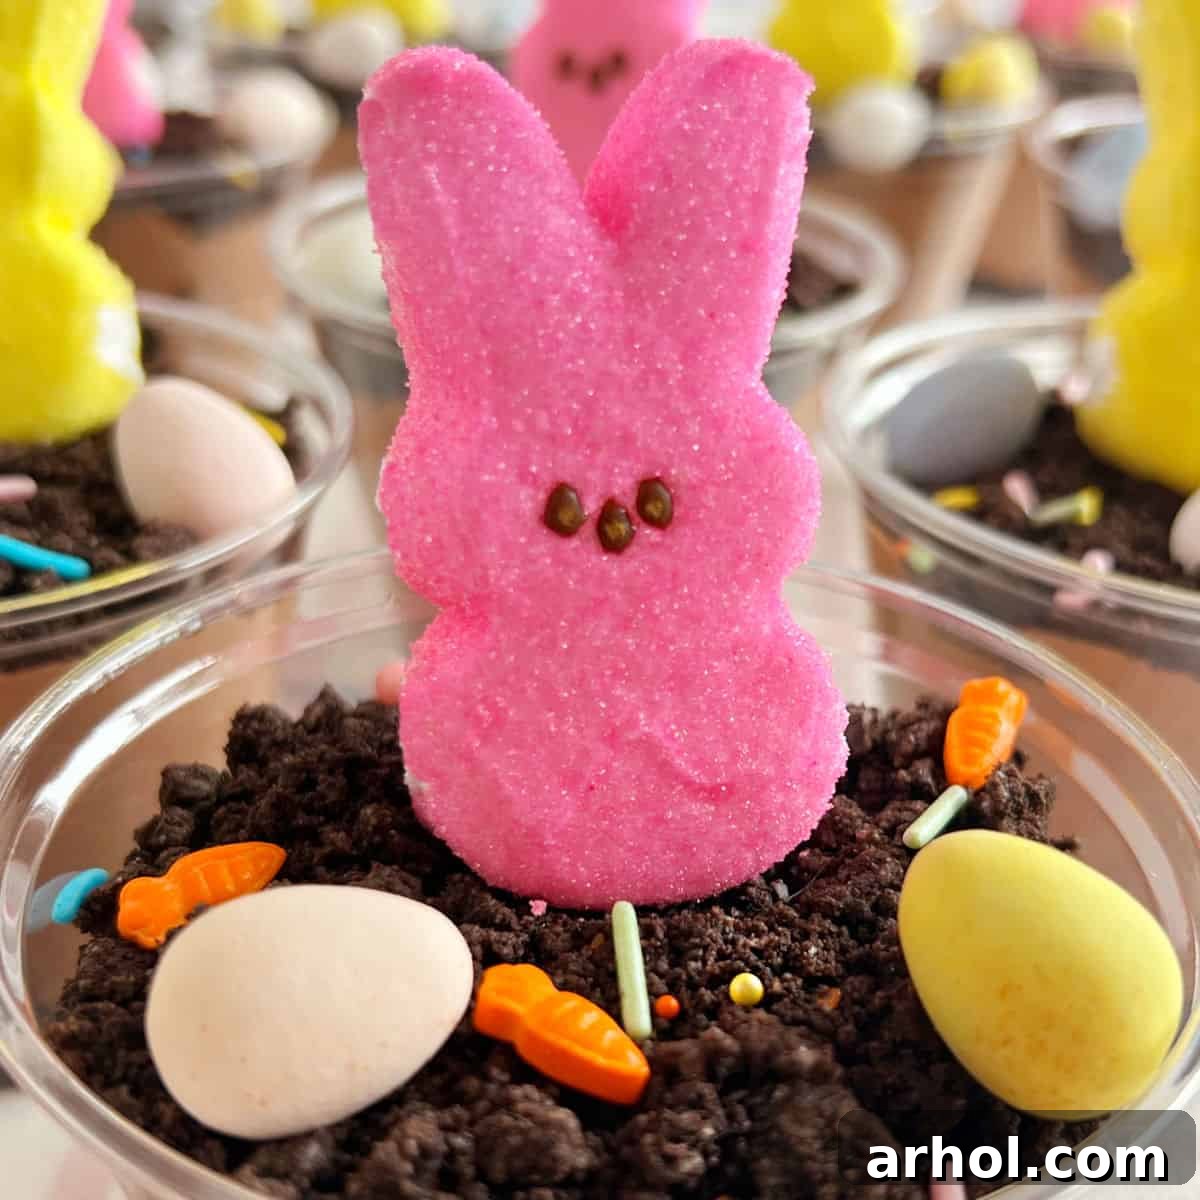
Delight your family and friends this Easter with our incredibly easy and utterly charming Easter Dirt Cups recipe. This no-bake dessert masterpiece is a guaranteed crowd-pleaser, featuring luscious layers of rich chocolate pudding, crunchy crushed Oreo cookies, adorable Peeps bunnies, and vibrant candy eggs. It’s the perfect sweet indulgence that captures the joyful spirit of springtime and brings smiles to every face, without any complicated baking required!
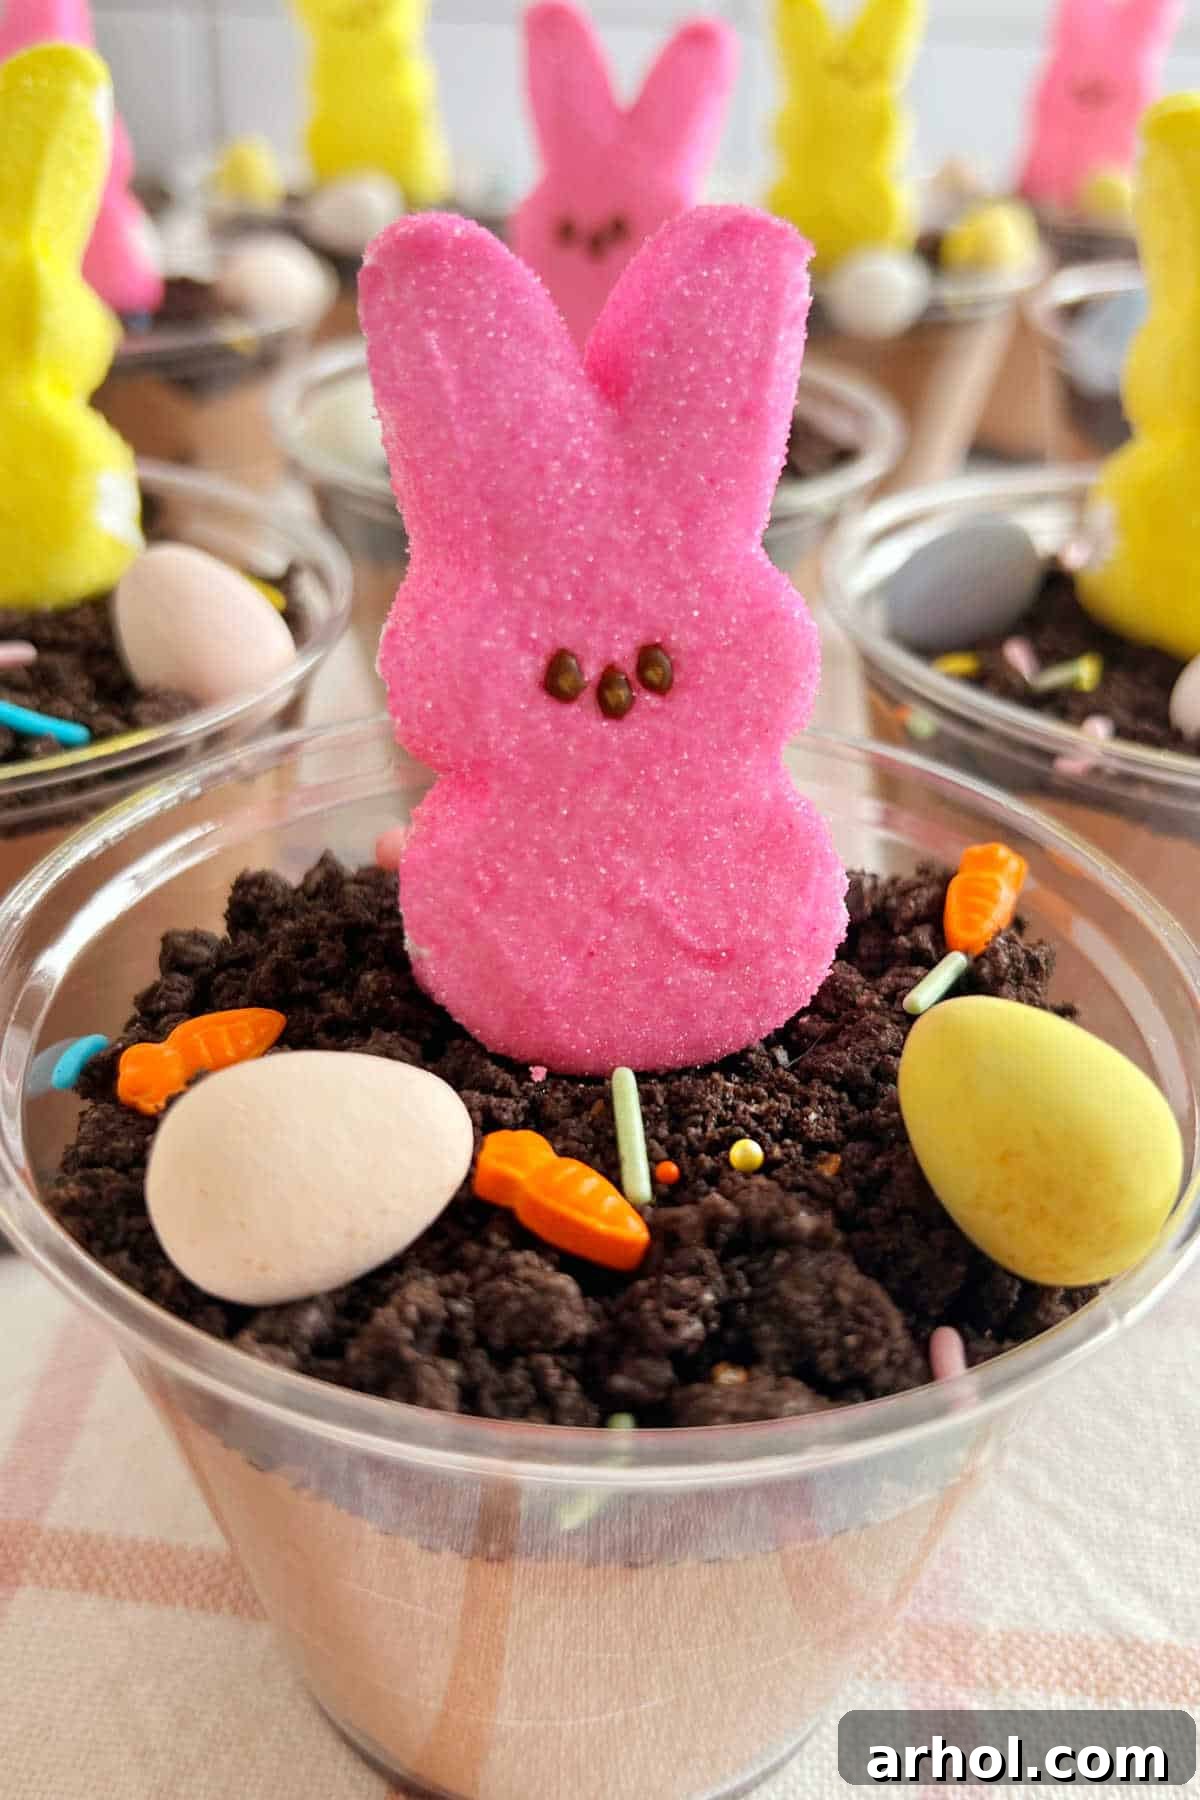
Table of Contents
- Easy Easter Pudding Cups: The Ultimate No-Bake Spring Dessert
- Why You Will Love This Easy Dirt Cup Recipe
- Ingredients for Easter Dirt Cups
- Essential Equipment for Your Dirt Cups
- Step-by-Step: How to Make Easter Dirt Pudding Cups
- Customizing Your Easter Dirt Cups: Substitutions and Tips
- Storage and Make-Ahead Tips for Freshness
- Frequently Asked Questions (FAQ)
- More Delicious Easter Desserts
- Easter Dirt Cups Recipe Card
Easy Easter Pudding Cups: The Ultimate No-Bake Spring Dessert
Are you searching for a dessert that’s not only irresistibly delicious but also incredibly simple to prepare for your Easter celebration? Look no further than these delightful Easter Pudding Cups! They are a fantastic twist on the classic “dirt cake” or “dirt cups,” specifically designed with the vibrant colors and playful themes of Easter in mind. With their decadent layers of creamy chocolate pudding, crunchy crushed Oreo cookies that mimic rich earth, and a charming array of Easter candy and marshmallow Peeps, these cups are more than just a dessert—they’re an edible spring landscape!
Easter gatherings are often filled with family, friends, and an abundance of delicious food. While traditional baked goods certainly have their place, offering a variety of sweet treats is always a winning strategy. These easy pudding cups are especially wonderful because they appeal to absolutely everyone, from the youngest picky eater to the most discerning adult palate. Their individual serving size makes them hygienic and convenient, perfect for a buffet-style dessert table or as a fun treat for kids’ parties. Plus, the joy of assembling them is almost as great as eating them, making it a fantastic activity to involve little ones in the kitchen.
The beauty of this recipe lies in its simplicity. As a no-bake dessert, it frees up valuable oven space and prep time, allowing you to focus on other aspects of your holiday meal. Forget the stress of elaborate baking or intricate decorations; these dirt cups come together quickly with minimal effort, yet they present a show-stopping appearance. They’re basically a cheerful, seasonal variation of the beloved Oreo dirt cups with gummy worms, only we’ve swapped out the spooky worms for festive Easter bunnies and colorful eggs!
Why You Will Love This Easy Dirt Cup Recipe
There are countless reasons why these Easter Dirt Cups will quickly become your new go-to spring dessert:
- Effortlessly Easy: No baking required! This recipe comes together with simple mixing and layering, perfect for beginner cooks or busy schedules.
- Kid-Friendly Fun: Children absolutely adore making and eating these. The “dirt” and “bunny in a garden” theme sparks imagination, and the hands-on assembly is a blast for them.
- Crowd-Pleaser: The combination of chocolate, Oreos, and sweet candy is universally loved, guaranteeing smiles from all your guests.
- Festive & Adorable: The vibrant Peeps bunnies and candy eggs make these cups incredibly photogenic and perfectly suited for any Easter or springtime celebration.
- Customizable: Easily adapt the flavors and toppings to suit your personal preferences or dietary needs.
- Make-Ahead Friendly: Prepare them a day or two in advance, saving you precious time on the day of your event.
- Individual Servings: Perfect for parties, potlucks, or portion control, these individual cups are neat and convenient.
Ingredients for Easter Dirt Cups
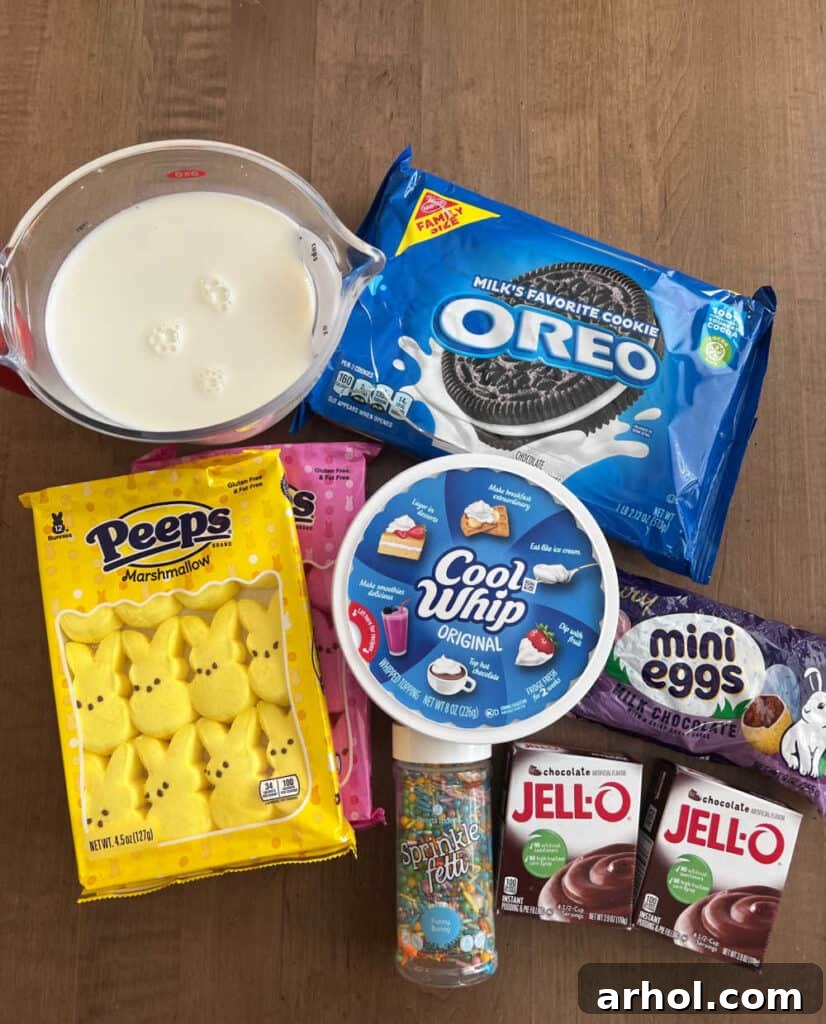
Gathering the ingredients for these delightful Easter Dirt Cups is a breeze. You’ll find everything you need at your local grocery store. For precise measurements, be sure to check the printable recipe card at the bottom of this article.
- Instant Chocolate Pudding Mix: We recommend using Jello brand instant pudding for its consistent texture and rich flavor. The key here is “instant” – avoid the “cook and serve” variety unless you’re prepared for an extra step, as instant pudding sets up quickly and easily.
- Milk: Essential for preparing the pudding to a smooth, creamy consistency. Whole milk or 2% milk will yield the richest, most luxurious pudding. While other milk alternatives can be used, they may alter the final texture slightly.
- Cool Whip Whipped Topping: This fluffy ingredient is folded into the prepared pudding to give it a wonderfully light, airy, and mousse-like texture. Ensure your Cool Whip is completely thawed before incorporating it, as this prevents lumps and ensures smooth blending.
- Oreo Sandwich Cookies: The star of our “dirt” layers! Classic Oreos provide the perfect chocolatey crunch and dark color that mimics rich soil. Feel free to use double-stuffed Oreos for an extra creamy touch, or any other chocolate sandwich cookie you prefer.
- Marshmallow Peeps: These iconic Easter candies are what truly make our dirt cups festive. We love using pink and yellow bunny Peeps for their vibrant colors and cute shapes, but chick Peeps also work wonderfully to create a fun, spring garden scene.
- Mini Chocolate Eggs: Whether you opt for dark chocolate or milk chocolate mini eggs, these add a delightful burst of flavor and a classic Easter aesthetic. Cadbury Mini Eggs are a popular choice for their colorful shells.
- Holiday Sprinkles: An optional but highly recommended addition for an extra touch of whimsy! We particularly love sprinkles that feature mini carrots or other Easter shapes to enhance the garden theme.
Essential Equipment for Your Dirt Cups
Beyond your standard mixing bowls and spatulas, you’ll need a few specific items to create and assemble these charming dessert cups:
- Plastic Cups or Small Glasses: Individual clear cups are ideal for showcasing the beautiful layers of your dirt cups. Any small serving glasses, mason jars, or even clean flower pots (new and food-safe, of course!) can also be used for a rustic touch.
- Food Processor or Large Ziploc Bag: For crushing the Oreo cookies into fine “dirt.” A food processor makes quick work of it, but a Ziploc bag and a rolling pin or meat mallet are perfect if you don’t have one.
- Toothpicks: These are crucial for helping your Peeps bunnies stand upright in the pudding layers, creating that delightful “peeking out of the dirt” effect. Remember to inform guests to remove them before eating!
Step-by-Step: How to Make Easter Dirt Pudding Cups
Creating these adorable and delicious Easter Dirt Cups is a straightforward process that’s enjoyable for all ages. Follow these simple steps for a perfect no-bake treat:
Step 1: Prepare the Oreo “Dirt”
Begin by crushing your Oreo cookies. For the finest “dirt” texture, place the cookies in a food processor and pulse until they form fine crumbs. If you don’t have a food processor, no problem! Place the Oreos in a large, heavy-duty zip-top plastic bag, seal it tightly (removing excess air), and use a rolling pin or even a meat mallet to crush them into small, even crumbs. The goal is a texture resembling rich, dark soil.
Step 2: Whisk the Instant Pudding
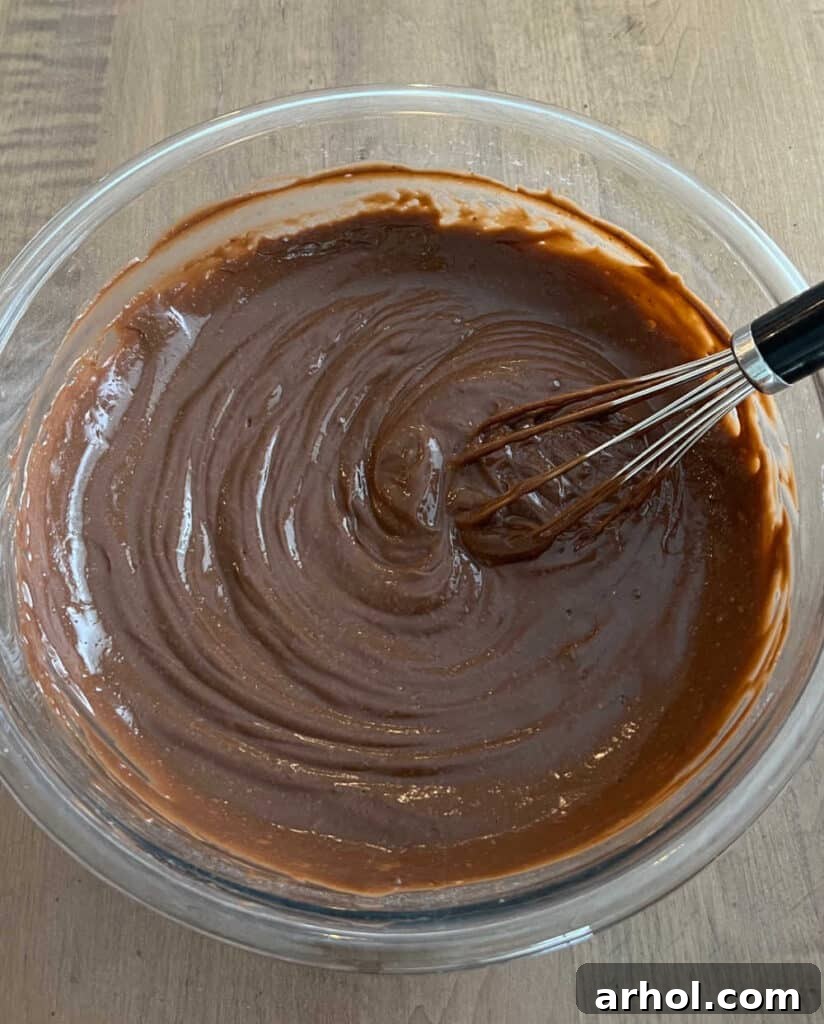
In a large mixing bowl, combine the instant chocolate pudding mix with the specified amount of cold milk. Whisk vigorously for about 2-3 minutes, or until the mixture thickens and is smooth, with no lumps of dry pudding mix remaining. Refer to your pudding package instructions for exact whisking times and milk quantities, as they can sometimes vary slightly.
Step 3: Fold in the Cool Whip
Once your pudding has thickened, gently fold in the thawed Cool Whip whipped topping. Use a rubber spatula to carefully incorporate the whipped topping into the pudding mixture with a light, lifting motion. Avoid over-mixing or using a hand mixer at this stage, as this can deflate the whipped topping and make the pudding less fluffy. Continue folding until the Cool Whip is completely blended and the pudding has a light, airy, and uniform texture.
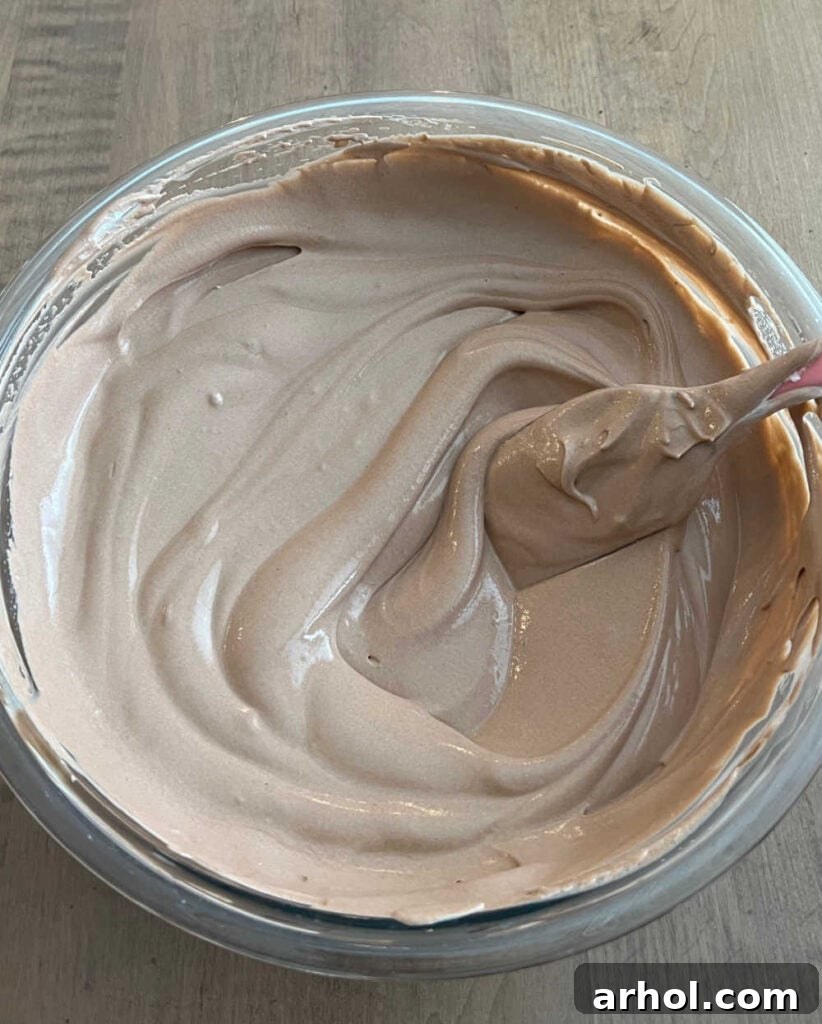
Step 4: Begin Layering the Cups
Now for the fun part – assembling your Easter Dirt Cups! Take your clear plastic cups or small glasses. Start by adding a thin layer (about 1-2 tablespoons) of the crushed Oreo cookies to the very bottom of each cup. This forms the initial “dirt” base.
Step 5: Add the Pudding Layer
Next, carefully spoon a generous amount of the fluffy pudding mixture on top of the crushed cookie layer. Fill the cup with pudding, leaving about an inch or so of space from the rim. You want enough room for more “dirt” and your decorations.
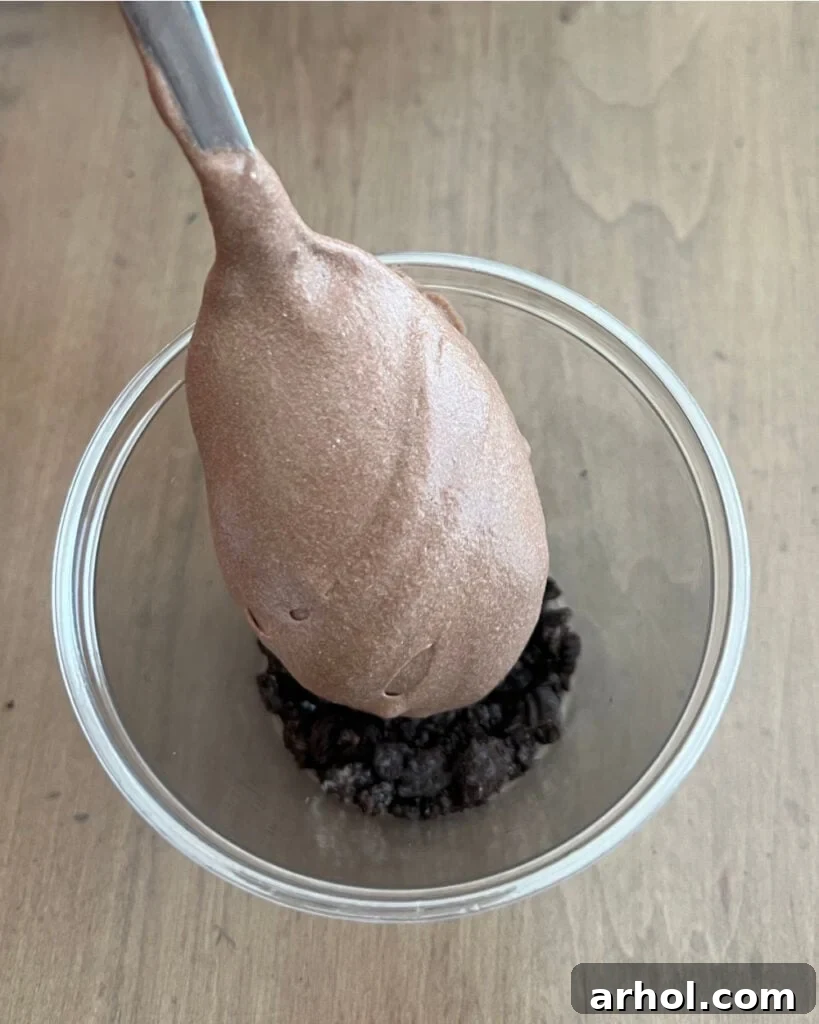
Step 6: Decorate Your “Garden”
Top the pudding layer with another sprinkle of crushed Oreos, creating the final “dirt” surface. Now, it’s time to bring your Easter garden to life! Carefully insert a toothpick into the bottom of each marshmallow Peeps bunny to help it stand upright. Gently place the Peeps into the crushed Oreo layer, positioning them as if they are peeking out of the “dirt.” Arrange your mini chocolate eggs around the bunny, scattering holiday sprinkles (especially those cute carrot ones!) for an extra festive touch. Repeat this process for all your cups.
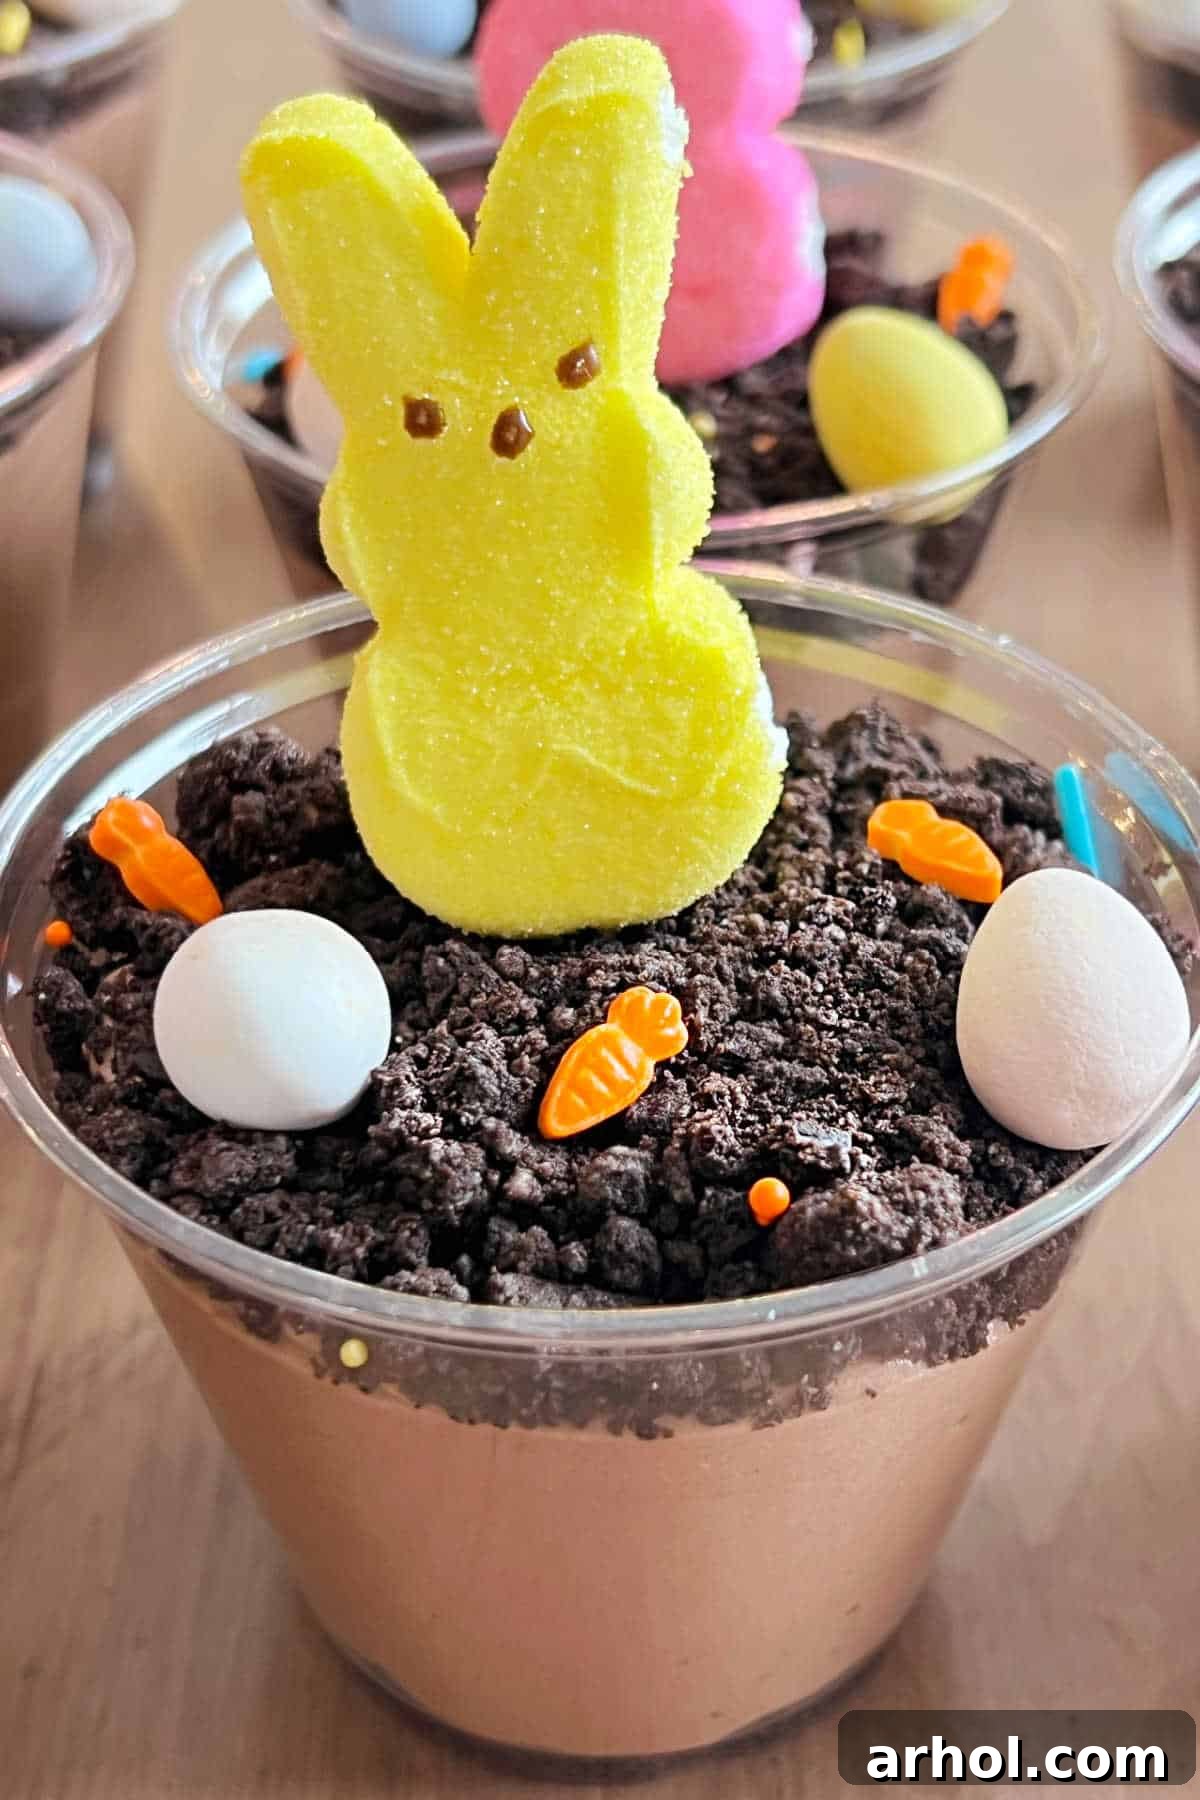
Step 7: Chill and Serve
Once all your Easter Dirt Cups are assembled and beautifully decorated, place them in the refrigerator to chill for at least 30 minutes. This allows the pudding to fully set and the flavors to meld beautifully. Before serving, make sure to remind everyone to remove the toothpicks from the Peeps bunnies!
Customizing Your Easter Dirt Cups: Substitutions and Tips
One of the best things about Easter Dirt Cups is how incredibly versatile they are! Feel free to get creative and customize them to your liking. Here are some ideas for substitutions and tips to make your dessert truly special:
- Pudding Variations: While chocolate pudding is classic, don’t hesitate to experiment! Vanilla instant pudding creates a lighter flavor profile, or try white chocolate, butterscotch, or even cheesecake flavored pudding for a unique twist. You can even alternate layers of chocolate and vanilla pudding for a striking marbled effect.
- Cookie Choices: Beyond Oreos, consider other crushed cookies. Chocolate chip cookies, graham crackers, Nilla wafers, or even gluten-free chocolate sandwich cookies can be excellent alternatives for the “dirt” layer.
- Candy Wonderland: The sky’s the limit for Easter candy! Instead of or in addition to mini chocolate eggs, try Robin’s eggs, jelly beans, M&M’s, mini chocolate bunnies, or even chopped candy bars. Arrange them creatively to look like hidden treasures.
- Add a “Garden” Element: Create edible grass by mixing shredded coconut with a few drops of green food coloring. Sprinkle it around your Peeps for a realistic garden look. You could also use green sugar sprinkles.
- Fruit Freshness: For a burst of freshness and color, add a layer of fresh berries like raspberries or blueberries between the pudding layers. Just be sure to add them close to serving time to prevent them from becoming too soft.
- Make it a Cake: If individual cups aren’t your style, transform this recipe into an Easter Dirt Cake! Layer all the ingredients in a large 9×13 inch baking dish or an elegant trifle bowl, similar to our Halloween Dirt Cake. This is perfect for serving a larger crowd.
- Cream Cheese Layer: For an even richer dessert, consider adding a cream cheese layer. Beat softened cream cheese with powdered sugar and a little milk, then fold in some whipped topping for a decadent addition between the pudding and cookie layers.
- Coffee or Espresso Kick: For adult palates, dissolve a teaspoon of instant espresso powder into the milk when making the chocolate pudding for a mocha flavor.
- Presentation Matters: Use clear cups or jars to show off the beautiful layers. For a truly whimsical touch, serve them in clean, new mini terracotta pots lined with parchment paper.
- Kid-Friendly Assembly: This is a fantastic recipe to get kids involved in the kitchen. Let them help crush the Oreos (in a sealed bag, of course!), spoon the pudding, and most importantly, decorate their own cups with candies.
Storage and Make-Ahead Tips for Freshness
These Easter Dirt Cups are wonderfully flexible, making them ideal for holiday meal prep. Here’s how to store them and prepare them in advance:
- Refrigeration: Always store your assembled dessert cups in the refrigerator until you are ready to serve them. The pudding and whipped topping need to remain chilled for optimal texture and food safety.
- Make Ahead: You can prepare the Easter Dirt Cups up to 2 days in advance. To do this, assemble the pudding and cookie layers in the cups. Cover each cup tightly with plastic wrap to prevent the pudding from drying out and absorbing refrigerator odors.
- Decorate Just Before Serving: For the freshest appearance and best texture, add the marshmallow Peeps, candy eggs, and sprinkles on the day you plan to serve them. This prevents the Peeps from getting too soft and the sprinkles from dissolving into the pudding.
- Leftovers: Any leftover dirt cups should be refrigerated promptly, ideally within 2 hours of serving. They will remain fresh and delicious for an additional 1-2 days when properly covered in the refrigerator. Note that the cookies might soften slightly over time, but the flavor will still be fantastic.
Frequently Asked Questions (FAQ)
Here are some common questions you might have about making Easter Dirt Cups:
- Can I use homemade pudding? Absolutely! If you prefer homemade chocolate pudding, ensure it is fully chilled and set before folding in the whipped topping.
- What if I can’t find Peeps bunnies? Chick-shaped Peeps are a great alternative, or any small marshmallow treat can be used. You can also use small plastic Easter toys (ensure they are clean and food-safe) as toppers.
- Are these dairy-free? The recipe as written is not dairy-free due to milk and Cool Whip. However, you can use dairy-free instant pudding mixes, plant-based milk (like almond or oat milk), and dairy-free whipped topping to adapt the recipe. Just ensure all your cookies and candies are also dairy-free.
- How many cups does this recipe make? This recipe is designed to make approximately 10 individual servings. However, this can vary slightly depending on the size of your cups and how generously you layer them.
- Can I use a different flavor of Oreo? Yes! Mint Oreos, Peanut Butter Oreos, or even Golden Oreos could offer an interesting flavor twist, though they might change the “dirt” aesthetic slightly.
More Delicious Easter Desserts
If you’re looking for more delightful treats to complete your Easter spread, explore some of our other family-favorite recipes:
- Whip up a batch of our whimsical Easter Bunny Bark for a quick and colorful confection.
- Indulge in the spiced sweetness of Carrot Cake Mix Cookies – an easy way to enjoy classic Easter flavors.
- For cheesecake lovers, our creamy Cadbury Mini Eggs Dip is an irresistible sweet dip perfect for fruit or cookies.
- And for a truly classic centerpiece, try our charming Easter Lamb Cake.
You can browse many more easy Easter recipes that your family is sure to love!

Saved
Pin
Easter Dirt Cups
Equipment
-
small plastic cups or glasses
-
toothpicks
-
Food processor (optional, for crushing cookies)
-
Large mixing bowls
-
Whisk and Rubber spatula
Ingredients
- 2 (3.9) oz boxes chocolate instant pudding
- 4 cups milk (2 percent or whole recommended for best creaminess)
- 25 Oreo sandwich cookies (or similar chocolate sandwich cookies)
- 8 oz Cool Whip whipped topping (thawed completely)
- 10 Easter Peeps (bunnies or chicks)
- Chocolate mini eggs (e.g., Cadbury Mini Eggs, or other small Easter candies)
- Easter sprinkles (optional, for extra festivity)
Instructions
-
Crush Cookies: Place the Oreo cookies in a large zip-top bag and crush them into fine crumbs using a rolling pin or meat mallet. Alternatively, use a food processor for quicker results. Set aside.
-
Prepare Pudding: In a large mixing bowl, add the instant chocolate pudding mix. Pour in the cold milk and whisk vigorously for 2-3 minutes until the pudding thickens and is smooth. Follow specific package directions for best results.
-
Fold in Cool Whip: Gently fold the thawed Cool Whip into the thickened pudding mixture using a rubber spatula. Mix until it’s well combined and the pudding becomes light and fluffy. Avoid over-mixing.
-
Layer Cookies: Add a thin layer (about 1-2 tablespoons) of the crushed Oreo cookies to the bottom of each small plastic cup or glass.
-
Spoon Pudding: Spoon the pudding mixture over the crushed cookie layer in each cup, filling almost to the top, leaving some space for more cookies and decorations.
-
Decorate: Sprinkle more crushed Oreos on top of the pudding layer to create the “dirt.” Insert a toothpick into the bottom of each Easter Peep bunny to help it stand up, then place the Peeps and chocolate mini eggs on top. Add a festive sprinkle of Easter sprinkles, if desired.
-
Chill & Serve: Refrigerate the Easter Dirt Cups for at least 30 minutes to allow the pudding to set completely. Remember to remove the toothpicks before serving! Enjoy your delightful no-bake Easter dessert.
Video
Notes
Always remember to remove the toothpicks from the Peeps bunnies before serving to ensure a safe and enjoyable treat for everyone!
Feel free to use your favorite Easter candies or chocolate eggs for decoration. Robin’s eggs, jelly beans, or even small chocolate birds are also excellent and colorful choices that fit the theme.
This recipe is highly adaptable and can be easily halved for a smaller gathering or tripled for a big party, without compromising on taste or texture.
Nutrition
Nutrition information is automatically calculated, so should only be used as an approximation.
Additional Info
For more delightful and easy recipes perfect for any occasion, make sure to sign up for our newsletter and follow us on social media! We’re always sharing fresh ideas to make your cooking and entertaining effortless and enjoyable.