
Crafting Joy: Unleash Creativity with DIY Salt Dough Doll Food for American Girl Dolls and Beyond!
Welcome, fellow crafting enthusiasts and parents seeking engaging, imaginative play ideas for their children! If your home, like ours, is a vibrant hub for doll adventures, particularly with beloved American Girl dolls, you know the magic these miniature worlds hold. My daughter’s passion for her American Girl collection goes beyond simply dressing them up; she loves to create entire narratives, and what’s a fantastic story without a delicious feast?
While ready-made doll accessories and food items are readily available, their cost can quickly add up. Furthermore, there’s nothing quite like the immense satisfaction of creating something unique and personal with your own hands. That’s why we embarked on a delightful crafting journey, transforming simple kitchen ingredients into an enchanting array of salt dough doll food. It’s an activity that promises not just fun, but also a wonderful opportunity for bonding, fostering creativity, and encouraging imaginative storytelling for kids of all ages.
Why Choose Salt Dough for Doll Food? The Ultimate DIY Crafting Solution
Salt dough has long been a favorite medium for countless craft projects, and for excellent reason! Its ingredients are incredibly affordable and likely already sitting in your pantry: flour, salt, and water. This accessibility makes it a fantastic, budget-friendly alternative to store-bought doll food, allowing for endless hours of creative exploration without breaking the bank. Beyond its economic benefits, working with salt dough offers a rich sensory experience for children, helping to develop crucial fine motor skills as they squish, roll, and shape the pliable mixture. It’s a wonderful tactile activity that engages young minds and hands.
For dolls like American Girl, which are typically 18-inches tall, or even smaller dollhouse families, scale is an important consideration when creating accessories. Salt dough is wonderfully versatile, allowing you to craft items in virtually any size you need, from tiny, intricate cookies to substantial, shared pizzas. This remarkable adaptability ensures that your creations will perfectly fit into your child’s miniature world, enhancing their imaginative play scenarios and making their doll’s universe feel even more authentic and exciting.
Shaping Our Miniature Feast: From Pretzels to Pizza Perfection
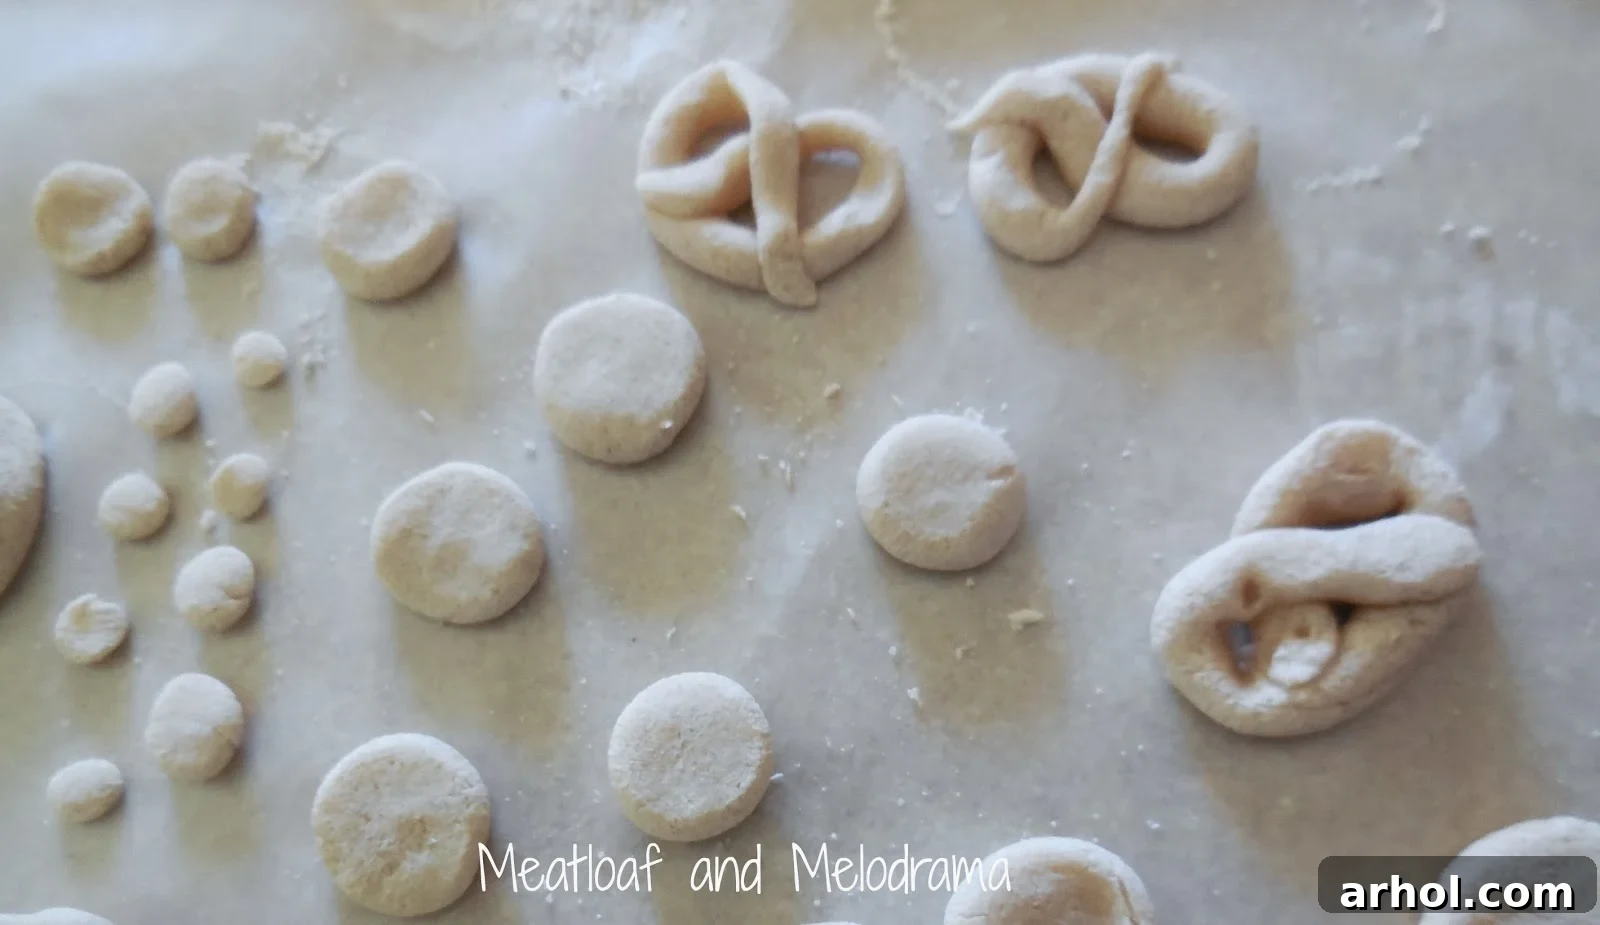
Our recent crafting session yielded a truly delightful assortment of miniature treats. We started with a small, manageable batch of our homemade salt dough, and it was incredible to see how many diverse food items we could create from such humble beginnings. For our 18-inch American Girl dolls and their smaller dollhouse counterparts, we envisioned a lavish spread – a culinary adventure designed to spark hours of imaginative play. What better way to celebrate friendship and imagination than with a table full of delectable doll food, lovingly crafted by hand?
Our expansive doll menu included classic favorites that are instantly recognizable and fun to create: golden-brown pretzels, an inviting assortment of cookies, delightfully frosted donuts, and a magnificent pizza, complete with all the toppings. Each item presented a unique shaping challenge, encouraging my daughter to think creatively about how to best represent real-world foods in miniature. For instance, pretzels required careful rolling and twisting, while cookies offered opportunities for various shapes. We even extended our crafting to include some adorable heart shapes, perfect not just for a doll’s Valentine’s Day party but also as charming decorations for any miniature scene, showcasing the incredible versatility of salt dough beyond just food items.
Bringing Colors to Life: The Art of Decorating Doll Food
Once our carefully crafted salt dough shapes had fully dried and hardened – a crucial step for ensuring their durability and longevity – the real magic began: the decoration phase. This is often the most exciting part for children, as they get to transform plain, earthy-toned dough into vibrant, realistic-looking miniature treats. My daughter, whom I affectionately call “the little Diva,” and I eagerly gathered our supplies: a vibrant palette of bright acrylic craft paints in various colors, an assortment of fine paintbrushes, and an abundance of artistic adventure.
Acrylic paints are an ideal choice for salt dough projects because they are non-toxic (once dry), dry relatively quickly, and offer excellent, opaque coverage. They allow for the creation of intricate details and vibrant hues that truly bring the miniature food to life, making it pop with color and realism. For our special Valentine’s Day cookies, we opted for cheerful pinks, romantic reds, and crisp whites, laying the perfect groundwork for some extra special embellishments. The layering of colors adds depth and character, turning each piece into a tiny work of art.
Adding Sweet Details: Sprinkles and Toppings for Miniature Delights
After carefully applying the base colors to our adorable heart cookies, we knew we wanted to add a touch of whimsy and irresistible realism. What, after all, is a festive cookie without a scattering of colorful sprinkles? Using a simple toothpick, we delicately dabbed on tiny dots of contrasting colors – bright yellows, blues, and greens against our pink and red bases – creating the charming illusion of colorful sprinkles. This fine detail work is not only incredibly fun for kids but also excellent for developing essential hand-eye coordination, fine motor control, and patience in children. It’s often these small, thoughtful touches that truly elevate a handmade craft from simply good to absolutely delightful and memorable!
The true beauty of decorating salt dough lies in its endless possibilities for personalization and creativity. You can utilize a variety of tools – toothpicks for creating delicate lines and tiny dots, the blunt end of a paintbrush for larger, more uniform dots, or even small sponges for adding interesting textures. Consider experimenting with adding a touch of craft glitter for a magical sparkle, or even tiny beads to simulate candy decorations. These diverse techniques allow for a truly personalized and imaginative finish, making each crafted piece a unique miniature masterpiece that reflects your child’s individual artistic flair.
Doesn’t the sight of these adorable, hand-painted treats just spark pure joy and perhaps a little bit of hunger? It’s enough to make one crave a batch of real heart-shaped cookies, hot from the oven and ready for a festive occasion! The vibrant colors and meticulous details truly make them look good enough to eat (though, of course, a gentle reminder that these are strictly for doll play and not for consumption!). This kind of positive reaction is precisely what makes crafting so incredibly rewarding – seeing the tangible, beautiful results of creativity, effort, and shared fun.
Crafting the Perfect Miniature Pizza for Dolls
Our miniature pizza was undoubtedly a masterpiece of layering and meticulous detail. We began this culinary miniature by painting the entire circular base a rich, appetizing red to represent a flavorful tomato sauce. Once that initial layer of paint had thoroughly dried, we carefully added a generous white layer for the melted mozzarella cheese, creating a wonderfully realistic and appealing contrast that mimics a freshly baked pizza. The final, crucial touches involved painstakingly painting on the various toppings: miniature pepperoni slices, finely crumbled sausage, and vibrant green pepper slivers. This multi-layered approach adds significant depth and incredible visual appeal, making the salt dough pizza look remarkably authentic and ready for a doll’s dinner party.
Creating different textures and colors for toppings is a fantastic way to engage older children in the decorating process, allowing them to explore more advanced painting techniques. They can experiment with various brush strokes, delicate color blending, and even tiny dots or lines to simulate different ingredients with precision. Imagine the possibilities: adding tiny black dots for olives, or thin yellow streaks for a hint of onion, or even a few carefully placed brown specks for mushrooms – the creative avenues are truly endless when it comes to customizing your doll’s favorite pizza to perfection!
The Grand Feast: A Spread Fit for Any Doll Gathering
Here, you can admire a sample of our completed culinary creations, meticulously crafted and now ready to be proudly served at the next doll tea party, an elaborate dinner gathering, or simply during everyday imaginative play. In addition to the magnificent pizza and festive heart cookies, our grand spread boasts perfectly formed pretzels, classic chocolate chip cookies complete with carefully painted “chips,” and delightfully frosted donuts that look good enough to bite into. Each piece, though small in scale, represents hours of creative fun, careful craftsmanship, and the pure joy of making something special.
Of course, no truly satisfying meal is ever complete without a refreshing drink! To perfectly accompany our delicious assortment of cookies, we knew we needed milk. We employed a clever and simple trick: squishing small pieces of soft, white tissue paper into miniature glasses to create a remarkably convincing effect of cold, fresh milk. These kinds of simple, imaginative additions truly elevate the entire play experience, making the doll world feel even more real, immersive, and engaging for your child. It’s these thoughtful details that transform good playtime into truly memorable adventures.
My daughter was absolutely beaming with pride and excitement over her newly created feast. The entire process of making these miniature treats, from the initial dough mixture and shaping to the final, intricate brushstrokes of paint, was an adventure she thoroughly enjoyed from start to finish. And, according to her enthusiastic reports, the dolls are just as thrilled with their expanded and delicious menu! This kind of creative, hands-on activity not only produces charming and unique accessories but also cultivates a profound sense of accomplishment, boosts self-esteem, and sparks endless hours of imaginative and meaningful play, fostering storytelling and problem-solving skills.
Craft Your Own Culinary Masterpieces: Our Favorite Salt Dough Recipe
Ready to roll up your sleeves and create your own delightful spread of miniature culinary wonders for your dolls? Here’s the simple, tried-and-true salt dough recipe we used, which consistently yields excellent, durable results. It’s incredibly forgiving and perfect for little hands to help with, making it an ideal family crafting project!
Ingredients:
- 3/4 cup all-purpose flour
- 3/4 cup plain salt
- 1/2 cup warm water
- 1 teaspoon cinnamon (optional, but highly recommended for natural color and scent!)
Instructions:
- Combine Dry Ingredients: In a medium-sized mixing bowl, thoroughly combine the all-purpose flour and plain salt. If you’re using cinnamon – which we highly recommend for a beautiful light brown hue and a wonderful aroma that masks the salty smell – add it in now and mix well until evenly distributed.
- Gradually Add Water: Begin to add the warm water to the dry ingredients, a little bit at a time. Mix and knead with your hands, gradually working the dough until it fully comes together. The exact amount of water can vary slightly depending on humidity and the brand of flour, so aim for a dough that is pliable and easy to work with, but critically, not sticky. You might not need all of the suggested water, or you might need a tiny bit more – trust your hands to guide you to the perfect consistency!
- Knead Until Smooth: Once the dough forms a shaggy ball, turn it out onto a clean, lightly floured surface and knead it for about 5-10 minutes. This essential step helps to develop its elasticity, ensures a smooth, uniform texture, and makes it easier to shape. The finished dough should be soft, supple, and completely non-sticky, indicating it’s perfect for crafting.
- Shape Your Creations: This is where the imaginative fun truly begins! We enjoyed flattening out pieces of dough with our hands, using standard cookie cutters for our heart shapes, and simply molding other imaginative shapes by hand. For pretzels, roll thin ropes and carefully twist them into the iconic shape. For donuts, roll a small ball, flatten slightly, and use a smaller circular object (like a pencil eraser or a tiny cookie cutter) to make the central hole. Let your creativity soar and encourage your child to invent their own miniature food items!
- Bake (or Air Dry) Your Creations: To ensure durability and relatively quick drying, we opted to bake our salt dough creations. Preheat your oven to a very low temperature, around 200 degrees Fahrenheit (95 degrees Celsius). Carefully place your shaped dough pieces on a baking sheet lined with parchment paper. Bake for approximately two hours, or until they are completely dry and hard to the touch throughout. Thicker pieces will inevitably require longer baking times, so check them periodically. As an alternative, you can also air dry them for several days, turning them periodically to ensure even drying.
- Cool Down: Once baked, carefully remove the pieces from the oven and allow them to cool completely on a wire rack. It is absolutely essential that they are entirely cool before you commence the exciting decorating process.
- Decorate!: Now for the artistic flair! Gather your acrylic craft paints, an assortment of brushes, and any other embellishments you desire. Let your creativity soar as you transform your plain dough shapes into vibrant, delicious-looking miniature foods, bringing your doll’s world to life!
Tips for Salt Dough Success and Endless Creativity
Crafting with salt dough is a wonderfully rewarding experience, and with a few extra tips, you can ensure your projects turn out perfectly every time, providing lasting joy and imaginative play:
- Varying Thickness: Try to keep your dough pieces of similar thickness for the most even baking and drying. Very thin pieces might dry faster but can be more fragile, while very thick pieces will take significantly longer to harden and may crack if dried too quickly.
- Adding Color to Dough: For an alternative or supplement to painting, you can add a few drops of food coloring to your warm water before mixing it into the dry ingredients. This will create colored dough from the start, though the colors might be slightly muted after baking.
- Sealing for Longevity: Once painted and completely dry, consider sealing your salt dough creations with a clear acrylic spray sealant or a coat of Mod Podge. This crucial step will protect the paint from chipping, add a slight sheen that enhances their realistic appearance, and make your doll food more durable, resisting moisture and general wear and tear over time.
- Proper Storage: Always store your finished salt dough items in a dry, airtight container or a cool, dry place. While they are designed to be durable, prolonged exposure to high humidity or direct contact with water can cause them to soften, warp, or even degrade over a long period.
- Safety Note: It is paramount to always remind children that salt dough creations are NOT edible. Despite their delicious and tempting appearance, the high salt content makes them unsuitable for consumption. This craft is purely for imaginative play, decoration, and creative expression.
- Beyond Doll Food: Remember that salt dough is incredibly versatile! Think beyond just doll food and consider making beautiful ornaments for holidays, personalized magnets, sturdy picture frames, or even decorative bowls. The creative possibilities are truly endless, limited only by your imagination!
Do you enjoy crafting with salt dough as much as we do? It’s truly one of my absolute favorite activities because it’s incredibly frugal, utilizing ingredients we almost always have readily on hand. It’s a fantastic, low-cost way to spend quality time together as a family, unleash boundless creativity, and create lasting, cherished memories (along with a wonderful collection of fun doll accessories!).
Thank you for joining us on this delightful crafting adventure and reading about our latest creations. We genuinely hope our journey inspires you to roll up your sleeves, gather your simple ingredients, and create your own miniature feast for the special dolls in your life. Have a wonderful and creatively fulfilling day, and please do come back soon! We absolutely love having visitors and sharing new ideas and adventures with our crafting community!
Warmly,
Dee