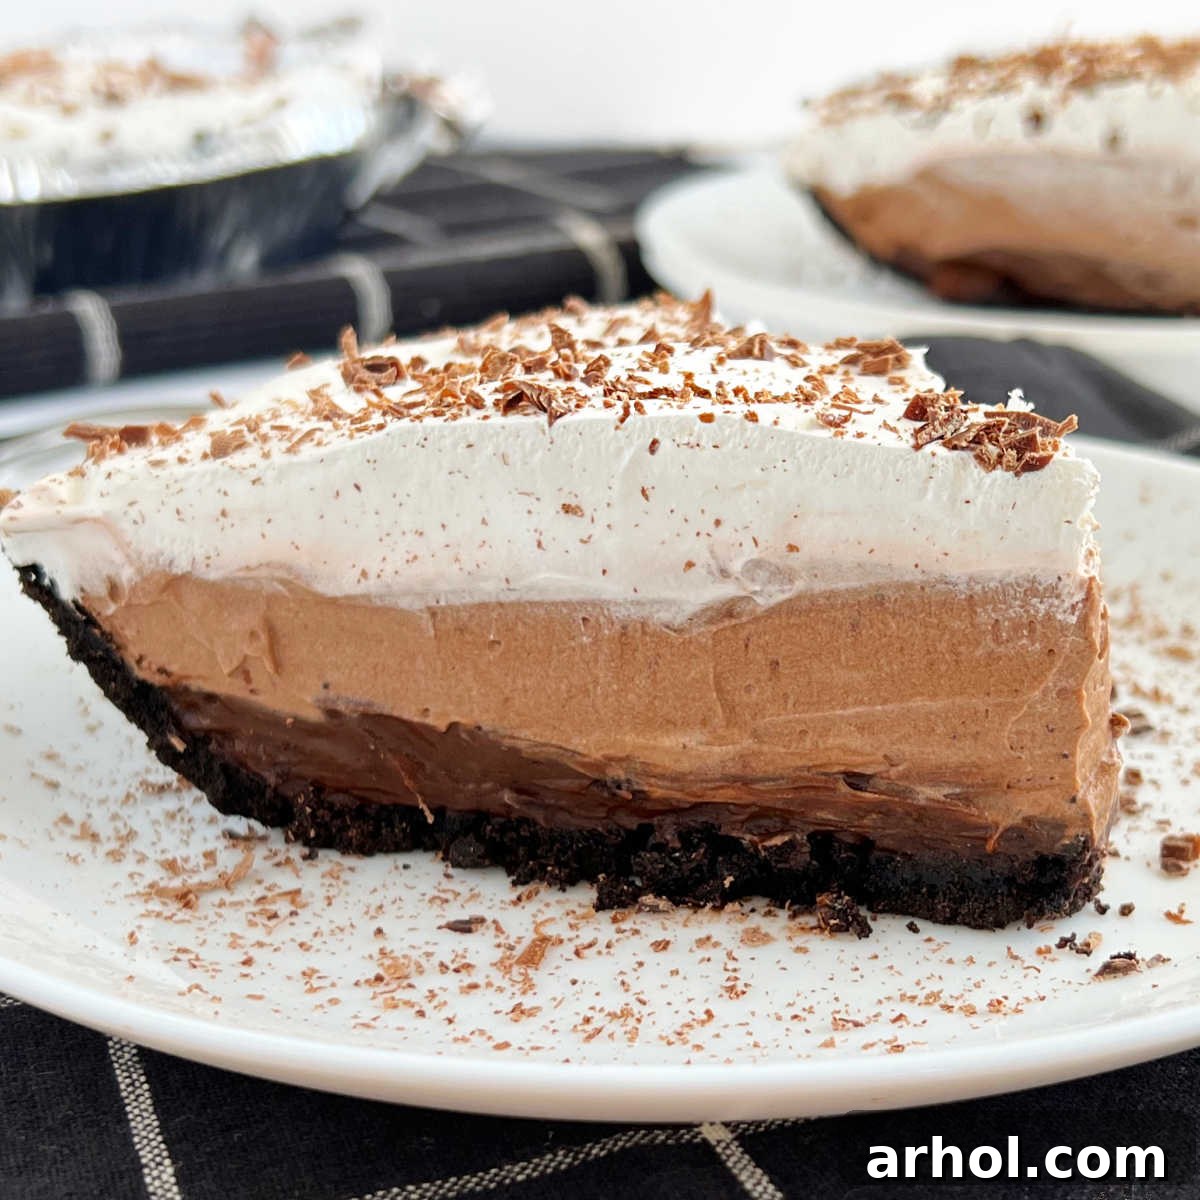
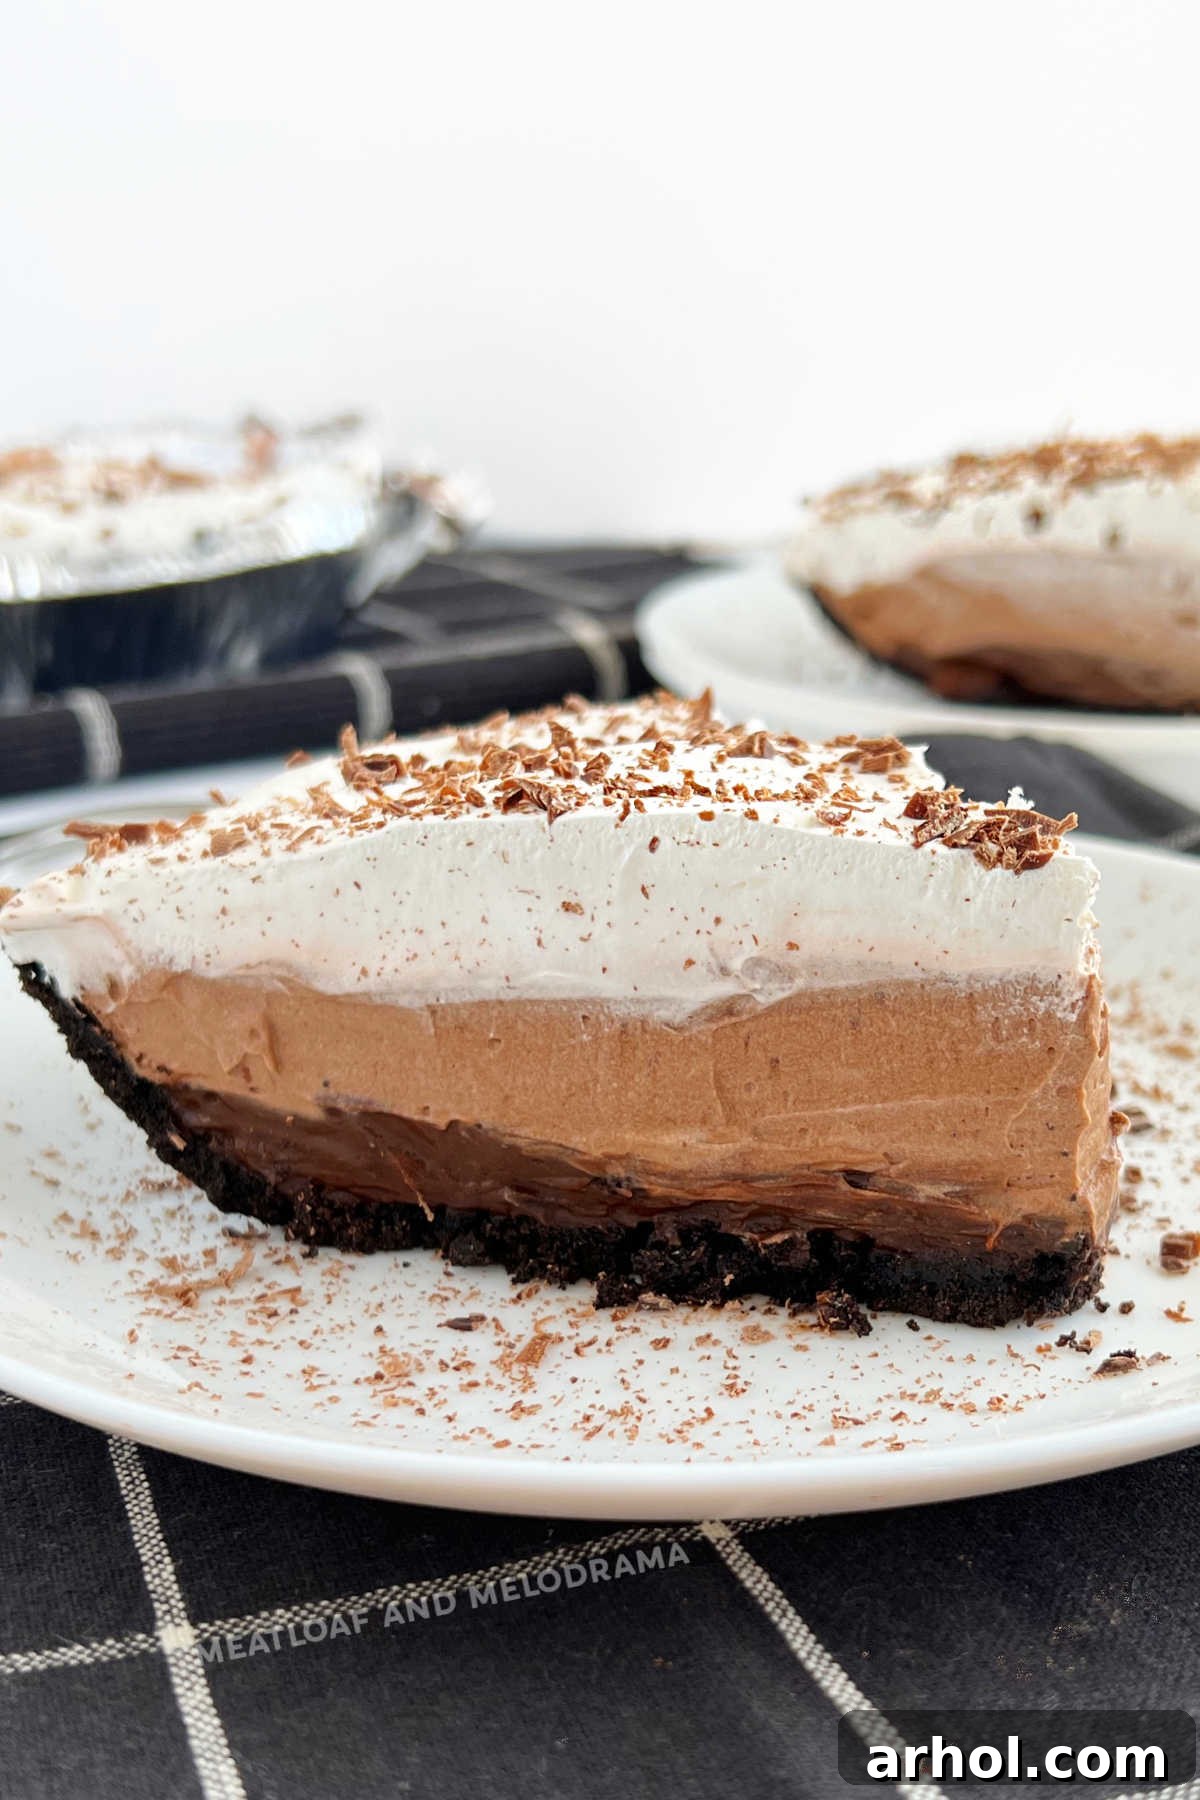
Indulge in the Ultimate No Bake Chocolate Pudding Pie: Your Go-To Easy Dessert
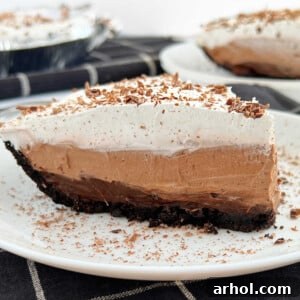
Craving a rich, creamy, and intensely chocolatey dessert that requires absolutely no oven time? Look no further than this incredible No Bake Chocolate Pudding Pie! This simple recipe combines the irresistible flavors of Jell-O instant chocolate pudding, fresh milk, and fluffy Cool Whip, all nestled into a delightful chocolate cookie crust. It’s the quintessential easy dessert, offering a cool and refreshing treat that’s ideal for those warm summer days or any time you need a quick, impressive crowd-pleaser.
Whether you’re a seasoned baker or a complete novice in the kitchen, this no-bake chocolate pie recipe is designed for effortless success. Its straightforward steps and minimal ingredient list make it a fantastic option for last-minute gatherings, potlucks, or simply satisfying that sudden chocolate craving. Get ready to impress your family and friends with a dessert that tastes gourmet but is incredibly simple to prepare!
Table of Contents
- Why You’ll Love This No-Bake Pie
- The Magic of No-Bake Desserts
- Key Ingredients for Success
- Step-by-Step: How to Make No Bake Chocolate Pie
- Expert Tips for a Flawless Pie
- Storage and Make-Ahead Instructions
- Creative Variations & Customizations
- Frequently Asked Questions
- No Bake Chocolate Pudding Pie Recipe Card
Why You’ll Love This No-Bake Chocolate Pudding Pie
If you’re searching for an easy dessert made with chocolate pudding and whipped topping, this recipe is tailor-made for you! Our simple chocolate pie shares similarities with beloved classics like a “Chocolate Delight” or “Dirt Pie,” but with its own unique twist – it’s entirely no-bake, offering convenience without sacrificing flavor. Unlike some other recipes, we focus on pure, unadulterated chocolatey goodness without the addition of gummy worms or other overly elaborate layers, keeping it elegantly simple yet utterly satisfying.
This no-bake chocolate dessert is your perfect companion for summer picnics, barbecues, or any occasion when turning on the oven is the last thing you want to do. It’s also a fantastic solution when you’re short on time or oven space during busy holidays and family gatherings. Just like my popular No Bake Eggnog Pie, this chocolate version has quickly become a family favorite, always disappearing first from the dessert table!
The Magic of No-Bake Desserts
No-bake desserts hold a special place in the culinary world, offering a delightful blend of simplicity and indulgence. Their primary appeal lies in the absence of an oven, making them perfect for hot weather, small kitchens, or when you just need a break from baking. This particular No Bake Chocolate Pudding Pie exemplifies these benefits. It’s not just about saving time; it’s about creating a rich, decadent treat with minimal effort. The chilling process allows the flavors to meld beautifully and the textures to set perfectly, resulting in a firm yet creamy pie that slices cleanly and tastes divine.
Beyond convenience, no-bake recipes often feature a unique textural quality, relying on ingredients like instant pudding, whipped toppings, and crushed cookie crusts to build layers of deliciousness. This pie offers a satisfying contrast between the crisp chocolate crust, the smooth and dense chocolate pudding, and the airy, light whipped topping. It’s a sensory experience that’s both comforting and refreshing, making it a standout choice for any dessert spread.
Key Ingredients for Success
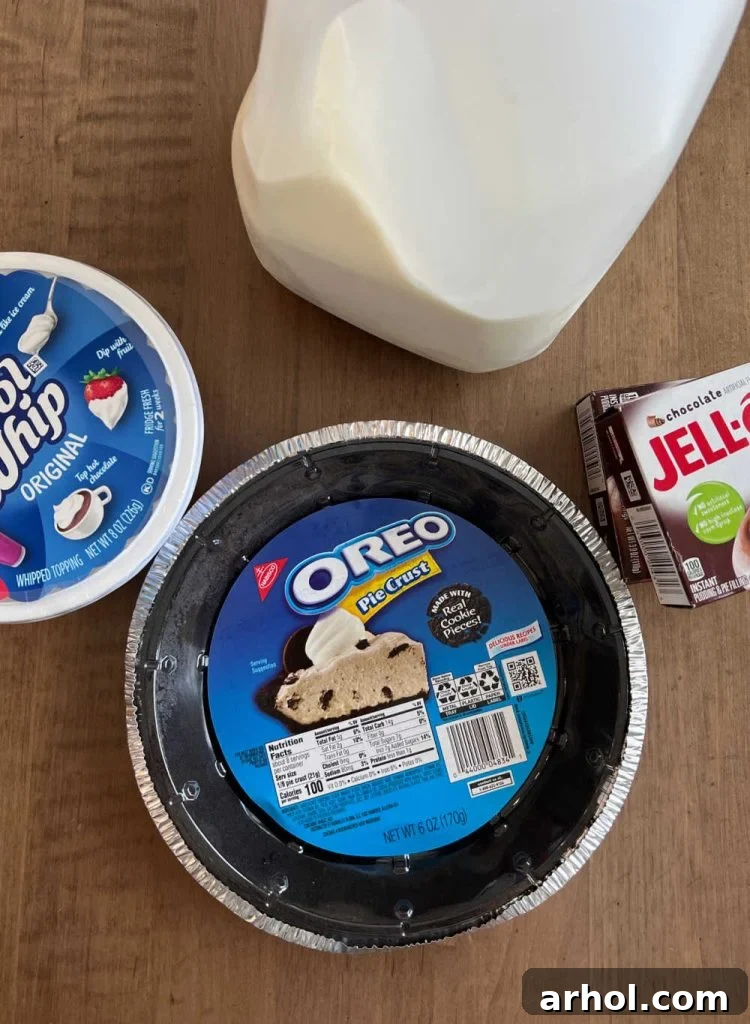
Crafting this luscious no-bake chocolate pudding pie requires just a handful of readily available ingredients. You can easily find them at your local grocery store or order them online for ultimate convenience.
- Jell-O Instant Chocolate Pudding Mix: We recommend two standard 3.9 oz or 4.5 cup serving size boxes for a truly rich and thick pie filling. Using instant pudding is key for the no-bake aspect, ensuring a quick setting time and creamy texture. Dark chocolate or chocolate fudge flavors also work wonderfully if you prefer a deeper cocoa profile.
- Milk: Cold 2 percent or whole milk is ideal for whisking with the instant pudding mix. The fat content in these types of milk helps create a richer, more luxurious pudding texture. Skim milk can be used, but the pudding might be slightly less creamy.
- Cool Whip or Any Whipped Topping: A thawed 8 oz tub of Cool Whip provides the perfect airy and sweet counterpoint to the dense pudding layers. It adds a light, refreshing element that balances the richness of the chocolate. Ensure it’s fully thawed for easy mixing and spreading.
- Chocolate Cookie Pie Crust: A pre-made 6 oz chocolate cookie crust (like an Oreo crust) is the ultimate shortcut for this no-bake marvel. Its crumbly texture and deep chocolate flavor perfectly complement the filling. You can also make your own homemade chocolate cookie crust by crushing chocolate sandwich cookies and mixing them with melted butter.
- Chocolate Bar (Optional for Decoration): A standard chocolate bar, such as a Hershey’s bar or a higher-quality dark chocolate bar, is perfect for shaving over the top. This simple garnish adds a touch of elegance and extra chocolatey appeal.
Pro Tip: It’s crucial to follow the specific milk quantities provided in our recipe card below, NOT the directions on the back of the Jell-O pudding boxes. Our recipe calls for less milk to ensure the pie filling achieves a perfectly firm, non-runny consistency, essential for a sliceable pie.
Step-by-Step: How to Make No Bake Chocolate Pie
Preparing this decadent dessert is surprisingly simple. Follow these easy steps to create your perfect layered chocolate pie:
-
Prepare the First Pudding Layer: In a large mixing bowl, combine both boxes of Jell-O instant chocolate pudding mix with the specified amount of cold milk. Whisk vigorously for about 2-3 minutes, or until the pudding is completely blended, smooth, and noticeably thick. Don’t worry if it seems exceptionally thick; this is exactly the consistency you’re aiming for to ensure a firm pie.
-
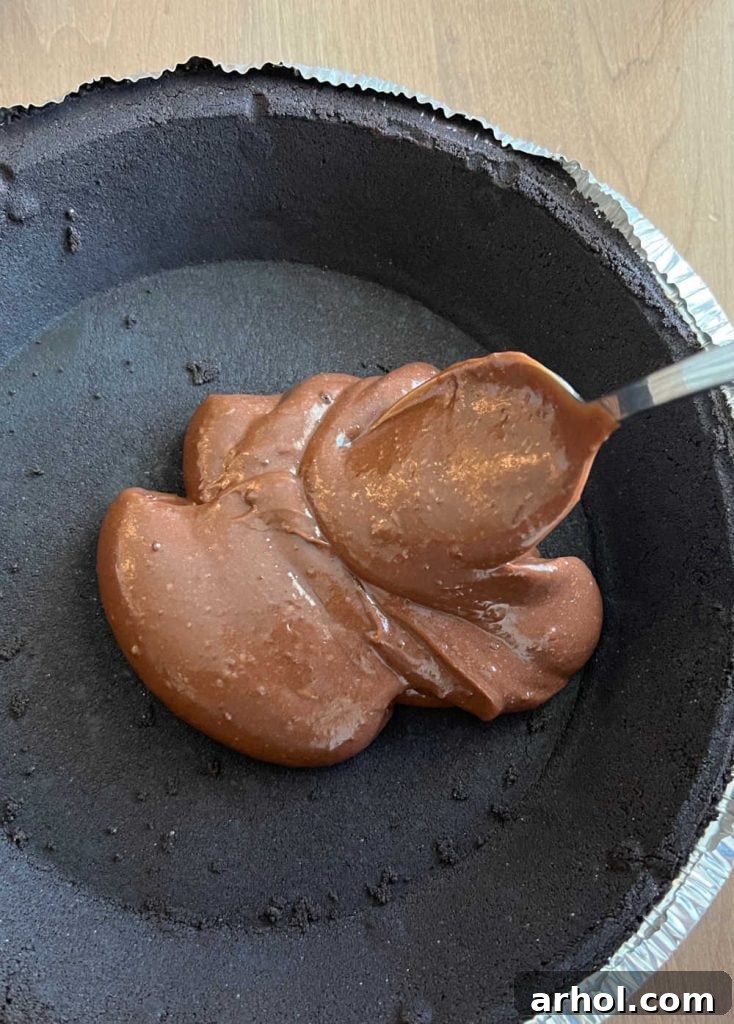
Create the Dark Chocolate Base: Carefully spoon half of this prepared, thick dark chocolate pudding into your chocolate cookie pie crust. Use a spatula to gently spread the pudding evenly across the bottom of the crust, forming a smooth and uniform layer. This dense layer will be the rich foundation of your pie.

-
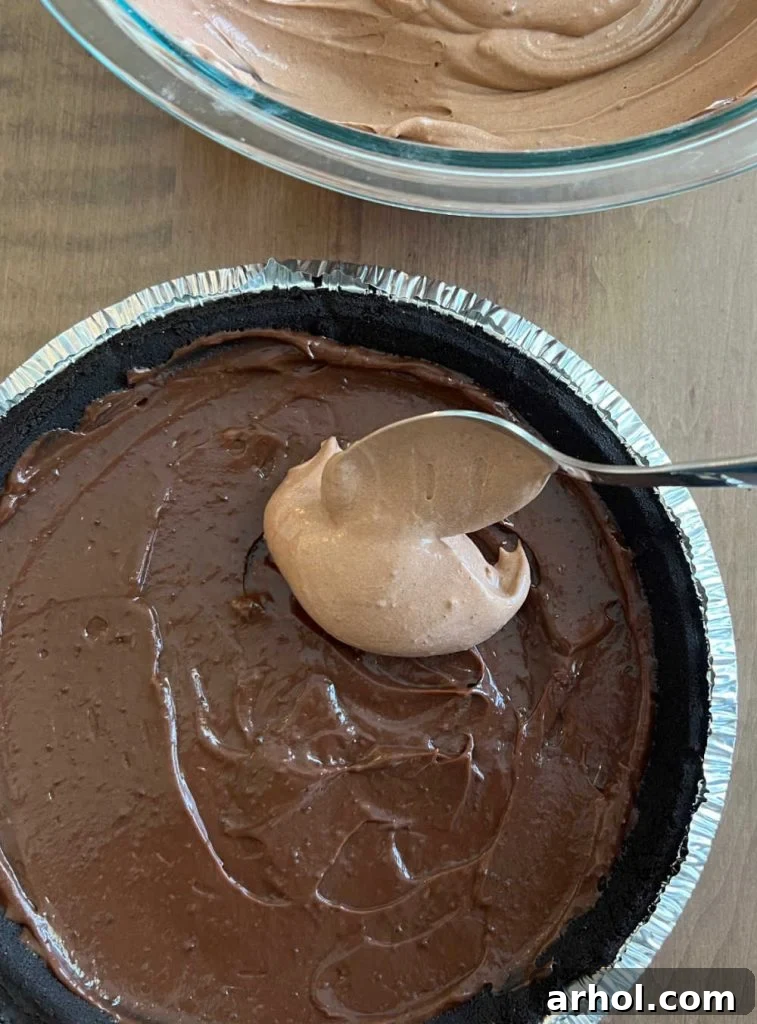
Prepare the Fluffy Chocolate Layer: To the remaining half of the dark chocolate pudding in your mixing bowl, add half of the thawed Cool Whip. Gently fold the Cool Whip into the pudding until it is well combined and the mixture transforms into a lighter, fluffy chocolate consistency. This layer will be aerated and less dense than the first.
-
Add the Light Chocolate Layer: Spoon this newly created fluffy chocolate pudding mixture over the dark chocolate base in your pie crust. Again, use your spatula to carefully spread this layer evenly, ensuring it completely covers the first dark layer. The contrast in color and texture between these two chocolate layers adds to the pie’s appeal.
-
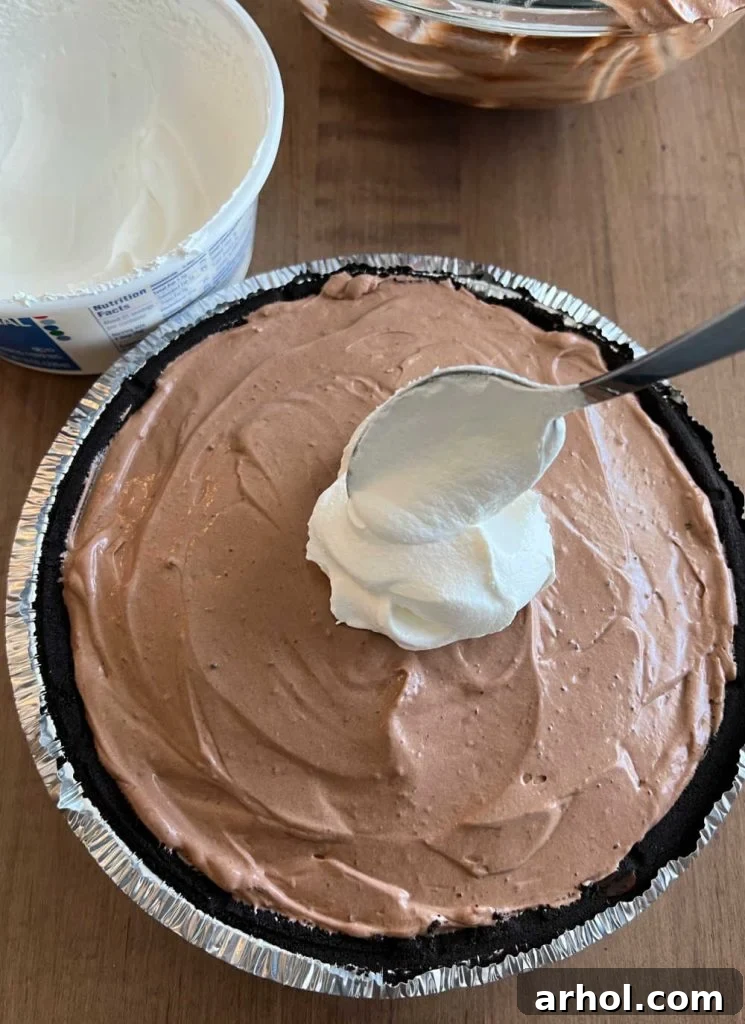
Top with Whipped Perfection: Finally, spread the remaining Cool Whip evenly over the second chocolate layer. You have the option to spread it all the way to the edges of the pie crust for a clean look, or leave a slight border of the chocolate filling showing for an appealing visual contrast.
-
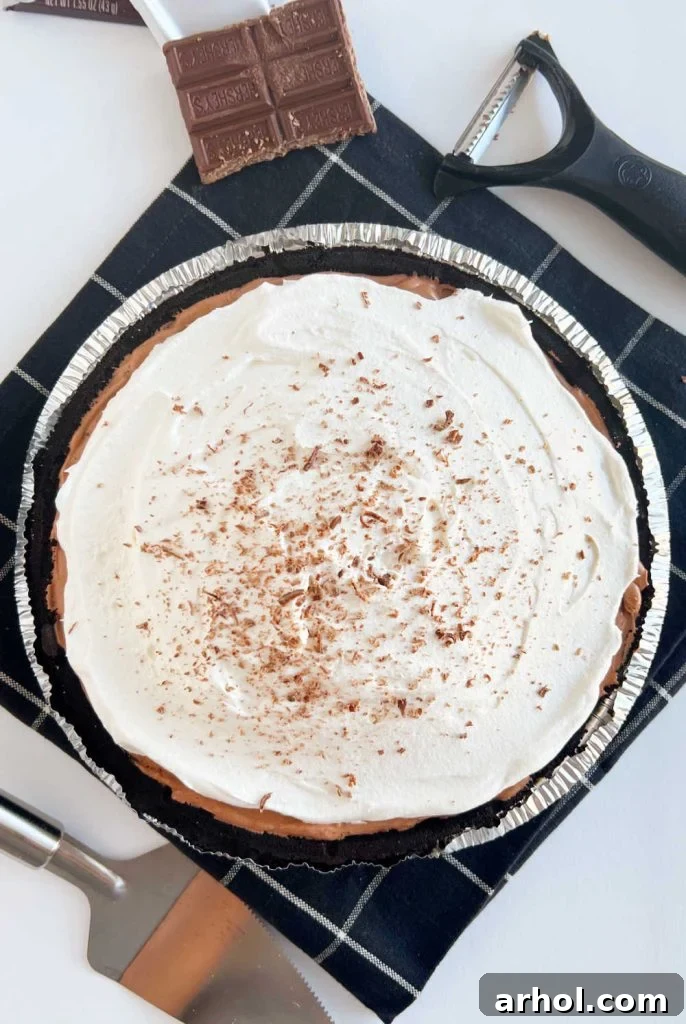
Garnish and Chill: For an extra touch of elegance and flavor, use a box grater or a vegetable peeler to shave a chocolate bar directly over the top of the Cool Whip layer. This step is entirely optional but significantly enhances the pie’s presentation. I often use a simple Hershey Bar, but any chocolate bar you love will work perfectly. Once garnished, place your pie in the refrigerator to chill.
Expert Tips for a Flawless Pie
- Cold Milk is Crucial: Always use very cold milk for your instant pudding. This helps the pudding set faster and achieve the desired thick consistency.
- Whisk Thoroughly: Don’t just stir the pudding and milk. Whisk vigorously for the full 2-3 minutes to ensure all the pudding powder is dissolved and the mixture thickens properly. Lumps can prevent it from setting.
- Gentle Folding: When combining the Cool Whip with the remaining pudding, use a gentle folding motion with a spatula rather than whisking. This preserves the airiness of the Cool Whip, resulting in a lighter, fluffier second layer.
- Even Layers: Take a moment to spread each layer evenly with your spatula. This not only makes for a more beautiful presentation when sliced but also ensures a balanced taste experience in every bite.
- Chill Time is Your Friend: While tempting to dive in immediately, adhering to the recommended chilling time is essential for the pie to fully set. This allows the layers to firm up and makes for clean, neat slices.
Storage and Make-Ahead Instructions
Proper storage is key to enjoying your No Bake Chocolate Pudding Pie at its best. Keep the pie refrigerated at all times to maintain its cool, creamy texture and prevent spoilage.
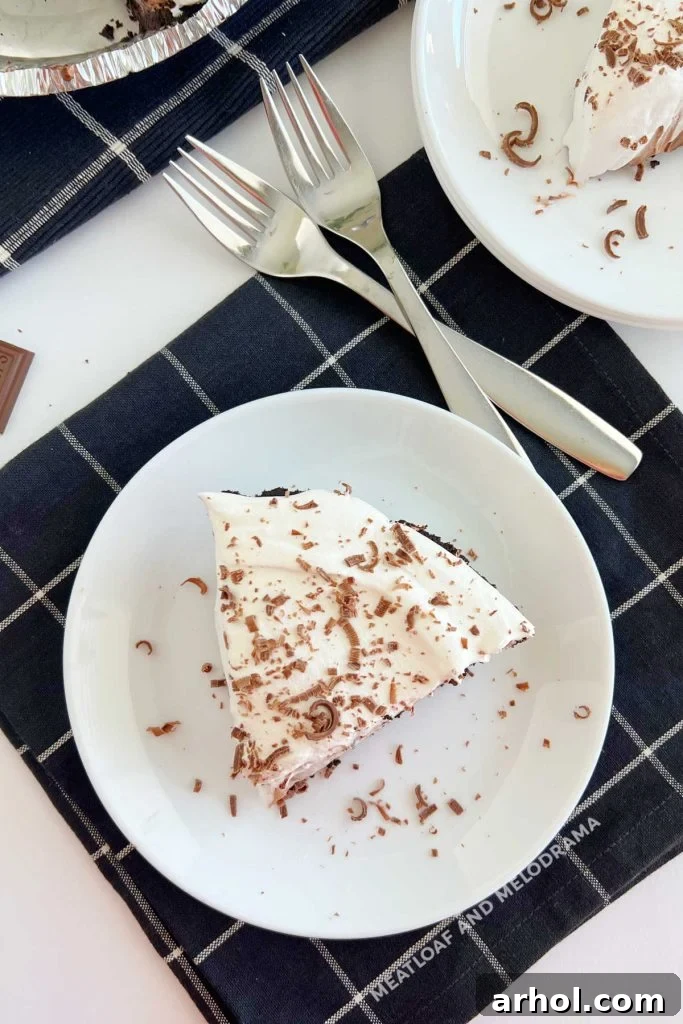
- Refrigeration: For optimal results and perfectly firm slices, refrigerate your chocolate pie for at least 2 hours before serving. This allows all the layers to set completely. If you simply can’t wait, you can certainly enjoy this chocolate treat sooner, though the layers might not be as neat when cut. If presentation isn’t your top priority, dig in!
- Leftovers: Store any leftover pie covered tightly with plastic wrap or in an airtight container in the refrigerator for up to 2 days. While it might last longer, the crust can soften over time, so it’s best enjoyed within this timeframe.
- Make Ahead: This chocolate pie is an excellent make-ahead dessert. You can prepare it up to 2 days before serving. However, for the freshest appearance, you might consider adding the final whipped topping layer and chocolate shavings just an hour or two before you plan to serve it. This keeps the whipped topping looking fresh and fluffy.
- Freezing: While not typically recommended due to potential textural changes in the Cool Whip and pudding, you *can* freeze this pie for longer storage (up to 1-2 weeks). Wrap it tightly in plastic wrap and then aluminum foil. Thaw in the refrigerator for several hours before serving. Be aware that the texture may be slightly different after freezing and thawing.
Creative Variations & Customizations
One of the joys of this No Bake Chocolate Pudding Pie is how easily it can be customized to suit different tastes and occasions. Here are some fantastic ways to switch things up:
- Pudding Flavor Swap: While chocolate is a classic, don’t limit yourself! Experiment with other instant pudding flavors. Vanilla pudding creates a lovely contrast with a chocolate crust, while cheesecake, pistachio, banana, or butterscotch pudding can offer exciting new taste profiles. For an even deeper chocolate experience, try dark chocolate fudge pudding mix.
- Crust Alternatives: If the chocolate cookie crust isn’t your preference, a classic graham cracker pie crust is always a winner, offering a sweet, buttery crunch. You could also try a vanilla wafer crust, a shortbread crust, or even a crushed pretzel crust for a sweet and salty twist! Making your own homemade crust is also an option for those who enjoy scratch baking.
- Layering Options: The distinct layers of this pudding pie are beautiful, but they aren’t a strict necessity.
- All Dark Chocolate: For a supremely rich and uniform pie, omit the Cool Whip and pudding mixture layer. Simply use all the prepared pudding as a single thick layer, then top with whipped cream.
- All Fluffy Chocolate: Conversely, if you prefer a lighter, airier pie, you can mix all the instant pudding with most of the Cool Whip (reserving some for the top layer) to create a single, fluffy chocolate filling.
- Homemade Whipped Cream: For an extra touch of indulgence, you can certainly make your own whipped cream using heavy whipping cream, powdered sugar, and a touch of vanilla extract. I recommend using homemade whipped cream primarily as the top layer for garnish, as it tends to be less stable than Cool Whip when mixed directly into the pudding base.
- Exciting Toppings: The possibilities for garnishes are endless! Elevate your pie with:
- Chocolate Overload: Mini chocolate chips, chocolate curls, cocoa powder dusting, or a drizzle of chocolate syrup.
- Cookie Crumble: Crushed Oreo cookies, Biscoff crumbs, or any favorite cookie.
- Nutty Crunch: Toasted chopped nuts like pecans, walnuts, or almonds.
- Fruity Freshness: A handful of fresh raspberries or sliced strawberries for a burst of color and tartness.
- Sprinkles & Candies: Colorful sprinkles, chopped candy bars, or mini marshmallows for a fun touch.
Frequently Asked Questions About No Bake Chocolate Pudding Pie
- Can I use sugar-free pudding or whipped topping?
- Yes, you can! Sugar-free instant pudding mixes and sugar-free whipped toppings (like sugar-free Cool Whip) work perfectly in this recipe. Just ensure you follow the milk quantities specified in our recipe for the correct consistency.
- My pudding didn’t set. What went wrong?
- The most common reasons for pudding not setting are usually related to the milk. Ensure your milk is very cold and that you whisked the pudding vigorously for the full 2-3 minutes. Using milk that is too warm or not whisking enough can prevent the pudding from activating and thickening properly. Also, double-check that you used instant pudding, not cook-and-serve.
- How long does this pie need to chill?
- For the best, most sliceable results, we recommend chilling the pie for at least 2 hours. This allows all the layers to firm up nicely. For an even firmer pie, an overnight chill is ideal.
- Can I use a homemade cookie crust?
- Absolutely! A homemade chocolate cookie crust is a fantastic option. Simply crush about 20-24 chocolate sandwich cookies (like Oreos) and mix them with 1/4 cup of melted butter. Press the mixture firmly into a 9-inch pie dish and chill for at least 30 minutes before adding the filling.
- Is this pie suitable for freezing?
- While it can be frozen for up to 1-2 weeks, the texture might change slightly upon thawing, especially the whipped topping. For best results, it’s generally recommended to consume it fresh from the refrigerator. If freezing, wrap it very tightly to prevent freezer burn.
No Bake Chocolate Pudding Pie Recipe
By: Dee
No Bake Chocolate Pudding Pie is an easy no bake dessert made with Jell-O instant pudding, milk and Cool Whip in a chocolate cookie crust. This delicious dessert is cool, creamy and perfect for summer!
Preparation Details
- Prep Time: 15 minutes
- Cook Time: 0 minutes
- Refrigeration Time: 2 hours
- Total Time: 2 hours 15 minutes
- Servings: 8
Ingredients
- 2 boxes (3.9 oz each) Jell-O Instant Chocolate Pudding Mix (4.5 cup serving size)
- 2½ cups cold milk (2 percent or whole milk recommended)
- 1 (8 oz) tub Cool Whip, thawed
- 1 (6 oz) chocolate cookie pie crust
- 1 chocolate bar (optional, for decoration)
Instructions
- In a large mixing bowl, combine the instant pudding mix and cold milk. Whisk vigorously until well combined and the mixture becomes thick.
- Spoon half of the prepared pudding into the bottom of the chocolate pie crust and spread evenly with a spatula.
- Add half of the thawed Cool Whip to the remaining pudding in the bowl. Stir gently until well combined and the mixture is light and fluffy.
- Spoon this fluffy pudding mixture over the dark pudding layer in the pie crust and spread evenly with a spatula, ensuring it covers the first layer completely.
- Spoon the remaining Cool Whip evenly over the second layer. If desired, use a box grater or vegetable peeler to shave a portion of the chocolate bar over the top for decoration.
- Place the pie in the refrigerator and chill for at least 2 hours before serving to allow it to set firmly.
Notes
- Always use the specific amount of milk called for in this recipe, not the amount listed on the pudding boxes, to ensure proper thickening.
- For the best consistency and clean slices, refrigerate the pie for a minimum of 2 hours. An overnight chill is even better.
- Store any leftover pie covered in the refrigerator for up to 2 days. If making ahead, add the final whipped topping and chocolate shavings just before serving for optimal freshness.
Nutrition Information (Approximate per serving)
- Calories: 81 kcal
- Carbohydrates: 11g
- Protein: 3g
- Fat: 3g
- Saturated Fat: 2g
- Polyunsaturated Fat: 0.1g
- Monounsaturated Fat: 1g
- Trans Fat: 0.1g
- Cholesterol: 10mg
- Sodium: 59mg
- Potassium: 135mg
- Fiber: 0.1g
- Sugar: 8g
- Vitamin A: 125 IU
- Vitamin C: 0.1mg
- Calcium: 119mg
- Iron: 0.03mg
Nutrition information is automatically calculated and should only be used as an approximation.
Additional Info
- Course: Dessert
- Cuisine: American
This easy chocolate cream pie is truly the perfect dessert for true chocolate addicts, and it’s one of my absolute favorite desserts to whip up with Jell-O instant chocolate pudding! Its simplicity and delightful taste make it a staple in our home.
I genuinely hope you enjoy this No Bake Chocolate Pudding Pie recipe as much as my family and I do! If you try it, please consider leaving a star rating and a comment below to let us know your thoughts. Your feedback means a lot!
For more fantastic no-bake delights and other simple meal ideas, explore my collection of easy dessert recipes. To stay updated with the latest easy recipe ideas, irresistible chocolate desserts, and convenient no-bake inspiration, be sure to subscribe to our newsletter and follow us on social media!