
Capturing Autumn’s Essence: A DIY Guide to Framing Imperfect Fall Leaves
As the days grow shorter and a crisp coolness fills the air, there’s an undeniable magic that autumn brings. The world transforms into a breathtaking palette of reds, oranges, and golds, inviting us to slow down and savor the season. For many, fall is a time of coziness, warm drinks, and the simple pleasure of a walk through rustling leaves. Today, with the skies overcast and a perfect autumnal chill in the air, I found myself in a particularly fall-inspired mood. It felt like the ideal time to embark on a little project: preserving some fall leaves. Now, I use the word “preserve” a bit loosely here, as the leaves I had on hand weren’t exactly in pristine condition. Yet, their very imperfections told a story, making them even more special.
Embracing Imperfection: The Sentimental Value of Our Fall Leaf Project
These particular leaves weren’t just any leaves; they were precious treasures collected by my children during a recent family trip up north. My youngest, especially, was deeply attached to his natural finds, unwilling to part with even a single crunchy specimen. Consequently, by the time we returned home, the leaves were, shall we say, a little worse for wear. They were wrinkled, a bit tattered, and certainly not flat. However, their colors remained vibrant and alive, a beautiful reminder of the joy and laughter we shared on that memorable day. It wasn’t just about preserving the leaves themselves; it was about encapsulating those wonderful family memories. I envisioned framing a couple of these unique specimens, and given their already crinkled and crunchy state, I realized a vintage, distressed look would be absolutely perfect. This approach allowed me to embrace their natural imperfections, turning them into a feature rather than a flaw.
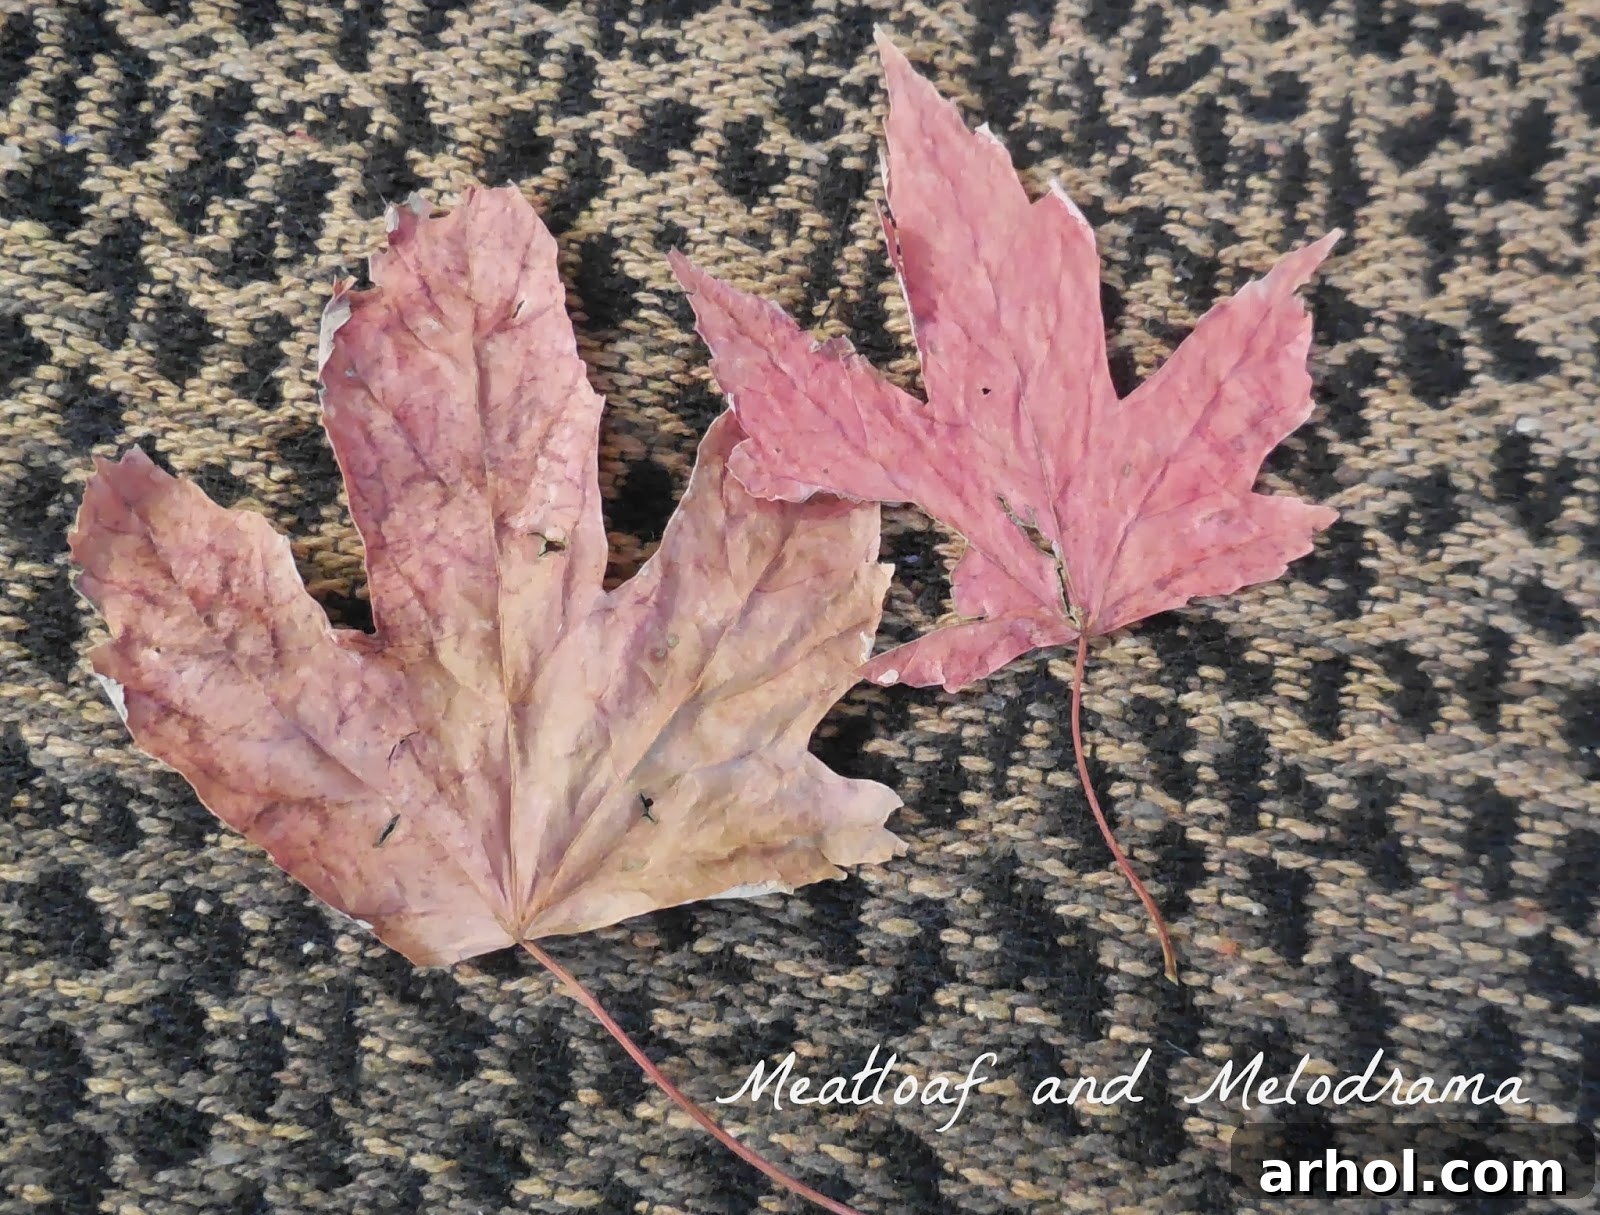
Here are the two cherished specimens that became the heart of this project:
The Art of Imperfection: Why a Vintage Aesthetic Elevates Natural Elements
As you can observe from the image, one leaf has a noticeable chunk missing from its side, while the other bears the beautiful lines of age and wrinkle. My initial thought was to try and flatten them perfectly, but then I realized that fighting against their natural state would defeat the purpose of celebrating their story. Instead, I leaned into the “flaws.” The only minor challenge throughout this entire endeavor was getting the slightly uneven leaves to sit smoothly enough within the frame to be visible without creating too much bulk. Beyond that, this project proved to be incredibly quick, satisfyingly simple, and remarkably easy! The beauty of this craft lies in its simplicity and the minimal supplies required. You don’t need an elaborate setup or specialized tools to create something truly meaningful. This approach perfectly aligns with the rustic, vintage aesthetic I was aiming for, where character and history are valued over flawless perfection.
Gathering Your Simple Supplies: An Easy Fall Craft for Any Home
For this charming fall craft, the supplies needed are refreshingly minimal and likely items you already have around your home, or can easily find at any craft store. To recreate this vintage-inspired framed leaf art, you will need:
- **Burlap Ribbon:** This provides a wonderfully rustic and textural background, instantly adding warmth and an aged feel to your piece. Its natural fibers complement the organic shapes of the leaves beautifully.
- **Card Stock:** A sturdy piece of card stock will serve as the base for your frame insert. Opt for a neutral color like cream, beige, or a soft brown to enhance the vintage look and allow the leaf colors to truly pop.
- **A Picture Frame:** The size and style of your frame will dictate the final look. For a vintage vibe, consider an older wooden frame that you can easily distress. Even a new, plain frame can be transformed with a little creativity.
- **A Pair of Scissors:** Standard scissors will work for cutting the burlap, but if you have scrapbooking scissors with decorative edges, they can add an extra touch of charm to your card stock.
These simple components, when combined with a touch of creativity, transform ordinary items into a beautiful piece of seasonal decor that tells a story.
Step-by-Step Guide: Crafting Your Framed Fall Leaf Decor
Step 1: Preparing Your Canvas – The Card Stock and Frame
The first step involves preparing the foundation for your autumn display. I carefully trimmed the card stock to ensure it fit perfectly inside the picture frame. Instead of a straight edge, I opted for scrapbooking scissors that create a charming, ragged edge. This choice wasn’t just for aesthetics; the slightly uneven, rough edge of the card stock complemented the naturally coarse texture of the burlap, making it easier for the burlap to conform and sit snugly around the paper without crisp, stark lines. This subtle detail contributes significantly to the overall vintage feel. While I already had a picture frame on hand, it was a plain, modern one. To achieve the desired aged look, I took some sandpaper and meticulously distressed the frame. Focusing on the edges, corners, and any raised areas, I gently rubbed away some of the finish, revealing the underlying wood and creating an effect that mimicked years of natural wear and tear. This process instantly transformed the frame, making it look authentically old and worn, perfectly aligning with the imperfect beauty of the leaves.
Step 2: Adding Rustic Texture with Burlap
With the card stock trimmed and the frame distressed, it was time to introduce the rustic charm of the burlap. I carefully wrapped the burlap ribbon around the prepared card stock, ensuring it was taut but not overly stretched. Using a small amount of craft glue, I secured the top edges of the burlap in place on the back of the card stock. The key here is to use enough glue to hold it firmly, but not so much that it seeps through to the front. The natural roughness of the burlap fabric provides a wonderful tactile and visual contrast to the smooth glass of the frame. An interesting effect emerged from this step: the underlying card stock remained subtly visible through the loosely woven burlap. This created a lovely, muted background color that added depth and dimension to the overall composition, allowing the vibrant colors of the fall leaves to stand out even more against a softened, organic backdrop.
Step 3: Arranging Your Autumn Treasures
Now for the most creative and personal part of the project: arranging the autumn leaves on top of the burlap background. This is where you can truly let your artistic eye guide you. I carefully placed my two leaves, experimenting with different angles and overlaps. Given that one of my leaves had a missing chunk, I strategically positioned part of the larger, more intact leaf over the smaller, damaged one. This clever layering not only concealed the imperfection but also made the arrangement appear more natural and organic, as if the leaves had simply fallen together in this beautiful configuration. I didn’t even bother with gluing the leaves in place onto the burlap. I found that the gentle pressure from the glass of the frame, once everything was assembled, would be sufficient to hold them securely in position. This also leaves the option open to rearrange them later if desired, or to replace them with new finds from future autumn adventures.
Step 4: The Final Assembly – Bringing Your Vision to Life
With the leaves perfectly arranged on their rustic burlap backdrop, the final step was to bring the entire piece together within the distressed frame. I carefully placed the glass over the leaves, ensuring it lay flat and snug without disturbing the arrangement. The slight crunchiness and wrinkles of the leaves actually contributed to the vintage charm, creating subtle shadows and textures under the glass that enhanced their aged appearance. Once the glass was in place, I carefully fitted the entire arrangement – the burlap-covered card stock with the leaves – into the prepared wooden frame. The distressed frame truly works wonders in completing the vintage look I was aiming for. It instantly makes the piece feel like an antique, as if these beautiful fall leaves have been a cherished part of our home decor for generations. The subtle imperfections of the leaves are no longer flaws but integral parts of a story, enhanced by the character of the old-world frame.
Beyond the Frame: Displaying Your Cherished Fall Memories
The finished framed leaves are a testament to the idea that beauty can be found in imperfection and that the most meaningful decor often comes from personal stories and simple efforts. Seeing the leaves transformed under the frame, their imperfections softened by the vintage aesthetic, brings a special kind of warmth to our home. My children, whose initial collection sparked this entire project, were delighted with the outcome. They didn’t mind at all how I chose to display their treasures; in fact, they loved seeing their finds elevated into a piece of art. And for me, there’s immense satisfaction in knowing I was able to not only preserve a tangible piece of autumn’s beauty but also to beautifully encapsulate some fun, fleeting family memories. This framed art now holds a cherished spot in our home, serving as a daily reminder of a wonderful day and the simple joys of the season.
Why This DIY Fall Leaf Frame is Perfect for You
This DIY fall leaf frame is more than just a craft; it’s an invitation to engage with the beauty of nature and imbue your home with personal touches. It’s an incredibly accessible project, requiring minimal artistic skill and a small investment of time and materials. The result is a piece of decor that is not only visually appealing but also rich in sentimental value. It’s a perfect way to bring the serene and vibrant spirit of autumn indoors, creating a cozy and inviting atmosphere. Whether you’re looking for a unique centerpiece for your mantel, a charming addition to a gallery wall, or a thoughtful handmade gift, this framed leaf art fits the bill. It celebrates the fleeting beauty of the season and transforms natural ephemera into lasting art, all while telling a unique story of your own autumn adventures.
Tips for Choosing and Preparing Your Leaves
While this project embraces imperfection, a little thought in choosing your leaves can enhance the final outcome. Look for leaves with vibrant, distinct colors – reds, oranges, yellows, and deep purples will create the most striking visual impact. Consider their shapes as well; interesting lobes, smooth edges, or delicate points can add artistic flair. If you want to achieve a slightly flatter look for easier framing, you can press your leaves between pages of heavy books for a few days, but don’t worry about perfect flatness, as the vintage style accommodates some natural texture. Handle fragile leaves with care, perhaps by collecting them directly into a shallow box or basket to prevent further damage before you get them home. You might also want to gently wipe them clean with a dry cloth to remove any loose dirt or debris.
Creative Variations to Personalize Your Project
Once you’ve mastered the basic technique, feel free to experiment with creative variations to make your framed leaves truly unique. Instead of just burlap, consider other textured fabrics like raw linen, aged lace, or even a piece of antique fabric for the background. You could also introduce additional small natural elements into your arrangement, such as tiny dried acorns, slender twigs, or even small pressed flowers if they complement your leaves. For the frame itself, explore different distressing techniques – try dry brushing with a contrasting paint color, or using dark wax to enhance the aged look. You could also use a metallic frame for a touch of unexpected elegance, or a brightly painted one for a more modern twist. Don’t limit yourself to just two leaves; a collage of smaller leaves or a single, magnificent specimen can be equally impactful. The possibilities for personalization are endless!
The Enduring Appeal of Nature-Inspired Home Decor
Incorporating elements of nature into our homes has a profound effect on our well-being, fostering a sense of calm, connection, and “hygge”—that Danish concept of coziness and contentment. This framed fall leaf project perfectly embodies this philosophy. By bringing the vibrant colors and organic textures of autumn indoors, you’re not just decorating; you’re creating an atmosphere that reflects the beauty of the natural world and the warmth of the season. It’s a subtle yet powerful way to celebrate the changing seasons, acknowledge the cycle of nature, and infuse your living space with a sense of peace and natural elegance. This simple craft connects us to the outside world, making our homes feel more grounded and serene, especially during the colder months when outdoor adventures might be less frequent.
So, why not gather some of those magnificent autumn leaves from your next walk and embark on this delightful crafting journey? It’s a truly rewarding experience that adds both beauty and meaning to your home decor. Do you already have favorite ways to incorporate fall leaves or other natural elements into your home? I’d love to hear your ideas!
Thanks so much for taking time out of your busy schedule to visit with me today. I love having company!
Dee 🙂