
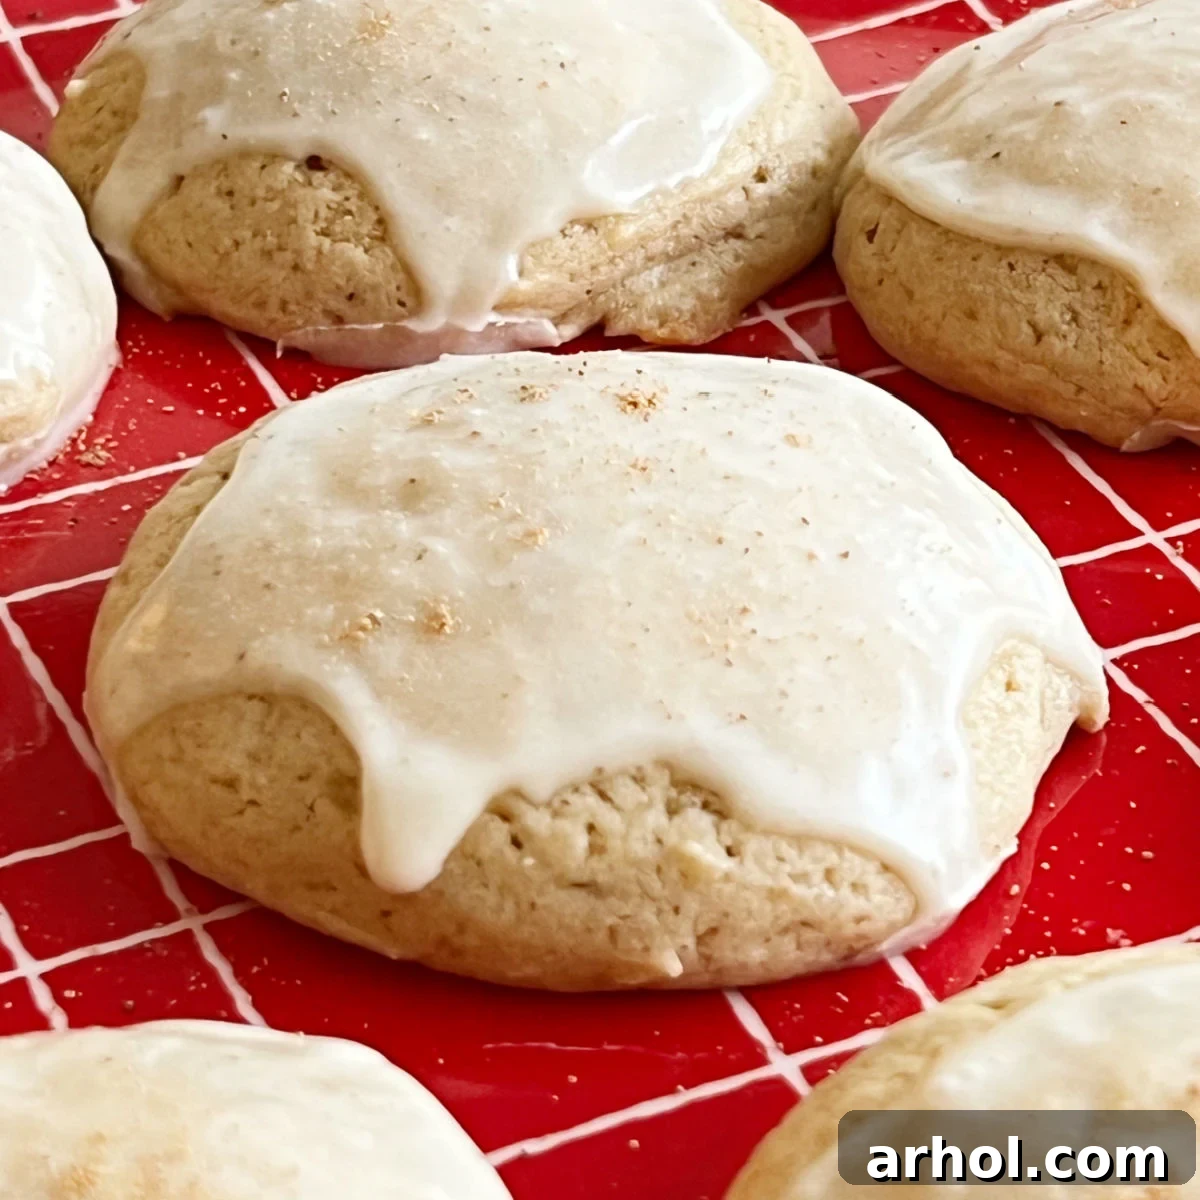
These Easy Glazed Eggnog Cookies are a holiday dream come true. Imagine soft, delightfully chewy cookies infused with rich eggnog flavor, all topped with a luscious, light eggnog glaze. They are more than just a treat; they’re an essential part of the festive season!
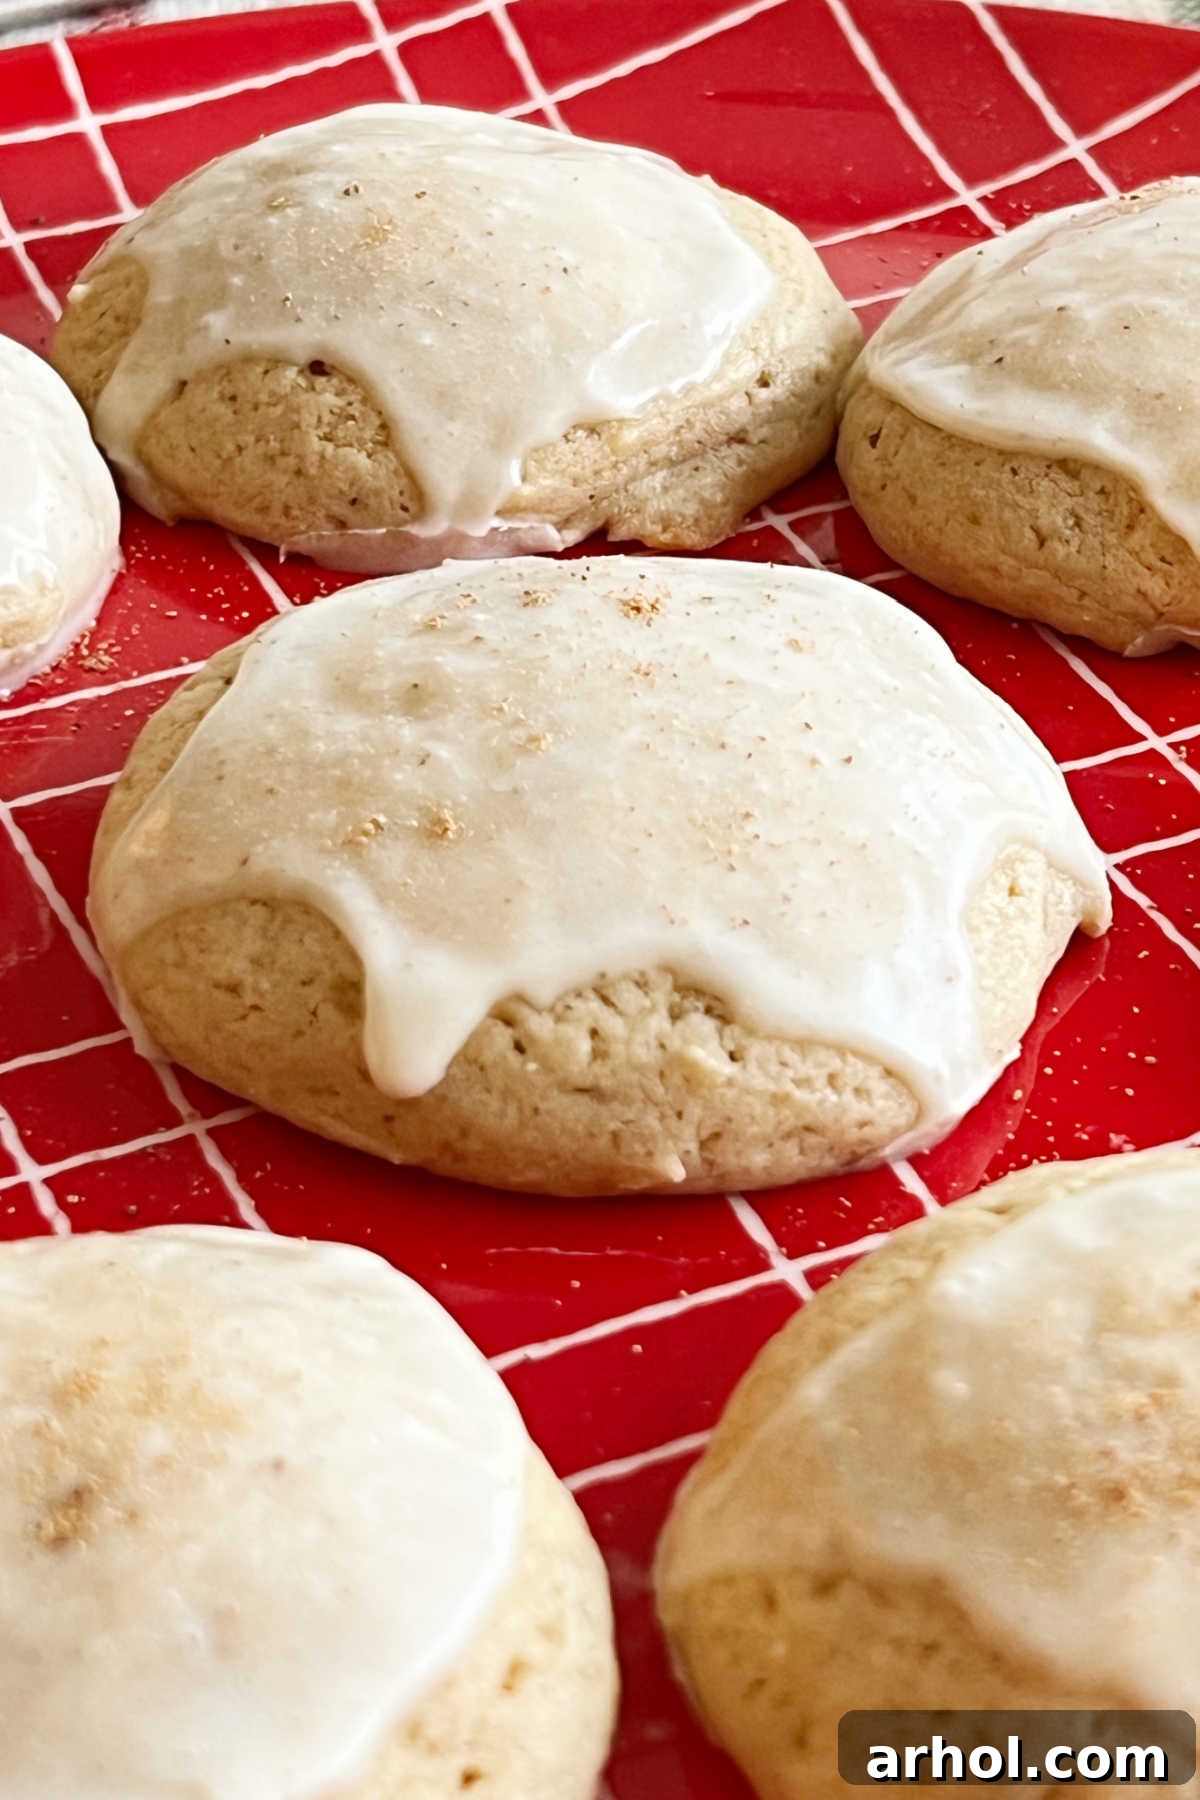
Table of Contents
- The Ultimate Easy Eggnog Cookie Recipe
- Why You’ll Love These Eggnog Cookies
- Ingredient Deep Dive for Perfect Eggnog Cookies
- Step-by-Step: How to Make Eggnog Cookies with Glaze
- Optimal Baking Time for Soft, Chewy Results
- Crafting the Irresistible Eggnog Glaze
- Storage and Make-Ahead Tips
- Expert Baking Tips for Success
- Frequently Asked Questions About Eggnog Cookies
- Easy Glazed Eggnog Cookies Recipe Card
The Ultimate Easy Glazed Eggnog Cookie Recipe for the Holidays
There’s a special kind of magic that eggnog brings to the holiday season. For my family, the sight of the first eggnog cartons appearing in stores signals the official start of festive baking! We’re absolutely head-over-heels for its creamy, spiced goodness, and we love finding new and creative ways to incorporate it into our holiday treats. From classic eggnog pie and delightful eggnog French toast to fluffy eggnog pancakes and a festive eggnog dip, we’ve explored many delicious avenues. But today, we’re diving into a recipe that truly stands out: these incredibly easy glazed eggnog cookies.
Not only are these cookies a fantastic way to celebrate the season, but they’re also a perfect solution for using up any leftover eggnog you might have lingering in your fridge after holiday gatherings. Seriously, these pillowy soft, delightfully chewy cookies boast a texture that literally melts in your mouth, delivering all the comforting flavors of eggnog in a convenient, handheld form. Each cookie is beautifully crowned with a slightly sweet, delicate eggnog glaze, elevating the classic holiday beverage into an unforgettable dessert. Get ready to make these a staple in your annual holiday baking tradition!
Why You’ll Love These Eggnog Cookies
- Unforgettable Flavor: They capture the distinctive, warm, and creamy taste of eggnog in every bite, enhanced by a sweet glaze.
- Perfect Texture: Expect a cookie that’s wonderfully soft and chewy, never dry or crumbly.
- Easy to Make: Despite their gourmet taste, these cookies are straightforward to prepare, making them ideal for bakers of all skill levels.
- Holiday Essential: Perfect for cookie exchanges, festive parties, or simply enjoying with a cup of coffee or a glass of actual eggnog.
- Customizable: Easily adaptable with additional spices, extracts, or holiday sprinkles to suit your taste.
Ingredient Deep Dive for Perfect Eggnog Cookies
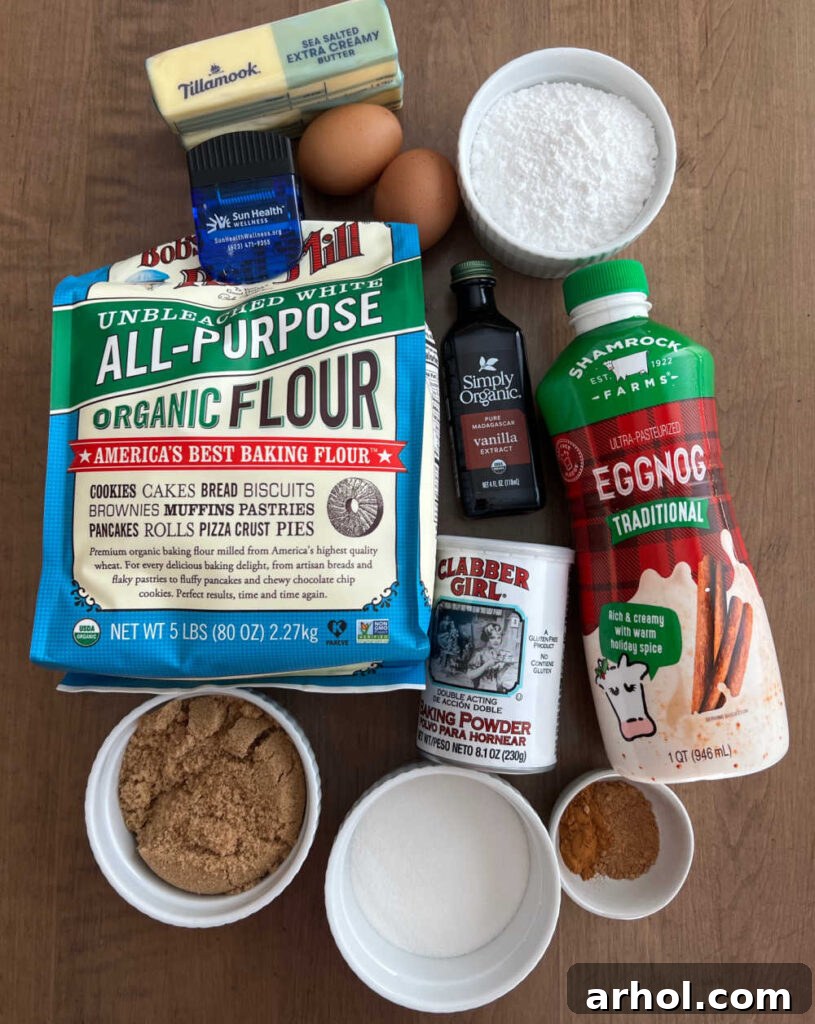
Crafting these delectable Christmas cookies requires just a few simple, readily available ingredients. You’ll find everything you need at your local grocery store. Full, precise amounts are detailed in the comprehensive recipe card at the bottom of this page.
- All-Purpose Flour: The foundation of our cookies, providing structure and chewiness. Ensure it’s measured correctly to avoid dense or dry cookies.
- Baking Powder: Our leavening agent, crucial for achieving that desirable soft, pillowy rise.
- Salt: A pinch of salt is vital for balancing the sweetness and enhancing all the other flavors in the cookie dough.
- Ground Cinnamon: A classic holiday spice that adds warmth and aromatic depth, perfectly complementing the eggnog flavor.
- Ground Nutmeg: This is where the magic happens! Nutmeg is synonymous with eggnog, and a good amount in the dough (and a touch in the glaze) truly makes these cookies sing with authentic eggnog taste.
- Granulated Sugar: Provides sweetness and helps achieve a tender crumb.
- Brown Sugar: Adds moisture, depth of flavor, and contributes to the wonderfully chewy texture of these cookies.
- Butter (Softened): Whether you opt for salted or unsalted, make sure your butter is softened to room temperature. This is key for creaming it properly with the sugars, creating an airy base for your dough.
- Vanilla Extract: A staple in most cookie recipes, vanilla enhances the overall flavor profile. For an extra festive twist or a bolder flavor, consider substituting a good quality rum extract.
- Eggnog: The star ingredient! I typically use traditional store-bought eggnog. While homemade eggnog is delightful for drinking, its thickness and flavor consistency can vary, potentially affecting the cookie’s texture and final taste.
- Large Eggs: Act as a binder, adding richness, moisture, and helping the cookies rise. Ensure they are also at room temperature for better incorporation into the batter.
- Powdered Sugar (for the Glaze): The base for our smooth, sweet glaze.
- Extra Ground Nutmeg (for Glaze): A final flourish that amplifies the eggnog flavor and adds a beautiful speckled appearance to the glaze.
Step-by-Step: How to Make Eggnog Cookies with Eggnog Glaze
Follow these simple steps to create a batch of the most delicious eggnog cookies you’ve ever tasted:
- Prepare Your Baking Station: Begin by preheating your oven to 350°F (175°C). Line your baking sheets with parchment paper or silicone mats for easy cleanup and to prevent sticking.
- Combine Dry Ingredients: In a medium mixing bowl, whisk together the all-purpose flour, baking powder, salt, ground cinnamon, and ground nutmeg. Set this mixture aside.
- Cream Wet Ingredients: In a large mixing bowl, using an electric mixer (either a hand mixer or a stand mixer with a paddle attachment), cream together the softened butter, granulated sugar, and brown sugar until the mixture is light, fluffy, and smooth. This typically takes 2-3 minutes.
- Add Vanilla and Eggs: Beat in the vanilla extract, then add the eggs one at a time, mixing well after each addition until fully incorporated.
- Incorporate Eggnog: Pour in the eggnog and mix until just combined. Be careful not to overmix at this stage.
- Combine Wet and Dry: Gradually add the dry ingredient mixture to the wet ingredients, mixing on low speed until just combined. Mix until no streaks of flour remain, but avoid overmixing, as this can lead to tough cookies. The dough will be soft and somewhat sticky – this is perfectly normal.
- Scoop the Dough: Using a tablespoon or a small cookie scoop, drop rounded portions of the dough onto your prepared baking sheets, leaving a few inches between each cookie to allow for spreading. If the dough is too sticky to handle easily, you can lightly dampen your hands or the scoop. For perfectly uniform cookies, you can gently smooth the tops of the scooped dough balls before baking.
Optimal Baking Time for Soft, Chewy Results
Bake the cookies for approximately 10 to 12 minutes. The exact baking time can vary depending on your oven, so keep a close eye on them. You’ll know they’re done when the edges appear firm and lightly golden, and the tops look set and dry to the touch. They might still seem slightly soft in the center, but they will continue to set as they cool on the baking sheet.
Crafting the Irresistible Eggnog Glaze
Once your freshly baked eggnog cookies have cooled completely on a wire rack, it’s time for the crowning glory: the simple yet sensational eggnog glaze. This glaze not only adds another layer of sweet eggnog flavor but also provides a beautiful finish to these holiday treats. It’s incredibly easy to make, so please, do not skip this essential step!
- Mix Glaze Ingredients: In a small bowl, combine the powdered sugar, a pinch of ground nutmeg (for extra flavor and visual appeal), and the eggnog.
- Achieve Desired Consistency: Whisk until the mixture is completely smooth and free of lumps. You’re aiming for a consistency that is thick enough to coat the back of a spoon but still pourable. If it’s too thick, add a tiny splash more eggnog. If it’s too thin, add a teaspoon more powdered sugar.
- Glaze the Cookies: You can either drizzle the glaze over the cooled cookies using a spoon or a whisk, or you can dip the tops of the cookies directly into the glaze.
- Optional Embellishments: For an extra festive touch, immediately after glazing, sprinkle a tiny bit more ground nutmeg over the wet glaze. You can also add some festive candy sprinkles for a burst of color, perfect for cookie exchanges!
Allow the glaze to set completely before stacking or storing the cookies. This typically takes about 30 minutes to an hour, depending on the thickness of your glaze and the humidity in your kitchen.
Storage and Make-Ahead Tips
To keep your easy glazed eggnog cookies tasting their best:
- At Room Temperature: Store the cooled and glazed cookies in an airtight container at room temperature. They will remain wonderfully fresh and flavorful for 3 to 5 days. Interestingly, many find that the flavors meld and deepen even further after a day or two!
- Freezing Plain Cookies: If you’re planning ahead, you can freeze the unglazed, baked cookies for up to 3 months. Once completely cooled, arrange them in a single layer on a baking sheet and freeze until firm. Transfer the frozen cookies to a freezer-safe airtight container or bag, separating layers with parchment paper. When you’re ready to serve, thaw the cookies at room temperature and then prepare and apply the fresh eggnog glaze.
- Freezing Glazed Cookies: While technically possible, freezing glazed cookies can sometimes affect the glaze’s texture upon thawing, potentially making it sticky or slightly cracked. For the best results, glaze fresh or thawed cookies right before serving.
Expert Baking Tips for Success
Even though this recipe is straightforward, a few expert tips can ensure your eggnog cookies turn out absolutely perfect every time:
- Room Temperature Ingredients: Always use room temperature butter and eggs. This allows them to cream together more efficiently, creating a smoother, lighter batter that traps air, resulting in softer cookies.
- Don’t Overmix: After adding the flour mixture, mix only until just combined. Overmixing develops the gluten in the flour, which can lead to tough, dense cookies.
- Sticky Dough is Normal: The cookie dough for these eggnog cookies will be a bit sticky, and that’s exactly what you want for a soft, chewy texture. Don’t be tempted to add more flour than the recipe calls for, as this will dry out your cookies.
- Uniform Cookie Size: Use a cookie scoop or a measuring spoon to ensure each cookie is roughly the same size. This promotes even baking, so all your cookies are perfectly done at the same time. If you prefer a flatter, more uniform cookie, you can gently press down on the scooped dough balls before baking.
- Monitor Your Oven: All ovens vary, so actual baking times may differ. Begin checking your cookies at the 10-minute mark. Look for firm edges and dry tops. If they start to brown too much, they’re definitely done or even slightly overdone.
- Cool Completely Before Glazing: This step is critical! If you glaze warm cookies, the glaze will melt and absorb into the cookie, rather than forming that beautiful, set coating.
- Let Glaze Set: Before stacking or storing your glazed cookies, allow the glaze to fully set and dry. This prevents them from sticking together and smudging the beautiful glaze.
Frequently Asked Questions About Eggnog Cookies
- Can I make these cookies dairy-free?
- While the recipe relies on traditional butter and eggnog, you can experiment with dairy-free butter alternatives and plant-based eggnog. Results may vary slightly in texture and flavor.
- Can I add rum to the cookie dough?
- Yes! For an adult twist, you can replace a portion of the vanilla extract (e.g., ½ teaspoon) with rum extract or even a tiny splash of actual rum (about ½ teaspoon to 1 teaspoon). Be mindful that too much liquid can alter the dough consistency.
- What if my glaze is too thick or too thin?
- If your glaze is too thick, add more eggnog a few drops at a time until you reach your desired consistency. If it’s too thin, whisk in additional powdered sugar, a tablespoon at a time, until it thickens up.
- Do these cookies spread a lot?
- These cookies will spread moderately. Ensure you leave enough space between them on the baking sheet to prevent them from merging.
- Can I use homemade eggnog?
- You can, but be aware that homemade eggnog can vary significantly in thickness and fat content compared to commercial versions. This might affect the cookie dough’s consistency. You may need to adjust the amount of flour slightly if your homemade eggnog is much thinner or thicker.
Pin
Easy Glazed Eggnog Cookies
Ingredients
For the Cookies
- 2 ½ cups All Purpose Flour
- 1 teaspoon baking powder
- 1 teaspoon ground cinnamon
- ½ teaspoon ground nutmeg
- ¼ teaspoon sea salt
- 1 cup brown sugar
- ¼ cup granulated sugar
- ¾ cup butter softened
- 1 teaspoon vanilla extract
- ¾ cup eggnog
- 2 large eggs
For the Glaze
- 1 cup powdered sugar
- ¼ teaspoon ground nutmeg
- 3 tablespoons eggnog
Instructions
Eggnog Cookies
-
Preheat oven to 350℉ (175°C).
-
In a medium mixing bowl, whisk together the flour, sea salt, cinnamon, nutmeg, and baking powder. Set aside.
-
In a large mixing bowl, cream the softened butter, vanilla, granulated sugar, and brown sugar together with an electric mixer until light and fluffy.
-
Beat in the eggs, one at a time, mixing well after each addition.
-
Add the eggnog and mix until just combined.
-
Gradually add the flour mixture to the wet ingredients, mixing on low speed until fully combined and no dry streaks remain. Avoid overmixing.
-
Drop by rounded tablespoonfuls onto an ungreased foil-lined or parchment-lined baking sheet.
-
Bake for 10-12 minutes, or until the edges are firm and the tops look dry.
-
Remove from oven and allow to cool completely on a wire rack before glazing.
Eggnog Glaze
-
In a small bowl, whisk powdered sugar, nutmeg, and eggnog until smooth and well combined.
-
Drizzle or spread the glaze over the cooled cookies. Optionally, sprinkle with extra nutmeg or holiday sprinkles.
-
Allow the glaze to set completely before storing.
Notes
Store in a tightly covered container at room temperature. The flavor of these cookies actually improves after a day or two!
Nutrition
Carbohydrates: 18g,
Protein: 1g,
Fat: 4g,
Saturated Fat: 2g,
Cholesterol: 23mg,
Sodium: 58mg,
Potassium: 43mg,
Sugar: 11g,
Vitamin A: 145IU,
Vitamin C: 0.1mg,
Calcium: 23mg,
Iron: 0.5mg
Nutrition information is automatically calculated, so should only be used as an approximation.
Additional Info
These easy glazed eggnog cookies are more than just a dessert; they’re a celebration of holiday cheer in every soft, spiced bite. They’re perfect for delighting guests at holiday parties, impressing friends at cookie exchanges, or simply enjoying a moment of festive indulgence with a tall glass of milk or, of course, a fresh glass of eggnog. Prepare for them to become an eagerly anticipated treat in your household year after year!
For more delightful holiday recipes and simple, family-favorite dishes, be sure to sign up for our weekly newsletter and follow us on social media. Happy baking, and happy holidays!

Recipe originally published in 2016 and comprehensively updated in 2023 for improved clarity, SEO optimization, and enhanced user experience.