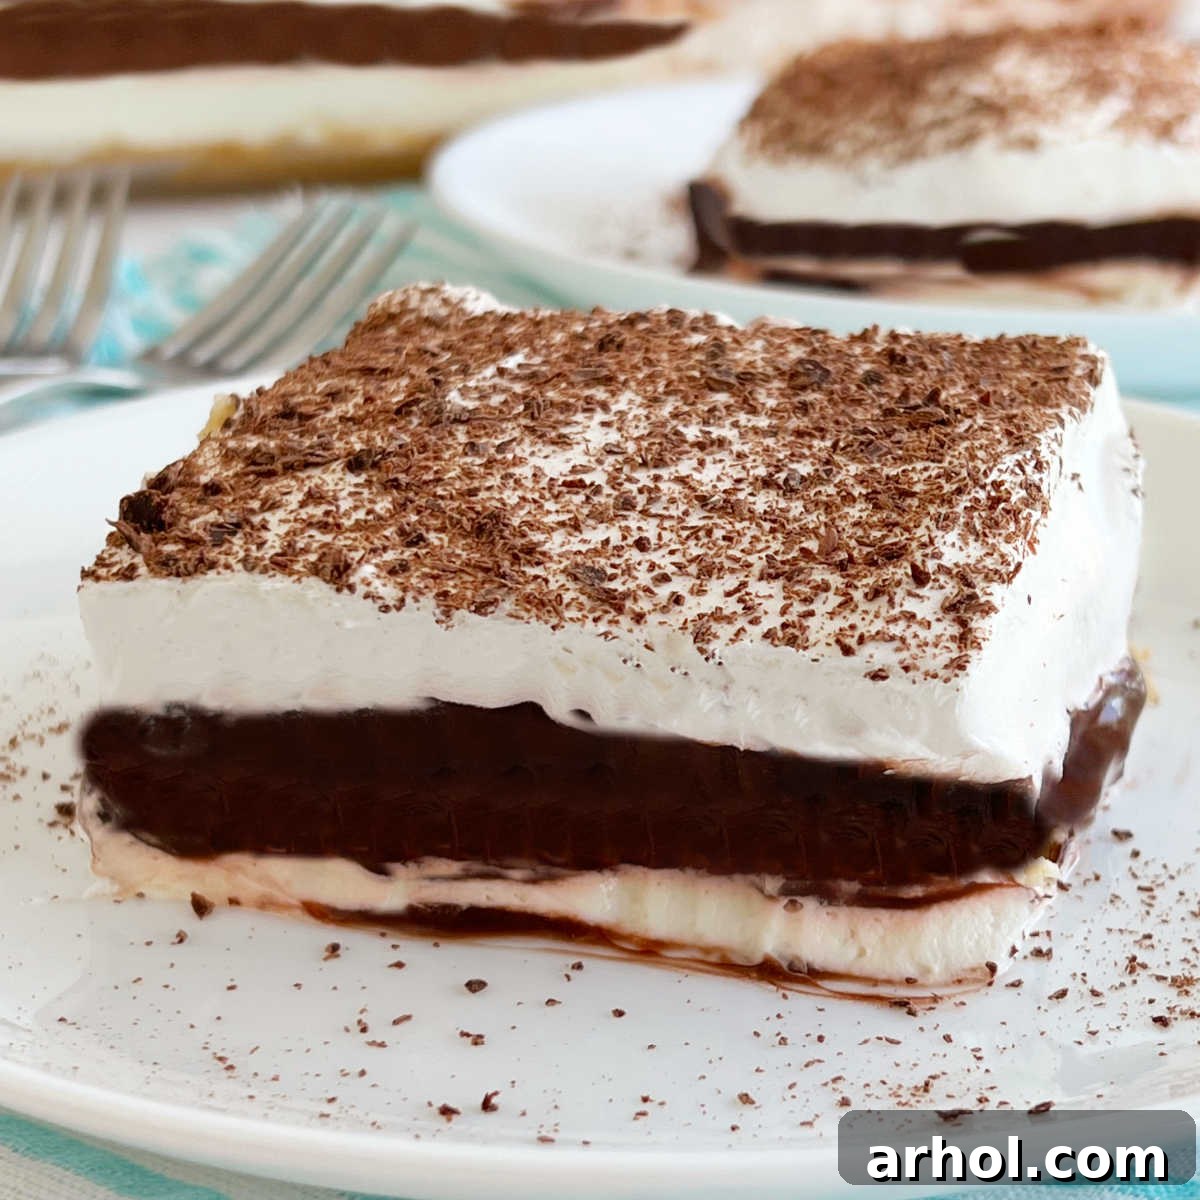
Grandma’s Chocolate Delight Recipe is a truly timeless dessert that has graced family tables for generations. This easy-to-make, no-bake layered treat (apart from its delightful shortbread crust) combines the creamy richness of sweetened cream cheese, the irresistible allure of chocolate pudding, and a generous topping of fluffy whipped cream. It’s the kind of cool, luscious dessert that consistently earns rave reviews and becomes a cherished favorite for any occasion, from casual family dinners to festive holiday gatherings and special celebrations.
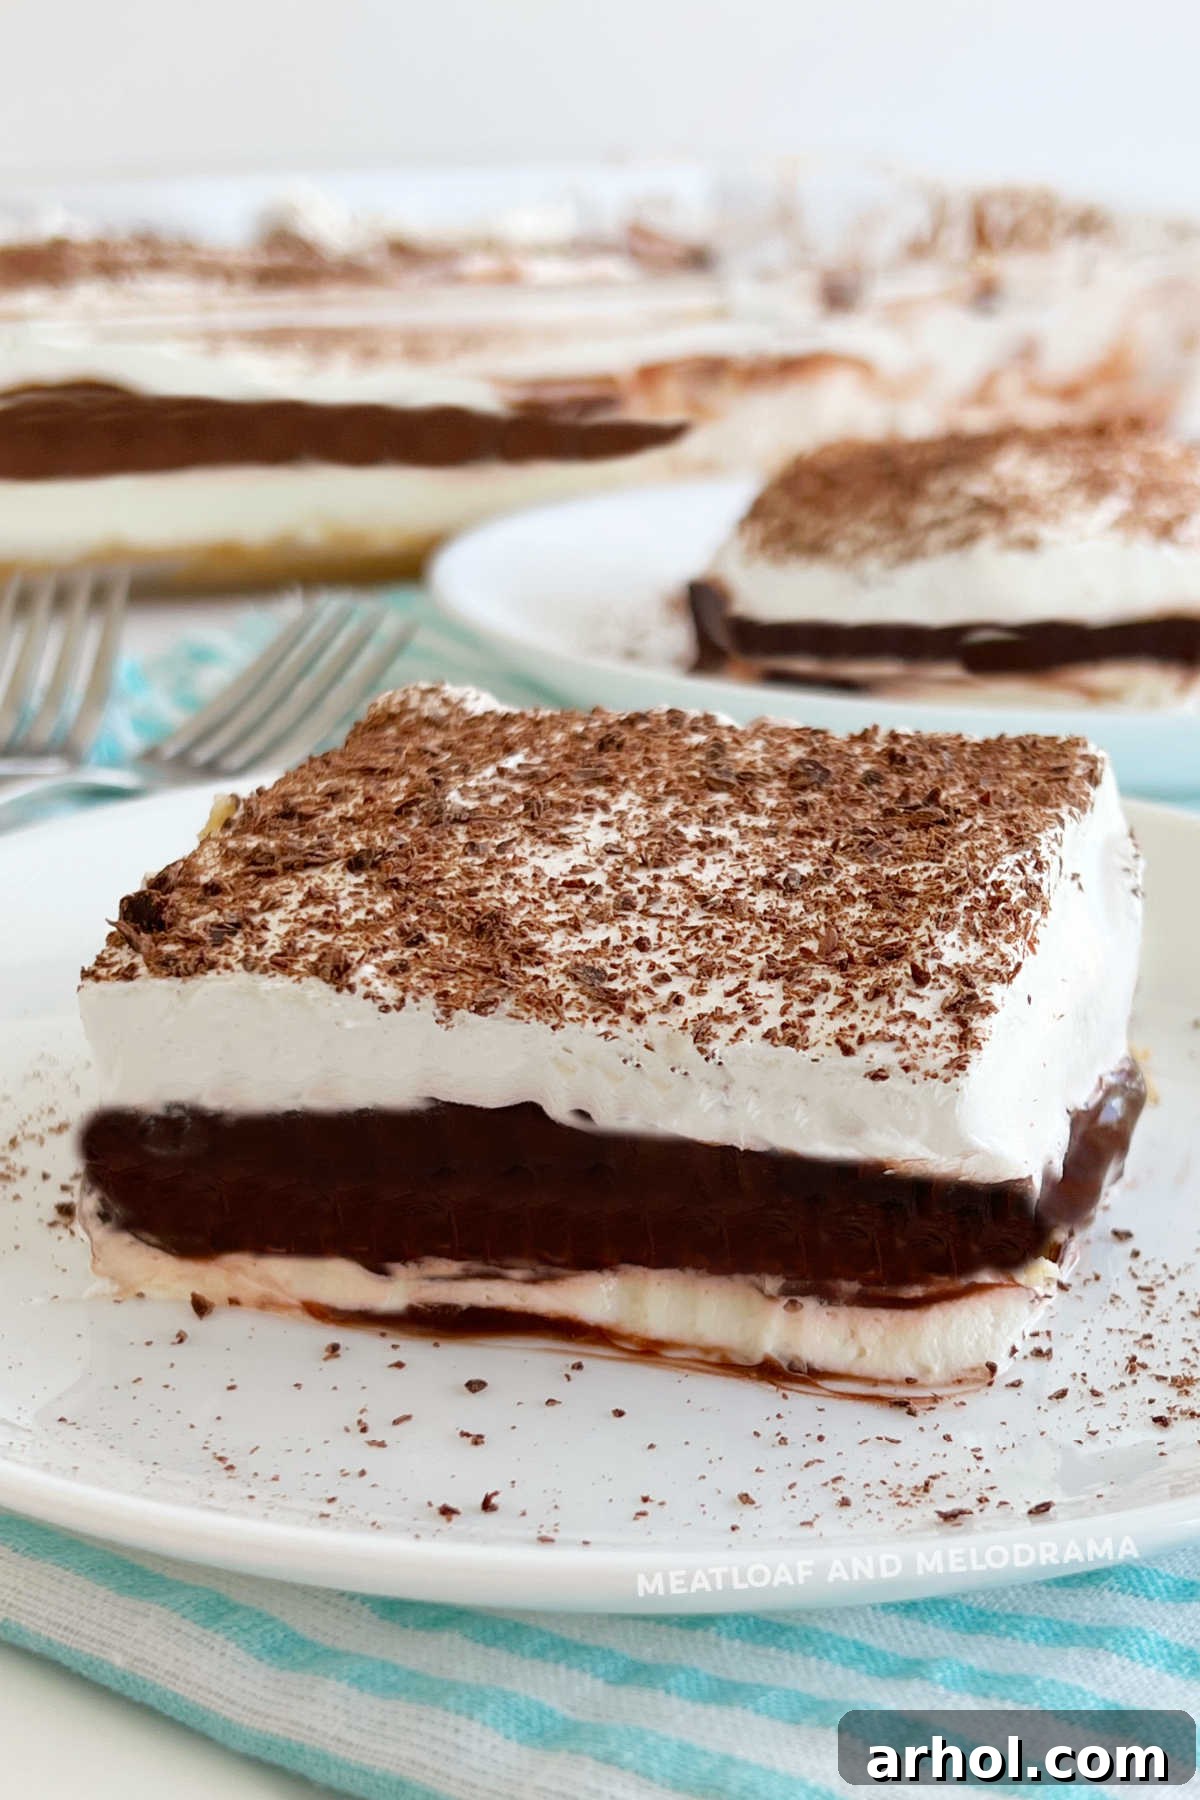
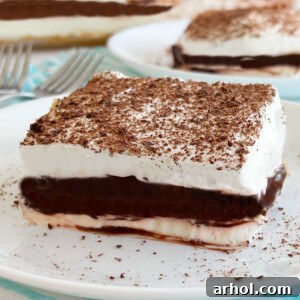
For devoted chocolate enthusiasts, this dessert is nothing short of a dream come true. Imagine sinking your spoon through distinct layers: a buttery, crumbly crust, followed by a velvety cheesecake-like filling, then a thick stratum of rich chocolate pudding, all crowned with a cloud of whipped topping and delicate chocolate shavings. Each bite delivers a harmonious blend of textures and flavors that truly lives up to the name “chocolate delight.”
Like many beloved recipes passed down through families, such as the classic Pineapple Dream Dessert or Grandma’s Lemon Bars, this old-fashioned dessert boasts a rich history and is known by a variety of affectionate monikers. You might recognize this delightful layered pudding creation as “Better than Sex Cake,” “Better than Sin Cake,” “Chocolate Lasagna,” or even “Chocolate Lush.” Regardless of what you call it, in our home, Grandma simply referred to it as “Dessert Chocolate” – a testament to its singular, satisfying appeal.
One of the many virtues of this particular chocolate delight recipe is its generous yield. It consistently makes enough to feed a crowd, making it an ideal choice for large church potlucks, boisterous family reunions, elegant holiday dinners, or any special occasion where a show-stopping dessert is desired. Its impressive presentation and irresistible taste guarantee it will be a crowd-pleaser every time.
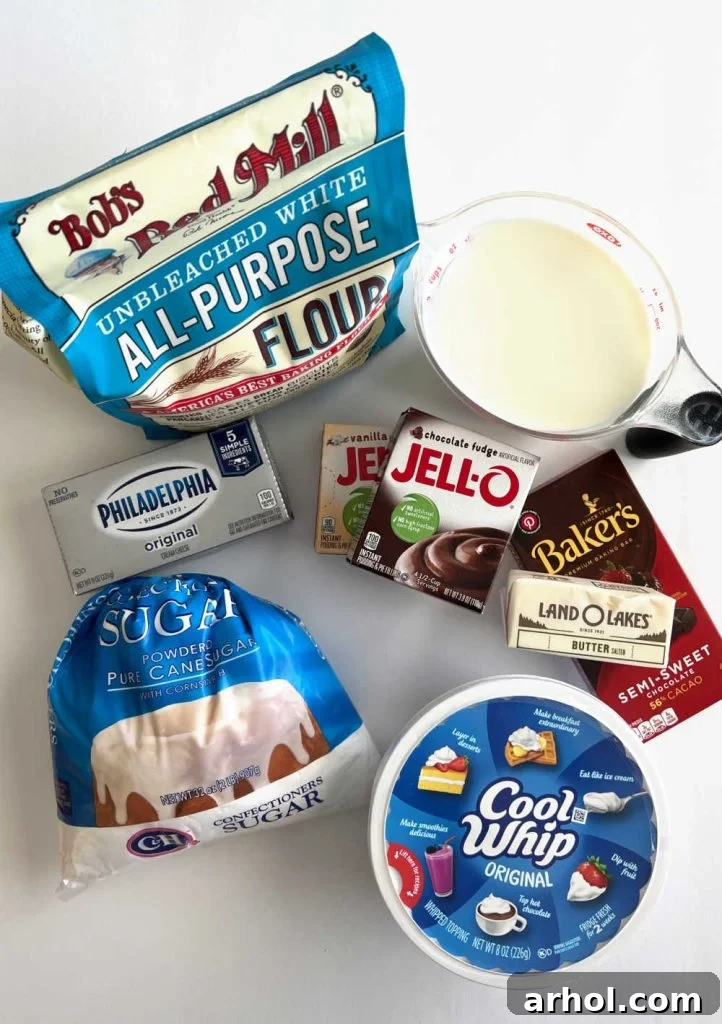
Essential Ingredients for Your Chocolate Delight
Crafting this incredible layered chocolate dessert requires only a handful of readily available ingredients. Most of what you need you probably already have in your pantry, and anything else can be easily sourced from your local grocery store or an online retailer. The simplicity of the ingredient list contributes to the overall ease of this delightful recipe.
For the Buttery Shortbread Crust:
- All-Purpose Flour: The foundation of our crisp, buttery base.
- Unsalted Butter: Softened to room temperature for easy blending, it provides richness and flavor.
For the Creamy Cheesecake Layer:
- Cream Cheese: Softened full-fat cream cheese is key for that smooth, rich, and tangy layer.
- Powdered Sugar: Also known as confectioners’ sugar, it sweetens and adds a silky texture to the cream cheese mixture.
- Cool Whip (or similar whipped topping): Incorporates lightness and extra creaminess into the cheesecake layer.
For the Decadent Pudding Layer:
- Instant Chocolate Pudding Mix (3.9 oz box): Choose your favorite brand for a deep chocolate flavor.
- Instant Vanilla Pudding Mix (3.4 oz box): Adding vanilla pudding mellows the chocolate slightly and adds another dimension of flavor.
- Milk (whole or 2 percent): Provides the liquid base for the pudding, ensuring it sets properly. Whole milk yields a richer pudding.
For the Fluffy Top Layer and Garnish:
- Cool Whip (or similar whipped topping): Forms the light, airy crown of the dessert.
- Chocolate Shavings (from a chocolate bar): A final flourish that adds both visual appeal and an extra burst of chocolate flavor. Grating your own fresh chocolate provides the best taste and texture.
How to Prepare This Layered Chocolate Masterpiece
Creating Grandma’s Chocolate Delight is a straightforward process, broken down into simple, manageable steps. While the layers themselves require no baking, we’ll start with a quick bake for the delicious shortbread crust. Precision in chilling is the secret to perfectly set layers and clean slices.
Step 1: Preparing the Shortbread Crust
Before you begin, preheat your oven to 350 degrees Fahrenheit (175°C). Lightly grease a 13×9-inch baking pan with non-stick cooking spray or a pat of butter. This prevents the crust from sticking and ensures easy removal later.
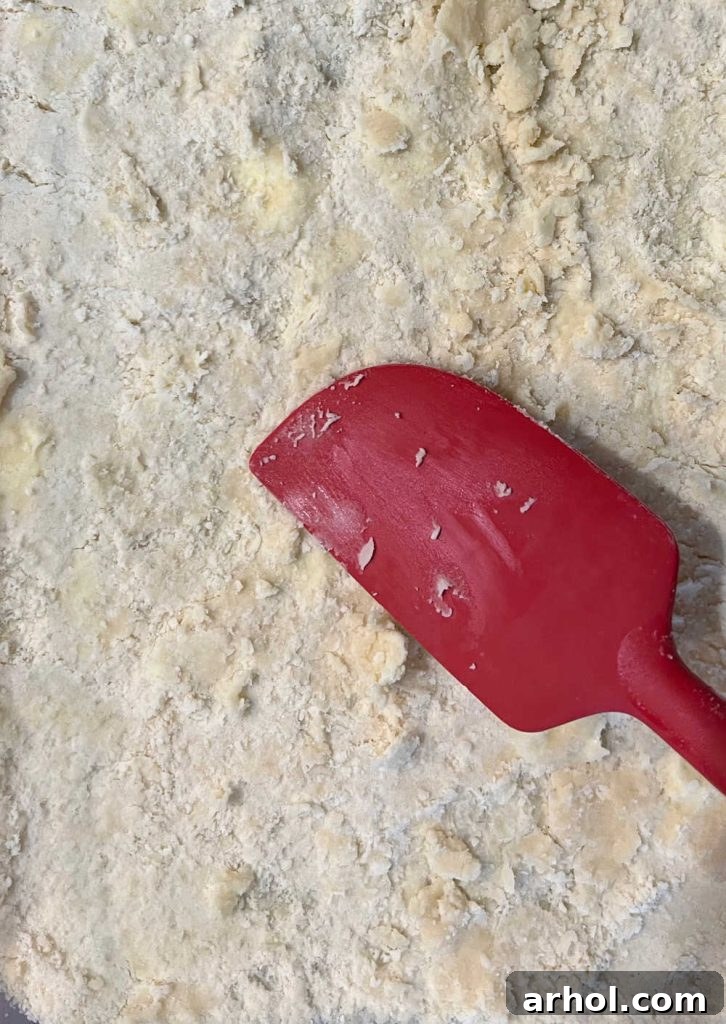
In a medium mixing bowl, combine the all-purpose flour with the softened butter. Using an electric mixer on low speed, pulse the mixture until it’s well combined and resembles coarse crumbs. Be careful not to overmix; you want a tender, not tough, crust. The key here is to incorporate the butter thoroughly without developing the gluten in the flour too much. If you don’t have an electric mixer, your hands or a pastry blender will also work effectively.
Once the crust mixture is ready, transfer it into your prepared baking pan. Using the back of a spoon or your clean hands, firmly press the mixture into an even layer across the entire bottom of the pan. Pay special attention to the corners and edges to ensure a uniform thickness, which will help the crust bake evenly.
Step 2: Baking and Cooling the Crust
Bake the pressed crust in the preheated oven for approximately 25 minutes. You’re looking for a beautiful golden-brown color and a firm texture. This short baking time creates a wonderfully crisp and buttery foundation for your dessert.
Once baked, remove the pan from the oven and set it aside to cool completely at room temperature. It’s crucial that the crust is fully cooled before adding the subsequent layers. Attempting to spread a creamy layer over a warm crust will cause it to melt and create a messy, unappealing result. Patience here will be rewarded!
Step 3: Crafting the Creamy Cheesecake Layer
While the crust cools, you can prepare the luscious cream cheese layer. In a medium mixing bowl, beat the softened cream cheese with an electric mixer until it’s exceptionally smooth and free of any lumps. This step is vital for achieving a silky, uniform texture in your cheesecake layer. Ensure your cream cheese is truly at room temperature for the best results; cold cream cheese will be lumpy and difficult to work with.
Next, add the powdered sugar and a portion of the Cool Whip (as specified in the recipe card below) to the beaten cream cheese. Continue mixing with the electric mixer on low speed until all ingredients are thoroughly combined and the mixture is light, creamy, and wonderfully spreadable. Avoid overmixing once the Cool Whip is added, as this can deflate its airy texture.
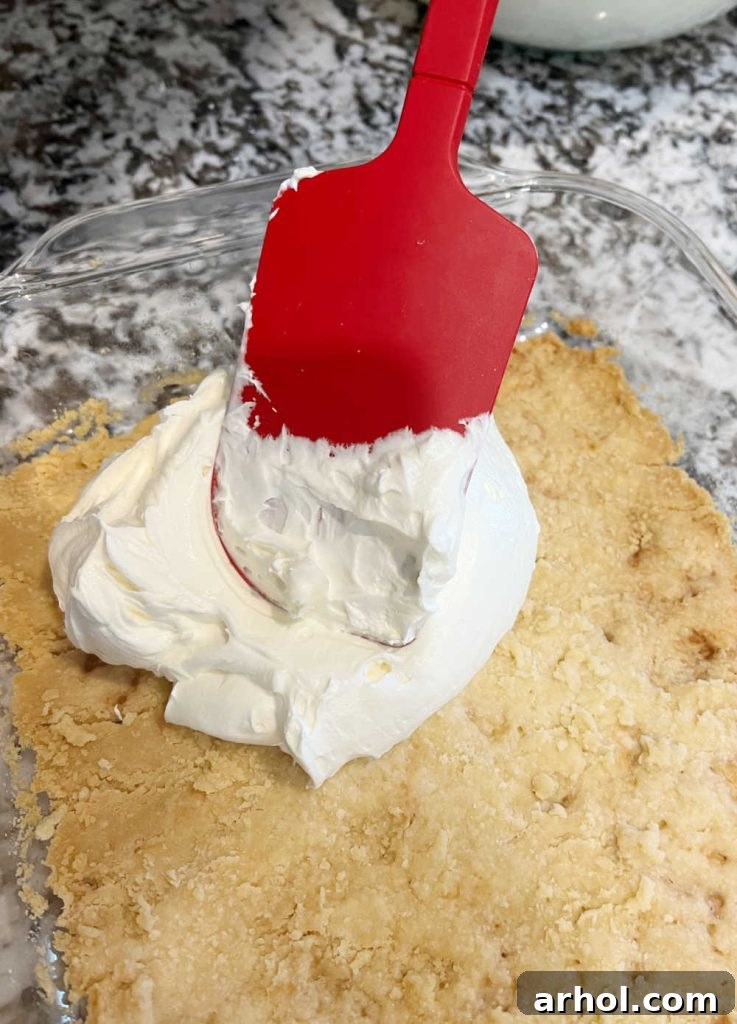
Gently spoon this delicious cream cheese mixture over the completely cooled shortbread crust in the baking pan. Use a spatula to carefully spread it into an even layer, ensuring every inch of the crust is covered. This layer sets the stage for the rich pudding to come.
Once spread, place the baking pan into the refrigerator. This chilling step allows the cream cheese layer to firm up and set, creating a stable base for the next layer and preventing any mixing of flavors or textures.
Step 4: Assembling the Rich Pudding Layer
Once your cream cheese layer has sufficiently set (it should feel firm to the touch), it’s time for the star of the show: the chocolate pudding layer. In a large bowl, pour in the cold milk and add both the instant chocolate and vanilla pudding mixes. Using a whisk, vigorously mix the pudding mixes with the milk until the mixture begins to thicken and is thoroughly combined. This usually takes about 2-3 minutes. Make sure to scrape the bottom and sides of the bowl to incorporate any dry pudding mix.
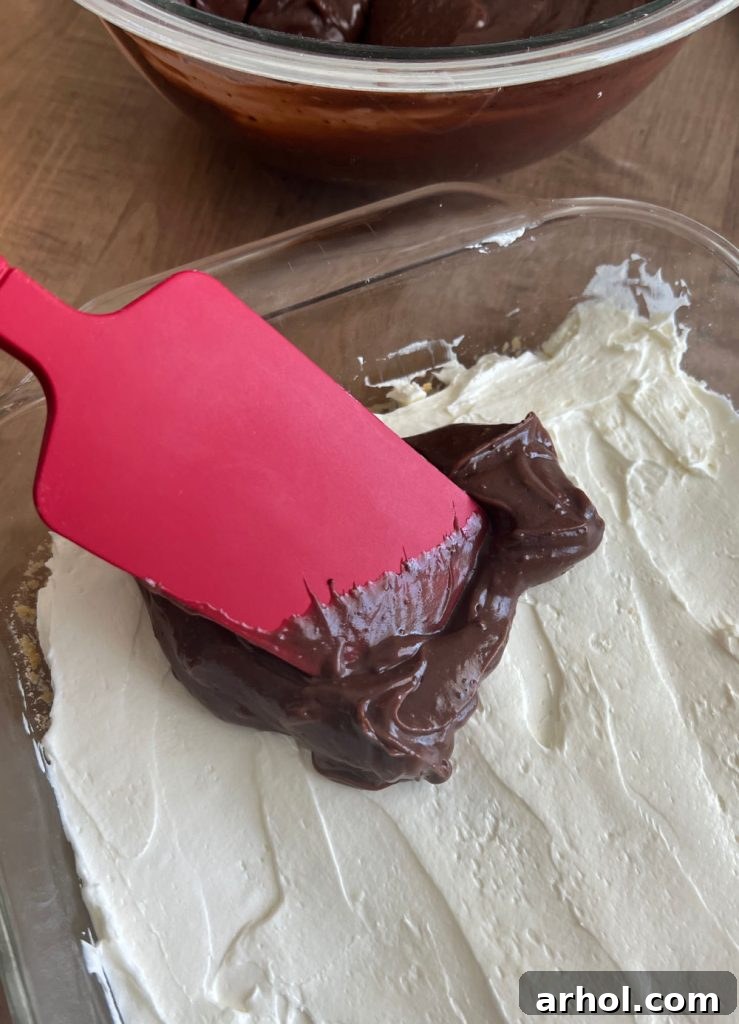
Carefully spoon this thickened chocolate pudding mixture over the set cream cheese layer. Gently spread it out with a spatula, making sure to cover the entire cream cheese layer evenly. Take your time during this step to avoid disturbing the layer beneath.
Return the baking pan to the refrigerator for the pudding layer to set. This typically takes around 30 minutes, but you can leave it longer if needed. A properly set pudding layer will be firm and hold its shape, crucial for clean slices.
Step 5: The Grand Finale – Whipped Topping and Garnish
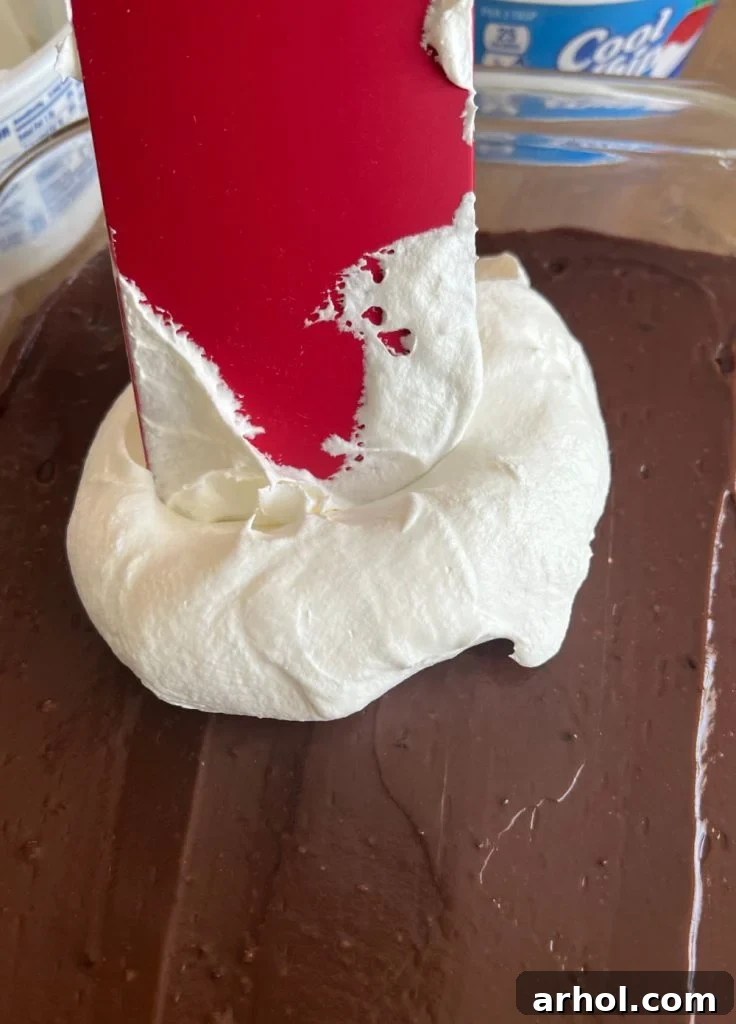
Now for the final, irresistible layer! Once the pudding has set, spoon the remaining Cool Whip over the chocolate pudding layer. Using a spatula, spread it evenly across the top, creating a smooth and appealing surface. This is your canvas for the finishing touches, so aim for neatness.
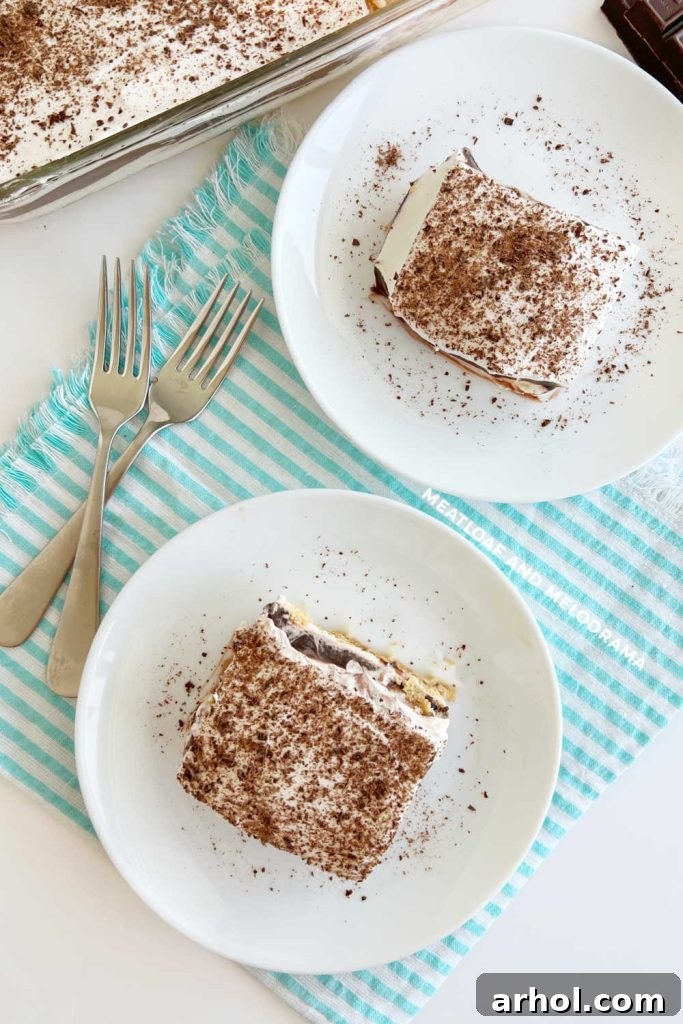
For the perfect garnish, sprinkle chocolate shavings generously over the Cool Whip. You can buy pre-made chocolate shavings for convenience, or for a superior taste and texture, grate your own from a high-quality chocolate bar using a cheese grater or a vegetable peeler. The fresh shavings add a delightful crunch and intense chocolate aroma.
Finally, refrigerate your magnificent layered chocolate dessert for a minimum of 3 hours, or ideally, overnight. This extended chilling time is essential for all the layers to fully set and for the flavors to meld beautifully. It also makes cutting clean, precise slices much easier. Once perfectly chilled, it’s ready to be served and thoroughly enjoyed!
Storing Your Chocolate Delight
This chocolate delight dessert is best enjoyed fresh, but it also stores remarkably well. Keep any leftovers in the refrigerator, either in an airtight container or tightly covered with plastic wrap, to prevent it from drying out or absorbing other odors. Properly stored, it will maintain its delicious flavor and creamy texture for 3 to 4 days. If you’re planning ahead, consider making it the day before your event, allowing ample time for the layers to set perfectly.
Creative Variations and Smart Substitutions
While Grandma’s original chocolate delight recipe is perfection itself, there are many delightful ways to customize this one-pan wonder to suit your taste or what you have on hand. Don’t hesitate to get creative and make it your own!
- Crust Customization:
- Instead of the classic flour and butter shortbread crust, consider a **graham cracker crust** for a slightly different texture and flavor profile. Simply crush graham crackers and mix with melted butter.
- A **cookie crust** made from crushed chocolate sandwich cookies (like Oreos) or vanilla wafers adds another layer of flavor.
- For a delightful nutty twist, add finely chopped pecans or walnuts to your shortbread crust mixture, creating a delicious **pecan shortbread crust**.
- Pudding Layer Adventures:
- The recipe calls for a mix of instant chocolate and vanilla pudding, which provides a balanced and intriguing flavor. However, feel free to experiment! You could use **two packages of instant chocolate pudding** for an extra rich and intense chocolate experience.
- Alternatively, if you prefer a milder chocolate flavor, use **two packages of instant vanilla pudding** or even **French vanilla pudding**.
- For a completely different flavor, transform this into a **butterscotch delight** by using instant butterscotch pudding mix. Other options include pistachio, coconut cream, or even banana cream pudding.
- Topping Enhancements:
- Beyond chocolate shavings, you can drizzle the top with luscious **chocolate sauce**, rich caramel sauce, or a melted white chocolate drizzle for an elegant finish.
- A sprinkle of **chopped nuts** (pecans, walnuts, almonds) adds a pleasing crunch and earthy flavor.
- For a burst of freshness, add **fresh fruit** such as sliced strawberries, raspberries, or even canned mandarin oranges (drained well) on top of the whipped cream.
- Add a few drops of peppermint extract to the whipped cream for a festive mint chocolate delight during the holidays!
Print Recipe
Grandma’s Chocolate Delight Recipe
Ingredients
Crust
- 1 cup flour
- ½ cup butter (1 stick, softened)
Cream Cheese Layer
- 8 oz cream cheese (softened)
- 1 cup powdered sugar
- 1 ½ cups Cool Whip
Pudding Layer
- 3.9 oz package instant chocolate pudding
- 3.4 oz package instant vanilla pudding
- 3 cups milk (whole or 2 percent)
Top Layer
- 2 cups Cool Whip
- ¼ cup chocolate shavings (from chocolate bar)
Instructions
Crust
- Preheat oven to 350 degrees F (175°C), and spray a 13 x 9 inch baking pan with non-stick spray or grease with butter.
- In a medium mixing bowl, mix the flour with softened butter until well combined and crumbly. Press evenly into the prepared baking pan.
- Bake for 25 minutes or until golden brown and firm. Remove from oven and let cool completely at room temperature.
Cream Cheese Layer
- In a medium mixing bowl, beat the softened cream cheese with an electric mixer until smooth and creamy. Add the powdered sugar and 1 ½ cups of Cool Whip, and mix until creamy and well combined.
- Gently spoon the cream cheese mixture over the cooled crust, and spread evenly with a spatula. Place into the refrigerator to set.
Pudding Layer
- In a large mixing bowl, whisk together the chocolate pudding mix, vanilla pudding mix, and milk until well combined and thick.
- Gently spoon the pudding over the cream cheese layer and carefully spread evenly. Place in refrigerator to set, about 30 minutes.
Top Layer
- Spoon 2 or more cups of Cool Whip over the pudding layer, and spread evenly. Top with grated chocolate shavings. Refrigerate for at least 3 hours or overnight for best results.
Notes
You can expedite the setting and cooling time for each layer by placing the pan in the freezer for short intervals (15-20 minutes) before adding the next.
This recipe yields the best results when made ahead of time, allowing ample time for all layers to fully set. This makes cutting into neat, beautiful squares much easier.
Nutrition
Nutrition information is automatically calculated, so should only be used as an approximation.
Additional Info
Like this? Leave a comment below!
With its perfectly balanced creamy layers and an intensely rich chocolate flavor, Grandma’s layered chocolate delight is always a tremendously popular choice in my household and for any special gathering. It’s a testament to simple ingredients coming together to create something truly extraordinary.
For more incredibly easy and delightful dessert recipes, along with a wide array of other simple meal ideas, be sure to subscribe to our newsletter and follow us on social media! We are constantly sharing delicious inspiration to make your kitchen adventures more enjoyable.