
Transforming a Tired Table into a Dreamy Nightstand: A DIY Girl’s Room Makeover
There’s an undeniable joy that comes with breathing new life into old furniture. After successfully transforming a well-worn thrift store table into a charming patriotic flag table for my son, my daughter, my very own “little Diva,” began campaigning for a special furniture makeover of her own. Her room, a vibrant haven of pink and sparkle, was missing that one personalized piece that would truly make it hers. For months, I diligently scoured thrift stores and yard sales, hoping to stumble upon the perfect candidate for her dream nightstand, but the right table remained elusive.
The pursuit of the ideal table often leads to unexpected discoveries. Just last week, my husband and I unearthed a couple of side tables, along with a few other treasures, all for a steal at under $14. My excitement was palpable, until we got them home and realized they were simply too large for any of the kids’ bedrooms. However, this slight disappointment quickly turned into a delightful realization. As I considered one of the new tables for our family room, rearranging existing furniture to make space, my eyes landed on a familiar, unassuming little table we’d had for years. And then it hit me: this overlooked piece, sitting patiently in the corner, was absolutely perfect to be transformed into a charming nightstand for my daughter’s room!
The Unveiling: A Glimpse at the “Before”
Every great transformation begins with its humble origins. This little table, before its grand makeover, was a quintessential brown laminate piece. Despite its plain appearance, I always harbored a fondness for it; there was something inherently retro and stylish about its design. The small integrated drawer was a particularly practical feature, ideal for stashing notepads, pens, or various odds and ends. However, time had taken its toll: the table sported several minor dings and scuffs, and a noticeable paint stain marred one of its legs. These imperfections, far from being drawbacks, actually made it the perfect canvas for a DIY table redo project. It was clearly yearning for a fresh look and a new purpose, ready to shed its past and embrace a vibrant future.
The Creative Process: Painting and Personalizing
My initial vision for this project involved minimal fuss, particularly when it came to preparing the notoriously tricky laminate surface. Painting laminate furniture typically requires extensive sanding and priming to ensure proper paint adhesion, a step I was keen to bypass. My solution? Homemade chalk paint. I decided to mix unsanded grout into white latex paint, a common DIY hack known for creating a paint that adheres beautifully to slick surfaces without the need for rigorous prep work. This method promised a lovely matte finish and saved valuable time and effort, making the transformation much more accessible.
The Little Diva’s Vision: From Matte to Glossy
However, as any seasoned DIYer knows, working with a specific client – especially a discerning little one – often requires flexibility. After applying the first coat of my homemade chalk paint, my “little Diva” inspected the progress. While I was pleased with the matte, chalky texture, she had a very particular aesthetic in mind: she wanted a glossier finish. Customer satisfaction is paramount, even with my pickiest client! So, I adapted the plan. For the second coat, I used the same white latex paint, but this time, I omitted the unsanded grout. This ensured a smoother, more lustrous surface that perfectly matched her vision, proving that sometimes, compromise leads to an even better outcome.
A Splash of Pink: Hardware Transformation
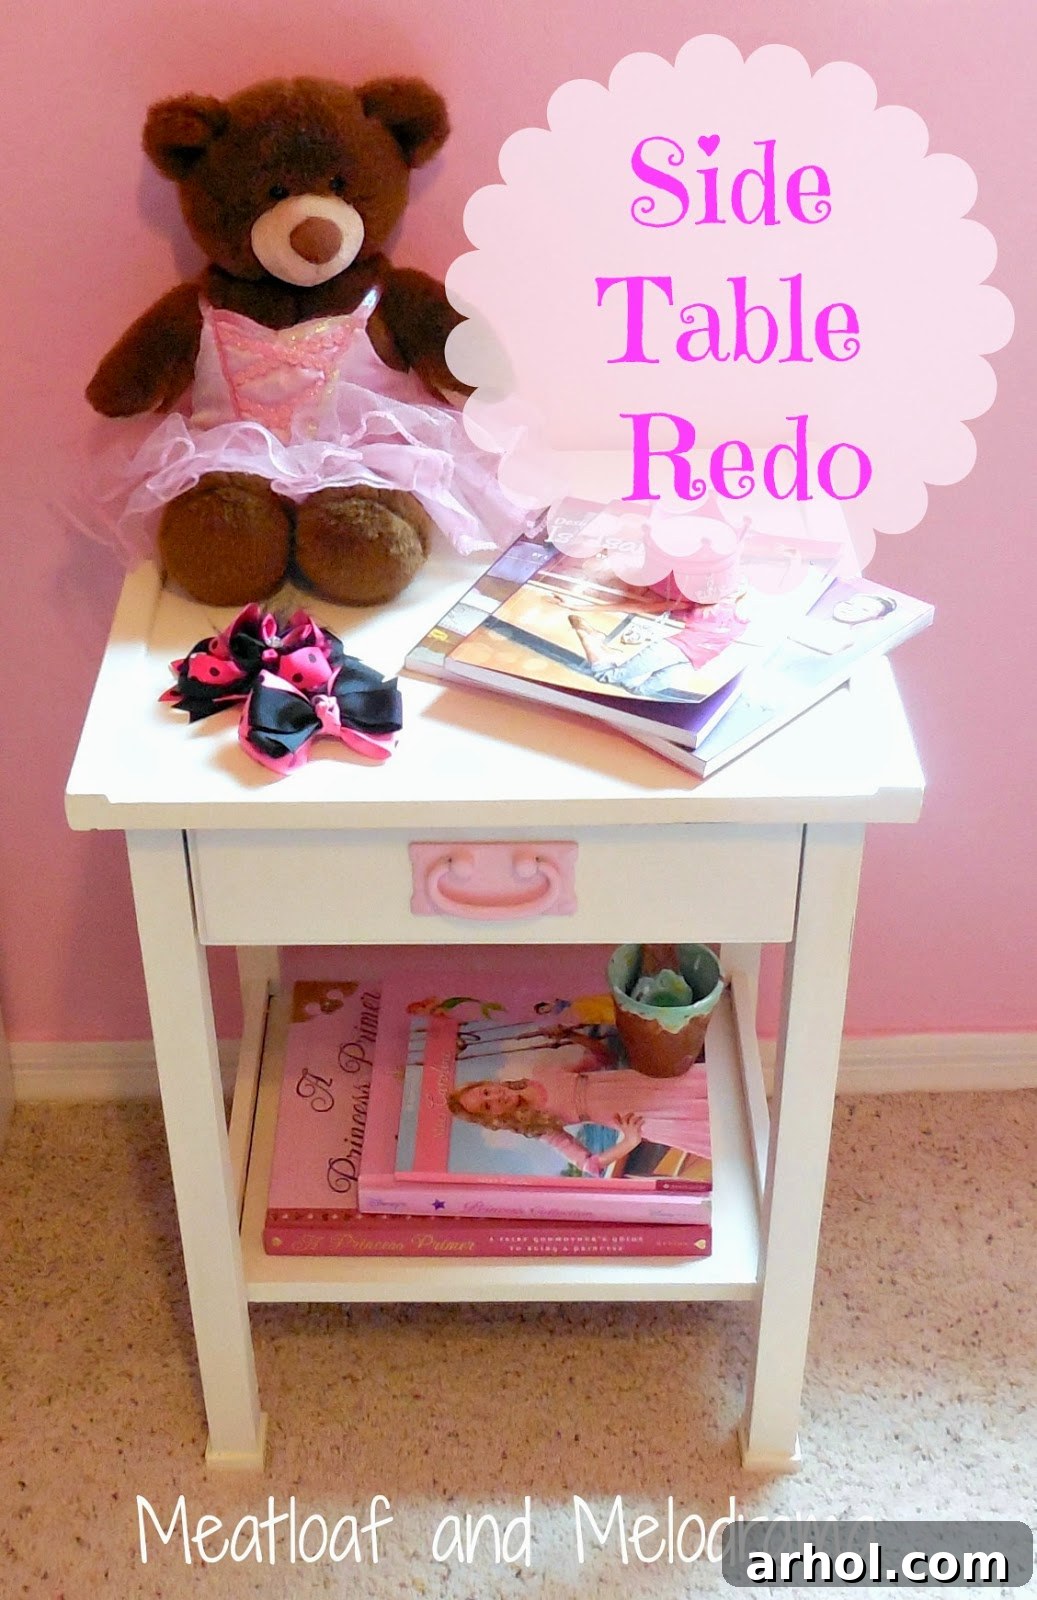
No detail was too small when it came to personalizing this nightstand for my daughter’s vibrant pink room. Her preference was clear: the table itself should be pristine white, but the drawer pull needed to be a distinctive, eye-catching pink. To achieve this, I first prepared the existing hardware by spray painting it with a high-quality primer, ensuring a smooth and durable base. Once the primer was dry, I applied the same cheerful pink latex paint that adorned her room’s walls, creating a cohesive look. For an extra touch of sparkle and sophistication, I blended in a subtle amount of gold craft paint, giving the drawer pull a lovely, gentle sheen that caught the light beautifully. This small detail added a luxurious feel, tying the entire design together with a flourish.
The Finishing Touches: Embracing Imperfection with Distressing
Initially, my daughter was quite firm about wanting a perfectly smooth, pristine finish for her new nightstand, completely free of any distressing. However, as I was lightly sanding down a few minor bumps and imperfections on the table’s edges, she observed the subtle effect these touches created. To my surprise and delight, she actually liked the slightly worn, gently aged look that emerged! This happy accident meant that the finished table now boasts a few carefully chosen distressed areas along its edges. These small, deliberate scuffs don’t detract from its elegant white finish; instead, they add a charming layer of character and a touch of vintage appeal, making the table feel even more unique and loved. It’s a wonderful reminder that sometimes, the most unexpected details contribute the most to a piece’s personality.
The Grand Reveal: A Perfect Addition to a Pink Paradise
As the final coat of paint dried and the pink hardware was reattached, I briefly considered adding a few more pink accents to the table itself. Perhaps some delicate pink stenciling or a touch of pink on the legs? However, after carefully positioning the newly refurbished nightstand in my daughter’s room, I was incredibly glad I resisted that urge. As you can see, her room is already a joyful explosion of pink! The crisp white of the table, accented only by the vibrant pink drawer pull, offers a perfect balance, allowing the table to stand out while seamlessly blending into its colorful surroundings. It creates a serene anchor amidst the playful hues, preventing the room from feeling overwhelmed.
This charming little table has found its perfect home as a bedside companion. It offers ample surface space for my daughter’s collection of beloved stuffed animals and her nightly stack of books, keeping them close at hand. The handy drawer, once a simple storage spot for office supplies, now serves as a special treasury for her most cherished little trinkets and secrets. It’s more than just a piece of furniture; it’s a functional, beautiful, and deeply personal addition to her space, reflecting her unique style and our shared creative journey.
Why DIY Furniture Projects are Incredibly Rewarding
This project, like many others, beautifully illustrates the myriad benefits of embracing DIY furniture makeovers. It’s more than just saving money; it’s about investing your time and creativity into something tangible and meaningful.
Personalization and Unique Style
One of the greatest advantages of DIY is the ability to create something truly unique and tailored to your specific taste and needs. Unlike mass-produced furniture, a DIY piece carries a story and reflects the personality of its owner. For my daughter’s room, we weren’t just picking a table off a shelf; we were crafting a piece that perfectly matched her “Diva” aesthetic, her love for pink, and her desire for a glossy finish. This level of personalization simply isn’t achievable with store-bought items.
Budget-Friendly Decor Solutions
Let’s be honest, furniture can be expensive. By choosing to upcycle an existing piece, whether it’s one you already own or a thrift store find, you can dramatically cut down on costs. Our “new” nightstand was essentially free since we already owned it, only requiring the cost of paint and a little time. This makes stylish decor accessible on almost any budget, allowing you to allocate funds to other areas of home improvement or simply save money.
Sustainable Living through Upcycling
In an age of increasing environmental awareness, upcycling furniture is a wonderfully sustainable choice. Instead of sending perfectly good items to landfills, we give them a second life, reducing waste and our carbon footprint. This project transformed a piece that might have otherwise been discarded into a functional and beautiful item, contributing to a more eco-conscious lifestyle.
The Joy of Creation and Accomplishment
There’s an immense sense of pride and accomplishment that comes with stepping back and admiring a project you’ve completed with your own hands. Seeing the “before” and “after” transformation, knowing the effort and love that went into it, is incredibly satisfying. It’s not just about the finished product, but the journey of learning, problem-solving, and creative expression along the way. This shared experience with my daughter also created lasting memories.
Tips for Your Own Furniture Makeover Project
Inspired to tackle your own furniture transformation? Here are a few tips to help you get started and ensure a successful DIY project:
1. Choose the Right Piece
Look for furniture with “good bones.” Even if it’s dinged or scratched, ensure the structure is solid and stable. A rickety table, no matter how pretty the paint job, won’t last. Thrift stores, yard sales, and even your own garage are excellent places to hunt for potential gems.
2. Plan Your Design
Before you even open a paint can, envision the final look. Consider your color scheme, the desired finish (matte, glossy, distressed), and how the piece will fit into its intended room. Gather inspiration from magazines, Pinterest, or interior design blogs. Having a clear plan saves time and avoids costly mistakes.
3. Don’t Fear Imperfection
Sometimes, the “flaws” are what give a piece its character. As my daughter discovered with the distressing, a little wear can add charm. Embrace the unique aspects of old furniture; they tell a story and make your piece one-of-a-kind. Not every surface needs to be factory-perfect.
4. Involve Your Family
If appropriate, get your family involved in the process. My daughter’s input was crucial to this project’s success and made the end result even more special to her. Even small tasks can foster a sense of ownership and create wonderful shared memories.
5. Experiment with Paints and Techniques
Don’t be afraid to try different types of paint or application methods. Chalk paint is fantastic for a no-prep approach, while latex offers durability and a range of finishes. Spray paint is great for hardware or intricate details. Practice on a scrap piece if you’re unsure before committing to your main project.
6. Prioritize Safety
Always work in a well-ventilated area, especially when using spray paints or strong solvents. Wear appropriate protective gear, such as gloves and a mask, to shield yourself from fumes and paint. Clean up spills promptly and dispose of materials responsibly.
This project was a wonderful reminder that sometimes, the best treasures are found right under your nose. Before embarking on a shopping spree, it truly pays to “shop your own home” first and see what hidden potential lies within your existing possessions. The transformation of this simple brown laminate table into a vibrant, personalized nightstand for my daughter’s room was a truly rewarding experience, proving that with a little creativity and effort, anything can be reimagined.
Thank you for joining me on this creative journey. I hope it inspires you to look at your own old furniture with fresh eyes and perhaps embark on your very own DIY adventure. Have a fantastic day!
Dee 🙂