Indulge in Bliss: The Ultimate No-Bake Peppermint Pie Recipe for Effortless Holiday Magic
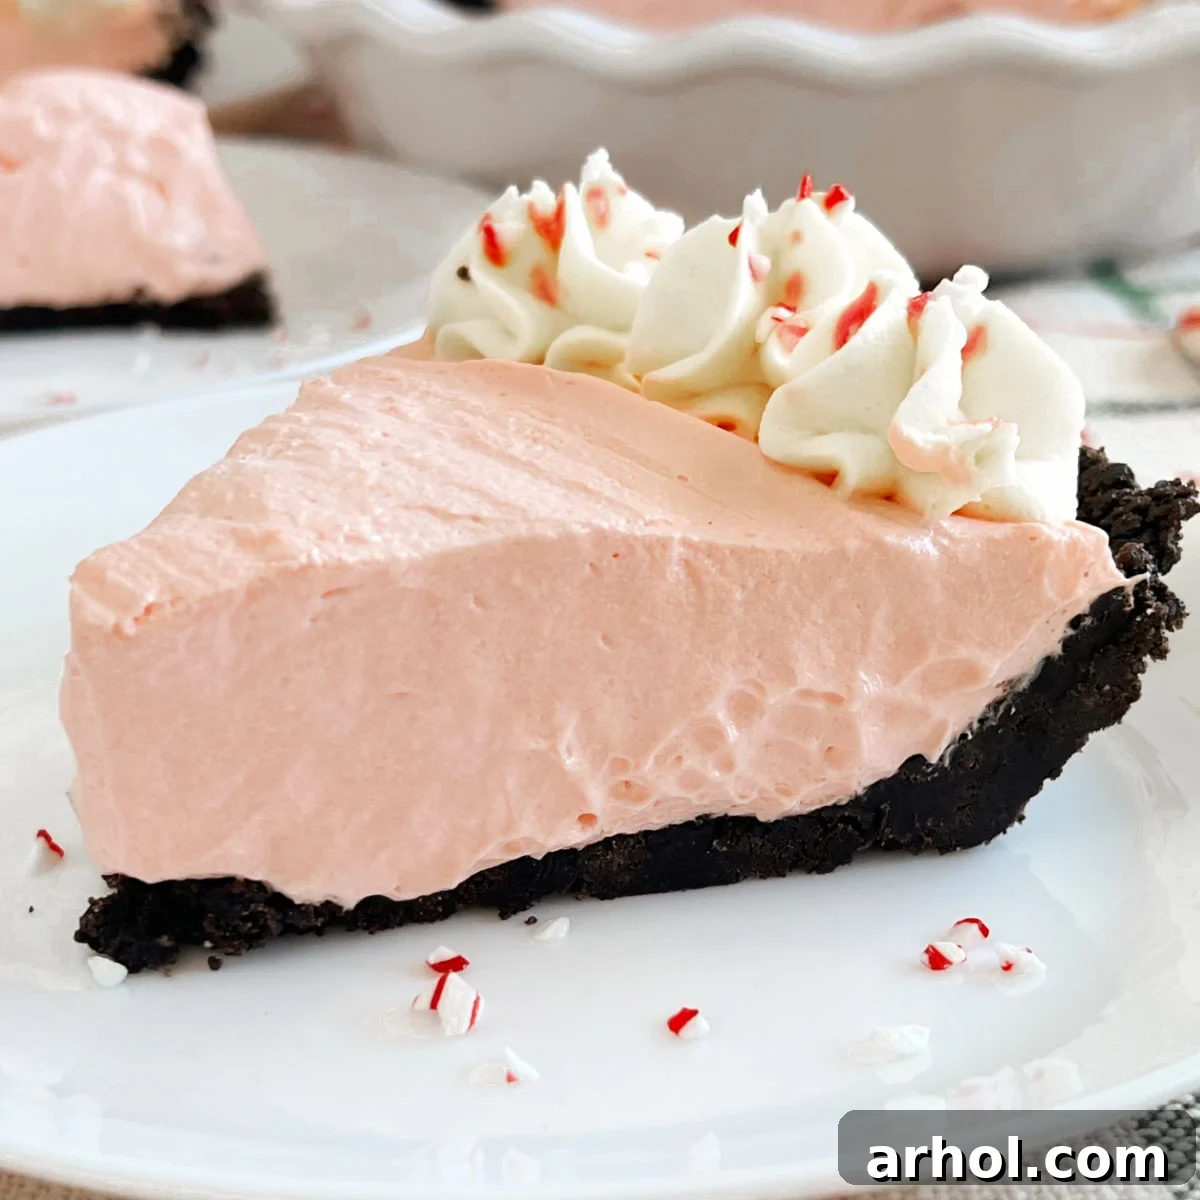
Step into a world of refreshing holiday delight with this incredibly easy no-bake peppermint pie. Imagine a cool, creamy, and vibrantly flavored dessert, perfectly nestled in a rich Oreo cookie crust, and crowned with fluffy whipped topping and festive crushed candy canes. This isn’t just a dessert; it’s a celebration of holiday cheer, designed to be simple enough for anyone to master yet impressive enough to steal the show at any festive gathering.
Forget the stress of baking during the busy holiday season. Our Peppermint Pie comes together in minutes with just a handful of everyday ingredients like Jello pudding mix and Cool Whip. It’s the quintessential holiday dessert, offering a burst of cool peppermint flavor that’s both nostalgic and invigorating, making it an instant classic for your Christmas table.
Why This No-Bake Peppermint Pie Will Be Your Holiday Hero
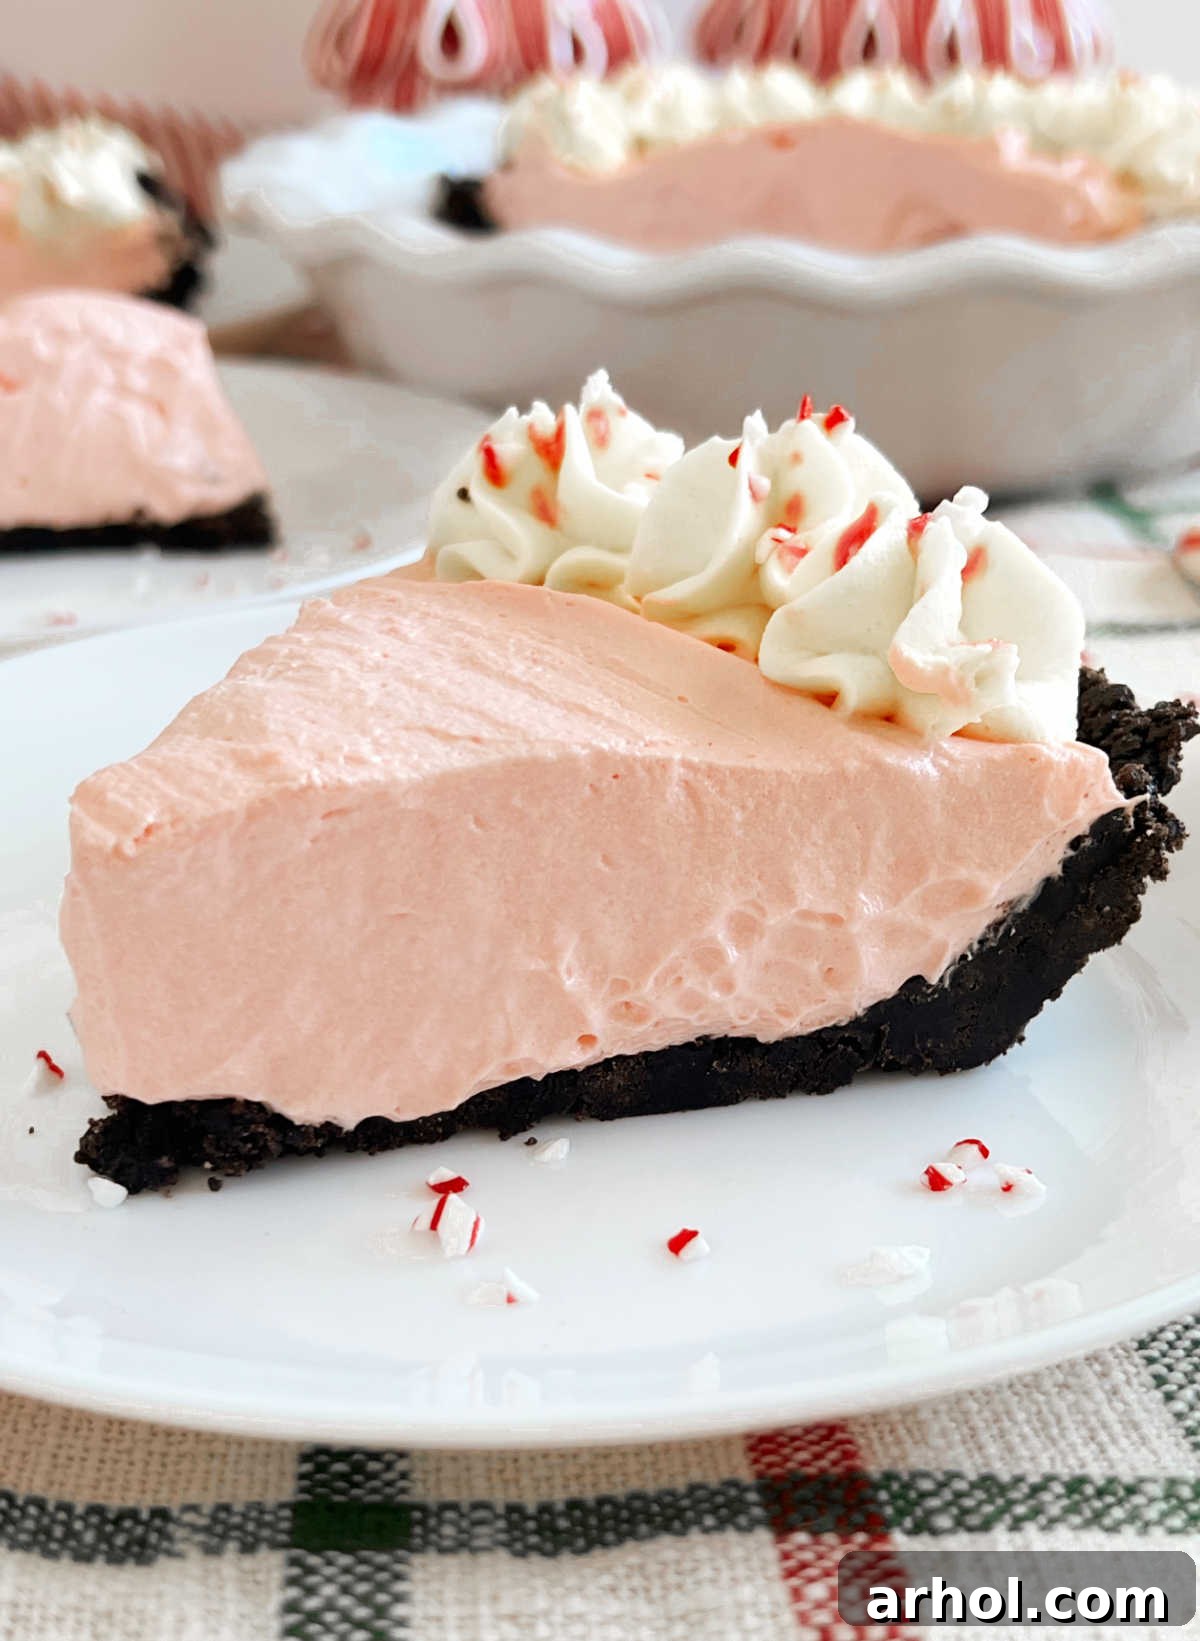
While there are countless peppermint pie recipes, this particular one stands out for its unparalleled simplicity and delightful results. It’s refreshingly cool, wonderfully creamy, and boasts that perfect balance of peppermint flavor – not too subtle, not too overpowering. We’ve perfected this recipe, drawing inspiration from beloved no-bake classics like our popular eggnog pie, ensuring it’s not only delicious but also incredibly straightforward to prepare.
Unwrap the Magic of This Christmas Pie

- Truly No-Bake: This pie liberates your oven for other holiday essentials, making it an ideal choice when kitchen space and time are at a premium. No baking means less fuss and more time to enjoy the festivities!
- Effortless Preparation: Utilizing instant pudding mix ensures a reliably perfect texture every time. The pudding acts as a stabilizer, helping the pie set beautifully while maintaining its delightful fluffiness and creamy consistency.
- Stunning Visual Appeal: With its vibrant pink hue and festive candy cane topping, this pie is a feast for the eyes as well as the palate. It adds a touch of whimsical elegance to any dessert spread, making it perfect for holiday photos and impressing guests.
- Crowd-Pleaser Guaranteed: The cool, refreshing flavor of peppermint combined with the comforting chocolate cookie crust is a combination that appeals to almost everyone. It’s a nostalgic taste that embodies the spirit of the season.
- Perfect for Any Skill Level: Whether you’re a seasoned baker or a complete novice in the kitchen, this recipe’s straightforward steps make it accessible and foolproof. You don’t need any special techniques or complicated equipment to achieve professional-looking results.
If you’re seeking an easy, yet show-stopping Christmas dessert for the holiday season, this simple and delicious recipe is unequivocally for you!
Essential Ingredients for Your Peppermint Masterpiece
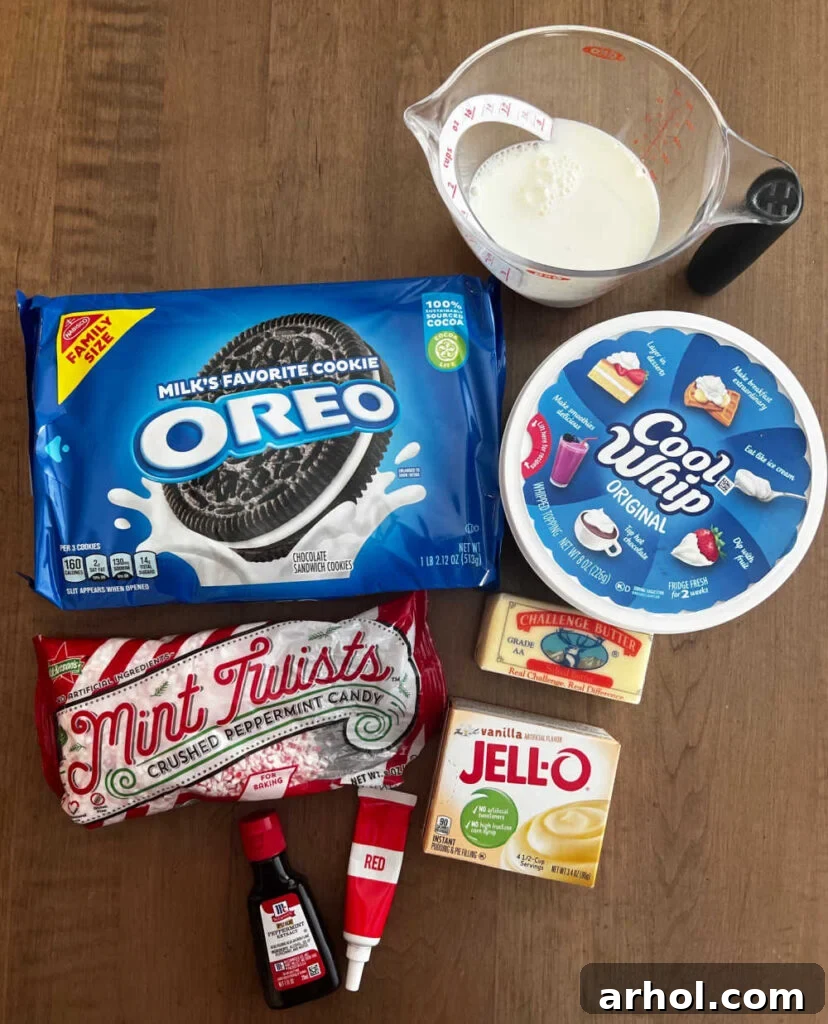
Crafting this festive candy cane pie requires only a few accessible ingredients, most of which you likely already have in your pantry or can easily find at any grocery store. The full measurements are detailed in the comprehensive recipe card found further down the page.
- Oreo Cookies: These iconic chocolate sandwich cookies form the foundation of our decadent pie crust. Their rich cocoa flavor and creamy filling blend together beautifully to create a sturdy yet crumbly base that perfectly complements the refreshing peppermint. For convenience, you can opt for a pre-made Oreo crust, or even use graham crackers or other chocolate wafer cookies for a slightly different take.
- Unsalted Butter: Melted butter is crucial for binding the cookie crumbs together, creating a firm and flavorful crust that holds its shape without needing to be baked. Using unsalted butter allows you to control the overall saltiness of your dessert.
- Instant Vanilla Pudding Mix: A box of instant vanilla pudding (like Jello brand) is the secret weapon for achieving the pie’s incredibly smooth, fluffy, and perfectly set filling. It provides a sweet vanilla base that highlights the peppermint, and its instant nature means no cooking required!
- Cold Milk: Essential for mixing with the instant pudding, whole milk or 2% milk will yield the creamiest and richest filling. Make sure it’s cold for optimal pudding setting.
- Red Food Coloring: To achieve that beautiful, festive pink hue characteristic of peppermint desserts, a few drops of red food coloring are used. Gel food coloring provides a more vibrant color with less liquid, ensuring it doesn’t thin out the filling.
- Pure Peppermint Extract: This is where the magic happens! Peppermint extract infuses the filling with its signature cool and minty flavor. Starting with half a teaspoon is recommended, but you can always add a tiny bit more to suit your personal preference for mint intensity.
- Cool Whip (Whipped Topping): Thawed Cool Whip is folded into the pudding mixture, giving the pie its light, airy, and incredibly fluffy texture. It also serves as a wonderful topping for decoration, adding another layer of creamy indulgence.
- Crushed Peppermint Candies or Candy Canes: These are primarily for garnish, adding a beautiful festive sparkle, a delightful crunch, and an extra burst of minty flavor to each slice. Crushing whole candy canes yourself can be a fun and rewarding step.
Step-by-Step Guide: Crafting Your Dreamy Peppermint Pie
Creating this easy peppermint pie is a straightforward process that yields impressive results. Follow these simple steps to assemble your delicious holiday dessert:
Part 1: The Perfect Oreo Crust
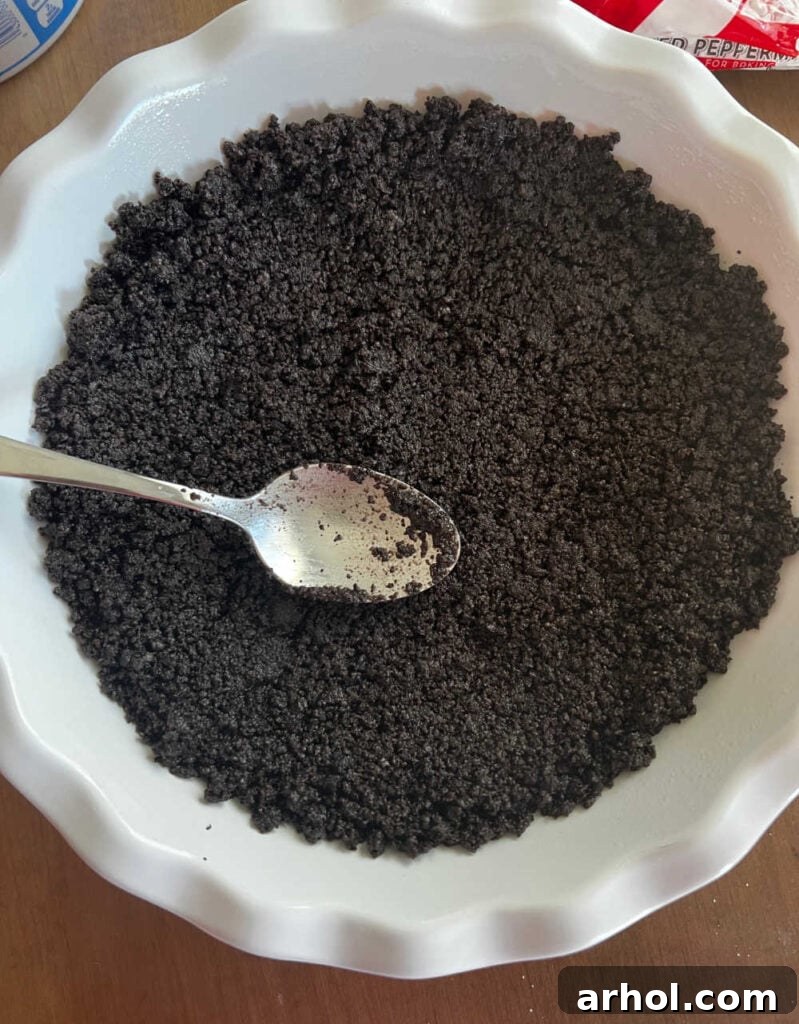
- Crush the Cookies: Begin by preparing your homemade Oreo crust. You can efficiently crush the entire package of Oreo cookies (no need to remove the cream filling!) using a food processor for fine crumbs. Alternatively, place the cookies in a large freezer bag and crush them thoroughly with a rolling pin until uniformly fine.
- Combine with Butter: In a medium bowl, melt the butter until completely liquid. Pour the melted butter over the crushed Oreo cookies and mix them together until the crumbs are fully moistened and resemble wet sand. This ensures a cohesive crust.
- Form the Crust: Lightly spray a 9-inch pie plate with non-stick cooking spray to prevent sticking. Evenly press the cookie and butter mixture into the bottom and up the sides of the pie plate. Use the back of a large spoon or a measuring cup to press firmly, creating a compact and even crust.
- Chill the Crust: For best results, place the prepared pie crust into the freezer for about 10-15 minutes while you prepare the filling. This quick chill will help the crust set firmly, preventing it from crumbling when sliced, all without requiring any baking!
Part 2: The Creamy Peppermint Filling
- Whisk Pudding and Milk: In a large mixing bowl, pour in the dry instant vanilla pudding mix. Gradually add the cold milk, and using a hand mixer on medium speed, beat the mixture for about 2 minutes until it’s well combined and starts to thicken.
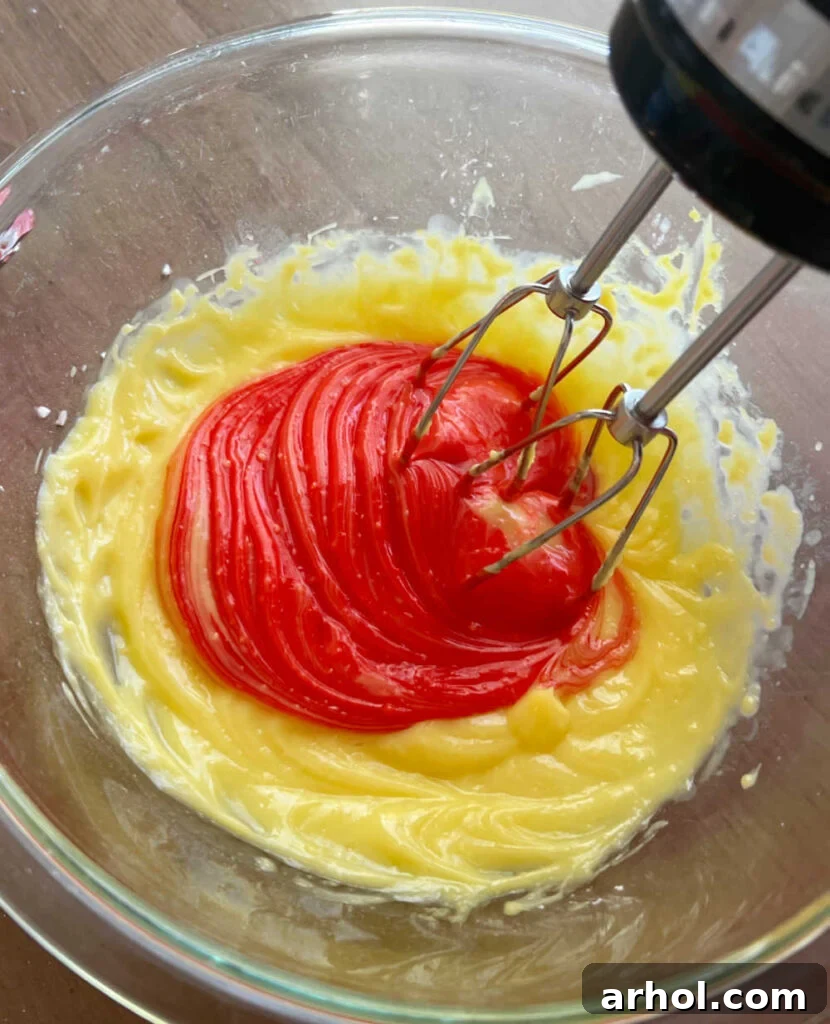
- Add Festive Color: Introduce the red food coloring to the pudding mixture. We used approximately 5 drops of gel coloring to achieve a lovely pink shade. If you’re using liquid food coloring, you might need a bit more to reach your desired vibrancy. Continue mixing until the color is evenly distributed.
- Infuse with Peppermint: Carefully add the peppermint extract. Start with ½ teaspoon; this amount usually provides the perfect balance of mint flavor without being overwhelming. If you absolutely adore a stronger peppermint kick, you can add a little more, a few drops at a time, tasting as you go. Mix thoroughly to ensure the flavor is evenly incorporated.
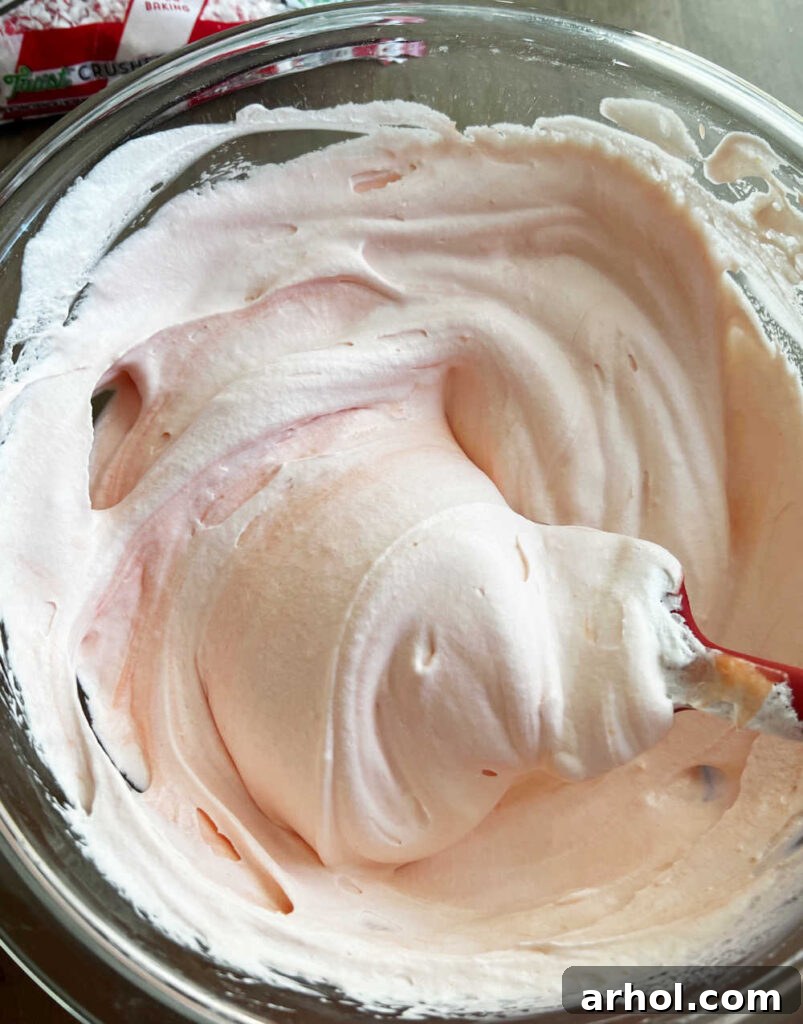
- Fold in Cool Whip: Gently, using a spatula, fold the thawed Cool Whip into the peppermint pudding mixture. Be careful not to overmix; the goal is to gently combine until no streaks of white remain, maintaining the airy and fluffy texture of the whipped topping.
Part 3: Assembly & Chilling
- Fill the Crust: Spoon the creamy peppermint filling into your prepared and chilled Oreo pie crust. Use the back of your spatula or spoon to gently smooth the top until it’s even.
- Refrigerate to Set: Place the assembled pie in the refrigerator for a minimum of 4 hours, or ideally overnight, to allow the filling to set completely. This ensures firm, clean slices.
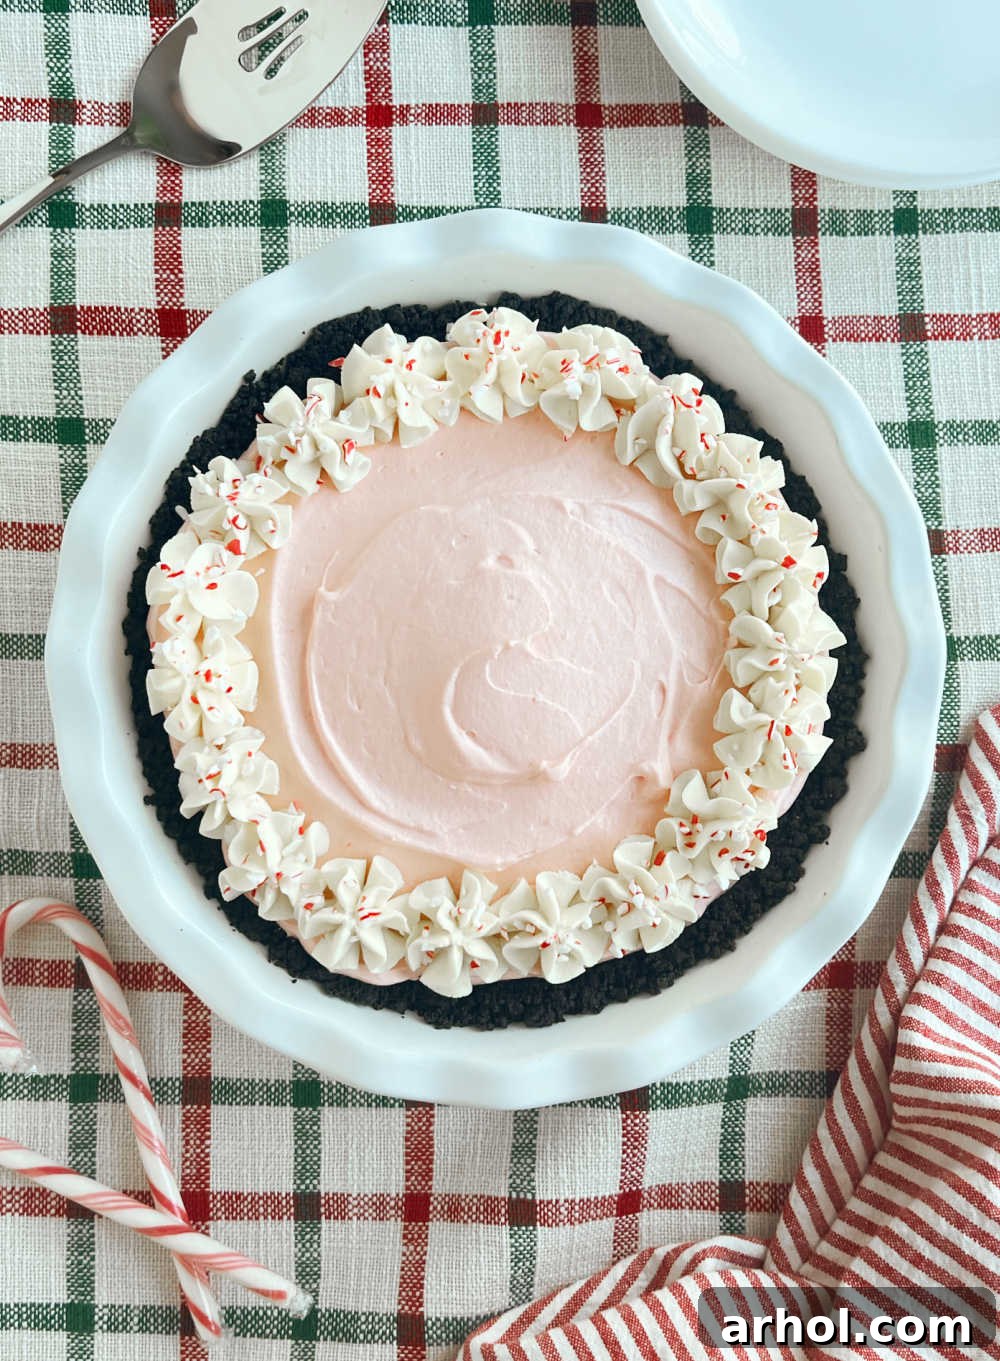
- Decorate and Serve: Just before serving, unleash your creativity! You can use the remaining Cool Whip to decorate the top of the pie. A piping bag with a star tip creates beautiful piped stars around the edge, or you can simply spread it evenly across the minty filling. Finally, generously sprinkle crushed peppermint candies or chopped candy cane pieces on top for that irresistible festive flourish.
Tips for Peppermint Perfection
Helpful Insights for a Flawless Pie
- Pie Pan Size: This recipe is perfectly suited for a standard 9-inch pie pan or a pre-made 9-inch crust.
- Thaw Cool Whip Properly: Always ensure your whipped topping is fully thawed before use. You will only need 2 cups for the pie filling; measure it out from an 8-ounce container, saving the rest for topping.
- Avoid Overmixing Cool Whip: When incorporating Cool Whip, use a gentle folding motion with a spatula. Using an electric mixer can break down its structure, resulting in a less fluffy and airy filling.
- Timing Your Garnish: For the best presentation, decorate your pie with crushed candy canes or peppermint candies on the day you plan to serve it. Peppermint tends to “bleed” or get a little sticky and runny when refrigerated for extended periods, which can affect the appearance.
- Adjusting Peppermint Flavor: Start with the recommended ½ teaspoon of peppermint extract. Taste the filling and add more a few drops at a time if you desire a stronger mint flavor, mixing well after each addition.
- For a Darker Crust: Ensure the Oreo crumbs are finely crushed for a more uniform and compact crust.
Storage & Make-Ahead Magic
One of the many advantages of this delightful peppermint pie is its versatility when it comes to storage and making ahead. Proper storage ensures your pie remains fresh, creamy, and delicious for days.
- Refrigeration: This pie requires at least 4 hours of refrigeration to set completely, but chilling it overnight will yield the best, most firm slices. Store any leftover pie in an airtight container or tightly covered with plastic wrap in the refrigerator for 3-4 days. After this period, the texture might become a little too soft.
- Make Ahead: This delicious pie can be made up to 2 days in advance, making it an excellent option for busy holiday meal planning. If making ahead, we highly recommend waiting to add the crushed peppermint candy garnish until the day of serving. As mentioned, peppermint candies can soften and bleed their color when refrigerated for too long.
- Freezing: For longer storage, this peppermint pie freezes beautifully! Cover the pie tightly with plastic wrap, then again with aluminum foil, and freeze for up to 2 months. Thaw in the refrigerator for several hours or overnight before serving. Freezing can make the texture even more firm, which some people prefer.
Serving Suggestions & Festive Garnish Ideas
While a simple sprinkle of crushed candy canes is classic, consider these ideas to elevate your peppermint pie’s presentation and flavor profile:
- Chocolate Shavings: A dusting of dark or white chocolate shavings adds a touch of elegance and complements the chocolate Oreo crust beautifully.
- Fresh Mint Leaves: For a sophisticated touch, place a few small fresh mint leaves on top of each slice.
- Chocolate Drizzle: A light drizzle of hot fudge or chocolate syrup creates a beautiful contrast and enhances the chocolate notes.
- Mini Chocolate Chips: Sprinkle mini chocolate chips over the whipped topping for added texture and a burst of cocoa.
- Peppermint Mocha Dust: Mix a little cocoa powder with a tiny pinch of instant coffee for a “mocha” dusting over the top.
Frequently Asked Questions About Peppermint Pie
Here are answers to some common questions you might have when making this delightful no-bake peppermint pie:
- Can I use homemade whipped cream instead of Cool Whip? Absolutely! While Cool Whip provides excellent stability and convenience, you can certainly use homemade whipped cream for a richer flavor. Just be aware that homemade whipped cream might not hold its shape as long, so it’s best to add it right before serving.
- Can I make this pie gluten-free? Yes! Simply opt for gluten-free chocolate sandwich cookies for the crust, or use a pre-made gluten-free chocolate cookie crust. The rest of the ingredients are typically gluten-free, but always check labels to be sure.
- How can I adjust the peppermint flavor intensity? Start with the recommended ½ teaspoon of peppermint extract. If you prefer a stronger mint flavor, add an extra ⅛ to ¼ teaspoon at a time, mixing and tasting after each addition until it suits your palate.
- What if I don’t have a food processor for the crust? No problem! Place the Oreo cookies in a large, sturdy freezer bag, seal it, and use a rolling pin or the bottom of a heavy pan to crush them into fine crumbs. It takes a little more effort but works perfectly.
- Can I add other flavors? While peppermint is the star, you could experiment! A tiny hint of almond extract alongside the peppermint, or even a layer of melted white chocolate at the bottom of the crust, could add an interesting twist.

Print Recipe
The Easiest Peppermint Pie
By: Dee
This Peppermint Pie is an easy no-bake dessert with Jello pudding mix and Cool Whip in an Oreo cookie crust. No-bake peppermint pie is the perfect holiday dessert!
- Prep Time:
- 15 minutes
- Cook Time:
- 0 minutes
- Chilling Time:
- 4 hours
- Total Time:
- 4 hours 15 minutes
- Servings:
- 8
- Rating:
- 5 from 9 votes
Ingredients
Pie Crust
- 5 tablespoons butter
- 22 Oreo cookies (not double stuff)
Pie Filling
- 3.4 oz instant vanilla pudding mix
- ¾ cup milk (whole or 2 percent)
- 5 drops red gel food coloring
- ½ teaspoon peppermint extract
- 2 cups Cool Whip (thawed)
Instructions
Pie Crust
- Crush the cookies in a food processor or in a freezer bag, using a rolling pin.
- Melt butter, and mix with cookie crumbs until the mixture is the texture of wet sand.
- Spray a 9-inch pie pan with non-stick spray, and press the cookie mixture into the bottom of the pie plate, using a large spoon or measuring cup. Place in freezer while you prepare the filling.
Pie Filling
- Pour the dry pudding mix into a large mixing bowl.
- Add the milk, and beat with an electric mixer on medium speed until well combined.
- Add the food coloring, and mix until combined.
- Add the peppermint extract, and mix well.
- Gently fold in the Cool Whip using a spatula until well blended.
- Spoon the filling into the prepared pie crust, and smooth until nice and even.
- Refrigerate for at least 4 hours or until set. Decorate with remaining Cool Whip and crushed peppermint candies.
Video
Notes
- Make sure Cool Whip is thawed. You only need 2 cups of Cool Whip for this recipe. Measure 2 cups using a measuring cup, and save the rest for topping.
- Refrigerate the pie for at least 4 hours or overnight before serving.
- Decorate the pie with crushed peppermint the day you are serving it, as peppermint candy tends to get runny in the refrigerator.
- You can make the pie up to 2 days ahead of time.
- Use a store-bought crust to make it even easier.
Nutrition
Nutrition information is automatically calculated, so it should only be used as an approximation.
- Calories:
- 301kcal
- Carbohydrates:
- 40g
- Protein:
- 3g
- Fat:
- 15g
- Saturated Fat:
- 7g
- Polyunsaturated Fat:
- 2g
- Monounsaturated Fat:
- 5g
- Trans Fat:
- 0.3g
- Cholesterol:
- 24mg
- Sodium:
- 285mg
- Potassium:
- 133mg
- Fiber:
- 1g
- Sugar:
- 27g
- Vitamin A:
- 275IU
- Vitamin C:
- 0.04mg
- Calcium:
- 56mg
- Iron:
- 4mg
Additional Info
- Course:
- Dessert
- Cuisine:
- American
Like this? Leave a comment below!
Explore More Refreshing Peppermint Dessert Recipes
If you’ve fallen in love with all things peppermint, your holiday dessert journey doesn’t have to end here! Dive into our collection of other delightful minty treats. You might enjoy our peppermint mocha dessert dip, perfect for festive snacking, or our whimsical candy cane dip. For fudge lovers, we have both white chocolate peppermint fudge and rich chocolate peppermint fudge. And don’t forget our chewy peppermint brownies or this incredibly easy peppermint bark. Be sure to browse our full category of easy dessert recipes for even more no-bake pies and countless other delicious sweet endings!
For a steady stream of easy recipes and Christmas dessert inspiration delivered straight to your inbox, don’t forget to sign up for our weekly newsletter and follow us on social media for daily dose of deliciousness!