
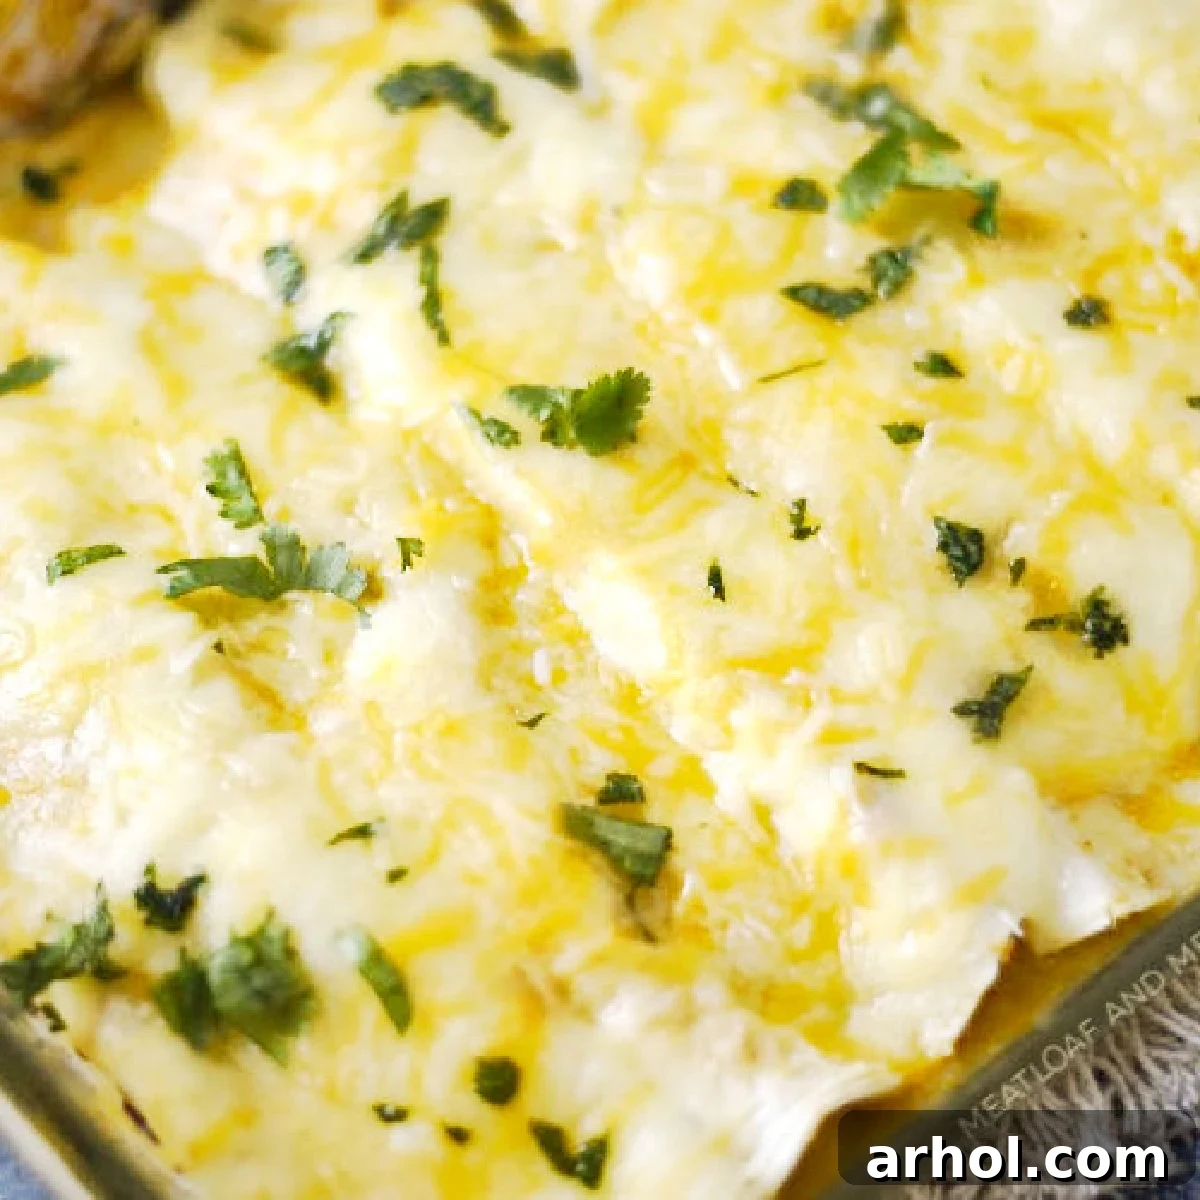
Instant Pot Chicken Enchiladas are a game-changer for busy weeknights, offering a symphony of flavors that will quickly become a family favorite. This incredibly easy recipe combines succulent shredded chicken infused with vibrant salsa verde, rich cream cheese, and a delectable homemade sauce, all wrapped in soft tortillas and baked to bubbly perfection. Whether you’re seeking a quick dinner solution or a fantastic dish to prepare in advance, these creamy chicken enchiladas promise a satisfying and delicious experience every time.
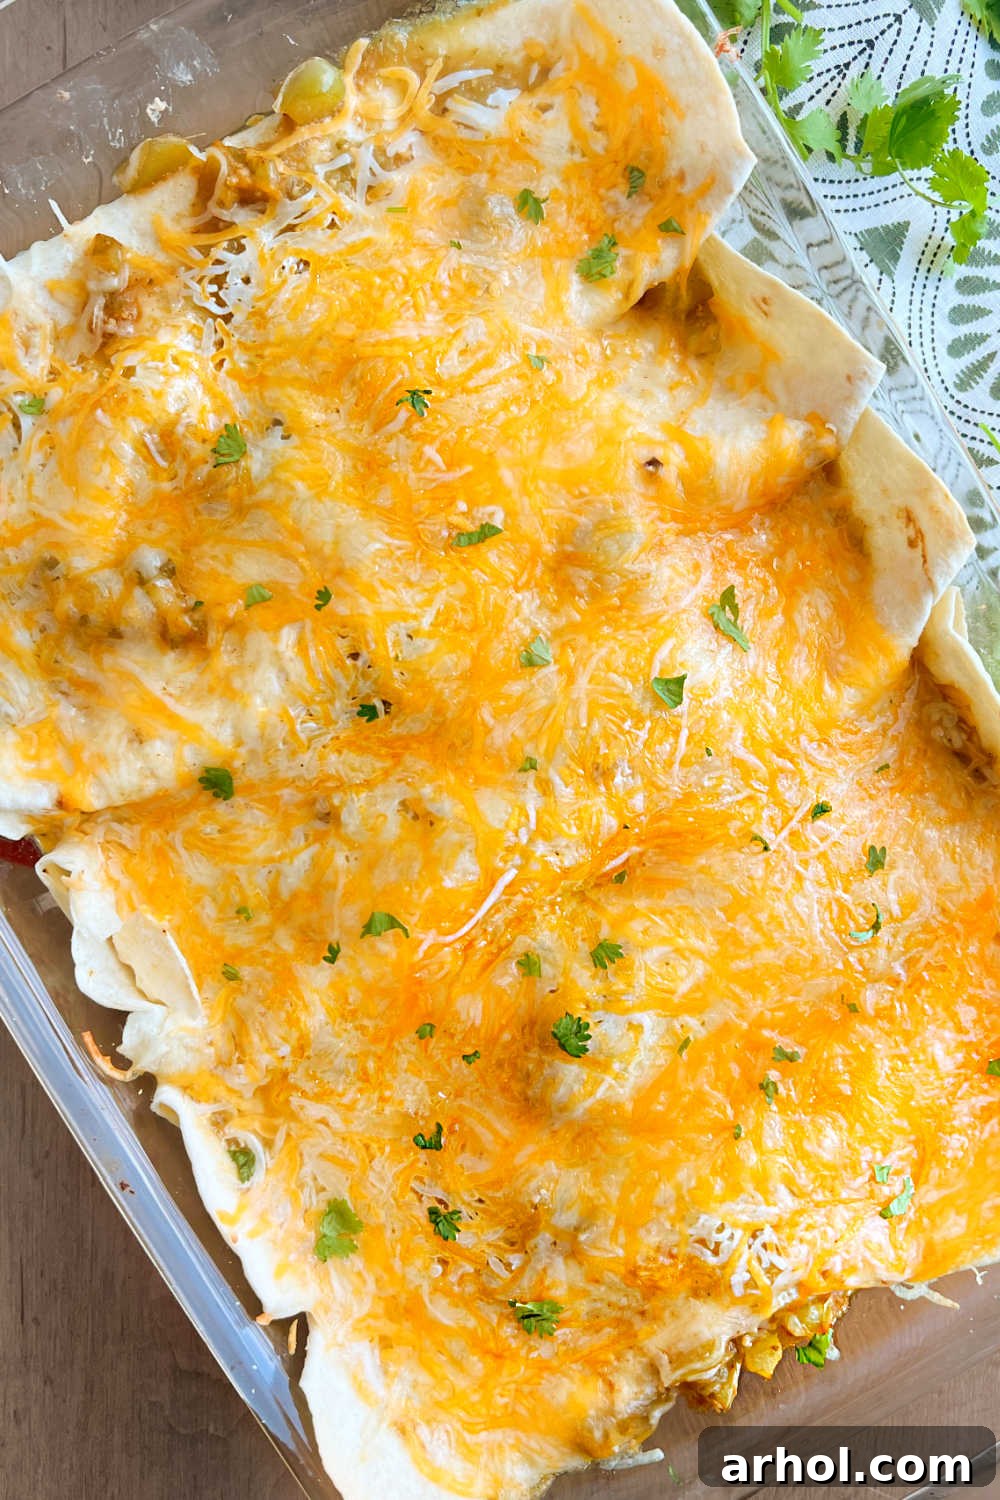
Table of Contents
- The Magic of Instant Pot Enchiladas
- Why the Instant Pot is Your Best Friend for Enchiladas
- Essential Ingredients for Perfect Enchiladas
- Step-by-Step: Crafting Your Creamy Chicken Enchiladas
- Baking and Serving Perfection
- Meal Prep and Storage Tips
- Frequently Asked Questions
- Exciting Enchilada Variations
- Creamy Instant Pot Chicken Enchiladas Recipe
- Conclusion
The Magic of Instant Pot Enchiladas: A Family Favorite
There’s something truly special about a dish that brings smiles to everyone at the dinner table, and these Creamy Instant Pot Chicken Enchiladas do exactly that. This recipe takes our beloved Instant Pot salsa verde chicken – a versatile star in its own right for tacos, burrito bowls, and salads – and elevates it into an unforgettable enchilada experience. Forget dry, bland chicken; the electric pressure cooker ensures every morsel is incredibly tender and bursting with flavor, forming the heart of our rich, homemade enchilada sauce.
Unlike traditional red sauce enchiladas, which can sometimes be too spicy for sensitive palates, or classic white chicken enchiladas that rely on a heavier cream sauce, our version strikes a delightful balance. These green chicken enchiladas, brightened by salsa verde and mellowed by cream cheese, offer a tangy, savory profile with just the right amount of warmth. My family consistently rates these as the best chicken enchiladas they’ve ever tasted, making them a top contender among our favorite Instant Pot dinner recipes. It’s a dish that proves ease doesn’t compromise on extraordinary taste!
Why the Instant Pot is Your Best Friend for Enchiladas
The secret to the unparalleled tenderness and flavor of these enchiladas lies in the Instant Pot. While I used to rely on rotisserie chicken or baked chicken for my enchiladas, the pressure cooker method has completely revolutionized the process. Here’s why it’s superior:
- Flavor Infusion: Cooking the chicken directly in salsa verde and a blend of spices allows the flavors to deeply penetrate the meat. This creates an incredibly rich and aromatic base for your enchilada filling and sauce, far beyond what simple baked or boiled chicken can offer.
- Unmatched Tenderness: The high-pressure environment of the Instant Pot breaks down the chicken fibers efficiently, resulting in chicken that’s fall-apart tender and never dry. This is crucial for shredded chicken, ensuring it remains juicy and moist.
- Speed and Efficiency: What might take hours in a slow cooker or oven is achieved in a fraction of the time. The Instant Pot significantly cuts down on active cooking time, making it feasible to enjoy homemade enchiladas even on the busiest weeknights.
- One-Pot Convenience: The initial cooking of the chicken, which generates the flavorful “homemade” enchilada sauce, all happens in one pot, minimizing cleanup and streamlining your cooking process.
This method not only simplifies meal preparation but also enhances the overall quality and taste of your enchiladas, transforming them into a dish that’s both easy to make and incredibly impressive.
Essential Ingredients for Perfect Enchiladas
Crafting these delicious Instant Pot enchiladas requires just a few straightforward ingredients, all readily available at your local grocery store. Each component plays a vital role in building the layered flavors that make this dish so irresistible.
- Olive Oil or Cooking Spray: Used for a quick sauté in the Instant Pot, helping to sear the chicken slightly and prevent sticking, enhancing its flavor before pressure cooking.
- Boneless Skinless Chicken Breasts: Approximately 1.5 pounds (about 4 medium breasts) are ideal for this recipe. You can also use boneless, skinless chicken thighs for an even juicier result. Ensure they are trimmed of any excess fat.
- Cream Cheese: The star ingredient for achieving that signature creamy texture and tangy undertone. Softened cream cheese blends seamlessly into the shredded chicken, adding richness and a delightful counterpoint to the salsa verde.
- Flour Tortillas: Medium-sized flour tortillas are perfect for rolling up the generous filling. While corn tortillas are more traditional in some regions, flour tortillas offer a softer texture that my family, and many others, prefer for their enchiladas. Choose what your family loves!
- Cheese: A blend of Monterey Jack cheese and Mexican blend cheese creates the ultimate melty, savory topping. Monterey Jack melts beautifully and offers a mild, buttery flavor, while the Mexican blend adds depth and a hint of sharpness. Feel free to use your favorite cheese combination, such as cheddar or a spicy pepper jack for an extra kick.
- Salsa Verde: The foundation of our “green” enchilada sauce. A good quality 16-ounce jar of salsa verde (I often use Herdez for its consistent flavor) is key. It provides the vibrant, tangy, and slightly spicy base that makes these enchiladas so unique.
- Seasonings: A carefully chosen blend of spices elevates the chicken’s flavor profile before it even hits the Instant Pot.
- Garlic Powder: Adds a foundational savory note.
- Ground Cumin: Essential for that authentic Tex-Mex warmth and earthy aroma.
- Smoked Paprika: Contributes a subtle smoky depth that complements the chicken and salsa verde beautifully.
- Cayenne Pepper (Optional): For those who enjoy a little heat, a touch of cayenne adds a welcome kick without overpowering the dish. Adjust to your preference, or substitute with taco seasoning for a pre-mixed flavor boost.
- Sea Salt: Balances and enhances all the other flavors.
With these simple yet powerful ingredients, you’re well on your way to creating a batch of Instant Pot Chicken Enchiladas that will impress everyone.
Step-by-Step: Crafting Your Creamy Chicken Enchiladas
Making these easy Instant Pot Chicken Enchiladas is a streamlined process, broken down into two main phases: pressure cooking the flavorful chicken, and then assembling and baking the enchiladas to golden perfection. Follow these steps for a guaranteed delicious outcome:
Phase 1: Preparing the Salsa Verde Chicken in the Instant Pot
- Season the Chicken: Start by adding a tablespoon of olive oil or a quick spray of cooking spray to the bottom of your Instant Pot insert. Place the boneless, skinless chicken breasts evenly in the pot. Sprinkle generously with sea salt, garlic powder, ground cumin, smoked paprika, and cayenne pepper (if using). Ensure each piece of chicken is well coated with the spices.
- Add Salsa Verde: Pour the entire jar of salsa verde over the seasoned chicken. Give it a slight stir to make sure the chicken is mostly submerged and evenly covered by the sauce. This liquid will form the rich, homemade sauce for your enchiladas.
- Pressure Cook: Secure the Instant Pot lid and set the sealing valve to the SEALING position. Select the “Pressure Cook” (or “Manual” on older models) setting and set the cooking time for 10 minutes on high pressure. The pot will display “ON” as it builds pressure, then begin counting down from 10 minutes.
- Natural and Quick Release: Once the 10-minute cooking cycle is complete, allow a natural pressure release for 10 minutes. This means letting the Instant Pot sit undisturbed, allowing the pressure to slowly decrease naturally. After 10 minutes, carefully hit “CANCEL” and then perform a quick pressure release by turning the valve to the VENTING position until the float valve drops. This two-stage release ensures the chicken remains incredibly tender and moist.
- Shred the Chicken: Carefully open the Instant Pot lid. Remove the cooked chicken breasts to a large mixing bowl. Pour the remaining flavorful cooking liquid into a separate bowl – this is your homemade enchilada sauce! Using a hand mixer (my preferred method for speed) or two forks, shred the chicken. Aim for larger, chunky pieces rather than finely shredded chicken, as this provides better texture in the enchiladas.
- Incorporate Cream Cheese: Add the softened cream cheese directly to the shredded chicken in the bowl. Mix thoroughly until the cream cheese is fully incorporated and the chicken mixture is creamy and well combined. This is your luscious enchilada filling!
Phase 2: Assembling and Baking the Enchiladas
- Preheat Oven: While assembling, preheat your oven to 350°F (175°C).
- Prepare Baking Dish(es): Grease one or two 9×13-inch baking dishes (casserole pans). Spread about 1/3 to 1/2 cup of the reserved cooking liquid (your homemade enchilada sauce) evenly across the bottom of each greased dish. If you’re making all 12 enchiladas, you’ll likely need to divide the sauce between two pans.
- Prepare Tortillas: Place a flour tortilla on a plate. Lightly brush or spread about 2 teaspoons of the reserved cooking liquid onto one side of the tortilla. This helps to soften the tortilla slightly and prevent it from drying out during baking.
- Fill and Roll: Spoon about 1/4 cup of the creamy chicken and cream cheese mixture in a line down the center of the prepared tortilla. Top this filling with a generous sprinkle of shredded Monterey Jack cheese. Carefully roll one end of the tortilla over the filling, continuing until you have a neatly formed enchilada.
- Arrange in Dish: Place the rolled enchilada, seam-side-down, into the prepared baking dish. Repeat this process with the remaining tortillas, chicken mixture, and cheese, arranging them snugly in the baking dish(es).
- Sauce and Top: Once all enchiladas are assembled, pour about 2 cups of the remaining reserved cooking liquid evenly over them. Then, sprinkle 1 cup of Monterey Jack cheese (or your preferred cheese) over the top of all the enchiladas.
Baking and Serving Perfection
The final step in creating your delicious Instant Pot Chicken Enchiladas is baking them to bubbly, golden perfection. This not only heats everything through but also melts the cheese into a glorious topping and allows the flavors to meld beautifully.
- Bake Time: Place your baking dish(es) in the preheated 350°F (175°C) oven. Bake for approximately 20 to 25 minutes, or until the enchiladas are heated through, the sauce is visibly hot and bubbly around the edges, and the cheese on top is completely melted and lightly golden.
- Total Cooking Time: Including the pressure cooking process for the chicken, the total time from start to a ready-to-serve meal is around 1 hour to 1 hour and 15 minutes, making it an incredibly efficient way to enjoy homemade enchiladas.
- Optional Additional Cheese: For an extra layer of cheesy goodness and a more vibrant visual appeal, I often like to add an additional cup of shredded Mexican blend cheese (or more Monterey Jack) during the last 5-10 minutes of baking. This ensures a fresh, gooey layer of cheese right before serving. Remember, when it comes to cheese, there are no rules – add as much as your heart desires!
Once baked, allow the enchiladas to rest for about 5 minutes before serving. This short resting period allows the sauce to set slightly, making the enchiladas easier to portion and serve without falling apart. Now comes the fun part: customizing your plate with your favorite toppings!
Elevate your enchilada experience with a vibrant array of garnishes. Classic choices include a dollop of cool sour cream, extra fresh salsa verde, or a scoop of zesty pico de gallo. For added freshness and crunch, consider diced tomatoes, creamy avocado slices, thinly sliced radishes, or a sprinkle of fresh cilantro. Serve alongside a side of black beans or refried beans to complete this satisfying meal. The beauty of enchiladas is that there are absolutely no rules – personalize them to your heart’s content!
Meal Prep and Storage Tips
This Instant Pot chicken enchilada recipe yields a generous batch of 12 enchiladas, making it perfect for feeding a crowd, enjoying throughout the week, or stashing away for future meals. Its make-ahead potential is one of its greatest assets!
- Portion Control and Versatility: If 12 enchiladas are more than you need for one meal, you have several options. You can use half the chicken for enchiladas and reserve the other half for a different recipe later in the week, such as quesadillas, salads, or sandwiches. Alternatively, you can prepare two smaller pans of 6 enchiladas each.
- Refrigeration: To prepare ahead for later in the week, assemble one pan of enchiladas as directed but do not bake. Cover the baking dish tightly with plastic wrap or aluminum foil and refrigerate for up to 3 days. When ready to bake, remove from the fridge and allow it to come closer to room temperature for about 20-30 minutes before baking as usual, possibly adding a few extra minutes to the bake time if still cold.
- Freezing Instructions: Enchiladas freeze beautifully! Assemble the enchiladas in a freezer-safe baking dish, cover tightly with a layer of plastic wrap and then a layer of aluminum foil. Label with the date and freeze for up to 3 months for optimal flavor. To bake from frozen, it’s best to allow the enchiladas to thaw in the refrigerator overnight before baking. If baking from frozen, cover tightly with foil and bake at 350°F (175°C) for about 45-60 minutes, then uncover and bake for an additional 15-20 minutes until hot and bubbly and the cheese is melted.
- Storing Leftovers: Any leftover baked enchiladas are incredibly delicious, often even better the next day! Store them in an airtight container in the refrigerator for up to 4 days.
- Reheating Leftovers: Reheat individual portions in the microwave until steaming hot. For larger quantities, place them back in the oven at 300°F (150°C) until thoroughly heated through. A quick breakfast enchilada is not unheard of in my house!
Frequently Asked Questions
While corn tortillas are often considered more traditional and authentic in some Mexican cuisines, Sonoran-style food, which is very popular in regions like Phoenix, frequently uses flour tortillas for enchiladas. My family has a strong preference for flour tortillas due to their softer texture and easier rolling. Ultimately, the choice is yours – use whichever type of tortilla you and your family enjoy most!
Absolutely! If you don’t have salsa verde on hand or prefer to use store-bought enchilada sauce, you can certainly substitute green enchilada sauce. Look for a good quality brand. If the green enchilada sauce appears very thick, you may want to thin it slightly with a small amount of water or chicken broth before pressure cooking the chicken to ensure there’s enough liquid for proper pressure buildup and to keep the chicken moist.
Yes, you can use frozen chicken breasts in the Instant Pot for this recipe. However, you will need to adjust the pressure cooking time. For approximately 1.5 pounds of frozen boneless, skinless chicken breasts, increase the pressure cook time to 12-15 minutes on high pressure, followed by a 10-minute natural release and then a quick release. Ensure the chicken reaches an internal temperature of 165°F (74°C) before shredding.
No Instant Pot? No problem! You can still make delicious shredded chicken in green sauce using a slow cooker. Simply combine the chicken, salsa verde, and seasonings in your slow cooker and cook on low for 6-8 hours or on high for 3-4 hours, until the chicken is easily shreddable. Then proceed with the rest of the recipe as directed, using the cooking liquid as your homemade sauce.
Exciting Enchilada Variations
One of the best things about homemade enchiladas is their versatility. You can easily customize this Instant Pot chicken enchilada recipe to suit your taste preferences or whatever ingredients you have on hand. Here are a few ideas to get you started:
- Cheese Choices: While Monterey Jack is fantastic for its melty quality, feel free to experiment with other cheeses. Sharp cheddar offers a bolder flavor, pepper jack adds a spicy kick, or a blend of Colby and Jack cheese works wonderfully too. Don’t be shy with the cheese!
- Add More Heat: If you love a spicier enchilada, consider adding finely diced jalapeños or serrano peppers to the chicken mixture, or a pinch more cayenne pepper. Hatch green chiles, whether canned or fresh, also make a fantastic addition, providing a unique smoky and mild-to-medium heat.
- Sour Cream vs. Cream Cheese: For a slightly different creamy texture and tang, you can substitute a portion of the cream cheese with sour cream in the chicken filling, or even swirl it into the sauce.
- Vegetarian Option: To make this recipe vegetarian, swap the chicken for shredded jackfruit, crumbled firm tofu, or a mix of roasted vegetables like zucchini, corn, and black beans. You’ll still want to flavor these with salsa verde and the same spice blend.
- Different Proteins: This recipe can easily be adapted for other proteins. Consider using cooked, shredded pork or even ground beef (browned and seasoned) instead of chicken. Adjust cooking times if using raw different meats in the Instant Pot.
- Spice it Up with Toppings: Beyond the suggested toppings, consider adding chopped green onions, a drizzle of hot sauce, or even a sprinkle of crumbled cotija cheese for an authentic touch.
- Make it a Casserole: For a quicker, less hands-on approach, layer torn tortillas, the chicken mixture, and sauce in a baking dish to create a deconstructed enchilada casserole.

Creamy Instant Pot Chicken Enchiladas
Instant Pot Chicken Enchiladas with cream cheese and salsa verde shredded chicken in homemade sauce is an easy chicken enchilada recipe everyone loves. This delicious dinner is a family favorite and a great recipe to make ahead of time.
Ingredients
For the Chicken
- 1 tablespoon olive oil
- 4 boneless skinless chicken breasts (about 1.5 pounds)
- 1 teaspoon sea salt
- 1 teaspoon garlic powder
- 1 teaspoon ground cumin
- 0.5 teaspoon smoked paprika
- 0.5 teaspoon cayenne pepper (optional)
- 1 (16 ounce) jar salsa verde (I use Herdez)
For the Enchiladas
- 4 ounces softened cream cheese
- 12 medium flour tortillas
- 6 cups shredded Monterey Jack cheese
- 2 cups shredded Mexican blend cheese (optional, for topping)
- Extra salsa verde (optional, for serving)
Instructions
Instant Pot Chicken Preparation
- Add the olive oil to the bottom of the Instant Pot inner pot. Add the chicken breasts.
- Season the chicken generously with sea salt, garlic powder, ground cumin, smoked paprika, and cayenne pepper (if desired).
- Pour the salsa verde over the chicken, mixing slightly to ensure the chicken is evenly coated and submerged in the sauce.
- Place the lid on the Instant Pot, set the sealing valve to the SEALING position. Select “Pressure Cook” (or “Manual”) for 10 minutes on high pressure. The pot will display “ON” as it comes to pressure, then begin counting down.
- After the 10-minute cooking cycle, allow a natural pressure release for 10 minutes. Then, hit CANCEL and do a quick release until the float valve drops.
- Carefully open the pot and remove the cooked chicken to a large bowl. Pour the cooking liquid (your homemade enchilada sauce) into another bowl and set aside.
- Using a hand mixer or two forks, shred the chicken into small chunks.
- Add the softened cream cheese to the shredded chicken and mix until well combined and creamy.
Enchilada Assembly and Baking
- Preheat your oven to 350°F (175°C).
- Grease one or two 9×13-inch baking dishes. Spread about 1/3 to 1/2 cup of the reserved cooking liquid (sauce) into the bottom of each dish.
- Place a tortilla on a plate, and lightly brush or spread about 2 teaspoons of the reserved cooking liquid onto one side.
- Place about 1/4 cup of the creamy chicken mixture in a line down the center of the tortilla, and top with some shredded Monterey Jack cheese.
- Roll one end of the tortilla over the filling to form an enchilada. Place the enchilada, seam-side-down, into the prepared baking dish. Repeat this process until all tortillas are filled and arranged in the pan(s).
- Pour about 2 cups of the remaining reserved cooking liquid evenly over the assembled enchiladas.
- Sprinkle 1 cup of Monterey Jack cheese over the top of the enchiladas.
- Bake for 20-25 minutes, or until the enchiladas are heated through, the sauce is bubbly, and the cheese is melted. For extra color and cheesiness, add the optional Mexican blend cheese (or more Monterey Jack) during the last 5-10 minutes of baking.
- Remove from the oven and let stand for about 5 minutes before serving. This helps the enchiladas set and makes them easier to remove from the dish.
Notes
- This recipe was developed using a 6-quart Instant Pot pressure cooker, but an 8-quart model can be used without adjusting amounts or cooking time.
- This recipe makes enough for 12 enchiladas. You can divide the cooking liquid between two pans, or make 6 at a time and refrigerate/freeze the remaining chicken and sauce for later use in another recipe.
- Feel free to use as much cheese as you desire and serve with additional salsa verde for an extra flavor boost.
Nutrition
Nutrition information is automatically calculated and should only be used as an approximation.
Additional Info
Enjoyed this recipe? Share your thoughts below!
Conclusion
I genuinely hope you and your family enjoy this Instant Pot Chicken Enchiladas recipe as much as we do! It’s truly a fantastic solution for a quick and satisfying weeknight meal, and without a doubt, a beloved family dinner staple. The ease of the Instant Pot combined with the irresistible flavors of salsa verde and cream cheese creates a dish that’s both comforting and exciting.
If you’re a fan of enchiladas and love the convenience of your Instant Pot, be sure to explore my other popular recipes like Instant Pot Chicken Enchilada Soup or Instant Pot Chicken Enchilada Pasta for more delicious variations. For more shredded chicken inspiration, don’t miss our Instant Pot Buffalo Chicken Dip, or browse the complete Instant Pot recipes archive for a treasure trove of easy meal ideas.
Don’t forget to follow me on social media and subscribe to my weekly newsletter to stay updated with more easy dinners and family-friendly recipes! Happy cooking!