
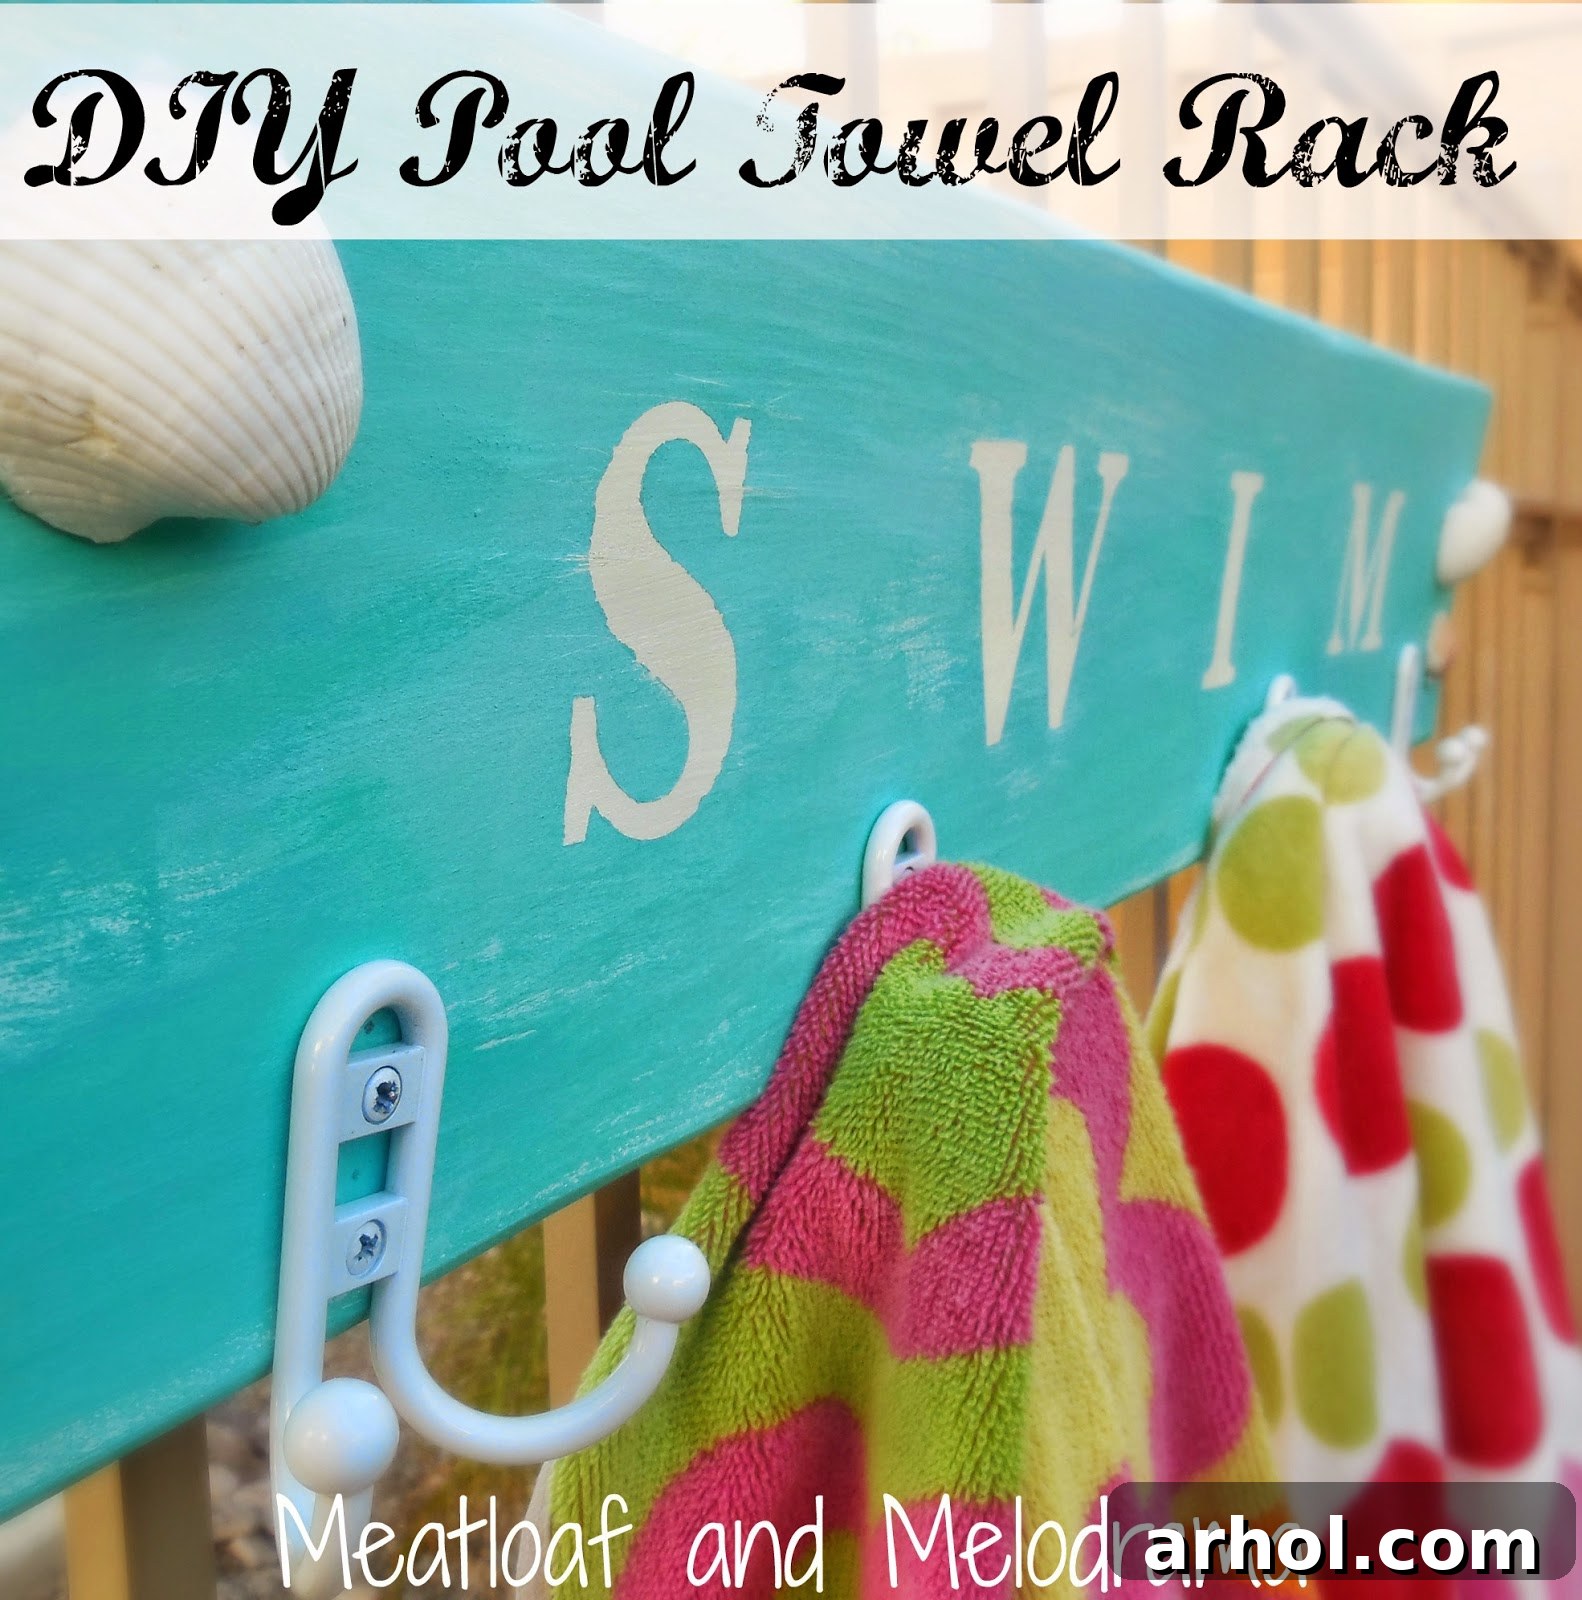
Transform Your Pool Area: DIY Beachy Pool Sign & Towel Rack Project
Hello fellow DIY enthusiasts and home decor lovers!
I hope your weekend has been as fulfilling and productive as mine. There’s a unique satisfaction that comes from dedicating time to a creative project, especially when it results in a functional and beautiful addition to your home. My husband and I were both engrossed in our respective projects, and since I’ve proudly crossed mine off the to-do list, I’m thrilled to share the details of what I created – a charming DIY pool sign and towel rack that has completely elevated our backyard space.
Why a DIY Pool Towel Rack is a Must-Have for Your Backyard Oasis
Every pool owner knows the struggle: wet towels strewn across chairs, draped over fences, or worse, forgotten on the ground. Not only does this create an untidy appearance, but it also makes it harder for everyone, especially children, to grab a fresh towel when needed. Our solution was a personalized, functional, and aesthetically pleasing DIY pool sign with integrated towel hooks. This project not only addresses a common backyard challenge but also adds a touch of coastal charm and organization to your outdoor living area.
The beauty of a DIY project like this lies in its versatility and cost-effectiveness. Instead of purchasing an expensive, generic outdoor towel rack, you can create a custom piece that perfectly matches your outdoor decor and personal style. Plus, it’s incredibly satisfying to transform a simple piece of material into something truly special and useful.
From Leftover Wood to Coastal Charm: The Project Begins
The inspiration for this project stemmed from a fortuitous discovery: a substantial piece of wood left over from a previous home improvement endeavor. It was just the right size, offering ample space for both a decorative sign and practical towel hooks. Given our ongoing efforts to enhance our backyard, the idea of creating a fun, beach-themed pool sign and towel holder immediately sprang to mind. Utilizing materials we already had on hand made this project even more rewarding and budget-friendly. This is how the raw wooden slab looked before its transformation – a blank canvas awaiting its new identity.
Step 1: Preparing Your Wooden Canvas and Choosing Your Words
The first crucial step for any woodworking project, especially one destined for the outdoors, is proper preparation. Begin by thoroughly sanding your wooden slab. This creates a smooth surface, ensuring better paint adhesion and a more professional finish. After sanding, wipe away any dust with a damp cloth and allow it to dry completely.
Next, I applied an off-white shade of paint as the base coat. This particular hue has become a staple in several of my recent projects, providing a clean, bright foundation that works beautifully with various decorative themes. For outdoor projects, always opt for exterior-grade paint that can withstand the elements, protecting your creation from sun, rain, and humidity. Apply two to three thin coats for optimal coverage and durability, allowing ample drying time between each coat.
While the base coat dried, I pondered the perfect lettering for the sign. The possibilities are endless – “SPLASH,” “POOL DAZE,” “SUNSHINE & SWIMS” – but ultimately, I opted for a simple, classic, and universally understood message: “SWIM.” Keeping it minimal ensures readability and a timeless appeal. Since I don’t own a Silhouette cutting machine, I creatively repurposed some letter decals that were originally intended for my younger girls’ room. These readily available decals are a fantastic alternative to stencils or freehand painting, offering crisp, clean lines with minimal effort. Carefully position and adhere them to your dried base coat, ensuring they are straight and evenly spaced.
Step 2: Embracing the Beachy Vibe with Coastal Colors
With the base coat dry and the letters firmly in place, it was time to introduce the vibrant, beach-inspired colors. I layered two different blue-green paints over the entire sign, including over the letter decals. The goal was to achieve that beloved beachy, slightly distressed aesthetic that instantly evokes feelings of the ocean and sunny skies. Applying multiple thin coats in varying shades of aqua and teal allows for depth and character, giving the sign a weathered, coastal charm that I absolutely adore.
When layering colors, you can experiment with different techniques. A dry brush method, where you use very little paint on your brush, can create a beautifully subtle, streaky effect that mimics worn wood. Alternatively, a wash of diluted paint can add a translucent layer that allows the base coat to peek through, enhancing the distressed look. Remember, there’s no single right way; let your creativity guide you to achieve the perfect beach house aesthetic. Ensure each coat dries thoroughly before applying the next.
Step 3: Revealing the Message and Adding Functional Hooks
This step is arguably the most satisfying part of the entire project! Once the top layers of paint were completely dry, I carefully peeled off the letter decals. This revealed the crisp, off-white “SWIM” lettering underneath, creating a striking contrast against the serene blue-green background. The reveal is always a moment of pure magic, seeing your design come to life.
To enhance the weathered, blended appearance, I gently sanded around the edges of the letters and along the entire surface. This subtle distressing softens any harsh lines, integrates the layers of paint seamlessly, and truly gives the sign that coveted rustic, beach-worn character. The key is to sand lightly, allowing just enough of the underlying layers to show through without overdoing it. After sanding, wipe away any dust.
Now for the functional aspect: attaching the towel hooks. I chose four sturdy hooks, strategically spacing them evenly along the bottom edge of the sign. Before screwing them in, always pre-drill pilot holes. This prevents the wood from splitting, especially when working with reclaimed or older wood. Measure carefully to ensure your hooks are aligned and parallel, providing a neat and organized space for hanging towels. With the hooks in place, the transformation from a plain piece of wood to a stylish and practical pool accessory was complete! What do you think of its new look?
Step 4: Adding Embellishments and Ensuring Outdoor Durability
To further enhance the beachy theme and add a personal touch, I incorporated some decorative elements. There was a noticeable knot in the wood, which I cleverly disguised with a few strategically placed seashells. I also added seashells to the opposite side to maintain a balanced aesthetic. These small details make a big difference, transforming the sign into a unique piece of coastal art. You could also consider adding small starfish, a length of nautical rope, or even painted buoys to personalize your sign.
For outdoor projects, sealing is non-negotiable. Once all paint layers are dry and embellishments are securely attached, apply several coats of a clear, exterior-grade sealant or polyurethane. This step is crucial for protecting your DIY pool sign and towel rack from moisture, UV rays, and general wear and tear, ensuring it remains vibrant and beautiful for years to come. Follow the product instructions for application and reapplication.
Effortless Installation and Functional Benefits
Our DIY pool sign and towel holder was designed for maximum convenience. I attached two heavy-duty hooks to the back, allowing it to simply hang over our pool fence. This “easy peasy” installation means no drilling into the fence itself and the flexibility to move it if needed. For different installation needs, you could use D-rings and screws for wall mounting, or even attach it to a freestanding post near your pool.
The benefits of this project are immediate and noticeable. Previously, towels were often tossed haphazardly over the pool fence, leading to clutter and making it difficult for the kids to grab a dry towel. Now, with dedicated hooks at an accessible height, it’s so much easier for everyone to keep the pool area tidy. Beyond its practical function, the vibrant aqua blue of the sign adds a beautiful pop of color, brightening up our pool area and reinforcing that wonderful coastal ambiance. It truly feels like a little slice of the beach right in our backyard.
Share Your DIY Journeys!
There’s immense satisfaction in completing a DIY project, especially when it solves a practical problem and enhances your living space. Crossing another item off the to-do list feels fantastic! I hope this tutorial inspires you to tackle your own backyard organization and decor projects. Have you completed any exciting DIY transformations around your home lately? I always love hearing about what others are creating!
Thank you so much for stopping by and sharing in my latest creation. I wish you all a wonderful and productive day!
Warmly,
Dee 🙂