
Hi there, fellow crafters and doll enthusiasts!
Today, I’m thrilled to share a delightful DIY project that brought immense joy to our home: a charming, rustic American Girl Doll picnic table. What started as a whimsical joke quickly transformed into a fulfilling family crafting session, proving that some of the best projects spring from the most unexpected inspirations.
The Spark of Inspiration: From Fencing to Furniture
My husband recently cut several redwood fencing boards for various sign-painting projects I had in mind for our home. As I looked at one of the perfectly sized pieces, a playful thought crossed my mind: “This board would be absolutely perfect for a doll picnic table!” Little did I know, this casual remark would set in motion an exciting new adventure in DIY doll furniture. My daughter, ever the enthusiast for her beloved American Girl dolls, overheard me and immediately seized upon the idea. Her excitement was infectious, and before we knew it, she and my husband were making another trip to Home Depot to gather additional boards specifically for this miniature masterpiece.
The beauty of DIY projects like this lies not only in the final product but also in the collaborative process. Watching my husband and daughter work together, measuring, cutting, and assembling, was a heartwarming experience. It’s these shared moments of creativity that truly make a house a home, and in this case, a dollhouse a more vibrant place!
Why Choose a DIY American Girl Doll Picnic Table?
There’s something uniquely charming about a picnic table. It evokes images of sunny afternoons, outdoor adventures, and delightful gatherings. For American Girl dolls, a picnic table opens up a whole new world of imaginative play. It’s more than just a piece of furniture; it’s a stage for storytelling, a prop for pretend meals, and a centerpiece for countless doll-sized celebrations. While store-bought doll furniture can be lovely, crafting your own offers unparalleled benefits:
- Customization: You get to choose the materials, dimensions, and finish, tailoring it perfectly to your dolls and play space.
- Cost-Effective: Often, DIY options are significantly more budget-friendly, especially when using reclaimed or readily available materials like fencing boards.
- Quality and Durability: You control the craftsmanship, ensuring a sturdy and long-lasting piece that can withstand years of enthusiastic play.
- Educational Value: For children, participating in or observing the creation process teaches valuable lessons about measurements, materials, and construction.
- Sentimental Value: A handmade item carries a special connection, becoming a cherished keepsake that tells a story.
Gathering Your Materials and Tools
For this rustic picnic table, we opted for redwood fencing boards. Redwood is an excellent choice for its durability and natural resistance to decay, giving the table a lovely, authentic outdoor feel. It also works beautifully with a “no paint” rustic aesthetic. If redwood isn’t readily available, pine or other softwoods would also be suitable for this project. The key is to select boards that are relatively thin and easy to work with, keeping the scale appropriate for 18-inch dolls.
Here’s what you’ll need:
- Wood Boards: Several pieces of redwood fencing (or similar wood) for the tabletop and benches, and additional pieces for the legs. The exact number will depend on the dimensions you choose.
- Wood Glue: A strong, durable wood glue is essential for secure assembly.
- Measuring Tape or Ruler: Precision is key for doll-sized furniture.
- Saw: A miter saw or handsaw for clean, accurate cuts. Safety first!
- Clamps (Optional but Recommended): To hold glued pieces together while drying.
- Pencil: For marking cut lines.
- Sandpaper (Optional): To smooth any rough edges, though we embraced the rustic look for this project.
DIY American Girl Doll Picnic Table: Step-by-Step Construction
Creating this miniature picnic set was surprisingly straightforward. My husband, with his keen eye for measurement, guided the process, ensuring everything was perfectly scaled for our 18-inch friends. While I often rely on estimation for my crafting endeavors, this project truly benefits from precise measurements – a lesson I’m always reminded of when I attempt sewing!
1. Planning and Measuring for Doll Dimensions
Before any cutting began, my husband carefully measured the dolls themselves to determine appropriate proportions. A good rule of thumb is to ensure the tabletop height allows the dolls to sit comfortably with their feet on the ground or dangling slightly, and the benches are wide enough for them to sit securely. For American Girl dolls (approximately 18 inches tall), a table height of about 8-10 inches generally works well, with benches around 4-5 inches high. The tabletop length and width can be customized, but around 12-15 inches long and 6-8 inches wide provides ample space for a doll picnic. Our table ended up being roughly 14 inches long and 6 inches wide.
2. Cutting the Wood Components
With the measurements established, the next step was cutting the boards. My husband meticulously cut the following pieces:
- Tabletop Boards: Three equal lengths for the main tabletop surface.
- Table Legs: Four identical pieces for the table legs, ensuring the table would be level.
- Bench Tops: Two pieces for the seat of each bench.
- Bench Legs: Four small, sturdy pieces for the legs of each bench (two per bench).
3. Assembling the Tabletop
Once all the pieces were cut, assembly began. For the tabletop, the three equal-length boards were laid side-by-side. My husband applied a generous amount of wood glue along the edges where the boards would meet. He then pressed them firmly together, making sure the surfaces were flush. For best results, it’s advisable to use clamps to hold the boards tightly while the glue dries completely. This creates a solid, unified tabletop surface. We let it dry overnight to ensure maximum strength.
4. Attaching the Table Legs
After the tabletop glue had cured, the next step was to attach the legs. My husband carefully positioned the four table legs at each corner, ensuring they were plumb and square for stability. He applied wood glue to the top edge of each leg and firmly attached them to the underside of the tabletop. Again, clamps can be invaluable here to hold the legs in place while the glue sets. We made sure to leave ample drying time before moving the table.
5. Crafting the Benches
The benches were constructed using a similar method. Each bench required a main board for the seat and two smaller pieces for the legs. My husband glued the two small legs to the underside of each bench seat, positioning them appropriately to provide stable support for the dolls. These miniature benches perfectly complement the picnic table, completing the ensemble.
The Grand Reveal: A Doll’s Delight!
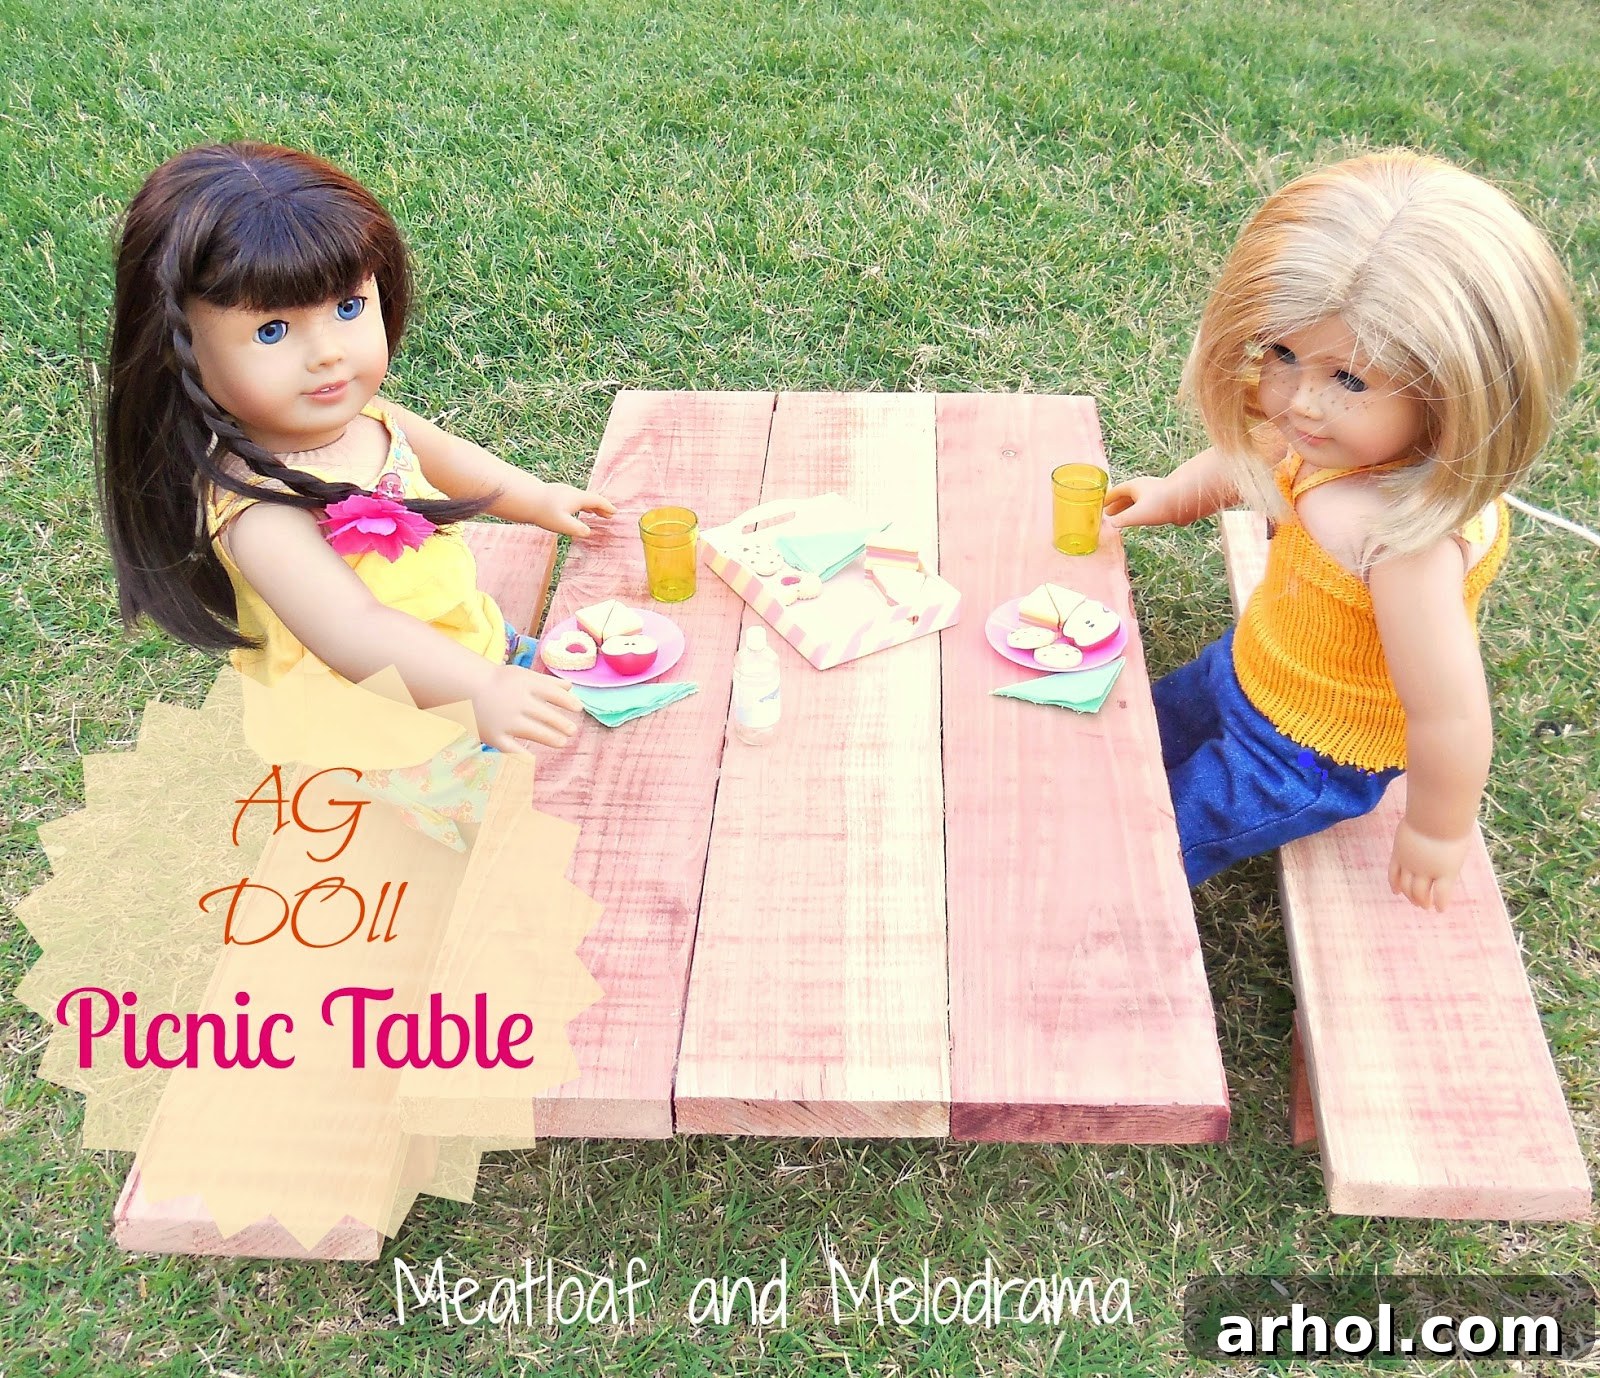
The moment the picnic table and benches were complete, our American Girl dolls were practically bursting with excitement! They couldn’t wait to host their very first outdoor gathering. The rustic, unpainted redwood gave the set such a natural, authentic feel, perfectly suited for an impromptu backyard picnic.
The dolls donned their cutest summer outfits and headed outside, eager to enjoy a light lunch. Their spread included delicate pastries, fresh fruit, tiny sandwiches, and miniature bottled water. It was clear they were missing one crucial accessory: a picnic basket! That’s definitely on the list for our next doll accessory DIY project. Thankfully, there were no “bears” – otherwise known as our furry canine companions – around to disturb their peaceful outdoor meal!
Exploring the Versatility of Redwood Fencing Boards
If the wood we used for this charming picnic table looks familiar, you’re not mistaken! These redwood fencing boards have proven to be incredibly versatile for various projects around our home. This is the very same wood we utilized for our beautiful rustic wall map, which adds a unique, personalized touch to our decor. We also repurposed similar boards to construct a handy DIY pet gate, showcasing its practical applications. My love for this particular type of wood knows no bounds; its rustic charm and ease of use make it a go-to for countless creative endeavors. Now, with the doll picnic table complete, I just need to carve out some time to start painting those signs I initially cut the boards for!
The beauty of using reclaimed or inexpensive lumber like fencing boards is that it encourages creativity and experimentation without a hefty investment. It’s an eco-friendly approach to crafting that also allows for unique, one-of-a-kind results that mass-produced items simply can’t replicate. From wall art to functional gates and now adorable doll furniture, these boards have transformed into invaluable elements of our home.
Join the DIY Doll Furniture Movement!
Creating homemade doll furniture like this American Girl Doll picnic table is a rewarding experience that offers endless possibilities for imaginative play and personal satisfaction. It’s a wonderful way to bond with your children, teach them about crafting, and provide their beloved dolls with unique, cherished accessories.
Whether you’re an experienced woodworker or a beginner looking for a fun project, this DIY picnic table is approachable and offers immediate gratification. Don’t be afraid to experiment with different types of wood, finishes, or even add a splash of paint if the rustic look isn’t quite your style. The most important thing is to enjoy the process and the joy it brings.
Thanks for stopping by to share in our little picnic adventure. I hope this inspires you to embark on your own easy doll craft projects. Happy crafting and have a truly wonderful day!
Dee 🙂