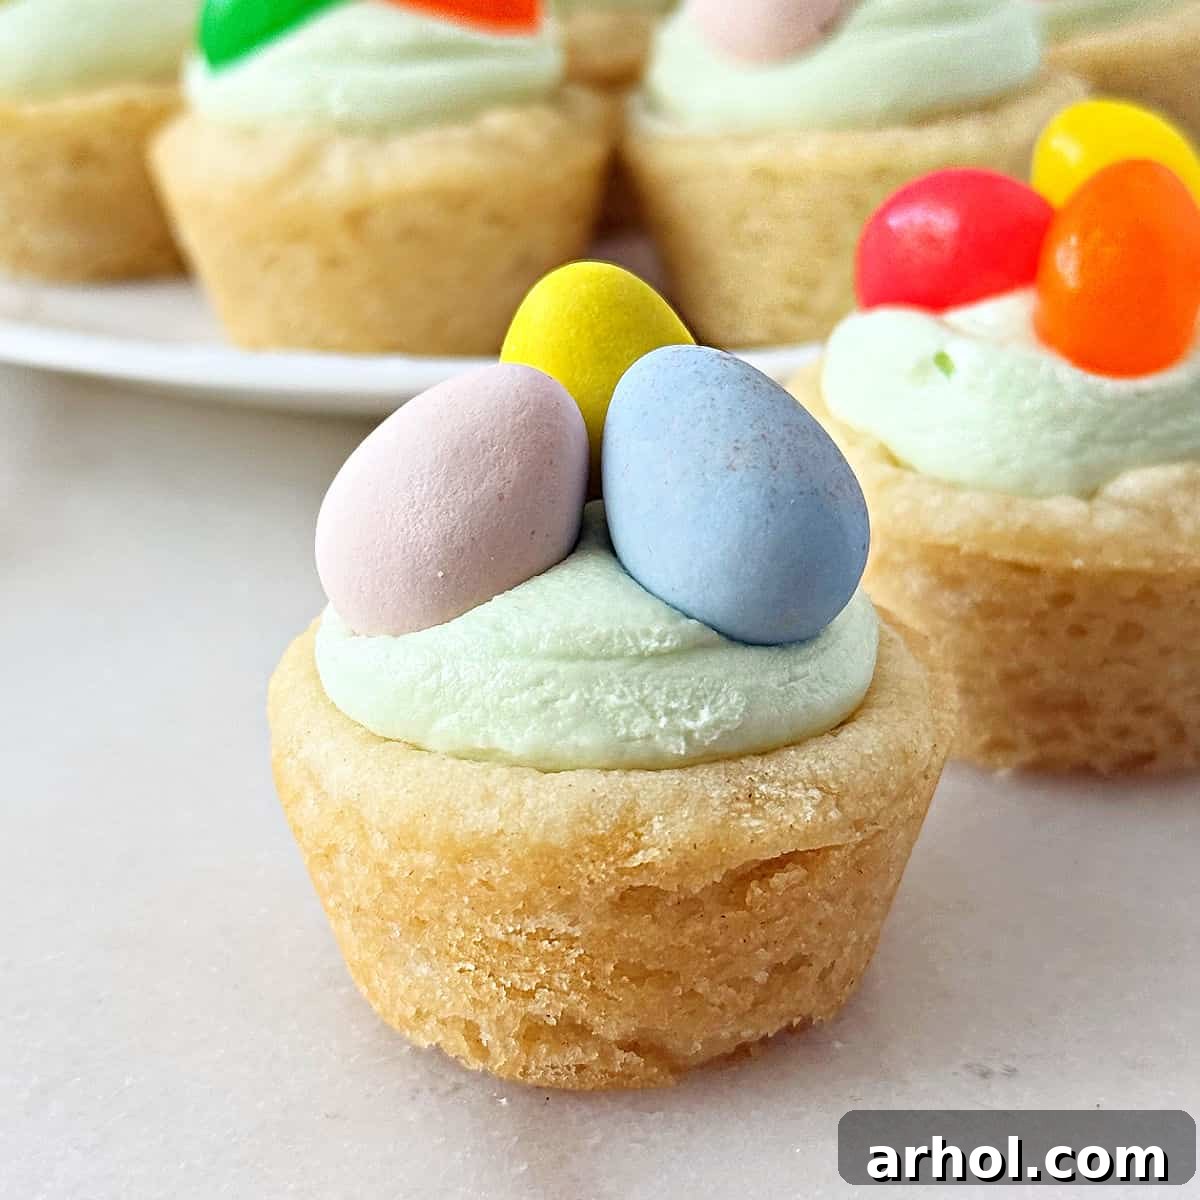
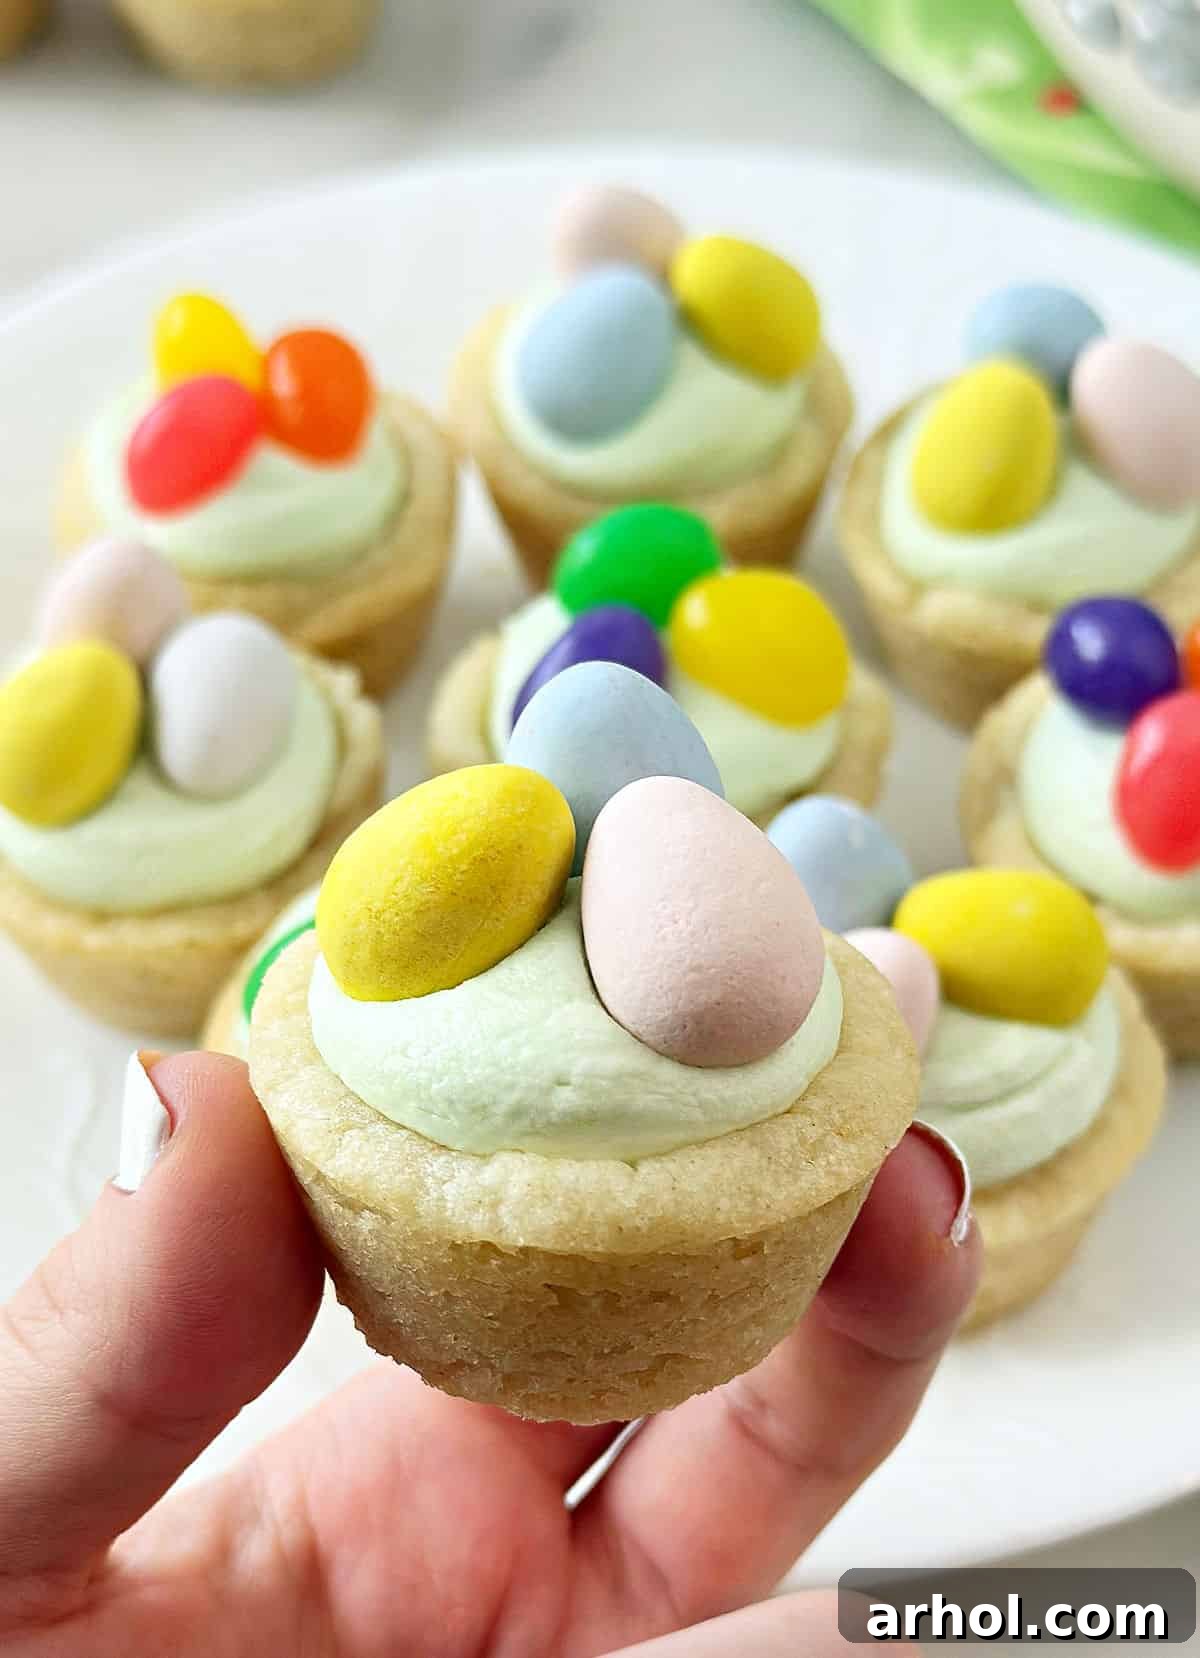
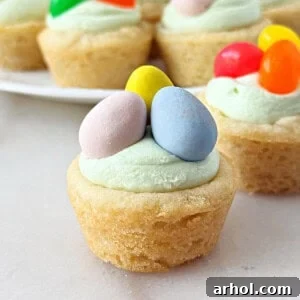
Delight in the sweet charm of the season with these adorable **Easter Basket Cookie Cups**! Imagine a soft, chewy sugar cookie base, perfectly molded into a cup, then generously filled with creamy green buttercream frosting, creating a whimsical “grass” effect. Topped with an assortment of colorful candy eggs and vibrant jelly beans, these mini desserts are not just a treat for the taste buds but also a feast for the eyes. This incredibly easy recipe promises to be a delightful and delicious highlight for any spring gathering or Easter celebration, bringing joy to both bakers and eaters alike.
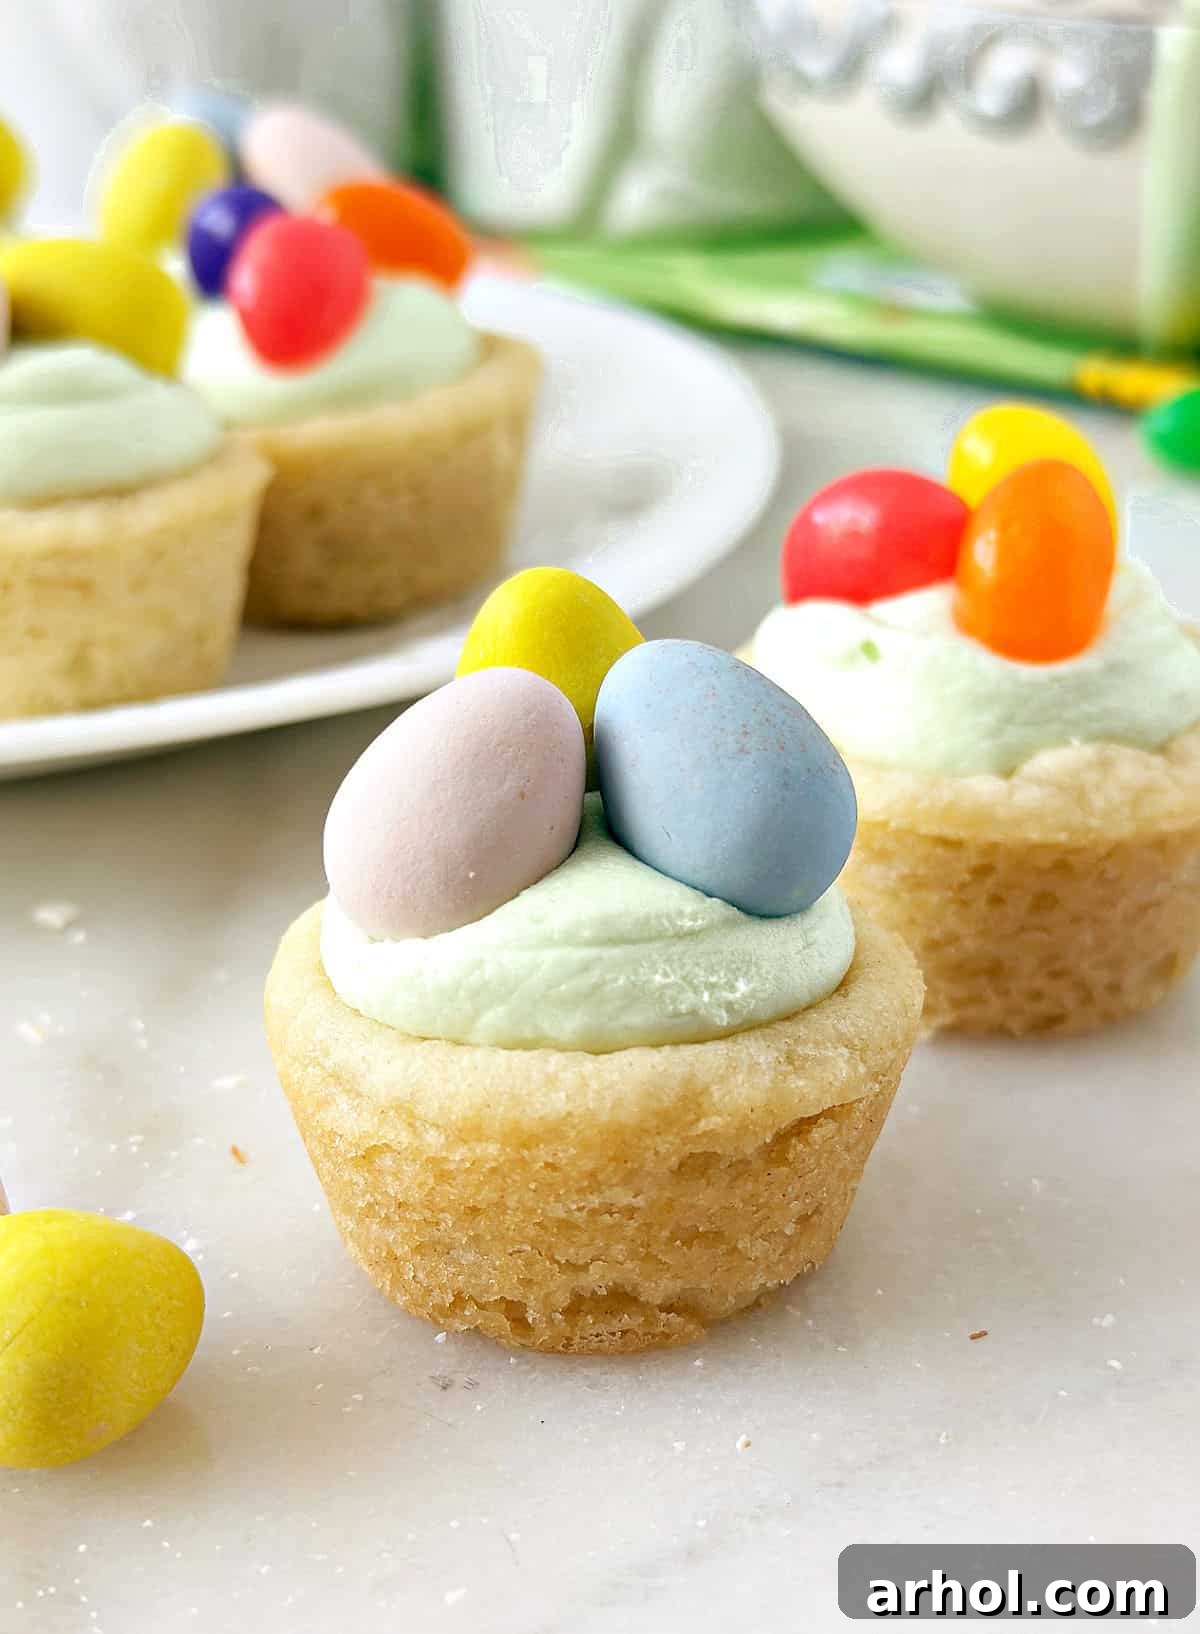
Easter is a time for renewal, family, and, of course, delightful treats! While traditional Easter baskets are always a hit, why not serve up a sweet twist that’s edible and utterly charming? These homemade Easter basket cookie cups are a beloved recipe in our household, a true celebration of spring in every bite. They’re a wonderful way to bring smiles to faces, offering a playful take on classic holiday desserts. Each cookie cup is a miniature masterpiece, soft, perfectly sweet, and wonderfully chewy, making them almost too cute to eat – almost! But trust us, once you take that first bite, you’ll understand why they’re an absolute must-make. My children, in particular, can’t get enough of these festive little baskets!
Whether you’re hosting a large Easter brunch, looking for a charming dessert for a potluck, or simply want to create a fun baking project with the kids, these Easter basket cookie cups fit the bill. Their individual serving size makes them incredibly convenient, and the simple ingredients ensure a stress-free baking experience. Get ready to impress your guests and satisfy your sweet tooth with these irresistible springtime delights.
Why You’ll Adore These Easy Easter Sugar Cookie Cups

These adorable cookie cups are more than just a dessert; they’re a perfect combination of convenience, flavor, and festive fun, making them an ideal choice for your Easter celebrations. Here’s why they’ll quickly become a favorite:
- Perfectly Bite-Sized & Shareable: Each cookie cup is an individual serving, making them incredibly easy to transport, arrange on a platter, and share with friends and family. No need for plates and forks; just grab and enjoy! This makes them ideal for parties, picnics, or school events.
- Quick & Effortless Baking: We love starting with ready-to-bake cookie dough because it shaves off significant preparation time, allowing you to create a homemade dessert with minimal fuss. This shortcut means more time enjoying the holiday and less time in the kitchen.
- Kid-Friendly Fun: The simplicity of this recipe makes it perfect for involving younger helpers. Children will love pressing the cookie dough into the muffin tins, shaping the cups, and especially decorating their “baskets” with vibrant candy eggs and jelly beans. It’s a wonderful activity that creates lasting memories and delicious results.
- Visually Stunning: Beyond their ease, these cookie cups are undeniably charming. The bright green frosting mimicking grass and the colorful candy eggs evoke the quintessential imagery of Easter baskets, making them an eye-catching centerpiece for your dessert table.
- Customizable Delights: While delicious as is, these cookie cups offer endless possibilities for personalization. You can experiment with different cookie dough flavors, frosting colors, or candy toppings to match your theme or dietary preferences.
Gather Your Ingredients: What You’ll Need
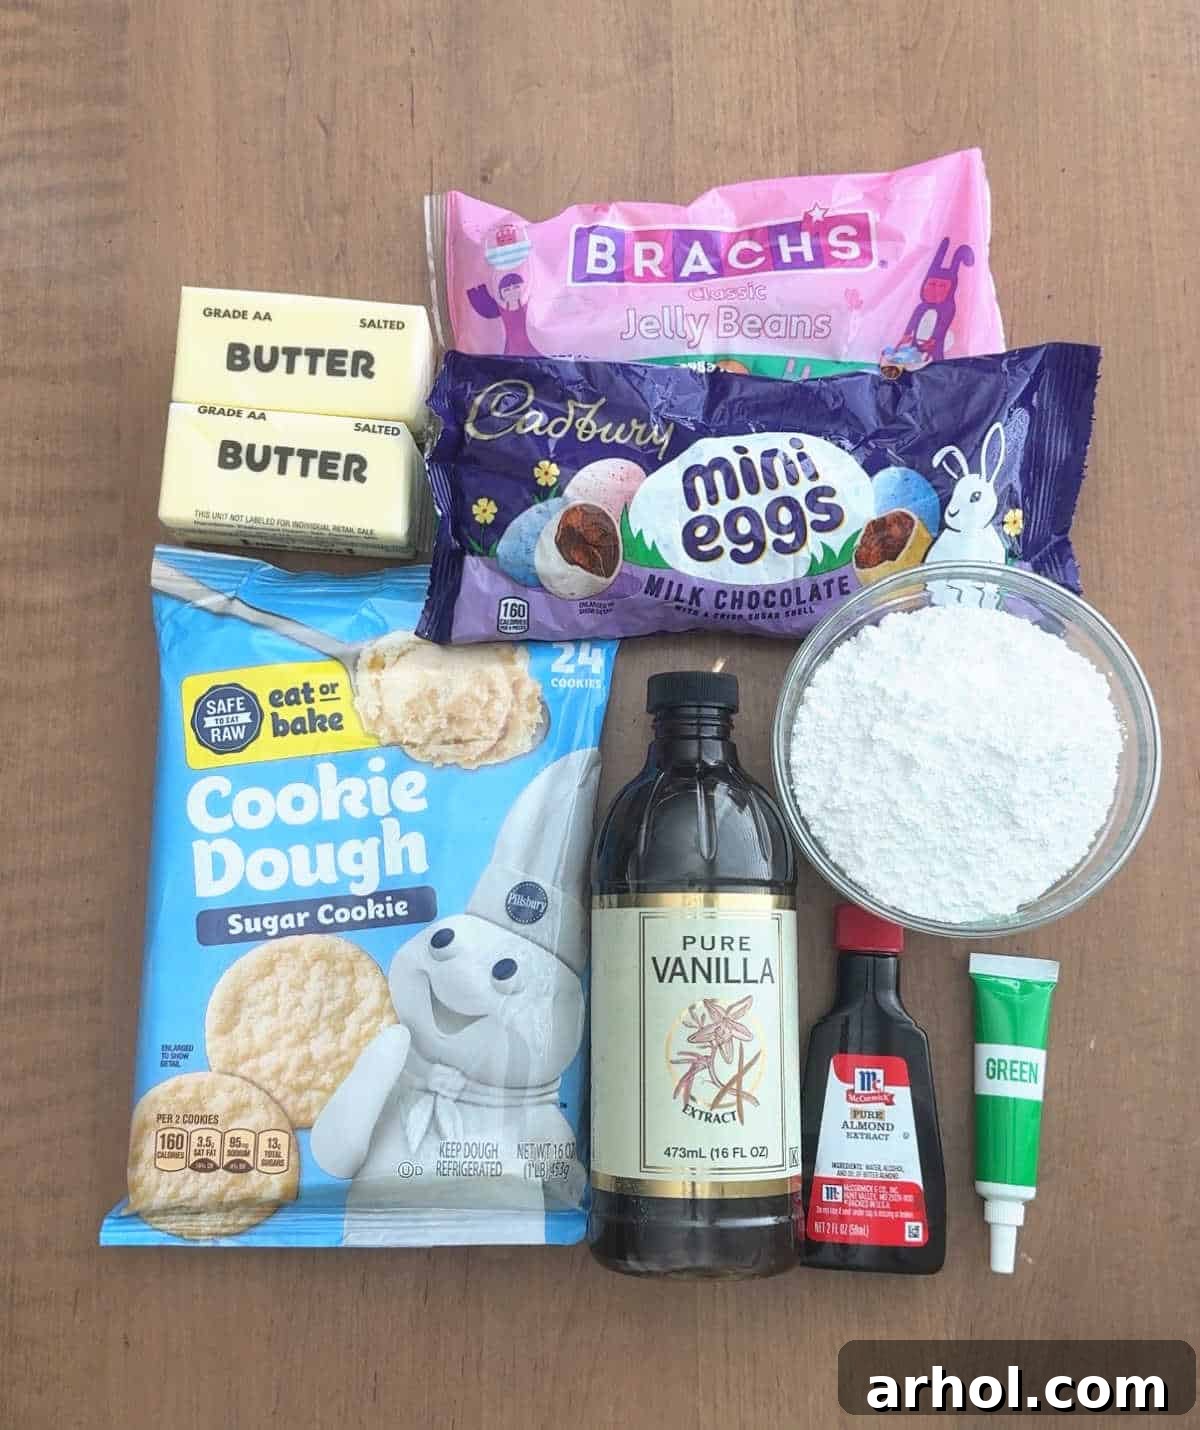
Creating these delightful Easter basket cookie cups requires only a handful of readily available ingredients, many of which you might already have in your pantry. The key to this recipe’s ease lies in starting with quality components. The full, detailed amounts can be found in the comprehensive recipe card further down this page.
- Sugar Cookie Dough: For ultimate convenience, we highly recommend using a pre-packaged, ready-to-bake sugar cookie dough. Brands like Pillsbury work wonderfully, but feel free to use your favorite store-bought variety. If you prefer, you can also use your go-to homemade sugar cookie dough recipe – just ensure it’s chilled and ready to be portioned.
- Butter (Softened): The foundation of our luscious buttercream frosting. Make sure your butter is at room temperature and softened, not melted, for the creamiest, fluffiest results. This allows it to whip beautifully with the other frosting ingredients.
- Powdered Sugar (Confectioners’ Sugar): Essential for creating a smooth, lump-free buttercream. Its fine texture dissolves easily, giving the frosting a silky consistency and sweet flavor.
- Vanilla Extract & Almond Extract: These extracts provide a beautiful depth of flavor to the buttercream. Vanilla offers a classic sweetness, while a hint of almond extract adds a unique, sophisticated note that perfectly complements the sugar cookie base.
- Green Food Coloring: To transform your buttercream into vibrant “Easter grass.” Gel food coloring is often preferred as it provides intense color with less liquid, preventing your frosting from becoming too thin. You can adjust the amount to achieve your desired shade of green.
- Mini Egg Candies & Jelly Beans: These are the “eggs” that fill your Easter baskets! A mix of Cadbury Mini Eggs and colorful jelly beans provides a wonderful variety of textures and flavors. Feel free to use your favorite small Easter candies – chocolate eggs, pastel-colored M&Ms, or even small foil-wrapped chocolates would work beautifully.
- Mini Muffin Tin: This crucial piece of equipment is what gives our cookie cups their perfect basket shape. A 24-cup mini muffin tin is ideal for this recipe.
Step-by-Step Guide: How to Craft Your Easter Basket Cookie Cups
Creating these charming Easter treats is simpler than you might think! Follow these easy steps to bring your edible cookie baskets to life. The detailed process ensures perfect cookie cups every time, ready for your festive celebration.
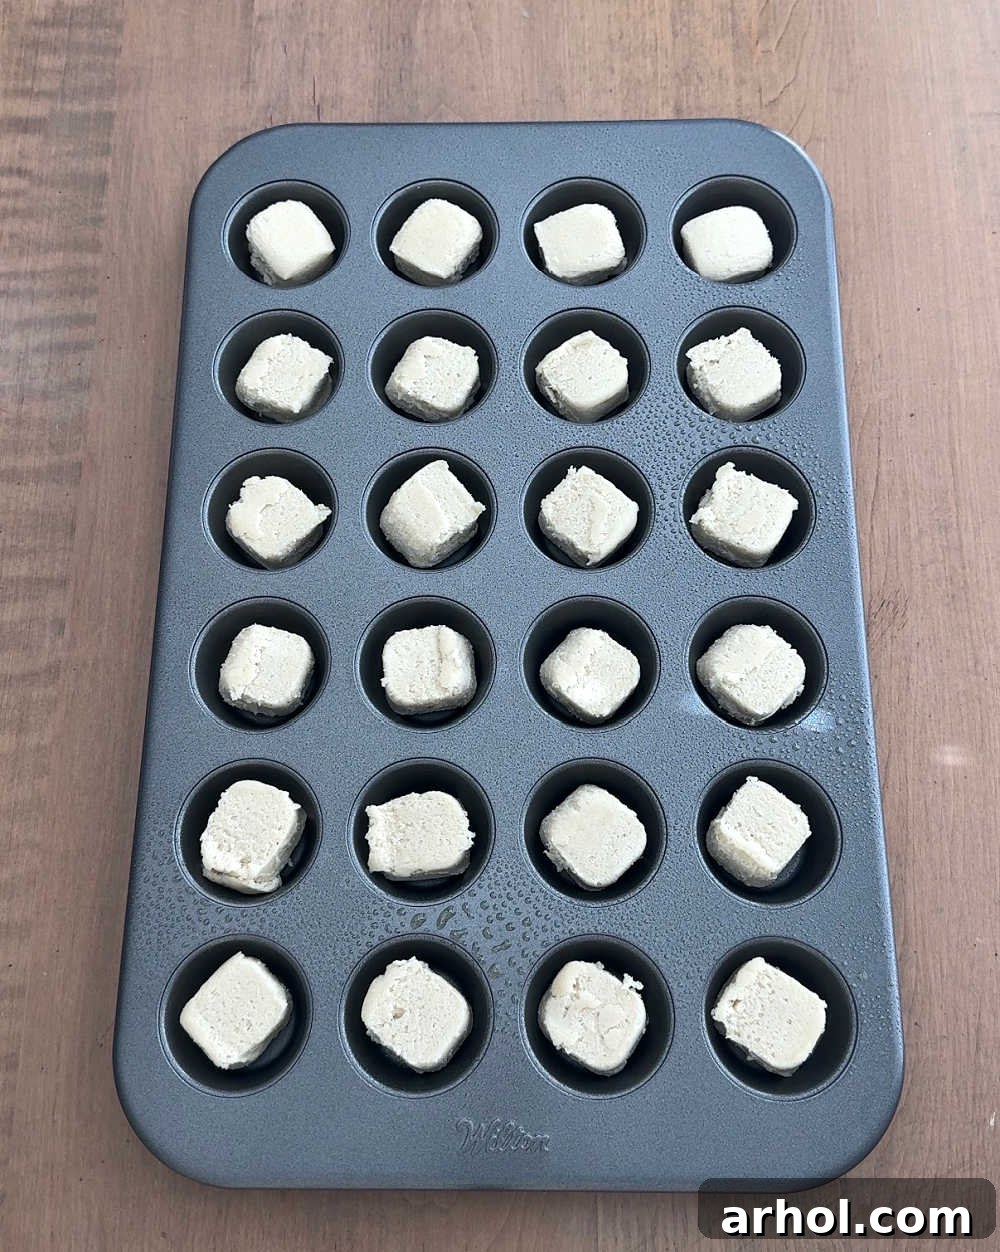
- Prepare and Bake the Cookie Cups: Begin by preheating your oven to the temperature specified on your cookie dough package (usually 350°F or 175°C). Lightly spray a 24-cup mini muffin tin with non-stick cooking spray to ensure easy removal. Place one square or tablespoon-sized portion of sugar cookie dough into each cup of the muffin tin. Bake for approximately 10-12 minutes, or until the edges are lightly golden brown.
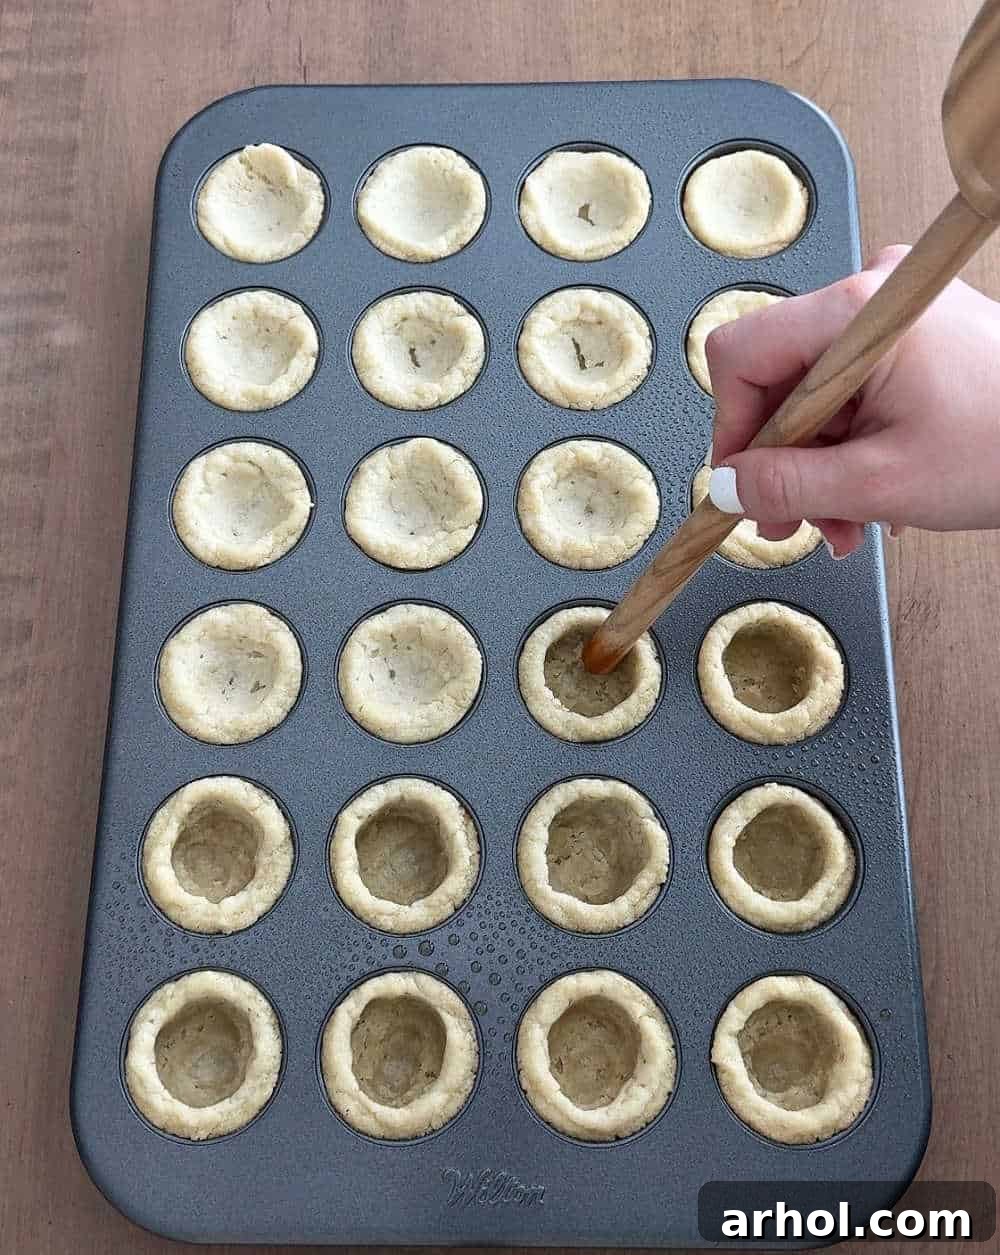
- Shape the Cookie Cups: Once baked, remove the muffin tin from the oven. While the cookies are still warm and pliable (but cool enough to handle), use the handle of a wooden spoon or a small, round object to gently press an indentation into the center of each cookie, forming a cup shape. Be careful not to press all the way through the bottom. Allow the cookie cups to cool slightly in the muffin tin before carefully removing them to a wire rack to cool completely. This step is essential for maintaining their shape.
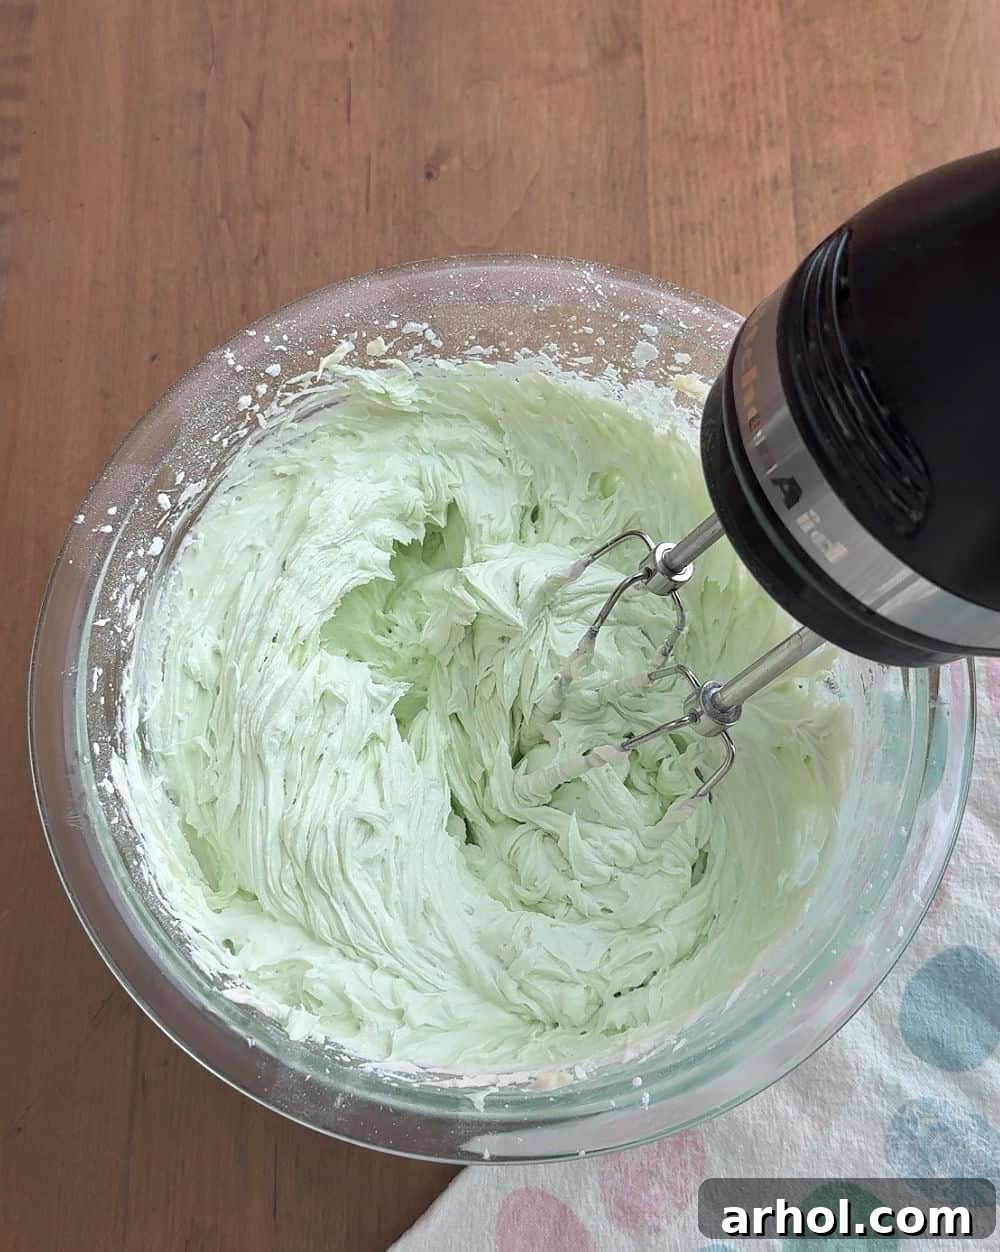
- Whip Up the Buttercream Frosting: While your cookie cups are cooling, prepare the creamy green buttercream frosting. In a large mixing bowl, combine the softened room-temperature butter, vanilla extract, and almond extract. Using an electric hand mixer or stand mixer, beat on medium-high speed until the mixture is light, fluffy, and significantly pale in color. This process usually takes about 5-7 minutes, ensuring a wonderfully airy frosting.
- Add Powdered Sugar and Color: Gradually add the powdered sugar to the butter mixture, one cup at a time, beating well after each addition until fully incorporated and smooth. If the frosting seems too thick, you can add a tiny splash of milk or cream (about ½ to 1 teaspoon at a time) until it reaches your desired consistency. Once the frosting is smooth, add a few drops of green food coloring and mix until you achieve a vibrant “grass green” shade. Add more food coloring if you desire a deeper hue.
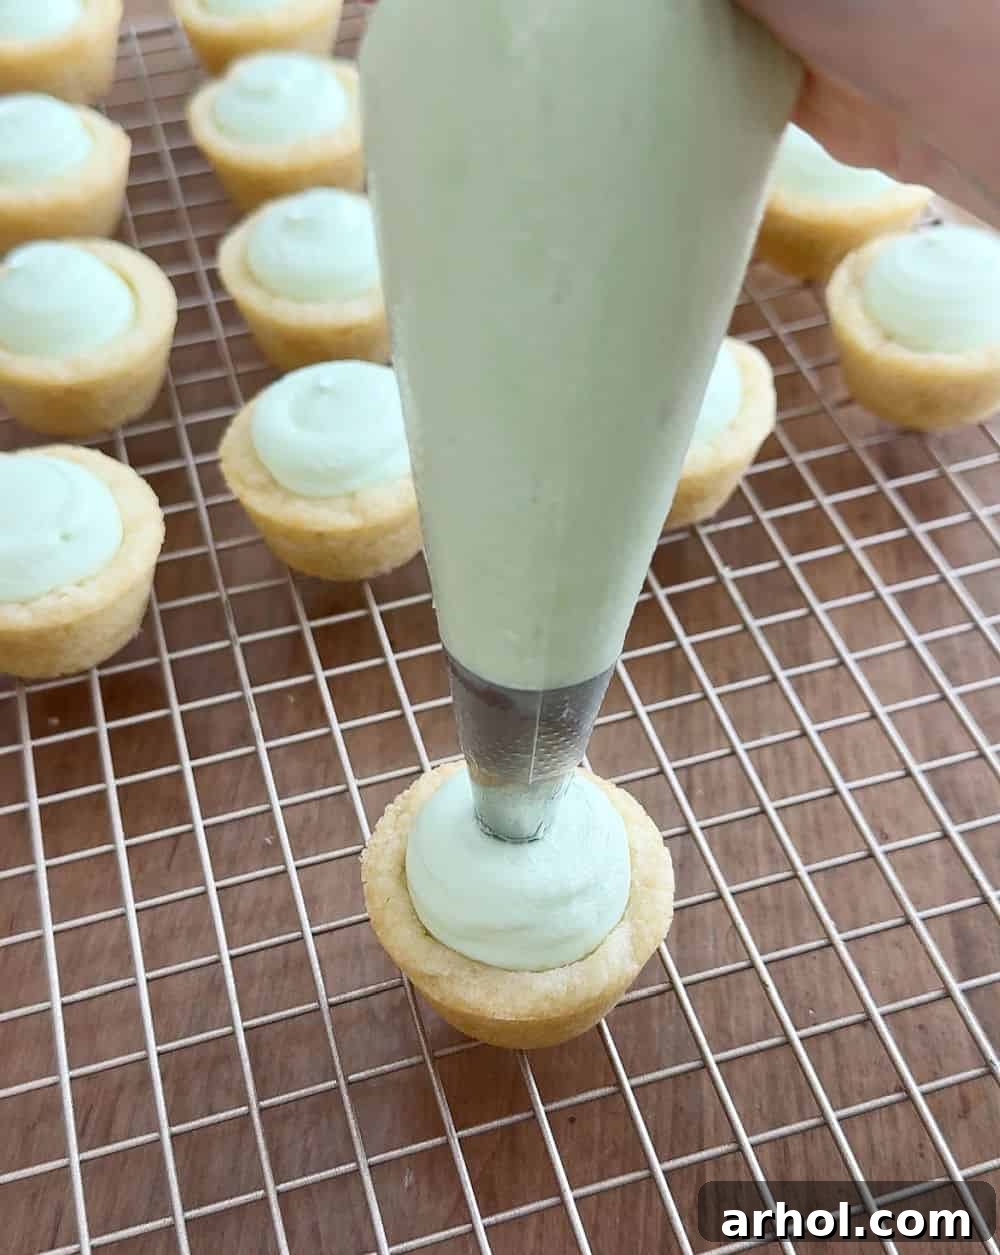
- Fill and Decorate Your Baskets: Transfer the green buttercream frosting to a piping bag fitted with a star tip (or simply use a spoon if you don’t have a piping bag). Pipe or spoon the frosting into each cooled sugar cookie cup, creating a “nest” or “grass” effect. Arrange your mini egg candies and jelly beans on top of the green frosting, nestling them gently into the “grass.”
- Chill and Serve: For best results and to allow the frosting to set, refrigerate the Easter basket cookie cups for at least 30 minutes before serving. This will also help them hold their shape. Enjoy these delightful treats chilled!
Expert Tips for Perfect Easter Cookie Cups
Achieving perfectly shaped and delicious Easter basket cookie cups is easy with a few simple tricks up your sleeve. These tips will help ensure your treats come out beautifully every time:
- Non-Stick Spray is Your Best Friend: Always thoroughly coat your mini muffin tin with non-stick cooking spray before adding the cookie dough. This tiny step is crucial for preventing the cookies from sticking and ensures they pop out cleanly, preserving their delicate shape.
- Mindful Indentation: When forming the cups with a wooden spoon handle, apply gentle but firm pressure. The goal is to create a well without piercing through the bottom of the cookie. A shallow cup is better than a hole! If you accidentally make a hole, gently pinch the dough together to seal it.
- Warm Removal is Key: Don’t wait for the cookie cups to cool completely in the muffin tin before attempting to remove them. They are much easier to lift out when they are still slightly warm and pliable. Use a thin offset spatula or a fork to gently pry them from the edges and transfer them to a wire rack to cool completely. If they cool too much in the pan, they can become brittle and might break when you try to remove them.
- Fully Cooled Before Frosting: Patience is a virtue when it comes to frosting. Ensure your cookie cups are completely cooled to room temperature before adding the buttercream. Applying frosting to warm cookies will cause it to melt and slide off, ruining your beautiful “grass” effect.
- Whip Butter Generously: For the creamiest, lightest, and smoothest buttercream frosting, make sure your butter is truly softened to room temperature and whip it for at least 5-7 minutes before adding powdered sugar. This incorporates air, making the frosting wonderfully fluffy and easy to pipe.
- Adjust Food Coloring for Desired Shade: Start with a small amount of green food gel and gradually add more until you reach your desired shade of “Easter grass.” Gel food coloring provides more concentrated color without thinning the frosting as much as liquid food coloring.
Creative Variations and Swaps
While the classic Easter basket cookie cups are delightful, this recipe is wonderfully adaptable, allowing for endless creative twists. Feel free to experiment with different flavors and fillings to suit your taste or occasion:
- Store-Bought Frosting Shortcut: To make this already easy recipe even quicker, simply use a can of pre-made green frosting. While homemade buttercream offers a superior taste and texture, store-bought options are a convenient time-saver, especially when you’re in a pinch.
- Alternative Cookie Bases: Don’t limit yourself to plain sugar cookie dough! Explore other flavors to create unique cookie cups. Chocolate chip cookie dough can make a rich, decadent base, while peanut butter cookie dough would be a fun twist. Even pre-made brownie batter baked in the mini muffin tins could create a fudgy “basket.”
- Different Frosting Flavors: While green buttercream is iconic for the “grass” effect, you can customize the frosting flavor. Try chocolate buttercream for a rich contrast, cream cheese frosting for a tangy sweetness, or even a lemon-flavored buttercream for a bright, zesty spring flavor.
- Exciting Fillings Beyond Frosting: Get creative with your fillings! Instead of just frosting, you could add a dollop of no-bake cheesecake filling (like these lemon cheesecake cups or pumpkin cheesecake cups for inspiration), a spoon of fruit curd, a square of chocolate ganache, or even a mini marshmallow for a soft surprise at the bottom.
- Diverse Topping Choices: While mini egg candies and jelly beans are traditional, feel free to use other Easter-themed candies. Gummy bunnies, chocolate-covered pretzels (for “sticks”), colorful sprinkles, or shredded coconut (dyed green or plain) for a different kind of “grass” can all add to the festive look.
- Gluten-Free Option: For those with dietary restrictions, many brands now offer gluten-free sugar cookie dough that can be used as a direct substitute, allowing everyone to enjoy these delightful treats.
Storage and Freshness Tips
To keep your Easter Basket Cookie Cups fresh and delicious for as long as possible, proper storage is essential. Since they contain buttercream frosting, refrigeration is recommended to maintain their texture and prevent spoilage.
- Refrigeration: Store the cookie cups in an airtight container in your refrigerator. Properly stored, they will maintain their freshness and delightful taste for 3-4 days. Placing parchment paper between layers can help prevent them from sticking together.
- Freezing for Longer Enjoyment: If you’ve made a large batch or want to prepare them in advance, these cookie cups freeze wonderfully! Place the decorated cookie cups in a single layer on a baking sheet and freeze until solid (about 1-2 hours). Once frozen, transfer them to an airtight freezer-safe container or a heavy-duty freezer bag. They can be frozen for up to 3 months.
- Thawing Instructions: To enjoy frozen cookie cups, simply remove them from the freezer and let them thaw in the refrigerator overnight, or at room temperature for an hour or two before serving. This gradual thawing helps preserve their texture and flavor.
Explore More Festive Easter Candy Desserts
If you’ve enjoyed making and tasting these Easter basket cookie cups, you’re in for a treat! The world of Easter candy desserts is vast and full of creative possibilities. Here are some other fun and delicious recipes that prominently feature classic Easter candies, perfect for extending your holiday baking repertoire:
- Easter Pudding Cups: For another adorable and easy-to-make individual dessert, try these Easter Pudding Cups. They typically involve layers of crushed cookies, pudding, and festive toppings to create a “dirt” and “garden” effect, complete with candy bunnies or eggs.
- Cadbury Egg Cheesecake Dip: Indulge in the rich, creamy goodness of this Cadbury Egg Cheesecake Dip. It’s a sweet, no-bake dip that’s perfect for serving with graham crackers, fruit, or shortbread cookies, showcasing the beloved mini eggs in a decadent form.
- Mini Egg Cookies: If you’re a fan of classic cookies with a holiday twist, these fun Mini Egg Cookies are a must-try. They’re typically soft, chewy cookies studded with colorful mini chocolate eggs, adding a delightful crunch and festive look.
- Birds Nest Cookies: Create charming, edible nests with these Birds Nest Cookies. Often made with chow mein noodles or shredded coconut and melted chocolate, these crunchy nests are perfect for holding a few candy eggs.
- Birds Nest Cupcakes: For a slightly more elaborate but equally delightful presentation, try these Birds Nest Cupcakes. Standard cupcakes are topped with a “nest” of frosting or chocolate and adorned with candy eggs, making them a show-stopping dessert.
Easy Easter Basket Cookie Cups
Dee
20 minutes
12 minutes
10 minutes
42 minutes
24
Ingredients
- 1 24-count package prepared sugar cookie dough
- 1 cup butter softened at room temperature
- 1½ teaspoons vanilla extract
- ½ teaspoon almond extract
- 2¼ cups powdered sugar
- ¼ teaspoon green food coloring
- mini egg candies & jelly beans
Instructions
-
Preheat your oven to 350℉ (175°C).
-
Spray a 24-cup mini muffin tin generously with non-stick spray.
-
Place one square of sugar cookie dough into each muffin cup. Bake for 12 minutes, or until the edges are light golden brown.
-
Remove the tin from the oven. While still warm (but cool enough to handle), gently press an indentation into each cookie with the handle of a wooden spoon to form a cup. Carefully remove the cookie cups to a wire rack or tray while still warm to cool completely.
-
Meanwhile, prepare the buttercream: In a large mixing bowl, add the softened butter, vanilla extract, and almond extract. Beat with an electric hand mixer until the butter is light, fluffy, and pale in color (this should take about 10 minutes).
-
Gradually add the powdered sugar, beating until well combined and smooth.
-
Dye the frosting green with green food gel, mixing until the color is uniform.
-
Using a spoon or a piping bag fitted with a star tip, evenly fill the baked and completely cooled sugar cookie cups with the green frosting.
-
Decorate each cookie cup with mini egg candies or jelly beans, creating a festive Easter basket look. Refrigerate until ready to serve.
Notes
Ensure cups completely cool on a wire rack before filling them with frosting; otherwise, the frosting will melt.
Whip the butter thoroughly (at least 5-7 minutes) for the creamiest and smoothest buttercream frosting.
Use more green food gel for a brighter, more vibrant green color for your “grass.”
Nutrition
,
Carbohydrates: 11g
,
Protein: 0.1g
,
Fat: 8g
,
Saturated Fat: 5g
,
Polyunsaturated Fat: 0.3g
,
Monounsaturated Fat: 2g
,
Trans Fat: 0.3g
,
Cholesterol: 20mg
,
Sodium: 61mg
,
Potassium: 3mg
,
Sugar: 11g
,
Vitamin A: 236IU
,
Calcium: 2mg
,
Iron: 0.01mg
Nutrition information is automatically calculated, so should only be used as an approximation.
Additional Info
Dessert
American
Like this? Leave a comment below!
Don’t miss out on more delightful recipes! Sign up for our free weekly newsletter to receive easy and inspiring recipes delivered directly to your email inbox, ensuring you’re always ready to bake something special.