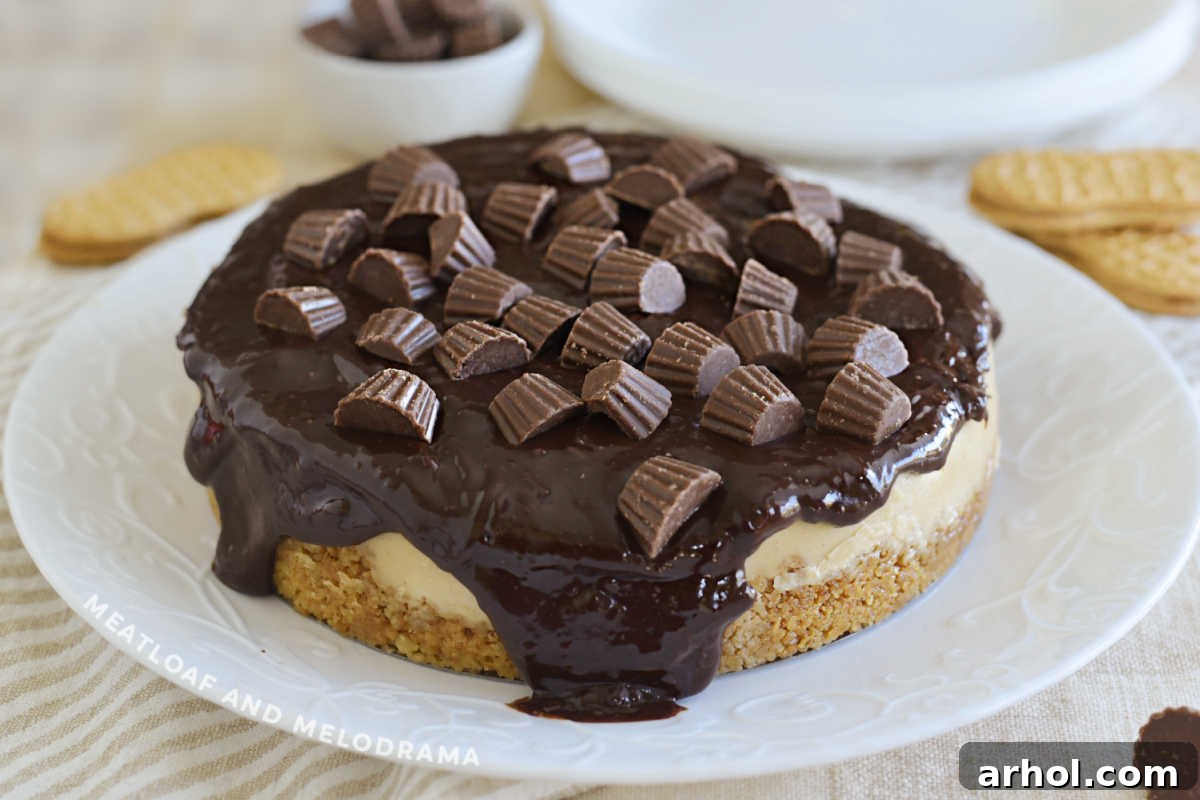
Welcome to the ultimate guide for creating an irresistible Instant Pot Peanut Butter Cheesecake! This dessert is a dream come true for peanut butter enthusiasts, featuring a rich, creamy peanut butter filling nestled atop a delightful Nutter Butter cookie crust and crowned with a luscious chocolate ganache. Forget complicated baking methods; with your electric pressure cooker, achieving bakery-quality cheesecake at home has never been easier or more consistent. Prepare to impress your taste buds and your guests with this smooth, decadent treat that’s perfect for any occasion.
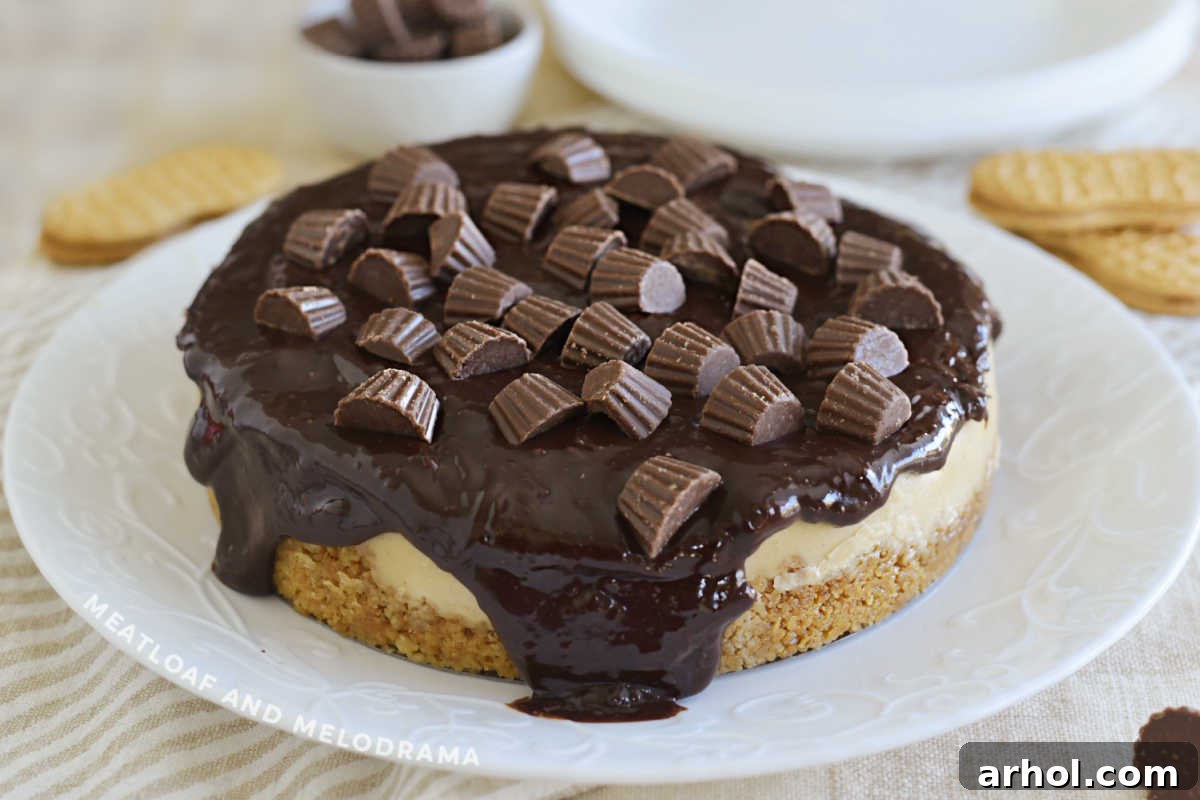
If you’re a devout peanut butter lover, or know someone who can’t get enough of this glorious spread, then this incredibly delicious cheesecake recipe is exactly what you need. It delivers an intense peanut butter flavor in every bite, beautifully complemented by the subtle sweetness of the cookie crust and the rich bitterness of the chocolate ganache. The added mini Reese’s cups on top aren’t just for decoration; they add another layer of texture and flavor that makes this dessert truly unforgettable. Even if you’re new to the world of Instant Pot recipes, rest assured, making a cheesecake in your pressure cooker is surprisingly straightforward and yields consistently perfect results.
Why Choose the Instant Pot for Cheesecake?
Making cheesecake in an Instant Pot might seem unconventional at first, but it’s a game-changer. The pressure cooker creates a steamy, consistent environment that mimics a traditional water bath without all the hassle. This ensures your cheesecake bakes evenly, remains incredibly moist, and is less prone to cracking on top. The controlled temperature and humidity prevent the edges from over-baking while the center cooks through beautifully. This method also drastically cuts down on baking time compared to conventional oven baking, meaning you can enjoy this decadent dessert sooner!
Essential Equipment for Instant Pot Cheesecake Success
To embark on your Instant Pot cheesecake journey, a few key pieces of equipment are necessary. These tools ensure proper cooking and easy removal of your masterpiece:
- 7-inch Springform Pan or Push Pan for the 6-Quart Instant Pot: A 7-inch pan is the ideal size to fit comfortably inside most 6-quart Instant Pot models. Springform pans feature removable sides, making serving incredibly simple. A push pan with a removable bottom also works wonderfully. Ensure your pan is labeled as oven-safe, even for pressure cooking.
- Sling, Foil Sling, or Push Pan with Handles: Lifting a hot cheesecake out of a deep Instant Pot liner can be tricky. A silicone sling with handles is specifically designed for this purpose. Alternatively, you can craft a sturdy foil sling by folding a long piece of aluminum foil into a strip that fits under your pan, creating handles on either side to carefully lift it. If you’re using a push pan, some models come with integrated handles that simplify the process.
- Trivet for the Pan to Sit On: A metal trivet (often included with your Instant Pot) is essential. It keeps the cheesecake pan elevated above the water, allowing the steam to circulate evenly around it for perfect cooking.
While a springform or push pan is highly recommended for cheesecakes, some creative cooks have found ways around it. One method involves lining a regular cake pan with foil or parchment paper, ensuring ample overhang to create makeshift “handles” for lifting. While I haven’t personally tried this, it could be an option if you’re in a pinch. However, for the best results and easiest handling, investing in a proper cheesecake pan is well worth it.
Crafting Your Homemade Chocolate Peanut Butter Cheesecake
The secret to an exceptionally smooth, crack-free cheesecake lies in proper preparation, especially regarding ingredient temperatures. Plan ahead and allow your cream cheese and eggs to come to room temperature before you begin. This small step makes a significant difference, ensuring a silky-smooth batter without lumps and contributing to a beautiful finish.
The Irresistible Nutter Butter Crust
The foundation of this incredible dessert is its Nutter Butter cookie crust. The nutty, slightly salty sweetness of these cookies perfectly complements the peanut butter filling.
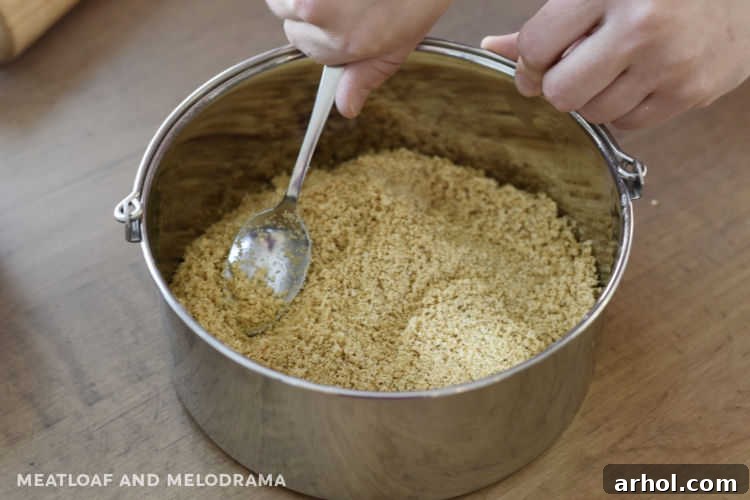
- Crush the Cookies: Start by finely crushing your Nutter Butter cookies. A food processor makes this task quick and effortless, resulting in uniform crumbs. If you don’t have one, place the cookies in a large zip-top bag, seal it, and use a rolling pin or the bottom of a heavy glass to crush them into fine crumbs. Aim for about 1 cup of crushed cookies, which is roughly 10 Nutter Butter cookies.
- Combine and Press: In a bowl, mix the crushed cookies with 1 tablespoon of sugar and 2 tablespoons of melted butter until the mixture resembles wet sand. This ensures the crust holds together beautifully.
- Form the Crust: Press the cookie mixture evenly into the bottom of a greased 7-inch cheesecake pan. You can use the bottom of a glass or your fingers to achieve a firm, uniform layer. For a more dramatic presentation, you can lightly press some of the mixture up the sides of the pan.
- Chill: Place the prepared crust into the freezer while you prepare the filling. This crucial step helps the crust set, preventing it from crumbling when you add the filling and ensuring it maintains its shape during cooking.
Crust Variations: If Nutter Butter cookies aren’t your preference or are unavailable, feel free to substitute. A classic graham cracker crust or a rich Oreo cookie crust would also be delicious alternatives for this cheesecake.
The Luscious Peanut Butter Filling
The heart of this dessert is its creamy, intensely flavorful peanut butter filling. Achieving a smooth, uncracked surface is key.
- Cream the Base: In a large mixing bowl, beat the softened room-temperature cream cheese with granulated sugar until the mixture is light, fluffy, and completely smooth. Scrape down the sides of the bowl frequently to ensure everything is well combined.
- Add Peanut Butter and Liquids: Incorporate the creamy peanut butter, heavy cream, and vanilla extract. Beat these ingredients until they are fully combined and the mixture is uniform. For the best results, use a creamy peanut butter; I find brands like Skippy Natural Peanut Butter work perfectly, providing that signature smooth texture. Avoid chunky peanut butter here, as it can affect the overall texture of the cheesecake.
- Incorporate Eggs Gently: This is a critical step for preventing cracks. Add the eggs one at a time, mixing only until just incorporated after each addition. Alternatively, you can lightly beat the eggs in a separate small bowl before gently folding them into the batter. The key is to avoid overmixing once the eggs are added, as this introduces too much air, which can cause the cheesecake to rise rapidly and then crack as it cools.
- Prepare for Pressure Cooking: Retrieve your chilled crust from the freezer. Carefully pour the peanut butter cheesecake batter over the crust, smoothing the top with a spatula if necessary.
Pressure Cooking Your Cheesecake to Perfection
The Instant Pot makes baking cheesecake almost foolproof.
- Set Up the Instant Pot: Pour 1 cup of water into the inner pot of your 6-quart Instant Pot. Place the metal trivet inside the pot.
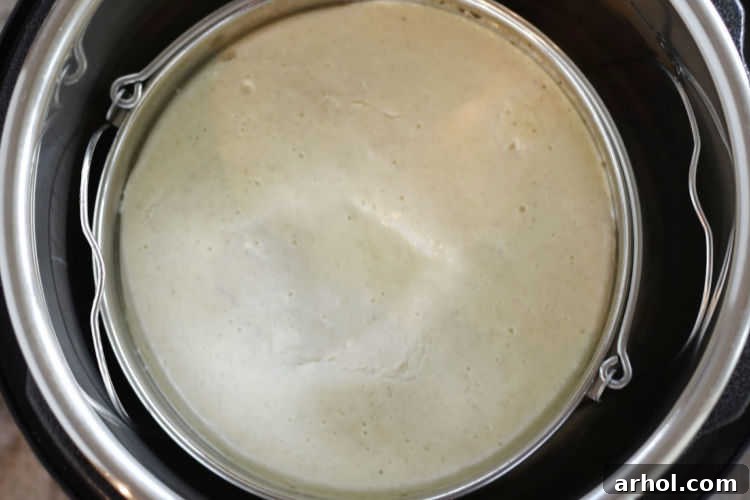
- Load the Cheesecake: If your cheesecake pan does not have integrated handles, create a sturdy foil sling and carefully lower the pan onto the trivet. If your pan has handles, simply place it directly onto the trivet.
- Cook and Release Pressure: Secure the Instant Pot lid, ensuring the sealing ring is properly in place, and turn the steam release valve to the SEALING position. Select the “Pressure Cook” (or “Manual”) setting and set the cooking time for 50 minutes on HIGH pressure.
- Natural Release: Once the cooking cycle is complete, allow a 10-minute Natural Pressure Release (NPR). This means you let the Instant Pot release pressure on its own for 10 minutes. After 10 minutes, carefully switch the steam release valve to the VENTING position to perform a Quick Release (QR) of any remaining pressure. Once the floating valve drops, it’s safe to open the lid.
- Check for Doneness: Gently shake the pan. A perfectly cooked cheesecake will have a slight jiggle in the very center, but the edges should be set. An instant-read thermometer inserted into the center should read around 150°F (65°C). If it appears too jiggly, you can cook it for an additional 5 minutes using the same pressure cooking method, followed by a 5-minute natural release.
- Remove and Blot: Carefully remove the cheesecake from the Instant Pot using your sling or pan handles. You might notice some moisture on the surface of the cheesecake; this is normal. Gently blot any excess water with the corner of a clean paper towel.
- Cool and Chill: Allow the cheesecake to cool slightly on a wire rack at room temperature for about 30-60 minutes. Once it’s cooled to touch, cover the pan loosely with plastic wrap and transfer it to the refrigerator. Chilling is paramount for cheesecake to fully set and develop its rich flavor and firm texture. Refrigerate for at least 4 hours, but for the absolute best results and a perfectly set dessert, chilling it overnight is highly recommended.
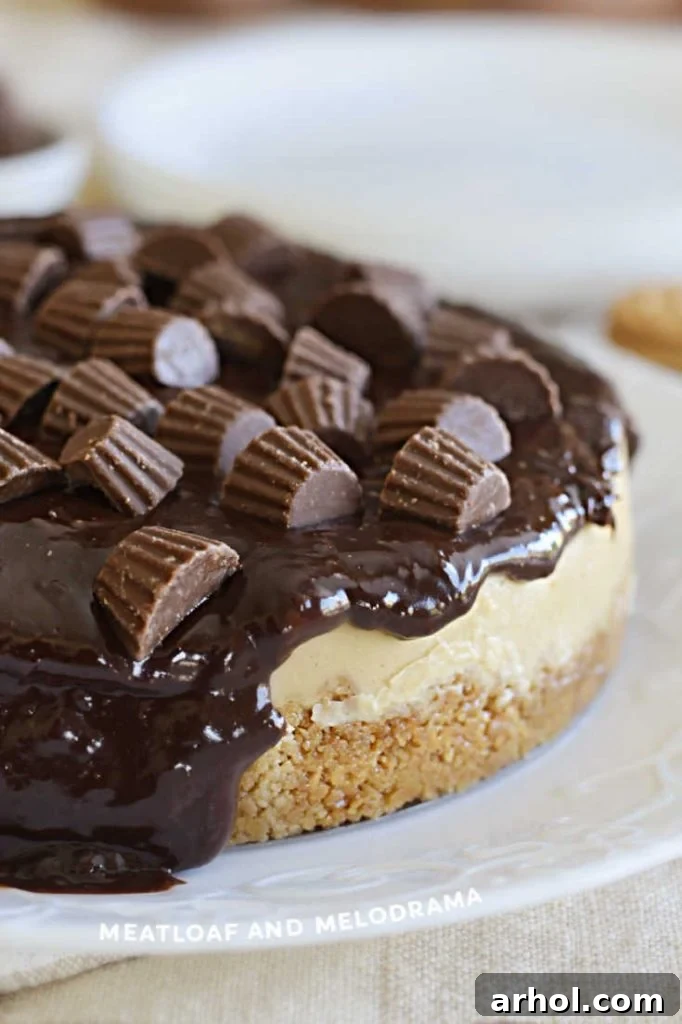
Creating the Perfect Chocolate Ganache Topping
A silky smooth chocolate ganache is the ideal crowning glory for this peanut butter cheesecake, adding a touch of elegance and a rich counterpoint to the nutty flavor. Ganache is surprisingly simple to make, requiring just two main ingredients: chocolate and heavy cream.
- Heat the Cream: In a small saucepan, gently heat ⅓ cup of heavy whipping cream over medium heat. Stir frequently to prevent scorching. Watch for small bubbles to start forming around the edges; do not bring it to a rolling boil.
- Melt the Chocolate: Remove the pan from the heat immediately. Stir in 1 teaspoon of vanilla extract and 1 cup of semi-sweet chocolate chips. Let the mixture sit undisturbed for about 5 minutes to allow the heat from the cream to melt the chocolate.
- Whisk to Smooth: After 5 minutes, gently whisk the mixture until it’s completely smooth, glossy, and lump-free.
- Cool and Pour: Allow the ganache to cool slightly at room temperature for about 10-15 minutes. It should thicken slightly but still be pourable. Pour the ganache evenly over the chilled cheesecake just before serving.
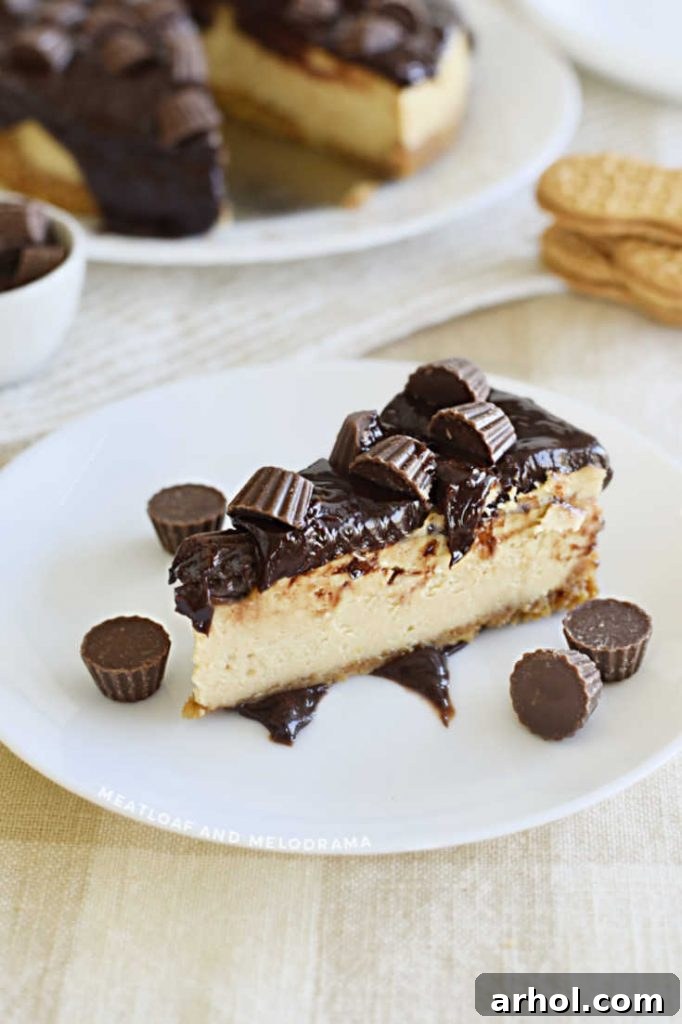
- Garnish: For an extra “WOW” factor and an additional burst of peanut butter goodness, scatter a few mini peanut butter cups or Reese’s Pieces over the ganache. This not only enhances the flavor but also makes for a stunning presentation.
Once topped, return the cheesecake to the refrigerator until you’re ready to serve. This allows the ganache to set slightly and become beautifully firm.
Tips for Success & Troubleshooting
- Room Temperature Ingredients: Always ensure cream cheese and eggs are at room temperature. This is the golden rule for lump-free, smooth cheesecake batter and helps prevent cracks.
- Don’t Overmix: Overmixing, especially after adding eggs, incorporates too much air. This can cause the cheesecake to puff up in the Instant Pot and then fall and crack as it cools. Mix just until combined.
- Proper Cooling is Key: Don’t rush the cooling process. Gradual cooling prevents sudden temperature changes that lead to cracks. Chilling for at least 4 hours (or overnight) allows the cheesecake to firm up and fully develop its texture and flavor.
- Moisture on Top: It’s common for some condensation to form on top of the cheesecake during pressure cooking. Gently blot this moisture with a paper towel immediately after removing it from the Instant Pot. Do not cover the pan with foil during cooking; it can trap steam and prolong the cooking time.
- Crust Alternatives: Feel free to experiment with other cookie crusts like Oreos, graham crackers, or even pretzel crust for a salty-sweet twist.
- Storage: Store leftover cheesecake covered in an airtight container in the refrigerator for up to 3-4 days.
Frequently Asked Questions (FAQ)
Q: Can I use an 8-quart Instant Pot?
A: Yes, you can! The cooking time should remain the same. Just ensure your 7-inch pan still fits comfortably inside with the trivet. If using a larger pan (e.g., 8-inch), you might need to slightly increase the cooking time by 5-10 minutes and adjust the water volume in the pot if your trivet requires more. Always ensure the water level doesn’t touch the bottom of your cheesecake pan.
Q: Can I use crunchy peanut butter?
A: While creamy peanut butter is recommended for a smooth cheesecake texture, you can use crunchy peanut butter if you prefer. Just be aware that it will introduce small peanut pieces into the filling, changing the texture.
Q: My cheesecake cracked. What went wrong?
A: Cracks are usually caused by overmixing the batter (introducing too much air), overbaking (drying out the cheesecake), or a sudden temperature change during cooling. Ensure ingredients are at room temperature, mix gently, and allow for proper natural release and gradual cooling.
Q: Can I freeze Instant Pot Peanut Butter Cheesecake?
A: Yes! To freeze, ensure the cheesecake is completely chilled and set. Wrap individual slices or the entire cheesecake (without ganache) tightly in plastic wrap, then again in aluminum foil. Freeze for up to 1-2 months. Thaw in the refrigerator overnight before adding the ganache and serving.
Q: How long does this cheesecake last in the fridge?
A: Stored properly in an airtight container in the refrigerator, this cheesecake will stay fresh and delicious for 3 to 4 days.
Instant Pot Peanut Butter Cheesecake
Equipment
-
Instant Pot Pressure Cooker
-
7-inch Springform Pan
Ingredients
The Crust
- 1 cup crushed Nutter Butter cookies (about 10 cookies)
- 1 tablespoon sugar
- 2 tablespoons butter, melted
The Filling
- 12 ounces cream cheese (at room temperature)
- ½ cup granulated sugar
- ½ cup creamy peanut butter
- ¼ cup heavy cream
- 1 teaspoon vanilla extract
- 2 eggs (at room temperature)
The Ganache
- ⅓ cup heavy whipping cream
- 1 teaspoon vanilla extract
- 1 cup semi-sweet chocolate chips
Instructions
The Crust:
-
Finely crush the Nutter Butter cookies using a food processor, or place them in a large zip-top bag and crush with a rolling pin until fine crumbs are formed.
-
Melt the butter and combine it with the crushed cookies and sugar. Mix until fully combined and the mixture has the consistency of wet sand.
-
Press the crust mixture firmly into the bottom of a greased 7-inch cheesecake pan, ensuring it is evenly distributed.
-
Place the prepared crust in the freezer to chill while you prepare the filling.
The Filling:
-
In a large bowl, beat the room temperature cream cheese and granulated sugar until the mixture is smooth and creamy.
-
Add the peanut butter, heavy cream, and vanilla extract. Beat until all ingredients are well combined and the batter is smooth.
-
Add the eggs, one at a time, mixing only until just combined after each addition. Alternatively, lightly beat the eggs in a separate bowl before gently folding them into the batter. Do not overmix.
-
Pour the cheesecake filling over the chilled crust in the pan, smoothing the top with a spatula if needed.
-
Pour 1 cup of water into the inner pot of your 6-quart Instant Pot. Place a trivet at the bottom of the pot.
-
If your cheesecake pan does not have a handle, create a sturdy foil sling, place the pan in the sling, and then carefully lower the sling with the pan into the Instant Pot. Skip this step if your pan has handles.
-
Close the Instant Pot lid, ensure the steam release valve is in the SEALING position. Select “Pressure Cook” (or “Manual”) on HIGH pressure for 50 minutes.
-
Once cooking is complete, allow a 10-minute Natural Pressure Release (NPR). After 10 minutes, perform a Quick Release (QR) by carefully moving the valve to the VENTING position to release any remaining pressure. When the pin drops, open the lid and carefully remove the cheesecake from the pot.
-
The cheesecake is done when only the center jiggles slightly when you gently shake the pan. An internal temperature of 150°F (65°C) also indicates doneness. If it’s not set, cook for another 5 minutes, followed by a 5-minute natural release.
-
Use the corner of a clean paper towel to gently blot any condensation or water from the top surface of the cheesecake.
-
Allow the cheesecake to cool slightly on a wire rack before covering it loosely with plastic wrap. Refrigerate for a minimum of 4 hours, or ideally overnight, before serving. Top with the prepared ganache and mini peanut butter cups, if desired.
The Ganache:
-
Add the heavy cream to a small saucepan and heat over medium heat, stirring frequently, until small bubbles begin to form around the edges. Do not let it boil vigorously.
-
Remove the pan from the heat. Stir in the vanilla extract and chocolate chips. Let stand for 5 minutes to allow the chocolate to melt, then stir until the ganache is smooth, glossy, and completely melted.
-
Allow the ganache to cool slightly to a pourable consistency, then pour it over the chilled cheesecake. Garnish with mini peanut butter cups, if desired. Store the cheesecake in the refrigerator until ready to eat.
Notes
The recipe uses a slightly reduced amount of cream cheese compared to some traditional recipes because peanut butter adds significant body and richness to the filling.
It’s not necessary to cover the cheesecake with foil during cooking in the Instant Pot, as this can extend the cooking time. Any condensation on the surface can be easily blotted with a paper towel after cooking.
Nutrition
Carbohydrates: 31g,
Protein: 10g,
Fat: 42g,
Saturated Fat: 21g,
Cholesterol: 120mg,
Sodium: 260mg,
Potassium: 319mg,
Fiber: 3g,
Sugar: 25g,
Vitamin A: 984IU,
Calcium: 80mg,
Iron: 2mg
Nutrition information is automatically calculated, so should only be used as an approximation.
Additional Info
Enjoyed this recipe? Share your thoughts below!
More Instant Pot Cheesecake Recipes to Explore
If you loved this peanut butter cheesecake, you’ll be thrilled to discover the versatility of your Instant Pot for making other delightful cheesecakes. Here are a few more recipes to inspire your next pressure cooker dessert adventure:
- Decadent Dark Chocolate Cheesecake
- Refreshing Lemon Blueberry Cheesecake
- Seasonal Pumpkin Cheesecake
- Festive Eggnog Cheesecake