
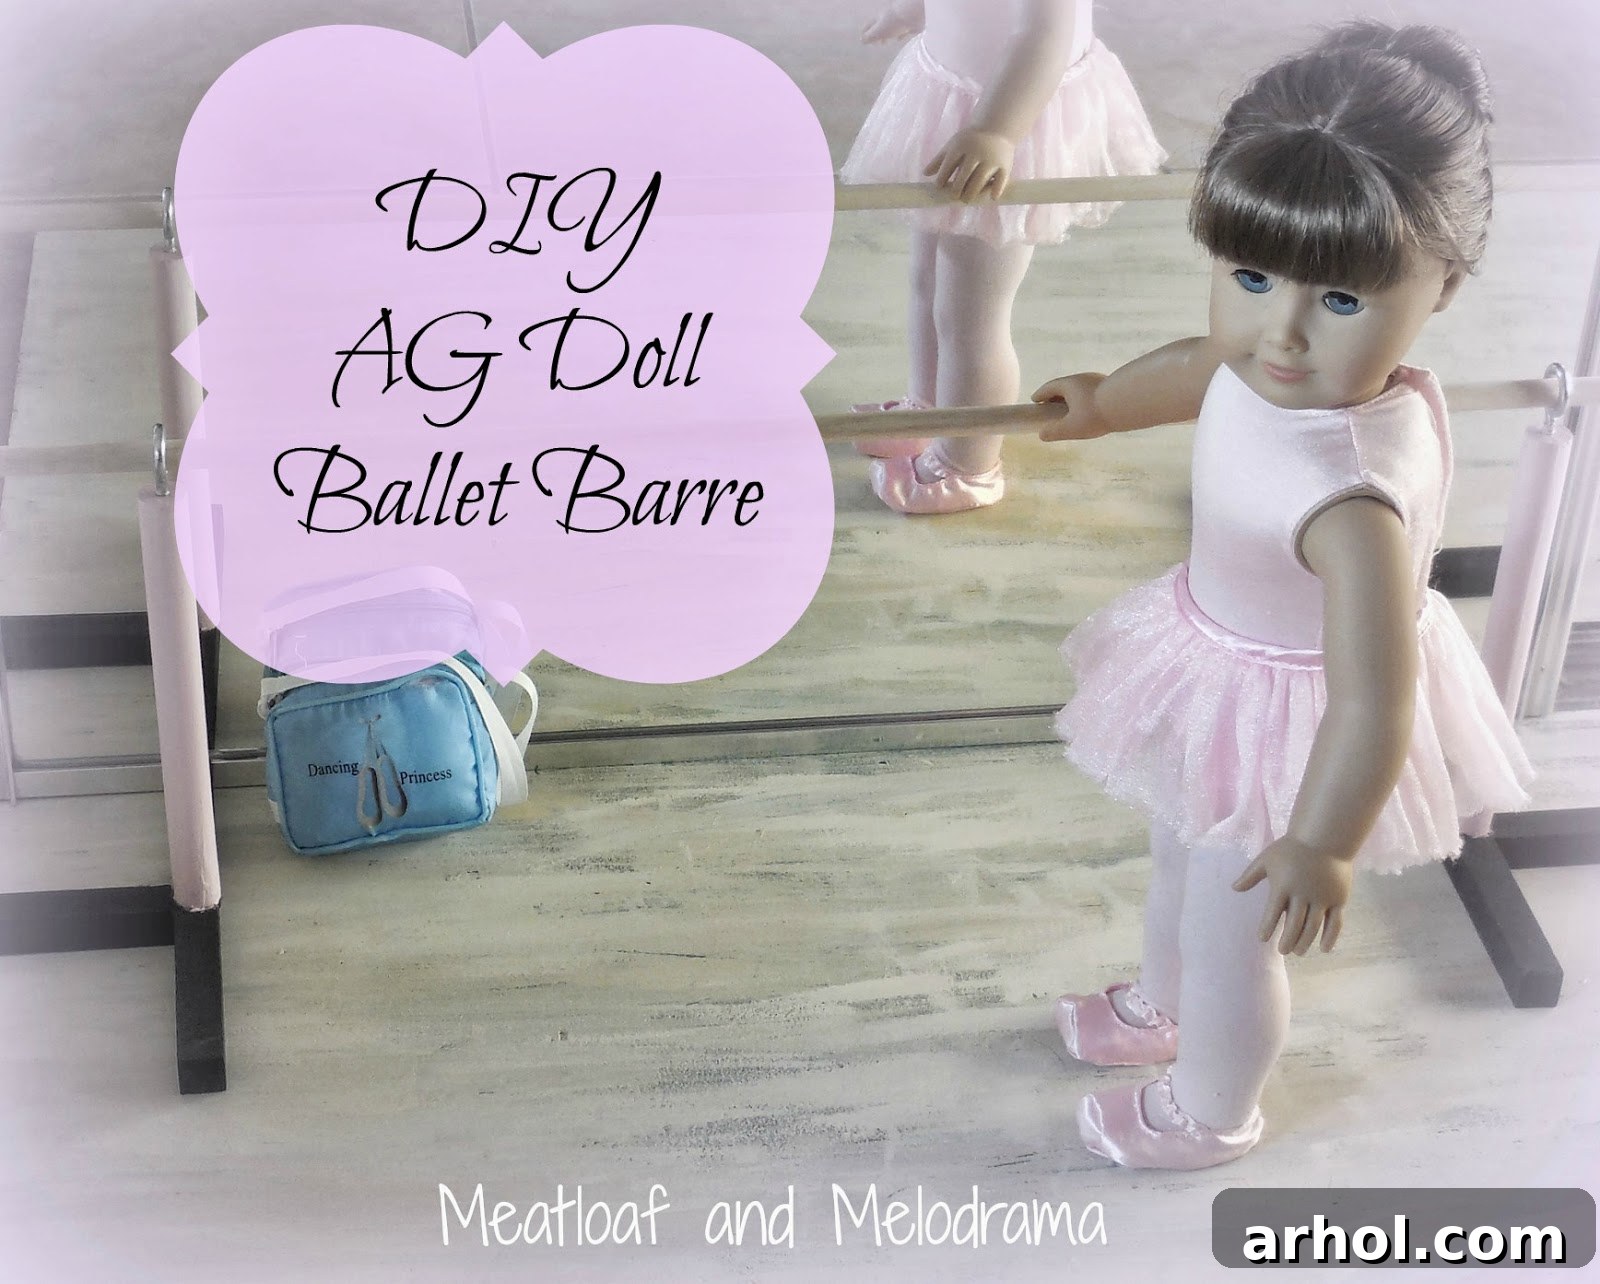
Welcome back! As the gentle hum of everyday life resumes and the delightful memories of spring break begin to settle, it’s time to ease back into our routines. This past break was truly a breath of fresh air, filled with laughter, cherished family moments, and, I must confess, some much-needed extra sleep! The children and I savored every moment, diving into various creative endeavors. Among our favorite accomplishments was a special project dear to my daughter’s heart: a custom-built ballet barre, perfectly sized for her beloved American Girl dolls.
The Spark of Inspiration: A Dancer’s Dream for Her Dolls
My daughter is an aspiring ballerina, a little dancer with big dreams and an even bigger imagination. Like many children, she adores her American Girl dolls, dressing them in an array of outfits, including charming ballet costumes. While her dolls are ready to pirouette, they faced a common challenge: perfecting their elegant ballet positions without the essential support of a barre. The newest American Girl doll, Isabelle, a dancer herself, may not yet be part of her collection, but she’s certainly at the top of her birthday wish list. Seeing her dolls struggle to maintain their form, and knowing how much a barre helps human dancers, my husband and I decided it was time to put our DIY skills to use. We wanted to create a miniature dance studio accessory that would not only enhance her dolls’ playtime but also fuel her own passion for dance.
Why DIY? The Magic of Handmade Doll Accessories
Choosing to embark on a do-it-yourself project offers a myriad of benefits that extend far beyond simply acquiring an item. For this American Girl doll ballet barre, the decision to craft it ourselves was driven by several factors. Firstly, it allowed for complete customization. We could tailor the design, size, and even the color palette to perfectly match my daughter’s vision and the aesthetic of her doll collection. This level of personalization is often unattainable with store-bought items. Secondly, it presented a wonderful opportunity for parent-child bonding. Working together on a creative endeavor strengthens our connection, creating shared memories and teaching valuable life skills. My daughter learned about planning, construction, and the satisfaction of seeing a project through from start to finish. Finally, DIY projects are often more cost-effective. Utilizing readily available and inexpensive materials, we were able to create a high-quality, durable accessory for a fraction of the cost of a retail equivalent. It’s an investment in creativity, imagination, and quality time.
Gathering Your Crafting Arsenal: Materials for Your Doll Ballet Barre
To recreate this charming American Girl doll ballet barre, you’ll need a few basic materials, most of which can be found at your local hardware or craft store. The beauty of this project lies in its simplicity and the affordability of its components. Here’s what we gathered:
- Wooden Dowels: We used two smaller dowels for the vertical stands and one longer, slightly thicker dowel for the horizontal barre itself. The smaller dowels were approximately 1/2 inch in diameter, and the longer one was about 3/4 inch, ensuring stability.
- Plain Wood Pieces: These rectangular pieces serve as the bases and additional support for the stands. You can use scrap wood or purchase small planks. Dimensions aren’t strict, but aim for pieces that will provide a stable footprint for the doll barre.
- Eye Screws: These are crucial for the adjustable feature of the barre. We used two eye screws, large enough for the main dowel to pass through easily. They are screwed into the top of the vertical dowels.
- Strong Wood Glue: Essential for securely fastening the wooden components together. Make sure it’s a fast-drying, durable glue.
- Paint (Optional): Acrylic craft paints in your desired colors (we chose pink and black, my daughter’s favorites). A primer might also be useful for better paint adhesion.
- Basic Tools: A saw (or have the wood cut at the store), a drill with appropriate drill bits, and paintbrushes.
Step-by-Step Guide: Building a Sturdy & Adjustable Ballet Barre
Crafting this American Girl doll ballet barre was a fun and straightforward process, proving that even novice DIYers can create something special. Here’s how my husband and I brought this project to life:
- Prepare the Wood Bases: My husband started by cutting the plain rectangular wood pieces into smaller, manageable sections for the bases of the barre stands. We needed two primary base pieces and two smaller support pieces per stand.
- Drill for the Vertical Dowels: In the center of two of the larger rectangular base pieces, he carefully drilled holes. These holes were sized just enough to snugly fit the smaller vertical wooden dowels. Precision here ensures a straight and stable stand.
- Assemble the Vertical Stands: We then applied a generous amount of wood glue into the drilled holes and inserted the two smaller dowels, ensuring they stood upright and were centered. We let this dry completely to form the primary structure of each stand.
- Add Eye Screws: Once the glue was fully cured, we screwed an eye screw into the top of each vertical dowel. These eye screws act as the holders for the main, long ballet barre, allowing it to be easily removed and adjusted.
- Enhance Stability: To provide additional support and prevent tipping, we glued two more rectangular wood pieces to the sides of each base. This widened the footprint of the stands, making them much more stable, especially when multiple dolls are “using” the barre.
A Canvas for Creativity: Personalizing with Paint
With the structural elements of the doll ballet barre complete and fully dried, it was time for the fun part: adding a splash of color! My little dancer and I eagerly took on the painting task. We chose her absolute favorite color combination: vibrant pink and sleek black. We were incredibly fortunate to have a beautiful, sunny day, making it perfect for an outdoor painting session. This kept the mess outside and allowed the paint to dry quickly.
While I initially thought about painting the long, main dowel as well, my daughter had a very specific vision. She wanted it to closely resemble the barre in her own real-life dance studio, which is typically unpainted wood. Naturally, I conceded. After all, this ballet barre was primarily for her dolls and her imaginative play, not for my aesthetic preferences! This collaboration made the project even more special, as it truly reflected her creative input.
The Grand Reveal: A Doll’s Dream Dance Studio
Once the paint was dry, the final assembly was effortless. The long, unpainted dowel simply slots into the eye screws on top of the two painted stands. The design allows for easy removal and repositioning, making the barre adjustable to different heights or even to accommodate more than one dancer. The entire structure is remarkably lightweight and portable, meaning my daughter can easily move her “mini dance studio” wherever her imagination takes her. This versatility adds significantly to its play value, allowing for dynamic and evolving imaginative scenarios.
The moment it was complete, my little dancer immediately sprang into action. She carefully positioned the American Girl dolls at the barre, ready to perfect their pliés, relevés, and arabesques. She strategically placed the ballet barre by my closet, transforming that corner of the room into an authentic-looking miniature dance studio, complete with mirrors (the closet doors). The joy on her face as she watched her dolls engage in their ballet practice was priceless. It truly is a charming addition to her playtime setup, sparking hours of creative storytelling and imaginative play.
Nurturing Imagination: More Than Just a Toy
This DIY American Girl doll ballet barre is more than just a handcrafted toy; it’s a gateway to an enriched world of imaginative play. It reinforces the importance of practice and dedication, mirroring the lessons learned in real dance studios. By providing her dolls with the right tools, my daughter can further immerse herself in storytelling, developing narratives around perseverance, grace, and the pursuit of dreams. Projects like this encourage children to think creatively, problem-solve in their play, and appreciate the value of handmade items. It’s a testament to how simple materials, a little time, and a lot of love can create lasting memories and foster a child’s passions.
Witnessing the pure delight and sustained engagement this simple project brought into our home reaffirms the power of DIY and the magic of childhood imagination. It reminds us that sometimes, the best toys are the ones made with our own hands, infused with personal touch and shared effort. This miniature dance studio has become a cherished spot, a hub of creativity and elegant doll movements.
Thank you for stopping by and taking a peek into our little corner of creativity. I hope you enjoyed touring our mini dance studio and perhaps even felt inspired to create something similar for the imaginative minds in your life. Have a wonderful day!