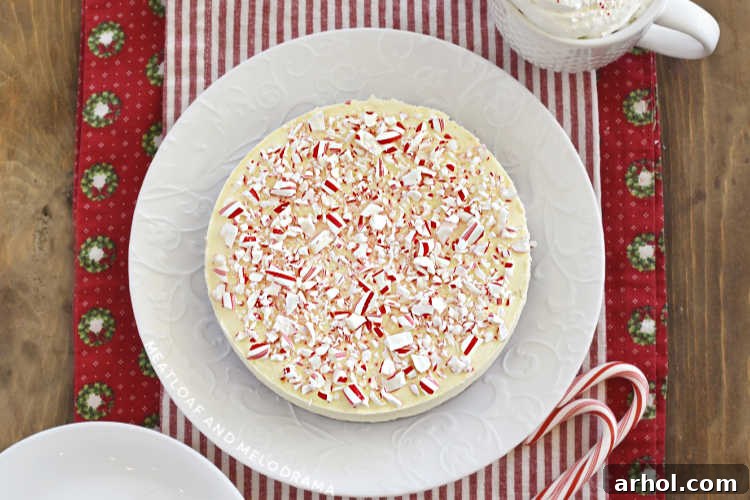
Instant Pot Peppermint Cheesecake: The Ultimate Holiday Dessert
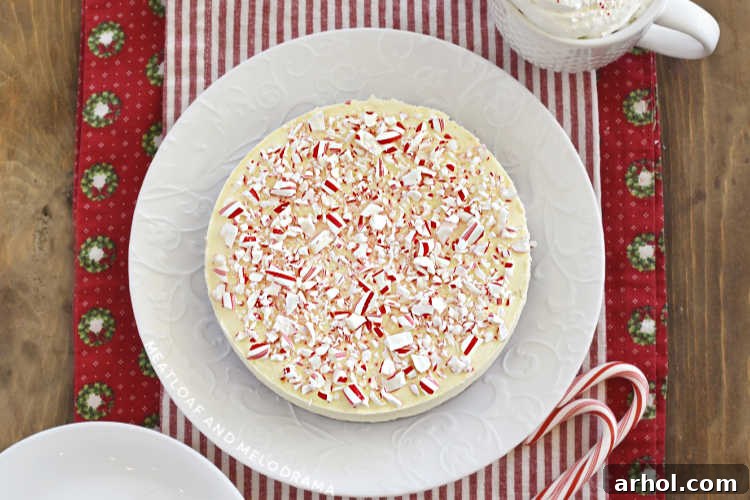
Are you searching for a show-stopping holiday dessert that will truly impress your Christmas guests? Look no further than this incredibly festive and utterly delicious Instant Pot Peppermint Cheesecake recipe. Forget the stress of traditional baking; this delightful dessert comes together effortlessly in your pressure cooker, delivering perfect results every time. Its vibrant flavor and stunning presentation make it an ideal centerpiece for any festive gathering, promising a memorable sweet treat for everyone.
While many of my favorite Instant Pot recipes focus on quick and easy dinners and practical side dishes, I’ve recently discovered a profound love for creating exquisite desserts in this versatile appliance. The Instant Pot transforms the often-intimidating process of making cheesecake into a remarkably simple and enjoyable experience. Gone are the days of fiddly water baths or worrying about cracks; the pressure cooker creates a perfectly moist, even cooking environment, ensuring a smooth, creamy texture that’s simply irresistible.
Following the immense success of my Instant Pot Pumpkin Cheesecake and the warmly received Instant Pot Eggnog Cheesecake, I was inspired to develop a new, festive flavor for the Christmas season. Peppermint immediately came to mind – a classic holiday flavor that evokes warmth, cheer, and a touch of indulgence. The result is this sensational peppermint-flavored cheesecake, designed to bring a burst of minty freshness and rich chocolate notes to your holiday table.
If you’re a fan of the refreshing zing of peppermint candy or the cozy indulgence of a peppermint mocha coffee, you are absolutely going to adore this easy-to-make peppermint cheesecake. Each bite offers a harmonious blend of smooth, creamy cheesecake, invigorating mint, and a subtle hint of chocolate, thanks to a unique and surprisingly simple secret ingredient.
Alright, no more suspense! The special ingredient that elevates the flavor profile of this holiday cheesecake to a whole new level is peppermint mocha coffee creamer! This serendipitous addition was discovered during recipe testing. I felt the cheesecake needed “a little something extra,” a deeper flavor complexity. While I initially considered adding more chocolate, I remembered having some peppermint mocha creamer left over from making my Peppermint Mocha Cookies. A dash of that creamer later, and the cheesecake’s flavor became incredibly rich and reminiscent of a beloved peppermint mocha latte – a truly magical combination!
Achieving Cheesecake Perfection: Expert Tips
Creating a flawless Instant Pot peppermint cheesecake is easier than you think, especially when you follow these essential tips:
- Room Temperature Ingredients are Key: Always ensure your cream cheese and eggs are at room temperature before you begin mixing. This crucial step guarantees a silky-smooth batter, preventing lumps and helping your cheesecake achieve a beautiful, crack-free top and an even texture. Cold ingredients tend to clump, leading to overmixing, which can incorporate too much air.
- Gentle Mixing is Best: Resist the urge to overmix your ingredients. Mix just until everything is blended and smooth. Overmixing can introduce excessive air into the batter, which can cause the cheesecake to puff up too much during cooking and then crack as it cools.
- Add Eggs Last & Mix Minimally: Incorporate your eggs as the final step in your filling preparation. This allows you to taste and adjust the flavor of the cream cheese mixture before the eggs are added. Once the eggs are in, mix them only until they are just combined. Avoid beating them vigorously until they become fluffy, as this can negatively impact the final texture of your cheesecake, making it uneven or soufflé-like.
- Blot Away Moisture: After pressure cooking, you might notice a thin layer of condensation on the surface of your cheesecake. Gently absorb this excess moisture with a clean paper towel. This step helps maintain the cheesecake’s pristine appearance and prevents a soggy top layer.
- Patience for Perfection: For the absolute best flavor and a wonderfully firm, stable texture, refrigerate your Instant Pot peppermint cheesecake for a minimum of 6 hours, or ideally, overnight. Chilling allows the cheesecake to fully set and the flavors to meld and deepen, resulting in a more delightful dessert experience.
Crafting Your Instant Pot Peppermint Cheesecake
Let’s walk through the simple steps to create this festive masterpiece in your Instant Pot. The process is straightforward, ensuring delicious results even for novice bakers.
Step 1: The Flavorful Oreo Crust
Begin by preparing the foundation of your cheesecake: the rich Oreo cookie crust. It’s important to use regular Oreo sandwich cookies, not the Double Stuf variety. The extra filling in Double Stuf Oreos can alter the crust’s consistency, making it too greasy or less stable. Crush the cookies finely using a food processor for speed and uniformity, or place them in a large zip-top bag and crush them with a rolling pin for a satisfying, hands-on approach.
Once your cookies are finely crushed, melt some unsalted butter and pour it over the crumbs. Mix these two ingredients together until the mixture resembles wet sand – cohesive enough to hold its shape when pressed. This is the perfect consistency for a sturdy, flavorful crust.
Carefully press this mixture evenly into the bottom and slightly up the sides of a greased 7-inch push pan or springform pan. For Instant Pot cheesecakes, I highly recommend a springform pan with a handle. This feature makes it incredibly easy to lower the cheesecake into the Instant Pot and remove it after cooking, preventing any potential spills or damage. It also provides a leak-proof seal, which is crucial for pressure cooking. You can usually find excellent options in the recipe equipment section of this post.
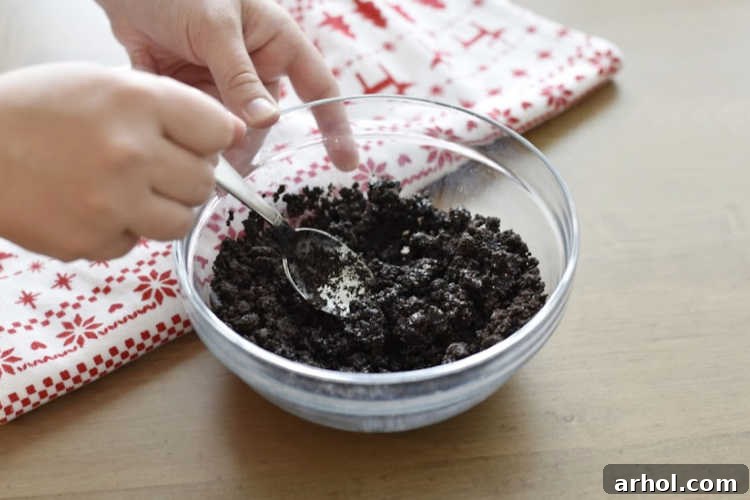
Once the crust is pressed firmly into the pan, place it in your freezer. This brief chilling period helps the crust firm up, preventing it from crumbling when the filling is added and ensuring a clean, stable base for your cheesecake.
Step 2: Preparing the Creamy Peppermint Filling
While your crust is chilling, you can begin preparing the luscious peppermint cheesecake filling. In a large mixing bowl, combine your softened, room-temperature cream cheese with the granulated sugar. Beat these two ingredients together on low speed until the mixture is smooth and creamy. Scrape down the sides of the bowl to ensure all ingredients are thoroughly incorporated.
Next, add the sour cream, that secret ingredient – peppermint mocha coffee creamer, and peppermint extract. Continue to mix on low speed until these ingredients are just combined. Again, avoid overmixing to keep the texture light and airy.
Finally, gently whisk in the room-temperature eggs, one at a time. Mix only until each egg is just incorporated into the batter. This step is crucial for maintaining the cheesecake’s delicate texture and preventing cracks. Overbeating the eggs can introduce too much air, leading to a soufflé-like consistency that may collapse upon cooling.
Pour the prepared peppermint cheesecake filling evenly over your chilled Oreo cookie crust. Use a spatula to gently smooth the surface, ensuring an even layer for cooking.
Step 3: Pressure Cooking in the Instant Pot
Now it’s time to cook your cheesecake! Pour 1 cup of water into the inner pot of your 6-quart Instant Pot. Place a trivet (the metal rack that usually comes with your Instant Pot) into the bottom of the pot. This keeps your cheesecake pan elevated above the water.
Carefully lower your cheesecake pan onto the trivet. If your pan doesn’t have a handle, you can create a “foil sling” by folding a long piece of aluminum foil into a strip, placing it under the pan, and using the ends as handles to lower and lift the pan. This ingenious trick makes handling the hot pan much safer and easier.
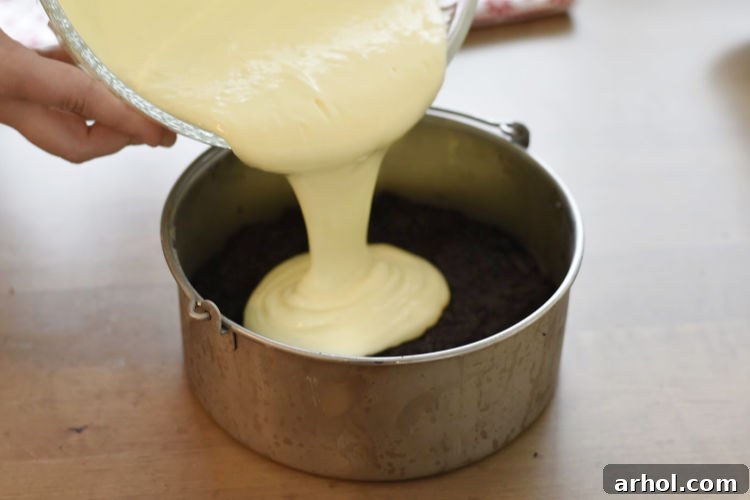
Optimal Cooking Time for Instant Pot Cheesecake
The cooking duration for cheesecake in the Instant Pot can vary slightly depending on the specific recipe and its density. For instance, a thicker, denser cheesecake like a pumpkin cheesecake might require approximately 45 minutes of pressure cooking. A lighter recipe, such as an eggnog cheesecake, typically cooks in about 30 minutes.
Given that this peppermint cheesecake incorporates both sour cream and the unique addition of coffee creamer, it benefits from a slightly longer cooking time to achieve perfect creaminess and structure. Therefore, set your Instant Pot to pressure cook for 35 minutes. Crucially, after the pressure cooking cycle is complete, allow for a 15-minute natural pressure release (NPR). This slow release of pressure is vital for preventing cracks in your cheesecake and ensuring a smooth, beautifully set top.
Determining When Your Cheesecake Is Perfectly Done
Knowing exactly when your cheesecake is finished cooking is key to its success. Here are the indicators to look for:
- The Gentle Jiggle Test: A perfectly cooked cheesecake will have a slight jiggle in its center when you gently move the pan. The edges should appear set, while the very center (about a 2-inch circle) will still have a subtle, soft movement. This indicates that it’s cooked through but not overbaked, which would result in a dry texture.
- Separation from the Pan: As the cheesecake cooks and begins to set, you’ll often notice the sides starting to pull away slightly from the edges of the springform pan. This is a good visual cue that it’s reaching doneness.
- Internal Temperature: For the most accurate assessment, you can use an instant-read thermometer. The internal temperature of the cheesecake’s center should be at or above 150 degrees Fahrenheit (65°C). This ensures food safety and optimal texture.
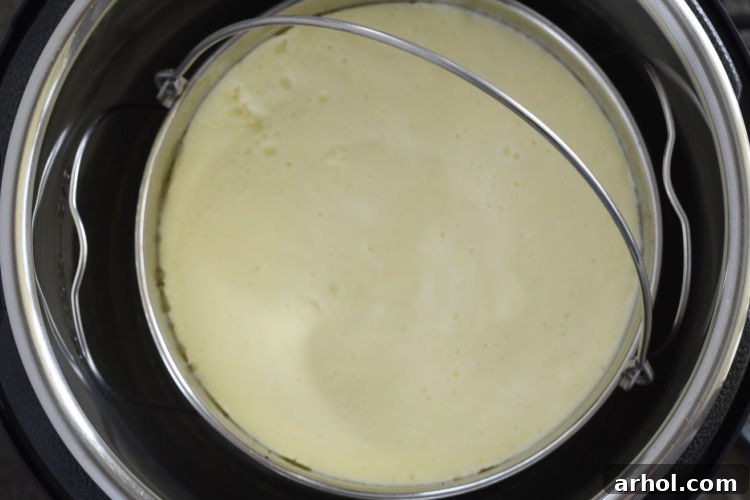
Once your cheesecake passes the doneness tests, perform a quick release to fully depressurize the Instant Pot. When the float valve drops, carefully remove the lid. Using oven mitts and the handles of your springform pan (or foil sling), gently lift the cheesecake out of the pot. As mentioned earlier, if there’s any surface moisture, blot it gently with a paper towel.
Allow the cheesecake to cool on a wire rack for approximately 30 minutes. This initial cooling period helps it transition gradually. After it has cooled slightly, cover it loosely with plastic wrap and transfer it to the refrigerator. Chilling for at least 6 hours, or ideally overnight, is crucial. While we tasted this peppermint mocha cheesecake after about 6 hours and it was delightful, the texture was noticeably firmer and the flavors were much more pronounced and harmonized the following day. As a wise Jedi master once said, “Patience, young padawan. Patience!”
Creative Decorating Ideas for Your Festive Cheesecake
Once your Instant Pot Peppermint Cheesecake is perfectly chilled and set, it’s time for the fun part: decoration! Elevate its holiday appeal with a variety of toppings:
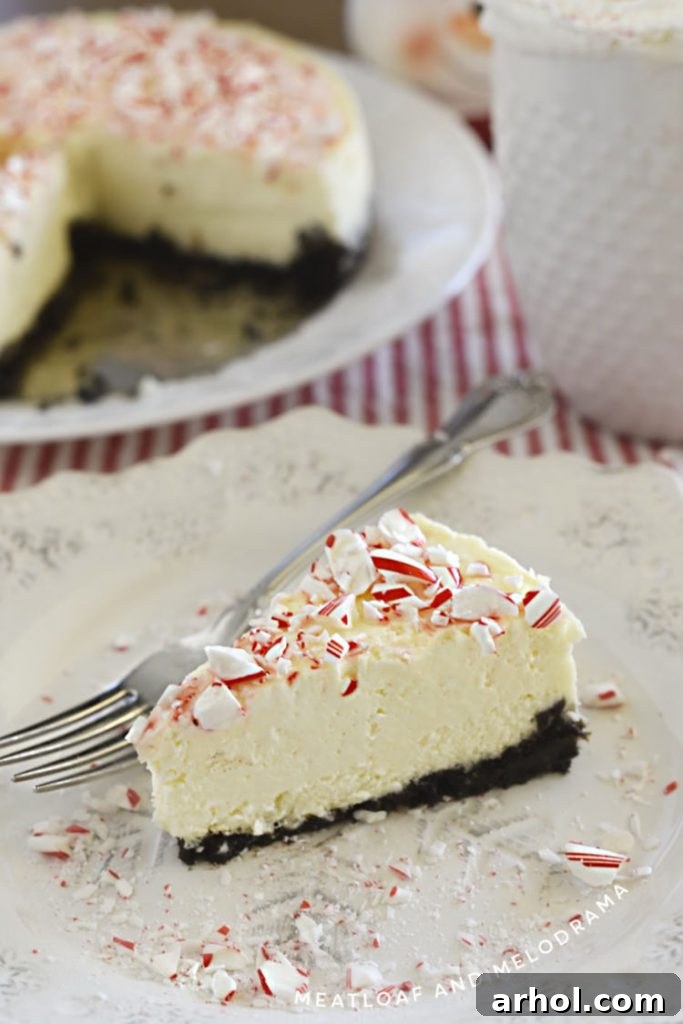
- Classic Crushed Candy Canes: The simplest and most iconic choice. Sprinkle crushed candy canes generously over the top for a beautiful crimson and white sparkle, and a delightful textural crunch.
- Whipped Cream Dollops: Add elegant dollops or a swirl of freshly whipped cream around the edges or directly on top. This adds a light, airy contrast to the rich cheesecake.
- Oreo Crumbs: Echo the crust by sprinkling a handful of extra crushed Oreo crumbs over the whipped cream or around the base.
- Chocolate Drizzle: A drizzle of melted dark or white chocolate can add another layer of flavor and visual appeal, complementing the mocha notes in the cheesecake.
- Fresh Mint Leaves: For a touch of sophistication, garnish with a few fresh mint leaves.
- Edible Glitter: A sprinkle of edible silver or gold glitter can add extra festive sparkle, perfect for Christmas celebrations.
Let your creativity shine and decorate with whatever “floats your boat” to make this peppermint cheesecake uniquely yours and perfectly suited for your holiday festivities!
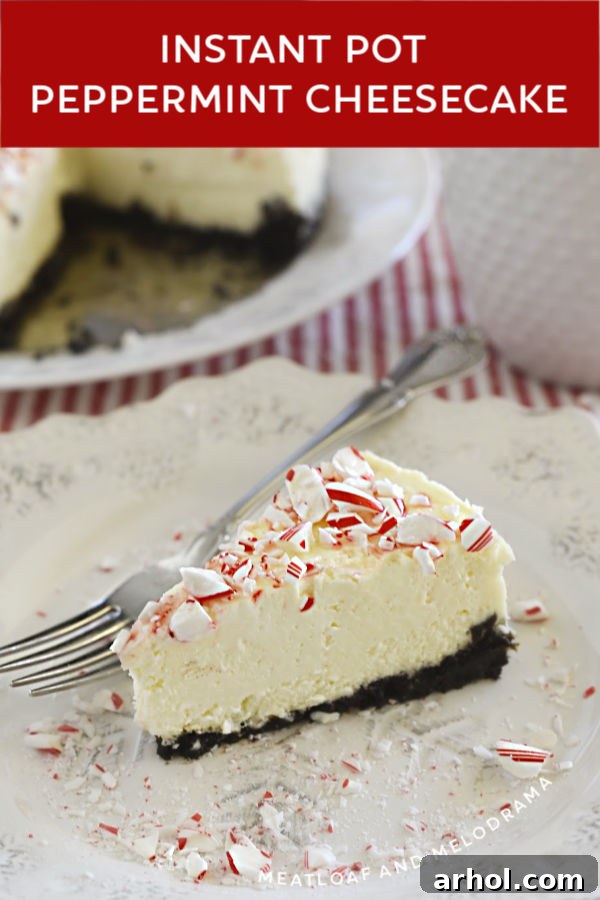
Instant Pot Peppermint Cheesecake Recipe
Pin
Instant Pot Peppermint Cheesecake
Equipment
-
Instant Pot Pressure Cooker
-
7 inch Springform Pan
Ingredients
The Crust
- 1 cup Oreo cookies regular, not double stuf, crushed about 20 cookies
- 2 tablespoons butter melted
The Filling
- 16 ounces cream cheese 2 – 8 ounce packages, at room temperature
- ½ cup granulated sugar
- ¼ cup sour cream
- ½ cup peppermint mocha coffee creamer
- 1 teaspoon peppermint extract
- 2 eggs room temperature
- crushed candy canes optional, for topping
Instructions
The Crust:
-
Finely crush the cookies using a food processor, or place in large zip top bag, close up, and crush with rolling pin.
-
Melt the butter and pour over the crushed cookies, and mix until combined and the consistency of wet sand.
-
Press the crust into the bottom of a greased 7 inch cheesecake pan, ensuring it is evenly distributed on the bottom and sides of the pan.
-
Place the crust in the freezer until the filling is ready.
The Filling:
-
Beat the room temperature cream cheese and sugar until just creamy.
-
Add the sour cream, coffee creamer and peppermint extract, and beat until just combined.
-
Add the eggs, one at a time, mixing in between until just combined. Do not over mix.
-
Pour the cheesecake filling onto the crust, smoothing out with a spatula if necessary.
-
Pour 1 cup of water into the inner pot of the Instant Pot (6 qt). Place a trivet in the bottom.
-
If your pan does not have a handle, create a foil sling, place the pan in the sling, then place the sling in the pot. Skip this step if your pan has a handle.
-
Close the lid and place the valve in the SEALING position. Hit PRESSURE COOK for 35 minutes, then do a 15 minute natural release.
-
Do a quick release to release the remaining pressure. When pin drops, remove lid, and using oven mitts, carefully remove the cheesecake from the pot by lifting handles.
-
The cheesecake is done when only the center jiggles slightly when you shake the pan back and forth and when its internal temperature is 150 degrees Fahrenheit. If it is not done yet, let it cook for another 5 minutes.
-
Take the corner of a paper towel and soak up any water on the top of the cheesecake.
-
Allow the cheesecake to cool slightly before covering. (about 30 minutes) Store covered in the fridge for 6 hours to overnight (recommended) before serving.
Notes
For best results, use room temperature cream cheese and eggs and mix ingredients until just combined. This helps avoid cracks in the top.
You can crack eggs into a separate bowl to avoid shells getting into the mixture.
I don’t like to cover the cheesecake with foil while cooking, since it can take longer to cook. Blot any water on top of the cheesecake with a paper towel.
Nutrition
Carbohydrates: 25g,
Protein: 6g,
Fat: 24g,
Saturated Fat: 13g,
Cholesterol: 103mg,
Sodium: 267mg,
Potassium: 149mg,
Fiber: 1g,
Sugar: 20g,
Vitamin A: 802IU,
Vitamin C: 1mg,
Calcium: 84mg,
Iron: 2mg
Nutrition information is automatically calculated, so should only be used as an approximation.
Additional Info