
Easy No-Bake Bird’s Nest Cookies: Your Go-To Easter & Spring Treat
As spring breathes new life into the world and Easter approaches, our thoughts turn to vibrant colors, delightful gatherings, and, of course, charming seasonal treats. Among the most beloved and effortlessly simple desserts for this time of year are No-Bake Bird’s Nest Cookies. These adorable creations, resembling miniature bird nests filled with colorful eggs, are not just a feast for the eyes but also a joy to make. Requiring no baking whatsoever, they are an ideal project for keeping the kitchen cool on warmer days and an engaging activity for children of all ages.
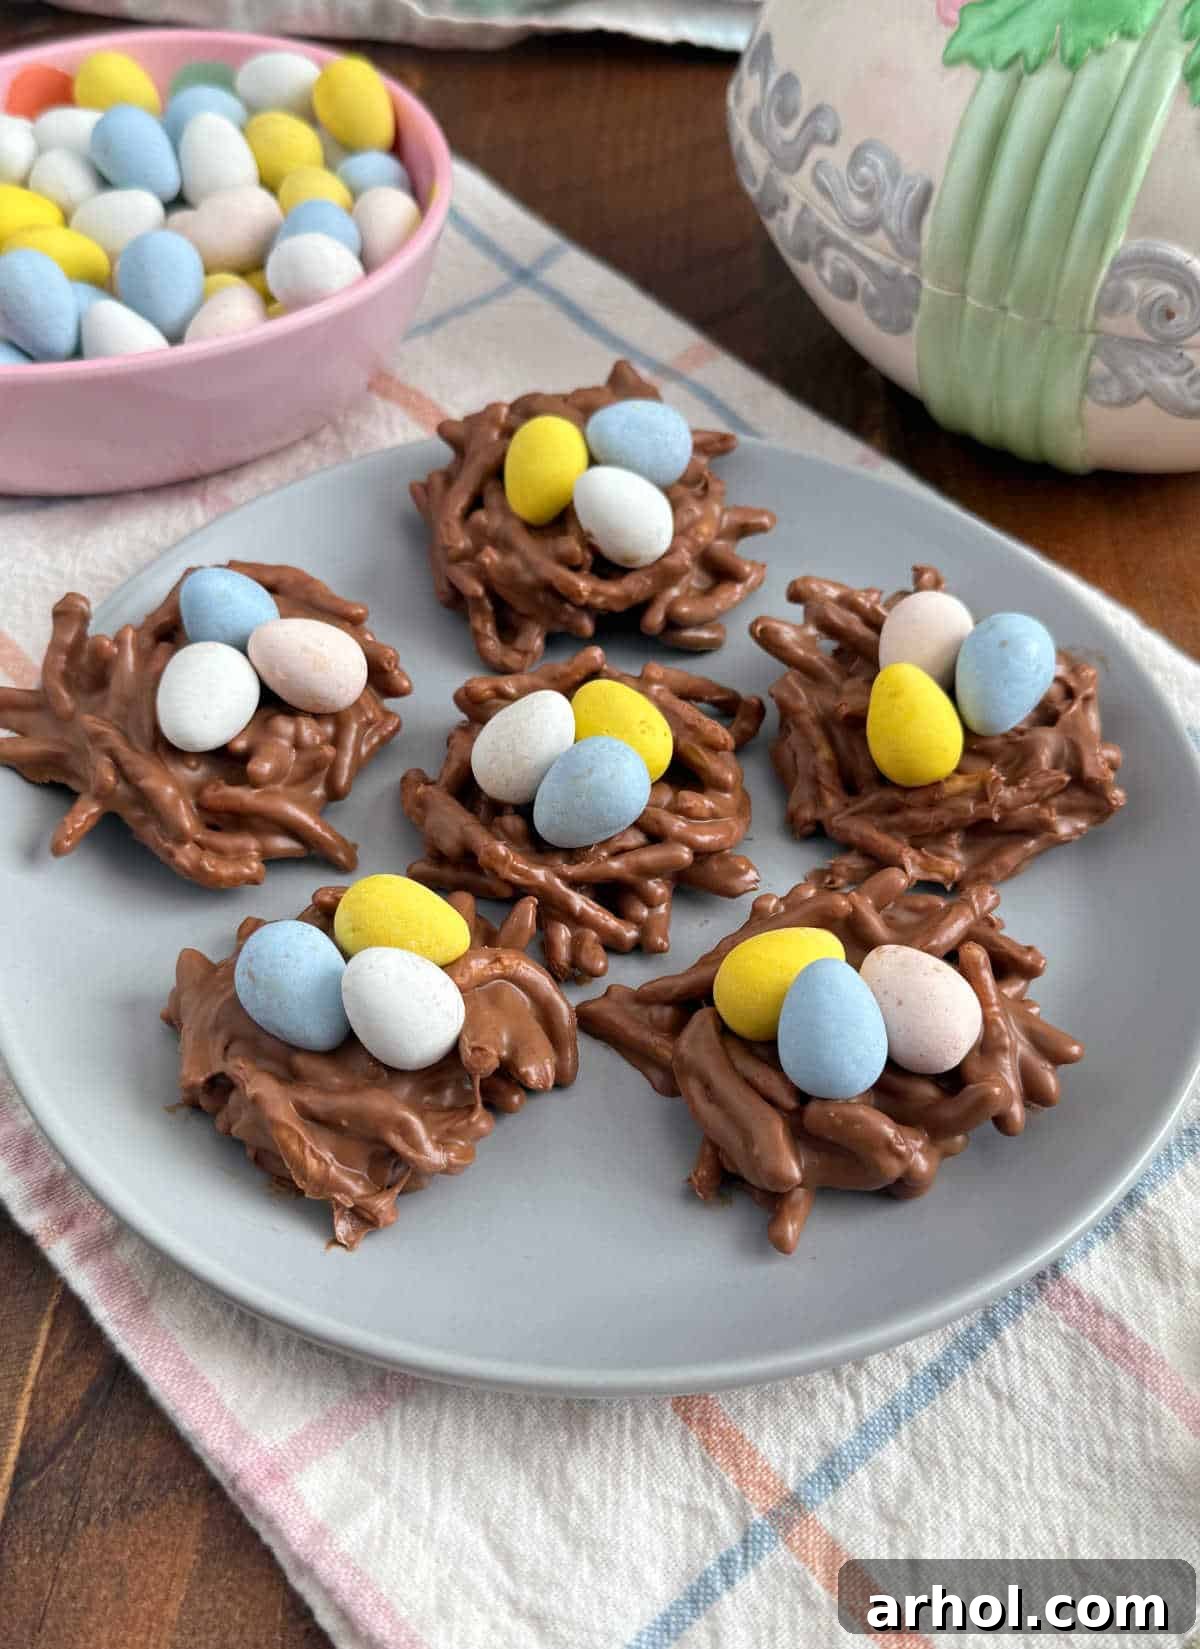
If you’re in search of a festive dessert that combines cuteness with utter simplicity, then this easy no-bake bird’s nest cookie recipe is precisely what you need. Crafted from a mere four ingredients, these delightful morsels come together without ever needing to touch an oven. This aspect is particularly advantageous as the weather warms, allowing you to save your oven for savory dishes or simply keep your kitchen cool and comfortable. Imagine the sweet aroma of chocolate and peanut butter filling your home without the heat of baking!
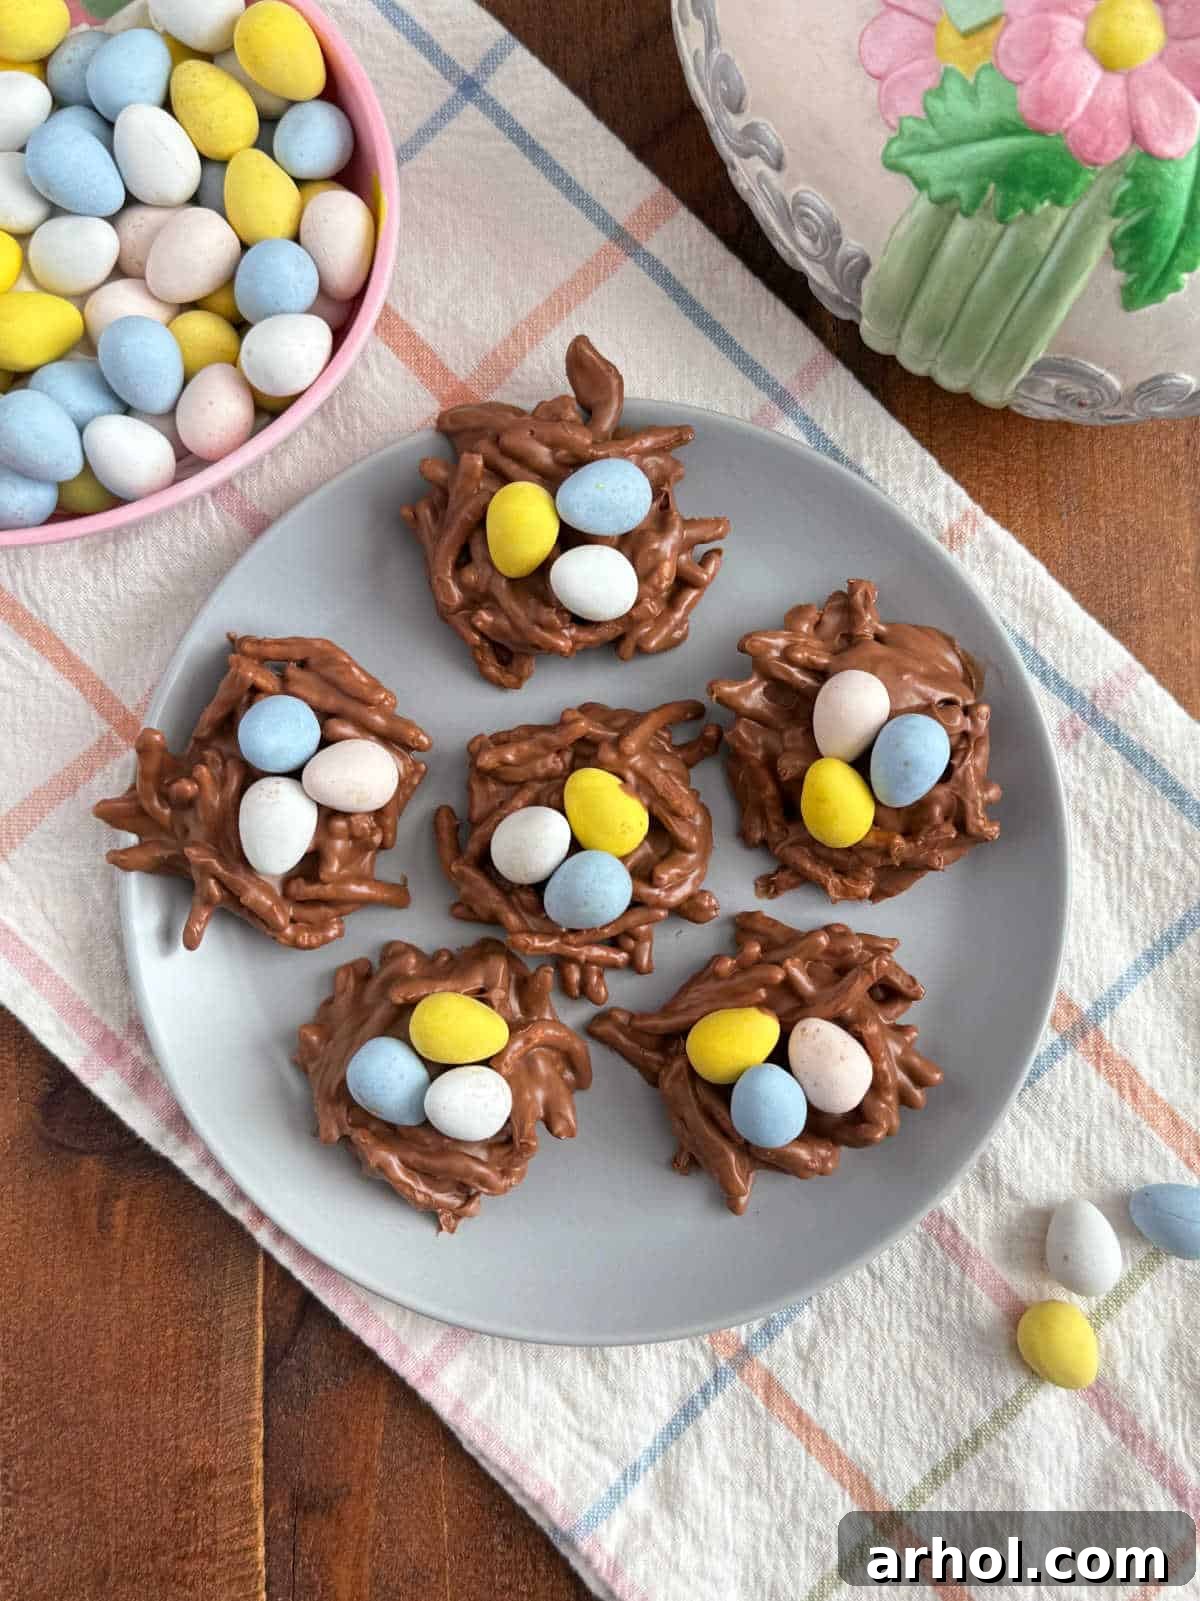
These unique chow mein noodle cookies offer a delightful crunch and a satisfying texture, reminiscent of classic holiday haystacks but with a distinct springtime flair. While haystacks often feature butterscotch and autumn-themed decorations, our version embraces the irresistible combination of smooth chocolate and creamy peanut butter, beautifully topped with vibrant candy eggs. Much like our popular bird’s nest cupcakes, these no-bake cookies are a guaranteed crowd-pleaser for any spring celebration. Their charming rustic appearance and universally loved flavors make them an instant hit at potlucks, family brunches, or as a special treat for school events.
Why These No-Bake Bird’s Nest Cookies Are a Must-Make
Beyond their undeniable charm, these no-bake bird’s nest cookies offer numerous benefits that make them a standout recipe for the season:
- Unbeatable Simplicity: With only four main ingredients, this recipe streamlines your holiday baking. It’s perfect for beginners or those seeking a stress-free dessert option.
- Oven-Free Convenience: Keep your kitchen cool and conserve oven space, a huge plus during busy holiday preparations or on warm spring days.
- Engaging for All Ages: The hands-on nature of mixing, shaping, and decorating makes this recipe a fantastic way to involve children in the kitchen. They’ll love creating their own edible nests!
- Seasonal Perfection: Their whimsical bird’s nest appearance and colorful candy eggs perfectly embody the themes of Easter, renewal, and spring.
- Incredibly Quick: From start to finish, including cooling time, these cookies can be ready in less than an hour, making them ideal for last-minute treats.
- Highly Customizable: Easily adapt the recipe with different types of chocolate, various candies, or additional mix-ins to suit your taste or dietary needs.
- Delicious Texture: The crisp chow mein noodles provide a delightful crunch that contrasts wonderfully with the smooth chocolate-peanut butter coating.
- Portable and Party-Ready: These sturdy little nests are easy to transport and perfect for sharing at any gathering, picnic, or school event.
Gather Your Ingredients: What You’ll Need
Crafting these adorable no-bake bird’s nest cookies requires just a few readily available ingredients. You likely have most of these staples in your pantry already, simplifying your shopping list. Here’s a detailed breakdown of the essential components:
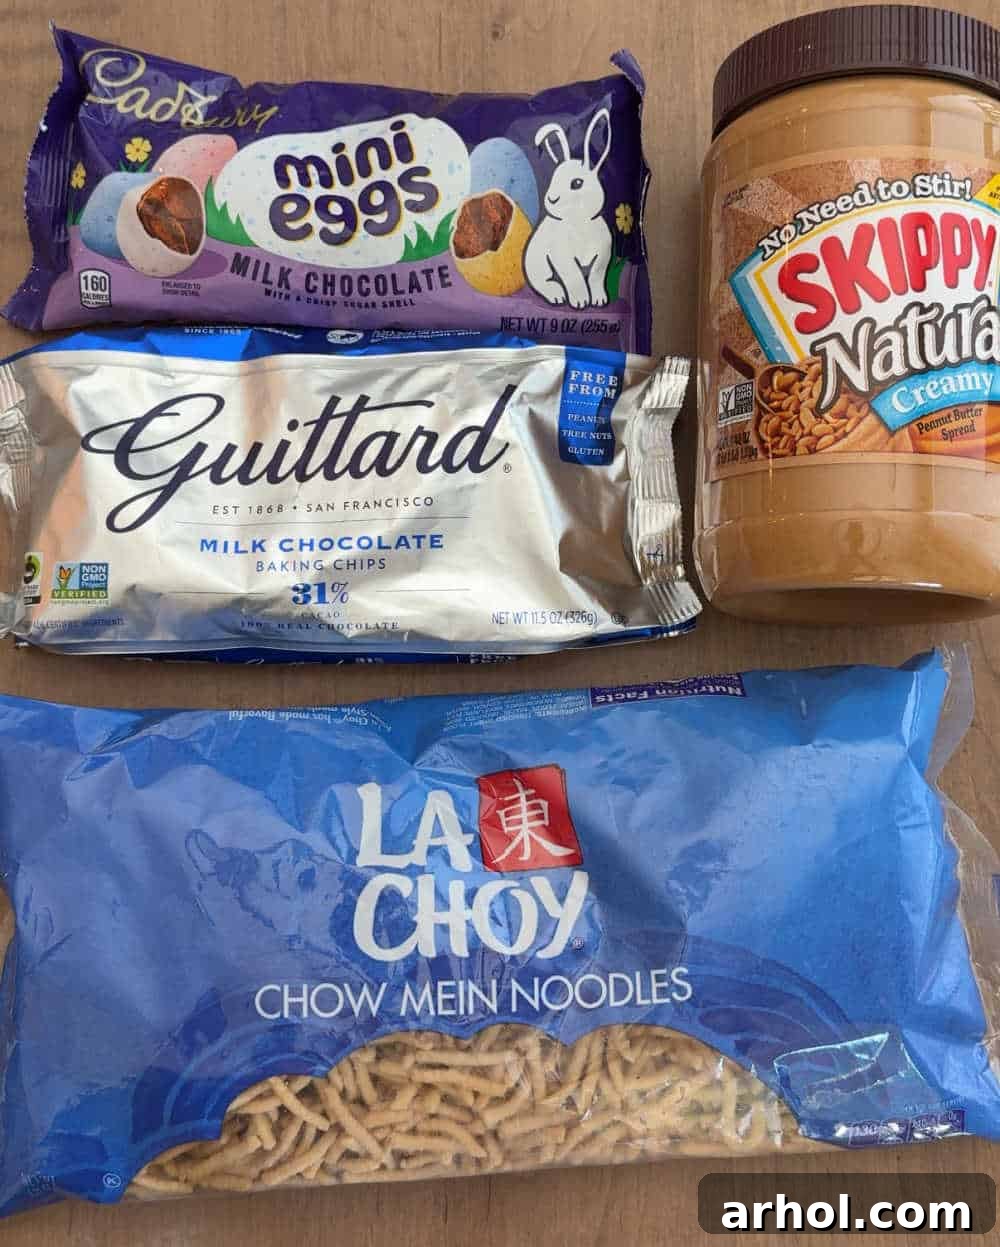
- Creamy Peanut Butter: The binding agent that holds everything together and infuses a classic, irresistible flavor. Any standard brand of creamy peanut butter will work wonderfully. For optimal consistency, it’s best to avoid natural peanut butter varieties that require stirring, as their separated oils can affect the final texture of your nests. Opt for a smooth, consistent spread.
- Milk Chocolate Chips: Our choice for these nests, milk chocolate chips, impart a beautiful, lighter brown hue that mimics natural bird’s nests. This also delivers a classic, sweet chocolate flavor. However, don’t hesitate to personalize! Semi-sweet chocolate chips will provide a deeper, richer chocolate experience, while dark chocolate chips offer a more intense, less sweet profile. For a nostalgic twist similar to traditional haystacks, butterscotch chips are a fantastic alternative.
- Dried Chow Mein Noodles: These crispy, savory noodles are the textural star, forming the perfect delicate and crunchy “twigs” for your nests. You’ll typically locate them in the Asian foods aisle of most major grocery stores, often packaged in bags or small tins. Ensure you select the dried, crunchy variety, not the soft, pre-cooked, or refrigerated noodles used for stir-fries. Their unique crispness is crucial for the cookie’s structure.
- Candy Eggs: These are the vibrant, festive jewels that transform your chocolate-noodle clusters into true bird’s nests. We love using Cadbury Mini Eggs for their iconic status, delicious chocolate centers, and colorful candy shells, which are synonymous with Easter. However, you have many options: Robin’s Eggs, jelly beans, M&M’s mini eggs, or any other small, egg-shaped candies will work beautifully. Choose a variety of colors to make your nests pop and add a whimsical touch.
How to Make Bird’s Nest Cookies: A Simple Step-by-Step Guide
Follow these straightforward instructions to create your charming no-bake bird’s nest cookies. This process is so easy, it’s perfect for little helpers!
-
Melt the Chocolate and Peanut Butter
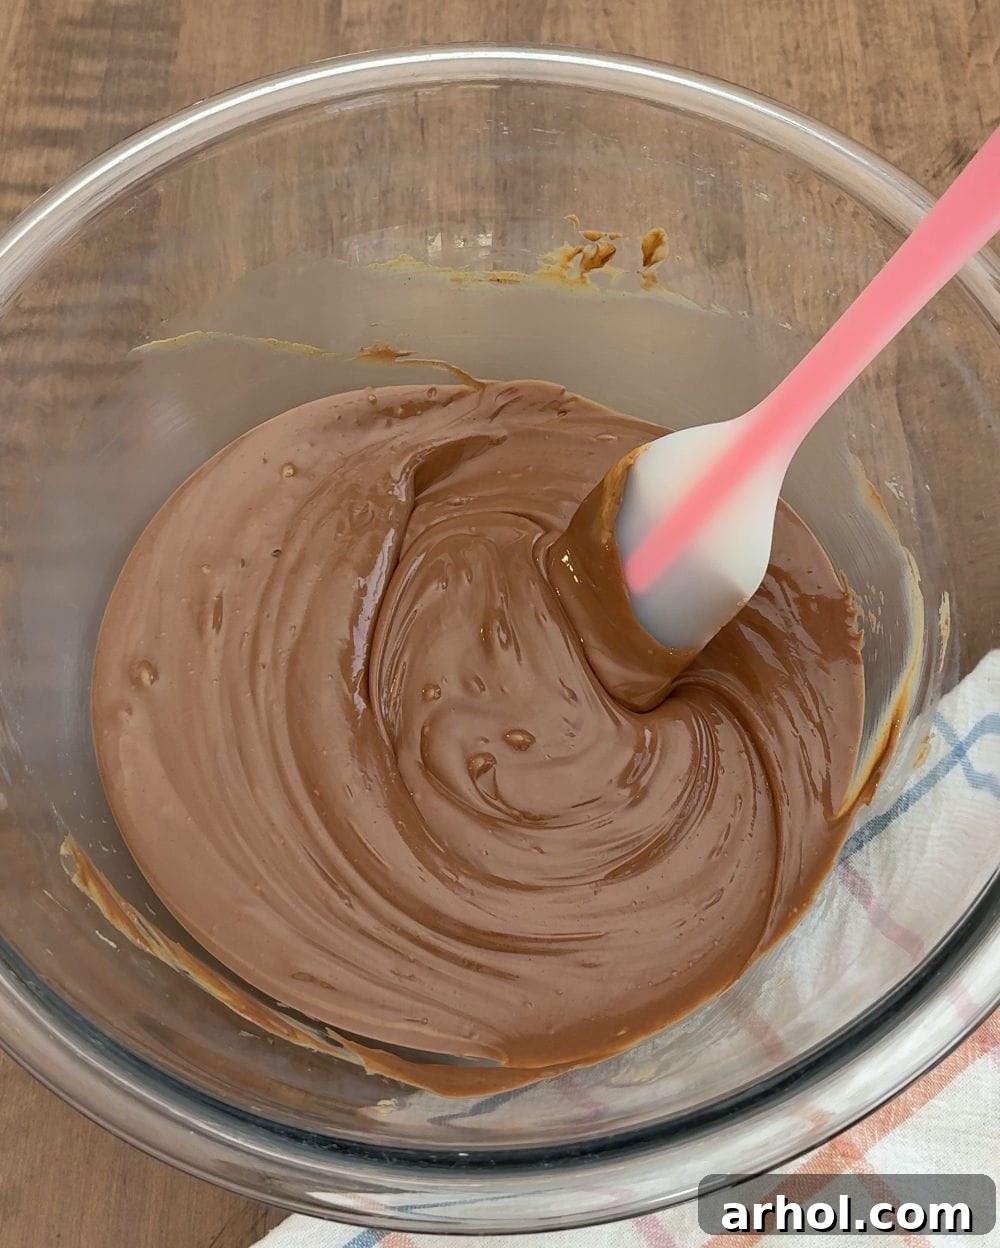
In a large, microwave-safe bowl, combine your milk chocolate chips and creamy peanut butter. Microwave the mixture in short, 30-second bursts, stirring vigorously after each interval. This gradual melting technique is essential to prevent the chocolate from overheating and seizing, which can result in a grainy or lumpy texture. Continue this process until the chocolate and peanut butter are fully melted and smoothly combined into a glossy, uniform sauce. Alternatively, you can melt them gently in a double boiler on the stovetop.

Ensure your chocolate and peanut butter mixture is perfectly smooth before adding noodles. -
Combine with Chow Mein Noodles
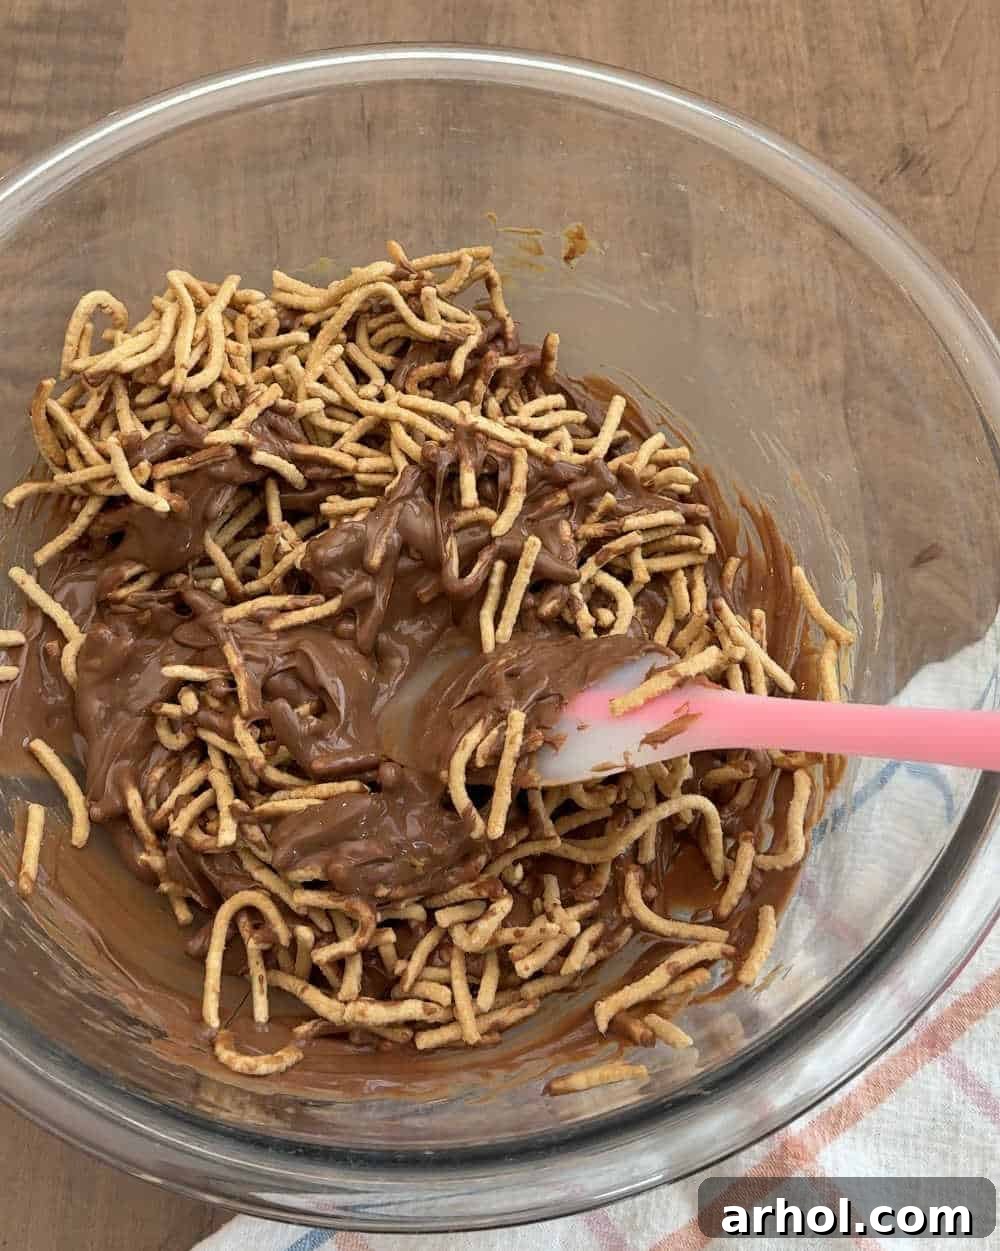
Once your chocolate-peanut butter base is warm and perfectly smooth, add the dried chow mein noodles to the bowl. Using a sturdy spatula or a large spoon, gently fold the noodles into the chocolate mixture. The goal is to coat every noodle strand thoroughly without breaking them into tiny fragments. Be mindful and gentle during this step to preserve the distinctive crunchy texture of the noodles, which is key to the nest-like structure.
Mix the chow mein noodles until they are thoroughly coated in the delicious chocolate blend. -
Form the Nests on a Baking Sheet
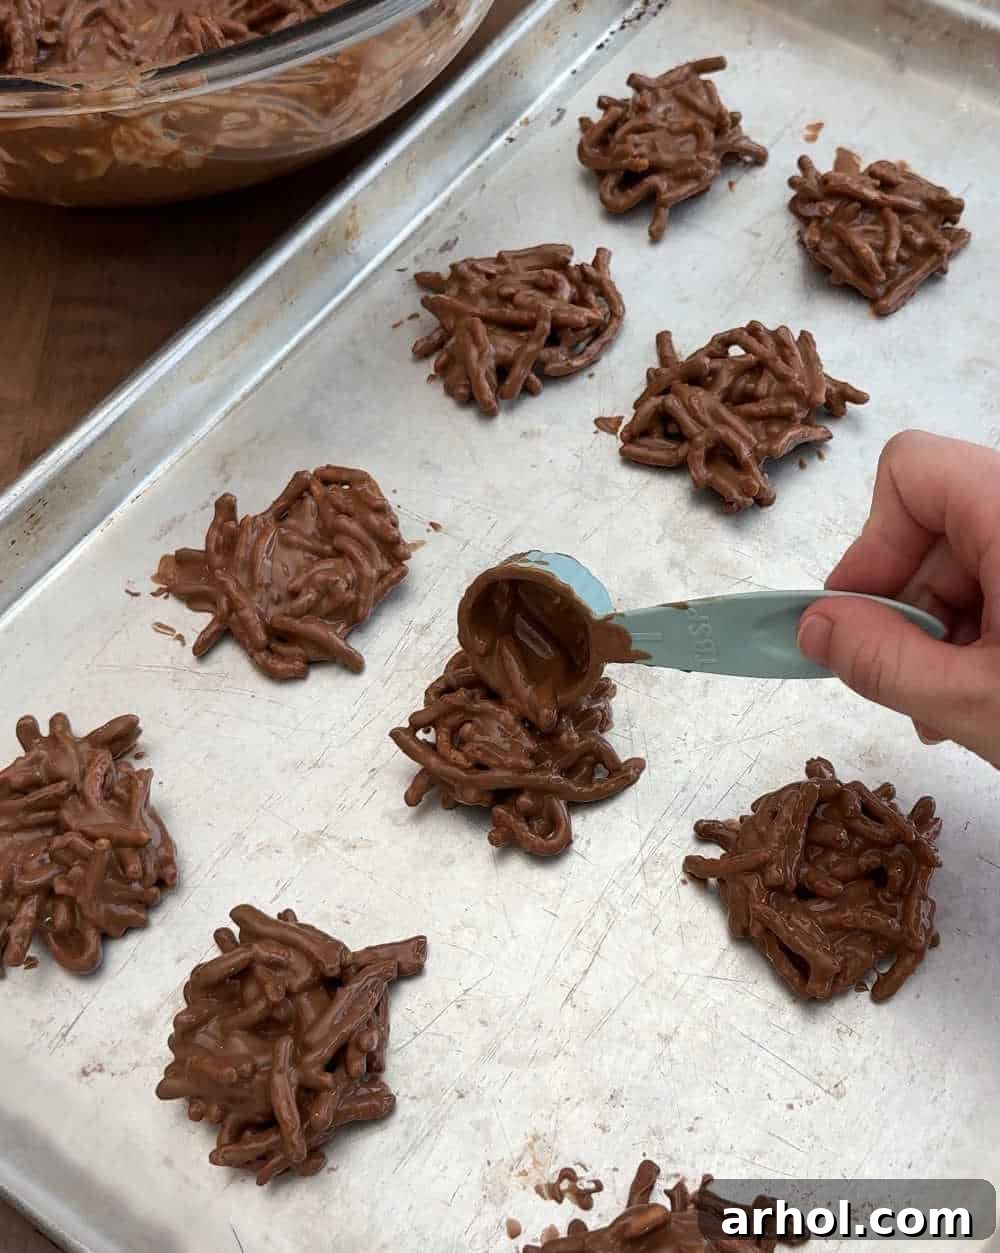
Prepare a baking sheet by lining it with either parchment paper or wax paper; this prevents sticking and makes for easy cleanup. Using a tablespoon (or a small cookie scoop), take portions of the chocolate-coated noodle mixture and drop them onto the prepared sheet. While the mixture is still warm and pliable, use your fingers or the back of the spoon to gently shape each portion into a small, round nest with a slight indentation in the center. Aim for consistent sizing across your nests for an appealing finished look.
Form the chocolate-coated noodles into their iconic nest shapes on the prepared sheet. -
Decorate with Candy Eggs and Chill
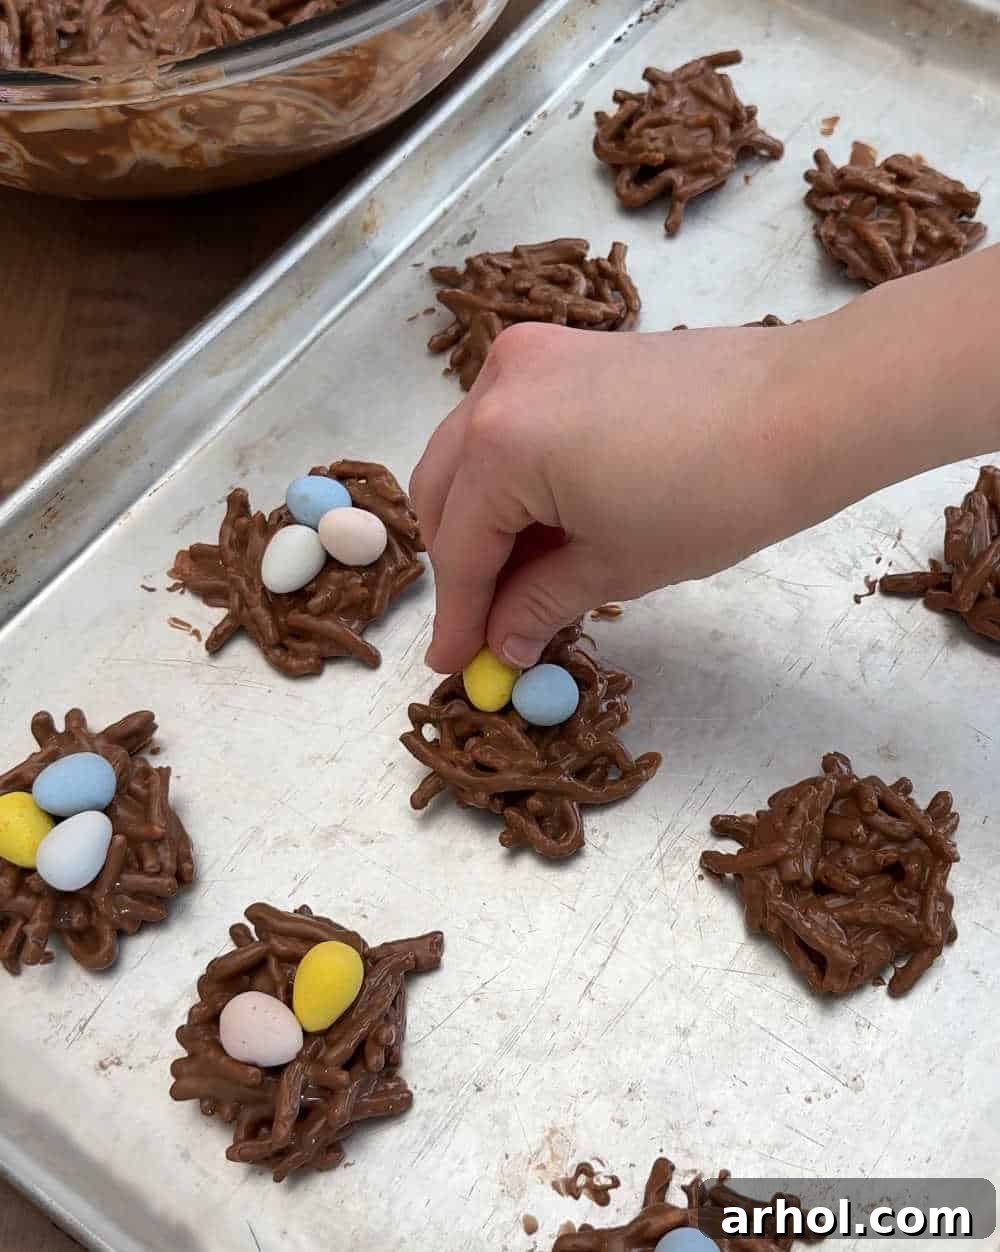
This is the fun part! Immediately after shaping each nest, carefully place 2 to 3 candy eggs into the central indentation. It is crucial to perform this step while the chocolate-noodle mixture is still warm and soft; as the chocolate cools, it will harden, making it difficult for the eggs to adhere without dislodging or damaging the nest. Once all your nests are decorated, transfer the baking sheet to the refrigerator and chill for a minimum of 15-30 minutes, or until the chocolate has completely set and the nests are firm. For a slower set, you can leave them at room temperature in a cool spot, but refrigeration speeds up the process significantly.
Adorn each nest with vibrant candy eggs while the chocolate mixture is still pliable.
Storage & Make-Ahead Strategies for Your Nests
These delightful no-bake bird’s nest cookies are not only simple to make but also excellent for preparing in advance, making them perfect for holiday planning or enjoying over several days. Proper storage ensures they remain fresh, firm, and wonderfully crunchy:
- Room Temperature Storage: If your home environment is consistently cool (typically below 70°F or 21°C), you can store the fully set nests in an airtight container at room temperature. They will retain their freshness and crunch for up to 5-7 days.
- Refrigeration for Extended Freshness: For warmer climates, during hot spells, or if you simply prefer a firmer cookie, store your bird’s nest cookies in an airtight container in the refrigerator. When chilled, they will stay fresh and hold their shape beautifully for up to 2 weeks. For the best texture, allow them to sit out for 5-10 minutes before serving, or enjoy them straight from the fridge for an extra firm and cool bite.
- Freezing for Long-Term Enjoyment: These cookies freeze exceptionally well! To freeze, arrange the completely set and firm nests in a single layer on a baking sheet and place them in the freezer until solid (about 1-2 hours). Once frozen, transfer them to a freezer-safe airtight container or a heavy-duty freezer bag, layering parchment paper between them to prevent sticking. They can be frozen for up to 3 months. To enjoy, simply thaw them in the refrigerator overnight or at room temperature for a couple of hours.
Expert Tips for Achieving Perfect Bird’s Nest Cookies
While this recipe is incredibly forgiving, a few expert tips can help ensure your no-bake bird’s nest cookies turn out flawlessly every single time:
- Gentle Chocolate Melting: When melting chocolate, especially in the microwave, always use short intervals (30 seconds) and stir diligently between each. Chocolate can seize (become thick and clumpy) if it overheats. If it does happen, don’t despair! You can often rescue it by stirring in a teaspoon of neutral oil (like vegetable or coconut oil).
- Strategic Egg Placement: The most crucial tip for decorating is to add the candy eggs while the chocolate-noodle mixture is still warm, soft, and somewhat sticky. As the mixture cools and hardens, the eggs won’t adhere properly. This step is also fantastic for involving children; they’ll love carefully placing the “eggs” into their nests!
- Don’t Crush the Noodles: When folding the chow mein noodles into the chocolate, be gentle. Aggressive stirring can break the noodles into smaller pieces, compromising the lovely, crunchy texture and authentic nest-like appearance.
- Accelerated Cooling: If you’re pressed for time or working in a warm kitchen, speed up the setting process by placing your baking sheet of formed nests directly into the refrigerator (15-30 minutes) or even the freezer (10-15 minutes).
- Adjusting Mixture Consistency: If your chocolate-peanut butter mixture feels too thick to coat the noodles easily, add half a teaspoon of coconut oil or vegetable shortening and stir well. If it seems too runny, let it cool for an extra minute or two before adding the noodles.
- Creative Serving Suggestions: Enhance the presentation by arranging your finished nests on a bed of green-tinted shredded coconut (simply mix coconut flakes with a drop of green food coloring) to resemble grass. For individual servings, place each nest in a colorful mini cupcake liner.
- Quality Ingredients Matter: While this recipe is simple, using good quality chocolate and fresh peanut butter will elevate the flavor significantly.
Creative Variations & Dietary Adaptations
The beauty of no-bake recipes lies in their flexibility! Feel free to customize your bird’s nest cookies with these exciting variations and cater to different dietary needs:
Flavorful Variations:
- Alternative Chocolates: Experiment beyond milk chocolate. Try semi-sweet chocolate for a deeper flavor, rich dark chocolate for a more sophisticated treat, or even white chocolate for a lighter, creamier taste. White chocolate can also be easily colored with food-grade gel dyes for pastel nests.
- Butterscotch Swap: For a traditional haystack flavor, substitute the chocolate chips entirely with butterscotch chips. This offers a different, equally delicious sweet profile.
- Nut Butter Alternatives: For those with peanut allergies or simply to explore different flavors, almond butter, cashew butter, or sunflower seed butter (SunButter) are excellent creamy substitutes. Ensure the chosen nut or seed butter is smooth and well-mixed.
- Exciting Add-ins: Boost texture and flavor by folding in a handful of mini marshmallows, extra shredded coconut, finely chopped nuts (if no allergies), or a sprinkle of flaky sea salt into the chocolate mixture along with the noodles.
- Sprinkle Extravaganza: Before the chocolate sets, a shower of festive spring-themed sprinkles or edible glitter can add an extra layer of sparkle and fun to your nests.
Dietary Adaptations:
- Gluten-Free Option: Ensure your dried chow mein noodles are certified gluten-free. Many brands now offer gluten-free varieties made from rice or other alternative flours.
- Dairy-Free/Vegan Version: Easily adapt by using dairy-free chocolate chips and confirming your peanut butter is vegan-friendly (most are, but always check labels). The recipe is naturally egg-free. For the “eggs,” opt for vegan-friendly candy eggs or decorate with nuts/seeds or small fruit pieces instead.
- Nut-Free Alternative: As mentioned, sunflower seed butter (SunButter) is an excellent and safe alternative for peanut butter if nut allergies are a concern. Always double-check all ingredient labels for hidden nuts.
More Delightful No-Bake Easter Desserts
These charming bird’s nest cookies are just one star in a galaxy of easy, no-bake treats perfect for your Easter and spring festivities. Expand your holiday dessert table with these complementary delights, all designed to minimize effort and maximize enjoyment:
- Bunny Bait Snack Mix: A playful and addictive sweet and salty mix, typically loaded with Easter candies, pretzels, popcorn, and various cereals. It’s perfect for snacking or as a party favor.
- Easter Bunny Tail Candy Bark: A visually stunning and easy-to-make white chocolate bark adorned with pastel candies, mini marshmallows (resembling fluffy bunny tails), and sprinkles. It’s beautiful and delicious.
- Mini Egg Cheesecake Dip: A creamy, luscious, and utterly decadent dessert dip featuring cream cheese, whipped topping, and generous amounts of crushed Cadbury Mini Eggs. Serve with graham crackers, vanilla wafers, or fresh fruit for dipping.
Incorporating these easy treats into your Easter menu guarantees a festive spread full of smiles and sweet, unforgettable memories for everyone.
Frequently Asked Questions (FAQ) About Bird’s Nest Cookies
Got questions about making these adorable no-bake treats? Here are answers to some common inquiries:
Q: Can I use crunchy peanut butter instead of creamy?
A: Absolutely! While creamy peanut butter offers a smoother coating, crunchy peanut butter is a fantastic alternative. It will add an extra layer of delightful texture and a more intense nutty flavor to your bird’s nests, making them even more robust.
Q: How long do these no-bake bird’s nest cookies take to set completely?
A: When refrigerated, these cookies typically firm up and are ready to enjoy in about 15-30 minutes. If you leave them at room temperature in a cool environment, it might take a bit longer, usually an hour or two. For the fastest results, a quick stint in the freezer can set them in just 10-15 minutes.
Q: What should I do if my chocolate mixture becomes too stiff before I’ve coated all the noodles?
A: If the chocolate-peanut butter mixture starts to thicken too much, simply pop it back into the microwave for another 10-15 seconds. Stir it thoroughly again. A tiny drizzle (about half a teaspoon) of neutral oil, like vegetable or coconut oil, can also help to loosen the mixture to a more workable consistency.
Q: Can I make these cookies without chow mein noodles?
A: Chow mein noodles are central to achieving the iconic “nest” texture and appearance of these cookies. While you could experiment with substitutes like crushed pretzels, crispy rice cereal, or even shredded coconut, please note that the final texture and visual appeal would be quite different from the traditional bird’s nest look. For authenticity, chow mein noodles are highly recommended.
Q: Are these bird’s nest cookies suitable for parties or larger gatherings?
A: Without a doubt! These no-bake bird’s nest cookies are an ideal party treat. They are individually portioned, easy for guests to pick up, and visually captivating. Furthermore, since they are a no-bake recipe, you can easily prepare them a day or two in advance, significantly reducing your stress on the day of your event and allowing you to enjoy the festivities more.
No-Bake Bird’s Nest Cookies: The Complete Recipe
Here’s the precise recipe to help you create these delightful no-bake bird’s nest cookies. Follow these simple instructions for a perfect batch every time!

No-Bake Bird’s Nest Cookies
By: Dee
These adorable no-bake bird’s nest cookies are a must-make for Easter and spring. Made with crunchy chow mein noodles, creamy peanut butter, rich chocolate, and colorful candy eggs, they’re incredibly easy to whip up and perfect for involving kids!
Prep Time: 5 minutes
Melt Time: 1-2 minutes
Cooling Time: 15 minutes
Total Time: Approximately 25-35 minutes
Yields: About 30 cookies
Print Recipe
Ingredients
- 1½ cups milk chocolate chips (or semi-sweet, dark, or butterscotch for variation)
- ¾ cup creamy peanut butter (external affiliate link for convenience)
- 3 cups crunchy dried chow mein noodles
- 1 bag (approx. 9-10 oz or 250-280g) Cadbury Mini Chocolate Eggs (or other small candy eggs)
Instructions
- In a large, microwave-safe bowl, combine the milk chocolate chips and creamy peanut butter. Microwave on high in 30-second intervals, stirring thoroughly after each, until the mixture is completely melted and smooth. This usually takes 1-2 minutes total.
- Add the crunchy chow mein noodles to the melted chocolate-peanut butter mixture. Gently fold with a spatula until all the noodles are evenly and completely coated. Be careful not to crush them.
- Line a baking sheet with parchment paper or wax paper. Using a tablespoon, scoop portions of the coated noodle mixture onto the prepared sheet. Quickly shape each scoop into a small, rounded nest, making a slight indentation in the center with your finger or the back of the spoon.
- While the chocolate mixture is still warm and soft, carefully press 2-3 candy eggs into the center of each bird’s nest. This ensures they adhere firmly as the chocolate sets.
- Refrigerate the baking sheet for at least 15-30 minutes, or until the chocolate has fully set and the bird’s nests are firm to the touch. Alternatively, you can let them set at room temperature for 1-2 hours in a cool place.
Notes
- For optimal adhesion, always add the mini chocolate eggs to the bird’s nests while the chocolate mixture is still warm and melty.
- If you live in a warm climate or your house is warm, it is best to store the finished cookies in the refrigerator to prevent them from becoming too soft.
Nutrition Information (Approximate per serving, based on 30 servings)
- Calories: 73 kcal
- Carbohydrates: 5g
- Protein: 2g
- Fat: 5g
- Sodium: 84mg
- Potassium: 59mg
- Calcium: 5mg
- Iron: 0.4mg
Please note: Nutrition information is automatically calculated and should be used as an approximation only.
Additional Recipe Info
- Course: Dessert, Snack
- Cuisine: American
- Occasion: Easter, Spring, Kid’s Party
We hope you loved making these charming bird’s nest cookies! Your feedback is invaluable – please consider leaving a comment below to share your experience or any delightful variations you tried!
Don’t want to miss out on more incredibly easy and delicious recipes? Be sure to sign up for our newsletter to get new recipes delivered straight to your email inbox, or follow us on our social media channels for daily inspiration and kitchen tips!