
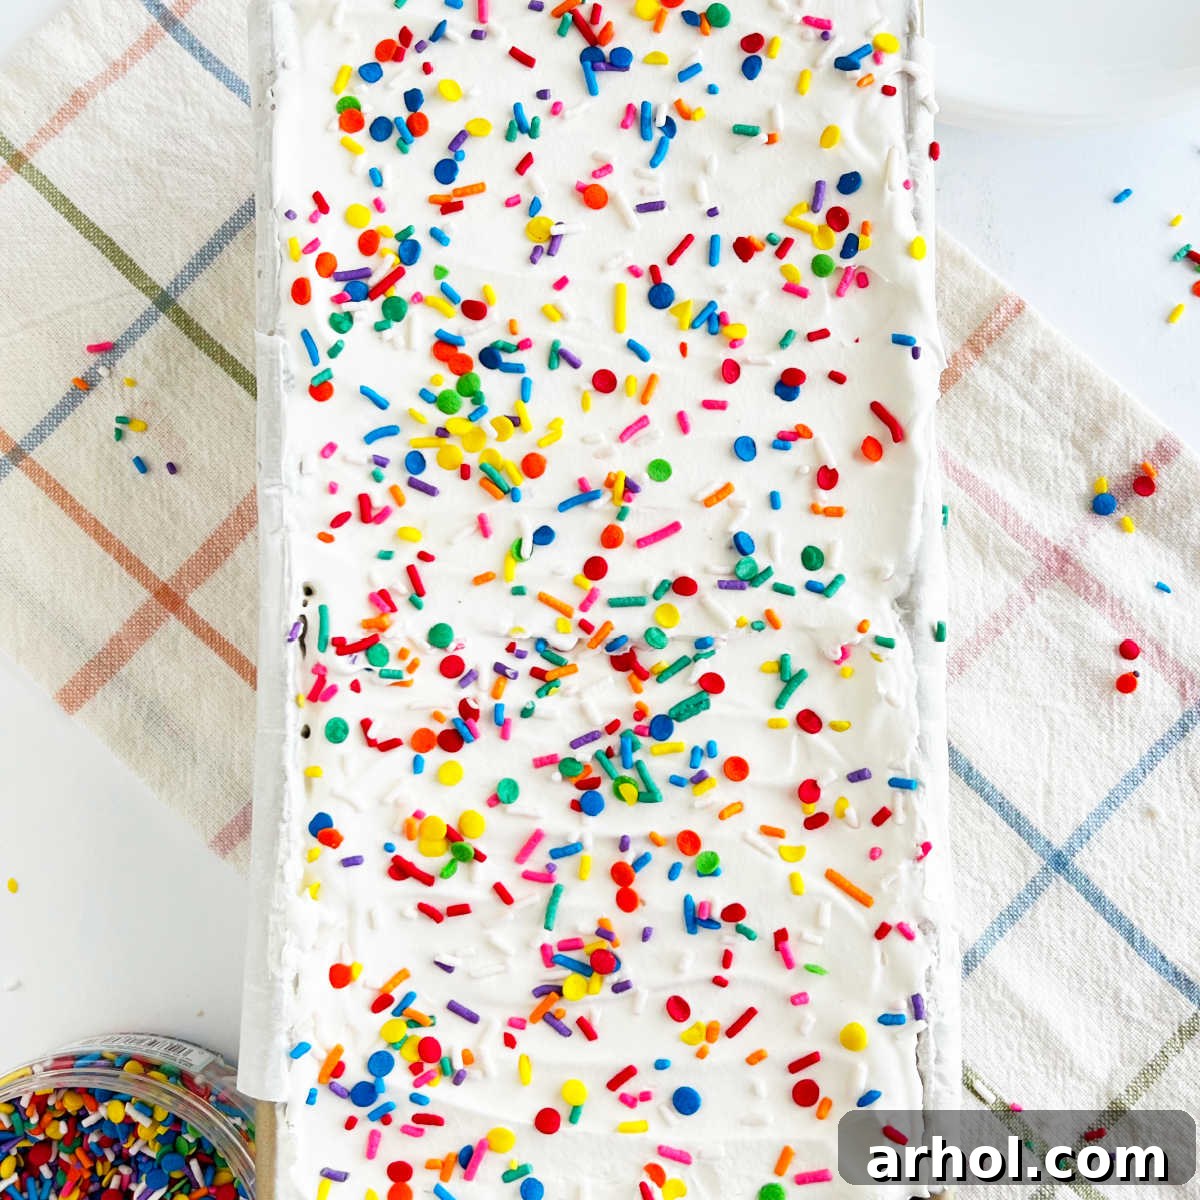
Welcome to the easiest and most delightful dessert you’ll ever create: the Ice Cream Sandwich Cake! Imagine a decadent, no-bake frozen treat crafted from classic ice cream sandwiches, fluffy whipped topping, and rich chocolate syrup. This incredibly simple recipe is not only a dream on a hot summer day but also serves as the perfect, stress-free birthday cake for anyone who adores ice cream. Forget complicated baking, mixing, or extensive prep – this cake is all about effortless assembly and pure enjoyment.
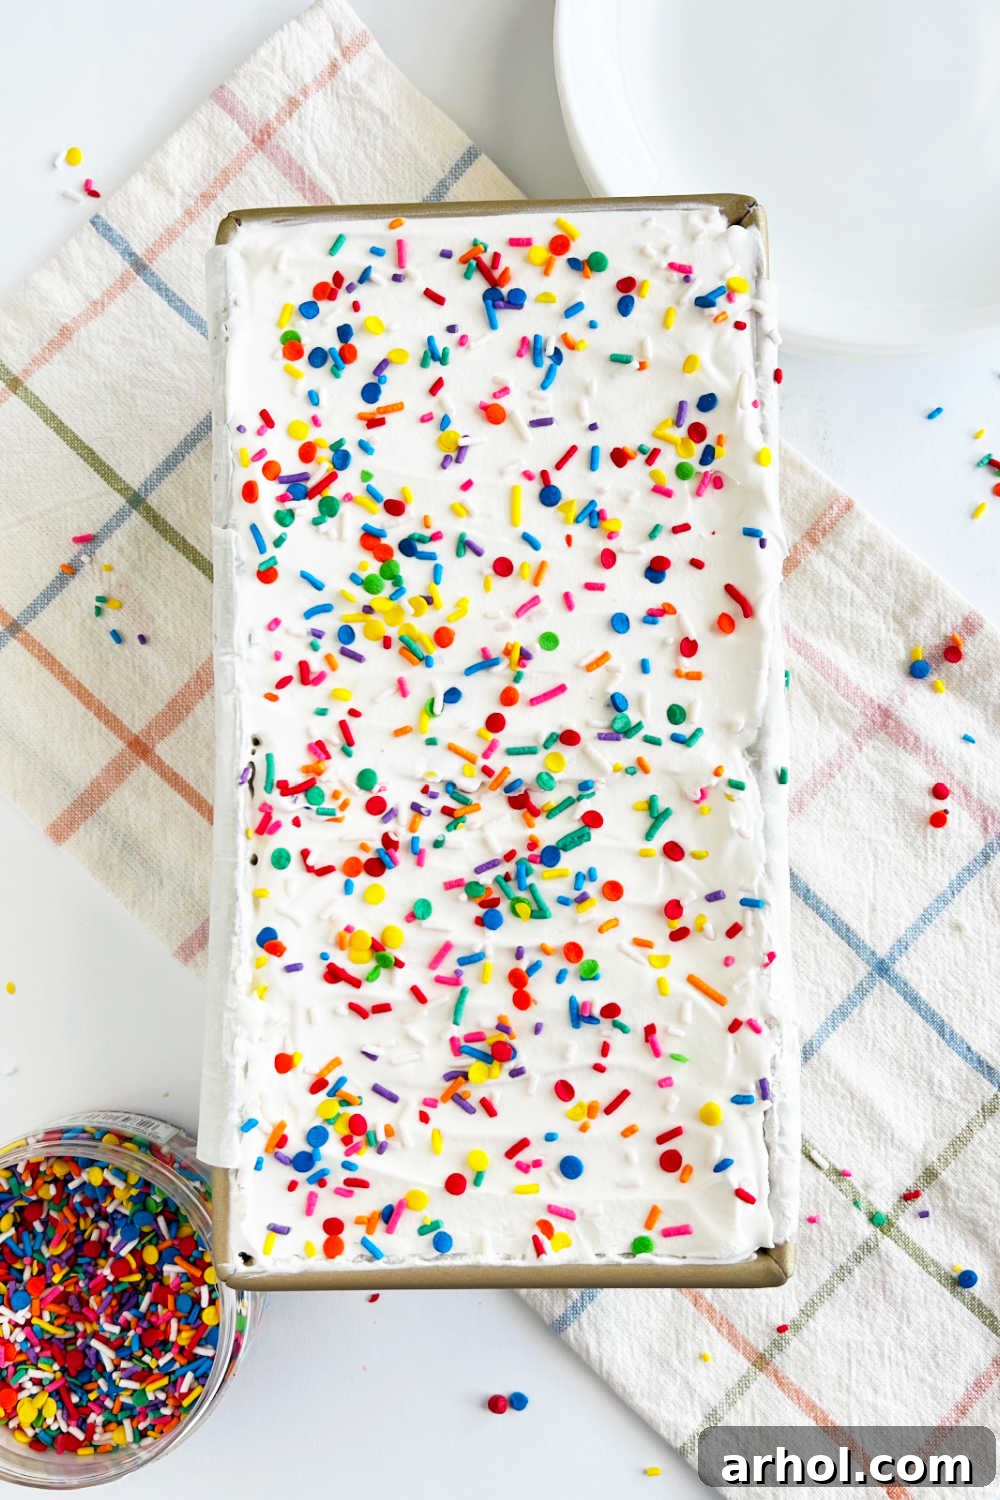
Table of Contents
- The Ultimate Easy Ice Cream Cake
- Why You’ll Love This No-Bake Ice Cream Sandwich Cake
- Minimal Ingredients, Maximum Flavor
- Step-by-Step Guide: How to Assemble Your Ice Cream Sandwich Cake
- Freezing for Perfection and Storage Tips
- Creative Variations and Serving Suggestions
- Expert Tips for Your Best Ice Cream Sandwich Cake
- More Irresistible Frozen Desserts
- Easy Ice Cream Sandwich Cake Recipe
The Ultimate Easy Ice Cream Cake
When it comes to celebrating, especially for those who aren’t traditional cake enthusiasts, finding a dessert that truly satisfies everyone can be a challenge. That’s why this super easy ice cream sandwich cake recipe has become a treasured staple in our family. For instance, my daughter, who isn’t particularly fond of conventional birthday cakes, absolutely adores ice cream. This cake was the perfect solution for her birthday party this year, delighting not only her but the entire family!
What makes this dessert truly remarkable is its simplicity. There’s zero cooking, no baking, no complex mixing, and virtually no mess to clean up. The entire process involves a straightforward assembly using classic ice cream sandwiches, generous layers of creamy whipped topping, and a drizzle of chocolate syrup. Once assembled, a brief chill in the freezer transforms these humble ingredients into an impressive, multi-layered ice cream cake that tastes like it took hours to prepare.
This indulgent frozen dessert isn’t just for birthdays; its universal appeal makes it a real crowd-pleaser for any special occasion. We’ve proudly served it for Father’s Day, Mother’s Day, graduations, backyard barbecues, and various family gatherings. Its ability to satisfy a sweet tooth on a warm day, combined with its ease of preparation, solidifies its place as one of the most beloved no-bake desserts in our repertoire. Prepare to impress your guests with minimal effort and maximum flavor!
Why You’ll Love This No-Bake Ice Cream Sandwich Cake
Beyond its incredible ease, there are countless reasons why this ice cream sandwich cake will become your go-to dessert. First and foremost, it’s a lifesaver during busy times. Whether you need a last-minute dessert for an unexpected gathering or simply want a sweet treat without turning on the oven, this recipe delivers. The no-bake aspect is especially appealing in warmer months, allowing you to enjoy a delicious dessert without heating up your kitchen.
Secondly, its versatility is unmatched. While the basic recipe calls for vanilla ice cream sandwiches, whipped topping, and chocolate syrup, it’s a blank canvas for customization. You can easily adapt it to suit different tastes, dietary preferences (within reason), or holiday themes. Imagine a festive red, white, and blue version for patriotic holidays, or a mint chocolate rendition for a refreshing twist.
Finally, this cake is incredibly budget-friendly. Using readily available, inexpensive ingredients, you can create a show-stopping dessert that looks and tastes far more elaborate than its cost. It’s a smart choice for feeding a crowd without breaking the bank, making it a favorite for potlucks, school events, and large family dinners. Get ready to enjoy a dessert that’s simple, adaptable, and economical, yet never compromises on deliciousness!
Minimal Ingredients, Maximum Flavor
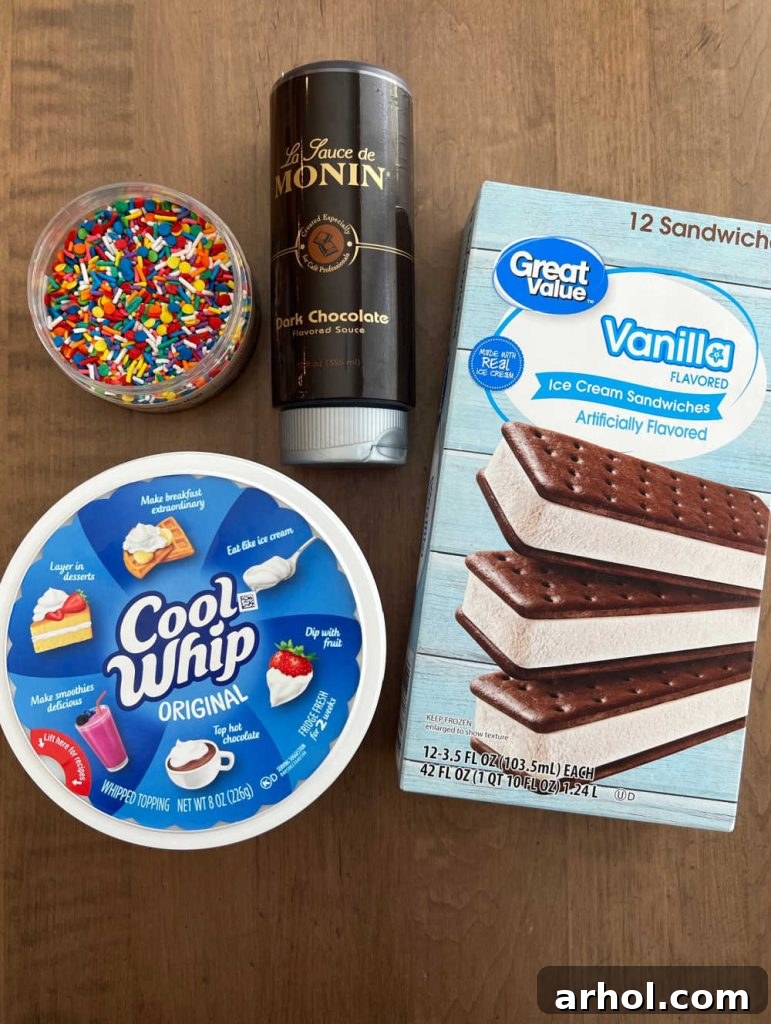
One of the true beauties of this Ice Cream Sandwich Cake lies in its incredibly short ingredient list. You’ll only need three primary items, all easily found at any local grocery store. The full, precise quantities are detailed in the recipe card below, but here’s a breakdown of what you’ll need and why each element is essential:
- Vanilla Ice Cream Sandwiches: These form the foundational layers of your cake. While classic vanilla is always a hit, feel free to experiment with your favorite flavors! Chocolate, Neapolitan, cookies and cream, or even seasonal varieties can add a unique twist. Ensure they are well-frozen before assembly to prevent premature melting.
- Cool Whip (Thawed): This is your creamy binder and luscious topping. Thawing it thoroughly is crucial for easy spreading. Cool Whip provides a light, airy texture and a sweet, subtle flavor that perfectly complements the ice cream. If Cool Whip isn’t available or preferred, any brand of whipped topping or homemade whipped cream can be used as a fantastic alternative. You’ll typically use an entire standard tub for this recipe, ensuring generous layers.
- Chocolate Syrup: More than just a flavor enhancer, the chocolate syrup plays a vital role in holding the layers together once frozen, creating a cohesive cake structure. Its rich, sweet flavor also adds a delightful contrast to the vanilla ice cream and whipped topping. For an even more indulgent experience, consider using hot fudge sauce, allowing it to cool slightly before drizzling.
- Rainbow Sprinkles (Optional): For that festive, fun touch, rainbow sprinkles are highly recommended! They add a pop of color and a delightful crunch. Don’t limit yourself – consider chocolate chips, crushed cookies, chopped nuts, or other candy toppings to personalize your cake.
Essential Equipment: To successfully assemble this delicious creation, you’ll need a standard 9×5-inch loaf pan. This size is ideal for creating a beautifully layered cake that’s easy to slice. Additionally, parchment paper is an absolute must-have; it will make the process of removing your frozen cake from the pan incredibly simple and mess-free, ensuring your masterpiece stays intact.
Step-by-Step Guide: How to Assemble Your Ice Cream Sandwich Cake
Creating this stunning Ice Cream Sandwich Cake is a remarkably straightforward process, designed for speed and simplicity. The key is to work efficiently, as you are dealing with frozen ingredients. Follow these steps for a perfectly layered and delicious result:
- Prepare Your Pan: Begin by lining your loaf pan with parchment paper. To do this effectively, cut two pieces of parchment paper and lay them in the pan, overlapping in the center. Allow the excess paper to hang over the sides of the pan; these “wings” will act as convenient handles later for easy cake removal. This step is crucial for ensuring a clean lift-out of your frozen cake.
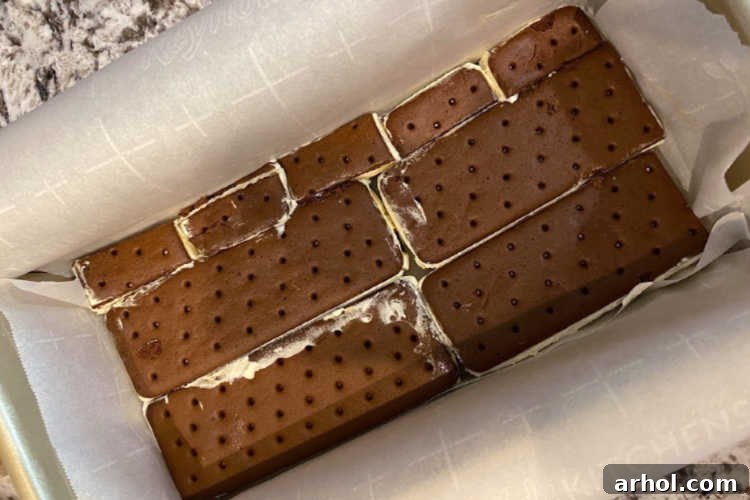
- First Layer of Sandwiches: Arrange approximately four vanilla ice cream sandwiches in a single layer at the bottom of the parchment-lined loaf pan. Depending on the exact size of your sandwiches and pan, you may need to gently trim the edges of one or two sandwiches to ensure a snug fit. Don’t discard these trimmed pieces; they can be used to fill any small gaps along the sides of the pan, ensuring a solid base.
- First Whipped Topping Layer: Once your first layer of sandwiches is in place, spread a generous and even layer of thawed whipped topping directly over them. The thickness doesn’t need to be excessive for this layer, but ensure it adequately covers the sandwiches. A simple spatula or the back of a spoon works perfectly for this task. You can reserve the thickest, most visually appealing layer of whipped topping for the very top of your finished cake.
- Chocolate Drizzle: Next, take your chocolate syrup and drizzle a light, even amount over the whipped topping layer. This isn’t just for flavor; the syrup helps to create a slight stickiness that will aid in keeping the subsequent layers of ice cream sandwiches securely in place once frozen. Of course, the added chocolate flavor is always a welcome bonus – yum!
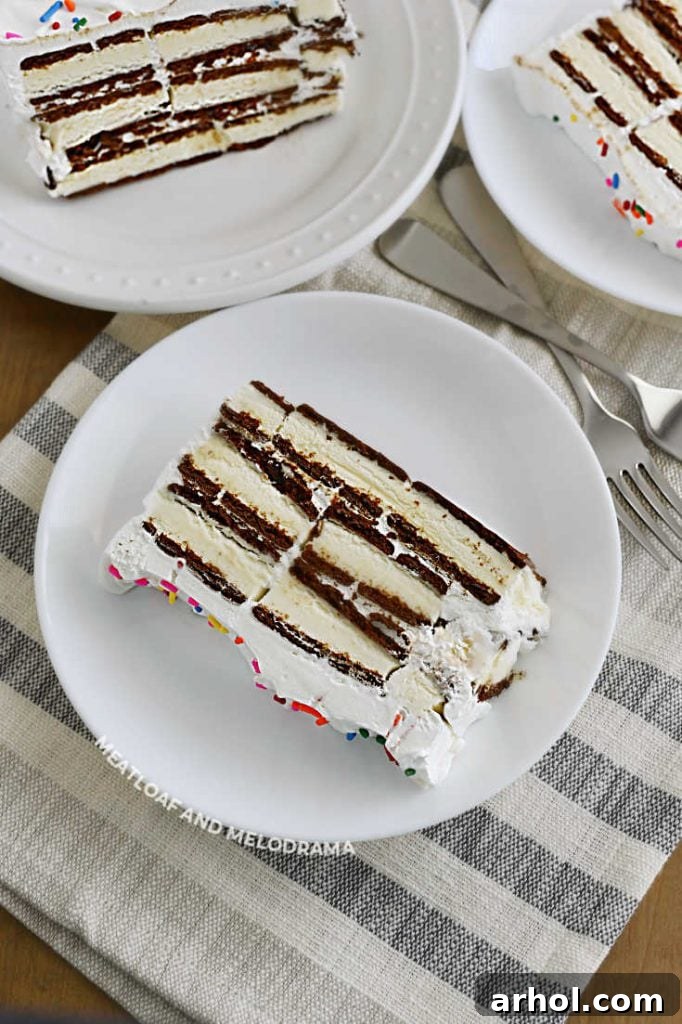
- Repeat the Layers: You’re now ready to continue building your cake. Add a second layer of ice cream sandwiches, arranging them in the same manner as the first. Follow this with another layer of whipped topping, and then another drizzle of chocolate syrup. Repeat this process one more time. By the time you’re finished assembling, you should have three distinct layers of ice cream sandwiches, each separated by whipped topping and chocolate syrup.
- Final Touches and Decoration: Once the final layer of ice cream sandwiches is in place, spread the remaining whipped topping generously over the entire top surface of the cake, creating a smooth, attractive finish. This is where your creativity comes in! Add a festive flourish with colorful jimmies, rainbow sprinkles, crushed cookies, or any of your favorite candies for decoration. The brighter, the better!
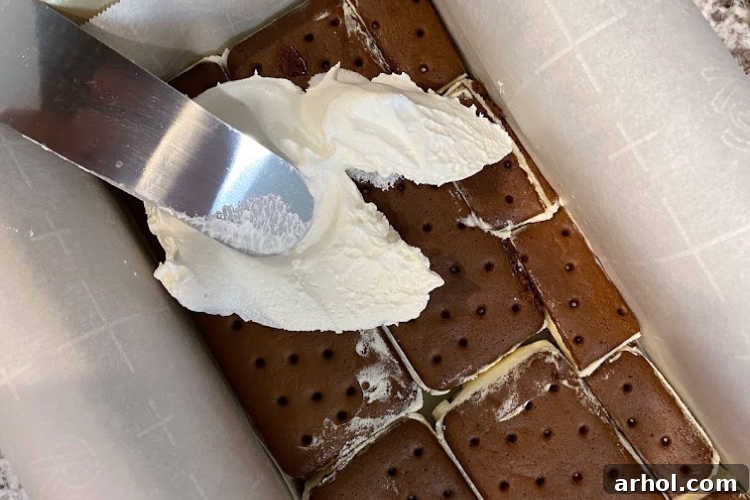
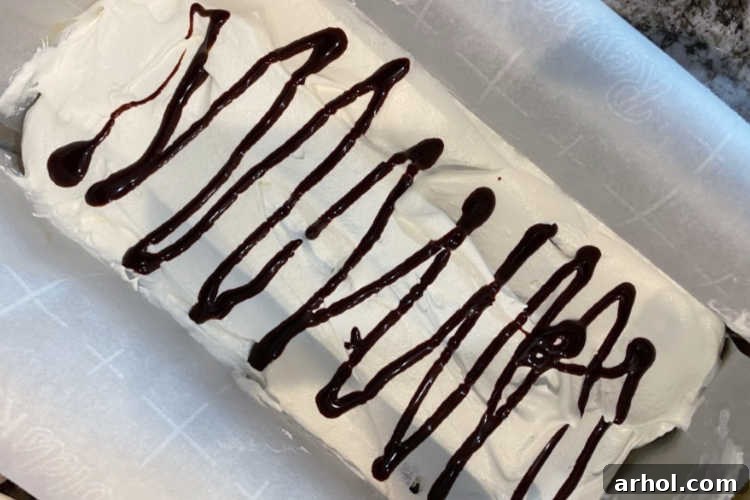
With the assembly complete, your cake is almost ready for its grand debut. The next crucial step is freezing it to perfection, which will transform these simple components into a firm, sliceable, and utterly irresistible dessert.
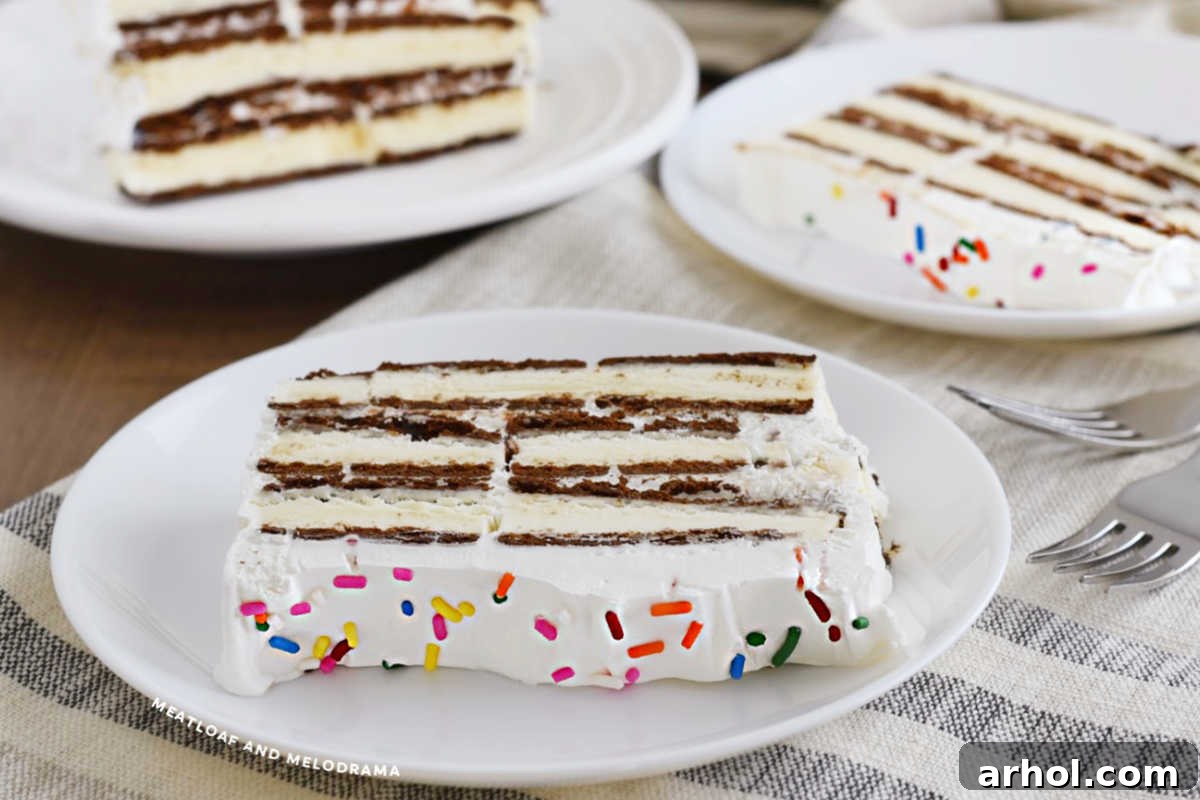
Freezing for Perfection and Storage Tips
After the quick and easy assembly, the most important step is allowing your Ice Cream Sandwich Cake to set properly in the freezer. This ensures that the layers meld together beautifully, making the cake firm enough to slice cleanly and serve without a hitch.
How Long to Freeze: Once your cake is fully assembled and decorated, carefully place the loaf pan into the freezer. Allow it to freeze for a minimum of 2 hours. For best results and a truly firm cake, aim for 3-4 hours, or even overnight. You’ll know the cake is ready when it feels completely solid to the touch and the layers are well-defined. This freezing time allows the ice cream sandwiches, whipped topping, and chocolate syrup to bind together, creating a cohesive, delicious structure.
How to Store: Proper storage is key to maintaining the quality and texture of your simple ice cream sandwich cake. It must remain in the freezer until you are ready to serve. For any delightful leftovers, or if you prepare the cake ahead of time, ensuring it’s airtight is crucial to prevent freezer burn and keep it tasting fresh. You have a couple of excellent options for storing:
- Airtight Container: The ideal method is to transfer any remaining slices or the entire cake into a freezer-safe, airtight container. This provides the best protection against ice crystals and flavor absorption from other freezer items.
- Plastic Wrap and Aluminum Foil: If an airtight container isn’t available, tightly wrap the cake first with a layer of plastic wrap, ensuring no air gaps. Then, add a second layer of aluminum foil for extra protection. This double-layer wrapping acts as an excellent barrier.
When stored correctly, your ice cream sandwich cake should keep beautifully in the freezer for up to a few weeks. However, its irresistible nature often means it won’t last that long!
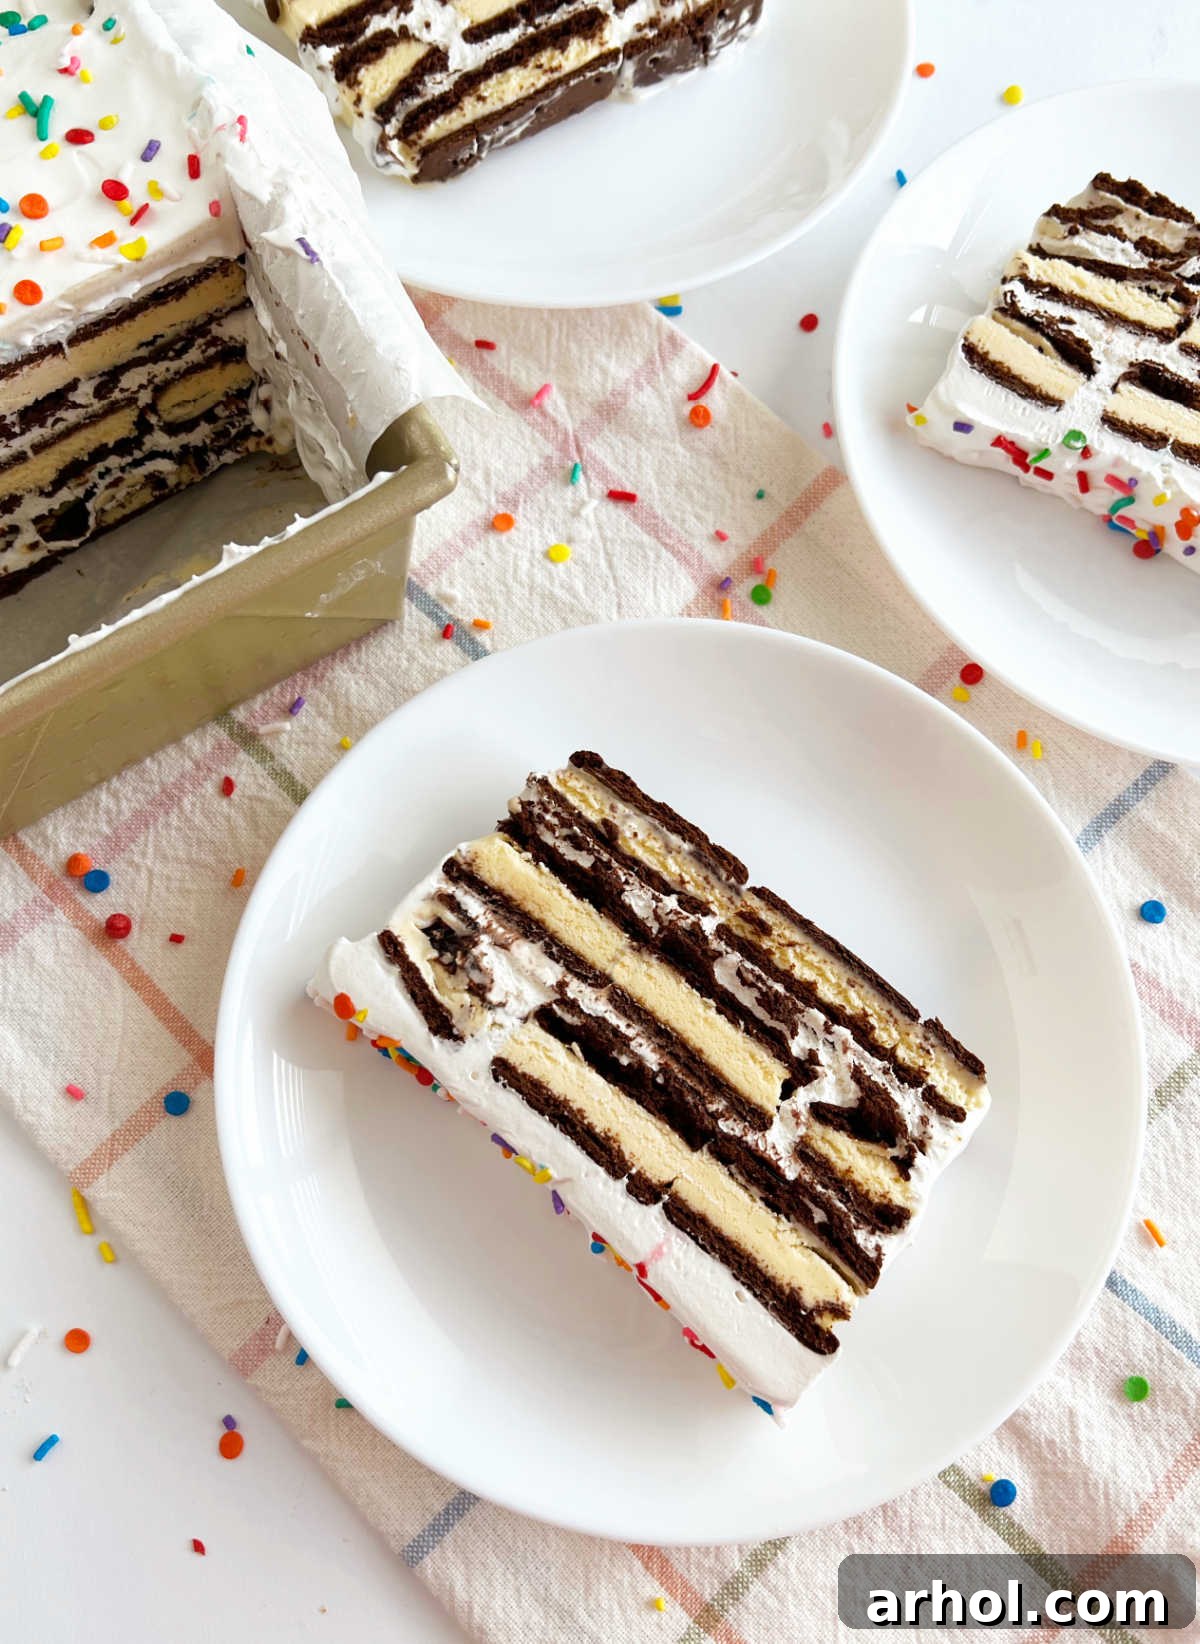
Creative Variations and Serving Suggestions
The beauty of this Ice Cream Sandwich Cake lies in its foundational simplicity, making it incredibly easy to customize and adapt to your personal tastes or specific occasions. Here are some fantastic recipe variations to spark your creativity:
Ice Cream Sandwich Flavors: Don’t limit yourself to vanilla! This icebox cake can be transformed by simply swapping out the ice cream sandwich flavor. Consider:
- Chocolate Ice Cream Sandwiches: For an intensely rich, chocolate-lover’s dream.
- Neapolitan Ice Cream Sandwiches: Offering a delightful blend of vanilla, chocolate, and strawberry in every bite.
- Cookies and Cream Ice Cream Sandwiches: Adding a popular, textural crunch from the cookie bits.
- Mint Chocolate Chip Ice Cream Sandwiches: A refreshing twist, especially popular during holidays.
- Seasonal Flavors: Keep an eye out for limited-edition flavors that can make your cake truly unique, like pumpkin spice for fall or peppermint for winter.
Syrup Swaps: The chocolate syrup is fantastic, but there are many other drizzles to explore:
- Caramel Sauce: Adds a buttery, sweet, and slightly salty dimension.
- Butterscotch Syrup: For a nostalgic, warm flavor profile.
- Strawberry Syrup: A fruity and vibrant alternative, especially good with vanilla or Neapolitan sandwiches.
- White Chocolate Sauce: For a creamy, decadent flavor.
- Peanut Butter Sauce: A nutty, rich option for peanut butter lovers.
Exciting Toppings: Go beyond sprinkles to add texture and even more flavor:
- Crushed Oreo Cookies: A classic pairing with ice cream.
- M&M’s Candies: Offering a colorful crunch and chocolatey goodness.
- Chopped Candy Bars: Snickers, Kit Kat, Reese’s Peanut Butter Cups – the possibilities are endless!
- Reese’s Pieces: For a vibrant and nutty topping.
- Toasted Coconut Flakes: Adds a tropical twist and lovely texture.
- Chopped Nuts: Pecans, walnuts, or almonds for a satisfying crunch.
- Fresh Fruit: Sliced strawberries, raspberries, or blueberries can add a refreshing contrast, especially when serving immediately.
Serving Size Adjustments: If you need to feed a larger crowd, simply scale up the recipe! Use a larger 9×13-inch baking pan, and you’ll typically need to double the amount of ice cream sandwiches, whipped topping, and syrups to fill it adequately. This larger size is perfect for parties and big family gatherings, ensuring everyone gets a generous slice of this delightful treat.
Expert Tips for Your Best Ice Cream Sandwich Cake
While this recipe is incredibly simple, a few expert tips can help ensure your Ice Cream Sandwich Cake turns out perfectly every time. Remember, you’re working with frozen ingredients, so speed and preparation are your best allies!
- Work Quickly: Ice cream melts! Have all your ingredients ready and prepped before you start assembling. This minimizes the time the ice cream sandwiches are out of the freezer, preventing them from softening too much.
- Unwrap Ahead of Time: Unwrap all your ice cream sandwiches and arrange them on a tray or cutting board before you begin layering. This small step saves crucial seconds during assembly.
- Ensure Cool Whip is Thawed: Make sure your whipped topping is fully thawed in the refrigerator before you start. If it’s too frozen, it will be difficult to spread evenly without tearing the delicate ice cream sandwiches.
- Enlist Helpers: This is a fantastic recipe for getting kids involved in the kitchen! Assign them the fun task of layering the sandwiches or drizzling the syrup (with supervision). Many hands make light work and add to the fun.
- Easy Removal from Pan: After the cake is completely frozen, gently pull on the parchment paper overhangs to lift the entire cake out of the loaf pan. Place it onto a serving platter before slicing. You can do this ahead of time and place it back in the freezer on the platter if you wish, making serving even smoother.
- Pre-slice for Parties: For large gatherings, consider pre-slicing the cake while it’s still firm, then returning the slices to the freezer. This makes serving quick and effortless when guests arrive.
- Double for a Crowd: If you need a larger cake for more servings, use a 13×9 inch baking pan. Remember to double all the ingredients to achieve the same delicious layered effect.
- Consider a Crust: For an extra touch, you could press a thin layer of crushed Oreos or graham crackers mixed with melted butter into the bottom of the pan before adding the first layer of ice cream sandwiches. Freeze for 15 minutes before proceeding with the recipe.
More Irresistible Frozen Desserts
If you’re a devoted fan of ice cream and easy-to-make treats, you’ll love exploring other frozen dessert ideas! Dive into homemade delights like rich coffee ice cream, decadent chocolate peanut butter ice cream, and the ever-popular Oreo ice cream. Discover these and many more easy dessert recipes that your family is sure to adore!
Easy Ice Cream Sandwich Cake Recipe
This Ice Cream Sandwich Cake is an easy dessert made with ice cream sandwiches, Cool Whip, and chocolate syrup. Perfect on a hot summer day and the easiest birthday cake you’ll ever make! This no-bake wonder is a true crowd-pleaser and comes together in minutes.
Recipe Details
- Author: Dee
- Course: Dessert
- Cuisine: American
- Prep Time: 5 minutes
- Cook Time: 0 minutes
- Freezing Time: 2 hours
- Total Time: 2 hours 5 minutes
- Servings: 8
Ingredients
- 12 ½ vanilla ice cream sandwiches
- 8 ounces whipped topping (Cool Whip, thawed)
- Chocolate syrup
- Candy for decorating (optional)
Instructions
- Cut parchment paper and overlap to fit inside a loaf pan, leaving an overhang on the sides.
- Place 4 ice cream sandwiches in the pan in a single layer, trimming to fit if necessary. Use small trimmed pieces to fill in any gaps along the sides.
- Spread an even layer of thawed whipped topping on top of the ice cream sandwiches.
- Drizzle chocolate syrup generously over the whipped topping.
- Repeat layers twice more: add a second layer of sandwiches, then whipped topping, then chocolate syrup. Finish with a third layer of sandwiches, then spread the remaining whipped topping over the top.
- Decorate with candy sprinkles or your preferred toppings, if desired.
- Freeze until solid, for about 2 hours or longer if needed, until the cake is firm enough to slice.
Notes
- You can use only 12 sandwiches or cut about half of another sandwich to completely fill in the loaf pan for a total of 12 ½ sandwiches, ensuring a snug fit.
- Feel free to use your favorite syrup or hot fudge sauce instead of chocolate syrup for different flavor profiles.
- If Cool Whip is unavailable, homemade whipped cream or other brands of whipped topping work equally well.
- To make a larger cake, double all ingredients and use a 13×9 inch baking pan to serve more people effectively.
Nutrition (Approximation per serving)
Calories: 312kcal, Carbohydrates: 46g, Protein: 5g, Fat: 13g, Saturated Fat: 6g, Cholesterol: 23mg, Sodium: 156mg, Potassium: 149mg, Sugar: 27g, Vitamin A: 283IU, Calcium: 104mg, Iron: 1mg.
Nutrition information is automatically calculated and should only be used as an approximation.
Like this easy recipe? Leave a comment below and share your experience!
For more easy recipes and delightful desserts that anyone can make, be sure to sign up for our weekly newsletter and follow us on social media for daily inspiration and sweet ideas.

Recipe first published in 2020 and updated in 2024 for enhanced clarity, additional tips, and improved SEO.