
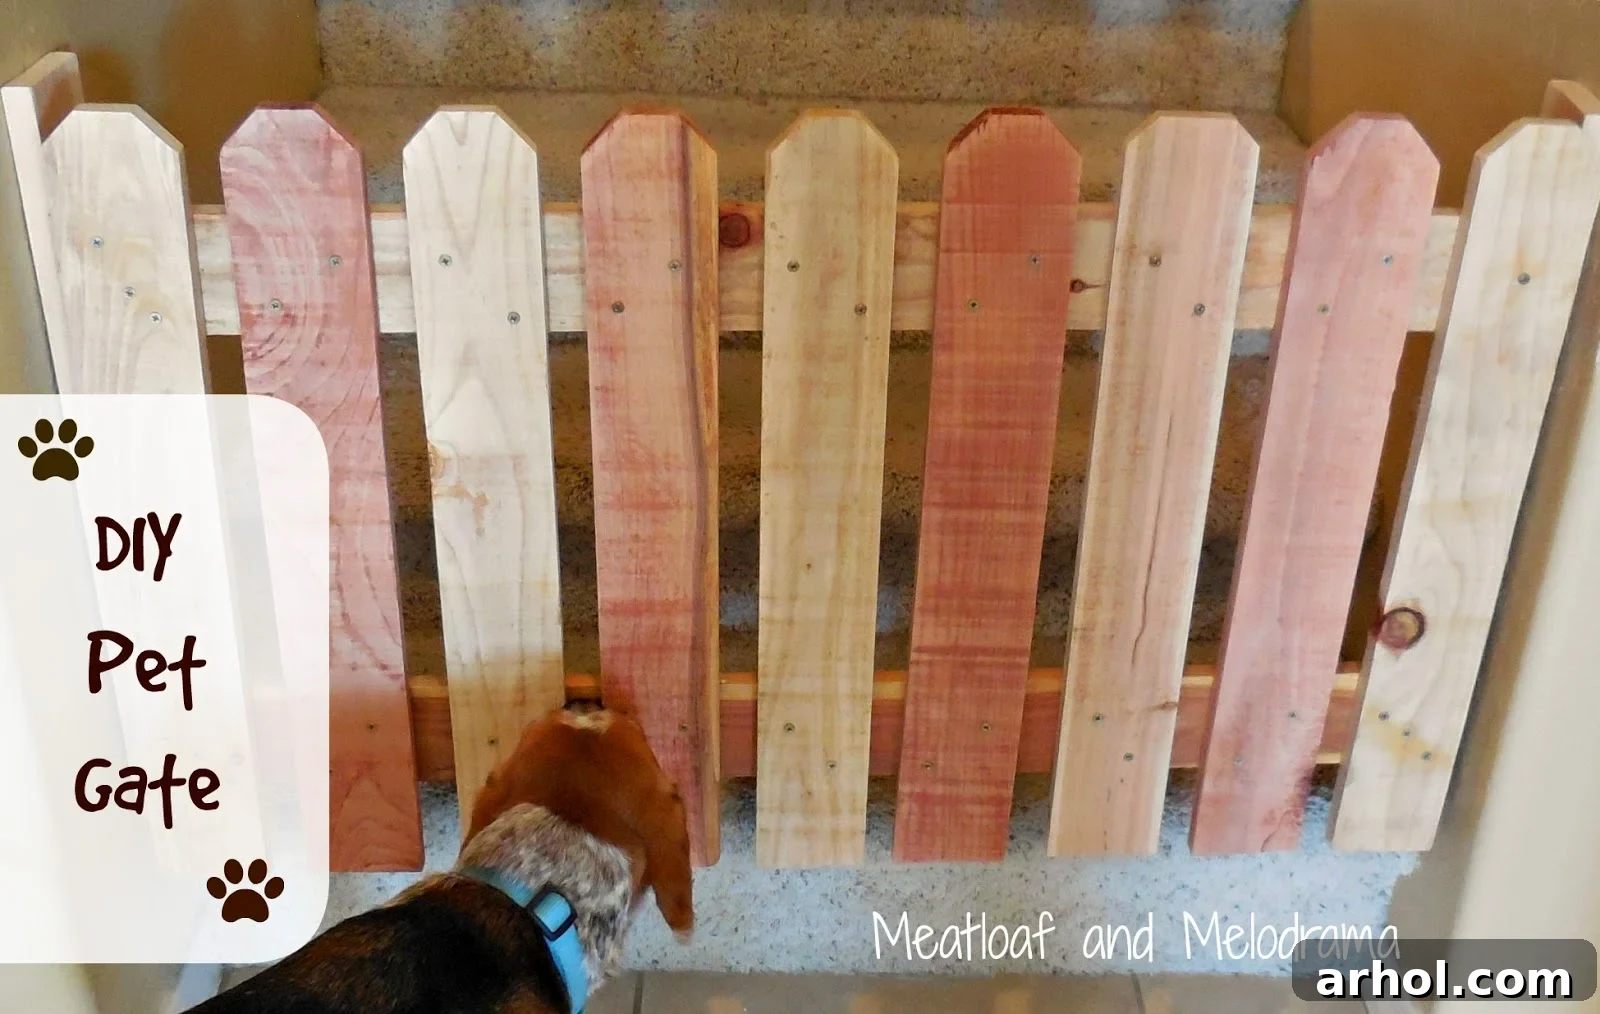
DIY Wooden Dog Gate: Build a Custom Pet Safety Barrier for Your Home
Hi everyone!
I am absolutely thrilled to share this DIY project with you today, as it’s something I’ve been eager to tackle for a long time! You might remember me mentioning that my husband (Hubby) and I were both engrossed in various home projects last week. While I playfully teased him about his project still being unfinished, I must admit, this custom wooden pet gate proved to be significantly more complex than my previous pool towel holder! Nevertheless, I’m overjoyed that our DIY pet gate is finally complete and functioning beautifully, even if our furry companions don’t quite share my excitement about their new boundary!
Why We Needed a Custom Dog Gate
For us, a reliable pet barrier wasn’t just a convenience; it was a necessity. Our beloved dogs, despite their charm, haven’t quite mastered the art of distinguishing between their toys, human belongings, and edible treats. This means anything left within their reach – especially tempting items like LEGOs, socks, and dolls – quickly becomes an irresistible chew toy. To protect both our possessions and, more importantly, our dogs from ingesting something harmful, we had to restrict their access to the upstairs.
Previously, we relied on a standard baby gate at the foot of our stairs. While it served its basic purpose, it was far from ideal. Constantly having to climb over it became a tiresome chore for us adults, and inexplicably, our teenagers developed a habit of trying to leap over it – a risky maneuver I never fully understood! This inconvenience, coupled with the gate’s less-than-aesthetic appearance, made it clear we needed a more permanent, user-friendly, and stylish solution.
Planning Your Homemade Dog Gate Project
After browsing countless inspiring DIY dog gate ideas online, building our own custom wooden pet gate quickly rose to the top of our project list. We wanted something that not only performed its function flawlessly but also complemented our home’s rustic decor. The beauty of a homemade dog gate is the ability to tailor it precisely to your space and style.
Gathering Your Materials for a Rustic Look
To achieve the rustic aesthetic we loved, we opted for the same fence posts we had previously used for our family room’s rustic wall art. This ensured a cohesive look throughout our home. Using fence posts is a fantastic way to add character and strength to your gate, but feel free to explore other wood types like pine, poplar, or even reclaimed wood for a unique touch. Here’s a general list of materials you might need:
- Wood for the Frame: Sturdy posts or planks (e.g., 2x2s or 2x4s) for the vertical sides and horizontal top/bottom rails.
- Wood for the Infill: Smaller slats, spindles, or fence pickets for the vertical bars of the gate. Consider different shades or types of wood for a contrasting look.
- Hinges: Two heavy-duty hinges to allow the gate to swing smoothly. We chose basic barrel hinges, but spring-loaded hinges can offer automatic closing functionality.
- Closure Mechanism: For our needs, a simple spring-based auto-close system with eye hooks was perfect, eliminating the need for a separate latch. Alternatively, you could use a traditional hook-and-eye latch, a magnetic catch, or a barrel bolt for added security.
- Mounting Boards: Longer pieces of wood to attach to the wall, especially if your walls are uneven, providing a flat surface for the hinges.
- Fasteners: Wood screws (various lengths), wood glue for strong joints.
- Finishing Supplies: Sandpaper (various grits), optional wood stain, sealer, or paint.
Essential Tools You’ll Need
Having the right tools makes any DIY project smoother and safer. For building your wooden dog gate, you’ll want to have:
- Measuring Tape and Pencil: For precise measurements and markings.
- Saw: A miter saw is ideal for accurate cuts, but a circular saw or even a hand saw with a miter box can work.
- Drill/Driver: For pre-drilling holes and driving screws.
- Sander: An orbital sander for quickly smoothing surfaces, or sandpaper for hand sanding.
- Level: To ensure your gate is mounted perfectly straight.
- Safety Gear: Safety glasses, hearing protection, and gloves are always a must.
Step-by-Step Guide to Building Your DIY Dog Gate
Step 1: Measure and Cut Your Wood
The first crucial step is accurate measurement. Measure the width of your doorway or staircase opening at the top, middle, and bottom, as openings can vary slightly. Also, determine the desired height of your gate. Remember that a shorter gate can be easier to clean under and might deter agile pets from jumping over, while a taller gate offers more security for larger or more energetic dogs.
My husband began by taking the tops of two fence posts to serve as the main vertical side pieces of the gate. The remaining lengths of the posts were then cut to form the horizontal top and bottom rails. When cutting your infill pieces (the vertical slats), ensure they are all uniform in length to create a neat, even appearance.
Step 2: Assemble the Gate Frame
With all your pieces cut, it’s time to assemble the basic frame. Lay out your two side posts and your top and bottom rails. Apply wood glue to the ends of the rails before screwing them into the vertical side posts. Ensure the frame is perfectly square using a carpenter’s square before fastening everything tightly. Strong, square joints are key for a sturdy gate.
Step 3: Install the Infill Slats
Next, we filled in the gate with the smaller fence posts, arranging them in an alternating color pattern. This replicated the design of our existing wall art, creating a beautiful contrast and visual interest. When spacing your infill slats, consider your pet’s size. Ensure the gaps are small enough that your dog cannot squeeze through or get their head stuck. Attach each slat securely to the top and bottom rails with screws and wood glue.
Step 4: Finishing Touches
We chose to keep our gate natural to preserve its rustic charm, but the finishing step is crucial for safety and durability. We thoroughly sanded every surface to make it smooth and free of splinters, which is incredibly important for the safety of both pets and humans. If you prefer, this is the stage to apply your chosen wood stain, paint, or a protective sealant to enhance its longevity and match your home’s aesthetic.
Step 5: Mounting Your Wooden Pet Gate
Mounting the gate correctly ensures its stability and functionality. Our stairwell presented a challenge: the walls on either side were uneven in length. To compensate, Hubby attached a long piece of wood to each wall, creating a flat, consistent surface to mount the gate against the stairs. This is a clever solution for irregular openings.
Once the mounting boards were secure, he attached two hinges to one side of the gate and then screwed the other side of the hinges into the mounting board on the wall. The beauty of our design is its simplicity: since we only needed to prevent our fur boys from going *up* the stairs, a complex latch wasn’t necessary. Instead, Hubby installed a clever spring mechanism using two eye hooks – one on the gate and one on the adjacent mounting board. The spring automatically pulls the gate shut, keeping it closed without any manual latching required by us. As long as our clever pups don’t figure out how to manipulate the spring, we’re safe!
Step 6: Testing and Adjusting
With the gate mounted, test its swing. When we want to go upstairs, we simply pull open the right side of the gate, and the spring gently pulls it back to a closed position automatically. Coming down the stairs only requires a small push to open it. We designed the gate to be a shorter length, which not only makes it easier to sweep and clean underneath but also (hopefully!) deters our teens from attempting their previous jumping stunts!
Customizing Your DIY Pet Barrier
The beauty of a homemade dog gate lies in its infinite customization possibilities. Don’t feel limited to fence posts; consider using decorative balusters for a more elegant look, or repurpose old pallet wood for an ultra-rustic feel. You can paint your gate to match your trim, stain it to highlight the wood grain, or distress it for a shabby-chic vibe. Think about adding decorative elements like cut-out shapes or unique hardware. For areas with high traffic or where you need extra security, explore different latching mechanisms – from simple barrel bolts to more sophisticated magnetic or child-proof latches. Adjusting the height and width is also completely in your hands, ensuring a perfect fit for any opening and any pet size.
Ensuring Pet Safety with Your New Gate
While building a stylish gate is satisfying, safety must always be paramount. Here are a few key considerations:
- Slat Spacing: As mentioned, ensure gaps between vertical slats are narrow enough to prevent your pet from squeezing through or getting their head trapped. A good rule of thumb is no more than 2-3 inches, depending on your dog’s size.
- Smooth Finish: Thorough sanding is crucial to eliminate any splinters or rough edges that could harm your pet or family.
- Secure Mounting: The gate must be securely anchored to the wall or doorframe. Wobbly gates can be a hazard.
- Non-Toxic Finishes: If you paint or stain your gate, ensure all products are pet-safe and non-toxic, especially if your dog is a chewer.
- Appropriate Height: The gate should be tall enough to prevent your dog from jumping over it, but not so tall that it’s inconvenient for humans.
The Benefits of a Handcrafted Pet Gate
Creating this custom dog gate has brought so many benefits to our home. Our peace of mind is immeasurable, knowing our dogs are safely contained without us constantly worrying about what they might be chewing on upstairs. The gate blends seamlessly with our home decor, unlike the bulky, temporary baby gate we had before. Its automatic closing mechanism makes it incredibly easy for us to navigate, which is a huge improvement over constantly stepping over or wrestling with the old gate.
Beyond the practical advantages, there’s immense satisfaction in building something useful and beautiful with your own hands. This project was not just about pet containment; it was about enhancing our living space and solving a long-standing household challenge with creativity and craftsmanship. And yes, as a happy momma right now, I’m already dreaming of future home improvements! While I’d love to remove the carpeting and refinish our stairs one day, the thought of one of the kids falling on bare wood gives me pause. Perhaps one day I’ll be brave enough to tackle that project too!
Thanks so much for taking a look at our newest DIY project! If you’ve got a fantastic DIY endeavor of your own to share, please let me know. I’d love to pop over for a visit and see what you’ve been creating!
Dee 🙂