
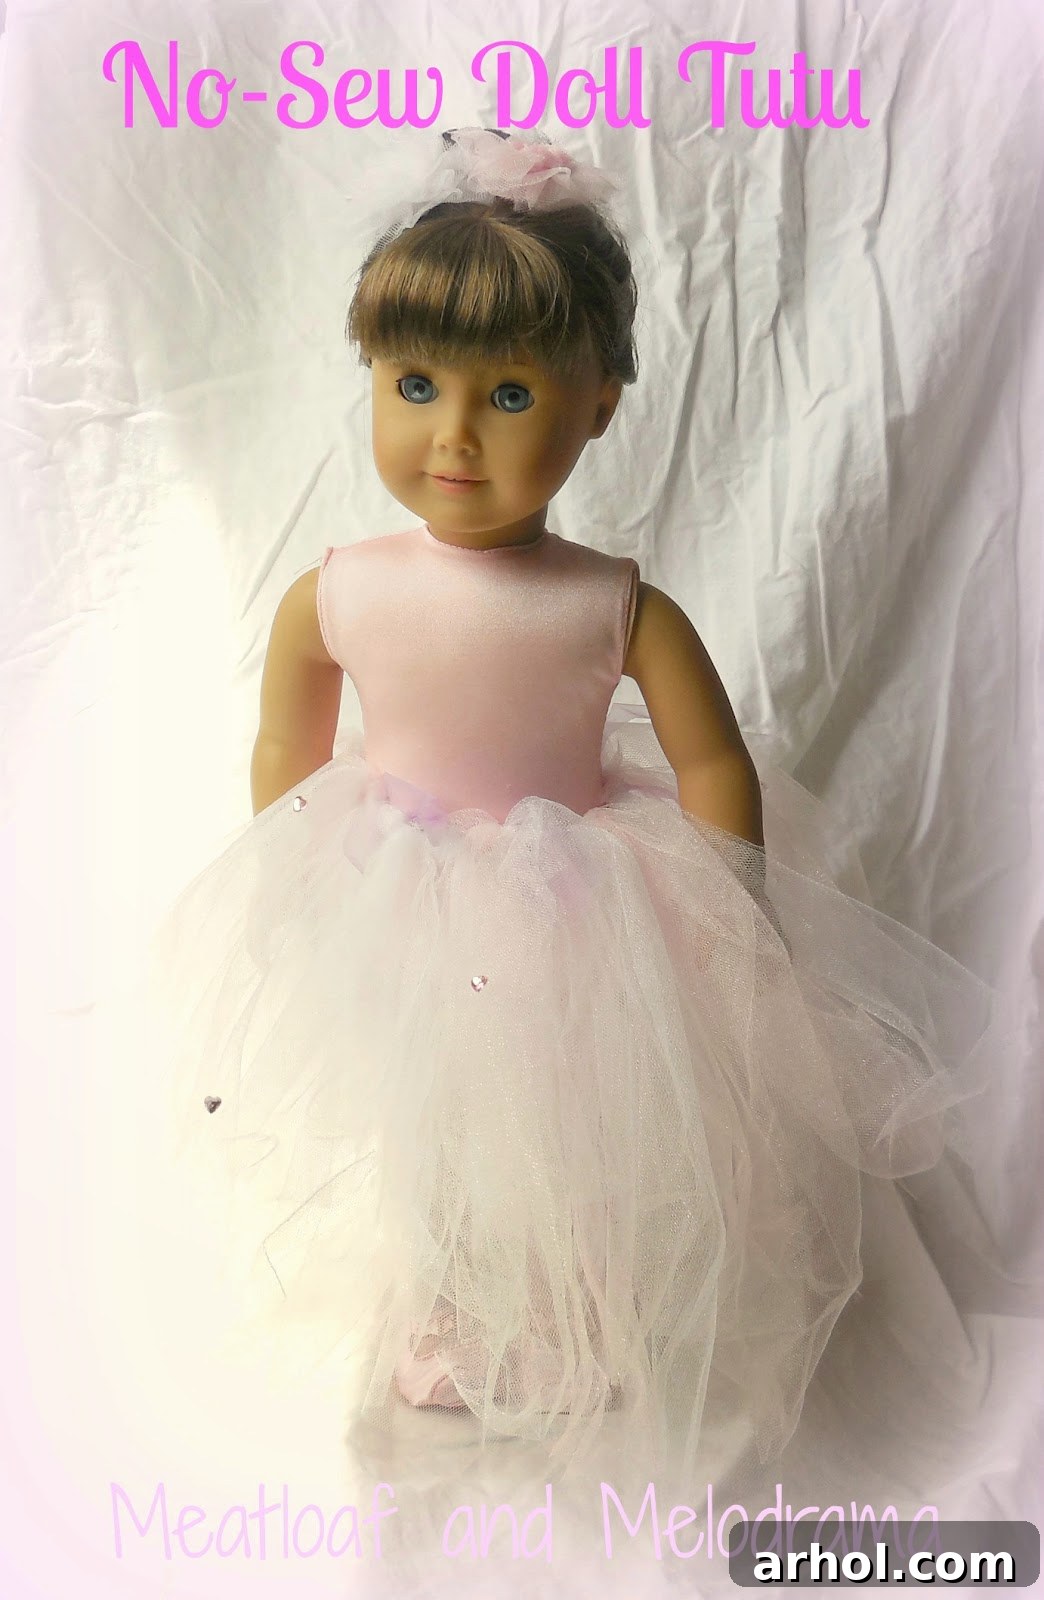
DIY No-Sew Tulle Tutu for American Girl Dolls: A Charming Upcycled Craft Project
Welcome, fellow crafters and doll enthusiasts! It’s wonderful to connect with you again for another exciting DIY project. As a parent, few things bring more joy than seeing our children’s imaginations soar, especially when we can contribute to their playtime with handmade creations. Recently, my daughter expressed a wish for new outfits for her beloved American Girl doll. Given our previous success crafting a DIY ballet barre for her dolls, a no-sew tutu seemed like the perfect next step to complete her doll’s ballerina ensemble.
This project is not only incredibly simple and requires no sewing skills whatsoever, but it also offers a fantastic opportunity to breathe new life into old materials. Instead of heading to the store for expensive doll clothes, we embarked on a creative journey using recycled fabric, making this project budget-friendly and environmentally conscious. The result? A stunning, multi-colored tulle skirt that adds a touch of whimsical elegance to any 18-inch doll’s wardrobe.
Why Choose a No-Sew Tutu for Your American Girl Doll?
Crafting a no-sew tutu is a brilliant choice for several reasons. Firstly, it eliminates the need for a sewing machine or any complex stitching techniques, making it incredibly accessible for beginners, children, and anyone looking for a quick and satisfying craft. You don’t need to be an experienced seamstress to create beautiful garments for your dolls.
Secondly, it’s a wonderfully economical option. Doll clothes, especially those for popular brands like American Girl, can often be quite pricey. By utilizing materials you might already have at home, such as old dresses, scraps of fabric, or even a few spools of inexpensive tulle, you can create custom outfits for a fraction of the cost. This DIY approach allows for endless creativity without breaking the bank.
Finally, the customization possibilities are boundless. From choosing specific color palettes to adding unique embellishments, you have complete control over the design. This means your doll can have a one-of-a-kind tutu that perfectly matches her personality or coordinates with other doll accessories you’ve made. For my daughter’s doll, who already had a pink leotard and a shorter pink tutu, we decided to create a longer, more elaborate skirt. To add visual interest and a unique flair, we moved beyond a single color, incorporating a delightful mix of pink, white, and a subtle hint of purple tulle.
Gathering Your Materials: What You’ll Need
One of the best aspects of this no-sew doll tutu project is the simplicity of its material list. You likely have most of these items around your home already, especially if you enjoy crafting or have children who’ve outgrown old party dresses.
- Tulle: This is the star of our project! You’ll need several strips. I found a fantastic, cost-effective source by repurposing tulle from my daughter’s old, outgrown dresses. This not only saves money but also adds a sentimental touch. If you don’t have old dresses, inexpensive spools of tulle can be found at any craft or fabric store. Choose colors that appeal to you; we went with pink, white, and purple.
- Ribbon: A narrow ribbon will serve as the waistband for the tutu. The length should be enough to comfortably tie around your doll’s waist with extra for a bow. A coordinating color is ideal; I used a shade of pink I already had on hand. Approximately 18-24 inches should suffice for an 18-inch doll.
- Scissors: Sharp scissors are essential for clean cuts through the tulle.
- Optional Embellishments: This is where the magic happens! We used pink heart-shaped crystal stickers, but you could also consider glitter glue, small fabric flowers, sequins, or even tiny beads.
- Optional: Hot Glue Gun and Bobby Pins: If you plan to make a matching headpiece, these will be handy.
- Your American Girl Doll: Essential for fitting and modeling your beautiful creation!
Step-by-Step Guide: Crafting Your No-Sew Tulle Tutu
Creating this charming American Girl doll tutu is incredibly straightforward. Follow these simple steps, and you’ll have a lovely skirt in no time!
Step 1: Prepare Your Tulle Strips
First, lay out your chosen tulle fabric. The length of your tulle strips will determine the length of your doll’s tutu. For a long, flowing skirt, I cut strips that were about 10-12 inches long. For a fuller look, aim for a width of about 1-1.5 inches per strip. If you’re using tulle from old dresses, carefully cut away sections that are suitable for strips. The beauty of tulle is that it doesn’t fray, so perfectly straight cuts aren’t essential, which makes this step even easier!
Step 2: Attach Tulle to the Ribbon Waistband
Take your narrow ribbon. This will be the foundation of your tutu. Begin tying the tulle strips around the ribbon. A simple loop knot works perfectly: fold a tulle strip in half, place the folded end under the ribbon, then pull the two loose ends through the loop and tighten gently. Position the knots close together, but not so tight that they distort the ribbon. I started by alternating pink and white tulle strips to create a lovely two-tone effect.
Continue this process until the ribbon is sufficiently covered with tulle, forming a dense and beautiful skirt. The goal is to ensure that when the tutu is on the doll, the ribbon waistband is completely hidden by the fullness of the tulle. Make sure to leave a few inches of ribbon free on both ends for tying.
Step 3: Introduce Secondary Colors and Layers
To add more depth and visual interest, I decided to incorporate a third color. Once the main pink and white sections were complete, I took some shorter pieces of purple tulle, approximately 6-8 inches long. I tied these shorter purple pieces at various points around the tutu. The purple accents are subtle, giving just a hint of contrasting color and adding a playful touch without overpowering the primary colors.
These shorter pieces also contribute to the overall volume and texture of the skirt, making it look more dynamic and professionally made. You can experiment with different lengths and placements of your accent colors to achieve various effects.
Step 4: Customizing the Fit
Once you’ve added all your desired tulle strips, it’s time for a fitting! Wrap the tutu around your American Girl doll’s waist. The extra ribbon length on either side should allow you to tie a neat bow or knot at the back, securing the tutu in place. The beauty of the ribbon tie is that it’s easy for little hands to put on and take off, fostering independence in playtime. When my daughter wants to change her doll’s outfit, she simply unties the ribbon – easy peasy!
Step 5: Embellish Your Tutu with Bling
No ballerina outfit is complete without a little sparkle! This is where your child can truly make the tutu their own. My daughter insisted on adding some extra bling, so she carefully pressed several pink heart-shaped crystal stickers onto the tulle. I let her decide on the placement, and she did a wonderful job. These little details elevate the tutu from a simple skirt to a dazzling costume, much like the ones dancers wear in performances, but at a fraction of the cost.
Step 6: Create a Matching Headpiece (Optional)
To complete the ballerina look, consider making a matching headpiece. From the same old dress where I sourced the tulle strips, I found a few small tulle flowers. I simply glued these little flowers onto bobby pins, creating a sweet and coordinating accessory for the doll’s hair. This touch adds an extra layer of charm and makes the entire outfit feel cohesive and special.
Tips for Success and Customization
This no-sew tutu project is incredibly versatile, allowing for endless creative possibilities. Here are some tips to help you customize and perfect your doll’s new outfit:
- Varying Lengths and Styles: While we opted for a longer tutu, you can easily make a shorter, more traditional ballet-style tutu by simply cutting your tulle strips shorter. Experiment with layering different lengths of tulle for a high-low effect or an asymmetrical look. You can even make multiple tutus in different lengths to give your doll a versatile wardrobe!
- Color Combinations: Don’t limit yourself to pink, white, and purple. Think about your doll’s existing wardrobe or your child’s favorite colors. Rainbow tutus, ombre effects, or even monochromatic designs with varying shades of the same color can look stunning.
- Different Ribbons: While a narrow satin ribbon works beautifully, consider using grosgrain ribbon for a different texture, or even a sparkly ribbon for extra glam. The ribbon’s width can also alter the look of the waistband.
- Alternative Embellishments: Beyond stickers, consider sewing on small beads (with caution for younger children), applying glitter glue for a shimmering effect, or using fabric paint pens for custom designs. Tiny silk flowers, small bows made from ribbon scraps, or even miniature iron-on patches can also add unique character.
- Involving Your Child: This is a fantastic project for children to help with! Younger children can choose colors and embellishments, while older ones can assist with cutting tulle strips (with supervision) and tying the knots. It’s a wonderful way to foster their creativity and fine motor skills.
- Fullness Factor: The more tulle strips you add and the closer you tie them, the fuller and more voluminous your tutu will be. Don’t be afraid to experiment with density.
- Trimming for Perfection: After the tutu is complete and on the doll, you might want to give it a slight trim for an even hemline. While my daughter preferred her tutu as long as possible, a neat trim can make a big difference in the finished appearance.
The Joy of Upcycling: Saving Money and the Planet
One of the most satisfying aspects of this DIY American Girl doll tutu project is its emphasis on upcycling. By repurposing tulle from old children’s dresses, you’re not only saving money on new fabric but also contributing to environmental sustainability. In a world where fast fashion and disposable items are prevalent, choosing to reuse and recycle materials for crafts is a small but meaningful step towards a greener lifestyle.
It teaches children the value of resources and encourages them to think creatively about how everyday items can be transformed into something new and exciting. This approach fosters a deeper appreciation for handmade items and reduces waste, proving that beautiful things don’t always have to come from a store-bought package.
Beyond Tutus: Inspiring More No-Sew Doll Clothes Ideas
This no-sew technique for doll clothes can inspire many other creative projects. Once you master the simple knotting of tulle onto a ribbon, you can apply similar principles to make other accessories. Think about simple no-sew scarves from fleece scraps, easy headbands made from elastic and fabric strips, or even rudimentary capes for superhero dolls using felt. The possibilities are truly endless when you embrace the “no-sew” philosophy!
Conclusion: Craft a Magical Tutu Today!
This no-sew tulle tutu for American Girl dolls is a delightful and rewarding project that brings joy to both the crafter and the child who plays with it. It’s incredibly easy, budget-friendly, and offers ample opportunity for personalization and creativity. Whether you’re an experienced crafter or just starting, you’ll find immense satisfaction in creating this charming accessory.
My daughter absolutely adores her doll’s new tutu, and I love that we created it together using materials we already had. It’s a testament to how simple ideas can lead to wonderful creations and cherished memories. So, gather your materials, let your imagination take flight, and craft a magical tutu for your American Girl doll today!
Thank you for stopping by and exploring this fun project with me. I hope you’re inspired to try it out yourself. Have a truly wonderful day, and happy crafting!
Dee 🙂