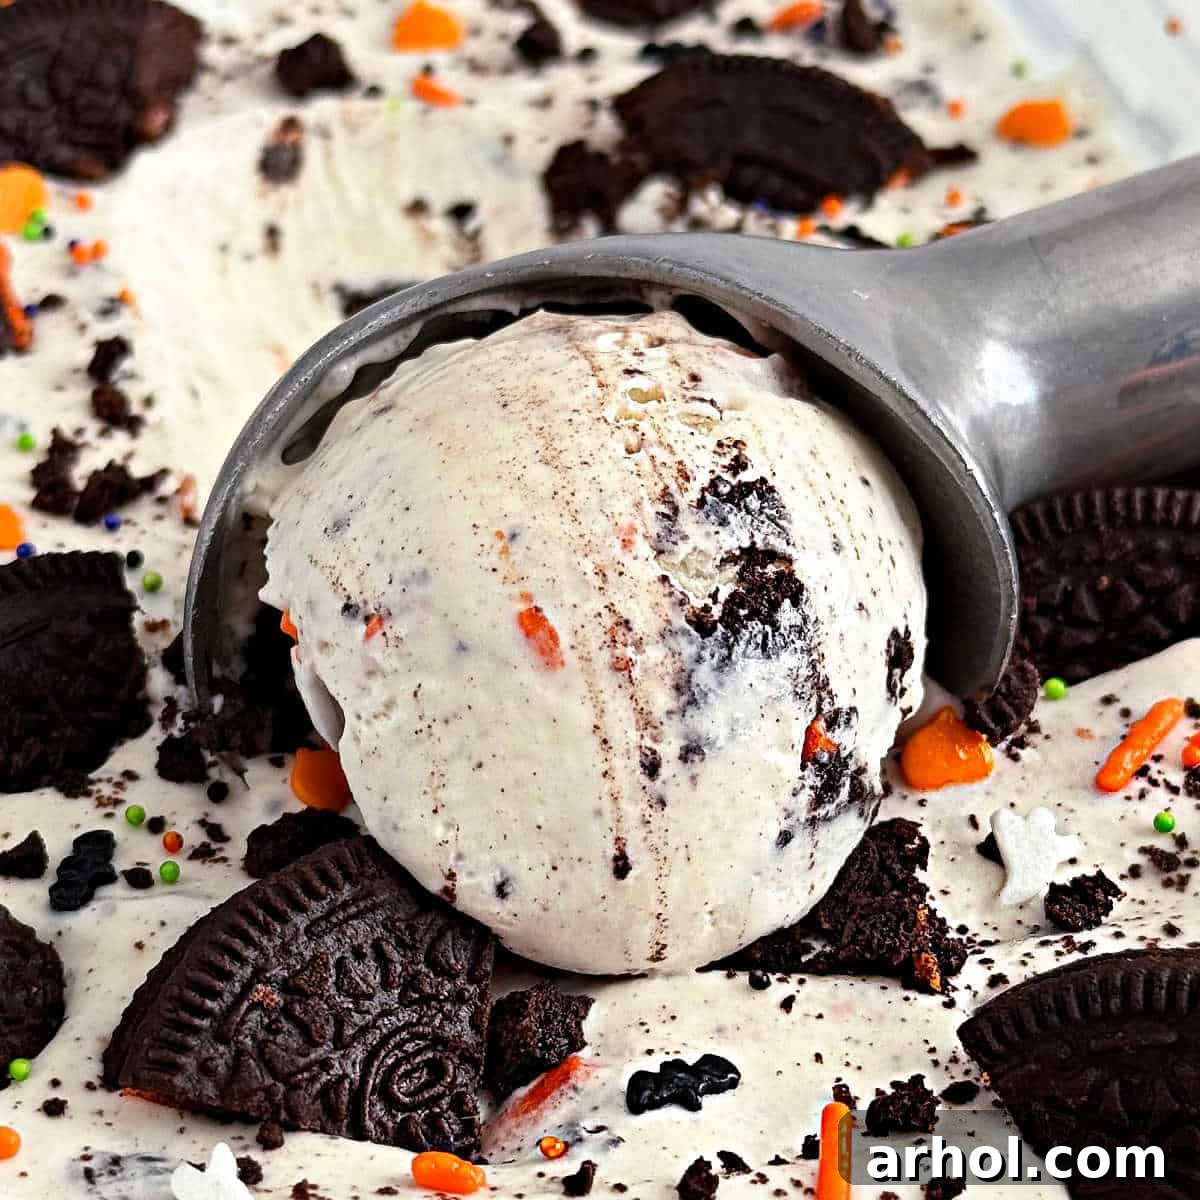
Homemade Halloween Ice Cream: A Spooktacular No-Churn Treat!
Dive into the spirit of Halloween with our incredibly easy and utterly delicious Homemade Halloween Ice Cream! This no-churn recipe, affectionately known as “Cookies and Scream,” is a delightful blend of creamy sweetness, crunchy Oreo cookies, and festive sprinkles. Perfect for spooky season gatherings, family movie nights, or simply a fun, themed dessert, this treat promises a frightfully good time without the need for an ice cream maker. Get ready to scoop up some ghostly good flavors!
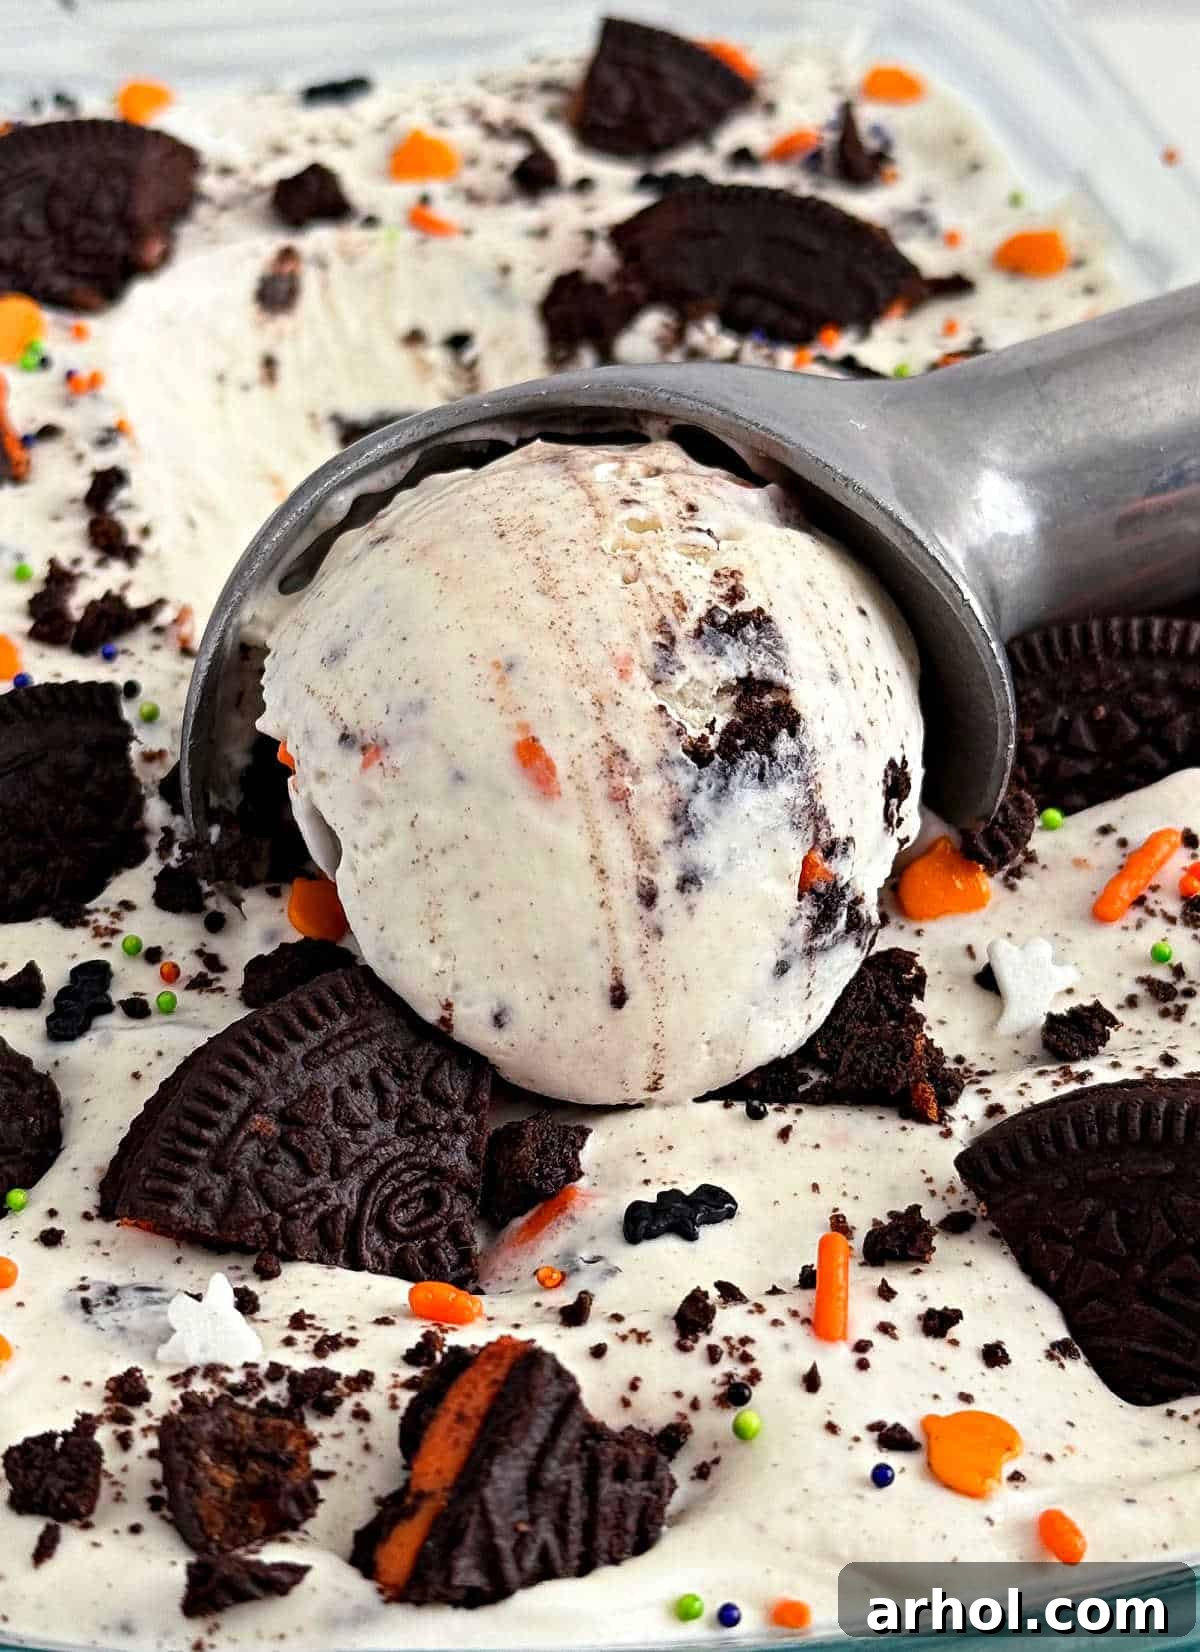
Unleash the Ghoulishly Good Flavors of Cookies and Scream Ice Cream
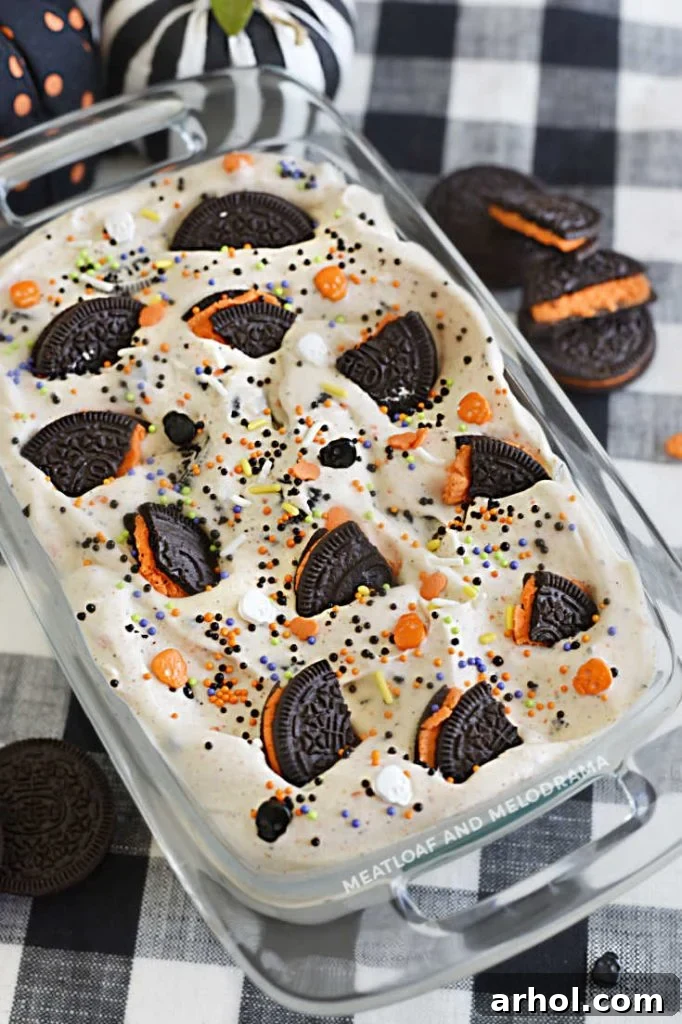
Are you searching for a show-stopping yet simple Halloween recipe that will thrill both kids and adults alike? Look no further than our Cookies and Scream ice cream! This cool, creamy confection is generously loaded with festive Halloween Oreos, creating a dessert that’s as visually appealing as it is delicious. Forget complicated machinery; this recipe builds upon a basic no-churn ice cream technique that we frequently rely on for classic Oreo ice cream. The only difference? We’re infusing it with extra Halloween magic, transforming a family favorite into a seasonal sensation with special edition cookies and candies.
Making homemade ice cream might sound daunting, but this recipe truly simplifies the process. It’s a fantastic entry point for beginners and a quick win for seasoned bakers looking for a hassle-free holiday treat. The rich base, combined with the delightful crunch and iconic flavor of Oreo cookies, makes every spoonful an indulgent experience. Plus, the ability to customize with various Halloween-themed mix-ins means you can make it uniquely yours year after year. Prepare to become the hero of your next Halloween party with this unforgettable dessert!
Why You’ll Adore This Easy Halloween Ice Cream Recipe!

This “Cookies and Scream” ice cream isn’t just a dessert; it’s a celebration of all things spooky and sweet, offering numerous reasons to become your new favorite Halloween tradition:
- No Ice Cream Machine Needed: That’s right! Say goodbye to bulky equipment and specialized gadgets. This recipe uses simple kitchen tools to create a creamy, luxurious texture that rivals store-bought options. It’s perfect for anyone who loves ice cream but doesn’t want to invest in a machine.
- Effortlessly Customizable: The beauty of this no-churn base lies in its versatility. While Halloween Oreos and sprinkles are our top picks, you can easily swap them for other favorite candies, crushed cookies, or even a swirl of pumpkin puree for a unique twist. Let your creativity run wild!
- Frightfully Delicious Flavor: Combining rich heavy cream, sweet condensed milk, and beloved Oreo cookies creates a flavor profile that is irresistible. The balance of creamy and crunchy, sweet and satisfying, makes it a hit with palates of all ages.
- Kid-Friendly Fun: This is a recipe kids will love to help make and eat! From crushing the cookies to sprinkling the toppings, there are plenty of safe and fun tasks for little hands. It’s a wonderful way to create lasting holiday memories in the kitchen.
- Perfect for Any Halloween Event: Whether you’re hosting a grand costume party, a cozy movie night, or just want a festive family treat, this ice cream fits every occasion. It’s easy to prepare ahead of time, reducing stress on the day of your event.
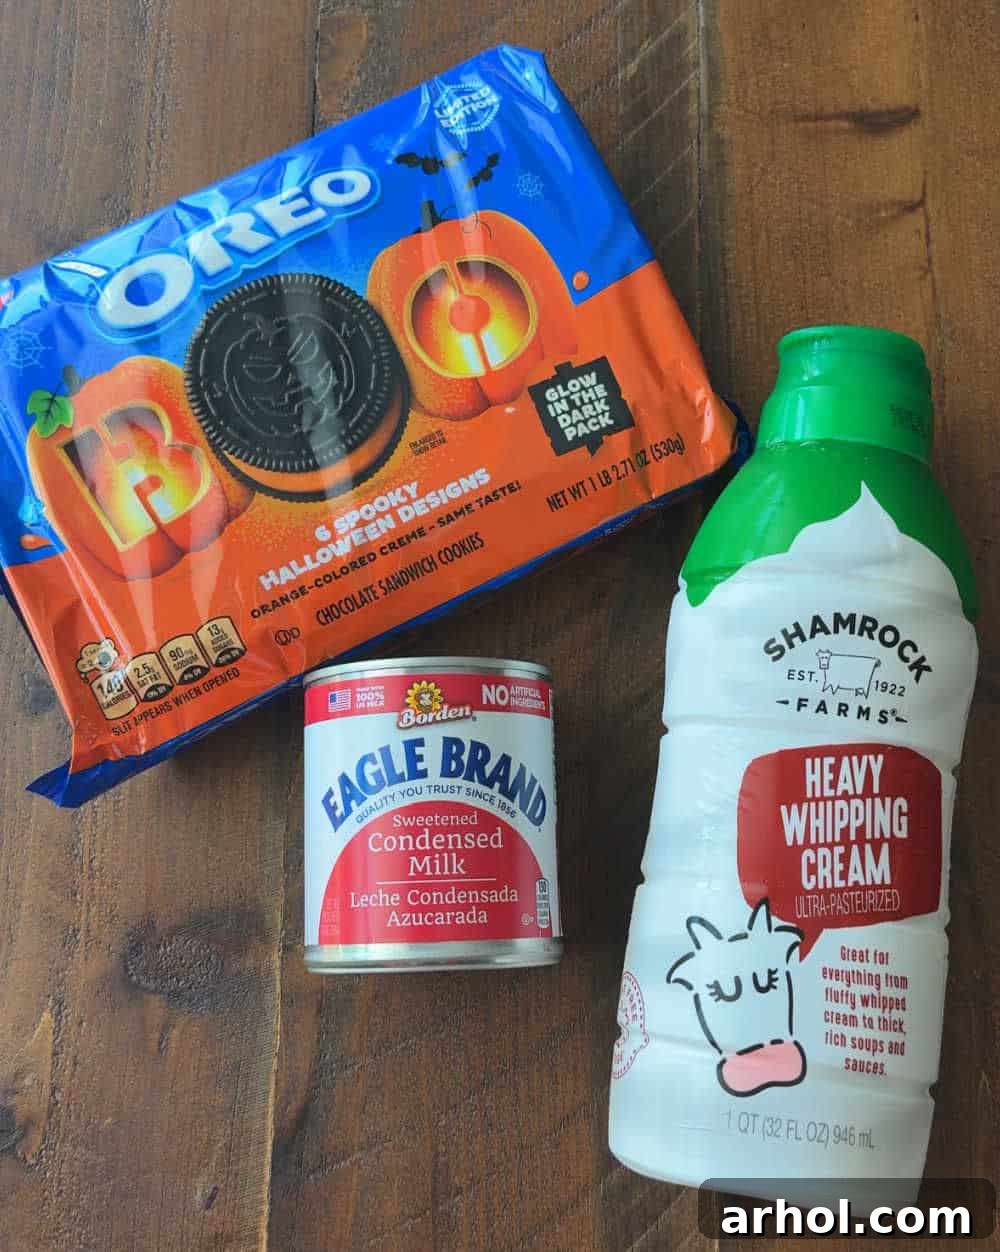
Essential Ingredient Notes for Your Spooky Creation
Crafting this delightful Halloween ice cream requires just a few key ingredients, each playing a crucial role in achieving that perfect creamy texture and irresistible flavor. Here’s a closer look at what you’ll need, with full amounts detailed in the printable recipe card below:
- Heavy Whipping Cream: This is the backbone of our no-churn ice cream, providing the essential airy volume and rich creaminess. For best results, ensure your cream is very cold before whipping. It’s crucial to use *heavy whipping cream* (or heavy cream), as alternatives like half-and-half or light cream simply won’t whip up to the necessary consistency, resulting in a less desirable, icy texture. Aim for at least 36% milk fat for optimal whipping.
- Sweetened Condensed Milk: The magical ingredient that sweetens and thickens our ice cream base, preventing ice crystal formation and giving it that smooth, scoopable quality. This is concentrated milk with sugar added, which is then evaporated. Double-check your label to ensure you’re grabbing sweetened condensed milk and *not* evaporated milk, as they are not interchangeable and using the latter would drastically alter the recipe’s outcome.
- Halloween Oreos (or your favorite sandwich cookie): These festive cookies are the “cookies” in “Cookies and Scream”! Their unique orange or purple creme filling adds a pop of color and extra sweetness, perfectly complementing the Halloween theme. While Halloween Oreos are ideal, feel free to use any seasonal or classic sandwich cookie you prefer. The mix of crushed and slightly larger pieces provides a wonderful textural contrast.
- Halloween Sprinkles or Small Halloween Candy: For that final festive flourish! Sprinkles add vibrant color and a playful crunch. Small, soft Halloween candies like candy corn, mini chocolate chips, or even gummy worms (added after freezing for best texture) can also be fantastic mix-ins or toppings to enhance the spooky vibe.
These core ingredients, when combined with a little love and creativity, form the foundation of an unforgettable Halloween dessert that everyone will rave about.
Crafting Your Homemade Halloween Ice Cream: A Step-by-Step Guide
Making this no-churn ice cream is remarkably simple and doesn’t require any specialized skills. Follow these easy steps to create your deliciously spooky treat:
Step 1: Prepare Your Oreo Cookies
Begin by gently breaking your Halloween Oreos into various sized pieces. We recommend a mix of finely crushed crumbs and larger chunks. The smaller pieces will blend into the ice cream base, imparting flavor and color, while the larger pieces will provide delightful bites of cookie goodness throughout. Set a handful of these broken cookies aside for topping your ice cream later.
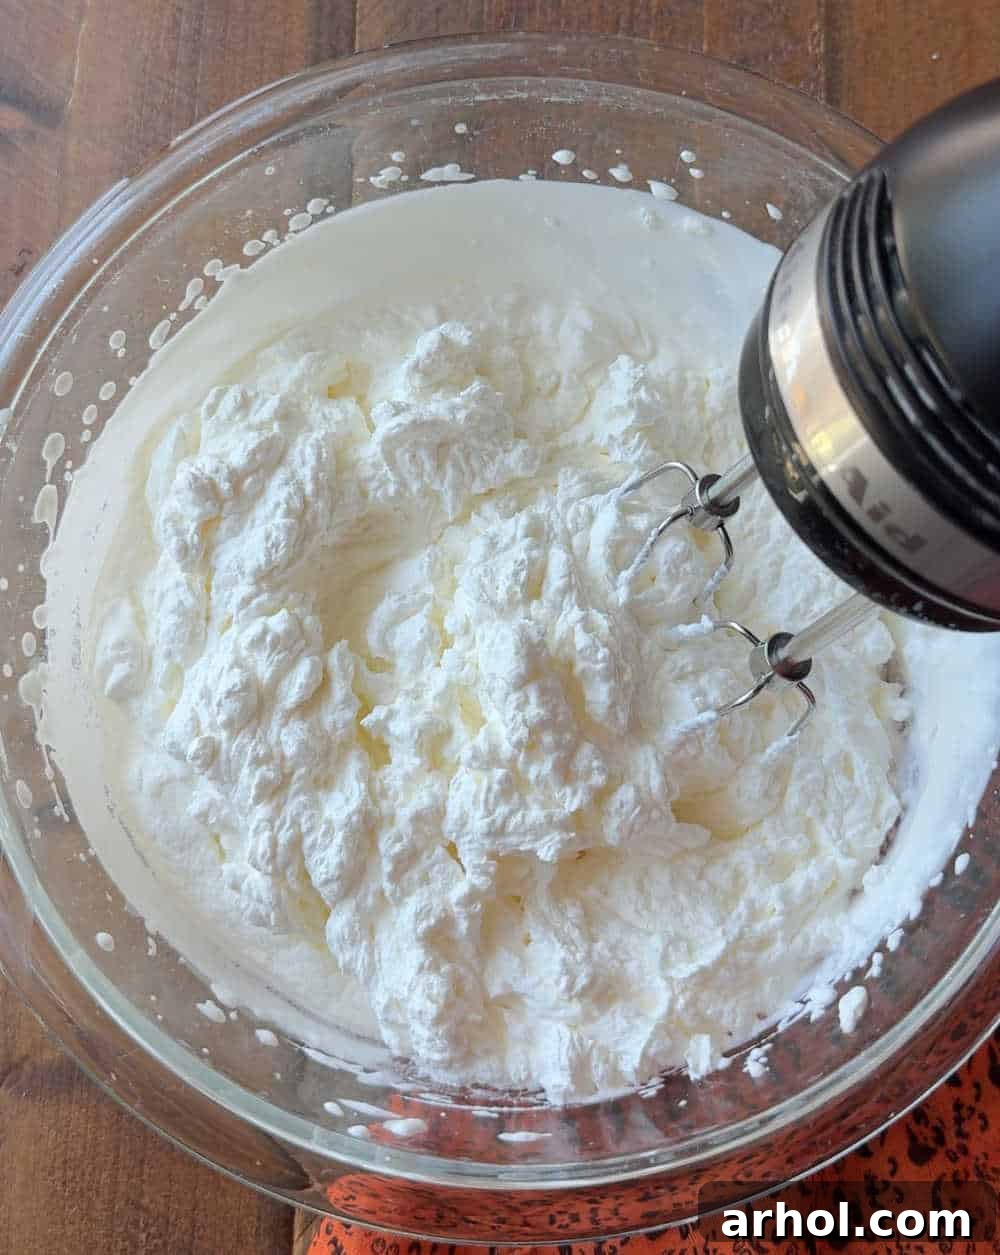
Step 2: Whip the Heavy Cream to Stiff Peaks
In a large, chilled mixing bowl, pour in your very cold heavy whipping cream. Using an electric mixer (or a sturdy whisk and some elbow grease), beat the cream on medium-high speed. As it whips, it will gradually thicken and increase in volume. Continue beating until stiff peaks just barely form. This means when you lift the beaters, the cream will hold its shape firmly. Be careful not to overmix, as this can turn your whipped cream grainy. For an extra touch of Halloween color, you can scrape the orange filling from about 5-7 Oreo cookies and add it to the heavy cream before whipping. This will subtly tint your ice cream a festive light orange hue!
Step 3: Combine with Sweetened Condensed Milk
In a separate large bowl, add the sweetened condensed milk. This rich, sweet liquid forms the other half of our magical no-churn base. Once your heavy cream is whipped, carefully and gently spoon it into the bowl with the sweetened condensed milk. At this stage, also add the majority of your broken Oreo cookies.
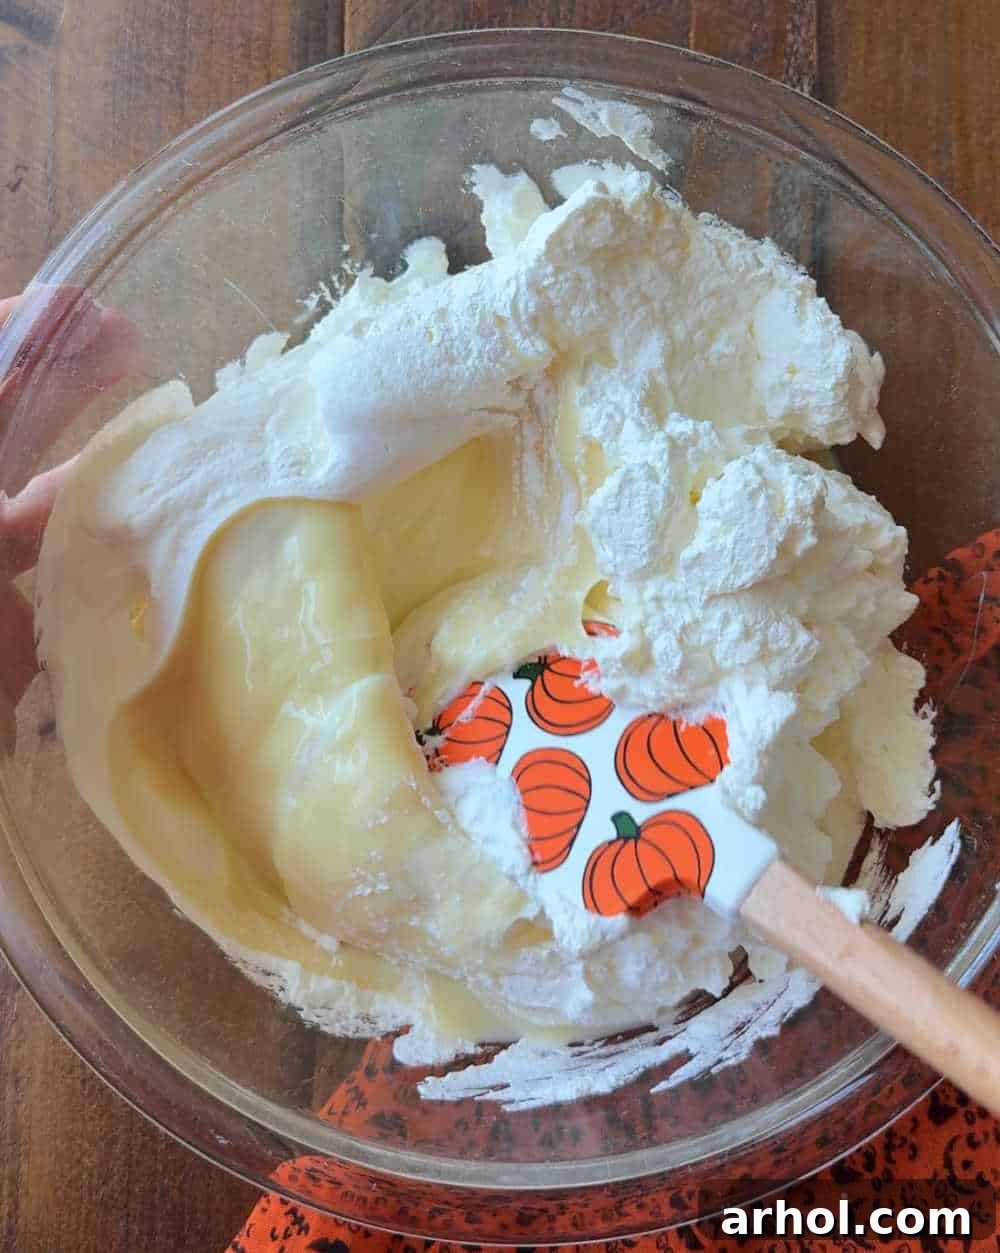
Step 4: Gently Fold for a Creamy Mixture
Using a spatula, gently fold the whipped cream into the sweetened condensed milk and crushed Oreos. The key here is to be gentle! Folding helps to incorporate the ingredients without deflating the airy volume you created in the whipped cream. Continue folding until the mixture is uniform and no streaks of condensed milk remain. Overmixing at this stage can lead to a denser, less creamy ice cream.
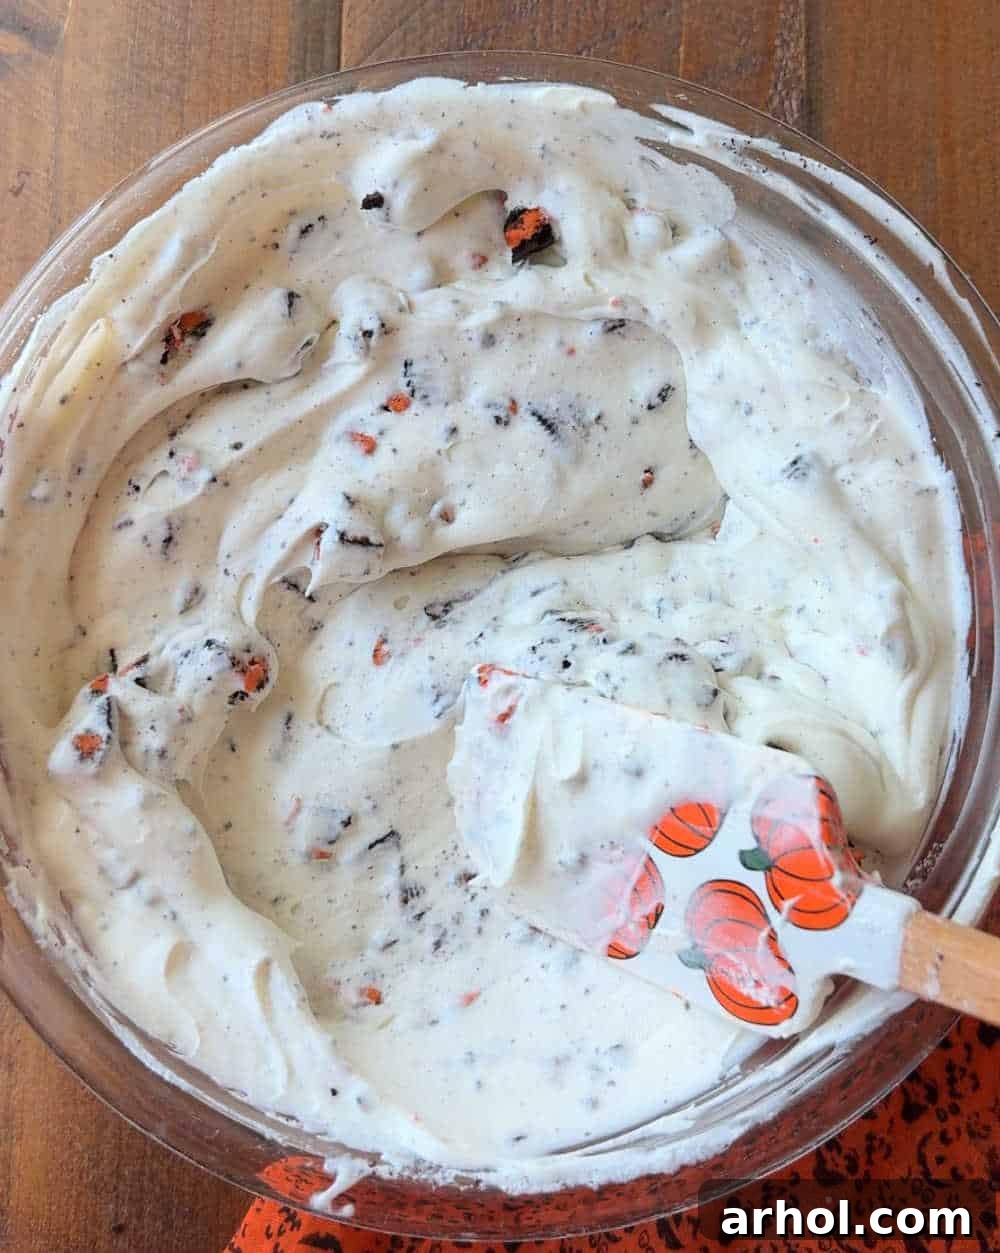
Step 5: Transfer to Loaf Pan and Freeze
Pour the creamy ice cream mixture into a standard loaf pan or any freezer-safe container. Smooth the top with your spatula. Now for the fun part: sprinkle the remaining reserved crushed Oreo pieces and your festive Halloween sprinkles or small candies generously over the top. This not only adds more texture and flavor but also creates a beautiful visual appeal that screams “Halloween!”
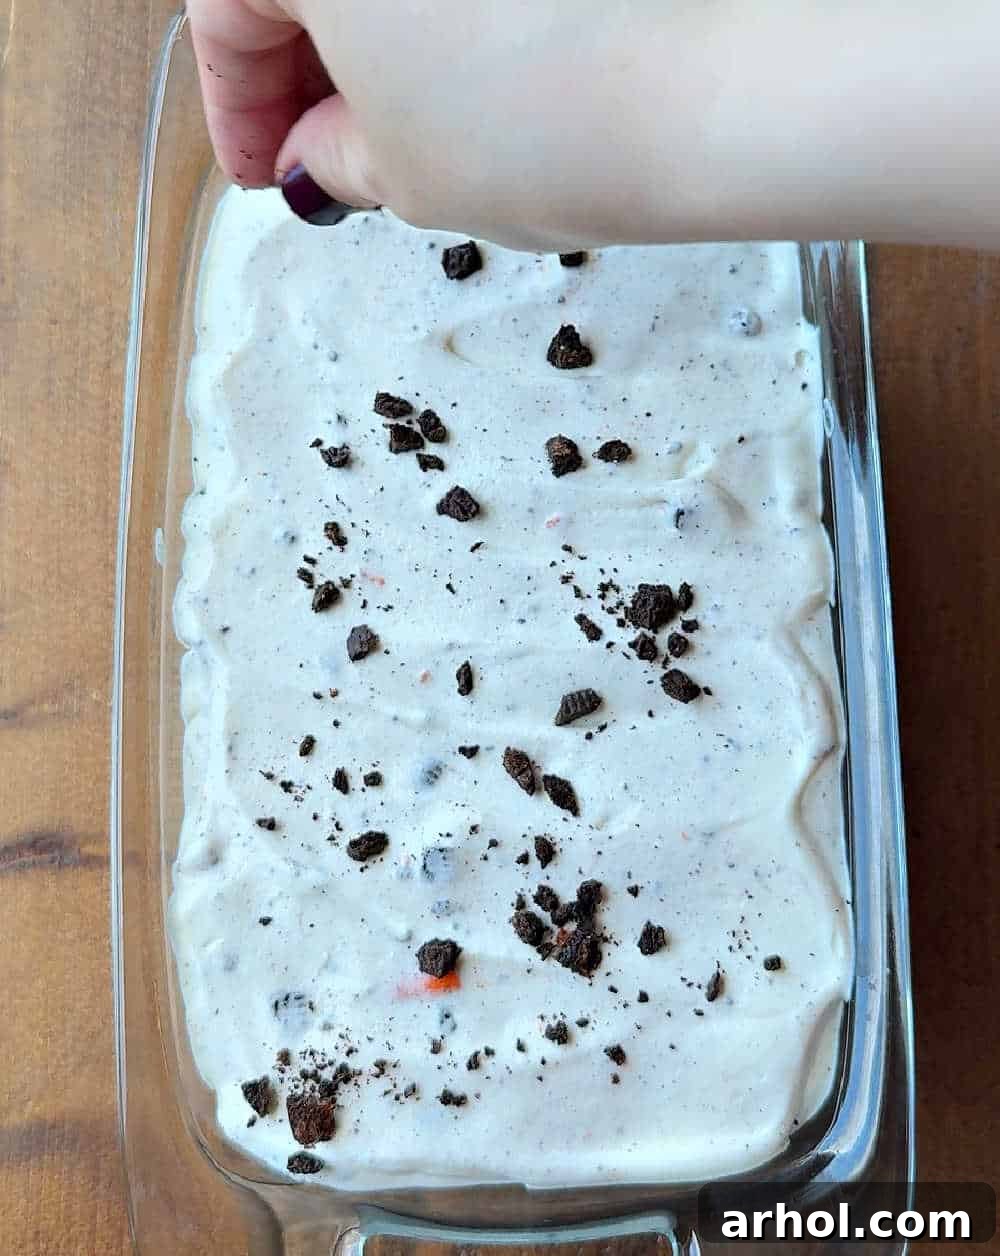
Step 6: Chill Until Firm
Cover the loaf pan tightly with plastic wrap or aluminum foil. Place the ice cream in the freezer for at least 6 hours, or ideally, overnight. Allowing it to freeze completely ensures it achieves that perfect firm, scoopable consistency. Patience is key for the best results!
Expert Recipe Tips for the Best “Cookies and Scream”
Achieving the perfect scoop of Cookies and Scream ice cream is easy with a few insider tips:
- Embrace the Orange Swirl: For an extra festive touch and a subtle orange tint, carefully scrape the orange creme filling from about 5-7 Halloween sandwich cookies. Add this filling directly to your heavy cream before whipping. This step isn’t strictly necessary for flavor but adds a delightful visual element, making your ice cream even more Halloween-ready!
- Texture Variety is Key: Don’t just crush all your cookies uniformly. We find that a mix of finely crushed cookie crumbs and larger, broken-up cookie pieces provides the best textural experience. The crumbs will melt into the ice cream, adding flavor, while the chunks offer a satisfying bite.
- Patience Pays Off: While the ice cream might seem somewhat firm after 4-5 hours, it truly benefits from a longer freeze. Allowing it to set for at least 6 hours, or preferably overnight, ensures optimal firmness and prevents it from being too soft or icy. Plan ahead to give your ice cream ample time to freeze properly.
- Chill Your Bowl and Whisk: For even faster and more stable whipped cream, place your mixing bowl and whisk attachment in the freezer for 10-15 minutes before you start whipping the heavy cream. Cold equipment helps the cream whip up more quickly and hold its stiff peaks better.
- Don’t Overmix the Whipped Cream: As tempting as it might be, stop whipping the heavy cream as soon as stiff peaks form. Overmixing can lead to a grainy texture, which isn’t ideal for smooth ice cream.
Storage and Longevity
Since this is a frozen dessert, proper storage is essential to maintain its creamy texture and prevent freezer burn. Once your Homemade Halloween Ice Cream is fully frozen, you have a couple of options:
- Keep it in the Loaf Pan: If you plan to serve it relatively soon or want to keep it in its original shape, simply cover the loaf pan tightly with a layer of plastic wrap, pressing it directly onto the surface of the ice cream to minimize air exposure. Then, cover with a layer of aluminum foil for added protection.
- Transfer to an Airtight Container: For longer-term storage, transfer the firm ice cream to a dedicated freezer-safe, airtight container. This will help prevent ice crystals from forming and keep the ice cream fresh.
When stored correctly, your delicious Cookies and Scream ice cream should last for up to 3 months in the freezer. Remember to take it out of the freezer about 5-10 minutes before serving to allow it to soften slightly for easier scooping.
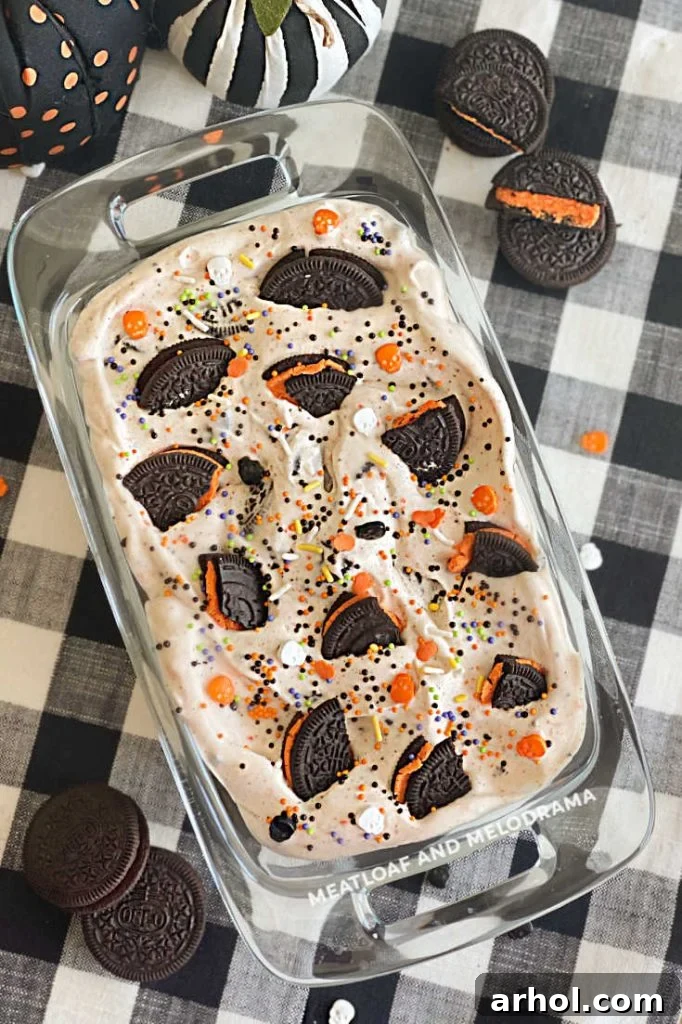
Serving Suggestions for an Epic Halloween Feast
This Homemade Halloween Ice Cream is fantastic on its own, but it also makes a spectacular addition to a wider Halloween spread or a festive dessert bar. Here are some ideas to elevate your spooky celebration:
- Pair with Savory Treats: Balance the sweetness by serving alongside fun savory items like Mummy Dogs. The contrast of sweet and savory will tantalize everyone’s taste buds.
- Create a Spooky Snack Spread: Offer it alongside other popular Halloween snacks such as Fall Puppy Chow or Monster Munch Snack Mix for a diverse and exciting party menu.
- Build Your Own Sundae Bar: Set up a festive sundae bar with various toppings! Think whipped cream, chocolate syrup (or green slime syrup!), extra Halloween sprinkles, candy corn, gummy worms, crushed cookies, and perhaps some chopped candy bars. Let guests customize their own ghoulish masterpieces.
- Serve with Warm Desserts: A scoop of this cold ice cream would be incredible paired with a warm Halloween-themed brownie, apple crisp, or even a slice of pumpkin pie.
- Milkshakes & Floats: Blend it into a thick, spooky milkshake with extra milk and a touch of food coloring, or create a chilling ice cream float with orange soda or cream soda.
More Easy Halloween Desserts to Try This Season
If you’re loving the festive spirit and ease of this ice cream recipe, you’ll be thrilled to discover more simple and delicious Halloween treats from our collection:
- Easy Halloween Ghost Cookies: Adorable and simple sugar cookies decorated like friendly ghosts.
- Halloween Oreo Pumpkin Treats: Cleverly disguised Oreos transformed into festive pumpkins.
- Halloween Marshmallow Pops: Fun, dippable marshmallow treats perfect for little goblins.
- Halloween Cake Pops: Bite-sized cakes on a stick, decorated for the holiday.
- Graveyard Cake: A delicious and spooky “dirt” cake complete with cookie tombstones.
- Classic Halloween Sugar Cookies: A versatile recipe for decorating with all your favorite Halloween designs.
Frequently Asked Questions About Homemade Halloween Ice Cream
Can I make this ice cream ahead of time?
Absolutely! This no-churn ice cream is perfect for making in advance. You can prepare it up to 2-3 months before your event and store it in an airtight container in the freezer. Just remember to take it out about 5-10 minutes before serving to ensure it’s easy to scoop.
What if I don’t have Halloween Oreos?
No problem at all! While Halloween Oreos add a fun festive touch with their colored creme, you can easily use regular Oreos or any other brand of chocolate sandwich cookie. To still get a pop of color, consider adding a few drops of orange or green food coloring to your whipped cream mixture, or simply use extra colorful Halloween sprinkles.
Can I add other mix-ins to the ice cream?
Yes, this recipe is highly customizable! Beyond Oreos, you can experiment with crushed candy corn, mini chocolate chips, chopped Halloween-themed candies (like M&M’s or Reese’s Pieces), gummy worms, or even a swirl of chocolate fudge or pumpkin puree. Just be mindful of adding too many liquid ingredients, as this can affect the texture.
Why is it important to use heavy whipping cream and sweetened condensed milk?
Heavy whipping cream (with at least 36% fat) is crucial because it whips up to create the light, airy texture that is characteristic of good ice cream. Sweetened condensed milk not only adds sweetness but also acts as a stabilizer, preventing the formation of large ice crystals and ensuring a smooth, creamy consistency without an ice cream maker.
How do I prevent my homemade ice cream from becoming icy?
Several factors contribute to an icy texture: not whipping the cream enough, over-folding the mixture, or improper storage. Ensure your heavy cream reaches stiff peaks, gently fold all ingredients, and store the finished ice cream in an airtight container, covered with plastic wrap pressed directly onto the surface, to minimize air exposure.
Print Recipe
Rated 5 out of 5 stars by 8 users
Homemade Halloween Ice Cream
This Homemade Halloween Ice Cream recipe is an easy Halloween dessert made with Oreo cookies, cream, sweetened condensed milk and sprinkles. Cookies and Scream is perfect for Spooky Season!
Ingredients
- 1 (14 oz) Can Sweetened Condensed Milk
- 2 Cups Heavy Whipping Cream
- 20 Halloween Oreo Cookies, broken into pieces (Mixture of halved, quartered, and crushed; can use as many as you want really)
Instructions
- Break up Oreos into a mix of crushed crumbs and larger pieces and set aside.
- In a large bowl, add the sweetened condensed milk and set aside.
- In another large, chilled bowl, add the heavy whipping cream. For an optional light orange tint, scrape the filling from about 5 Oreo cookies and add it to the cream.
- Using an electric mixer or a whisk, beat the heavy whipping cream until stiff peaks just barely form. Be careful not to overmix.
- Carefully spoon the whipped cream into the bowl with the sweetened condensed milk. Add the majority of the broken-up Oreos to this mixture.
- Gently fold the whipped cream into the sweetened condensed milk and Oreos until fully combined and no streaks remain. Do not overmix to retain the airy texture.
- Pour the mixture into a loaf pan (or other freezer-safe container) and top with additional reserved Oreo pieces and festive Halloween candy or sprinkles.
- Place the ice cream in the freezer, covered tightly, for at least 6 hours (preferably overnight) before serving for the best firm consistency.
Notes
It’s not absolutely necessary to scrape off some of the filling, but it gives the ice cream a light orange color, perfect for Halloween!
You can use any brand of sandwich cookie, but using one with Halloween colors for the filling (like orange or purple) will give the best festive results.
Make sure you use sweetened condensed milk and not evaporated milk; they are not interchangeable in this recipe.
Nutrition
Calories: 165 kcal
Carbohydrates: 1g
Protein: 1g
Fat: 18g
Saturated Fat: 11g
Cholesterol: 65mg
Sodium: 18mg
Potassium: 36mg
Sugar: 1g
Vitamin A: 700IU
Vitamin C: 1mg
Calcium: 31mg
Nutrition information is automatically calculated, so should only be used as an approximation.
Additional Info
We hope you enjoy making and sharing this delightful Homemade Halloween Ice Cream. It’s a simple yet spectacular way to add a touch of spooky fun to your celebrations. Don’t forget to leave a comment below to let us know how your “Cookies and Scream” turned out!
Sign up for our free weekly newsletter to receive more easy, festive, and utterly delicious recipes straight to your inbox every week. Never miss out on a new family favorite!