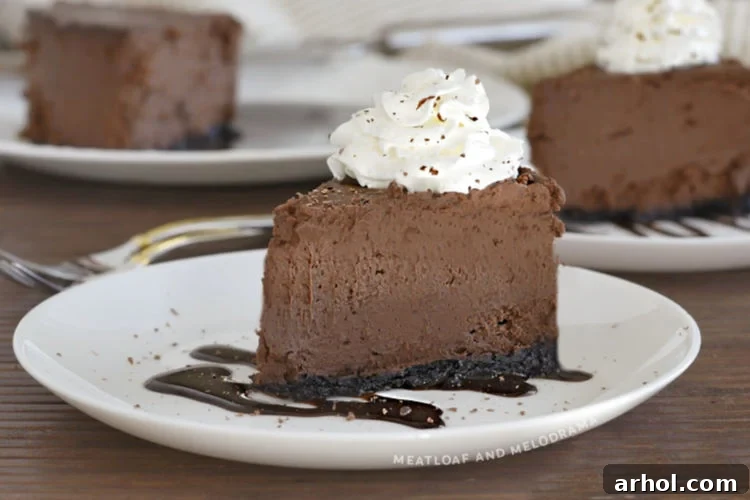
Welcome, fellow dessert enthusiasts, to the ultimate guide for creating an irresistibly rich, luxuriously creamy, and effortlessly delicious Instant Pot Chocolate Cheesecake. If you’ve ever dreamed of savoring a slice of gourmet chocolate cheesecake without the fuss and complexity of traditional baking, your dream is about to come true. This recipe isn’t just easy; it’s a revelation, promising to deliver a show-stopping dessert that will impress at any gathering, from intimate family dinners to grand holiday feasts.
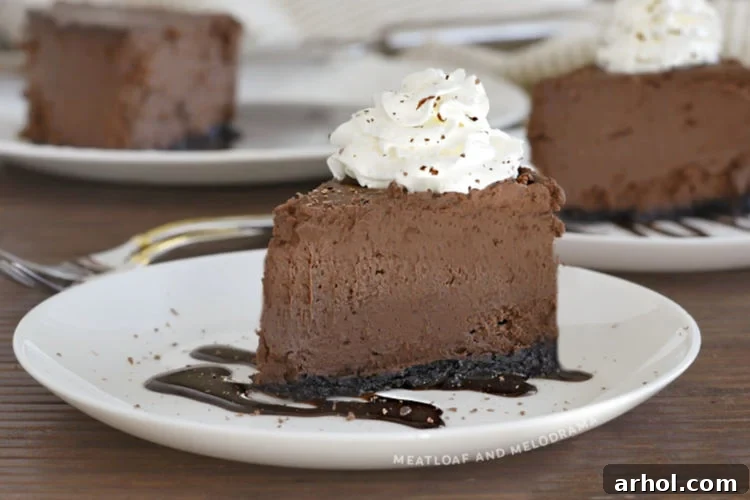
For connoisseurs of the deepest, most satisfying chocolate desserts, this recipe for Instant Pot Chocolate Cheesecake stands in a league of its own. It’s designed to banish those persistent chocolate cravings with its intense flavor and velvety texture. We’re talking about a dessert so spectacular, it evokes the magic of a Cheesecake Factory masterpiece, particularly their famous Godiva Chocolate Cheesecake. Imagine achieving that same level of decadent indulgence, right in your own kitchen, with the help of your trusty pressure cooker. Yes, this is essentially a beloved Cheesecake Factory copycat recipe, meticulously adapted for the unparalleled convenience and consistent results of the Instant Pot.
My journey into Instant Pot cheesecakes began with a simple curiosity, which quickly transformed into an obsession. The pressure cooker proved to be an ideal environment for baking cheesecakes, eliminating common frustrations like cracks, dry edges, and the need for elaborate water baths. This particular chocolate cheesecake recipe has been perfected to ensure every bite is a harmonious blend of deep chocolate notes and smooth, creamy delight, all achieved with astonishing ease. Prepare to embark on a culinary adventure that will redefine your perception of homemade desserts.
Why Choose the Instant Pot for Your Chocolate Cheesecake?
The Instant Pot isn’t just for savory meals; it’s a dessert game-changer, especially for cheesecakes. Here’s why using your electric pressure cooker is the secret to cheesecake perfection:
- No Cracks: The moist, steamy environment inside the Instant Pot prevents the cheesecake from drying out and cracking, a common challenge with oven-baked versions. You’ll get a beautifully smooth top every time.
- Consistent Texture: Pressure cooking ensures even heat distribution, resulting in a uniformly creamy and dense texture from edge to center, without overcooking.
- Hands-Off Cooking: Once you set the cooking time, the Instant Pot takes care of the rest. No need to monitor the oven or constantly check for doneness.
- Faster Process: While cooling time is still essential, the actual cooking time in the Instant Pot is significantly shorter compared to traditional oven baking, getting you to dessert bliss sooner.
- Less Heating of Your Kitchen: Especially during warmer months, using the Instant Pot means you won’t heat up your entire kitchen like an oven would.
The Secret to the Best Instant Pot Chocolate Cheesecake: Key Ingredients
Crafting this exquisite chocolate cheesecake begins with selecting the right ingredients. Each component plays a vital role in achieving that signature rich flavor and silky-smooth consistency:
- Dark Chocolate (72% Cacao): This is non-negotiable for achieving the deep, intense chocolate flavor that makes this cheesecake so special. Using 72% cacao ensures a perfect balance of bitterness and sweetness, preventing the cheesecake from being overly sugary. Brands like Ghirardelli often offer this percentage and are readily available. Avoid milk chocolate or semi-sweet chocolate, as they will drastically alter the flavor profile and sweetness.
- Oreo Cookies for the Crust: Crushed Oreo cookies create a sturdy, flavorful, and incredibly delicious base for this cheesecake. The chocolatey crunch of the cookies perfectly complements the creamy filling. If Oreos aren’t available, any chocolate wafer cookie will work as a fantastic substitute, just ensure they are finely crushed.
- Cream Cheese (Softened to Room Temperature): This is paramount for a lump-free, velvety filling. Cold cream cheese will result in a clumpy batter, leading to an uneven texture. Plan ahead and let your cream cheese sit out on the counter for at least an hour before you begin.
- Eggs (Room Temperature): Like cream cheese, room temperature eggs emulsify better with the other ingredients, creating a smoother, more uniform batter. Add them last and mix gently to avoid overmixing.
- Hot Coffee and Hot Water: These liquids enhance the chocolate flavor, making it deeper and more complex, without making the cheesecake taste like coffee. It’s a classic chef’s trick to intensify chocolate.
- Vanilla Extract: A touch of vanilla extract rounds out the flavors, adding warmth and depth to the overall chocolate experience.
Essential Instant Pot Cheesecake Tips for Success
Even though this recipe is designed for ease, a few key tips will ensure your Instant Pot Chocolate Cheesecake turns out flawlessly every time:
- Use Quality Dark Chocolate: As mentioned, aim for 72% cacao dark chocolate. The quality of your chocolate directly impacts the richness of your cheesecake.
- Room Temperature Ingredients are a Must: Seriously, this cannot be stressed enough. Cream cheese and eggs need to be at room temperature to ensure a smooth, uniform batter free of lumps. Set them out at least an hour before you plan to start baking.
- Don’t Overmix the Batter: Overmixing incorporates too much air into the batter, which can cause the cheesecake to puff up too much during cooking and then crack as it cools. Mix only until the ingredients are just combined and smooth.
- Add Eggs Last: This helps prevent overmixing the eggs, which can lead to a less desirable texture. Incorporate them one at a time on low speed until just blended.
- Prep Everything in Advance: Have all your ingredients measured, chopped, melted, and at the correct temperature before you start mixing. This streamlines the process and helps prevent mistakes.
Choosing the Right Springform Pan for Your Instant Pot
The size of your springform or push pan is crucial for a successful Instant Pot cheesecake:
- For a 6-quart Instant Pot electric pressure cooker, a 7-inch springform pan or push pan is the ideal size. It fits perfectly, allowing enough room for the trivet and steam.
- For an 8-quart pressure cooker, you can comfortably use an 8-inch springform pan or push pan.
Ensure your chosen pan is oven-safe and has a removable bottom. Many bakers prefer push pans for cheesecakes as they minimize the risk of water seeping in, though a well-wrapped springform pan also works beautifully.
How to Make Decadent Chocolate Cheesecake in the Instant Pot: Step-by-Step
Let’s walk through the simple steps to create this magnificent chocolate cheesecake. Each stage is designed for maximum flavor and minimal fuss.
1. Prepare the Irresistible Chocolate Crust
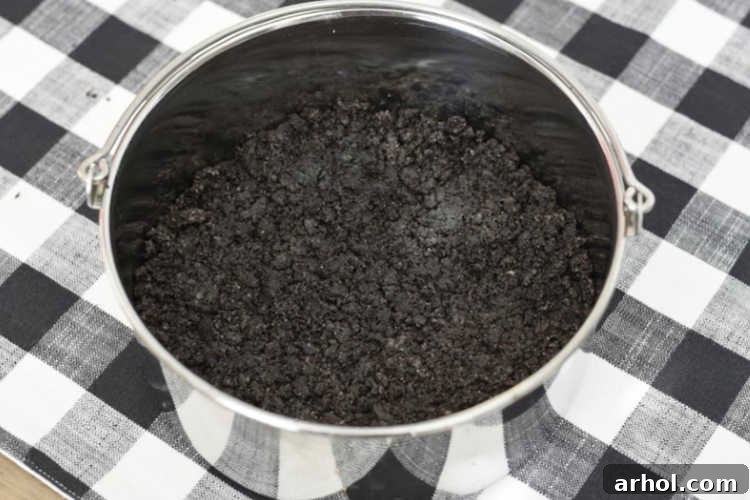
The foundation of any great cheesecake is its crust. For this recipe, we opt for a rich Oreo cookie crust. Begin by finely crushing your Oreo cookies. A food processor makes quick work of this, but if you don’t have one, place the cookies in a large zip-top bag and crush them with a rolling pin until they resemble fine crumbs. Once crushed, combine the crumbs with melted butter and a touch of granulated sugar. Mix until the mixture has the consistency of wet sand. This ensures it will hold together perfectly. Press this mixture firmly into the bottom and slightly up the sides of your greased 7-inch cheesecake pan. The key here is an even layer for consistent baking. Once pressed, place the pan in the freezer to firm up while you prepare the filling. There’s no need to cover the crust at this stage.
2. Craft the Velvety Chocolate Filling
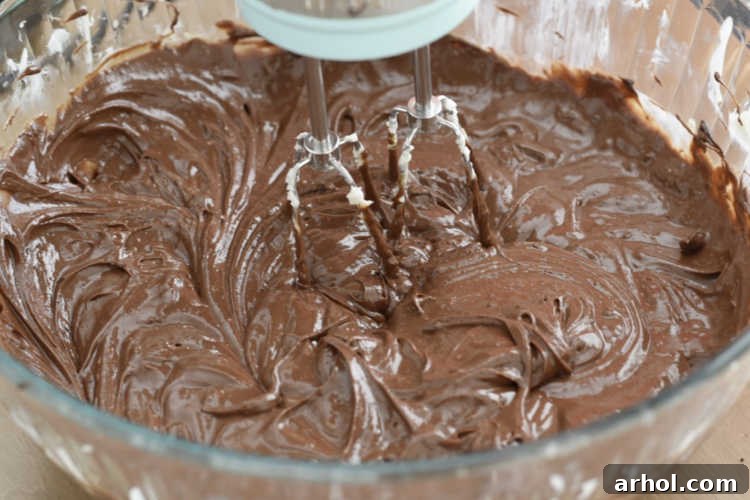
The heart of our cheesecake is its rich, creamy filling. Start by melting your dark chocolate. Chop the chocolate bars into small pieces for even melting. Use a microwave-safe bowl and melt in short increments (15-30 seconds), stirring well after each, until smooth. Be careful not to overheat the chocolate, as this can cause it to seize. In a separate bowl, combine hot coffee and hot water; this mixture will be added to the chocolate later to enhance its flavor. Now, in a large mixing bowl, beat your softened cream cheese with granulated sugar until the mixture is light, fluffy, and completely creamy. This is where room temperature cream cheese really shines! Slowly pour in the melted chocolate, followed by the coffee mixture and vanilla extract. Beat on low speed until everything is just combined. Finally, add your room temperature eggs, one at a time, mixing only until each egg is incorporated. Remember, resist the urge to overmix at this stage; a slightly thick batter is perfectly normal and desired.
3. Assemble and Prepare for Pressure Cooking
Carefully spoon the prepared chocolate cheesecake batter over the chilled cookie crust. Use a rubber spatula to gently smooth the top of the batter, ensuring an even layer across the entire surface of the crust. This helps with even cooking and a beautiful presentation. You don’t need to cover the pan with foil, as the Instant Pot’s steamy environment is perfect for cheesecake. Pour 1 cup of water into the inner pot of your 6-quart Instant Pot and place a trivet at the bottom. If your cheesecake pan doesn’t have a handle, create a foil sling by folding a long piece of aluminum foil into a strip that’s about 2 inches wide. Place the pan in the center of the sling, then use the ends of the sling to carefully lower the pan onto the trivet in the Instant Pot. If your pan has a handle, simply use that to lower it in.
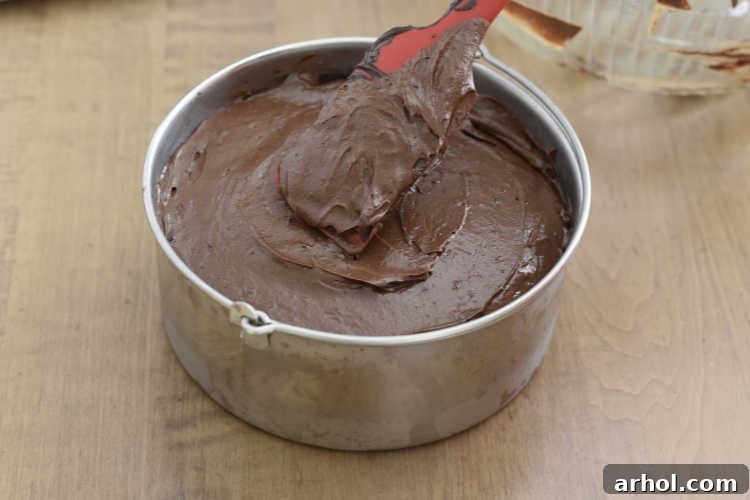
4. Pressure Cook to Perfection
Close the lid of your Instant Pot and set the steam release valve to the SEALING position. Select the “Pressure Cook” (or “Manual”) setting and set the cooking time for 35 minutes on high pressure. Once the cooking cycle is complete, allow for a 15-minute natural pressure release. This gradual release of pressure is vital for preventing cracks in your cheesecake. After 15 minutes, carefully perform a quick release of any remaining pressure by turning the valve to the VENTING position. Once the float valve drops, you can safely open the lid. Using oven mitts and the foil sling (or pan handle), carefully lift the cheesecake out of the Instant Pot. Don’t worry if there’s a small amount of condensation on top; simply use the corner of a clean paper towel to gently absorb any excess liquid.
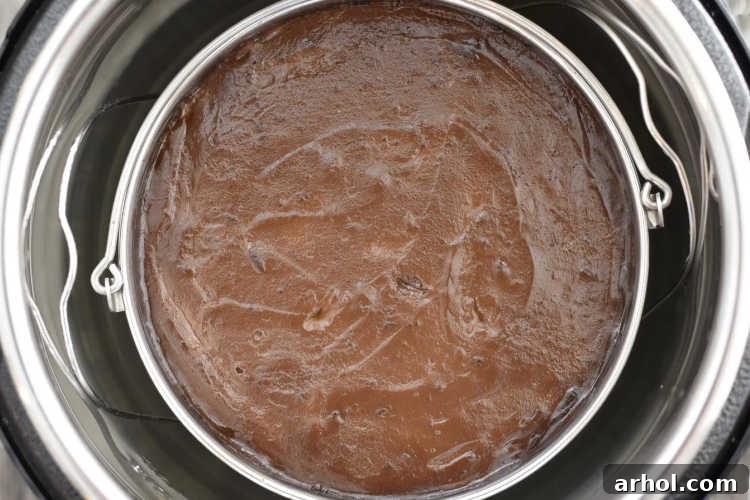
How to Tell if Your Instant Pot Cheesecake is Done
Determining doneness is key to a perfectly creamy cheesecake. Here are the signs to look for:
- Internal Temperature: The most accurate way is to use an instant-read thermometer. The cheesecake is cooked when its internal temperature reaches 150 degrees Fahrenheit.
- The Jiggle Test: Gently shake the pan. The edges should appear set and slightly firm, perhaps just beginning to pull away from the sides of the pan. The very center (about 1-2 inches in diameter) should have a slight jiggle, like firm gelatin. This means it’s cooked through but will firm up beautifully as it cools. If the entire cheesecake still wiggles freely, it needs a bit more time. You can cook it for another 5 minutes on high pressure with a quick release.
- Appearance: The surface should look mostly set and opaque.
Cooling and Chilling for Flawless Results
Patience is a virtue when it comes to cheesecake, especially during the cooling and chilling phases. After removing the cheesecake from the Instant Pot, allow it to cool on a wire rack at room temperature for about 30-60 minutes. This allows the internal temperature to gradually decrease. Once it has cooled down sufficiently, cover the cheesecake loosely with plastic wrap and transfer it to the refrigerator. Chilling for at least 6 hours, or preferably overnight, is crucial. This extended chilling time allows the cheesecake to fully set, develop its rich flavor, and achieve that perfect dense, creamy texture that makes it so irresistible. Rushing this step will result in a softer, less stable cheesecake.
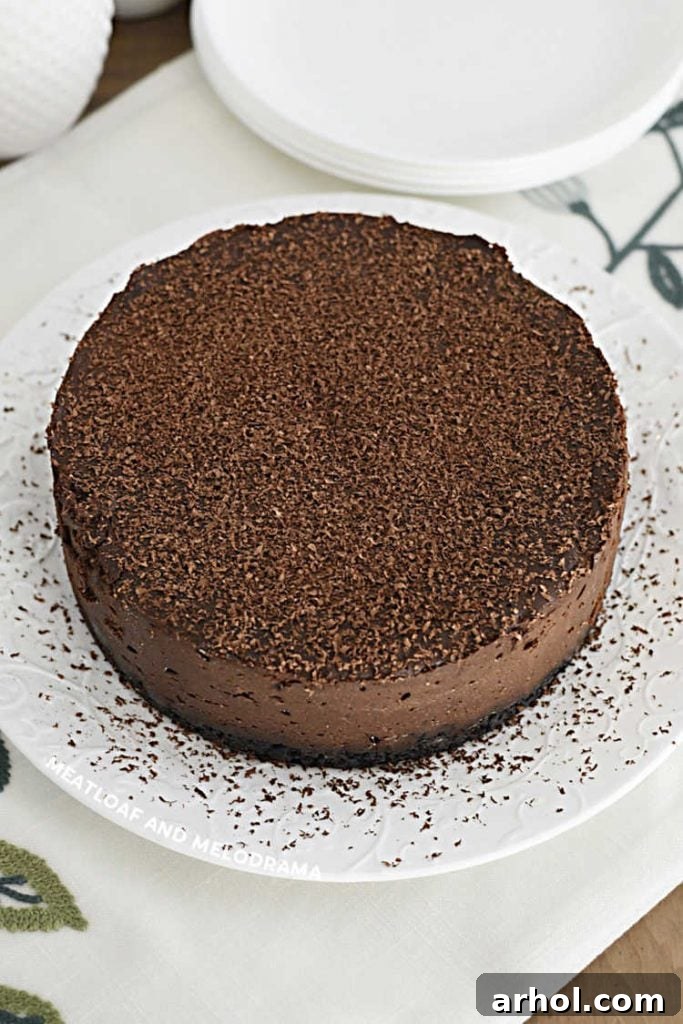
Serving Suggestions and Customizations
While this Instant Pot Chocolate Cheesecake is divine on its own, a few simple garnishes can elevate it to an even more impressive dessert:
- Fresh Whipped Cream: A dollop of homemade whipped cream provides a light, airy contrast to the rich cheesecake.
- Chocolate Shavings: Finely grated dark chocolate sprinkled over the top adds an elegant touch and extra chocolatey goodness.
- Fresh Berries: Raspberries, strawberries, or cherries offer a bright, tart counterpoint to the sweetness and richness of the chocolate.
- Chocolate Ganache: For the ultimate chocolate overload, drizzle a homemade chocolate ganache over individual slices.
Other Delicious Instant Pot Cheesecake Flavors to Explore
Once you master this chocolate rendition, don’t stop there! The Instant Pot is a versatile tool for endless cheesecake possibilities. Here are a few other flavors to inspire your next dessert creation:
- Instant Pot Pumpkin Cheesecake
- Instant Pot Peppermint Cheesecake
- Instant Pot Eggnog Cheesecake
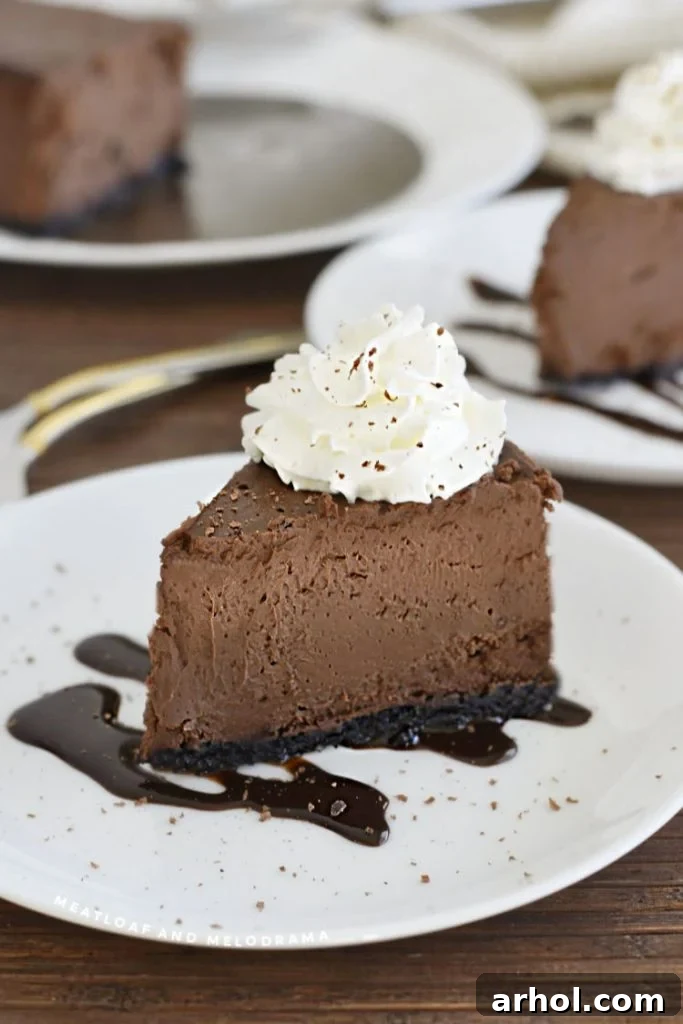
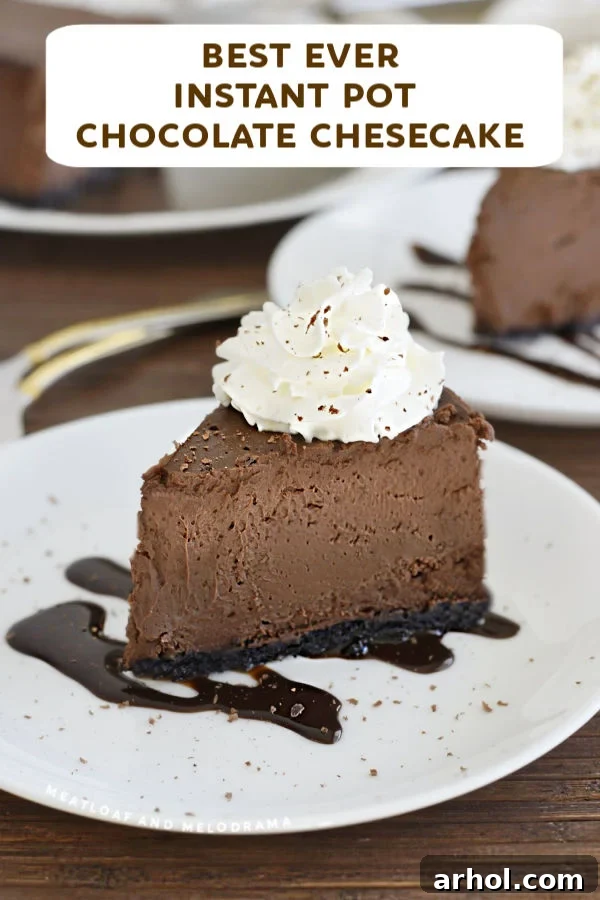
Instant Pot Chocolate Cheesecake Recipe
Instant Pot Chocolate Cheesecake
Equipment
-
Instant Pot Pressure Cooker
-
7 inch Springform Pan
Ingredients
The Crust
- 1 cup Oreo cookies, crushed
- 2 tablespoons butter, melted
- 1 tablespoon granulated sugar
Chocolate Filling
- ¼ cup hot coffee
- ¼ cup hot water
- 3 ½ 3.5-ounce dark chocolate bars 72% cacao (chopped and melted, approximately 14 ounces)
- 16 ounces cream cheese, softened (2 8-ounce packages)
- 1 cup granulated sugar
- 2 teaspoons vanilla extract
- 2 eggs
Topping
- ½ chocolate bar (finely grated for garnish)
Instructions
The Crust:
- Finely crush the Oreo cookies using a food processor or by placing them in a large zip-top bag and crushing with a rolling pin until fine crumbs are formed.
- Melt the butter and pour it over the crushed cookies. Add the granulated sugar and mix until thoroughly combined and the mixture resembles wet sand.
- Press the crust mixture firmly and evenly into the bottom of a greased 7-inch cheesecake pan (springform or push pan). Ensure it’s distributed evenly on the bottom and slightly up the sides.
- Place the prepared crust in the freezer while you prepare the cheesecake filling.
The Filling:
- In a small bowl, mix ¼ cup hot coffee with ¼ cup hot water and set aside.
- Chop the dark chocolate bars with a serrated knife. Place the chopped chocolate in a microwave-safe bowl and melt on defrost or low power in 15-second increments, stirring frequently, until the chocolate is smooth and melted. Set aside to cool slightly.
- In a large mixing bowl, beat the room temperature cream cheese and granulated sugar with an electric mixer until light, fluffy, and just creamy. Do not overmix.
- Slowly add the coffee mixture, vanilla extract, and melted chocolate to the cream cheese mixture. Beat on low speed until all ingredients are just combined.
- Add the eggs, one at a time, mixing on low speed only until each egg is just incorporated. Be careful not to overmix the batter once the eggs are added.
- Pour the chocolate cheesecake filling onto the chilled crust in the pan. Use a spatula to gently smooth the top surface of the filling to ensure it’s even.
- Pour 1 cup of water into the inner pot of your 6-quart Instant Pot. Place a trivet in the bottom of the pot.
- If your cheesecake pan does not have a handle, create a foil sling. Place the cheesecake pan in the sling, then use the sling to carefully lower the pan onto the trivet in the Instant Pot. If your pan has a handle, you can skip this step.
- Close the Instant Pot lid and set the steam release valve to the SEALING position. Select the PRESSURE COOK (or Manual) setting and cook on HIGH pressure for 35 minutes.
- Once cooking is complete, allow a NATURAL PRESSURE RELEASE for 15 minutes. After 15 minutes, perform a QUICK RELEASE of any remaining pressure by carefully turning the valve to the VENTING position. When the float valve drops, remove the lid.
- Using oven mitts (and the sling if applicable), carefully remove the cheesecake from the Instant Pot. The cheesecake is done when the edges are set and firm, and only the very center (about 1-2 inches) has a slight jiggle. If it seems too jiggly, you can cook it for another 5 minutes at high pressure with a quick release.
- If there’s any condensation on the top of the cheesecake, gently blot it dry with the corner of a clean paper towel.
- Allow the cheesecake to cool slightly on a wire rack at room temperature for about 30 minutes. Then, cover it loosely and refrigerate for at least 6 hours, or ideally overnight, before serving. This chilling time is essential for the cheesecake to fully set and achieve its perfect creamy texture.
- Serving suggestion: Before serving, finely grate the remaining chocolate bar over the top of the cheesecake. Serve slices with a dollop of fresh whipped cream for an extra touch of indulgence.
Notes
For the chocolate filling, ensure you use dark chocolate with 72% cacao. While specific brands aren’t critical, the cacao percentage is vital for the intended flavor profile. You will need approximately 14 ounces of melted chocolate for the filling, plus extra for garnish. Using milk, semi-sweet, or unsweetened chocolate will result in a different taste and texture.
For the smoothest preparation, have all your ingredients measured, prepped, and at the correct temperature before you begin mixing. This makes the entire process much easier and more enjoyable.
Nutrition
Nutrition information is automatically calculated, so should only be used as an approximation.
Additional Info