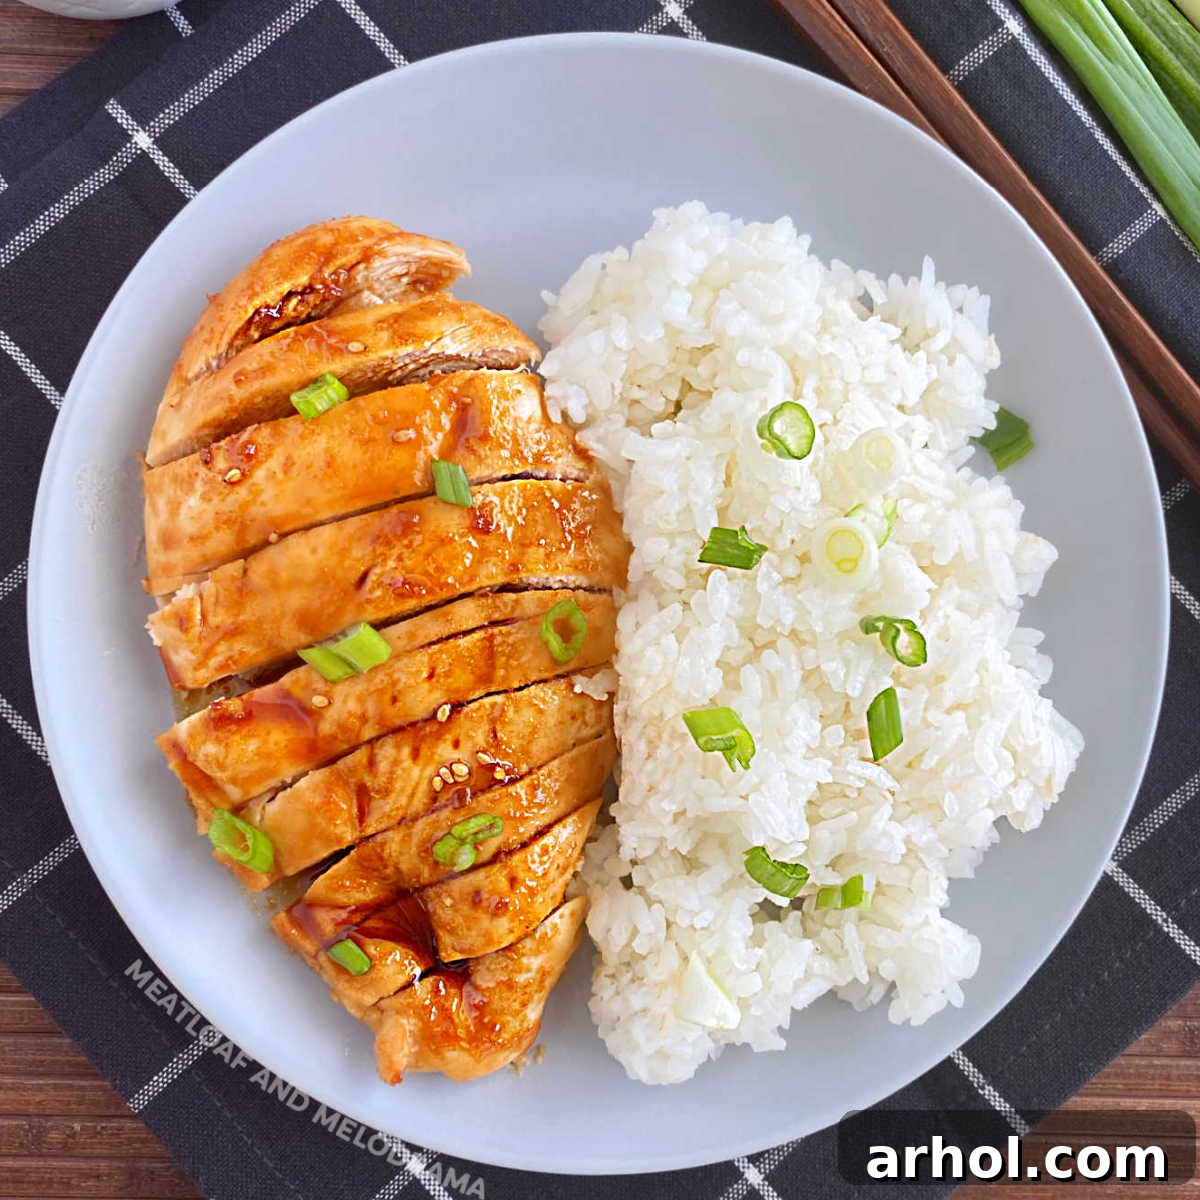
Welcome to your new favorite weeknight dinner! This **Baked Teriyaki Chicken Recipe** offers an incredible combination of savory and sweet, all brought together by a rich, homemade teriyaki sauce. Crafted with readily available simple ingredients, this dish promises an easy chicken dinner that the entire family will wholeheartedly enjoy. Perfect for those busy weeknights when time is precious but flavor is non-negotiable, this recipe is designed to be both delicious and incredibly convenient.
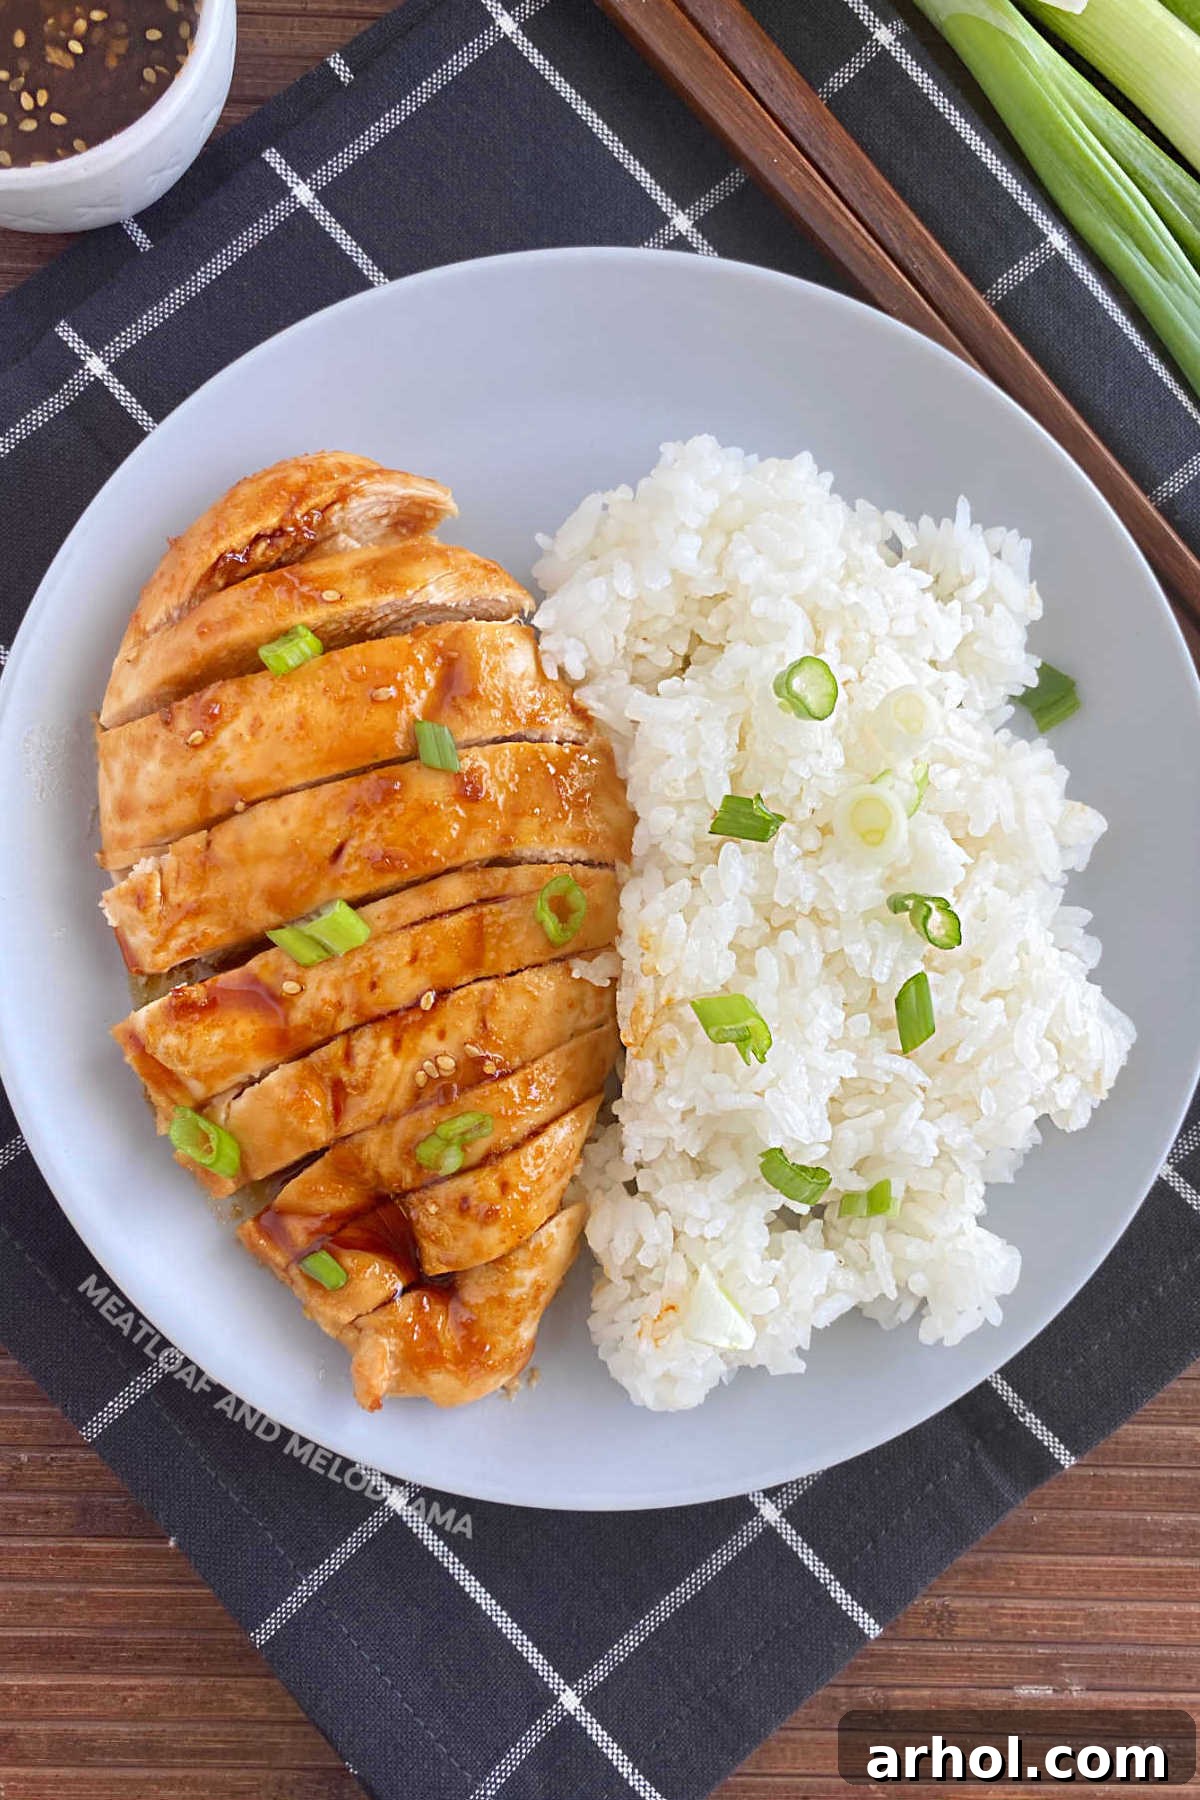
Table of Contents
- Why You’ll Love This Baked Teriyaki Chicken
- Essential Ingredients for Baked Teriyaki Chicken
- Step-by-Step Guide to Making Easy Baked Teriyaki Chicken
- Achieving the Perfect Cooking Time
- Delicious Serving Suggestions
- Creative Variations for Your Teriyaki Chicken
- How to Store and Reheat for Best Results
- Baked Teriyaki Chicken Recipe Card
- Frequently Asked Questions About Baked Teriyaki Chicken
Baked chicken teriyaki stands out as one of my ultimate go-to easy recipes, particularly when I’m looking for a flavorful yet simple way to prepare boneless, skinless chicken breasts. Its appeal lies in its straightforward preparation and the speed with which it comes together, making it an absolute lifesaver for those evenings when you crave a delicious, fuss-free chicken dinner. Whether you’re a seasoned cook or just starting your culinary journey, this dish promises satisfying results every time.
Beyond its immediate dinner appeal, this easy chicken recipe is also incredibly versatile and perfectly suited for **meal prep**. I often dedicate a bit of time to prepare a larger batch in advance. This cooked teriyaki chicken then serves as a fantastic base for quick meals throughout the week, whether it’s for lunchboxes, quick wraps, or adding to salads. It’s a smart way to ensure healthy and delicious options are always at hand.
The beauty of this baked chicken teriyaki recipe is that you have the flexibility to choose between convenience and custom flavor. You can opt for a high-quality store-bought teriyaki sauce for an even quicker assembly, or, for a truly superior taste, you can whip up an easy **homemade teriyaki sauce** using just a few pantry staples. Both methods yield equally delicious results, so the choice ultimately depends on your preference and how much time you have on any given day!
If you’re exploring other convenient teriyaki options, don’t miss my sheet pan honey teriyaki chicken dinner for a truly one-pot meal experience, or my Instant Pot teriyaki chicken and rice for a super-fast, flavorful solution that cooks everything in a single pot. Each offers a unique spin on this beloved Asian-inspired flavor profile, ensuring there’s a teriyaki dish for every cooking style and occasion.
Why You’ll Love This Baked Teriyaki Chicken
There are countless reasons why this baked teriyaki chicken recipe consistently earns rave reviews and becomes a staple in so many households. Its universal appeal stems from a few key factors that make it an undeniable winner:
- **Effortless Preparation:** From start to finish, this recipe is designed for simplicity. With minimal chopping and straightforward cooking steps, you can have a gourmet-tasting meal on the table without spending hours in the kitchen. It’s perfect for new cooks and busy parents alike.
- **Incredible Flavor Profile:** The homemade teriyaki sauce strikes the perfect balance between sweet, savory, and tangy. This vibrant sauce coats every piece of chicken, infusing it with an irresistible Asian-inspired taste that is deeply satisfying and incredibly addictive.
- **Healthy and Wholesome:** Utilizing lean boneless, skinless chicken breasts, this dish offers a great source of protein. When paired with fresh vegetables and rice, it creates a balanced and nutritious meal that supports a healthy lifestyle without compromising on flavor.
- **Family-Friendly Appeal:** Teriyaki chicken is a universally loved dish, even by the pickiest eaters. The sweet glaze and tender chicken make it an approachable and enjoyable meal for children and adults alike, ensuring clean plates all around.
- **Versatile for Any Occasion:** While ideal for a quick weeknight dinner, this teriyaki chicken is also elegant enough to serve to guests. Its vibrant presentation and delicious taste make it a fantastic option for entertaining, proving that easy doesn’t mean less impressive.
- **Fantastic for Meal Prepping:** As mentioned, this recipe is a meal prep superstar. Cook a larger batch, and you’ll have flavorful protein ready to go for salads, sandwiches, rice bowls, or quick dinners throughout the week, saving you time and effort later on.
Essential Ingredients for Baked Teriyaki Chicken
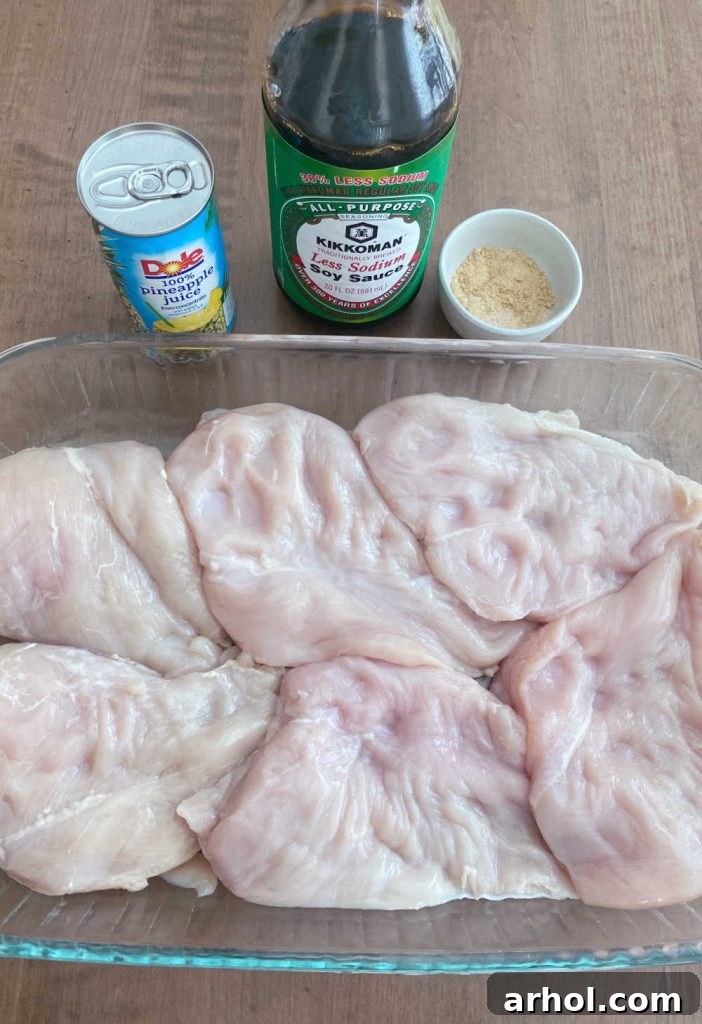
One of the many charms of this **easy baked teriyaki chicken** is its reliance on a minimal list of everyday ingredients. You’ll be delighted to find that most of what you need for both the chicken and the simple homemade teriyaki sauce are likely already staples in your pantry. However, knowing the role each component plays can help you make the best choices and substitutions when necessary.
- **Chicken Breasts:** You’ll need 4 to 6 thin boneless, skinless chicken breasts, totaling approximately 2 pounds. Opting for thin-cut breasts or pounding thicker ones to an even thickness ensures uniform cooking and tender results. Boneless, skinless thighs can also be used for a richer flavor, though they may require a slightly longer cooking time.
- **Soy Sauce:** I highly recommend using low sodium soy sauce. This allows you to control the overall saltiness of the dish, preventing it from becoming overly salty. If regular soy sauce is all you have, you might consider reducing the amount slightly or omitting any added salt in the sauce. For gluten-free diets, tamari is an excellent substitute.
- **Pineapple Juice:** This ingredient is a true game-changer! Pineapple juice adds a wonderful fruity tang that perfectly complements the savory notes of the teriyaki sauce. More importantly, the natural enzymes in pineapple juice act as a fantastic tenderizer, ensuring your chicken is incredibly moist and succulent.
- **Brown Sugar:** A touch of brown sugar is crucial for that signature sweet and sticky teriyaki glaze. It provides depth and a subtle molasses flavor that white sugar simply can’t replicate. You can adjust the amount to your sweetness preference or substitute with honey or maple syrup for a different nuanced sweetness.
- **Sea Salt:** Used sparingly, especially if using regular soy sauce. It enhances all the other flavors.
- **Garlic Powder:** Essential for adding a foundational aromatic flavor to the sauce. It offers a milder, more consistent garlic presence compared to fresh garlic, which can sometimes burn during the cooking process.
- **Ground Ginger:** Provides that classic warm, slightly spicy, and aromatic essence characteristic of teriyaki. While fresh ginger can be used, ground ginger is convenient and blends seamlessly into the sauce.
Additionally, I always recommend having **nonstick cooking spray** on hand. It’s a simple tool that makes clean-up remarkably easier, ensuring your baking dish releases the chicken and its delicious glaze without any fuss.
Step-by-Step Guide to Making Easy Baked Teriyaki Chicken
Creating this delicious **baked teriyaki chicken** is a wonderfully straightforward process, making it an ideal choice for any weeknight. Follow these simple steps to achieve perfectly tender chicken bathed in a rich, homemade teriyaki glaze.
1. Prepare Your Oven and Baking Dish:
First things first, you’ll need to preheat your oven. Set it to 350 degrees Fahrenheit (175 degrees Celsius). While the oven heats, prepare a 13 x 9-inch baking pan or casserole dish by lightly spraying it with nonstick cooking spray. This crucial step prevents the chicken and sauce from sticking, ensuring an easy transfer and cleanup.
2. Arrange the Chicken:
Carefully place your boneless, skinless chicken breasts in a single layer within the prepared baking dish. Ensuring a single layer allows for even cooking and proper glazing. If your chicken breasts are particularly thick, consider pounding them lightly to an even half-inch thickness for quicker and more consistent cooking. Set the dish aside for a few minutes while you turn your attention to the star of the show: the homemade teriyaki sauce.
3. Craft the Homemade Teriyaki Sauce:
To create the delicious sauce that will infuse your chicken with incredible flavor, gather all your sauce ingredients. Add the soy sauce, pineapple juice, brown sugar, sea salt, garlic powder, and ground ginger to a small saucepan. I find that mixing everything directly in the saucepan saves on extra dishes and makes the process incredibly efficient.
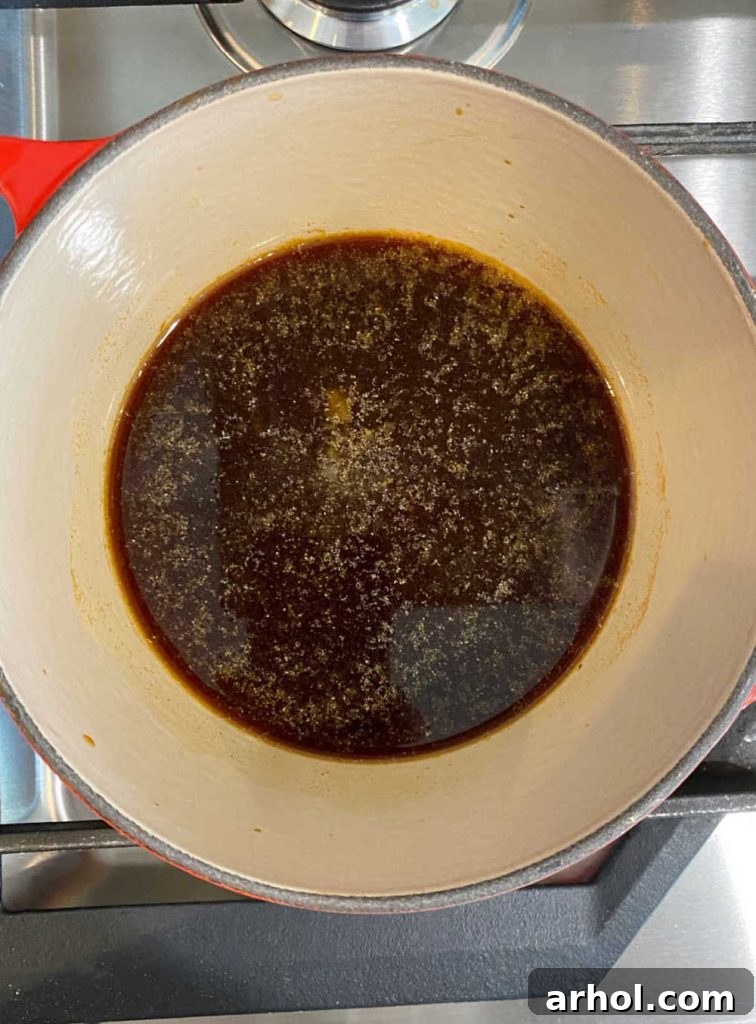
4. Simmer and Thicken the Sauce:
Place the saucepan over medium heat and bring the mixture to a gentle boil, stirring frequently to ensure the brown sugar dissolves completely. Once boiling, reduce the heat to medium-low and allow the sauce to simmer for about 5 minutes. During this time, the sauce will naturally start to thicken slightly, developing that desirable syrupy consistency. Be sure to stir occasionally to prevent sticking or burning.
5. Glaze and Bake:
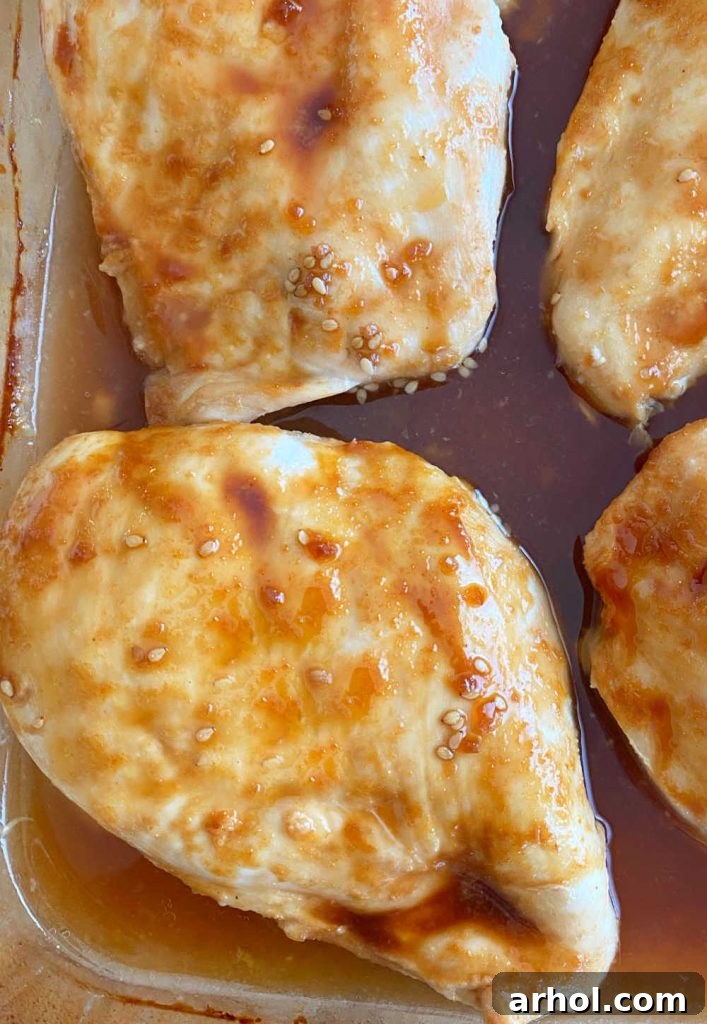
Once the sauce has thickened to your liking, pour about half of this flavorful teriyaki sauce evenly over the chicken breasts in the baking dish. This initial coating will begin to infuse the chicken with flavor as it bakes. Return the remaining sauce in the saucepan to the stove and keep it warm on low heat, stirring occasionally. This reserved sauce will become even thicker and more luscious, perfect for spooning over the cooked chicken at serving time. Now, carefully place the baking pan with the glazed chicken into your preheated oven.
Achieving the Perfect Cooking Time
Baking teriyaki chicken to perfection requires careful attention to cooking time and temperature, ensuring the chicken is tender, juicy, and safely cooked through. While the general guidelines are straightforward, understanding the nuances will help you achieve consistently excellent results.
Baking Temperature and Initial Time:
Bake your teriyaki chicken at 350 degrees Fahrenheit (175 degrees Celsius) for an initial period of 25 to 30 minutes. This temperature allows the chicken to cook thoroughly without drying out, while the teriyaki sauce bakes into a beautiful glaze.
Verify Internal Temperature for Safety:
The most reliable way to determine if your chicken is fully cooked and safe to eat is by using a meat thermometer. Insert the thermometer into the thickest part of the largest chicken breast, avoiding any bones. The chicken is done when the internal temperature reaches 165 degrees Fahrenheit (74 degrees Celsius). Never guess with poultry; a thermometer is your best friend for food safety.
Factors Influencing Cook Time:
It’s important to remember that total cook time can vary. Several factors play a role:
- **Thickness of Chicken:** Thinner chicken breasts will cook faster than thicker ones. If your chicken pieces vary significantly in size, the thicker pieces will dictate the overall cooking time.
- **Oven Calibration:** Ovens can sometimes run hotter or colder than their display indicates. If you know your oven tends to be temperamental, adjust cooking times accordingly or consider investing in an oven thermometer.
- **Starting Temperature of Chicken:** Chicken cooked straight from the refrigerator will take slightly longer than chicken that has rested at room temperature for 15-20 minutes.
The Broiling Finish for Extra Flavor and Color:
For an irresistible golden-brown finish and an extra layer of caramelized flavor, I highly recommend a quick broil after the chicken has reached its internal temperature. Spoon some of the pan sauce over the chicken, then place the baking dish under the broiler for about 5 minutes. Keep a very close eye on it during this step, as broilers can quickly go from perfection to overcooked. The goal is a beautiful golden char, not burnt. This brief broil adds an incredible depth of flavor and a visually appealing sheen to your **baked teriyaki chicken**.
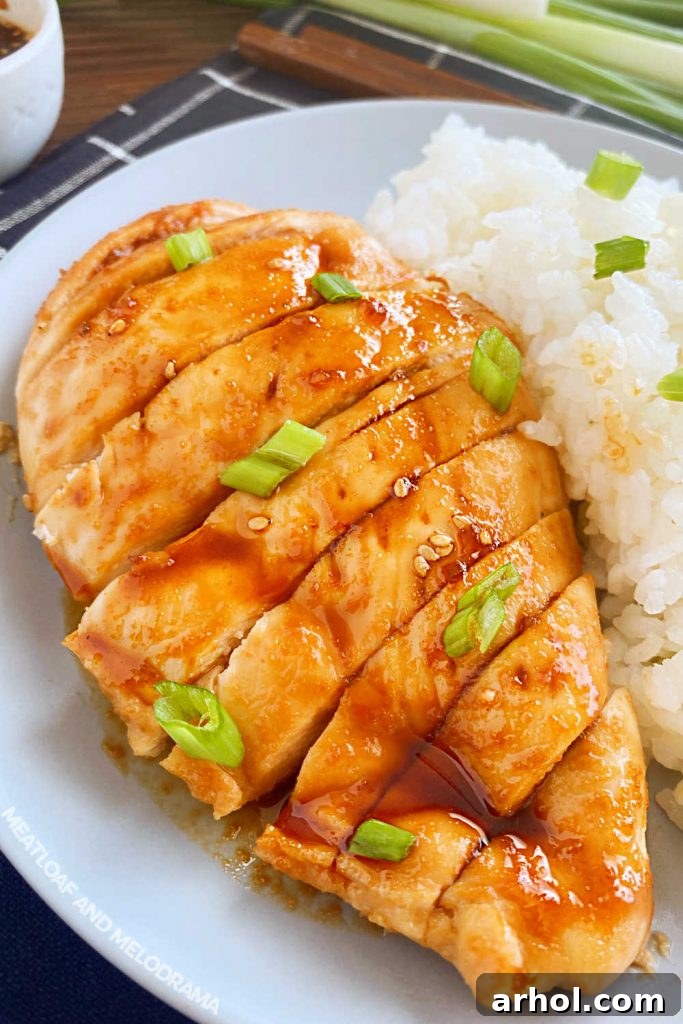
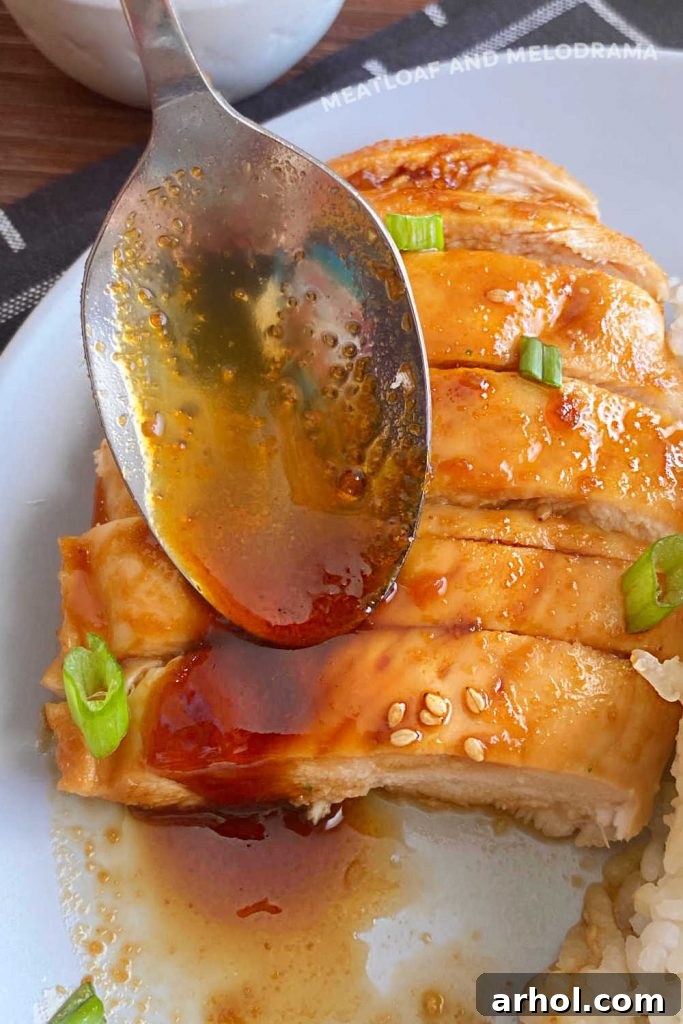
Once your chicken is beautifully cooked and broiled (if desired), remove it from the oven. Spoon the remaining warm, thick teriyaki sauce from the stovetop over the chicken when serving. This reserved sauce will be wonderfully reduced and flavorful, adding a final decadent touch to your meal. For an extra flourish and burst of freshness, sprinkle with sesame seeds and chopped green onions. The green onions not only add a nice pop of color but also a subtle oniony bite that complements the teriyaki perfectly.
Before serving, I like to slice the chicken breasts against the grain. This not only makes them easier to eat but also allows the delicious teriyaki sauce to thoroughly coat and flavor every single bite. This is especially helpful if you’re planning to use chopsticks or create delightful **chicken rice bowls**.
Delicious Serving Suggestions
Now that you’ve mastered the art of baking perfect teriyaki chicken, the next step is pairing it with complementary side dishes to create a complete and satisfying meal. The versatility of baked teriyaki chicken means it pairs beautifully with a wide array of options, making it easy to tailor your dinner to your preferences.
Classic Rice Pairings:
White rice is an undeniable classic and a perennial favorite for serving with teriyaki chicken. The mild flavor and fluffy texture of rice make it an ideal canvas to soak up all that delicious teriyaki sauce. I often prepare Instant Pot jasmine rice or brown rice while the chicken is baking, ensuring everything finishes around the same time. Brown rice offers a nuttier flavor and added fiber, making it a great healthy alternative.
Noodle Options:
For those who prefer noodles, teriyaki chicken is an excellent match. You can serve chicken teriyaki with ramen noodles, stir-fried lo mein, or even simple udon noodles. A light toss of the chicken and sauce with hot noodles creates a satisfying and hearty dish.
Vibrant Vegetable Sides:
To round out your meal with essential nutrients and fresh flavors, a variety of vegetables work wonderfully. Some of my top recommendations for vegetables that go with teriyaki chicken include:
- **Microwave Green Beans**: Quick, easy, and crisp-tender.
- **Microwave Cauliflower**: A mild, versatile choice that absorbs sauce beautifully.
- **Microwave Broccoli**: A vibrant green vegetable that provides a pleasant crunch and earthy flavor.
- **Crispy Air Fryer Broccoli**: For those who love a bit of char and extra texture, air-fried broccoli is a fantastic and much-loved option around here!
- **Sautéed Asparagus or Bell Peppers:** Lightly sautéed vegetables with a touch of sesame oil can add another layer of Asian-inspired flavor.
- **Simple Side Salad:** A fresh green salad with a light vinaigrette offers a refreshing contrast to the richness of the teriyaki.
Don’t forget the garnishes! A sprinkle of **sesame seeds** adds a beautiful visual appeal and a subtle nutty flavor, while freshly chopped **green onions** provide a mild oniony zest and a pop of color. For a slightly spicy kick, a dash of red pepper flakes or sriracha can elevate the experience. With these serving suggestions, you can create a customized and memorable meal every time.
Creative Variations for Your Teriyaki Chicken
One of the best aspects of this delicious baked teriyaki chicken recipe is its incredible adaptability. It serves as a fantastic base for customization, allowing you to tailor the flavors and ingredients to suit your personal preferences or what you have on hand. Here are some creative variations to inspire your next culinary adventure:
1. Switch Up the Sauce:
While our homemade teriyaki sauce is a standout, you can certainly opt for convenience. Instead of making the sauce from scratch, feel free to use your favorite store-bought teriyaki sauce. Brands like Soy Vay Yeri Yeri teriyaki sauce are excellent and can be poured directly over the chicken before baking for an equally delicious, time-saving meal.
2. Add a Tropical Twist with Pineapple:
To make **baked teriyaki chicken with pineapple**, simply add a few pineapple chunks or tidbits to the baking dish along with the chicken. The pineapple will caramelize slightly as it bakes, adding an extra layer of sweetness and a delightful tropical flavor that complements the teriyaki beautifully. You can also use fresh pineapple for a bolder taste.
3. Explore Different Cuts of Chicken:
Not a fan of white meat, or simply prefer a richer, juicier cut? Easily substitute **boneless, skinless chicken thighs** for the chicken breasts. Chicken thighs are more forgiving and remain incredibly moist during baking, though they might require an extra 5-10 minutes of cooking time to reach the safe internal temperature of 165 degrees Fahrenheit (74 degrees Celsius).
4. Sauce Base Alternatives:
If pineapple juice isn’t available, or you’re looking for a different flavor profile, you can substitute it with cold water or chicken broth. Chicken broth will add an extra layer of savory depth to your teriyaki sauce, while water will allow the other flavors to shine through more prominently.
5. Sweetener Substitutions:
Brown sugar provides a lovely molasses note, but you can certainly substitute it with honey or maple syrup for a different kind of sweetness. These natural sweeteners will slightly alter the flavor profile, offering a richer or more nuanced taste.
6. Thicken the Sauce with Cornstarch Slurry:
If you prefer a thicker, glossier sauce and don’t want the hassle of simmering it separately on the stove, you can use a cornstarch slurry. Simply mix 1 tablespoon of cornstarch with 1 tablespoon of cold water until smooth. Stir this slurry into the boiling teriyaki sauce just before pouring it over the chicken. The cornstarch will quickly thicken the sauce, which will then bake beautifully onto the chicken, creating a rich, restaurant-quality glaze.
7. Spice It Up:
For those who enjoy a little heat, add a pinch of red pepper flakes to your teriyaki sauce. You can also finish the dish with a drizzle of sriracha or a sprinkle of chopped fresh chili peppers for an extra kick.
8. Garlic and Ginger Boost:
If you love a stronger aromatic presence, feel free to add fresh minced garlic and grated fresh ginger along with the powders. Sauté them briefly before adding the other sauce ingredients for a more intense flavor base.
These variations demonstrate how easily you can customize your **baked teriyaki chicken** to suit any palate or dietary need, ensuring this flexible recipe remains a fresh and exciting option in your meal rotation.
How to Store and Reheat for Best Results
Ensuring your delicious baked teriyaki chicken remains fresh and flavorful for future meals is key, especially if you’re using it for meal prep. Proper storage and reheating techniques are essential to maintain its quality and taste.
Storing Leftovers in the Refrigerator:
Once the baked teriyaki chicken has cooled completely to room temperature (within two hours of cooking), transfer any leftovers to an airtight container. Refrigerate promptly. Stored correctly, your leftover teriyaki chicken will keep beautifully for 3 to 4 days. This makes it an ideal component for quick lunches or easy dinners throughout the week.
Freezing for Longer Storage:
For longer-term storage, freezing is an excellent option. Place the cooled teriyaki chicken in a freezer bag or a freezer-safe airtight container. Remove as much air as possible from freezer bags to prevent freezer burn. Label with the date. Frozen teriyaki chicken will maintain its best flavor and texture for up to 3 months. While it’s safe to eat beyond this period, the quality might start to decline.
Meal Prep Strategies:
- **Cooked Chicken Prep:** As mentioned, once the chicken cools down, you can portion it into individual airtight containers for grab-and-go meals during the week. Pair it with rice and steamed vegetables for a complete meal.
- **Uncooked Chicken Prep (Freezer Meal):** For ultimate convenience, you can prepare raw chicken breasts with the teriyaki sauce as a freezer meal. Place uncooked chicken breasts into zip-top freezer bags along with the freshly made (and cooled) teriyaki sauce. Press out excess air, seal, and freeze for up to 3 months. When you’re ready to cook, simply thaw the bag in the refrigerator overnight, then pour the contents into a baking dish and bake as directed. This method allows the chicken to marinate as it thaws, enhancing the flavor even further!
Reheating Cooked Teriyaki Chicken:
To enjoy your leftovers, proper reheating is crucial to avoid drying out the chicken.
- **Oven Reheating:** For the best results that retain moisture, preheat your oven to 300 degrees Fahrenheit (150 degrees Celsius). Place the chicken in an oven-safe dish, add a tablespoon or two of water or chicken broth to prevent drying, and cover tightly with foil. Reheat for 15-20 minutes, or until warmed through.
- **Microwave Reheating:** This is the quickest option for individual portions. Place the chicken in a microwave-safe dish, add a splash of water or broth, and cover loosely. Heat on medium power for 1-2 minutes, stirring halfway through, until heated through. Be careful not to overheat, as this can make the chicken tough.
- **Stovetop Reheating:** For sliced chicken, you can gently reheat it in a skillet over medium-low heat with a little extra teriyaki sauce or broth. This method helps to re-moisten the chicken and rejuvenate the sauce.
By following these simple storage and reheating tips, you can enjoy the delightful flavors of your **baked teriyaki chicken** long after it’s initially prepared, making it a truly practical and delicious recipe for any busy household.
Baked Teriyaki Chicken Recipe Card
Baked Teriyaki Chicken Recipe
Ingredients
- 4 to 6 small chicken breasts about 2 pounds
- ½ cup low sodium soy sauce
- ½ cup pineapple juice
- ¼ cup brown sugar
- ½ teaspoon sea salt
- ½ teaspoon garlic powder
- ¼ teaspoon ground ginger
Instructions
- Preheat oven to 350°F (175°C).
- Spray non-stick cooking spray in a 9×13-inch baking dish, and place chicken breasts in a single layer in the baking dish.
- In a small saucepan, combine the soy sauce, pineapple juice, brown sugar, sea salt, garlic powder, and ground ginger. Whisk until well combined.
- Bring the sauce to a boil over medium-high heat, stirring frequently. Reduce heat to medium-low and allow to simmer for about 5 minutes or until the sauce starts to thicken.
- Pour about half of the sauce over the chicken. Return the remaining sauce to the stovetop and keep warm on low heat, stirring occasionally.
- Place the baking dish with chicken into the preheated oven and bake for 25 to 30 minutes, or until the internal temperature of the chicken reaches 165°F (74°C) using a meat thermometer.
- Optional: Spoon some of the pan sauce over the chicken, then broil for about 5 minutes for extra color and texture. Watch carefully to prevent burning.
- Serve the chicken immediately, spooning the remaining warm, thickened sauce from the stovetop over each serving. Garnish with sesame seeds and chopped green onions if desired.
Notes
Optional: For a thicker sauce without simmering on the stove, mix 1 tablespoon of cornstarch with 1 tablespoon of cold water to create a slurry. Stir this slurry into the boiling sauce until dissolved and thickened. Pour all the sauce over the chicken before baking.
If pineapple juice is unavailable, you can substitute it with chicken broth or cold water.
Nutrition
Nutrition information is automatically calculated, so should only be used as an approximation.
Additional Info
Frequently Asked Questions About Baked Teriyaki Chicken
Q: Can I use chicken thighs instead of breasts?
A: Absolutely! Boneless, skinless chicken thighs are a fantastic alternative. They tend to stay juicier during baking and have a richer flavor. Keep in mind that chicken thighs might require an extra 5-10 minutes of baking time compared to breasts to reach the safe internal temperature of 165°F (74°C).
Q: How can I make the teriyaki sauce thicker?
A: There are a few ways! You can simmer the sauce longer on the stovetop to reduce it, allowing more liquid to evaporate. Alternatively, you can create a cornstarch slurry by mixing 1 tablespoon of cornstarch with 1 tablespoon of cold water until smooth. Stir this slurry into the simmering sauce, and it will thicken almost immediately. If using the slurry method, you can pour all the sauce over the chicken before baking.
Q: What if I don’t have pineapple juice?
A: No problem! While pineapple juice adds a unique sweetness and helps tenderize the chicken, you can easily substitute it with chicken broth for a savory flavor, or even plain cold water. The sauce will still be delicious.
Q: Can I marinate the chicken in the teriyaki sauce before baking?
A: Yes, marinating can add even more flavor depth! If you choose to marinate, place the raw chicken and about half of the prepared teriyaki sauce in a sealed bag or airtight container in the refrigerator for at least 30 minutes, or up to 4 hours. Discard any sauce that has come into contact with raw chicken if not cooked properly.
Q: How do I know when the chicken is fully cooked?
A: The most accurate way is to use a meat thermometer. Insert it into the thickest part of the largest chicken breast (avoiding bones). The chicken is safely cooked when it reaches an internal temperature of 165°F (74°C).
Q: Can I make this a one-pan meal with vegetables?
A: Yes! You can add quick-cooking vegetables like broccoli florets, sliced bell peppers, or snap peas to the baking dish during the last 15-20 minutes of cooking. Toss them lightly with some of the teriyaki sauce for a complete and easy one-pan meal.
I genuinely hope you love this **easy baked teriyaki chicken recipe** as much as my family and I do! It truly is a versatile and flavorful dish that brings comfort and convenience to any table. Whether you’re making it for a busy weeknight or preparing it for meal prep, it’s sure to become a cherished addition to your recipe collection.
For more incredibly easy chicken recipes, delightful homemade dishes, and innovative cooking tips, make sure to sign up for our weekly newsletter! You’ll get fresh ideas and inspiration delivered right to your inbox.
Don’t forget to show your love for this recipe! If you enjoyed it, please take a moment to **comment and rate the recipe** below. Your feedback means the world to us. And if you’re proud of your culinary creation, share it on your favorite social media platforms! Happy cooking!