
Easy Candy Coated Halloween Pretzels: Your Go-To Spooky Sweet & Salty Treat
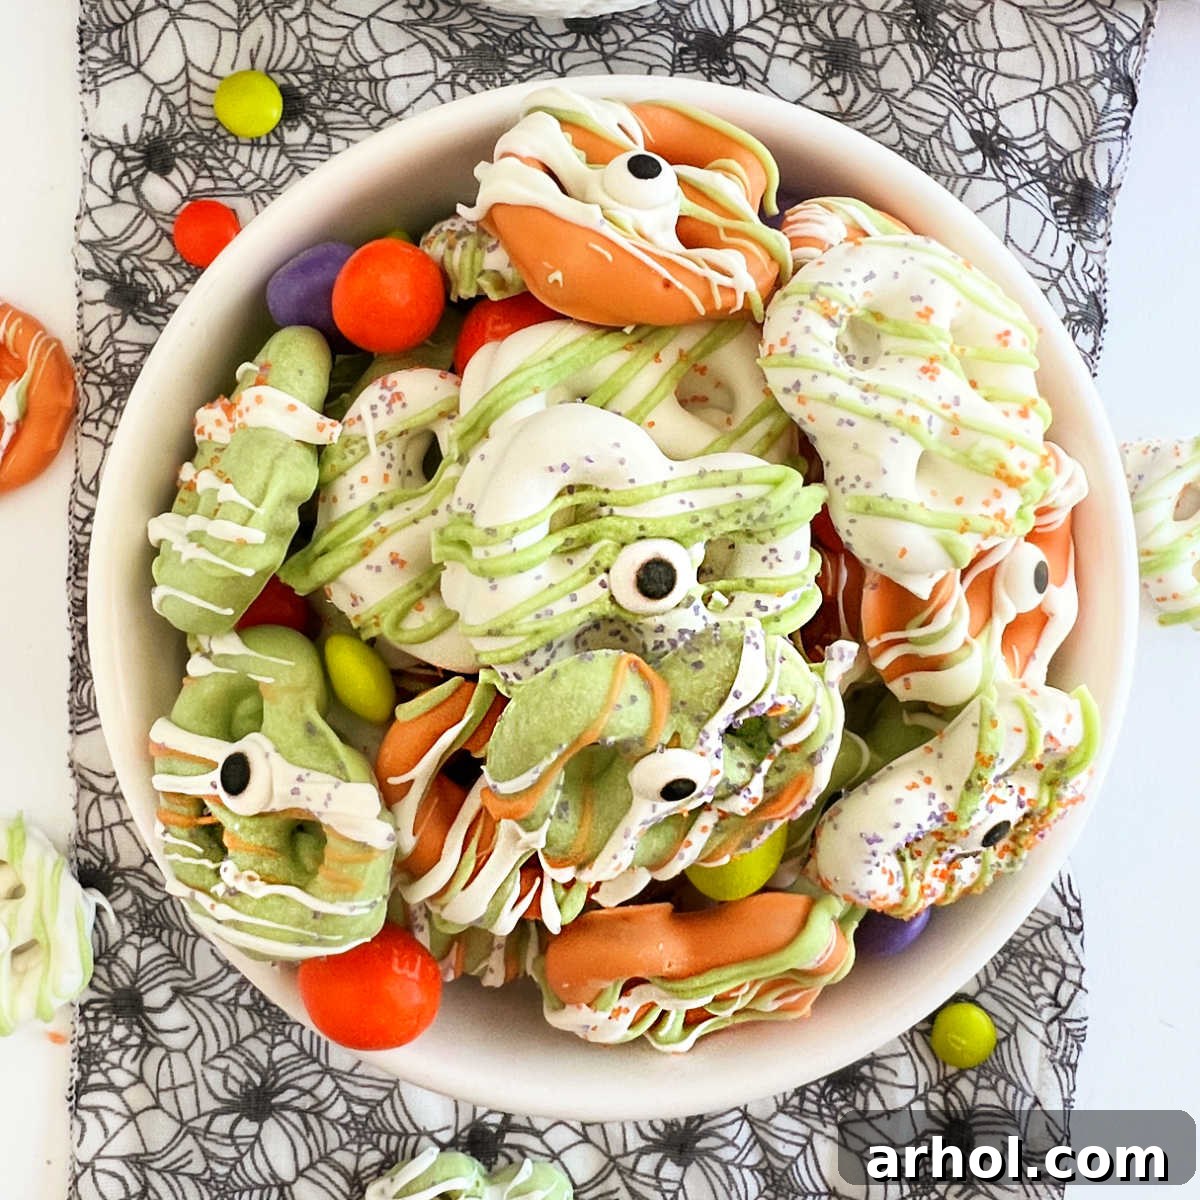
Get ready to whip up a batch of utterly delightful and spooktacular Halloween Pretzels! Made with vibrant candy coating and charming candy eyes, these treats are the epitome of easy Halloween party snacks. They’re a ghoulishly good indulgence the entire family will adore, from the littlest monsters to the grown-up ghouls. This simple recipe comes together faster than you can shout “Boo!” and promises a delicious salty-sweet sensation with every bite.
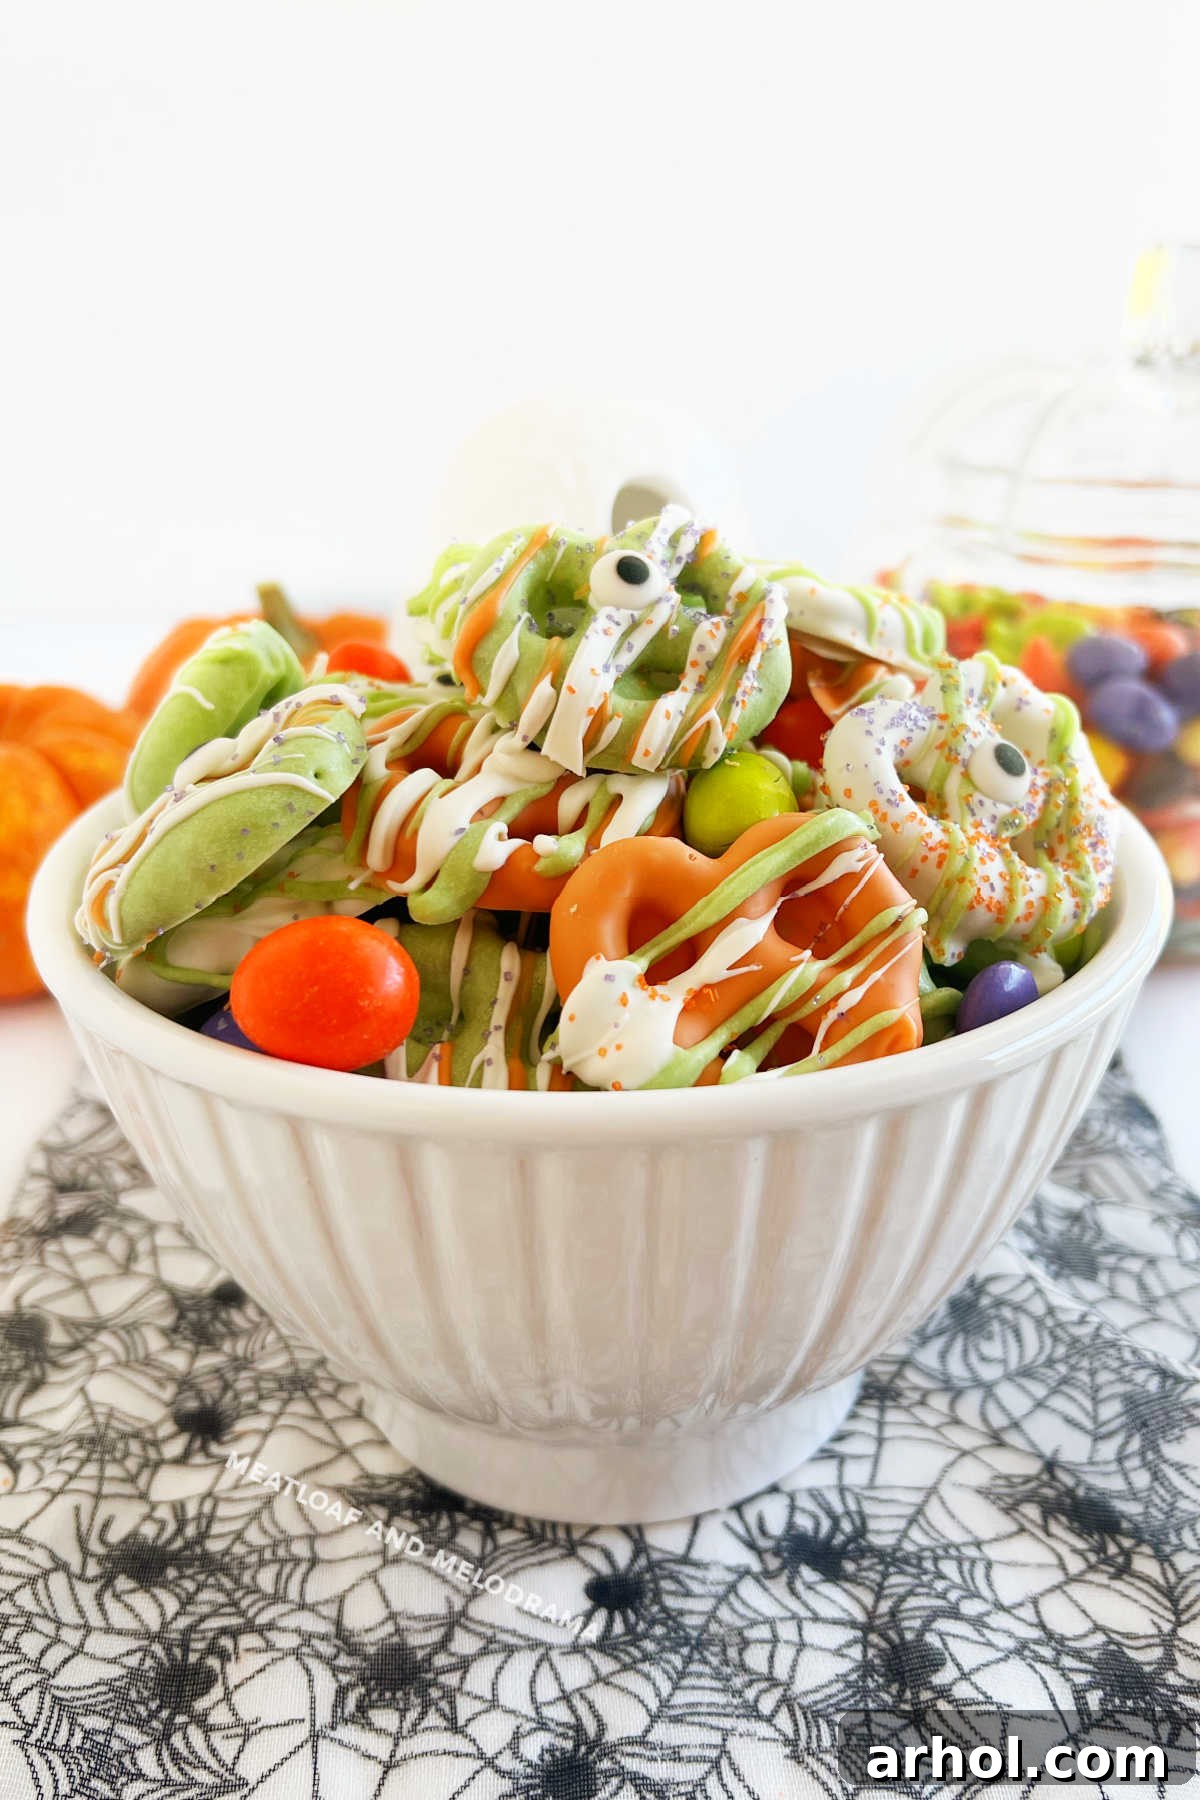
Table of Contents
- The Ultimate Salty-Sweet Halloween Snack
- Gather Your Simple Ingredients
- Step-by-Step: Crafting Your Spooky Pretzels
- Get Creative: Fun Pretzel Variations
- Expert Tips & Frequently Asked Questions
- Easy Halloween Pretzels Recipe Card
- Share the Spooky Fun!
The Ultimate Salty-Sweet Halloween Snack for Parties and Fun
Are you on the hunt for a super quick and incredibly easy Halloween treat? Something that’s perfect for bustling Halloween parties or simply for adding a touch of festive fun to an ordinary autumn afternoon? Look no further! These Easy Candy Coated Halloween Pretzels are precisely what you’ve been searching for. They combine that irresistible crunch of a salty snack with the delightful sweetness of candy, creating a flavor combination that’s truly unmatched. It’s like enjoying the best of both worlds in one perfect bite – a sweet dessert and a savory treat, all rolled into one spooky package!
For years, my kids and I have eagerly anticipated making these festive delights as the spooky season approaches. They’re an absolute hit with everyone – little kids, big kids, and even parents can’t resist these charming monster pretzels! This year, before the neighborhood trick-or-treaters descend, we’re hosting a small gathering for the kids’ friends. Our spread will, of course, feature these irresistible sweet and salty pretzels, alongside other beloved Halloween classics like our traditional spicy sriracha mummy dogs, a big bowl of Halloween Monster Munch popcorn, cute Halloween Oreos, and adorable Nutter Butter ghost cookies. These candy-coated pretzels always disappear first!
Gather Your Simple Ingredients for Spooky Pretzel Fun
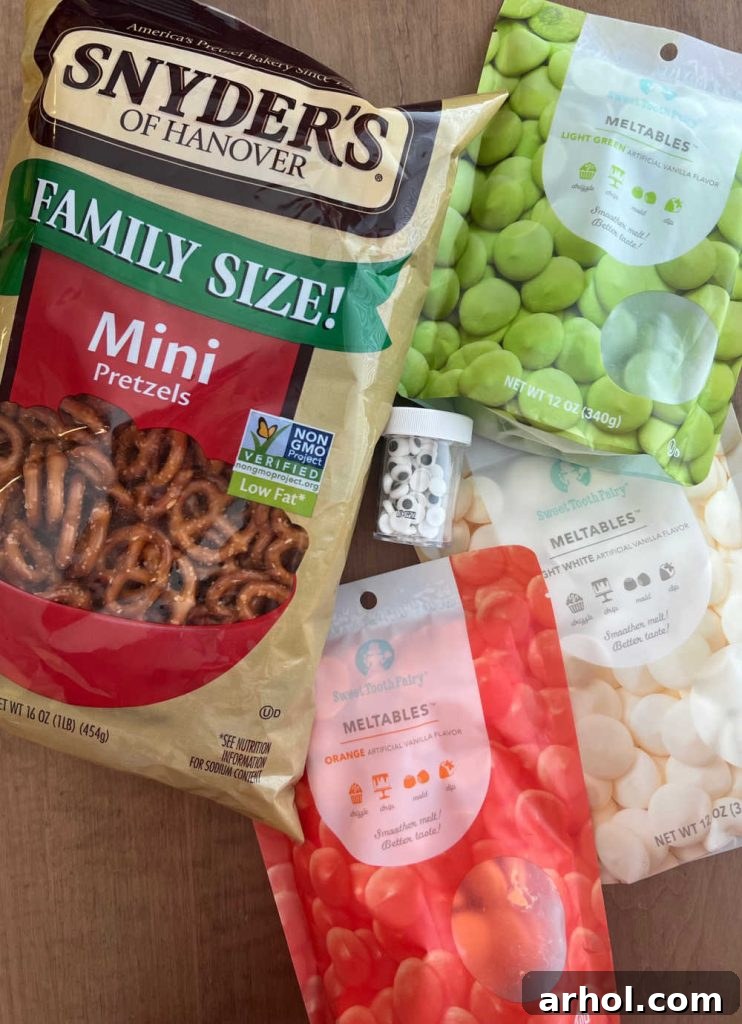
One of the best things about these candy coated Halloween pretzels is how few ingredients you need. Most items can be easily found at your local grocery store, craft store, or even ordered online. Gather these essentials to start your spooky snack adventure:
- Mini Pretzel Twists: The classic choice for their perfect bite-size and sturdy structure. They provide the ideal salty crunch. You can also use pretzel rods for a different shape!
- Candy Melts: These are crucial for vibrant colors and smooth coating. Opt for a variety of Halloween-themed hues such as bright orange, ghoulish green, mysterious purple, and classic white candy melts. White chocolate can also be used, but candy melts are often easier to work with for consistent color and texture. Brands like Wilton offer a fantastic range of colors.
- Candy Eyes: Edible candy eyeballs instantly transform your pretzels into charming monsters and ghouls, adding a playful touch that kids especially love.
Optional Decorating Extras:
- Halloween Sprinkles or Colored Sugar: Black, orange, purple, and green sprinkles can add extra texture and festive flair. Consider themed shapes like bats, pumpkins, or ghosts for an even more elaborate look.
- Halloween M&M’s or Candy Corn: If you’re planning to create a larger Halloween snack mix, these candies make wonderful additions alongside your finished pretzels.
Essential Tools You’ll Need:
- Microwave-Safe Bowls: Separate bowls for each candy melt color are ideal to prevent colors from mixing prematurely.
- Forks or Dipping Tools: These are indispensable for submerging pretzels into the melted candy and allowing excess to drip off cleanly.
- Wax Paper or Parchment Paper: Crucial for lining your baking sheets or plates, ensuring your candy-coated pretzels don’t stick as they dry.
- Baking Sheets or Plates: To hold your dipped pretzels while they set. A wire drying rack also works wonderfully for air circulation.
Step-by-Step: Crafting Your Spooky Candy Coated Pretzels for Halloween
Creating these Halloween pretzels is incredibly straightforward, making it a perfect activity for all ages. Follow these simple steps for a successful batch:
Step 1: Melt the Candy Melts.
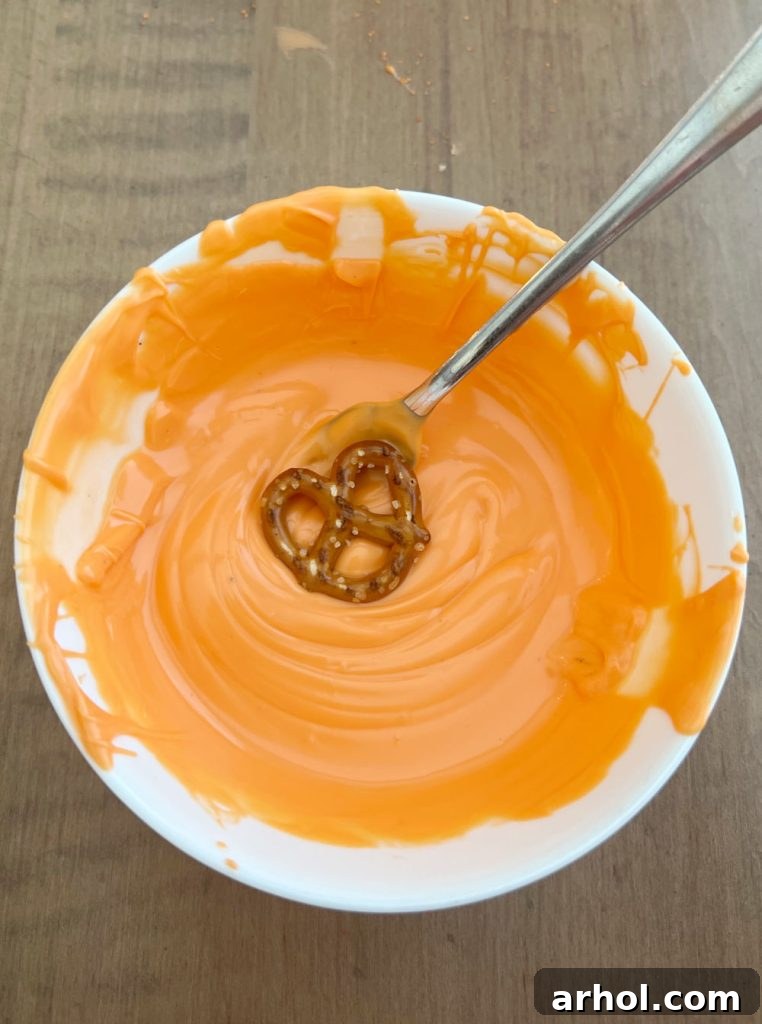
Begin by placing your candy melts into separate microwave-safe bowls, one for each color you plan to use. This prevents colors from blending and allows for distinct, vibrant pretzels. Heat the candy melts in the microwave according to the package directions. Typically, this involves heating in 30-second intervals, stirring well after each interval, until the candy is smooth and fully melted. Be careful not to overheat, as this can cause the candy to seize or become too thick.
Step 2: Dip the Pretzels.
Using a fork or a specialized dipping tool, carefully dip each mini pretzel twist into the melted candy. Ensure the pretzel is completely coated for an even finish. Gently tap the fork against the side of the bowl to allow any excess candy coating to drip back into the bowl. This prevents pooling and ensures a clean, crisp coating.
Step 3: Arrange for Drying.
Once dipped, carefully place the candy-coated pretzels onto a baking sheet or plate lined with wax paper or parchment paper. A wire drying rack can also be used, allowing air to circulate around the pretzels for faster, more even drying. Don’t crowd the pretzels; leave a little space between each one.
Step 4: Drizzle and Decorate.
After you have a tray filled with freshly dipped pretzels, move quickly to the decorating phase. Before the candy coating sets completely, take a different color of melted candy and use a clean fork to drizzle contrasting colors over the pretzels. For example, drizzle green over orange, or purple over white, to create captivating patterns. The slight warmth of the still-soft base coat will help the drizzle adhere.
Step 5: Add Candy Eyes and Sprinkles.
Immediately after drizzling, gently press a candy eye (or two!) onto the top of each pretzel. You can add eyes to all your pretzels for a truly monstrous batch, or just to some for a varied look. Now is also the time to scatter any Halloween sprinkles or black sprinkles if desired. The key is to add these decorations while the candy coating is still wet enough to act as an adhesive, but not so wet that the decorations slide off.
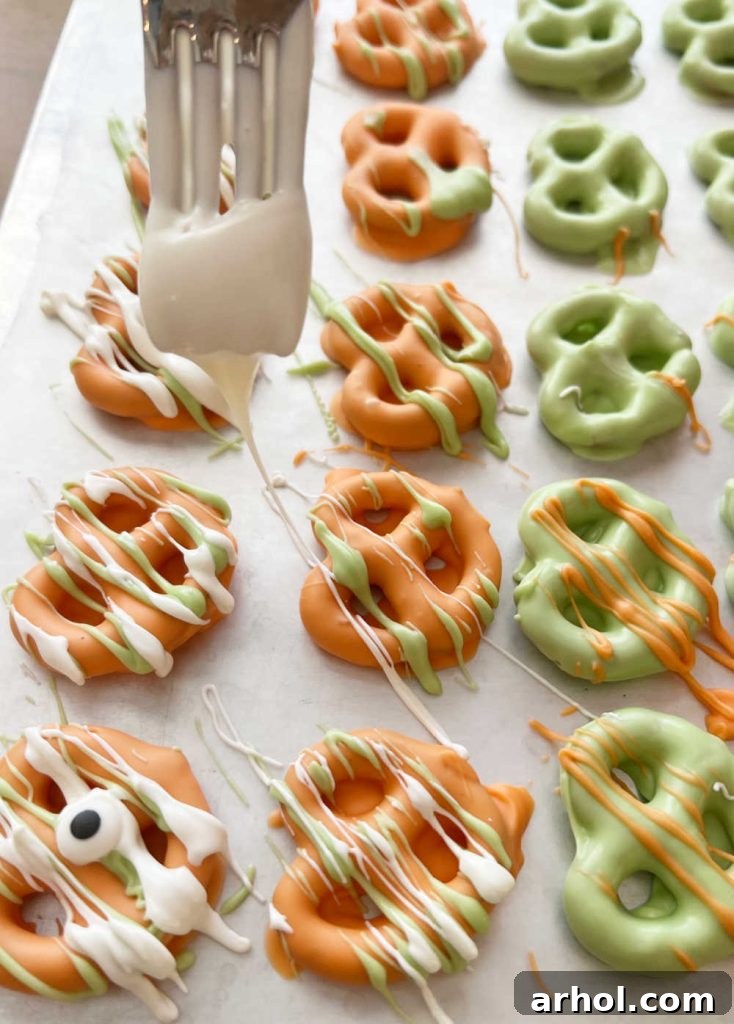
Step 6: Allow to Dry.
To speed up the drying process and ensure the candy coating sets firmly, I usually transfer these adorable Halloween pretzels to the refrigerator. They typically need about 10-15 minutes in the fridge to harden completely. If your house is cool, room temperature drying is perfectly fine, though it may take a bit longer, typically 30-60 minutes. Once fully dry, the candy will be firm to the touch and the decorations will be securely attached.
These little morsels never last long in my house – they’re simply too tempting and vanish almost as soon as they’re ready!
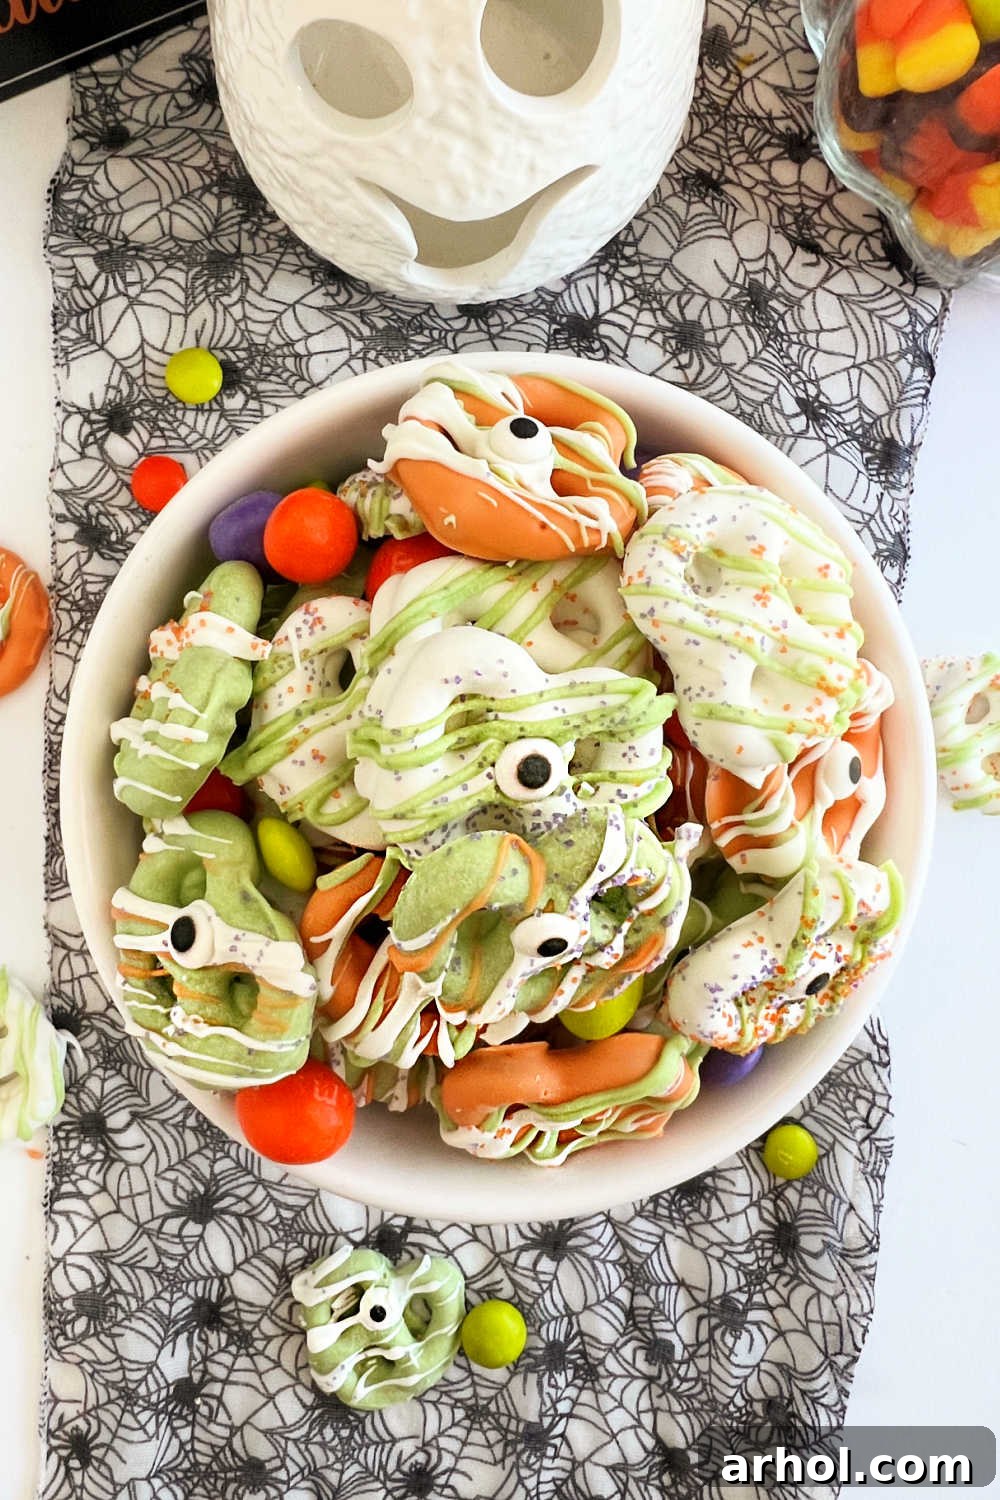
You can serve these delightful pretzels on their own as a standalone treat, or incorporate them into a larger, fun monster snack mix. To make a snack mix, simply combine your candy-coated pretzels with other Halloween favorites like assorted Halloween candies, candy corn, and perhaps even a few plain pretzels for added texture and contrast.
Get Creative: Fun Pretzel Variations for Even More Spooky Treats
These festive Halloween treats are incredibly versatile and super easy to customize, allowing your creativity to shine! Here are a few exciting variations to inspire your next batch:
- Halloween Pretzel Rods: Instead of mini pretzel twists, use pretzel rods. Dip the top half or two-thirds of the rod into your chosen candy coating. Before it sets, sprinkle with colorful Halloween sprinkles or create striped patterns with different colored drizzles. These are fantastic for a more substantial treat!
- Pumpkin Patch Pretzels: Dip mini pretzel twists entirely in orange candy coating. Once set, add a small drizzle of green candy melt at the top to resemble a pumpkin stem, or attach a small green candy or sprinkle.
- Pretzel Mummies: Dip pretzels in white candy coating. After it slightly firms up but is still tacky, use a piping bag with a very fine tip (or a fork) to drizzle thin lines of white coating back and forth across the pretzel, creating a “bandaged” mummy effect. Finish by pressing two candy eyes into place.
- Frankenstein Pretzels: Dip pretzel rods in green candy melts. Once set, use black candy melts (melted and placed in a piping bag with a small hole) to draw hair across the top and stitch-like scars. Attach two candy eyes.
- Spiderweb Pretzels: Dip pretzels in white or orange candy melts. While still wet, pipe concentric circles of black melted candy onto the wet base. Then, drag a toothpick from the center outwards through the circles to create a spiderweb design. Add a small candy spider for extra creepiness!
- Ghostly White Pretzels: Simply dip mini pretzel twists in white candy melts. Before they dry, add two black candy eyes to create cute little ghost faces. A very simple yet effective Halloween treat!
Expert Tips & Frequently Asked Questions (FAQ)
Making candy-coated pretzels is generally easy, but a few tips and tricks can ensure perfect results every time. Here are some common questions and expert advice:
The trick to getting candy eyes (and sprinkles) to stick perfectly is timing. Add them to the pretzels while the candy coating is still slightly wet and tacky, but not overly fluid. If the coating is too wet, the eyes might slide off. If it’s too hard, they won’t adhere. Aim for that sweet spot where the candy has begun to set but is still pliable. Gently press them into place for the best results.
Candy coated pretzels are best stored in an airtight container at room temperature. Placed on the counter, they will stay fresh and delicious for up to 2 weeks. If your home is particularly warm, or if you want to extend their shelf life, you can store them in the refrigerator. Just be aware that refrigeration can sometimes cause a slight “bloom” or condensation on the chocolate, but it doesn’t affect taste. Always ensure they are completely dry before storing to prevent sticking.
For the smoothest coating, melt candy melts in the microwave in short bursts (30 seconds at a time) on a medium-low power setting, stirring thoroughly after each interval. This prevents scorching. Alternatively, use a double boiler method over simmering water, stirring constantly until fully melted. Avoid getting any water into your candy melts, as even a tiny drop can cause them to seize and become clumpy.
While you can use melted chocolate chips, candy melts are often preferred for their ease of use, vibrant colors, and smooth texture without needing tempering. If using chocolate chips, you might need to add a teaspoon of coconut oil or shortening to help thin the chocolate slightly for a smoother dipping consistency, and ensure it sets nicely.
These candy-coated Halloween pretzels can be made up to two weeks in advance. Store them properly in an airtight container at room temperature or in the refrigerator, and they will retain their crunch and flavor, making them an excellent make-ahead treat for busy Halloween preparations.
Rated: 5 out of 5 stars (based on 2 votes)
Easy Halloween Pretzels
Dee
10
10
20
10
Ingredients
- 5 cups Mini Pretzel Twists
- 5 cups Candy melts (in various Halloween colors like orange, green, white, purple)
- Edible Candy Eyeballs
- Optional: Halloween Sprinkles
Instructions
-
Melt the candy coating according to the directions on the package. Use separate microwave-safe bowls for each color, heating in 30-second intervals and stirring until smooth.
-
Use a fork to dip each pretzel into the melted candy, making sure the pretzel is completely covered. Gently tap the fork on the bowl’s edge to remove excess coating.
-
Place the dipped pretzels on a baking sheet lined with wax paper or parchment paper.
-
Before the coating dries completely, use a clean fork to drizzle contrasting colors of melted candy over the pretzels. Immediately add candy eyes and/or Halloween sprinkles.
-
Allow the pretzels to dry completely at room temperature or by placing them in the refrigerator for 10-15 minutes until firm.
Notes
Nutrition
Carbohydrates: 48g,
Protein: 2g,
Fat: 14g,
Saturated Fat: 13g,
Polyunsaturated Fat: 0.3g,
Monounsaturated Fat: 0.2g,
Sodium: 314mg,
Potassium: 47mg,
Fiber: 1g,
Sugar: 31g,
Vitamin C: 0.4mg,
Calcium: 6mg,
Iron: 1mg
Nutrition information is automatically calculated and should only be used as an approximation.
Additional Info
Snack, Dessert
American
Halloween Party, Fall Celebration, Kids’ Activity
Enjoyed this recipe? Leave a comment and let us know!
Share the Spooky Fun and Delight!
These delightful candy-coated Halloween pretzels are more than just a treat; they’re an experience! Their vibrant colors and playful candy eyes make them perfect for packaging in cellophane bags as cute, homemade gifts for friends, neighbors, or even teachers. After all, you’re never too old to enjoy a fun, handcrafted treat during the spooky season!
I genuinely hope you and your loved ones enjoy making and devouring these fun Halloween treats as much as my family and I do. They’ve become a cherished favorite for the spooky season, bringing smiles and a delicious salty-sweet crunch. If you make them, please be sure to leave a review and a star rating on the recipe card below – your feedback is always appreciated!
For more fantastic Halloween recipes, fun holiday ideas, and inspiring culinary adventures, remember to follow us on social media and subscribe to our weekly newsletter. Don’t miss out on seasonal delights that are both easy to make and guaranteed to impress!
Recipe originally published in 2015 and proudly updated in 2022 to bring you the best and most current version of this Halloween classic.