
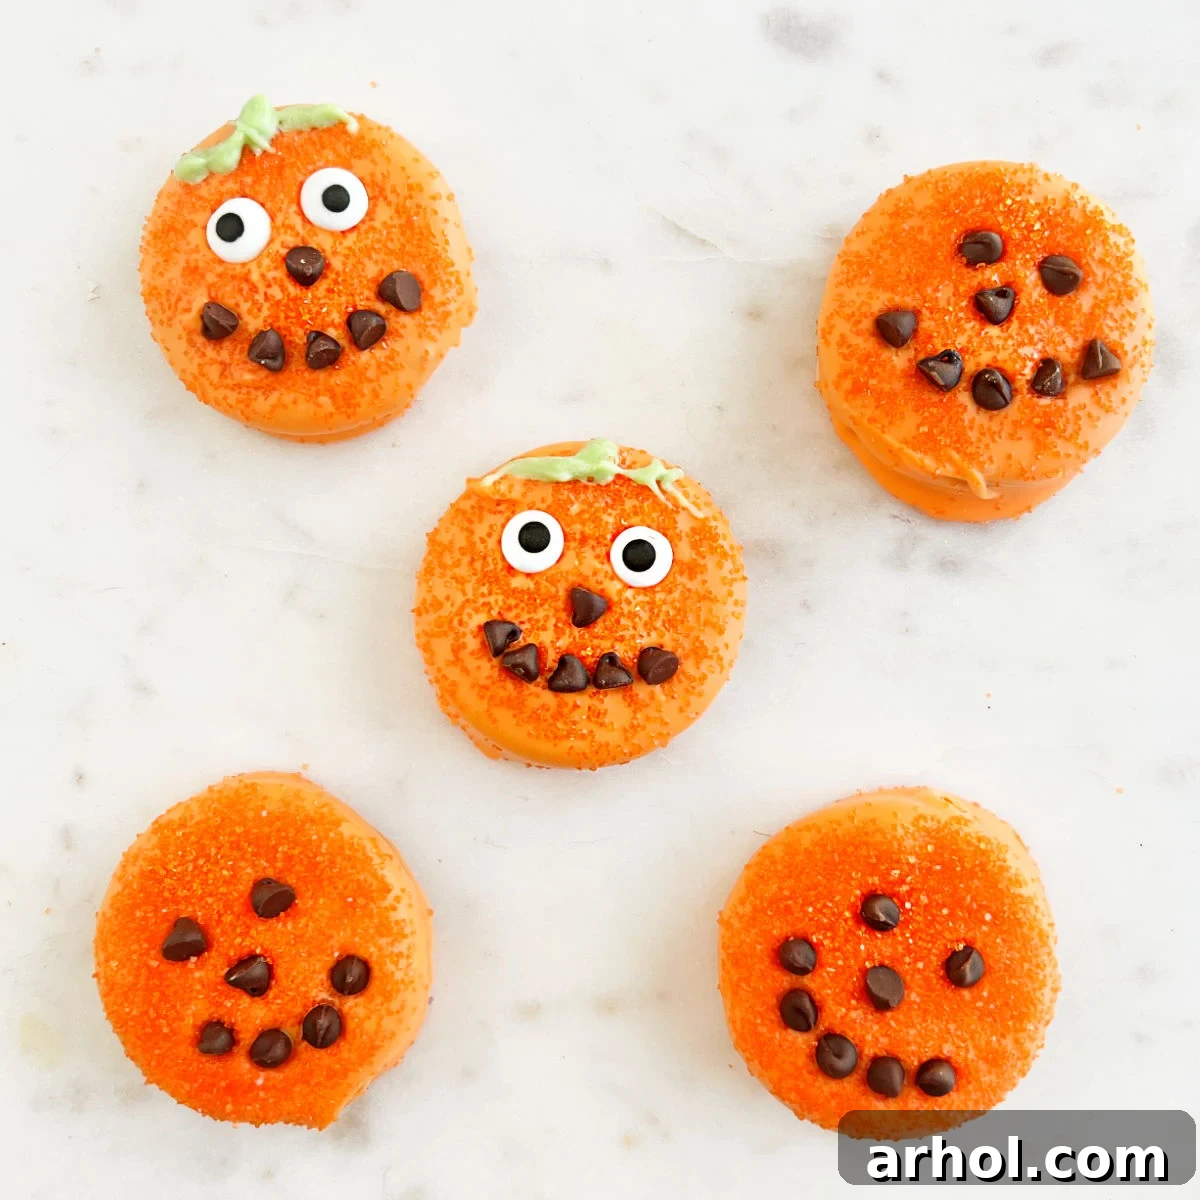
Spooky Sweet Delights: Easy Halloween Oreo Pumpkin Treats are the quintessential no-bake Halloween dessert, transforming classic Oreo cookies into adorable, pumpkin-faced masterpieces with vibrant candy melts, playful candy eyes, and mischievous chocolate chip grins. These simple yet impressive treats are perfect for any Halloween party, school event, or a fun, family-friendly activity that even the youngest ghouls and goblins can help create!
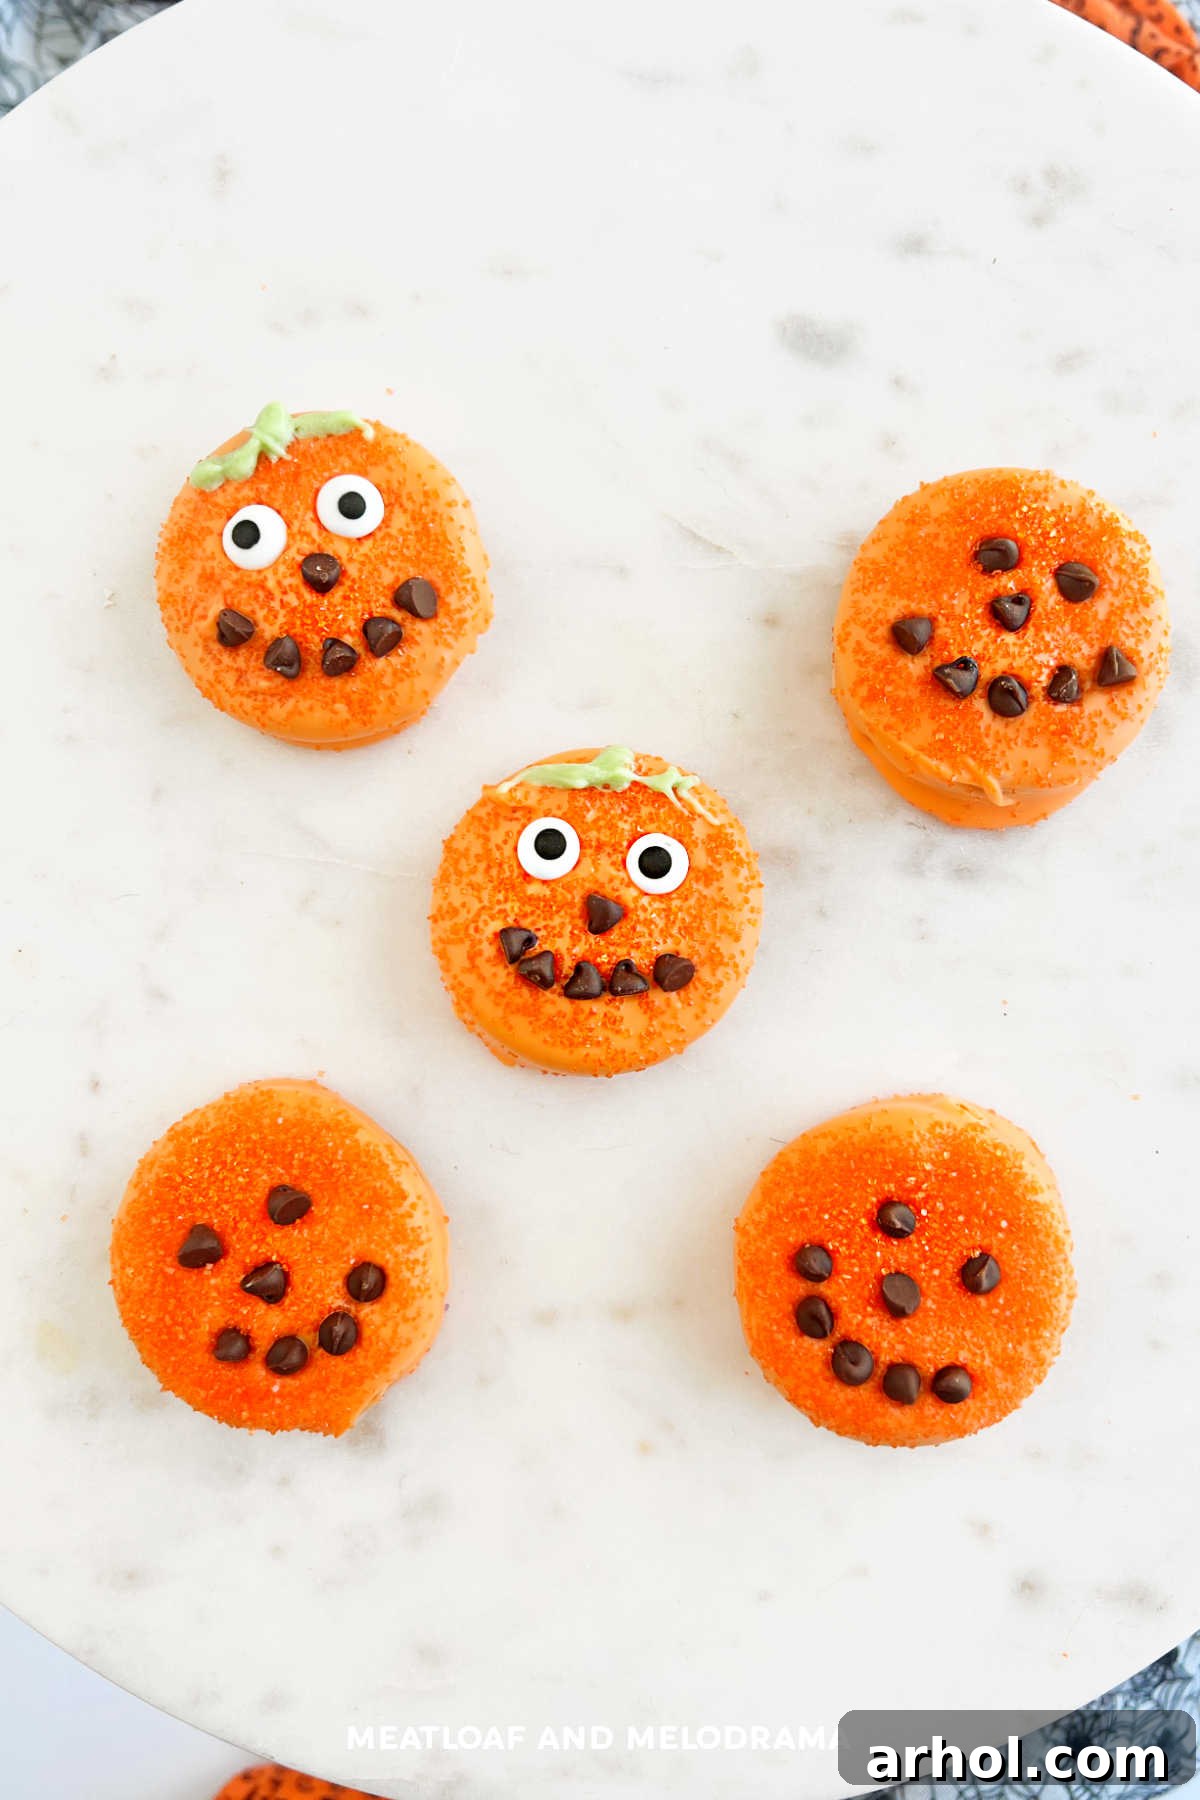
Table of Contents
- The Magic of Halloween Oreo Pumpkins
- Why You’ll Adore These Halloween Treats
- Ingredients for Spooky Oreo Pumpkins
- Step-by-Step Guide to Making Halloween Dipped Oreos
- How to Store Your Halloween Oreo Treats
- Creative Variations for Spooky Oreos
- Expert Tips for Perfect Candy Coated Treats
- Halloween Oreo Pumpkin Treats Recipe
- Frequently Asked Questions
The Magic of Halloween Oreo Pumpkins: A Family Tradition
As the air grows crisp and autumn leaves begin to fall, our thoughts inevitably turn to Halloween—a season filled with delightful costumes, eerie decorations, and, of course, enchanting treats! Each year, my children and I eagerly anticipate our annual tradition of crafting quick, simple, and utterly charming Halloween snacks. While we love whipping up classics like Halloween Candy Bark, Halloween Marshmallow Pops, Halloween Pretzels, Ghost Cookies, Monster Munch, and even savory Mummy Dogs, there’s something uniquely special about these whimsical Halloween Oreo Pumpkin Treats.
This year, as we brainstormed new and exciting Halloween dessert ideas, my daughter enthusiastically suggested these adorable Oreo pumpkins. They immediately became a favorite due to their simplicity and undeniable festive charm. Whether you’re hosting a spooky Halloween party, contributing to a school potluck, or simply looking for a fun holiday activity to enjoy with your family, these no-bake cookies are an absolute winner. They bring smiles to every face and a burst of color to any Halloween spread.
If you’re eager to explore even more creative Halloween Oreo recipes or expand your collection of spooky sweet treats for the Halloween season, don’t miss our fantastic Homemade Halloween Ice Cream recipe, which perfectly complements these delightful pumpkin cookies!
Why You’ll Adore These Easy Halloween Treats
There are countless reasons why these Halloween Oreo Pumpkin Treats have become a staple in our autumnal celebrations. First and foremost, their incredible ease of preparation makes them accessible to everyone, regardless of baking experience. They are genuinely a no-bake wonder, meaning less time fussing over ovens and more time enjoying the creative process with loved ones.
Beyond their simplicity, these dipped Oreos offer a fantastic canvas for creativity. Each “pumpkin” can be given its own unique personality with different candy eye placements and chocolate chip expressions, making every treat a little work of art. This hands-on decorating aspect is particularly appealing for kids, turning dessert making into an engaging craft project. It’s an excellent way to get children involved in the kitchen, fostering their imagination and developing fine motor skills.
Furthermore, these treats are perfectly portioned for individual enjoyment, making them ideal for party platters, lunchbox surprises, or a sweet reward after trick-or-treating. Their vibrant orange color instantly captures the spirit of the season, making them a visually stunning addition to any Halloween celebration. They combine the universally loved taste of Oreo cookies with the sweet crunch of candy melts, creating an irresistible flavor and texture combination that will have everyone reaching for more. Truly, these pumpkin-themed Oreos are not just desserts; they are edible moments of Halloween joy!
Essential Ingredients for Your Spooky Oreo Pumpkins
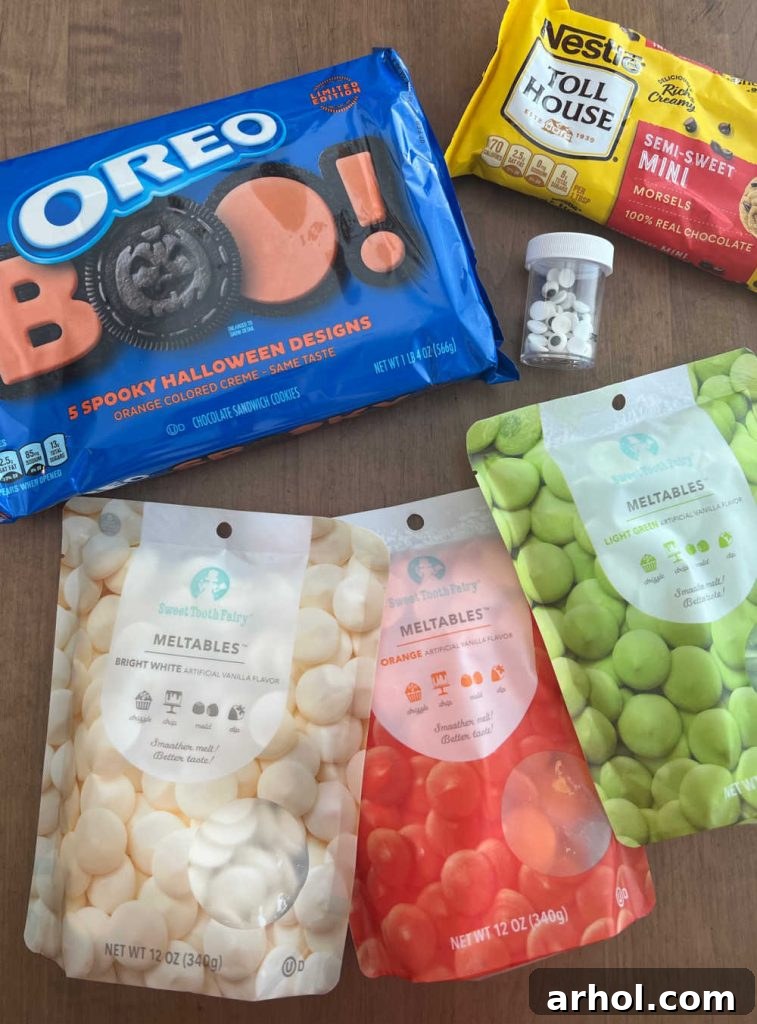
Crafting these adorable no-bake Halloween cookies requires just a handful of readily available ingredients. You’ll find everything you need for these fun, festive treats at your local grocery store, a specialty craft store, or conveniently online. The beauty of this recipe lies in its flexibility, allowing for substitutions and creative additions.
- Oreo Cookies: While special Halloween Oreo cookies with orange creme filling are fantastic for an extra festive touch, any variety of Oreo sandwich cookies will work beautifully. Feel free to use classic Oreos, Golden Oreos, or even your favorite store-brand sandwich cookies. The sturdy nature of these cookies makes them perfect for dipping.
- Orange Candy Melts: These vibrant confectionary wafers are the key to achieving that iconic pumpkin hue. They melt smoothly and set quickly, creating a delightful shell around your cookies. If you wish to add green leaves or stems, a small bag of green candy melts will also be needed. White chocolate chips or almond bark can be used as an alternative, which can then be tinted with oil-based food coloring (water-based food coloring will cause chocolate to seize).
- Edible Candy Eyes: These whimsical little sugar eyes are what truly bring your Oreo pumpkins to life, giving them their charming, slightly spooky expressions. They come in various sizes, so choose the ones that best fit your desired pumpkin personality.
- Mini Chocolate Chips: These tiny morsels are perfect for creating the pumpkin’s nose and mouth. You can arrange them to make traditional jack-o’-lantern grins, funny frowns, or even a full face if you prefer not to use candy eyes for every cookie.
- Halloween Sprinkles or Colored Sugar (Optional): For an added touch of sparkle and festivity, a dash of orange or black sugar sprinkles can elevate the appearance of your pumpkin treats, giving them a magical shimmer.
- Optional additions for stems: Thin pretzel sticks (broken into small pieces), green M&M’s, or even a small dab of green royal icing can be used to create the pumpkin stem.
Remember, the base of this cute treat is remarkably versatile. We often opt for Halloween Oreos when they’re in season simply because they add an extra layer of holiday spirit. In fact, one year, my youngest daughter meticulously hid a package of these beloved cookies from her older siblings, determined to ensure we had enough for our crafting session before they could disappear into hungry tummies! It’s a common occurrence in our house – many, many times!
Step-by-Step Guide to Making Halloween Dipped Oreos
Creating these festive Halloween Oreo Pumpkins is a straightforward and enjoyable process. Follow these simple steps to bring your spooky sweet vision to life:
1. Prepare Your Workstation and Melt the Candy Coating
Before you begin, set up a clean, organized workspace. Line a baking sheet or a large plate with wax paper or parchment paper. This non-stick surface is crucial for the dipped cookies to dry without sticking.
Next, carefully melt your candy coating. For best results, use a separate microwave-safe bowl for each color of candy melts you plan to use (e.g., one for orange, one for green if adding stems). Always follow the specific instructions on the back of your candy melt package, as melting times can vary. Typically, this involves heating the melts in the microwave in short, 30-second intervals, stirring thoroughly after each interval, until the candy is smooth and completely melted. Be cautious not to overheat, as this can cause the candy to seize or burn.
2. Dip the Oreo Cookies
Once your orange candy melts are perfectly smooth and fluid, it’s time to dip the Oreos! Using a fork or a dipping tool, gently submerge each Oreo cookie into the melted orange candy coating, ensuring it’s fully covered. Lift the cookie out, allowing any excess candy to drip back into the bowl. A gentle tap against the side of the bowl can help remove extra coating, ensuring a clean finish. Carefully place each dipped cookie onto your prepared wax paper-lined baking sheet or plate.
3. Decorate Your Pumpkin Faces
This is where the real fun begins! While the candy coating is still partially wet but beginning to set (it should be sticky enough for decorations to adhere but not so wet that they slide off), it’s time to add the faces. Press two edible candy eyes onto each cookie to create the pumpkin’s gaze. Then, use the mini chocolate chips to form the nose and mouth. Experiment with different arrangements to create various expressions – happy, spooky, surprised, or grumpy jack-o’-lanterns! For an extra festive touch, we often sprinkle a bit of orange-colored sugar over some of the cookies for a subtle shimmer.
4. Add the Pumpkin Stems (Optional)
To complete your Oreo pumpkins, you can add a green stem. If you’re using green candy melts, melt them in a separate small bowl following package directions. Use a toothpick or a small piping bag to carefully drizzle a small amount of green candy coating at the top of each orange Oreo, creating a stem and perhaps a tiny leaf shape. Alternatively, you can use a small green M&M candy or a tiny piece of pretzel stick as a quick and easy stem.
5. Allow to Dry Completely and Serve
Once all your pumpkins are decorated, allow them to set completely. This can take anywhere from 20-30 minutes at room temperature, or you can speed up the process by placing the baking sheet in the refrigerator for about 10-15 minutes. Once the candy coating is firm to the touch, your spooky sweet Halloween Oreo Pumpkin Treats are ready to be enjoyed! It’s truly that simple to create such an impressive and delicious Halloween dessert.
These delightful creations are essentially Oreo Jack-O-Lanterns, perfectly capturing the spirit of Halloween in every bite. We affectionately call them Halloween Oreo Pumpkins for ease, and they are always a monstrous hit!
How to Store Your Halloween Oreo Treats
Proper storage is key to keeping your dipped Oreo pumpkins fresh and delicious for as long as possible, ensuring you can enjoy them throughout the Halloween season or prepare them in advance for a party. Here’s what you need to know:
To maintain their quality and prevent them from becoming sticky or losing their shape, store these dipped Oreo pumpkins in an airtight container at room temperature. Find a cool, dry spot away from direct sunlight. If you live in a particularly warm or humid climate, or if your house tends to be warm, storing them in the refrigerator is a better option. Just be sure to bring them to room temperature for about 10-15 minutes before serving for the best texture and flavor.
When stored correctly in an airtight container, chocolate-covered Oreos and those dipped in candy coating can remain fresh and delicious for up to 2 weeks. This makes them an excellent make-ahead Halloween party treat, allowing you to focus on other preparations closer to your event.
Creative Variations for Spooky Oreo Treats
While our Halloween Oreo Pumpkin Treats are undeniably charming, the versatility of this easy Oreo dessert idea means you can effortlessly transform them into a whole host of different spooky characters! Unleash your creativity and delight your guests with these fun variations:
- Oreo Mummies: Use white chocolate chips, white candy melts, or almond bark for the base coating. Once set, use a fork or a piping bag with a very fine tip to drizzle additional white coating back and forth across the cookie, creating the appearance of mummy bandages. Add two edible candy eyes peeking out from beneath the “bandages” for a classic spooky look.
- Oreo Monsters: Dive into a rainbow of colors for these monstrous delights! Use vibrant purple, bright green, or even electric blue candy melts as your base. Before the coating sets, add a variety of sprinkles for “hair,” mini chocolate chips for multiple eyes (or one giant eye!), and thin pretzel sticks or black licorice for horns or scars. Each monster can be uniquely goofy or ghoulish!
- Oreo Spiders: Dip your Oreos in melted dark chocolate or milk chocolate for a rich, dark base. While the chocolate is still wet, carefully place two candy eyes on top. For the legs, use thin pieces of black licorice laces, pretzel sticks dipped in chocolate, or even pre-made edible spider legs arranged around the cookie. You can even draw a small red hourglass shape on the back with red icing for a black widow effect.
- Black Cat Oreos: A purr-fectly simple variation! Dip Oreos in dark chocolate or black candy melts. While wet, attach two candy eyes. For ears, cut mini Oreos in half or use small black candy triangles and attach them to the top. Use a white edible marker or white icing to draw tiny whiskers for an extra touch of feline charm.
- Oreo Ghosts: Simply dip your Oreos in white candy melts or white chocolate. Before setting, gently place two small chocolate chips or candy eyes for the ghost’s eyes. You can even use a toothpick to gently pull the melted white candy coating into a flowing “tail” at the bottom before it sets, giving the impression of a floating spirit.
- Witch Hat Oreos: After dipping your Oreos in your chosen color (purple or black works well), let them set. Then, place a Hershey’s Kiss on top as the peak of the hat, securing it with a dab of melted candy coating. Use a small amount of green or orange melted candy to pipe a “hat band” around the base of the Hershey’s Kiss.
I must admit, sometimes I find myself almost liking the Oreo mummy cookies even more than the pumpkins, but honestly, they’re all incredibly cute and, more importantly, absolutely delicious when you’re craving a sweet treat during the spooky season!
Expert Tips for Perfect Candy Coated Treats
Achieving perfectly coated and beautifully decorated treats is easy with a few insider tips. These general guidelines will help ensure your Halloween Oreo Pumpkins (and any other candy-coated creations) turn out flawless every time:
- Melt in Small Increments: Whether using a microwave or a double boiler, always melt candy melts in short bursts (30 seconds in the microwave) and stir thoroughly between each. This prevents overheating, which can cause candy melts to burn, become clumpy, or lose their smooth, dippable consistency.
- Avoid Water Contact: Candy melts and chocolate are very sensitive to water. Even a tiny drop can cause them to seize and become thick and unusable. Ensure all your bowls, spatulas, and tools are completely dry.
- Maintain Ideal Consistency: If your candy melts seem too thick for dipping, you can thin them slightly by stirring in a small amount of shortening (like Crisco) or coconut oil. Add a quarter teaspoon at a time and stir until the desired consistency is reached. Avoid adding water or milk.
- Use Proper Dipping Tools: A regular dinner fork, a specialized candy dipping tool, or even a pair of tongs can make the dipping process much easier and less messy, allowing for better drainage of excess coating.
- Prepare Your Drying Surface: Always set your dipped treats on a sheet of wax paper or parchment paper. This prevents sticking and makes for effortless removal once the coating has set, minimizing clean-up.
- Time Your Decorations: For decorations like candy eyes and chocolate chips to adhere properly without sliding off, add them when the candy coating is partially set – still wet and sticky, but no longer fully liquid. If the coating dries too much, you can use a tiny dab of melted candy coating as “glue.”
- Speed Up Drying with Refrigeration: If you’re short on time or working in a warm environment, placing your baking sheet of dipped treats in the refrigerator for 10-15 minutes will significantly speed up the setting process.
- Work in Batches: If you’re making a large quantity, consider melting your candy melts in smaller batches. This keeps the coating at an ideal temperature and consistency throughout the decorating process.
Halloween Oreo Pumpkin Treats
Ingredients
- 1 package Oreo sandwich cookies (about 40 cookies)
- 2 packages orange candy melts (or a combo of colors for variations)
- Mini chocolate chips
- Candy eyes
- Optional: Green candy melts for stems/leaves, Halloween sprinkles/colored sugar
Instructions
-
Melt the candy coating according to package directions in a microwave-safe bowl. Stir well until smooth.
-
Dip each Oreo cookie into the melted orange candy coating, ensuring it’s fully covered. Tap gently to remove excess.
-
Place dipped cookies on a wax paper-lined plate or cookie sheet to dry.
-
While the coating is still partially set (sticky but not fully liquid), add candy eyes and mini chocolate chips to create the pumpkin faces. If desired, sprinkle with colored sugar for extra sparkle.
-
For green stems, melt green candy melts and drizzle a small amount on top of each pumpkin with a toothpick, or use a green M&M.
-
Allow cookies to set completely at room temperature or in the refrigerator before serving.
Notes
Nutrition
Nutrition information is automatically calculated and should be used as an approximation.
Additional Information
Frequently Asked Questions About Halloween Oreo Treats
Yes, you can use regular chocolate (like chocolate chips or baking bars) for dipping. However, it’s important to temper regular chocolate to ensure a smooth, shiny finish that sets firmly and doesn’t melt easily at room temperature. If you don’t temper it, the chocolate may result in a dull finish or “bloom” (white streaks) and be messier to handle. Candy melts are formulated to melt smoothly and set without tempering, making them easier for beginners and for vibrant colors.
If your candy melts appear too thick after melting, you can thin them out by adding a small amount of vegetable shortening (like Crisco) or coconut oil, a quarter teaspoon at a time. Stir thoroughly after each addition until you achieve a smooth, pourable consistency. Be careful not to add too much, as it can make the coating too thin.
Absolutely! These Halloween Oreo Pumpkin Treats are incredibly kid-friendly. The melting of candy melts should be done by an adult or under strict supervision, but children can safely and joyfully participate in dipping the cookies, placing the candy eyes, and arranging the chocolate chip faces. It’s a fantastic activity to do together, promoting creativity and fun in the kitchen.
Yes, these are perfect make-ahead Halloween treats! As mentioned in the storage section, they can be stored in an airtight container at room temperature for up to two weeks. This allows you to prepare them well in advance of your Halloween festivities, saving you time and stress closer to your event.
Did you enjoy making these? Leave a comment below and share your creations!
We always have so much fun making these delightful dipped Oreos. If you try your hand at these Halloween Oreo Pumpkin Treats, please let me know how they turn out! Your feedback and creativity are always cherished. Don’t forget to leave a comment and a star rating on the recipe to share your experience.
For more fantastic Oreo dessert ideas, an array of easy Halloween desserts, and a continuous stream of simple, delicious recipes, be sure to sign up for our newsletter and follow us on your favorite social media channels. Happy haunting and happy baking!
This beloved easy recipe was originally published in 2017 and has been thoughtfully updated in 2022 to provide even more tips, variations, and improved instructions for your enjoyment.