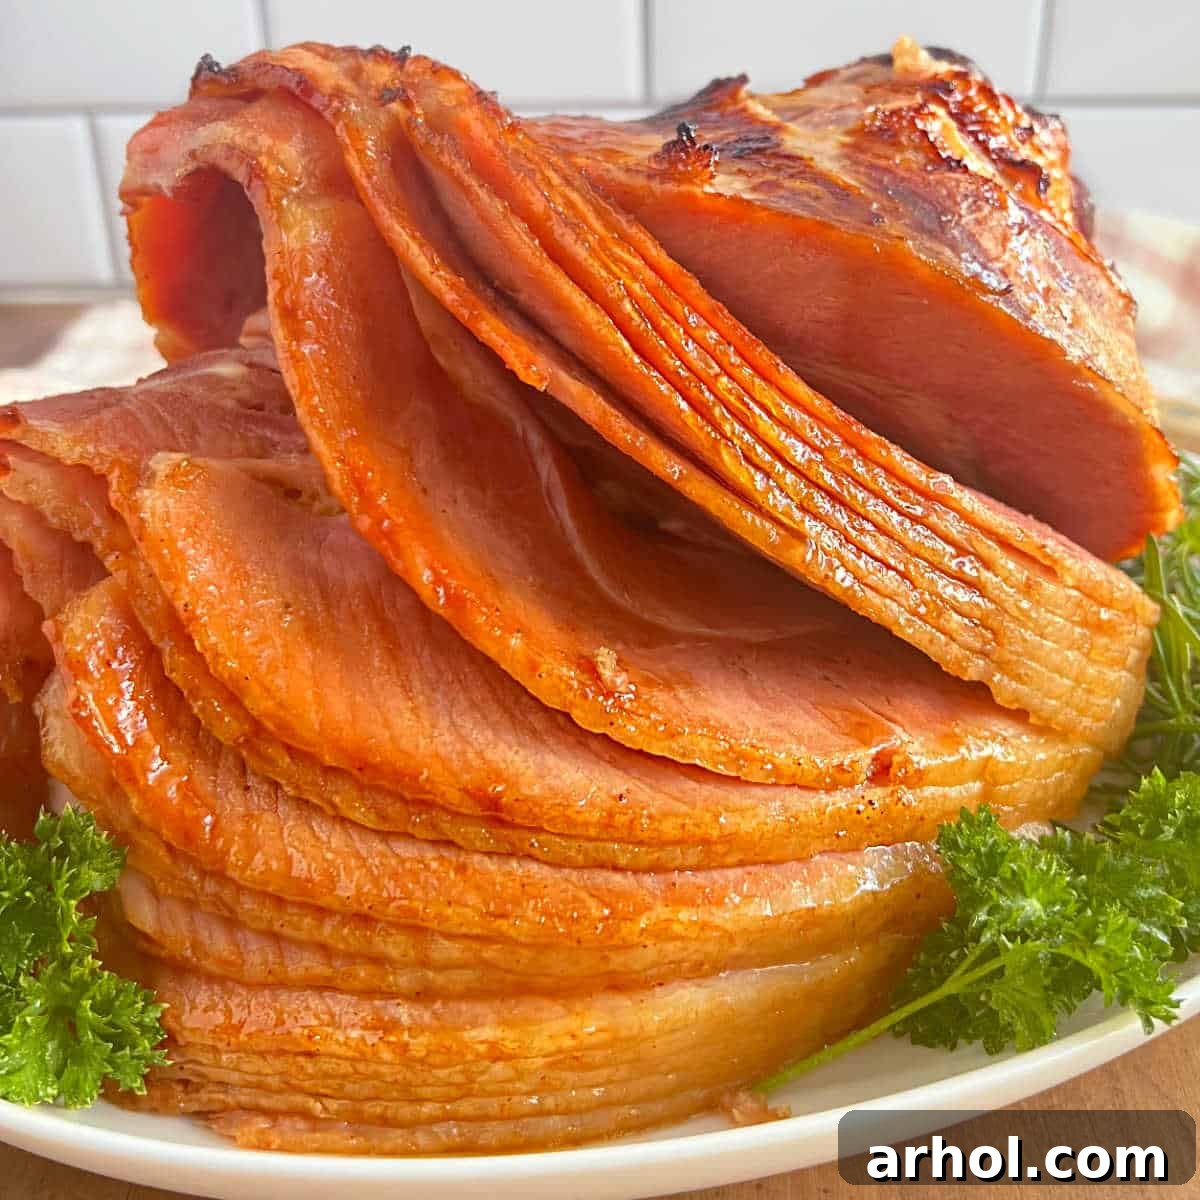
Elevate your holiday table with a show-stopping center-piece: a perfectly baked ham generously coated in a shimmering Dr. Pepper glaze. This recipe isn’t just easy; it’s a guaranteed crowd-pleaser that combines sweet, tangy, and savory notes to create an unforgettable culinary experience. Whether you’re planning an elaborate Easter brunch, a cozy Christmas dinner, or a special family gathering, this glazed ham will steal the show and leave everyone asking for the secret ingredient!
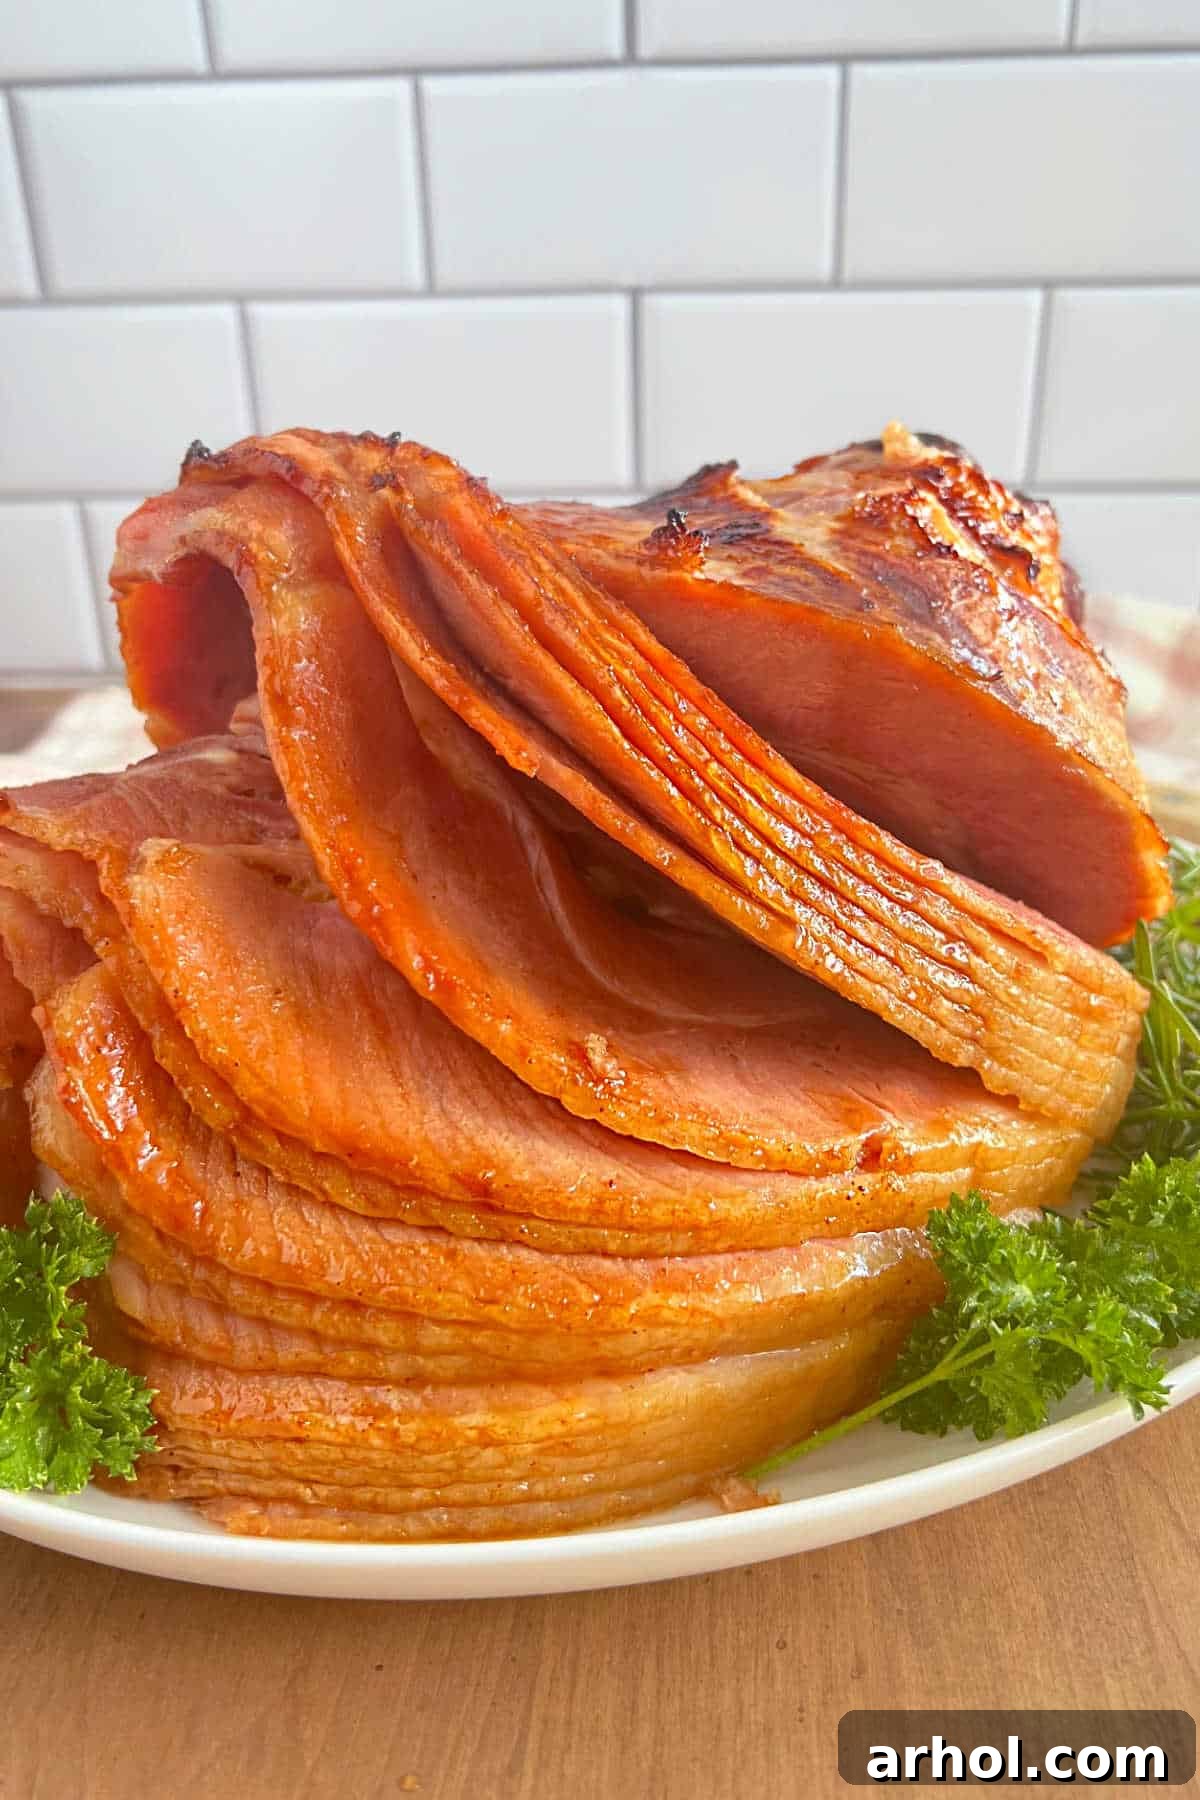
Table of Contents
- The Magic of Dr. Pepper Glazed Ham
- Essential Ingredients for Your Dr. Pepper Ham
- Step-by-Step Guide to Baking a Perfect Ham
- Crafting the Signature Dr. Pepper Glaze
- Optimal Baking Times and Temperatures for Ham
- The Art of Glazing: When to Apply for Perfection
- Storing and Reimagining Leftover Ham
- Creative Substitutions and Flavorful Variations
- Baked Ham with Dr Pepper Glaze Recipe Card
The Magic of Dr. Pepper Glazed Ham
For many, a succulent ham is the quintessential dish for festive occasions like Christmas and Easter. While slow cooker hams offer convenience, especially when oven space is limited, there’s truly nothing quite like a traditional baked ham, roasted to perfection and adorned with a rich, caramelized glaze. This recipe brings that classic comfort with an unexpected, yet utterly delicious, twist: a Dr. Pepper infused glaze.
The secret lies in a simple, yet profoundly flavorful, glaze crafted from a blend of pineapple juice, brown sugar, and—the star ingredient—a bottle of Dr. Pepper. It might sound unconventional, but trust us, this unique combination works wonders. The Dr. Pepper, with its complex 23 flavors, imparts a subtle, spiced sweetness that beautifully complements the savory ham, while the pineapple juice adds a bright, tangy counterpoint. The result is a ham that boasts incredible depth of flavor and remains exceptionally tender and moist throughout the baking process. Our family has fallen in love with this recipe, making it a beloved tradition at our holiday gatherings.
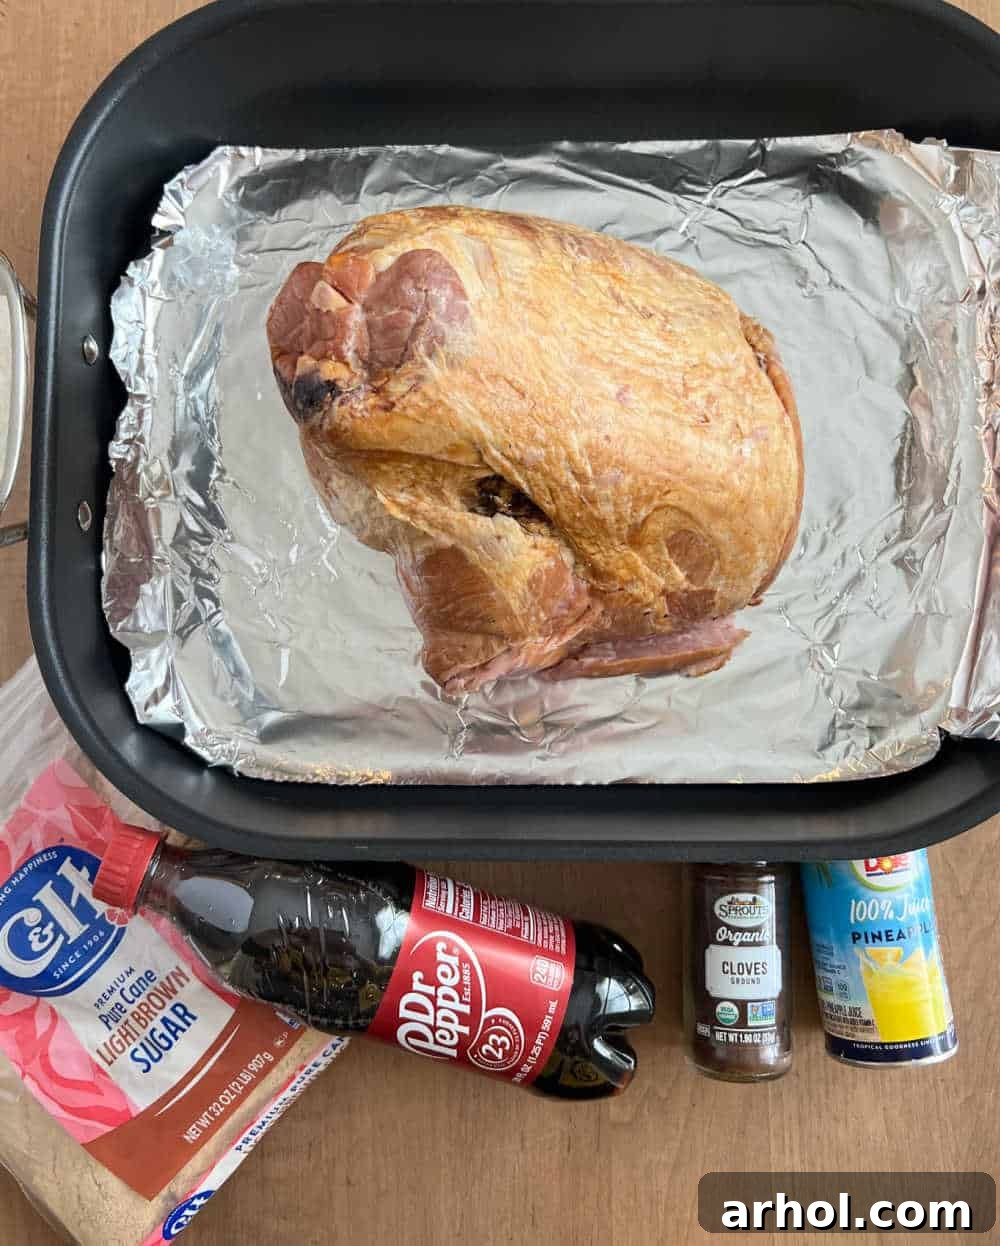
Gathering the ingredients for this spectacular Dr. Pepper glazed ham is incredibly straightforward. Most items are pantry staples or readily available at any local grocery store, ensuring that you can whip up this impressive dish without any fuss. Below, you’ll find a comprehensive list of all the components you’ll need, along with detailed instructions in the printable recipe card at the end of this article.
Essential Ingredients for Your Dr. Pepper Ham
Crafting this unforgettable ham starts with selecting the right ingredients. Each component plays a vital role in achieving that perfect balance of sweet, savory, and tangy flavors that makes this dish so special.
- Fully Cooked Ham: The foundation of our recipe. Opt for a pre-cooked ham, which simplifies the process considerably as you’re essentially reheating it to a safe temperature rather than cooking it from raw. A bone-in spiral-cut ham, typically around 7 pounds, is highly recommended. The bone-in aspect adds flavor and moisture, while the spiral cuts allow the glaze to penetrate deep into the meat, ensuring every bite is infused with deliciousness. If a spiral-cut isn’t available, a bone-in half ham will also work beautifully, though you might consider scoring the surface to create channels for the glaze.
- Dr. Pepper (Regular): This is the star of our unique glaze! You’ll need about half a cup. It’s crucial to use regular Dr. Pepper, not diet. The natural sugars in the regular soda are essential for caramelization, which creates that beautiful, sticky, glossy finish on the ham and contributes significantly to the glaze’s depth of flavor. Diet sodas lack these sugars and will not produce the same rich, caramelized effect.
- Pineapple Juice: A classic companion to ham. A 6-ounce can of pure pineapple juice is ideal, providing the perfect amount of tangy sweetness. Alternatively, if you’re using canned pineapple rings or chunks for garnish, you can easily use the juice from the can. If pineapple juice is hard to find, a good quality orange juice can serve as a suitable substitute, offering a similar citrusy tang that complements the ham and Dr. Pepper.
- Brown Sugar: This ingredient is key for both sweetness and texture. Brown sugar not only enhances the overall sweetness of the glaze, balancing the tang of the pineapple and the unique notes of Dr. Pepper, but its molasses content also helps to thicken the glaze as it simmers. This creates that desirable sticky consistency that adheres wonderfully to the ham, forming a luscious crust.
- Ground Cloves: A small but mighty spice. Ground cloves provide a warm, aromatic depth that perfectly rounds out the sweet and tangy profile of the glaze. Their distinctive, slightly pungent flavor is a traditional pairing with ham, adding a touch of holiday warmth and complexity. If you’re not a fan of cloves, or prefer a different spice, you could experiment with a pinch of ground cinnamon or even a tiny amount of dry mustard for a subtle savory kick.
Step-by-Step Guide to Baking a Perfect Ham
Achieving a perfectly baked ham is easier than you might think, especially with a pre-cooked spiral-cut ham. Follow these simple steps to ensure your ham is moist, tender, and ready to absorb all that incredible Dr. Pepper glaze.
- Prepare Your Oven: Begin by preheating your oven to 325 degrees Fahrenheit (160 degrees Celsius). It’s important to give your oven ample time to reach and stabilize at this temperature for even cooking. For best results, place an oven rack in the lowest position; this helps distribute heat evenly and prevents the top of the ham from browning too quickly, especially once glazed.
- Unpack and Prepare the Ham: Carefully remove the ham from its packaging. Most pre-cooked hams, particularly spiral-cut varieties, come with a small plastic disk or bone guard on the cut side. Be sure to locate and remove this disk before proceeding.
- Position the Ham for Baking: Place the ham cut-side down in the center of a large, sturdy roasting pan. This orientation helps to retain the ham’s natural juices, ensuring it remains moist throughout the baking process. For easier cleanup later, you can line the bottom of your roasting pan with heavy-duty aluminum foil – this step is entirely optional but highly recommended to save time on dishwashing!
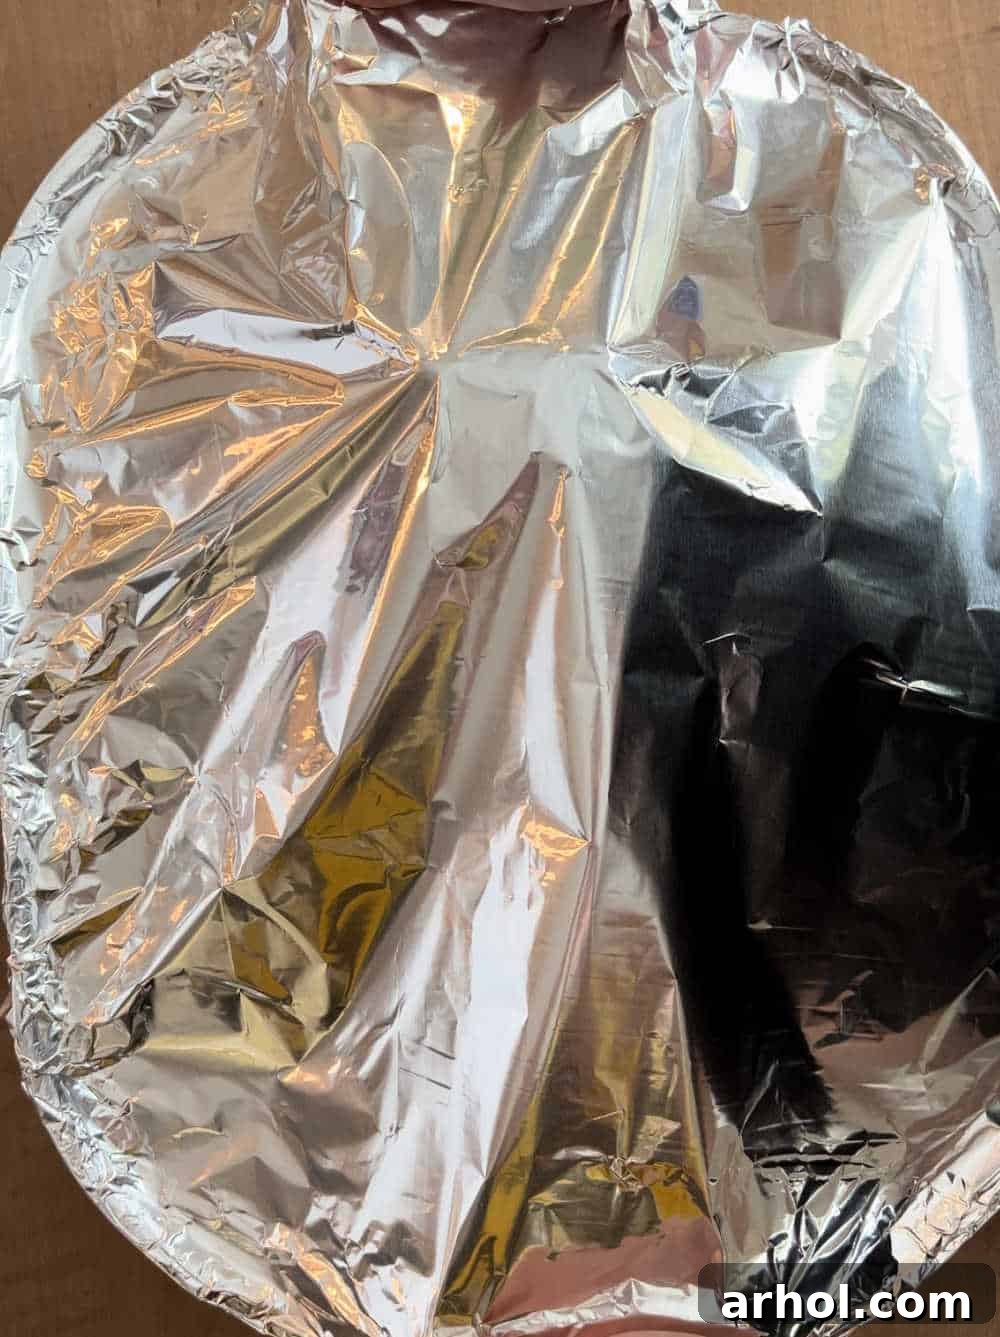
- Cover and Initial Bake: Once positioned, cover the ham tightly with aluminum foil. This creates a steamy environment that helps the ham heat through gently without drying out. Place the covered ham into your preheated oven.
- Glazing Strategy: You’ll begin applying the glaze about halfway through the cooking process. Gently brush a generous amount of the homemade Dr. Pepper glaze over the ham. If you’re using a spiral-cut ham, take extra care to spoon some of the glaze between the slices, allowing it to permeate deeper into the meat for maximum flavor. After glazing, cover the ham tightly again with foil and return it to the oven.
- Final Glazing and Browning: During the last 30 minutes of cooking, you’ll add the remaining glaze. At this point, remove the foil completely. Continue to cook the ham uncovered, allowing the glaze to caramelize into a beautiful, sticky, and slightly crispy crust.
- Check for Doneness: The most crucial step is ensuring the ham reaches the correct internal temperature. Using a reliable meat thermometer or instant-read thermometer, insert it into the thickest part of the ham, avoiding the bone. The ham is fully heated and safe to eat when it reaches an internal temperature of 145 degrees Fahrenheit (63 degrees Celsius).
Crafting the Signature Dr. Pepper Glaze
While your ham is steadily baking in the oven, it’s the perfect time to prepare the star of the show: the homemade Dr. Pepper glaze. This sweet and tangy concoction is surprisingly simple to make and comes together quickly on the stovetop, transforming humble ingredients into a rich, aromatic coating that will elevate your ham to new heights.
To begin, gather your glaze ingredients: the half cup of regular Dr. Pepper, the 6 ounces of pineapple juice (or orange juice substitute), three-quarters cup of brown sugar, and the distinctive hint of ⅛ teaspoon of ground cloves. Combine all these elements in a small saucepan. The goal is to gently dissolve the brown sugar and then allow the mixture to thicken into a beautiful, syrupy glaze.
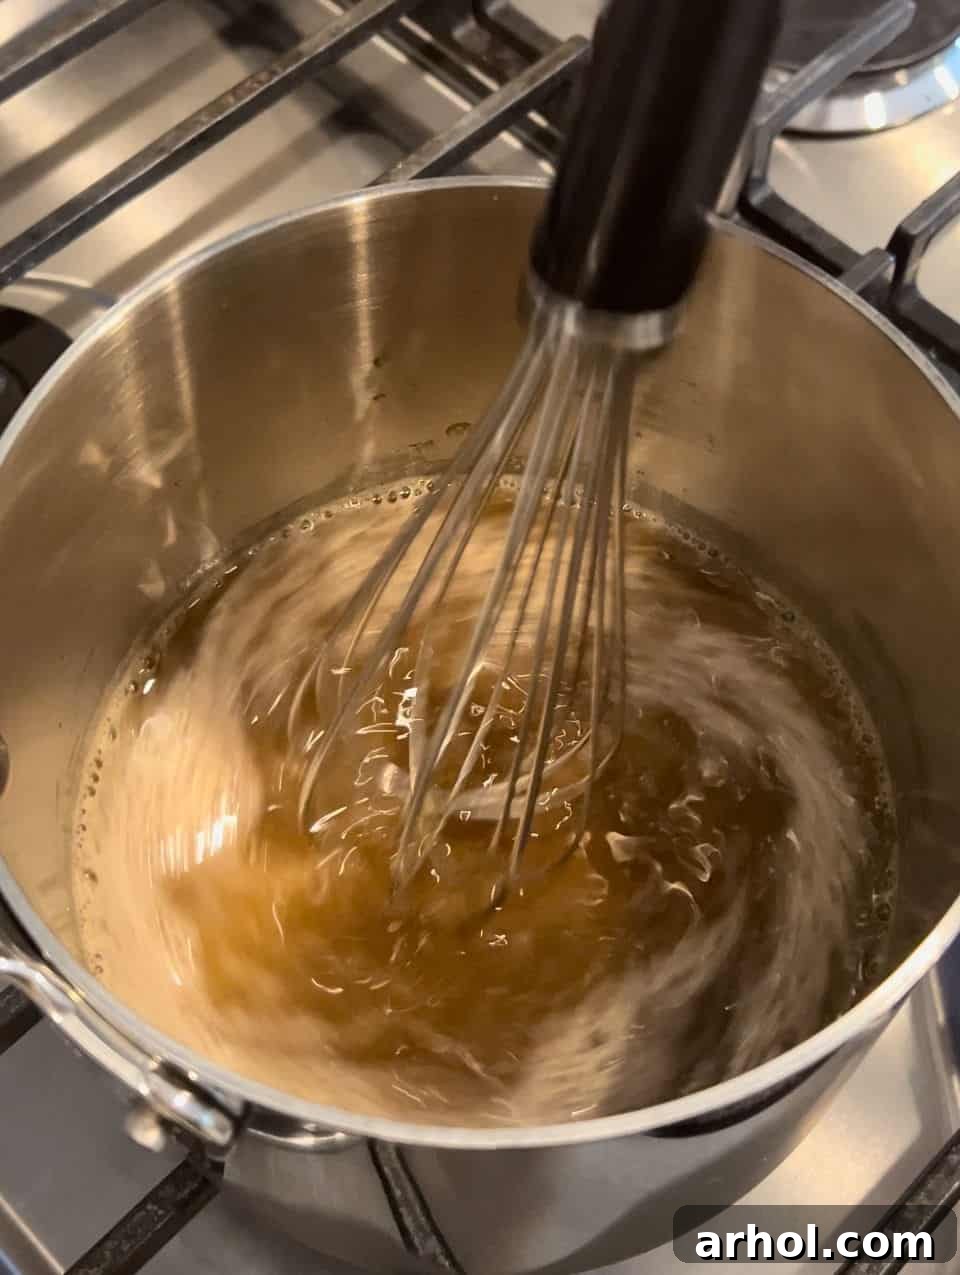
Place the saucepan over medium heat on your stovetop. With a whisk, stir the ingredients continuously until the brown sugar is fully dissolved. Once dissolved, bring the mixture to a gentle boil. As it begins to bubble, reduce the heat to a low simmer. Allow the glaze to simmer for approximately 5 to 8 minutes, or until it has noticeably thickened. You’ll observe it transforming from a thin liquid into a glossy, more viscous syrup that will beautifully coat the back of a spoon. This thickening process is crucial, as it ensures the glaze adheres properly to the ham and caramelizes effectively in the oven.
Once the glaze has reached your desired consistency, remove the saucepan from the heat and set it aside to cool slightly. As it cools, it will thicken even further. This homemade Dr. Pepper glaze offers a delightful balance of sweet from the brown sugar and soda, tangy from the pineapple, and a warm, earthy spice from the cloves, creating an irresistible aroma that will permeate your kitchen and perfectly complement your baked ham.
Optimal Baking Times and Temperatures for Ham
Baking a ham, especially a pre-cooked one, is more about reheating it gently to a safe internal temperature than it is about “cooking” it from scratch. This makes it a less intimidating task than it might seem! While specific instructions can vary slightly depending on the brand and cut of ham, a general rule of thumb is an excellent guide for success.
The typical guideline for baking a fully cooked ham is to allow 12 to 15 minutes of cooking time per pound. This ensures that the ham heats through evenly and reaches the necessary internal temperature. Since the ham is already cooked, the primary goal is to warm it up to a safe and palatable temperature of 145 degrees Fahrenheit (63 degrees Celsius). It’s crucial to use a reliable meat thermometer, or an instant-read thermometer, inserted into the thickest part of the meat (avoiding the bone) to accurately gauge its temperature.
For example, if you’re baking a 7-pound ham, as used in this recipe, it will typically take just under 2 hours to reach the target internal temperature. A 10-pound ham, following the same rule, would require approximately 2 hours and 30 minutes. Always keep in mind that larger hams will naturally take more time to heat through, while smaller hams will be ready quicker. It’s always best to start checking the temperature a bit before the estimated time, especially if your oven tends to run hot or if your ham is on the smaller side of the weight range.
The consistent oven temperature of 325 degrees Fahrenheit (160 degrees Celsius) is purposefully chosen for this recipe. It’s a moderate heat that allows the ham to warm up slowly and thoroughly without drying out. This gentler heat, combined with initially covering the ham with foil, helps maintain moisture and tenderness, resulting in a juicy ham that is perfectly heated and ready to be glazed.
The Art of Glazing: When to Apply for Perfection
The timing of your glaze application is more than just a step in the recipe; it’s an art that can significantly impact the final flavor and appearance of your baked ham. While some recipes suggest adding the glaze only during the last few minutes of cooking, there’s a compelling argument for a multi-stage approach that yields deeper flavor and a more beautiful finish. This truly boils down to personal preference, but understanding the effects of different timings can help you achieve your desired outcome.
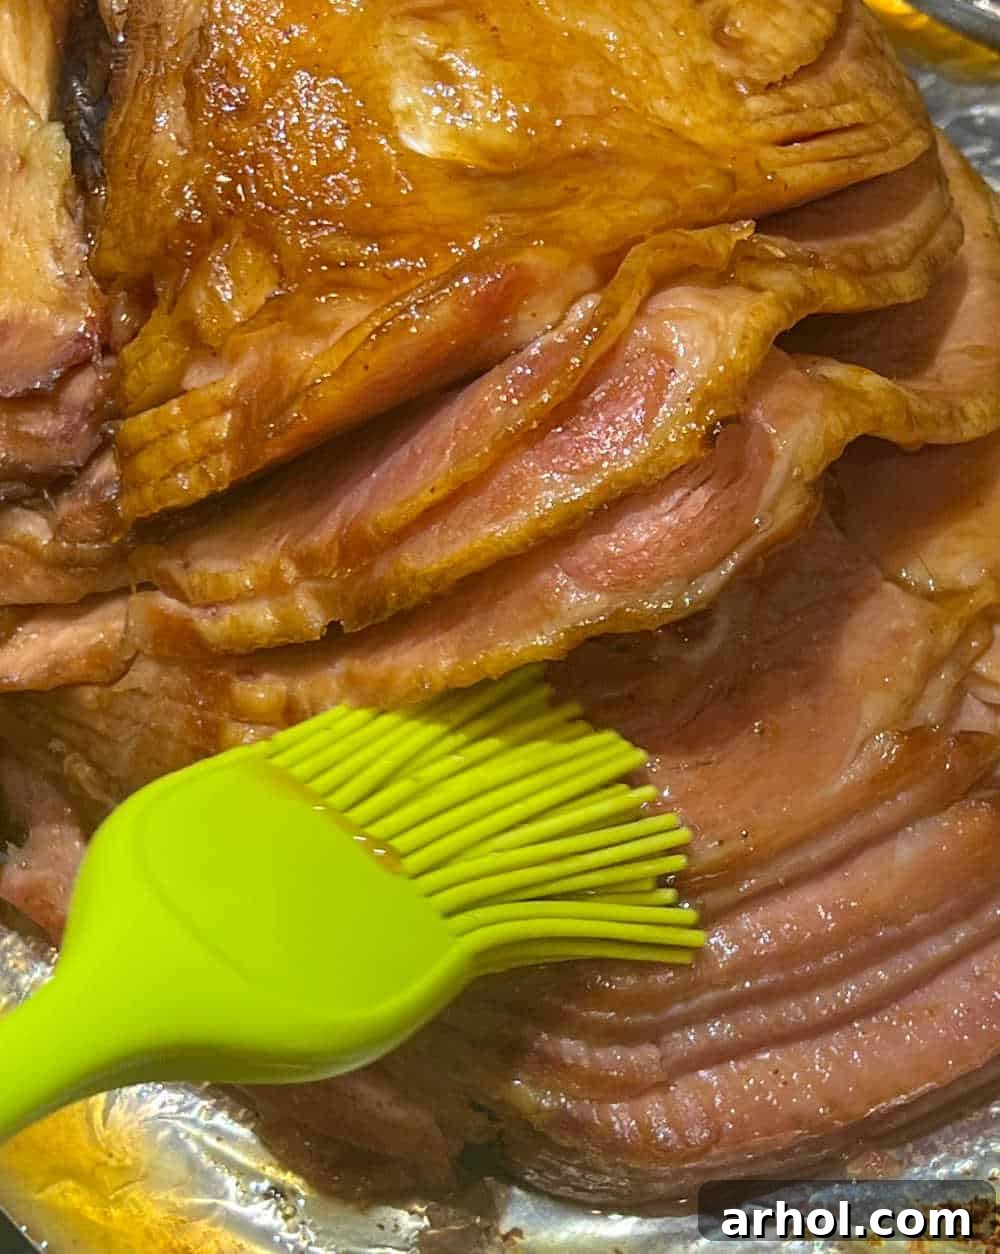
My preferred method, and one that I believe delivers the most flavorful results, involves applying the Dr. Pepper glaze in two stages. I like to brush a portion of the glaze over the ham approximately halfway through the cooking time. For spiral-cut hams, this is particularly beneficial, as the glaze can seep into the pre-cut slices, infusing more flavor directly into the meat. After this initial glaze, the ham is covered again with foil and returned to the oven to continue baking.
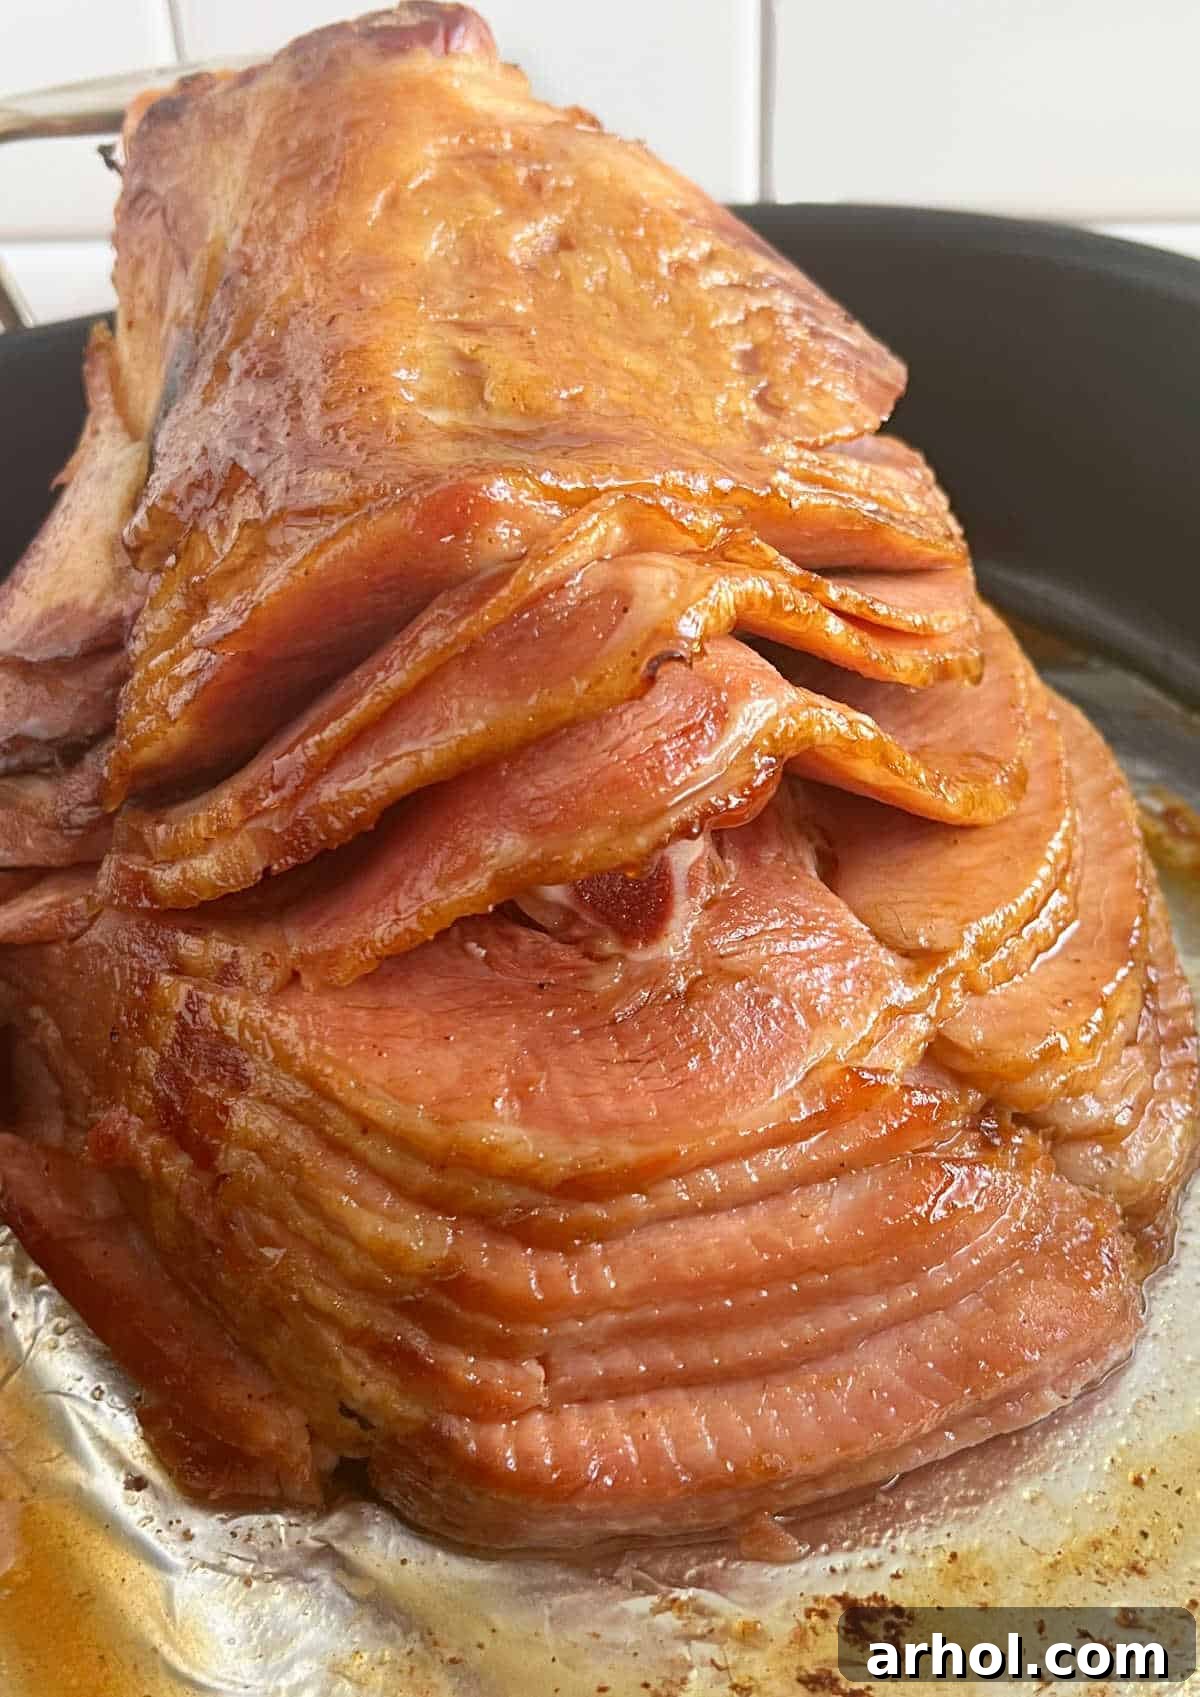
The second application comes during the final 30 minutes of cooking. At this point, the foil is removed, and the remaining glaze is generously brushed over the ham. As the ham finishes cooking uncovered, the sugars in the Dr. Pepper glaze caramelize beautifully, creating that signature shiny, slightly sticky, and irresistibly flavorful crust. Any cooking juices that have accumulated in the pan can also be incorporated at this stage, adding another layer of savory goodness to the glaze as it reduces and concentrates.
Applying some glaze earlier in the process allows the flavors to truly penetrate the ham, while the later application ensures that perfect caramelized exterior. If you were to apply all the glaze right at the beginning, there’s a higher chance it might become too dark or even burn before the ham is fully heated through. However, if you prefer a richer, darker caramelization, a light initial coat can be done, keeping a close eye on it. This two-stage method offers a fantastic balance: deep flavor infusion and a gorgeous, golden-brown glaze. Don’t forget to save a little extra warm glaze to serve on the side, allowing guests to add more of that sweet, tangy magic to their plates!
Storing and Reimagining Leftover Ham
A beautiful baked ham often means delicious leftovers, and with proper storage, you can enjoy them for days to come! Ensuring food safety is paramount, so make sure to refrigerate any leftover ham within two hours of serving. Transfer the ham to an airtight container, and it will keep perfectly in the refrigerator for 3 to 4 days.
For those who love to get the most out of their ham, we highly recommend removing any remaining meat from the bone. The ham bone itself is a treasure trove of flavor and can be saved to make incredibly rich and hearty soups. It’s perfect for a comforting ham and lentil soup, adding depth that no bouillon can replicate. Simply wrap the bone well and freeze it until you’re ready to make your next batch of soup.
If you have more ham than you can eat within a few days, freezing is an excellent option for longer storage. Cut the ham into smaller portions or dice it, then pack it tightly into freezer-safe bags or containers. Properly frozen ham can last for up to 3 months, making future meal prep a breeze.
The versatility of leftover ham is truly remarkable. Beyond the classic ham sandwiches, consider these creative ways to transform your leftovers:
- Ham and Cheese Sliders: Layer thinly sliced ham with Swiss cheese and a savory butter topping on Hawaiian rolls, then bake until golden and melty.
- Ham and Egg Breakfast Burritos or Omelets: Dice the ham and add it to scrambled eggs, omelets, or breakfast burritos for a protein-packed start to your day.
- Creamy Ham and Pea Pasta: Toss diced ham with pasta, peas, and a rich cream sauce for a quick and satisfying dinner.
- Tortellini with Ham: A delightful and easy dish, perfect for a busy weeknight.
- Ham Fried Rice: Replace chicken or pork in your favorite fried rice recipe with diced ham for a flavorful twist.
- Ham and Bean Soup: A hearty and budget-friendly classic, especially comforting on a cold day.
- Ham and Potato Casserole: Layer diced ham with potatoes, cheese, and a creamy sauce for a comforting baked dish.
For even more inspiration, be sure to check out our extensive collection of 20 easy leftover ham recipes, ensuring that not a single delicious morsel goes to waste!
Creative Substitutions and Flavorful Variations
While this Dr. Pepper glazed ham recipe is a tried-and-true winner, feel free to get creative and tailor it to your personal taste or what you have on hand. A few simple substitutions or additions can open up a world of new flavors!
- Alternative Soft Drinks: The beauty of soda-based glazes is their versatility. While Dr. Pepper offers a unique blend of 23 flavors, you can certainly experiment with other soft drinks. Coca-Cola will yield a slightly different, perhaps more classic, caramelized flavor. Root Beer provides a distinctly sweet, almost vanilla-like note that pairs wonderfully with ham. Even ginger ale could add a subtle spicy kick. The key is to always use the regular, full-sugar version, as the sugars are essential for the glaze to thicken and caramelize properly. Diet sodas will not achieve the desired sticky, glossy finish.
- Adding Moisture to the Pan: If you prefer a juicier ham or simply want more sauce to serve with your meal, you can add about a half-inch of liquid to the bottom of the roasting pan before baking. This could be additional Dr. Pepper for more flavor, or simply water or even apple cider for extra moisture and aromatic steam during the cooking process. This helps to keep the ham moist and can create a flavorful pan sauce.
- Spice Variations for the Glaze: Ground cloves provide a traditional and warming spice, but your palate might prefer something different. If cloves aren’t your favorite, you can easily omit them. Alternatively, consider adding other warm spices like a pinch of ground cinnamon, nutmeg, or allspice for a different aromatic profile. For a bit of heat and complexity, a tiny dash of cayenne pepper or smoked paprika could be an adventurous, yet surprisingly delicious, addition.
- Citrus Zest: For an extra burst of fresh flavor, consider adding the zest of an orange or lemon to your glaze as it simmers. The bright citrus notes will beautifully cut through the sweetness and richness of the ham.
- Mustard for Tang: A tablespoon of Dijon mustard or whole grain mustard added to the glaze can introduce a lovely tang and depth, balancing the sweetness and adding a more gourmet touch.
Don’t be afraid to experiment with these ideas to make this Dr. Pepper glazed ham truly your own. Each variation offers a chance to discover a new family favorite!
Baked Ham with Dr Pepper Glaze
Ingredients
- 7 pound spiral-cut ham pre-cooked, bone-in ham
- 6 oz pineapple juice
- ½ cup Dr Pepper regular, not diet
- ¾ cup brown sugar
- ⅛ tsp ground cloves
Instructions
-
Pre-heat oven to 325℉ (160°C) and place oven rack in lowest position.
-
Remove ham from packaging, and remove plastic disk from cut side.
-
Place ham, cut side down, in a large roasting pan, and cover tightly with aluminum foil.
-
Bake in preheated oven for 12-15 minutes per pound.
-
About halfway through cooking time, uncover ham. Add about half of the prepared glaze over the ham, making sure to spoon some between slices if using spiral cut. Cover again and return to oven.
-
During the last 30 minutes of cooking, remove foil and brush on remaining glaze. Cook uncovered until the internal temperature is 145℉ (63°C) according to a meat thermometer.
Dr Pepper Glaze
-
Add pineapple juice, Dr Pepper, brown sugar, and cloves to a small saucepan.
-
Whisk together, and bring to a boil over medium heat. Reduce heat to simmer and continue to simmer until thickened, about 5-8 minutes. Allow to cool slightly before using.
Notes
If you want more sauce, add about 1/2 inch of water or additional Dr. Pepper to the bottom of the roasting pan before baking.
You can substitute Coke or a different soda, but be sure to use regular and not diet, as the sugar is vital for the glaze’s caramelization.
Nutrition
Nutrition information is automatically calculated, so should only be used as an approximation.
Additional Info
We hope this detailed guide helps you create the most delicious Dr. Pepper glazed baked ham! It’s truly a recipe that combines ease with extraordinary flavor, perfect for making your holiday meals memorable. Don’t forget to share your creations and experiences!
If you loved this recipe, please consider leaving a comment below! Your feedback is invaluable and helps us create more delicious content.
For more mouth-watering holiday recipes, follow us on social media and sign up for our weekly newsletter to get the latest culinary inspiration delivered straight to your inbox.